SEARCH FINESCALE.COM

Enter keywords or a search phrase below:

ESCI 48th scale Tornado, another dinosaur

12262 views
135 replies
1 rating 2 rating 3 rating 4 rating 5 rating
  • Member since
    February 2014
Posted by USMC6094 on Friday, December 18, 2015 12:57 PM

Been too long since I worked on this one, once I got into my job and things took off, I havent sat at the bench for man twenty minutes and it was always to do other-than-model stuff.

I hope to have this old lady completed in the new year.

  • Member since
    February 2014
Posted by USMC6094 on Thursday, August 14, 2014 6:46 PM

thanks for the info fellas, but without robbing another kit I don't have access to any British ordnance. I just want the finished product to be busy and cool looking for my cousins.

  • Member since
    August 2005
  • From: Sydney, Australia
Posted by Phil_H on Monday, August 11, 2014 7:39 PM

stikpusher
Just a suggestion, but you need some Brit style bombs. They did not use the Mk. 80 series in the Gulf

British LGBs are also based on the 1000 pounder above, rather than the US Mk.80 series.

Some BL755 CBU's would also go down well, but I don't know where you'd get those.

  • Member since
    July 2004
  • From: Sonora Desert
Posted by stikpusher on Monday, August 11, 2014 12:29 AM

Just a suggestion, but you need some Brit style bombs. They did not use the Mk. 80 series in the Gulf


F is for FIRE, That burns down the whole town!

U is for URANIUM... BOMBS!

N is for NO SURVIVORS...

       - Plankton

LSM


  • Member since
    April 2014
Posted by B_one fixer on Saturday, August 9, 2014 11:55 AM

Looking good so far ! I think I will try the bondo filler on my next build.

  • Member since
    March 2003
  • From: Western North Carolina
Posted by Tojo72 on Saturday, August 9, 2014 11:10 AM

Louts of hard work,but looking good

  • Member since
    February 2014
Posted by USMC6094 on Saturday, August 9, 2014 10:51 AM

had to check in, haven't had the time or the energy to do much after work the past week or two.

She is ready for paint, and I haven't gotten the chance to figure up my painting plan yet.

Hopefully I'll have a better update tomorrow

  • Member since
    February 2014
Posted by USMC6094 on Sunday, July 27, 2014 10:19 AM

and on the pylon

more to follow later this week  

  • Member since
    February 2014
Posted by USMC6094 on Sunday, July 27, 2014 10:17 AM

now for the ordnance, I'm using two Hasegawa Mk-84's as well as four sway braces from the same weapons kit.

I cemented the four halves together with Tamiya Extra thin and after letting them set for a day I attempted to scribe all the details because the halves didn't align as well as I hoped so I had some sanding to do.

So the bombs are done, less painting, and the pylons are salvaged. I used clipped straight pins for locators and the head of a straight pin to replicate the foot that kicks the bomb away from the pylon.

pylons


  • Member since
    February 2014
Posted by USMC6094 on Sunday, July 27, 2014 10:12 AM

 I'm almost ready to do a base coat, but there are a few trouble spots I've found that need attention first

  • Member since
    February 2014
Posted by USMC6094 on Sunday, July 27, 2014 10:11 AM

the crew in their permanent home


  • Member since
    February 2014
Posted by USMC6094 on Sunday, July 27, 2014 10:09 AM

thanks for the compliments fellas, and the tips on the putty, I might try it on my next round of self abuse, I mean next kit build, you guys are gonna think I'm crazy when I drop it on you, but let me post some updates and a picture or two.

First off, I have been making slow progress since I re-entered the job market. Most notably the crew is in for good, the pivot points of the pylons are tweaked for a good friction fit, and I have salvaged the belly pylons and have gotten them ready for a pair of Mk-84 two thousand pounders.

anyway, I'll annotate the pictures as I go.

First is an overall shot or two


  • Member since
    July 2004
  • From: Sonora Desert
Posted by stikpusher on Monday, July 21, 2014 12:05 PM

Looking pretty good there! Almost ready for its base coat of paint.


F is for FIRE, That burns down the whole town!

U is for URANIUM... BOMBS!

N is for NO SURVIVORS...

       - Plankton

LSM


  • Member since
    August 2013
Posted by Jay Jay on Monday, July 21, 2014 9:26 AM

I know it's too  late for this build, but have you tried Bondo's Glazing and spot putty ?   I got the tip to use this stuff from Don Stauffer and not used any other putty since. Easy to work with and very fine grit ( grain ) so it sands very well.  Any auto parts stores have it, just make sure you get the single tube #907 rather than the 2-part stuff.


 I'm finally retired. Now time I got, money I don't.

  • Member since
    February 2014
Posted by USMC6094 on Sunday, July 20, 2014 11:18 AM

I took the kit to my local clubs monthly meeting yesterday and got a talking to about all the work I've done and the fact its going to be hanging from a ceiling, but I'm not going to cut corners just because it wont be a finished model that you can look at closely.............

More pictures to follow

  • Member since
    February 2014
Posted by USMC6094 on Sunday, July 20, 2014 11:15 AM

okay so the Milliput experiment didnt work, neither did the use of Testors contour putty that followed, so I stripped off both attempts and filled the seams with CA, sanded and polished.

Next came the aircrew, they are finished, seated and installed, and are now permanantly affixed their respective offices.

After the crew was perched, I installed the canopy with CA at the front and rear and have started fairing the canopy assembly with Mr Surfacer.


  • Member since
    February 2014
Posted by USMC6094 on Sunday, July 13, 2014 12:50 PM

and last but not least is the is the entire wing load, pods and fuel tanks.

  • Member since
    February 2014
Posted by USMC6094 on Sunday, July 13, 2014 12:48 PM

I have a feeling its going to take quite a bit more to smooth everything out once I get the putty sanded, but nothing on this model has come easily.


  • Member since
    February 2014
Posted by USMC6094 on Sunday, July 13, 2014 12:47 PM

Filler of choice so far has been some Miliput Superfine I bought last week.

I finally got around to getting the intakes attached, I used MM Sky Type S for the intake trunking, attached it to the fuselage with CA and filled the monster gaps with epoxy putty


  • Member since
    February 2014
Posted by USMC6094 on Sunday, July 13, 2014 12:42 PM

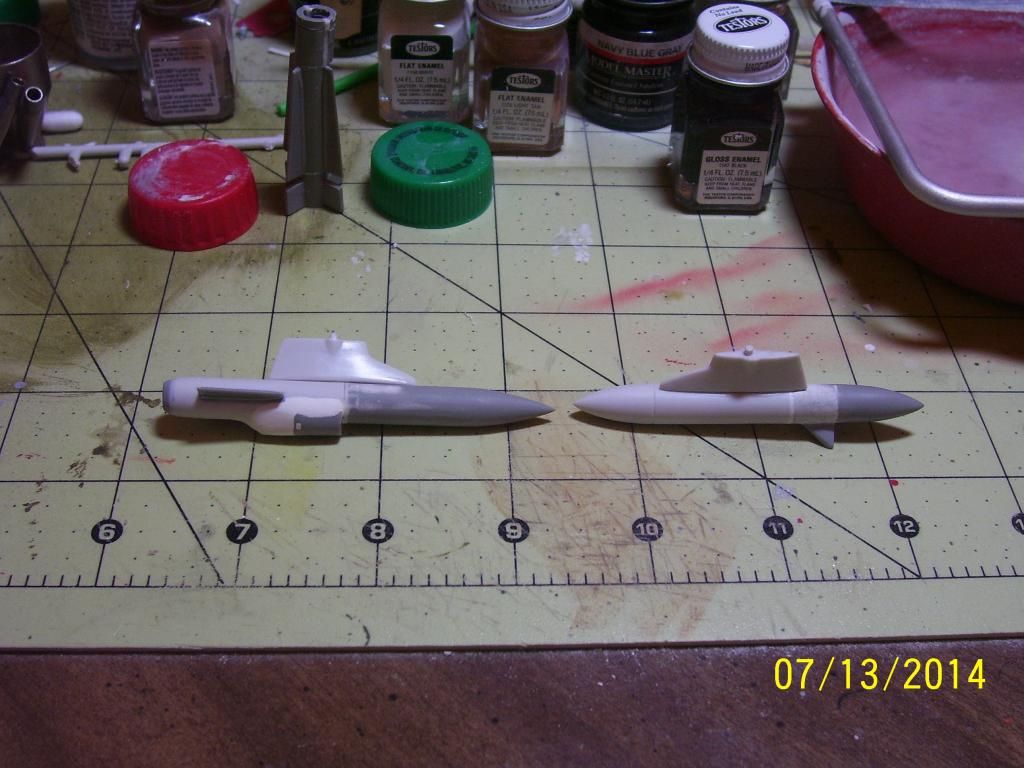
the other BIG area was the reworking of the out board pylon ordnance load. The kit came with American style  frangible nose rocket pods, which I have never seen on an RAF aircraft. So I used each one as a basis for a ECM pod, though I tried my best to make them accurate, I'm pretty sure they aren't, and one I took complete artistic license with, but they look cool and my cousins will like them.

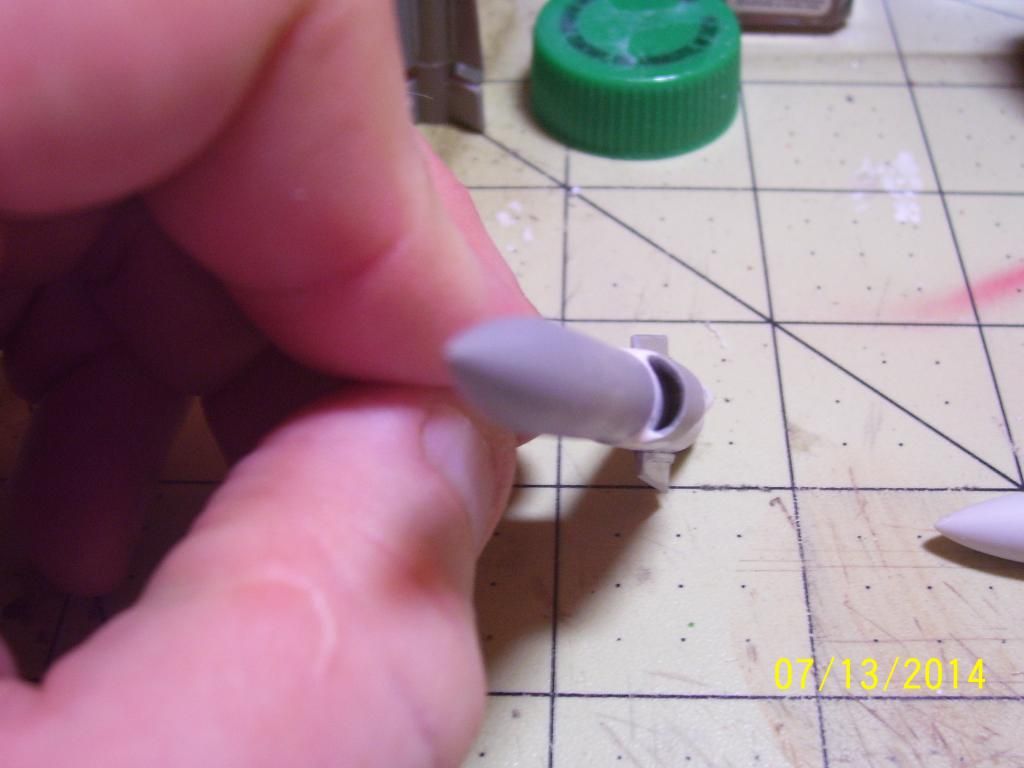
Heres the most modified pod. I added the forward end from a Monogram Phoenix missile, the intake is also a section of Phoenix I thinned to look the part better, the rear louvered area is a heat exchanger I robbed off the same Monogram Tomcat that the phoenixes came from which is also where the pods fins came from.

The pod on the left is the one I just described, to its right is the other modded pod, it has the rear most fins off another Phoenix, as well as the nose cone to close up the opening.
Pod number ones rear end
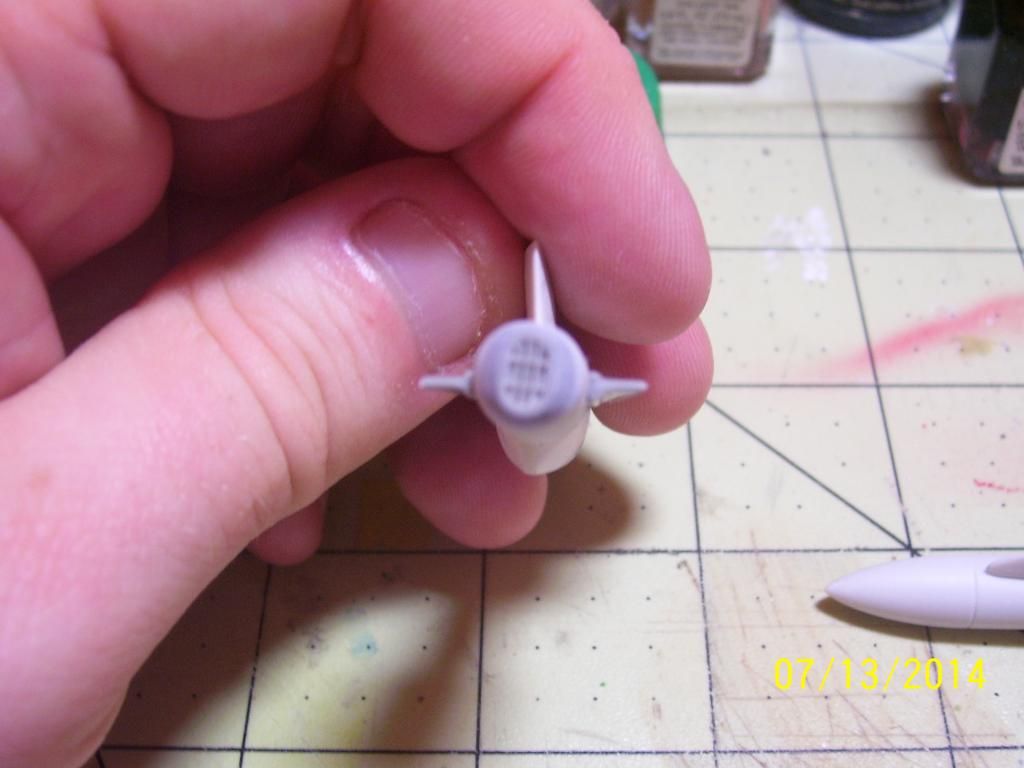
and from the front, the ram air cooling intake
  

  • Member since
    February 2014
Posted by USMC6094 on Sunday, July 13, 2014 11:23 AM

got some work done finally........

Here are a few of the pilot that's closest to be completed.


  • Member since
    February 2014
Posted by USMC6094 on Friday, July 11, 2014 4:41 PM

Hey fellas, a quick update, been doing mostly accessory work, the outboard wing mounted ECM gear has been on the front burner, but thankfully because of my new job lol, I haven't had all that much time to sit down and get serious work done during the week.

But pictures will follow this weekend

  • Member since
    February 2014
Posted by USMC6094 on Wednesday, July 2, 2014 6:40 PM

LOL thanks for the heads up Phil_H, its too late now, these two Limies ( sorry Bish ;) ), are gonna be in the 70s blue style flight suits.

On another note, I wont be able to do any work on this beast this week, I am house/dog sitting this week and with Arthur on his way, wont be able to get behind the bench until after the holiday.


@Jim, yeah its a monster alright, and the next one is gonna be a breeze

  • Member since
    February 2003
Posted by Jim Barton on Wednesday, July 2, 2014 3:33 PM

Looks like you're finally getting that model subdued--and you didn't even need the sledgehammer.Yes

"Whaddya mean 'Who's flying the plane?!' Nobody's flying the plane!"

  • Member since
    August 2005
  • From: Sydney, Australia
Posted by Phil_H on Sunday, June 29, 2014 5:34 PM

USMC6094
I decided on US Navy blue gray for the RAF flight suits, it just had the right look to me for the blue fabric.

The modern RAF flight suits are an olive green colour.

  • Member since
    February 2014
Posted by USMC6094 on Sunday, June 29, 2014 10:02 AM

I'm not really worried about the black paint being over powering when its all said and done, especially since I plan on trying more than one shade of tan/sand/brown before I seal it all up to decal.

  • Member since
    February 2014
Posted by USMC6094 on Sunday, June 29, 2014 10:00 AM

then I got to work on the crew.

I decided on US Navy blue gray for the RAF flight suits, it just had the right look to me for the blue fabric.


  • Member since
    February 2014
Posted by USMC6094 on Sunday, June 29, 2014 9:58 AM

and then I laid it down on a very low pressure, I think I was spraying at something like 15 psi


  • Member since
    February 2014
Posted by USMC6094 on Sunday, June 29, 2014 9:56 AM

I cranked up the airbrush last night to do some shading work, for the fuselage I just thinned flat black to a little less than milk consistency and then laid on successive coats of very thin paint

I masked off the front and rear cockpits with paper towels I cut into strips and sealed it with Micro-mask. and masked off the area around the cockpit sill as well as the radome.


JOIN OUR COMMUNITY!

Our community is FREE to join. To participate you must either login or register for an account.

SEARCH FORUMS
FREE NEWSLETTER
By signing up you may also receive reader surveys and occasional special offers. We do not sell, rent or trade our email lists. View our Privacy Policy.