SEARCH FINESCALE.COM

Enter keywords or a search phrase below:

ESCI 48th scale Tornado, another dinosaur

12262 views
135 replies
1 rating 2 rating 3 rating 4 rating 5 rating
  • Member since
    February 2014
Posted by USMC6094 on Monday, June 16, 2014 7:39 AM

stik I'll try that tonight once I'm home from school, with all the pictures I take I shouldve known that

I made some more progress over the weekend, the fuselage halves are together, the nose cone is attached, and the belly antenna fairings are in place.

It took quite a lot of rubber bands to get the upper and lower parts togehter, and I still have to finish cementing the intake areas and the shoulders of the wings,

  • Member since
    February 2014
Posted by USMC6094 on Monday, June 16, 2014 7:40 AM

  • Member since
    February 2014
Posted by USMC6094 on Monday, June 16, 2014 7:43 AM

  • Member since
    July 2004
  • From: Sonora Desert
Posted by stikpusher on Monday, June 16, 2014 11:30 AM

Starting to take good shape there!


F is for FIRE, That burns down the whole town!

U is for URANIUM... BOMBS!

N is for NO SURVIVORS...

       - Plankton

LSM


  • Member since
    February 2014
Posted by USMC6094 on Tuesday, June 17, 2014 11:51 AM

thanks stik,

I made some progress in the putty department over the last few evenings, and after three layers, I'm still filling low spots around the radome, but its really starting to take shape.


  • Member since
    February 2014
Posted by USMC6094 on Tuesday, June 17, 2014 11:51 AM

  • Member since
    February 2014
Posted by USMC6094 on Tuesday, June 17, 2014 11:52 AM

  • Member since
    February 2014
Posted by USMC6094 on Tuesday, June 17, 2014 11:53 AM

I started with a base of Squadron White putty and then moved to Tamiya Grey putty for the built up layers.

  • Member since
    February 2003
Posted by Jim Barton on Tuesday, June 17, 2014 4:07 PM

That model is going to be more putty than plastic by the time you're finished with it.Big Smile

"Whaddya mean 'Who's flying the plane?!' Nobody's flying the plane!"

  • Member since
    February 2014
Posted by USMC6094 on Tuesday, June 17, 2014 6:41 PM

that's how its shape'n up lol, the seams aft of the wings are gonna be the same way

  • Member since
    April 2014
Posted by B_one fixer on Tuesday, June 17, 2014 7:11 PM

I got a F-14A made by these guys, I wonder if I am going to run into the same kind of seam work. Looking good though !

  • Member since
    February 2014
Posted by USMC6094 on Tuesday, June 17, 2014 8:19 PM

lol the pictures are out of focus, naw, thanks for the kind words, but this kit is a DOG, but on the up side I'm getting lots and LOTS of good solid fundamental practice and getting to experiment with pre-shading. So it could be worse. Hopefully by Friday I'll have the speed brakes/wells painted and the brakes installed, and the vertical on, but not filled. The vertical tail is what worries me, it has two LONG seams at its base and one side worse than the other, but then again the glory is in the struggle

  • Member since
    February 2014
Posted by USMC6094 on Wednesday, June 18, 2014 7:45 AM

LOTS of filling last night and early this morning.................

I made the mistake of caffeine late last night and was up till three this morning slathering on filler.

Heres the low down, I used putty for the base, Squadron up front, and Tamiya at the back. The forward fuselage looked alright until I started to running my fingers across the seam and there was a very slight divet the length of the seam, so I brushed on a coat of Mr. Surfacer 1000 followed by a coat down the seam of Mr. Surfacer 500.

At the rear, the upper and lower halves were so misaligned at the seams (even with the styrene tabs I installed) that I used Tamiya grey putty where the top butts up against the bottom, then added Mr. Surfacer 1000 and then 500 to fill the low areas and blend it out to where I believe it will feather into the plastic.

Anyway, here is the forward fuselage sides

  • Member since
    February 2014
Posted by USMC6094 on Wednesday, June 18, 2014 7:48 AM

sorry they're slightly out of focus, they looked better on the camera screen when I took them earlier this AM

Here is the view from the rear

From my experience this layering of Mr. Surfacer will take a day or two to dry completely, so all my work will be on the little parts I havent gotten to yet, like the aircrew, seats and thrust reversers

  • Member since
    July 2004
  • From: Sonora Desert
Posted by stikpusher on Wednesday, June 18, 2014 11:33 AM

Thats it! See the learning value in a challenging project! Yeah it may be a beast to wrestle into shape, But I think  more pride comes from that sort of work. I like how it is shaping up here!


F is for FIRE, That burns down the whole town!

U is for URANIUM... BOMBS!

N is for NO SURVIVORS...

       - Plankton

LSM


  • Member since
    April 2014
Posted by Sandbox on Wednesday, June 18, 2014 2:23 PM

While I am big fan of the Tornado, I was thinking I'm glad I'm not trying to wrestle this bird...oh, wait a minute, I just checked my stash.  I've got one of these birds too.  Keep up the good work.

  • Member since
    July 2004
  • From: Sonora Desert
Posted by stikpusher on Wednesday, June 18, 2014 5:05 PM

Lol! I have the Airfix (ADV)& Italeri (GR.1)Tornados in my stash. Both are similar vintage. I hope they won't be quite as challenging as this one here. One day...


F is for FIRE, That burns down the whole town!

U is for URANIUM... BOMBS!

N is for NO SURVIVORS...

       - Plankton

LSM


  • Member since
    February 2014
Posted by USMC6094 on Thursday, June 19, 2014 12:32 PM

more progress has been made, namely sanding, and filling, the wash and repeat, lol.

Heres a look at the now three tone grey the model is transforming to

The stinger between the burner cans and the side fairings have been attached, the fairings will require filling and sanding to fair them into the surrounding area. 


  • Member since
    February 2014
Posted by USMC6094 on Thursday, June 19, 2014 12:34 PM

for some reason in up close mode the camera isn't focusing as it usually does, but you get the idea lol


  • Member since
    February 2014
Posted by USMC6094 on Thursday, June 19, 2014 12:36 PM

next is the rear fuselage, I'm beginning to think this model and some of the others I bought from an LHS may he spent some time in an attic or garage because of the warpage and resultant misaligned seams, but that's life in this hobby right.


  • Member since
    February 2014
Posted by USMC6094 on Thursday, June 19, 2014 12:41 PM

I had to extend the areas I already filled to blend the areas I sanded already because of the way the seams were misaligned, while I was at it I treated the low spots left from this mornings sanding session to Mr. Surfacer 1000 and now its at the house setting up so I can sand it after work tonight. Then I'll treat the exhaust side fairings to a CA reinforcement and then fill the gaps on either side of them.

  • Member since
    February 2014
Posted by USMC6094 on Friday, June 20, 2014 11:31 AM

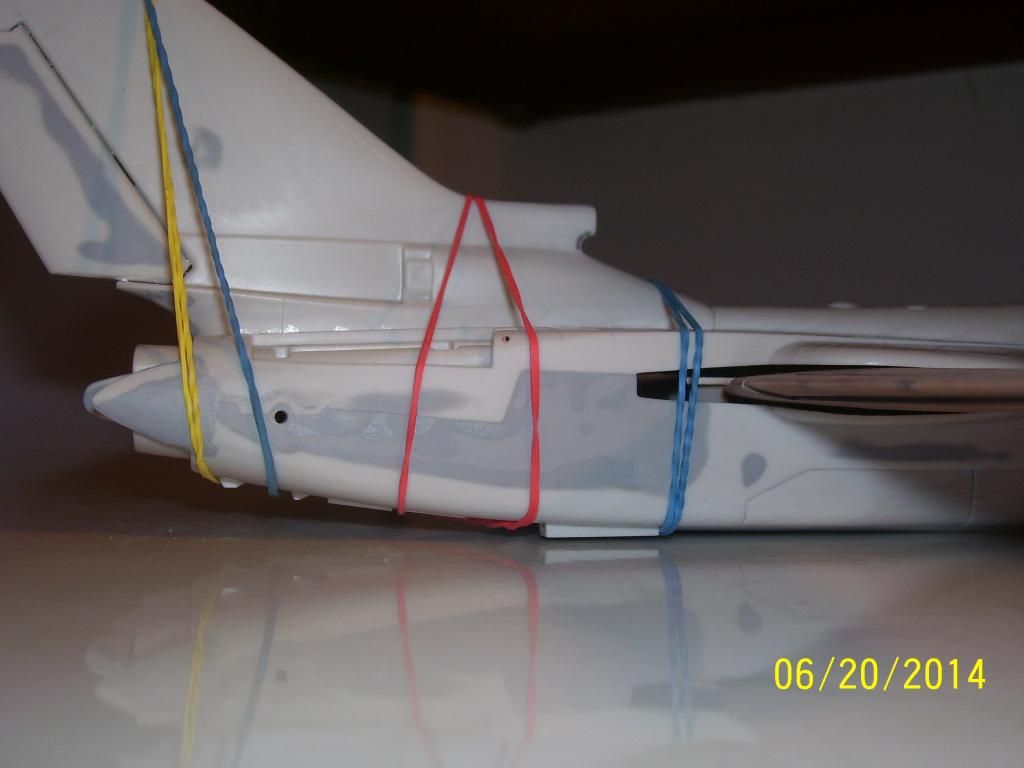
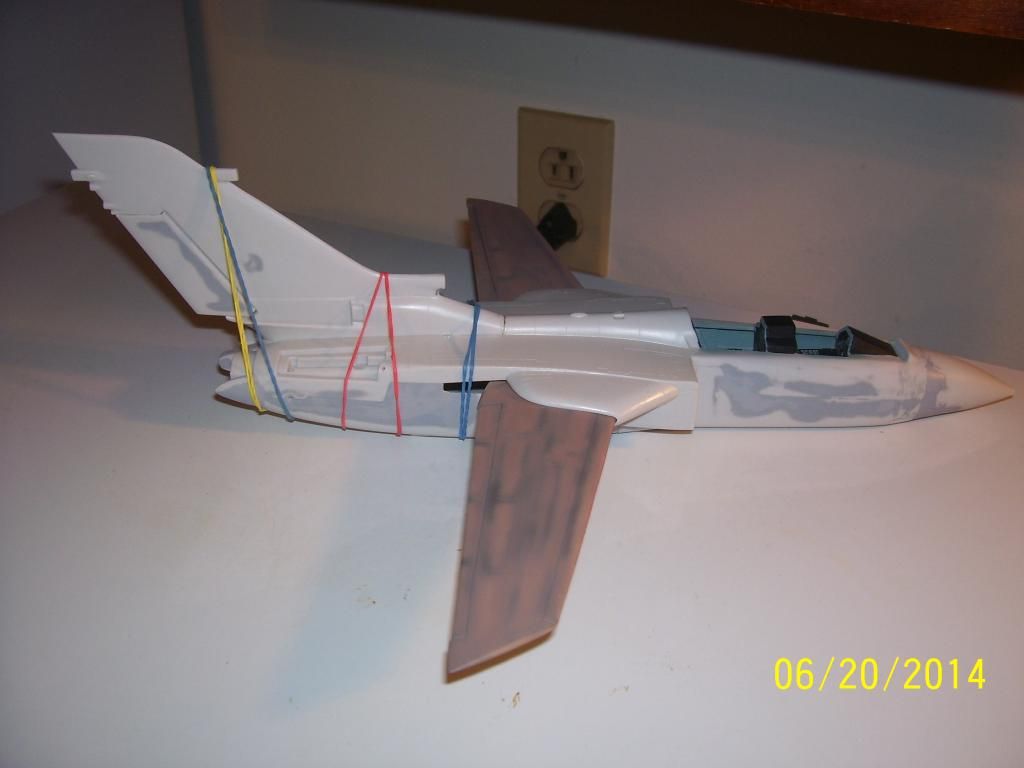
I tackled my biggest worry this morning.........the vertical tail. I figured I couldn't get around it, so off I went.

I hollowed out the area ahead of the front end of where the tail attaches to the upper fuselage, then added a piece of sprue to give the tail more purchase when I cemented it in.

A heads up to you fellas with this kit in your stash, think about three steps ahead of where you are as you assemble this model, there are so many variables and trouble spots not thinking ahead could come back to bite you as it almost did me. Bottom line, you'll have almost as much thought energy in this one as you will labor to build it.

Now, the sprue attachment I added was CA'd and accelerated to anchor it to the vertical tail assembly, then I soaked it with Ambroid Pro Weld and rubber banded it to the fuselage, then soaked the seam that ran the length of the tail to the stinger between the exhausts.

Heres how she looks as of the radio show this morning.
  

  • Member since
    February 2014
Posted by USMC6094 on Friday, June 20, 2014 11:31 AM

  • Member since
    February 2014
Posted by USMC6094 on Friday, June 20, 2014 11:32 AM

  • Member since
    February 2014
Posted by USMC6094 on Friday, June 20, 2014 11:34 AM

On another note, I'm still filling the gaps on the side fairings outboard of where the exhausts will sit, I've started painting the ejection seats am debating the lengths I want to go on the ordnance

  • Member since
    April 2007
  • From: Twin Towns, MN
Posted by MAgather on Saturday, June 21, 2014 1:28 PM

Yeah, she is definitely a labor of love. She will definitely look good flying from the ceiling tho!

Good Modeling,
  • Member since
    February 2014
Posted by USMC6094 on Saturday, June 21, 2014 1:46 PM

thanks MAgather, I have some more progress to report.

First, the vertical tail is on and anchored, and square to the rest of the fuselage.......then I started filling the HUGE gap at the front of it.

I've filled it twice and may possibly have to add more later today, the last few hits of filler will be Mr. Surfacer, as the putty has done all I asked and expected it to.

I've layered three coats of Tamiya grey putty in an attempt to even out the contours before I hit the area with Mr. Surfacer 1000.

The seam is just in the most awkward place to fill, sand and contour.........


  • Member since
    February 2014
Posted by USMC6094 on Saturday, June 21, 2014 1:50 PM

while said Grand Canyon seam was setting up I went to work on the canopy and windscreen.

Five minute double-bubble did the trick here. then I cemented the canopy assembly to the windscreen assembly since one part seemed to be easier to work with, then I got a surprise.......

Sorry its a little out of focus, but notice the gap between the canopy sill and the fuselage, more filling.......yippeeeeee

So I shimmed the area immediately in front of the windscreen, with plastic stock and then started on the cockpit enclosure


  • Member since
    February 2014
Posted by USMC6094 on Saturday, June 21, 2014 1:53 PM

After I had a few things worked as far as I could take them for the moment, I decided to take a few pictures of everything together at this stage

I'll have some pictures of the ejection seats tomorrow.  

  • Member since
    February 2014
Posted by USMC6094 on Sunday, June 22, 2014 10:07 AM

last night was more of the same, brushing Mr. Surfacer on the spine seam and filling pin holes that used to be air bubbles on other seams. Mr. Surfacer 1200 is great brushed on for this purpose.

I started filling the gap between the cockpit sill and canopy assembly with square styrene stock, its slow going but its getting there.

As I promised, here are the bang seats.

You wouldn't believe the amount of plastic that had to be removed for me to get the pilot figures to fit theses seats, probably a third of the total plastic in the seats came off between the xacto knife and the grinding bit on the dremel tool

JOIN OUR COMMUNITY!

Our community is FREE to join. To participate you must either login or register for an account.

SEARCH FORUMS
FREE NEWSLETTER
By signing up you may also receive reader surveys and occasional special offers. We do not sell, rent or trade our email lists. View our Privacy Policy.