SEARCH FINESCALE.COM

Enter keywords or a search phrase below:

ESCI 48th scale Tornado, another dinosaur

12260 views
135 replies
1 rating 2 rating 3 rating 4 rating 5 rating
  • Member since
    February 2014
Posted by USMC6094 on Monday, June 23, 2014 8:47 AM

still working on the final surface treatment before the pre-shading starts. I took her to my clubs monthly meeting on Saturday and heat from the trip (closed up car while I was in BAM) made the finished filler contract once it got warm and then cooled off, so its touch up filler time almost all around.

In other filler news, I gave all the seams a coat of Testors silver to see what the seams really looked like and by and large they came out well, except for the whole shrinkage thing

  • Member since
    February 2014
Posted by USMC6094 on Thursday, June 26, 2014 12:43 PM

working the canopy/windscreen assembly seams and have painted the jet exhausts with MM Metallizer as well as the thrust reversers. The ejection seats are coming a long as well.

Once I get the silver paint cleaned off the cockpit will be masked and I'll be about ready to preshade the fuselage in preparation for final painting.

  • Member since
    November 2009
  • From: SW Virginia
Posted by Gamera on Thursday, June 26, 2014 2:21 PM

She's coming together pretty well- I hope you stocked up on putty though!

"I dream in fire but work in clay." -Arthur Machen


  • Member since
    February 2014
Posted by USMC6094 on Thursday, June 26, 2014 2:33 PM

I think the major puttying is past, now its just dressing the low spots with Mr Surfacer and prepping for paint, don't get me wrong, I love detail work, but this kits starting to wear on me. I need to pick something painless to build once I finish this one

  • Member since
    November 2009
  • From: SW Virginia
Posted by Gamera on Thursday, June 26, 2014 2:42 PM

I know that feeling, whenever I build a limited run kit (and this seems pretty darn close to one) building something simple does provide a chance to decompress!

"I dream in fire but work in clay." -Arthur Machen


  • Member since
    February 2014
Posted by USMC6094 on Thursday, June 26, 2014 2:58 PM

not just simple, I see a Tamiya He-162 Salamander in my future after this one

  • Member since
    February 2014
Posted by USMC6094 on Friday, June 27, 2014 5:15 AM

here we go, took pictures of the last few days as well as last nights progress.

First is the exhausts, MM metalizer all around


  • Member since
    February 2014
Posted by USMC6094 on Friday, June 27, 2014 5:18 AM

the majority of my bench time has been getting the canopy/windscreen gap filled.

the red lines are the plastic from a plastic bread bag tie. I figured it looked and felt like styrene, so I sectioned it and it reacted to cement so I used it and Plastruct strip stock to fill the gap.


  • Member since
    February 2014
Posted by USMC6094 on Friday, June 27, 2014 5:19 AM

  • Member since
    February 2014
Posted by USMC6094 on Friday, June 27, 2014 5:22 AM

after some experimentation, I gave the entire filled area a light coat of Testors liquid cement and then rubber banded it to the fuselage, that way the cement and the tension from the rubber bands could compress and fill in the really tiny spots would otherwise have had to fill with CA


  • Member since
    February 2014
Posted by USMC6094 on Friday, June 27, 2014 5:23 AM

here are a few other shots, I've closed the speed brakes and have a tad bit of filling to do on them.


  • Member since
    February 2014
Posted by USMC6094 on Friday, June 27, 2014 5:26 AM

and I took some overall shots just to show the progress

And here was my house keeping project that gave my all my work space back  

I've got some putty curing on the canopy assembly to cover up some uneven and low spots from the styrene filling session, I'll post more pictures later today  

  • Member since
    July 2004
  • From: Sonora Desert
Posted by stikpusher on Friday, June 27, 2014 10:57 AM

excellent progress.... some more feint hearted folks might call a kit like this "unbuildable". You are certainly wrestling ths into shape very nicely!


F is for FIRE, That burns down the whole town!

U is for URANIUM... BOMBS!

N is for NO SURVIVORS...

       - Plankton

LSM


  • Member since
    February 2014
Posted by USMC6094 on Friday, June 27, 2014 2:10 PM

thanks stik. It is coming a long nicely all things considered

I got to work on the belly bomb racks last night, for the life of me I couldn't let such a bad inaccuracy as them go. So I broke out the old Monogram 72nd scale model and used its belly racks as a pattern and eyeballed the two pallets as well as their strakes. Now these are by no means correct, they just look right to me as compared to the originals.

Heres the base line rack

other than the filler, this is box stock

Here is the .050 styrene I cut got the pallets and the stock I'm carving the strakes out of


  • Member since
    February 2014
Posted by USMC6094 on Friday, June 27, 2014 2:12 PM

next is the almost completed, accurized rack with the new pallets

Now does anyone know a good source for 48th scale British ordnance? 

  • Member since
    April 2014
Posted by r13b20 on Friday, June 27, 2014 4:10 PM

Don't know about ordinance, but you are doing great work! Maybe this started life as a toy, not a model? It "seams" to have that look about it. You have a stout heart handling this project. Bob

  • Member since
    February 2014
Posted by USMC6094 on Saturday, June 28, 2014 11:01 AM

nothing but canopy work today...........

Started building up the forward corners of the windscreen frame, am pretty satisfied with the end result, the rest of the filling will be with Mr Surfacer

I had to take a break from the belly racks, I've sanded so much lately it looks it snowed all over my bench  

  • Member since
    February 2014
Posted by USMC6094 on Sunday, June 29, 2014 9:56 AM

I cranked up the airbrush last night to do some shading work, for the fuselage I just thinned flat black to a little less than milk consistency and then laid on successive coats of very thin paint

I masked off the front and rear cockpits with paper towels I cut into strips and sealed it with Micro-mask. and masked off the area around the cockpit sill as well as the radome.


  • Member since
    February 2014
Posted by USMC6094 on Sunday, June 29, 2014 9:58 AM

and then I laid it down on a very low pressure, I think I was spraying at something like 15 psi


  • Member since
    February 2014
Posted by USMC6094 on Sunday, June 29, 2014 10:00 AM

then I got to work on the crew.

I decided on US Navy blue gray for the RAF flight suits, it just had the right look to me for the blue fabric.


  • Member since
    February 2014
Posted by USMC6094 on Sunday, June 29, 2014 10:02 AM

I'm not really worried about the black paint being over powering when its all said and done, especially since I plan on trying more than one shade of tan/sand/brown before I seal it all up to decal.

  • Member since
    August 2005
  • From: Sydney, Australia
Posted by Phil_H on Sunday, June 29, 2014 5:34 PM

USMC6094
I decided on US Navy blue gray for the RAF flight suits, it just had the right look to me for the blue fabric.

The modern RAF flight suits are an olive green colour.

  • Member since
    February 2003
Posted by Jim Barton on Wednesday, July 2, 2014 3:33 PM

Looks like you're finally getting that model subdued--and you didn't even need the sledgehammer.Yes

"Whaddya mean 'Who's flying the plane?!' Nobody's flying the plane!"

  • Member since
    February 2014
Posted by USMC6094 on Wednesday, July 2, 2014 6:40 PM

LOL thanks for the heads up Phil_H, its too late now, these two Limies ( sorry Bish ;) ), are gonna be in the 70s blue style flight suits.

On another note, I wont be able to do any work on this beast this week, I am house/dog sitting this week and with Arthur on his way, wont be able to get behind the bench until after the holiday.


@Jim, yeah its a monster alright, and the next one is gonna be a breeze

  • Member since
    February 2014
Posted by USMC6094 on Friday, July 11, 2014 4:41 PM

Hey fellas, a quick update, been doing mostly accessory work, the outboard wing mounted ECM gear has been on the front burner, but thankfully because of my new job lol, I haven't had all that much time to sit down and get serious work done during the week.

But pictures will follow this weekend

  • Member since
    February 2014
Posted by USMC6094 on Sunday, July 13, 2014 11:23 AM

got some work done finally........

Here are a few of the pilot that's closest to be completed.


  • Member since
    February 2014
Posted by USMC6094 on Sunday, July 13, 2014 12:42 PM

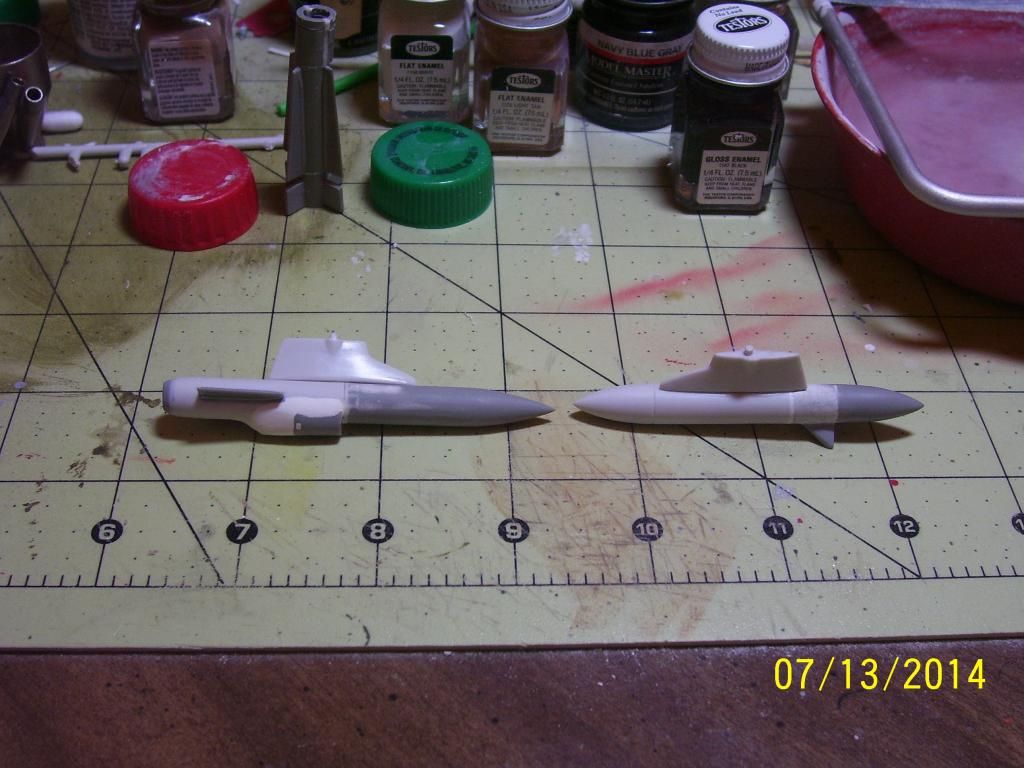
the other BIG area was the reworking of the out board pylon ordnance load. The kit came with American style  frangible nose rocket pods, which I have never seen on an RAF aircraft. So I used each one as a basis for a ECM pod, though I tried my best to make them accurate, I'm pretty sure they aren't, and one I took complete artistic license with, but they look cool and my cousins will like them.

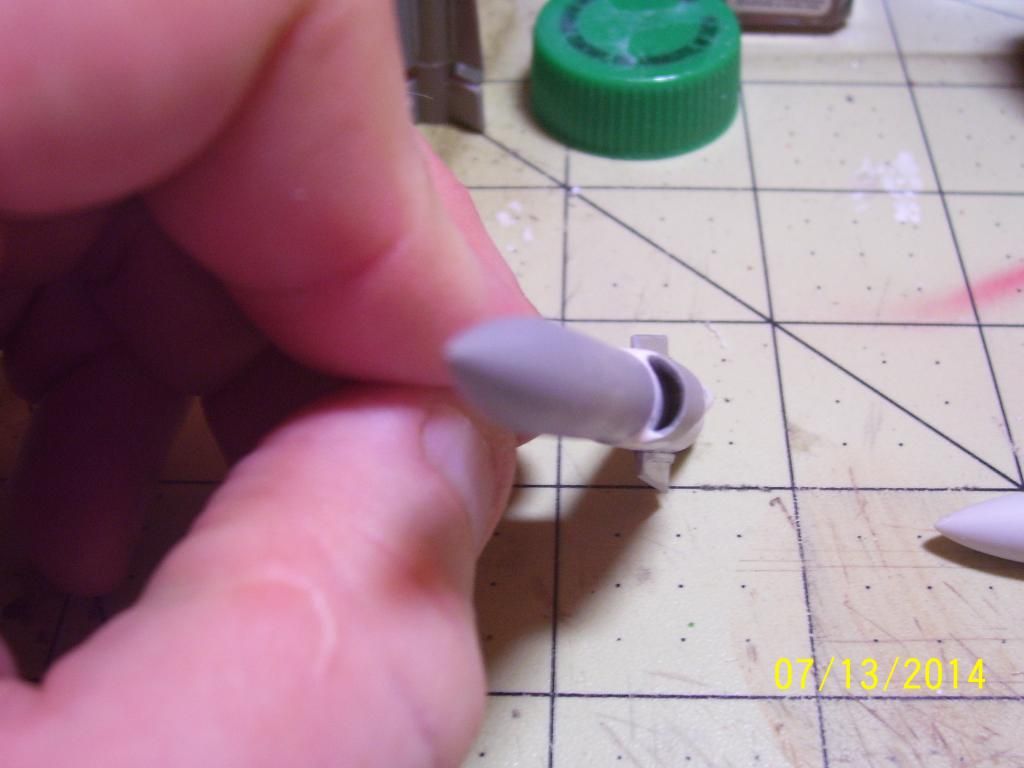
Heres the most modified pod. I added the forward end from a Monogram Phoenix missile, the intake is also a section of Phoenix I thinned to look the part better, the rear louvered area is a heat exchanger I robbed off the same Monogram Tomcat that the phoenixes came from which is also where the pods fins came from.

The pod on the left is the one I just described, to its right is the other modded pod, it has the rear most fins off another Phoenix, as well as the nose cone to close up the opening.
Pod number ones rear end
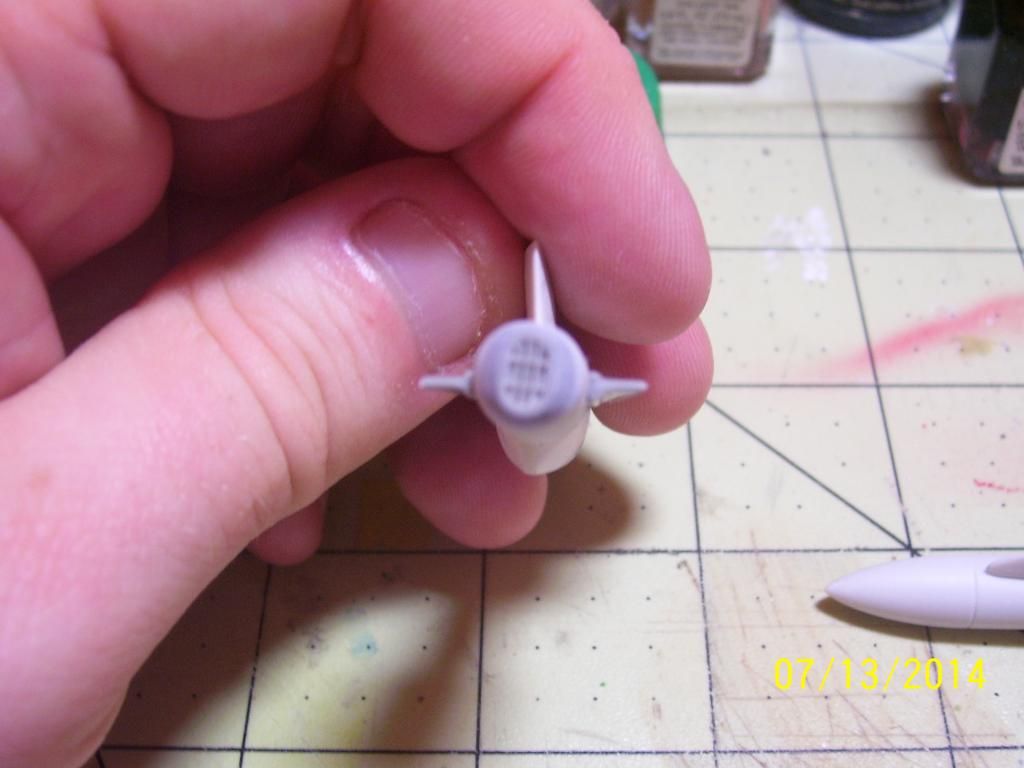
and from the front, the ram air cooling intake
  

  • Member since
    February 2014
Posted by USMC6094 on Sunday, July 13, 2014 12:47 PM

Filler of choice so far has been some Miliput Superfine I bought last week.

I finally got around to getting the intakes attached, I used MM Sky Type S for the intake trunking, attached it to the fuselage with CA and filled the monster gaps with epoxy putty


  • Member since
    February 2014
Posted by USMC6094 on Sunday, July 13, 2014 12:48 PM

I have a feeling its going to take quite a bit more to smooth everything out once I get the putty sanded, but nothing on this model has come easily.


  • Member since
    February 2014
Posted by USMC6094 on Sunday, July 13, 2014 12:50 PM

and last but not least is the is the entire wing load, pods and fuel tanks.

JOIN OUR COMMUNITY!

Our community is FREE to join. To participate you must either login or register for an account.

SEARCH FORUMS
FREE NEWSLETTER
By signing up you may also receive reader surveys and occasional special offers. We do not sell, rent or trade our email lists. View our Privacy Policy.