SEARCH FINESCALE.COM

Enter keywords or a search phrase below:

Completed: Spitfire Turns 80: 1/48 Tamiya, Eduard & Special Hobby

6185 views
74 replies
1 rating 2 rating 3 rating 4 rating 5 rating
  • Member since
    January 2015
Posted by BrandonD on Friday, March 25, 2016 5:34 PM

Colin - thank you so much! I had seen those before, but the fact that the exchange rate worked in my favor made me pull the trigger, so now I am just waiting on it to show up. I actually ordered two, since I have another Eduard Mk.IX in the stash, and not dealing with the split cowl is worth it to me.

-BD-

  • Member since
    January 2015
Posted by BrandonD on Friday, March 25, 2016 5:52 PM

Well I have been doing a lot of fitting, sanding, building, etc., and all are now in various stages of paint.

The Special Hobby Seafire took the most work with the wing-to-fuselage seam, as it didn't close up properly, and there was a prominent step at the join. I shaved it somewhat, and then used Tamiya putty to smooth it out.
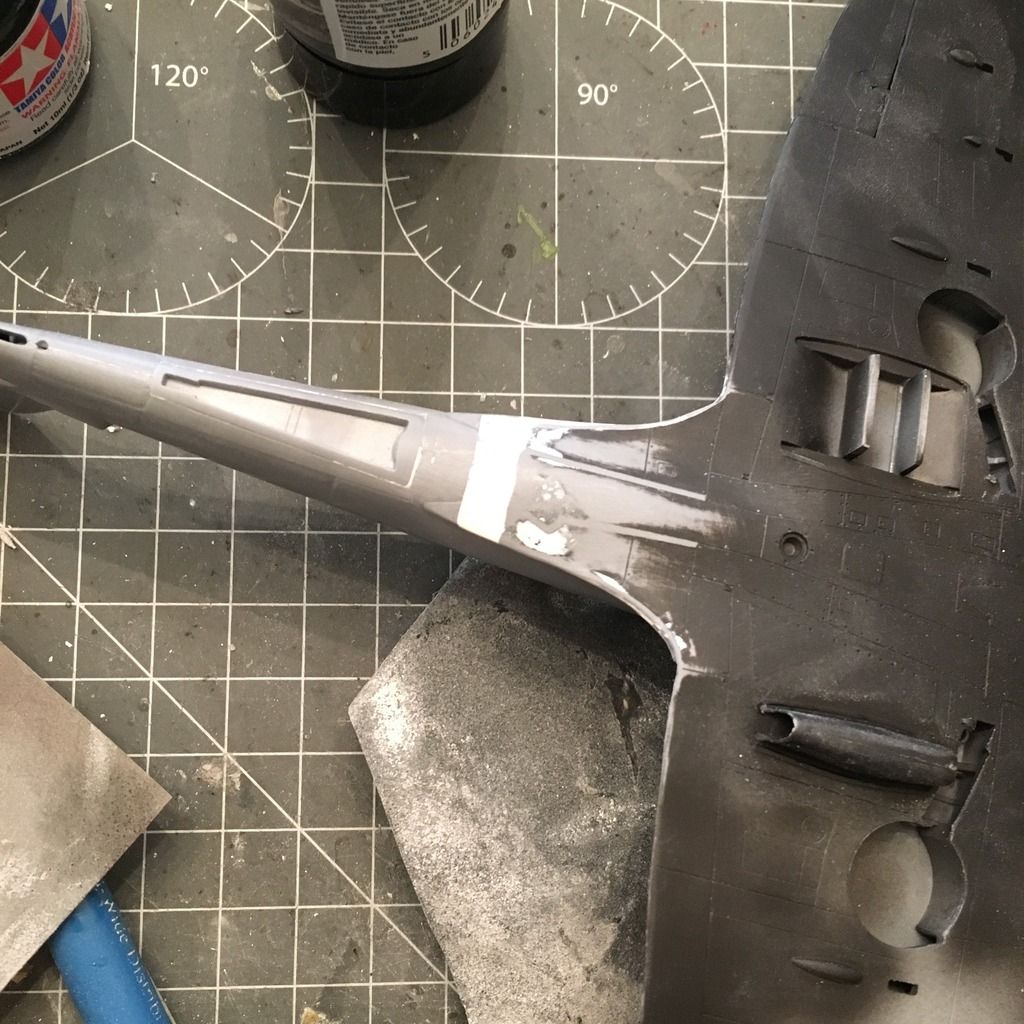
In the end, it doesn't look like I changed the profile much, if at all, and while it was a lot of work, I am pretty happy with the result.

I then got all three constructed and primed with Mr. Surfacer 1500 black.
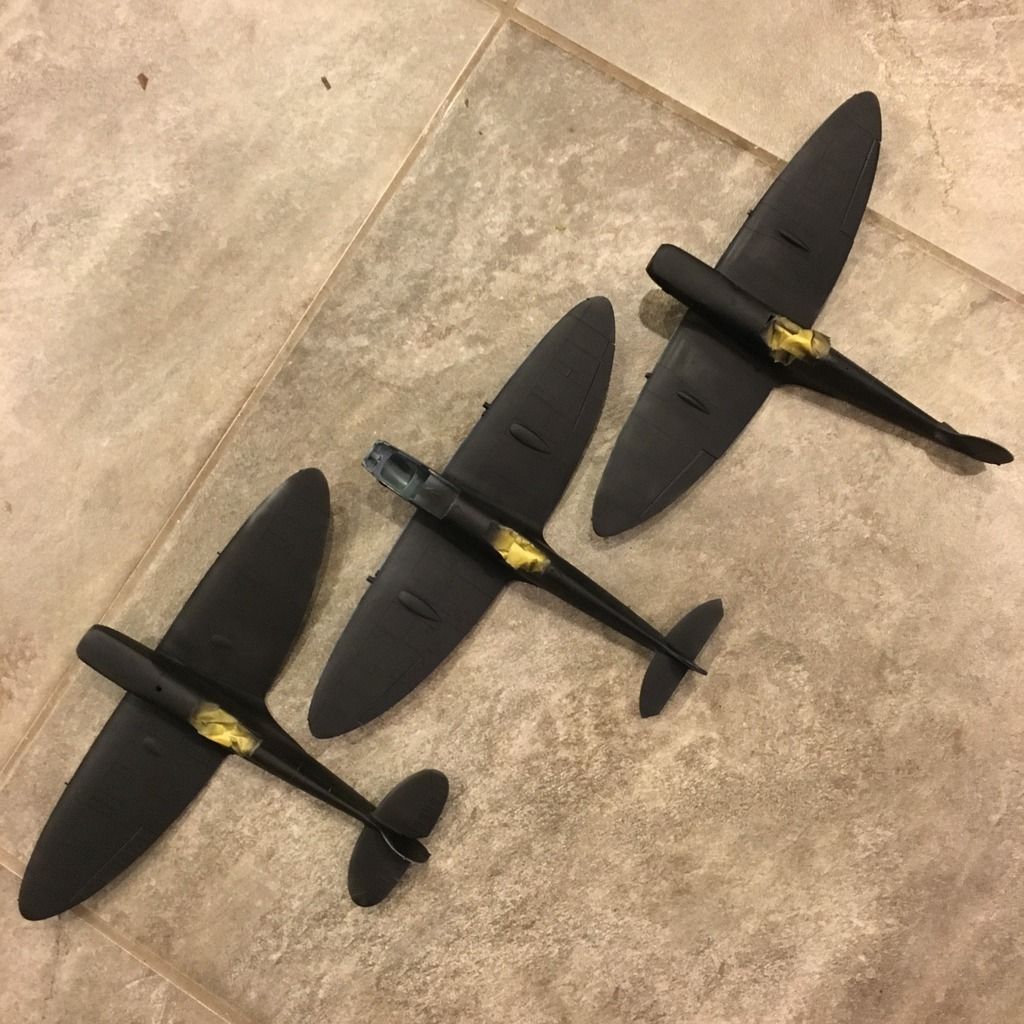
The Tamiya kit went together the easiest, and the Eduard was next. The only knock against Eduard I have is the two-piece cowling, which is a victim of its own success in a way. The other two kits have the same cowling seam, but they don't have the rivet detail present on the Eduard, so even though they still need sanding and filling, it somehow feels like less of a problem. With Eduard already using slide molding on the kit, I wish they had just done more of that and made the cowl one piece. Oh well, the Ultracast resin one is on the way (the part is NOT unbuildable - I'm just lazy).

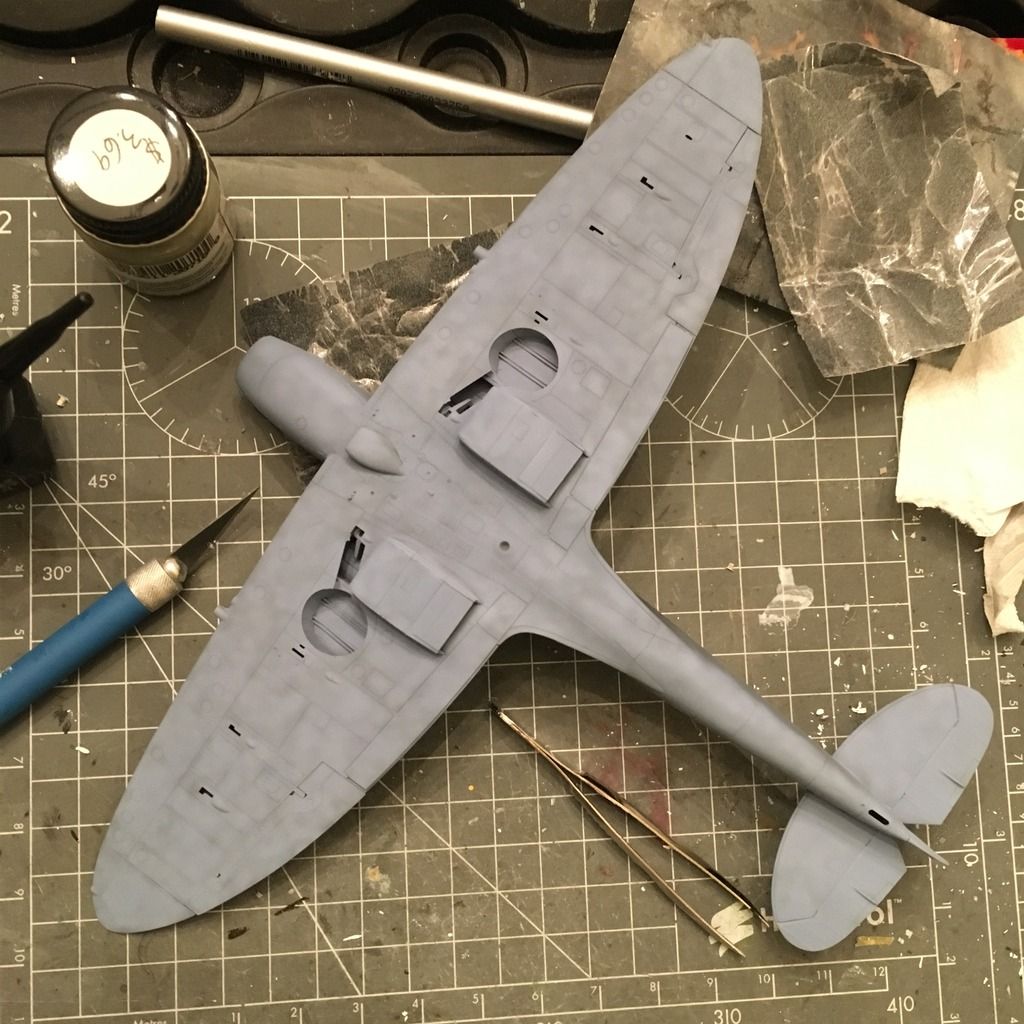
The next thing I did was paint the Model Master Azure Blue on the underside of the Eduard Mk.IX.
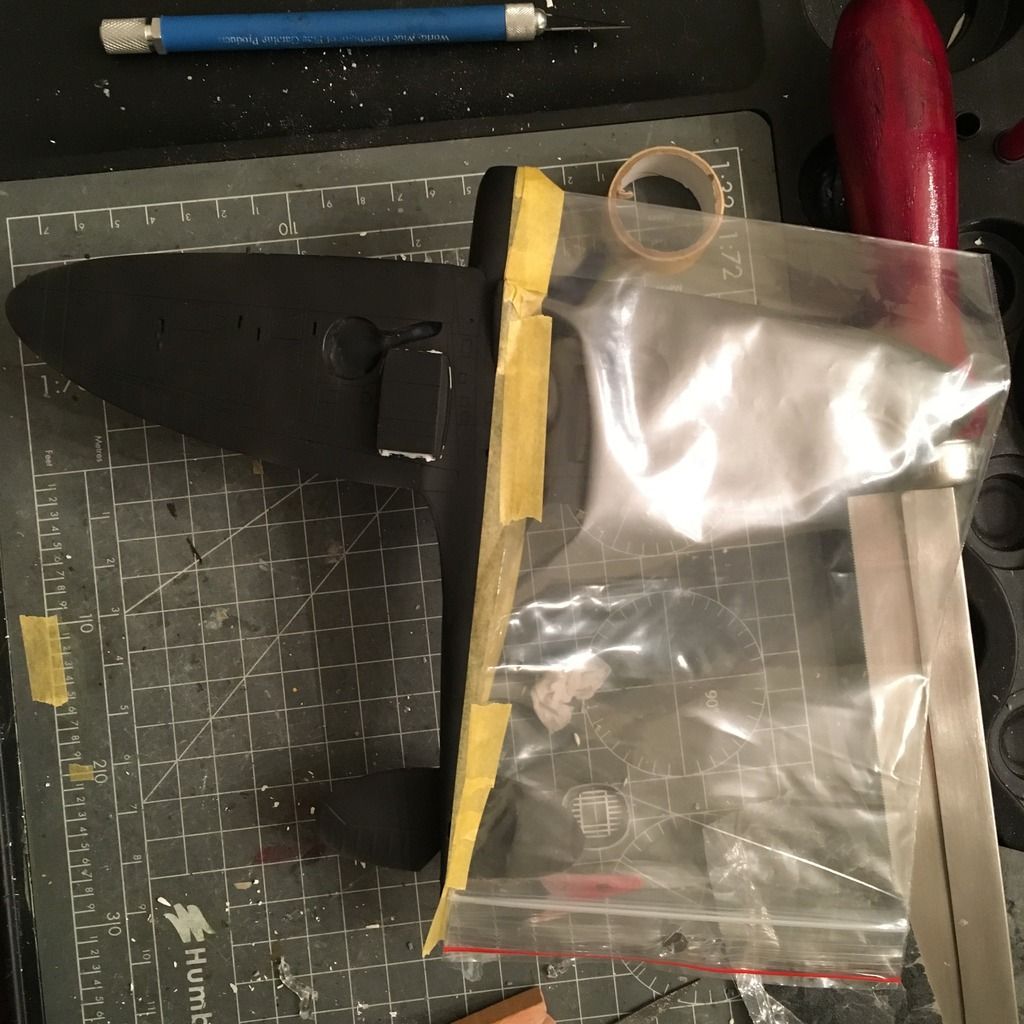
When it came time to paint the Tamiya one, I went with a black/white underside to go with some Montex markings I have. I used Tamiya Medium Blue to mottle the black-primered surface, and then I came back with a blend coat of Tamiya Rubber Black to even it out, give some depth and not appear so starkly black. You'll get a pic of it once I finish the white, which the photo below shows the masking for. Yes, as I was masking, I kind of wished I hadn't filled the fuselage seam...
On the Seafire, I painted the underside Tamiya Sky. It took the most work to get to the paint stage, but I guess I got on a roll with it, and I masked the underside and shot the top colors last night.

Though it's in French Aeronavale markings, it wears its Fleet Air Arm scheme, and after spraying the rudder Alclad Duraluminum (it was replaced on this particular plane and left in doped silver), I shot Model Master Dark Slate Gray for the upper surface camouflage. In the past, I've always waited for one color to dry before masking and shooting the next, but I decided to see if I could freehand the pattern, and I mixed Tamiya Dark Sea Gray 3:1 with Tamiya NATO Black to get an approximation of Extra Dark Sea Gray, and I sprayed that on freehand.
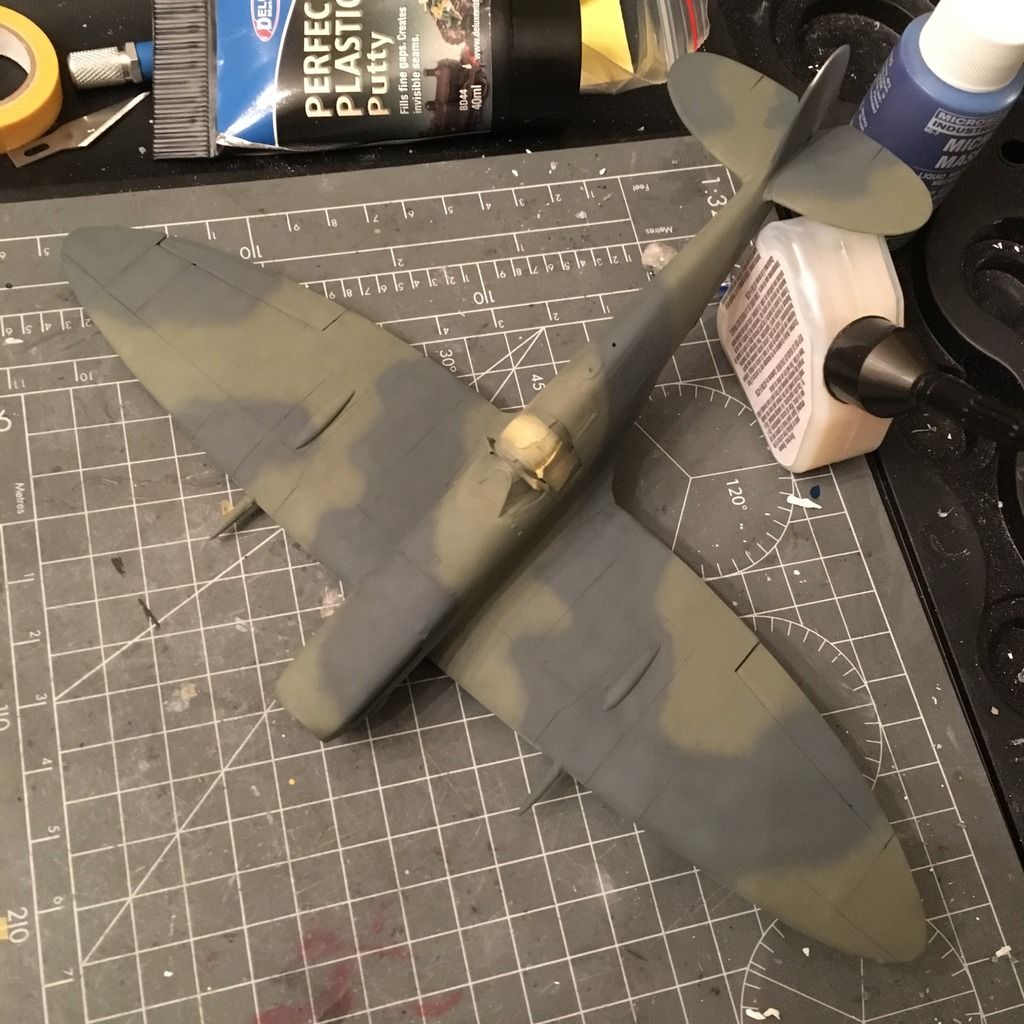
With that done, I masked the wing walk lines and the black strips at the wing roots, then shot them at lunch today (and fixed a little bit of the camouflage on the cowling and starboard horizontal stabilizer.
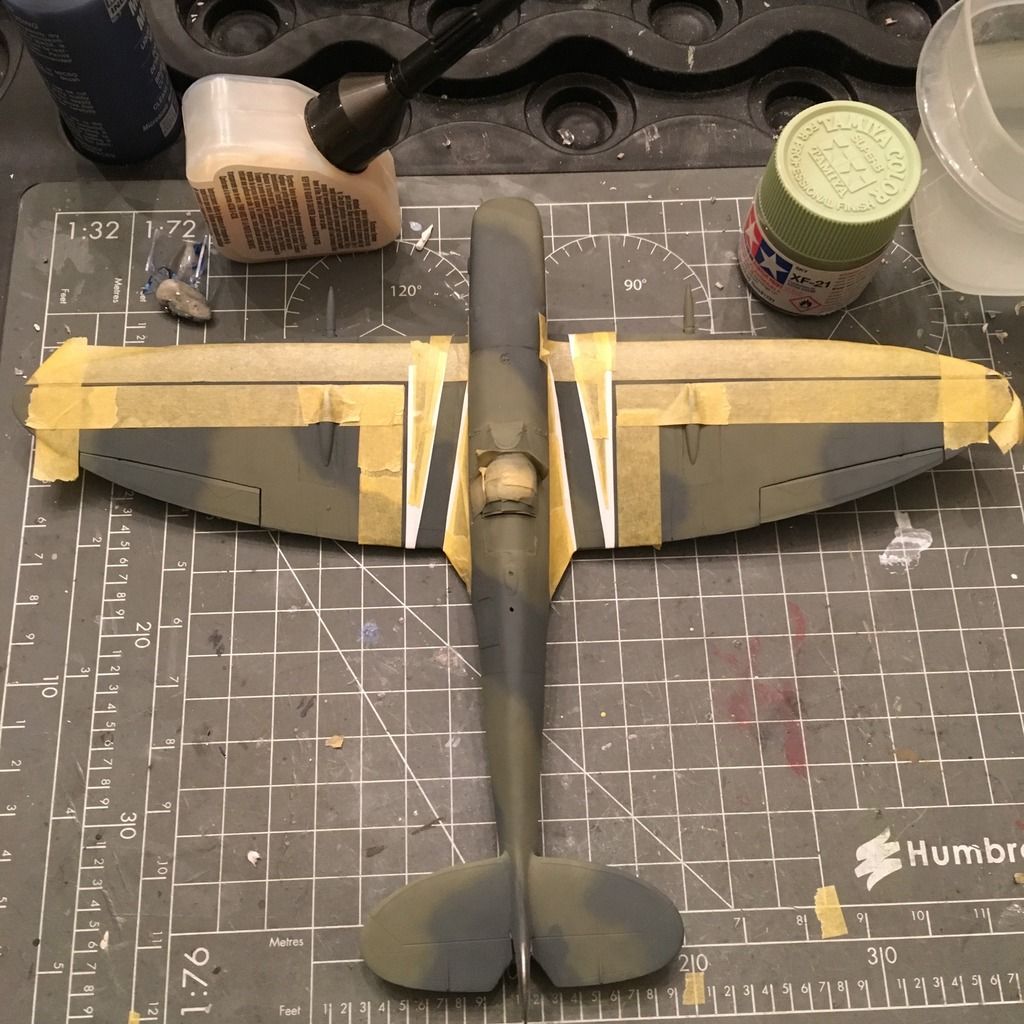
After painting it, I pulled off the masks. I think the wing walk lines are a little thick but not enough for me to worry about redoing them, and I will shoot a gloss clear on it hopefully tonight.
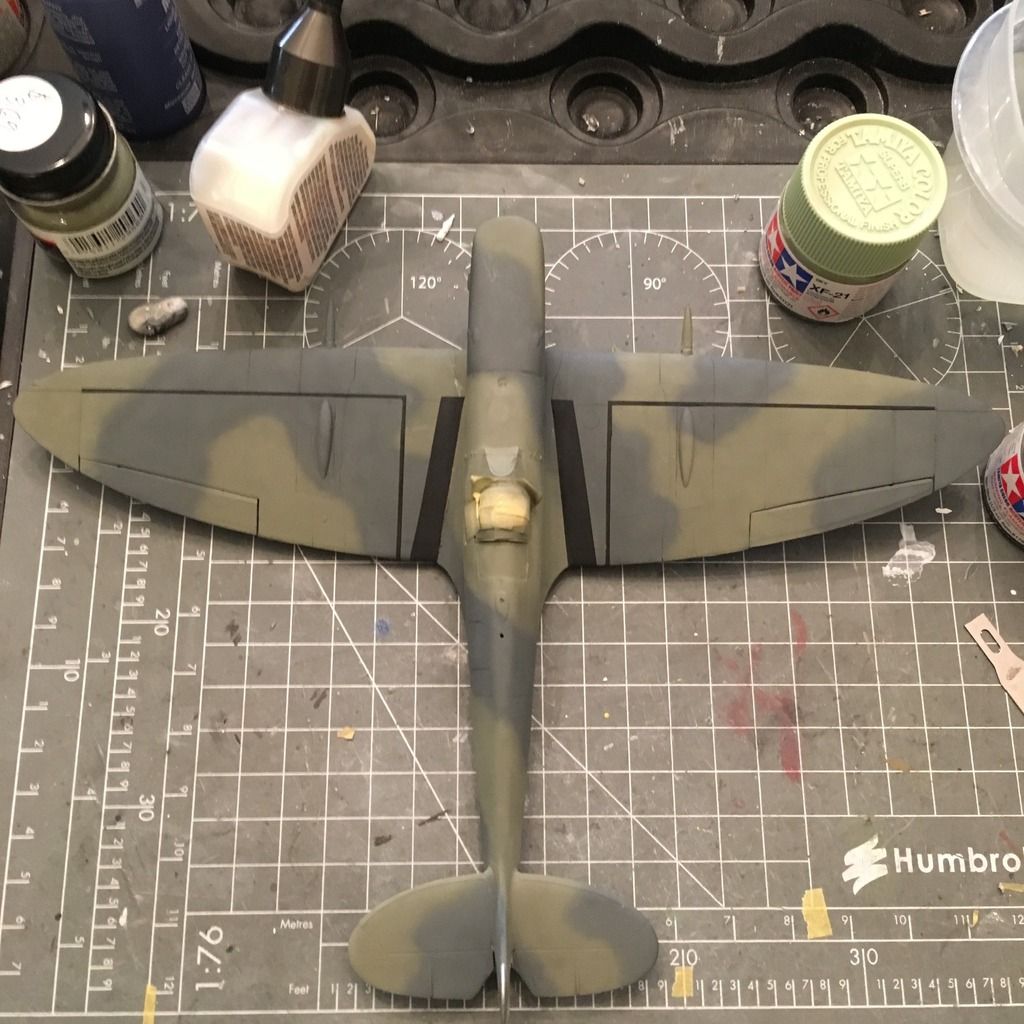
One thing to note about the Special Hobby Seafire that I really like: The strakes along the fuselage and the strenghtening piece around the panel behind the cockpit are provided as vinyl self-adhesive parts, and they work great (you get a spare of each piece, too). As I understand it, these were to strengthen then airframe for catapult launches. They're a nice touch and complement the PE parts well.

-BD-

  • Member since
    June 2014
Posted by BrandonK on Saturday, March 26, 2016 11:12 AM

These are coming along really nicely. The paint is looking fantastic. This is a really cool build.

BK

On the bench:

A lot !! And I mean A LOT!!

2024 Kits on deck / in process / completed   

                         14 / 5 / 2  

                              Tongue Tied

  • Member since
    February 2012
  • From: Olmsted Township, Ohio
Posted by lawdog114 on Saturday, March 26, 2016 8:03 PM
Looking great. Agreed, the cowl on the Eduard kit is tricky....silly design. I like the painted walkway lines.

 "Can you fly this plane and land it?...Surely you can't be serious....I am serious, and don't call me Shirley"


  • Member since
    January 2012
  • From: Barrie, Ontario
Posted by Cdn Colin on Sunday, March 27, 2016 4:51 PM

Very glad I could help.

I build 1/48 scale WW2 fighters.

Have fun.

  • Member since
    January 2015
Posted by BrandonD on Monday, March 28, 2016 4:40 PM

Thanks, Lawdog!

Colin - the cowls were on my doorstep when I came home friday. What a perfect, drop-in fit. I thought the Eduard would be ready to go, but the filler shrank a bit on the hood, so I had to do some more sanding and filling. It *should* be good to go now, and I primed the cowl. Hopefully I can get paint on it in the next day or so.

-BD-

  • Member since
    January 2015
Posted by BrandonD on Monday, March 28, 2016 4:47 PM

Ok, I got the clear on the Seafire and then went about decaling this weekend. The decals were, for the most part, very nice. They laid down smoothly and really sank into the recessed detail. However, even with Micro Set beneath them, there wasn't much room to maneuver them, and I was glad Special Hobby supplied another aeronavale plane's markings, as the one I intended to do folded on itself and became a mess.

I have since added a panel line wash and flat coat, and I painted the prop spinner today. I used a mix of Tamiya tape, Montex vinyl msk and liquid mask for the canopy, and I have to say my favorite is the Montex mask, with the Tamiya tape being a close second. I felt the liquid mask didn't give as sharp of a line as I'd like, and was kind of a pain to get on the piece.

For the Tamiya Mk.I, I painted the underside colors of split black and white. I cut the white a little with neutral gray (5:1 white:gray), and it might look a little too gray now. I may go back and mask it off again and spray a super thin coat of white to lighten it. Not sure if I have the patience for that, though...

With theunderside masked, I shot the Gunze Dark Earth on the upper surfaces this morning (yay for a day off of work!)

It's been drying for several hours now, and I should be able to mask it and get the dark green on this evening.

The Eduard kit needed some final filling and sanding on one part, and I primed it, hopefully for the final time, this morning. I should get color on it tomorrow evening.

-BD-

  • Member since
    January 2015
Posted by BrandonD on Wednesday, March 30, 2016 12:46 PM

I decided I didn't like the amount of gray in the white portion of theunderside, so I re-masked it and shot a heavily thinned coat of white over it to lighten it, and I'm happier with the results now.

I also masked the upper surface camouflage, and I can say this picture perfectly captures why I hate hard-edged camo and why I love Tamiya tape for curves. It was super easy to work with, and it didn't allow any seepage underneath it, even though in places I shot right at the tape.

For the markings on this one, I got a set of Montex masks and painted them. I am mostly happy with the results, but I have to say it was really tedious to work with, and it was hard to align them perfectly. With the high-quality decals being thin and laying down into panel lines so well, I see these as a good alternative to thick kit decals (like Tamiya's), but probably not my go-to markings option unless I want to do a really worn look that is just easier with paint.

Today I hope to spray the fuselage lettering and get some of the tail flash done, which I stupidly forgot about when I had the paints loaded up.

I have a set of Barracuda stencils for the plane, and while I thought of laying them down before the markings, I decided not to, as the decal edges would likely show under the paint. I will try to cut them around the decals and see how that works. I also plan to paint the wing walk lines.

-BD-

  • Member since
    January 2015
Posted by BrandonD on Wednesday, March 30, 2016 3:34 PM

Lunch painting session was a success, as I got the fuselage letters painted and fixed the out-of-round portion of the starboard wing roundel that made the red portion off-center. Fortunately masking it off was easy.

As for the fin flash, the masks don't want to sit down against the horizontal stabilizer root, so I will mask with regular Tamiya tape and paint them later.

-BD-

  • Member since
    February 2012
  • From: Olmsted Township, Ohio
Posted by lawdog114 on Wednesday, March 30, 2016 8:45 PM
Outstanding. I started paint my roundels too. It looks so much better.

 "Can you fly this plane and land it?...Surely you can't be serious....I am serious, and don't call me Shirley"


  • Member since
    January 2015
Posted by BrandonD on Friday, April 1, 2016 3:58 PM

Thanks, Lawdog. After moving on with the colors and markings, I am liking them more and more. They might be worth the time after all.

-BD-

  • Member since
    January 2015
Posted by BrandonD on Friday, April 1, 2016 4:03 PM

Quick update on the Mk.I markings. I got all the roundels, wing walk lines, fuselage lettering and fin flash painted, then glossed it with Tamiya clear. Then I applied the decal that came with the Montex set (the bird) and applied stencils. I have the Barracuda stencil set, which is nice, but it doesn't include white markings, so I used the Tamiya stencils for those, and cut them around the markings. The wing stabilizer location markings are all Tamiya, but the rest are Barracuda, and they went down very well.

I cleared it again at lunch and will hopefully get the Flory wash on it tonight, though I'm not sure what I want to do for the black. I may pick up a Vallejo white wash or some light oil paint.

-BD-

  • Member since
    February 2012
  • From: Olmsted Township, Ohio
Posted by lawdog114 on Friday, April 1, 2016 9:15 PM
Outstanding.....

 "Can you fly this plane and land it?...Surely you can't be serious....I am serious, and don't call me Shirley"


  • Member since
    January 2015
Posted by BrandonD on Wednesday, April 6, 2016 1:50 PM

Thanks, Lawdog!

I've been working away on the Mk.I and the Seafire, but nothing really worth progress shots as yet. I also ran into a small problem where one ofthe wing roundels on the Seafire flaked a bit, and I need to fix that :(

On the Eduard Mk.IX, though, I managed to get paint on it last night.

Unfortunately, I have the elevators on upside-down (the actuator arms for the trim tabs are on the bottom, and they should be on thetop. On the bright side, I haven't glued them or the rudder in place, so it's an annoying fix, but an easy one. I'll re-prime it, spray the Azure, then mask and match the top camo pattern.

I also need to tough up the little tag of Middle Stone on the starboard wing and round it out slightly inboard of the cannon bulge. That should also be easy.

After that, I need to come back with a darker version of Flat Earth and spray the upper wing roundel outlines as well as the spaces for the fuselage lettering and fin flash where the USAAF painted over RAF markings. Then it's on to the clear coat.

The colors I have on this one are Model Master Azure and Gunze Mr. Hobby Dark Earth and Middle Stone for the top camouflage. I plan to weather it with oils, so we will see how that goes.

-BD-

  • Member since
    January 2015
Posted by BrandonD on Wednesday, April 6, 2016 1:52 PM

Oh, and I just have the cowl tacked on for ease of painting. It will come off again so I can install the exhaust without annoying masking.

-BD-

  • Member since
    February 2014
  • From: Michigan
Posted by silentbob33 on Wednesday, April 6, 2016 3:42 PM
Looks really good! I don't know if I have it in me to mask and paint RAF roundles though.

On my bench: Academy 1/35 UH-60L Black Hawk

  • Member since
    January 2016
  • From: A Galaxy Far, Far Away
Posted by Hunter on Wednesday, April 6, 2016 6:11 PM

Brandon - 

OMG!! You sir have some very serious skills! The paint work on your builds is flippin' awesome! I thank you for your commentary throughout the entire build...I have picked up a lot of tips and techniques I will put into my builds. Thank you for sharing, and again your work is absolutely awesome.


Mr. Skinner - Here is a perfect article for FSM! 

Hunter 


  • Member since
    November 2003
  • From: Naples, FL
Posted by tempestjohnny on Wednesday, April 6, 2016 9:14 PM
BD these are amazing. The fact that it is three completely different schemes makes it even more amazing.


  • Member since
    January 2015
Posted by BrandonD on Friday, April 8, 2016 12:56 PM

Silentbob - Thanks. It was actually easier than it could have been. Montex does a good job, and the only trouble I ran into was when I inadvertently stretched the starboard roundel pattern and made it slightly oblong. Fortunately, fixing it was pretty simple. Oh, and there was a small problem when I didn't tape over the join where one circle went inside another. The gap was just big enough to allow a mist of red to get on the white, and I carefully fixed it with a brush. Both of those issues are easily avoided, though.

Hunter - Thank you, but you've definitely overplayed my skills. There are a few issues with each build, but hopefully they're minor enough to be unnoticeable. Getting to this point is more patience and method than skill, really.

Tempestjohnny - Thanks. I would go crazy doing three of them in the same scheme. As it is, I'm kind of tired of painting Spitfires now, but I am still having fun as all three head into the final stages.

-BD-

  • Member since
    January 2015
Posted by BrandonD on Friday, April 8, 2016 1:10 PM

It's time to bring you up to speed on the Eduard Mk.IX, which is now painted and has decals.

Since this one is in USAAF service, the original British markings were painted over. To do this, I reused the Montex wing roundel masks, which saved me buyng a circle cutter and making my own out of tape. The fin flash was easy, with just a few strips of tape, and the fuselage lettering overpaint was done by cutting masks out of Tamiya Tape (I think it's the 20mm roll).

I have seen pictures with the paint being darker than the Dark Earth, so I mixed some Tamiya XF-1 with the Gunze Dark Earth (I really don't know the ratio) and layed it down. My first thought was that it was too dark, but in the end, I was OK with it.

Next up was clear coat (Tamiya Clear) and decals.

As this is the Weekend Edition kit, it doesn't come with stencils (their newer ones like the Bf-109 E-7 do come with stencils). I picked up an Eduard stencil sheet on sale and applied them and the excellent markings included in the kit.

I think Eduard decals are on par with Cartograf, and are the nicest kit manufacturer-made decals I've come across. The carrier film is minimal, they sing into panel lines nicely, and the registration is always crisp and spot-on. In fact, this is the only plane of thethree I didn't feel like I needed to paint the wing walk lines.

Just FYI if you buy this kit - the only markings included are the stars, the 8-ball, the writing on the nose, the fuselage lettering, the blackpatch on the port wing root and the instrument cluster. The stencil sheet is a must, as it includes the fuel capacity stencil, various hydraulic and oil stencils that show prominently, the wing walk lines and associated stencils, the machine gun patch covers and the underwing support marking stencils.

I ran into some silvering issues on some of the stencils I need to deal with, but once that's done, it'll be time to seal them with the second clear. The only other issue is that the8-ball sits a little high, but it sank down on the model and refused to move no matter how much Micro-Set I slathered it with, so it's going to stay there.

Anyway, this is how it sits now. Unfortunately, I don't think I'll get time to work on it this weekend.

-BD-

  • Member since
    January 2015
Posted by BrandonD on Friday, April 15, 2016 4:08 PM

Ok, I got a fair amount done on the Spits over the past week or so, and I'll start with the Mk.I.

It's all but finished now, and I got the underside weathered. I used Flory Dark Dirt wash for the white side of the plane, and Vallejo Wash for White Models for the black side to give it some contrast. I'd never worked with that before, but found it to be pretty nice/ I used ground up pastel chalk applied with a pointed Q-tip for the shell ejection ports, and then used raw sienna oil paints to dirty up the underside consistent with operating off a grass/muddy strip in England during the Battle of Britain.

Next up was the Eduard Mk.IX. After painting and decals (post above), I wanted to fade the thing a bit, so I used yellow ochre artist's oils applied in random dots to tone down the paint and hopefully make it look faded/operated out of a desert/sandy environment. This was my first time using this method, and I want to explore it more. Here it is in the middle of the process, as I was using turpenoid on a flat brush to streak it in the direction of airflow (I finished by wiping most of it off with a paper towel.

I probably put too much oil on it, but in any case, here is the result (the pic is a little washed out).

The underside got a similar treatment with two colors.

And after. I like how this plane retained one Brit roundel on the underside. Next up will be shell ejection port streaking and a bit of griminess from the engine.

This is a horrible pic, but shows where they all sit at the moment. The Mk.I just needs some chipping on the prop and walkways, and then it's done. The Mk.IX needs its legs, pants and feet attached, as well as the rudder and locks for the elevators (which I have posed in the down position to coincide with the control yoke placement). The Seafire Mk.III needs its arrestor hook painted and attached, some sort of fix to the starboard win roundel (maybe...) and its feet, radio mast, cockpit door and upper signal lamp.

That's all for now.

-BD-

  • Member since
    December 2002
Posted by 7474 on Friday, April 15, 2016 7:23 PM

Incredible work BD, keep it up and I can't wait to see them finished soon. Can you tell me what paint brands and colors you use to paint the roundels? I want to start painting markings on my models. 

  • Member since
    January 2015
Posted by BrandonD on Saturday, April 16, 2016 1:34 AM

7474 - Thank you! I'm honestly ready to get them off the bench, as much fun as I am having.

For the roundels, I used Tamiya XF-3 Yellow, XF-2 White and XF-8 Blue. The red was Model Master Insignia Red (simply because I think it covers better than the Tamiya red, which I have trouble with over dark colors like blue and black).

I do like the way the roundels look painted, but I have to say that it's hard to tell the difference with the Eduard decals when pressed down and hit with two doses of Micro-Sol. In the pic below, the dark brown circle under it is paint, masked with the same Montex mask I used on the Mk.I.

My take, for what it's worth, is that painting is a FAR better option than using Tamiya decals or something else that's thick, but I won't be painting when I have Cartograf or Eduard decals in the box. The biggest challenge I found with the masks was laying them down without having the high contrast you get with the decal to make sure they are placed correctly.

-BD-


  • Member since
    February 2012
  • From: Olmsted Township, Ohio
Posted by lawdog114 on Saturday, April 16, 2016 6:25 AM
Very ambitious with the artist oils. I like it. Is that over an acrylic clear coat? I use alclad clear which is oil based., so I would imagine the turpenoid would eat through it. Looks like your in the home stretch bud.

 "Can you fly this plane and land it?...Surely you can't be serious....I am serious, and don't call me Shirley"


  • Member since
    January 2015
Posted by BrandonD on Tuesday, April 19, 2016 11:43 AM

Thanks, Lawdog. Yes, the paints are enamels, but I used the Tamiya gloss clear before and after decals, then used flat clear over all of it, so there's three layers of barrier between the turpenoid and the enamels.

And yeah - home stretch for sure!

-BD-

  • Member since
    January 2015
Posted by BrandonD on Friday, April 22, 2016 12:42 PM

Here's an unveiling of the first completion - the Tamiya Mk.I with Montex masks and a mix of stencils (Barracuda and Tamiya, since Barracuda didn't provide white stencils for the blck underside).

I actually think this is the best I've done to date, and while there are some errors, I'm pretty happy with it. I try to do something new on each build, and this one had painted markings and codes and an HGW harness, both of which were new for me. It was also my first time using the Tamiya tape for curves, and I'm totally sold on that!

I should finish up the other two this weekend, and then I will get some actual shots of them individually and together.

-BD-

  • Member since
    November 2003
  • From: Naples, FL
Posted by tempestjohnny on Friday, April 22, 2016 1:46 PM
Awesome


  • Member since
    March 2013
Posted by patrick206 on Friday, April 22, 2016 2:23 PM

Brandon - What a well done WIP post, great detailed info and photos. The Spit's are beautiful, perfectly built and finished. What a guy, you're such a productive forum member, always a treat to see what you're up to. Thanks.


Patrick 

  • Member since
    February 2014
  • From: Michigan
Posted by silentbob33 on Friday, April 22, 2016 6:52 PM
Looking really good Brandon! I really like the effect the oils have, and your Mk.I looks great. I have the same kit in the stash so it was really nice seeing it come together here.

On my bench: Academy 1/35 UH-60L Black Hawk

  • Member since
    January 2015
Posted by BrandonD on Friday, April 29, 2016 11:53 AM

Well, it's been almost two months, but the Spitfires are done. I'll post a few pics in this of the trio, then do a separate reply for each one with the pros and cons for those who may care.

Anyway, as a refresher, these are all 1/48. The one in the temperate land scheme is a Spitfire Mk.I by Tamiya, the desert scheme is a Spitfire Mk.IXc (early) by Eduard, and the third is a Seafire Mk.III by Special Hobby.

More pics coming.

-BD-

JOIN OUR COMMUNITY!

Our community is FREE to join. To participate you must either login or register for an account.

SEARCH FORUMS
FREE NEWSLETTER
By signing up you may also receive reader surveys and occasional special offers. We do not sell, rent or trade our email lists. View our Privacy Policy.