SEARCH FINESCALE.COM

Enter keywords or a search phrase below:

1/48 Meng P-51 D Mustang 352 FG John C. Meyer "Petie 2nd" (FINISHED)

8288 views
65 replies
1 rating 2 rating 3 rating 4 rating 5 rating
  • Member since
    June 2013
Posted by bvallot on Friday, February 24, 2017 1:20 PM

Very cool so far Joe. Hang in there! =] Would you place this build over the Tamiya yet??  I'm personally feeling not convinced yet.

On the bench:  

Tamiya F4U-1  Kenneth Walsh


  • Member since
    March 2015
  • From: Streetsboro, Ohio
Posted by Toshi on Friday, February 24, 2017 4:16 AM

Your build is amazing lawdog114.

Toshi

On The Bench: Revell 1/48 B-25 Mitchell


Married to the most caring, loving, understanding, and beautiful wife in the world.  Mrs. Toshi


  • Member since
    December 2002
  • From: Bury St Edmunds, Suffolk, England
Posted by Bish on Friday, February 24, 2017 3:55 AM

Great job with the Alclad. And that blue has come out really nice, will have to remember that mix and try it.

I have a couple of Bodney Mustang decal sets which make referance to the differant shades of blue used on differant aircraft. But i can't recall off the top of my head which colours they suggest.

I am a Norfolk man and i glory in being so


On the bench: Airfix 1/72nd Harrier GR.3/Fujimi 1/72nd Ju 87D-3

  • Member since
    February 2012
  • From: Olmsted Township, Ohio
Posted by lawdog114 on Friday, February 24, 2017 2:26 AM

BrandonD

Well, you've inspired me, and my kit is in the post...

You're bad for my wallet, lawdog. :)

-BD-


Sorry Bro...


I'm finally in the home stretch.  My struggle with this turkey continues.  I taped off the windscreen and tried to add it for easy of painting the blue nose which encroaches onto it,  Unfortunately I couldn't get it to click in and under pressure I accidentally broke the starboard gear.  The fact that I added wire brake lines saved it from disappearing completely....absolute dumb designAngry.  I walked away for a bit then returned later.  After some trimming I got it pressed in there.  Of course there was a small gap as with everything else so far but at this point I'm past caring.    

On to painting.  The Eagle Cal sheet showed that at one point Petie 2nd had two black belly bands that were apparently wider than normal invasion stripes.  They had a photo included to confirm this.  I decided to paint these in accordingly.  I notice that most folks who build this scheme don't add these so I wanted to be different.  

Then came that blue nose.  I used XF-8 Flat Blue with a touch of XF-4 Yellow Green.  I added some XF-2 Flat White and I think I got it close.  Alot of people stess over taping off the Bodney nose.  I found it to be fairly easy with Tamiya tape which curves well when sliced thin.  Once complete, I sprayed the blue with Alclad Clear Gloss.  

The Eagle Cal decals behaved wonderfully.  Finally something went right.  

I added a Flory wash which really brings out the detail on this kit.   I then started adding the other bits and pieces.  Of course I almost broke off all the landing gears trying to press on the tires.  So far nothing HASN'T require glue.  

I'm planning on a dusting of Dullcoat, Some postshade weathering, then addition of the canopy and it will be done...... 


 "Can you fly this plane and land it?...Surely you can't be serious....I am serious, and don't call me Shirley"


  • Member since
    January 2015
Posted by BrandonD on Tuesday, February 21, 2017 5:36 PM

Well, you've inspired me, and my kit is in the post...

You're bad for my wallet, lawdog. :)

-BD-

  • Member since
    February 2012
  • From: Olmsted Township, Ohio
Posted by lawdog114 on Sunday, February 19, 2017 3:29 AM

nanookAK
The Hasegawa kit's only real 'flaw' IMHO is the super-shallow wheel wells. Both kits did not replicate the wheel well properly though so that can be laid at both kits' feet. For me personally, I'm not wound up about the wheel wells...in all seriousness how often are our built kits viewed from below? I appreciate getting it right but sometimes it seems a bit overboard.

Later,

Lee


Thanks Toshi and Lee.  Indeed the Hasegawa kit is still nice as I have a few in the stash.  I agree about the LG bay, no biggie to me.  You could always close the inner doors, which would be believable since the flaps are molded closed.  You could argue there was still hydraulic pressure.  

Another annoyance with the Hase version is how the top engine cowl is a seam, so you have to sand and scribe the center line, then add the fasteners with a pin vise.  I like Tamiya's one piece insert here.  Personally, I think it's a step below Tamiya in regard to surface detail too.  I do however prefer Hasegawa's one piece bubble canopy which I usually drop onto my Tamiya kits sincecI display my cockpits open.  The Tamiya two piece abomination is utter garbage.    

I can't wait to see what Airfix and Eduard do with this subject.


 "Can you fly this plane and land it?...Surely you can't be serious....I am serious, and don't call me Shirley"


  • Member since
    February 2012
  • From: Olmsted Township, Ohio
Posted by lawdog114 on Sunday, February 19, 2017 3:03 AM

BrandonD

Oh, one thing I have heard about the Meng kit (and I'm sure you're aware of) is that the canopy in the open position is inaccurate. I read that due to the way Meng made it posable, it doesn't dip down in the rear when open, like the real onedid.

Not having built it, I can't comment on that, but something to watch for.

-BD-


Thanks.....worst case I'll do surgery to make it sit right.

 "Can you fly this plane and land it?...Surely you can't be serious....I am serious, and don't call me Shirley"


  • Member since
    February 2012
  • From: Olmsted Township, Ohio
Posted by lawdog114 on Sunday, February 19, 2017 3:01 AM

BrandonD

Nice work so far, Lawdog. As far as the snaptite assembly, I think I would have a hard time not gluing it all down.

No sink marks in the fuselage where those big attachment points are? Nice!

I think if I can snag one of these for under $40 I will go for it, but I have high hopes for the Eduard Mustang in 2018. Because I think Eduard will absolutely rock it and make the definitive Mustang kit. Judging by the way they released their Spitfires and Bf-109G series, I think we can even expect an A-36 down the line, as well as an early D model without the tail fillet.

As for colors, I did Petie 2nd with Humbrol (I know) French Blue.

Looking at my kit, I'm thinking it's definitely time to build another...

-BD-


Awesome!  I hope mine turns out half that nice.  That blue is dead on.  I think my LHS carries Humbrol so I'll go check it out.  Besides, I'm out of Micro Sol.  Airfix is releasing a new tooled D later this year too.  Rumor has it you will have a tail fillet option, which I find very appealing.  


Thanks for all the kind words everyone...  

 "Can you fly this plane and land it?...Surely you can't be serious....I am serious, and don't call me Shirley"


  • Member since
    March 2015
  • From: Streetsboro, Ohio
Posted by Toshi on Wednesday, February 15, 2017 3:36 PM

The Alclad looks fantastic.  

Toshi

On The Bench: Revell 1/48 B-25 Mitchell


Married to the most caring, loving, understanding, and beautiful wife in the world.  Mrs. Toshi


  • Member since
    January 2011
  • From: Walton, KY
Posted by nanookAK on Wednesday, February 15, 2017 12:31 PM

Looking good! Almost on the home stretch now. I agree that French Blue is a good match for the blue nose birds. I think many folks have used it for years for this.

Also agree on the forthcoming Eduard P-51 family. I can only imagine that they will kit all of the relevant versions. What is funny to read though is that some folks think the Hasegawa and Tamiya kits are in need of being replaced. They may lack a bit of super fine detail in a few areas but sheesh these kits STILL look great after 20+ years on the market. The Hasegawa kit's only real 'flaw' IMHO is the super-shallow wheel wells. Both kits did not replicate the wheel well properly though so that can be laid at both kits' feet. For me personally, I'm not wound up about the wheel wells...in all seriousness how often are our built kits viewed from below? I appreciate getting it right but sometimes it seems a bit overboard.

Later,

Lee

"Even Stalin has an Airfix Spitfire Mk.IX!!!" Der Fuhrer

  • Member since
    January 2015
Posted by BrandonD on Wednesday, February 15, 2017 12:23 PM

Oh, one thing I have heard about the Meng kit (and I'm sure you're aware of) is that the canopy in the open position is inaccurate. I read that due to the way Meng made it posable, it doesn't dip down in the rear when open, like the real onedid.

Not having built it, I can't comment on that, but something to watch for.

-BD-

  • Member since
    January 2015
Posted by BrandonD on Wednesday, February 15, 2017 12:21 PM

Nice work so far, Lawdog. As far as the snaptite assembly, I think I would have a hard time not gluing it all down.

No sink marks in the fuselage where those big attachment points are? Nice!

I think if I can snag one of these for under $40 I will go for it, but I have high hopes for the Eduard Mustang in 2018. Because I think Eduard will absolutely rock it and make the definitive Mustang kit. Judging by the way they released their Spitfires and Bf-109G series, I think we can even expect an A-36 down the line, as well as an early D model without the tail fillet.

As for colors, I did Petie 2nd with Humbrol (I know) French Blue.

Looking at my kit, I'm thinking it's definitely time to build another...

-BD-

  • Member since
    April 2015
  • From: Detroit, MURDER CITY
Posted by RudyOnWheels on Wednesday, February 15, 2017 12:11 PM
Great work as always! Really like the "wood" you did, looks authentic to me. Rudy
  • Member since
    September 2013
Posted by blackdog62 on Wednesday, February 15, 2017 10:54 AM

Your build as always looks great.

This might be topic for elsewhere but is this going to be the new model design snaptite. For adults  I started building in the late 60s and gluing a kit is something I have really learned to like. But then again I guess I can glue a snap tite. Snaptite is how I taught my kids to use glue.

  • Member since
    November 2008
  • From: Central Florida
Posted by plasticjunkie on Wednesday, February 15, 2017 8:52 AM

The pit is looking spectacular. Hey dog I agree with you about skipping the laminar flow putty on the wings. I have a 1/32 Dragon Mustang in the stash that I have been looking over and like you said, too pretty to cover up the details.


 GIFMaker.org_jy_Ayj_O


Too many models to build, not enough time in a lifetime!!

  • Member since
    September 2014
Posted by rooster513 on Wednesday, February 15, 2017 6:31 AM

The Alclad came out looking great! I'm going to have to try that trick for the wing roots which are always a problem for me. Looking forward to the blue going on!

-Andy

  • Member since
    February 2012
  • From: Olmsted Township, Ohio
Posted by lawdog114 on Wednesday, February 15, 2017 4:21 AM

Thanks guys.

Well, I'm not going to make a complete 360 on my initial assessment, but I must admit I overreacted a wee bit.  Once a coat of Alclad primer was added I became more pleased with it.  I only had a few minor seams that needed attention but I was happy with the results.  That detail is simply breath taking.  It was so nice that I wasn't able to "laminair flow" the wings with putty.....too beautiful to mess with.  

After primer, I started with Alclad Duraluminum as a base which is my go to for that worn "combat" look.  I used to get pebbling at wing roots but I discovered that higher pressure (about 20 psi) coupled with getting in close, resulted in it going on wet.  This seems to alleviated it for me.    


Next I started taping off panels and spraying shades of the Alclad.  I may even add more.  

Almost time for that blue nose.  I need to research the proper shade.  I believe the 352nd had an early, lighter blue and late one that was much darker.  Petie 2nd was probably the lighter blue.   

 "Can you fly this plane and land it?...Surely you can't be serious....I am serious, and don't call me Shirley"


  • Member since
    January 2011
  • From: Walton, KY
Posted by nanookAK on Tuesday, February 14, 2017 11:30 PM

Looks very good so far, sir! I've been debating on saving up to buy one if these kits...I may need to wait until it pops up on sale. Very nice work though even with the Issues. The detail looks superb that's for sure.

Later,

Lee

"Even Stalin has an Airfix Spitfire Mk.IX!!!" Der Fuhrer

  • Member since
    March 2015
  • From: Streetsboro, Ohio
Posted by Toshi on Tuesday, February 14, 2017 7:21 AM

Bish

Well your doing a good job despite the issues.


I agree with Bish!

Toshi

On The Bench: Revell 1/48 B-25 Mitchell


Married to the most caring, loving, understanding, and beautiful wife in the world.  Mrs. Toshi


  • Member since
    December 2002
  • From: Bury St Edmunds, Suffolk, England
Posted by Bish on Tuesday, February 14, 2017 6:28 AM

Well your doing a good job despite the issues.

I am a Norfolk man and i glory in being so


On the bench: Airfix 1/72nd Harrier GR.3/Fujimi 1/72nd Ju 87D-3

  • Member since
    February 2012
  • From: Olmsted Township, Ohio
Posted by lawdog114 on Monday, February 13, 2017 11:38 PM

Johnny1000

sounds frustrating, but you're making it look great. (As always.) 

Meanwhile, I'm especially excited to see what you do with that Tamiya Corsair. Have you picked a subject?

cheers

-J


Thanks Johnny.  Out of curiousity, I went and looked at a few builds of the kit and some folks said things were falling off and they needed glue as well.  One modeler discovered a niffy alteration to the landing gear so it could be installed later. Interestingly nobody seemed to experience the machine gun insert issues.  Perhaps its operator error here.

Reference the Corsair, I'm building Pappy Boyington's #774 then Tommy Blackburn's #1.      

 "Can you fly this plane and land it?...Surely you can't be serious....I am serious, and don't call me Shirley"


  • Member since
    July 2016
  • From: NYC
Posted by Johnny1000 on Monday, February 13, 2017 10:54 PM

sounds frustrating, but you're making it look great. (As always.) 

Meanwhile, I'm especially excited to see what you do with that Tamiya Corsair. Have you picked a subject?

cheers

-J

  • Member since
    February 2012
  • From: Olmsted Township, Ohio
Posted by lawdog114 on Monday, February 13, 2017 10:13 PM

Thanks all. Maker, I used an old PE fret I had in my stash.  


Toshi, I'm going to get into that here.  For the folks who have built this kit without glue I must applaud you.  You are the Masterclass.  I have been having no such luck and it's been a frustrating, profanity laced experience thus far.  

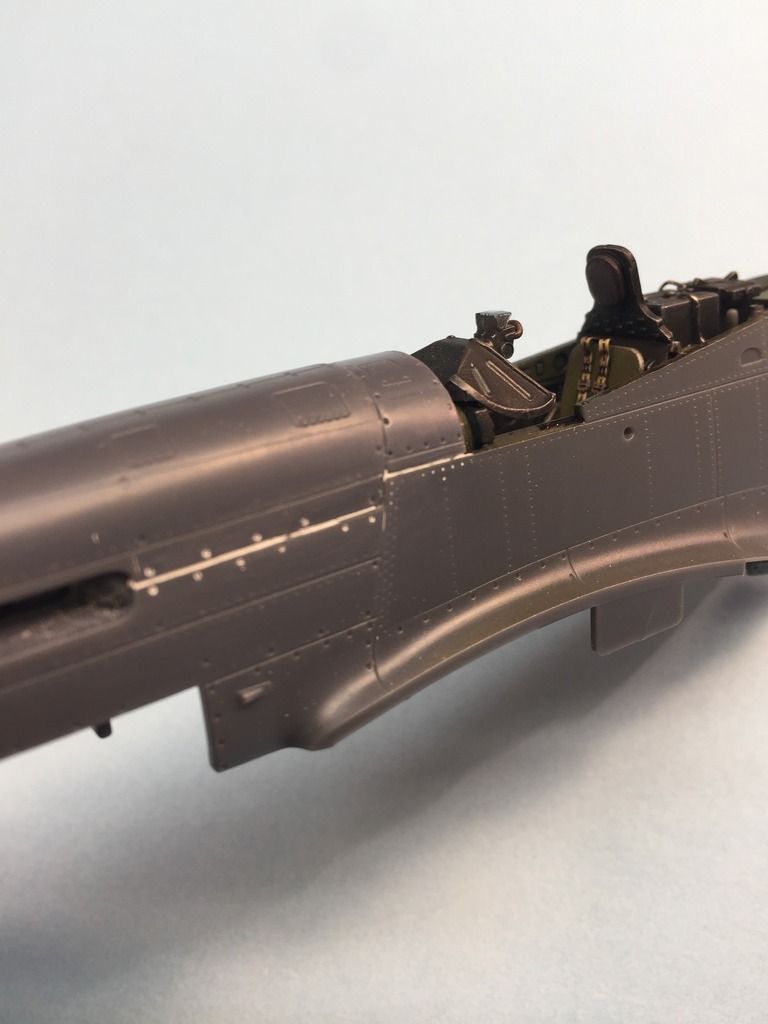
First off, I assembled the fuselage/cockpit/radiator area and it was smooth sailing.  I was fat, dumb and happy, all proud of myself until I attached the upper cowl pieces.  I couldn't get these pressed flush and there were large gaps that I had to fill. I ended up gluing them down and filling them with Perfect Plastic Putty.
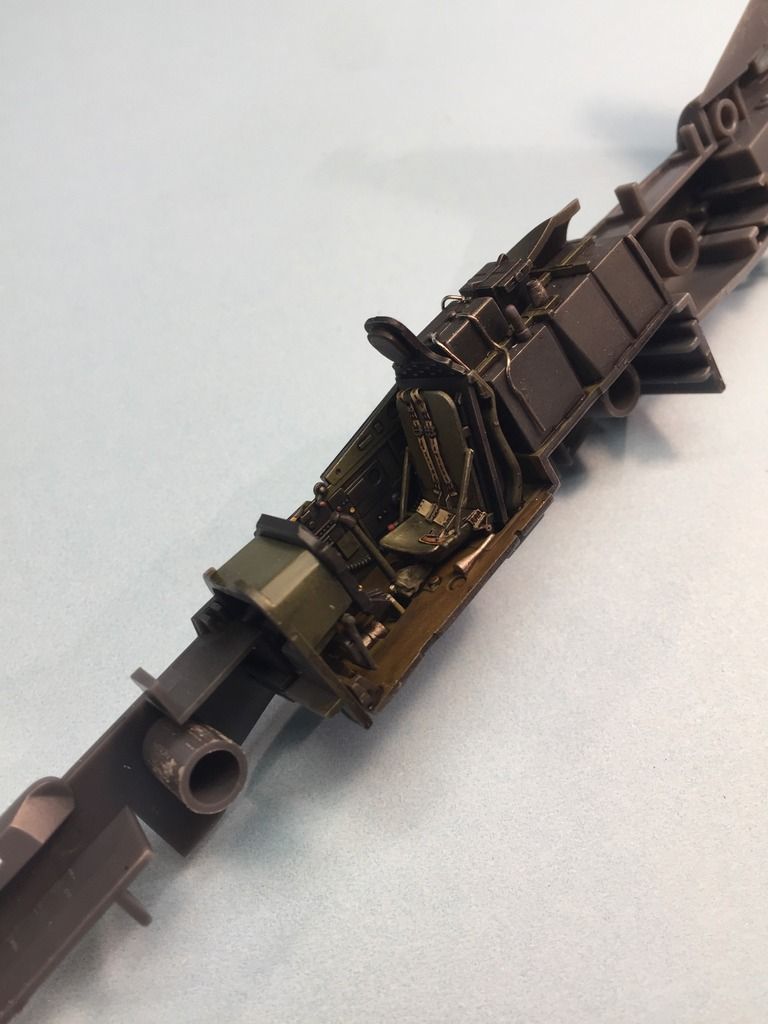
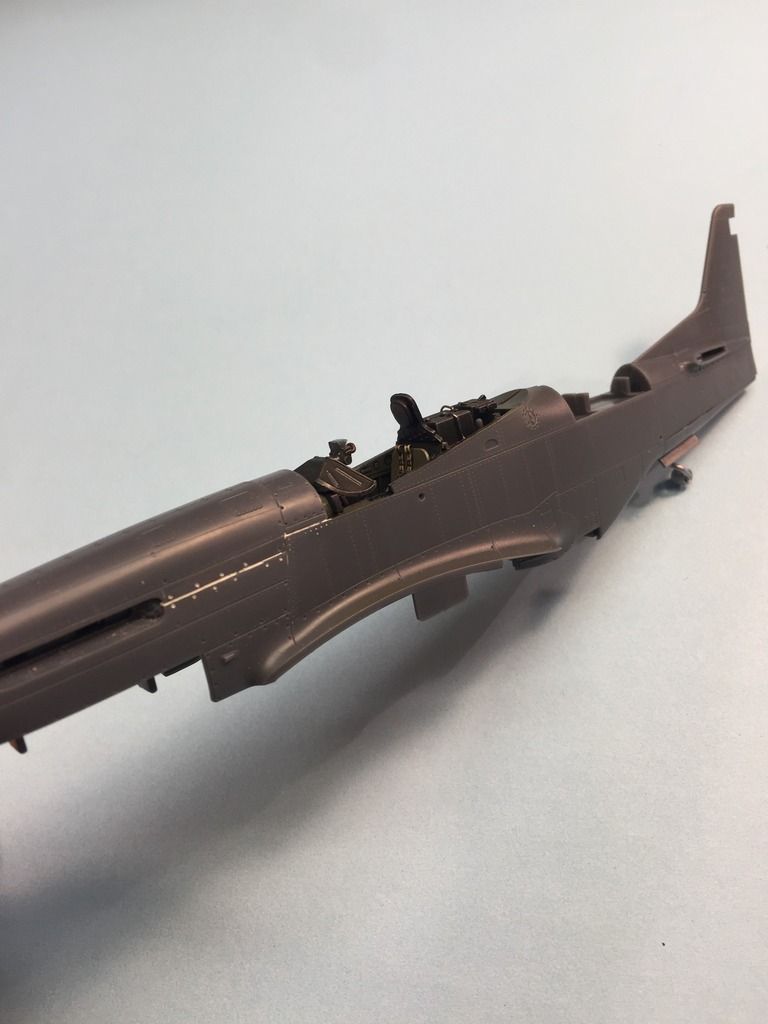
Close up...
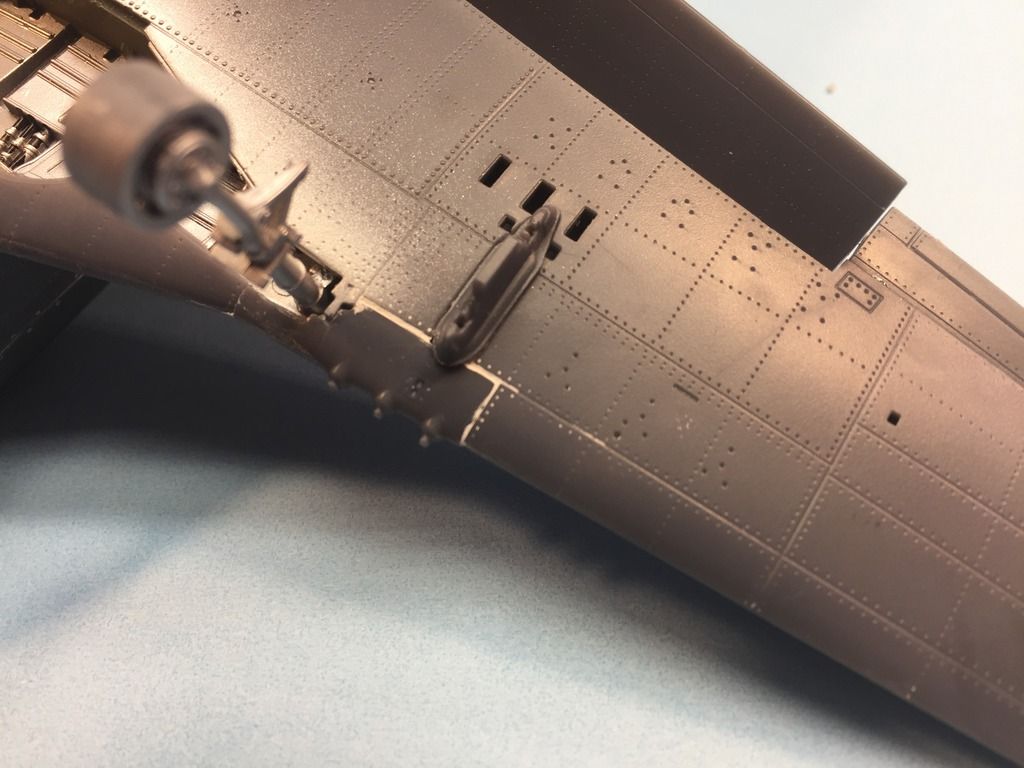
Next gripe.  You have to follow the instructions, as the build order dictates how its held together without glue.  This was first experienced with the landing gear legs and tail wheel which have to be installed as you proceed through basic assembly.  Apparently they want you to paint everything separately and then assemble it.  From the factory, the P-51 had an aluminum lacquer gear bay with the back wall (wing spar) in Zinc Chromate.  This kit is the first to get this area right in 1/48.  I did the light housing in ZC, painted the bulb silver then added a drop of 5 minute epoxy to simulate glass. The gear legs got brake lines.  
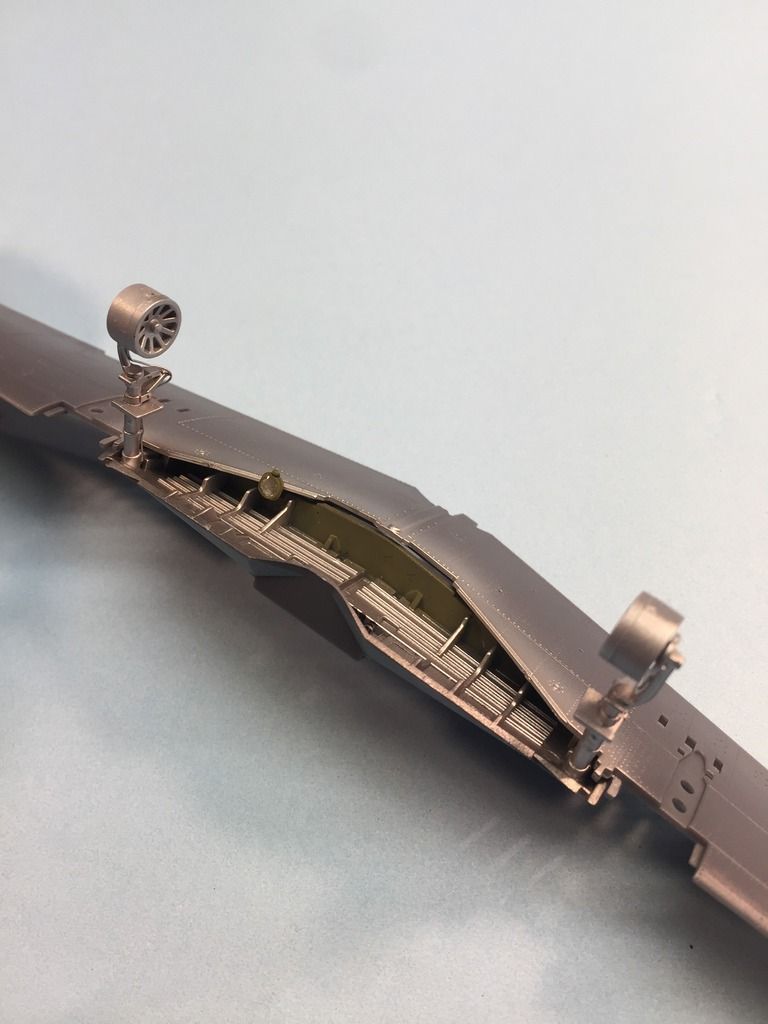
     

I managed to get everything together but I just was not happy with the tolerances of the panel lines.  There were gaps everyhere.  I seemed to be gluing/squeezing then filling everything with putty.  I ended up gluing the wing leading edges since the seam was visible.  
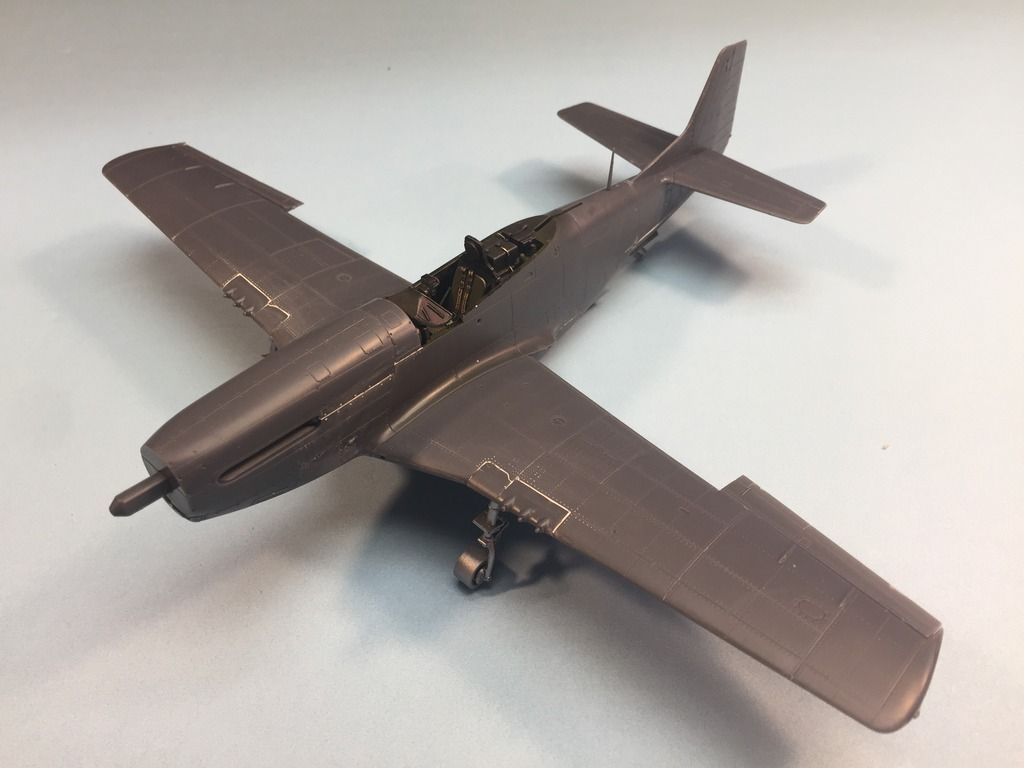
Then the fun really began. For the life of me I could not get the machine gun inserts to fit.  They just kept springing out and I ended up breaking off the starboard aileron (also a lousy design) under finger pressure trying to force them in place.  I kept waiting for a "click" that never came.....all while trying not to break the landing gears that I had to install prematurely...Bang Head.  I ended up chopping out the insides and then supergluing them in place. I then filled the gaps with putty.   
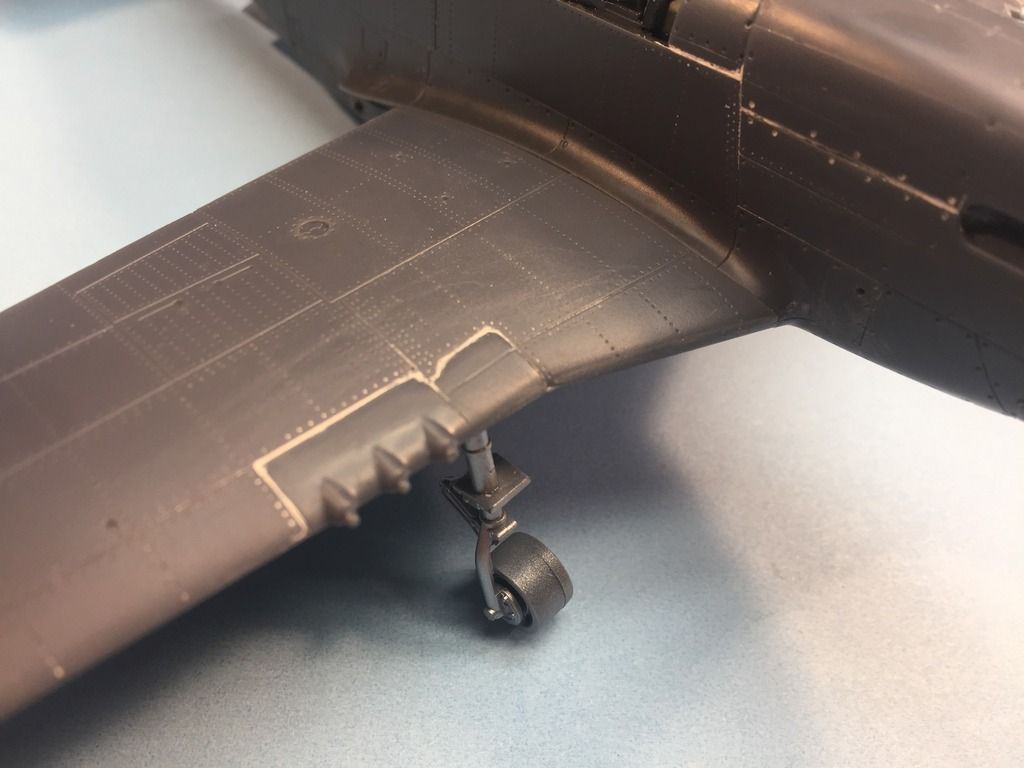
    

Perhaps I'm being too harsh but for a $50.00 kit, it should perform as advertised.  That's alot of work for something that isn't supposed to even need glue. Maybe I had one piece that was out of whack or had some flash that I didn't see that threw everything off.  Who knows, I'm not particularly impressed so far. 


It will get some primer soon.  I'm not sure I'm going to waste my Petie 2nd markings or use my precious Alclad on this kit.  I may switch to a painted subject. We'll see how it looks under some primer.  So far it's safe to say my Tamiya and Hasegawa kits are safe in the stash.   

Maybe I'll switch gears and start that big Tamiya Corsair?....Whistling


 "Can you fly this plane and land it?...Surely you can't be serious....I am serious, and don't call me Shirley"


  • Member since
    April 2013
  • From: Eleva, Wisconsin
Posted by Greatmaker on Monday, February 13, 2017 4:57 PM

Amazing work as per usual.  Those seatbelts look like PE!


  • Member since
    March 2015
  • From: Streetsboro, Ohio
Posted by Toshi on Saturday, February 11, 2017 2:37 AM

What are you opinions on this kit thus far?

Toshi

On The Bench: Revell 1/48 B-25 Mitchell


Married to the most caring, loving, understanding, and beautiful wife in the world.  Mrs. Toshi


  • Member since
    February 2012
  • From: Olmsted Township, Ohio
Posted by lawdog114 on Friday, February 10, 2017 8:04 PM

BrandonD

Just out of curiosity, how do the kit decals look? I like the schemes, but haven't built any Meng aircraft, and have no experience with their decals.

-BD-


Thanks everyone for the kind words.  I found it on eBay a few Months ago and jumped on it. I paid a bit more for it because it was already in the US.  

Brandon, I'm going to use an Eagle Cal sheet for the Petie markings but the kit decals look fine from what I can see.  Unfortunately you never know until you use them.  I'll need them for the common markings and stuff.  

 "Can you fly this plane and land it?...Surely you can't be serious....I am serious, and don't call me Shirley"


  • Member since
    December 2002
  • From: Bury St Edmunds, Suffolk, England
Posted by Bish on Friday, February 10, 2017 4:32 PM

This should be interesting. Off to a good start as always, and always nice to see a Bodney bird

I am a Norfolk man and i glory in being so


On the bench: Airfix 1/72nd Harrier GR.3/Fujimi 1/72nd Ju 87D-3

  • Member since
    January 2015
Posted by BrandonD on Friday, February 10, 2017 3:58 PM

Great start. I've been trying to find this kit for sale, but it's out of stock everywhere I see it. Kinda kicking myself for not buying it from Hong Kong in December, but I had done a self-imposed moratorium on buying new kits until I finish an old one.

Oh well, it'll be back around.

Watching this one with interest. I like the wood floor. Seems a bit easier than the method of painting it desert yellow, then streaking burnt umber artist's oil over it, waiting for it to dry and then spraying a 1:1 clear orange/clear yellow over that. Yours looks great.

And also, I love the subject. My Tamiya 51 wears those markings, and it remains one of my favorites.

Just out of curiosity, how do the kit decals look? I like the schemes, but haven't built any Meng aircraft, and have no experience with their decals.

-BD-

  • Member since
    January 2015
  • From: Tumwater, WA.
Posted by M. Brindos on Thursday, February 9, 2017 11:15 PM

Beautiful work, Joe! I can't wait to see how you handle the rest of it.  :)

- Mike Brindos "Lost Boy"

  • Member since
    October 2009
Posted by Ultra on Thursday, February 9, 2017 9:19 PM

Hmm interesting.  I've seen those "snap-fit" ones at the hobby shop but I bet none are going to look as good as this one!

JOIN OUR COMMUNITY!

Our community is FREE to join. To participate you must either login or register for an account.

SEARCH FORUMS
FREE NEWSLETTER
By signing up you may also receive reader surveys and occasional special offers. We do not sell, rent or trade our email lists. View our Privacy Policy.