Bringing it home
I've finally got to wrap this up the other day and put her in the books. I'm much happier with this build over the original one I did about -- I had to pause. I was going to say 6 years ago, but it's actually right at 9. It's hard to believe I've been doing this that long already. It seems like I just got started still. Anyhow, I recall a huge seam line down the front of the fuselage I didn't know to fill on the first one...some other knick knacks that are more subjective in nature with painting and weathering, but ultimately an okay build from a novice modeler. The kit itself probably helped a good bit as Eduard offers a fantastic hellcat. This one helps me feel redeemed though. I'm glad I got it done.
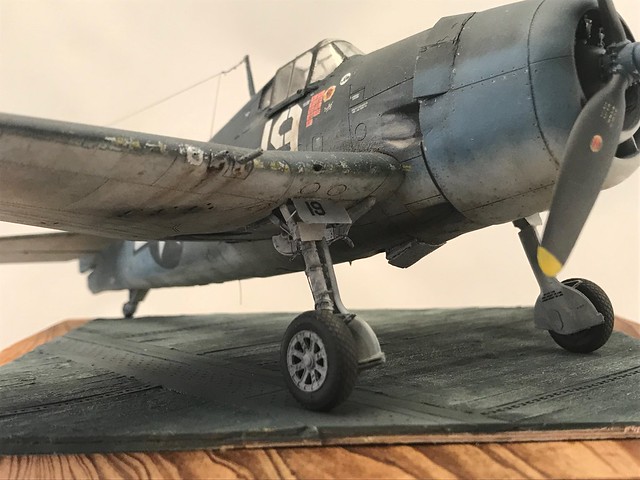
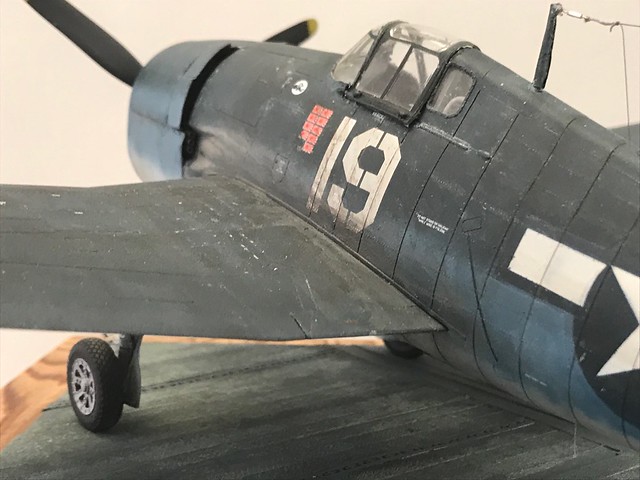
Here's a walkaround:
 Untitled by Britt Vallot, on Flickr
 Untitled by Britt Vallot, on Flickr
 Untitled by Britt Vallot, on Flickr
 Untitled by Britt Vallot, on Flickr
 Untitled by Britt Vallot, on Flickr
I'll take a moment here to discuss some of what is going on here. In photos of Vraciu's hellcat I noticed what looked like some sort of sheath on top of the antenna mast that may have aided in easy removal of the antenna aerial. Naturally, I aimed to include it. This was made of lead foil from a wine bottle. Cut to fit, embossed with rivets and glued shut with a white glue using the actual antenna mast as a mold. Very easy to do and worth the effort. The radio line itself is EZ line. It's passed through a small length of albion tube, twisted over itself and glued with CA, and the hook end is small brass wire rod fitted through the tube and bent into shape.
 Untitled by Britt Vallot, on Flickr
 Untitled by Britt Vallot, on Flickr
The tail hook was crudely fashioned by Eduard. One of their rare misteps, but it is easily corrected with a sharp No. 11 blade. I cut a "v" shape into the top of the retracted hook part and worked it into a "u" shape a little at a time. Didn't take long at all and it makes all the difference. Also, a bit of clear stretched sprue was sanded round and smoothed over to replace the tail light.
 Untitled by Britt Vallot, on Flickr
Stretched sprue makes up the whips.
 Untitled by Britt Vallot, on Flickr
 Untitled by Britt Vallot, on Flickr
 Untitled by Britt Vallot, on Flickr
 Untitled by Britt Vallot, on Flickr
 Untitled by Britt Vallot, on Flickr
 Untitled by Britt Vallot, on Flickr
 Untitled by Britt Vallot, on Flickr
 Untitled by Britt Vallot, on Flickr
 Untitled by Britt Vallot, on Flickr
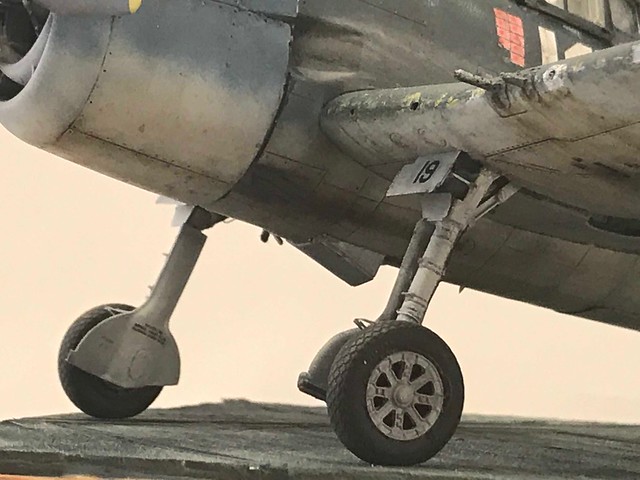
If you look just aft of the waste gate door that vents the radiator, you'll see a little nub poking out from the bottom of the fuselage. It's a nozzle that fits into a recepticle on the 150 gl drop tank. I added it since I'm leaving the drop tank off here.
 Untitled by Britt Vallot, on Flickr
 Untitled by Britt Vallot, on Flickr
 Untitled by Britt Vallot, on Flickr
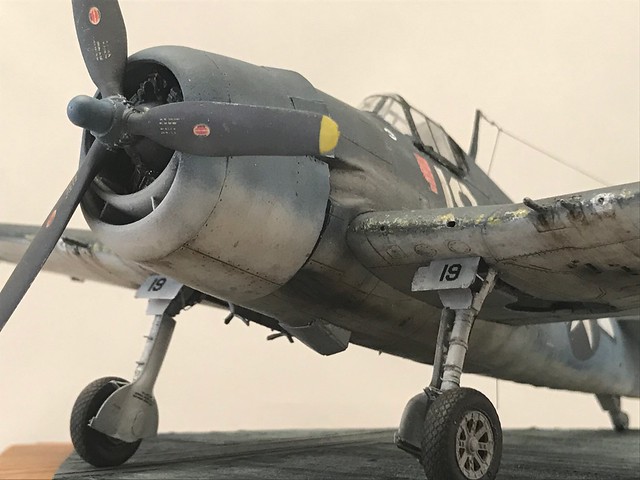
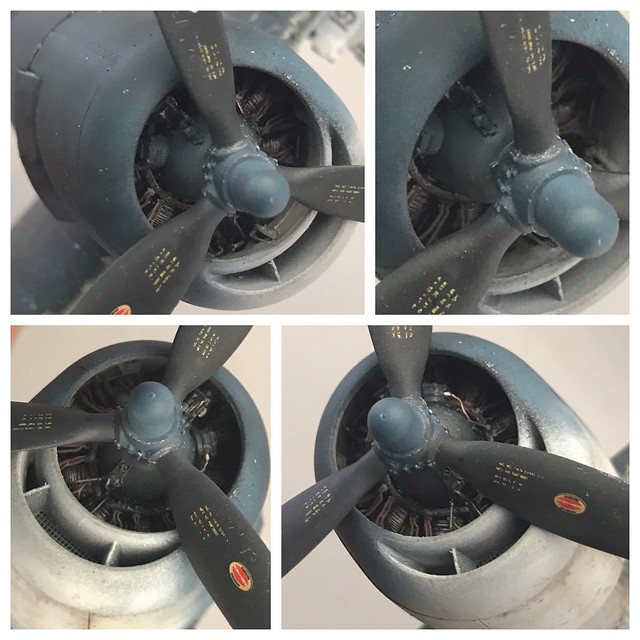
Close up on the prop...I added some bits of stretched sprue and notched them to build up the bolts which Eduard somewhat underdefined here at the hub. A simple thing to beef up the detail. The prop was also sanded thinner to bring it closer to scale. When I paint these nowadays I start with a metal color base (Alclad Aluminum) and follow up with a slightly lighter Flat Black which also gets covered up with a more "faded" looking black. The follow up is done in a non-uniform fashion to allow some darker values to show through. I usually just add a bit of grey to my eye's liking based on how weathered a look I'm going for. When the decals go on (and after some Detailer weathering around the hub) I will seal everything with a flat coat to allow for a light dusting of paint over the decals. It tones them down a bit to keep them from appearing so stark bright over a weathered prop. It's resealed after completing. Here I resealed it with a Light Sheen from Alclad again in a non-uniform fashion but unfortunately my lighting is too difused to show it well. I'll be working on getting some addtional lights to help with that one day soon.
 Untitled by Britt Vallot, on Flickr
 Untitled by Britt Vallot, on Flickr
 Untitled by Britt Vallot, on Flickr
 Untitled by Britt Vallot, on Flickr
A few close ups of the landing gear. Eduard did a great job OOB to render this area and their PE detail set is even better. There are still a few spots where detail can be added. they left out a few parts that are readily seen when looking directly into this area. I found some fantastic pictures of this area on a refirb of one of these hellcats. DM me if you're looking for some.
 Untitled by Britt Vallot, on Flickr
A few cockpit pics. This is always a dark area to try to shoot. One day I'll come up with a better way to show it.
 Untitled by Britt Vallot, on Flickr
 Untitled by Britt Vallot, on Flickr
I even put the salt shaker in. =]
 Untitled by Britt Vallot, on Flickr
 Untitled by Britt Vallot, on Flickr
 Untitled by Britt Vallot, on Flickr
That's a wrap folks. Questions are welcomed. Thanks for following along. =]