And fortune smiles again. The kiddos are staying with Nana and PaPa today. =]
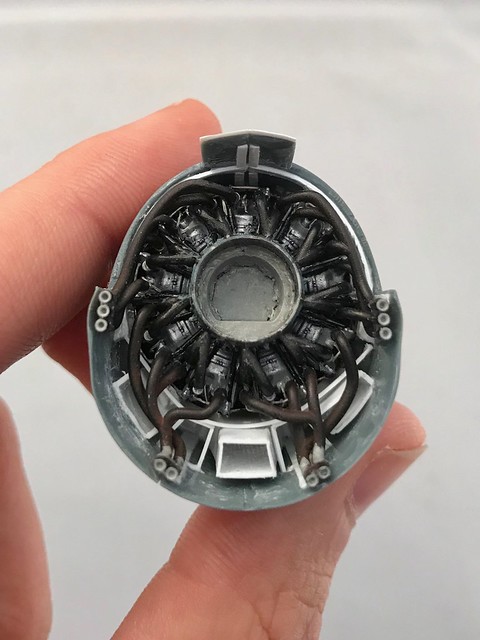
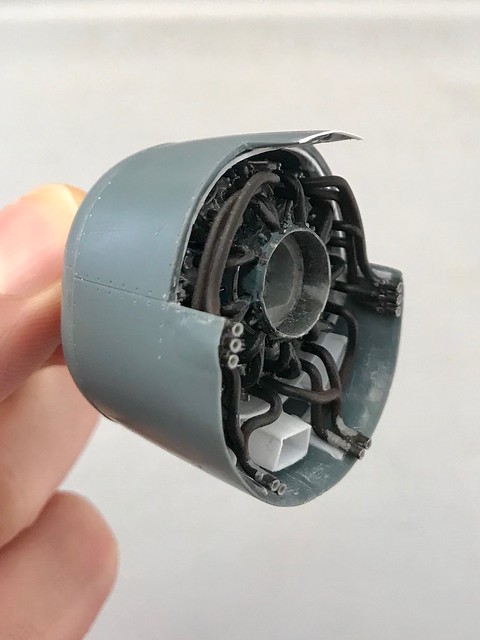
I wanted to show a better more up to date picture from that posterior exahaust manifold view of the engine. This is where I'm at with that.
 Untitled by Britt Vallot, on Flickr
 Untitled by Britt Vallot, on Flickr
Some noteworthy things to mention here are how I've sanded down the sides of the cowling to bring them more into scale for how these panels would actually appear. Be careful when doing something like this. If your join is to be perfectly flush onto the fuselage here as in this case, then you'd be removing plastic to bite and grip onto the molded part of the fuselage that would receive it. Plenty of ways to go about this. Just something to pay attention to. I have such a snug fit with everything here that I could literally just slide my engine onto it's hub without any glue. Still debating on that.
Another thing you can see here is the rubbing on the lower exhaust stacks. This will get repainted and weathered later. The intercooler vents should be a little thinner and taller than what I represented here. Even still, none of these measurements by Eduard would allow for them to be present anyhow. I figured I could settle for this since I'm leaving this closed up. That Brassin engine is beautifully molded and put together. Hats off to Eduard on that one.
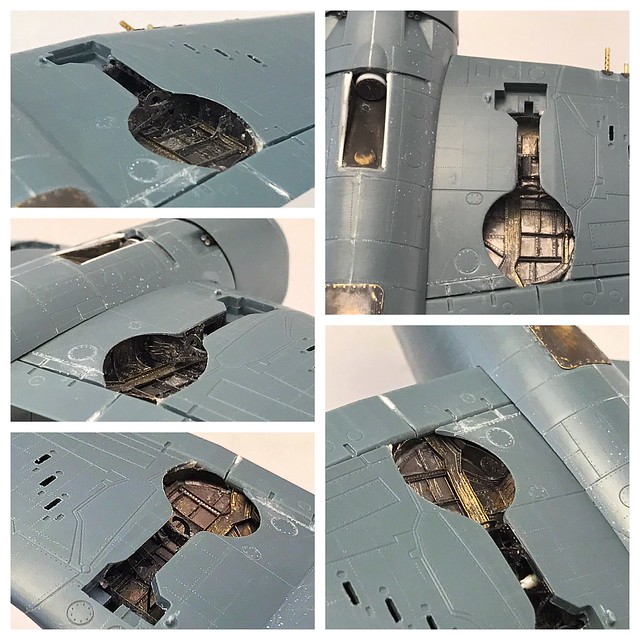
Undercarriage
I do apologize for not having a few more in between steps for this section. Once I started building this I was really excited to see it done. Plus, I didn't count on doing a WIP at the time so the couple of photos I grabbed weren't really worth putting here. I had to clean up some spots where my CA got away from me and that sort. But the meat of what's important is here and that's what I have for you.
Much of this speaks for itself, again. A side by side comparison of the kit molded parts show a fairly decent mock up of this section. It's not quite deep enough to bring the landing gear and wheels up if that were desired. You'd need to modify it in some way. But in all it's not bad when compared to other kits basically forgetting about this area. The PE detail set however is something quite special to look at.
 Untitled by Britt Vallot, on Flickr
 Untitled by Britt Vallot, on Flickr
 Untitled by Britt Vallot, on Flickr
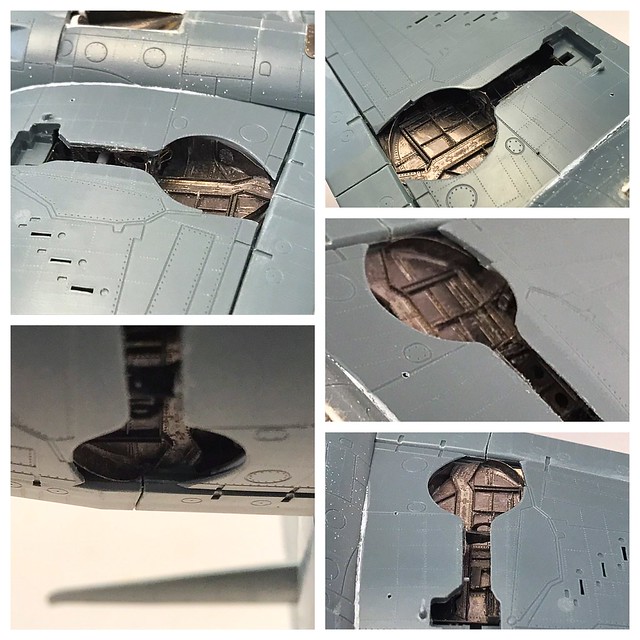
Plenty of detail here. Assembling all of this takes some patience and know how. Definitely worth the effort though.
 Untitled by Britt Vallot, on Flickr
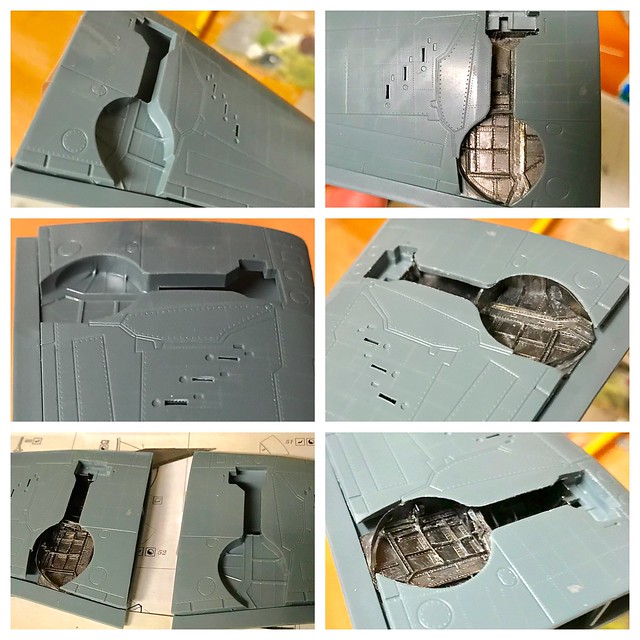
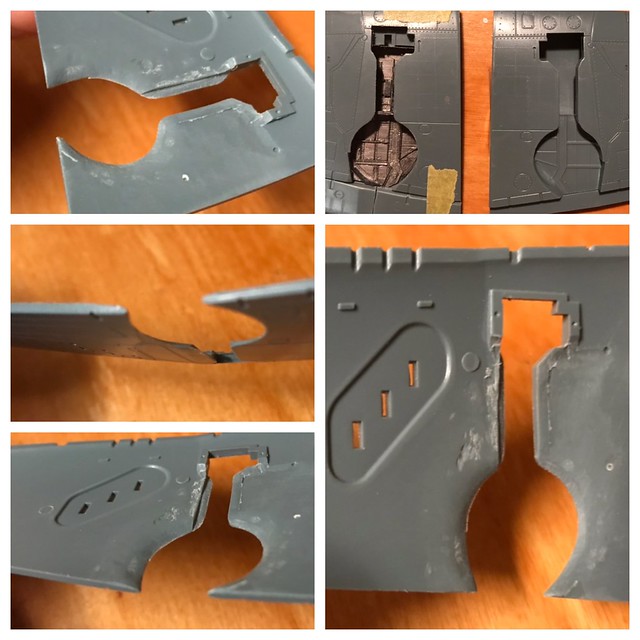
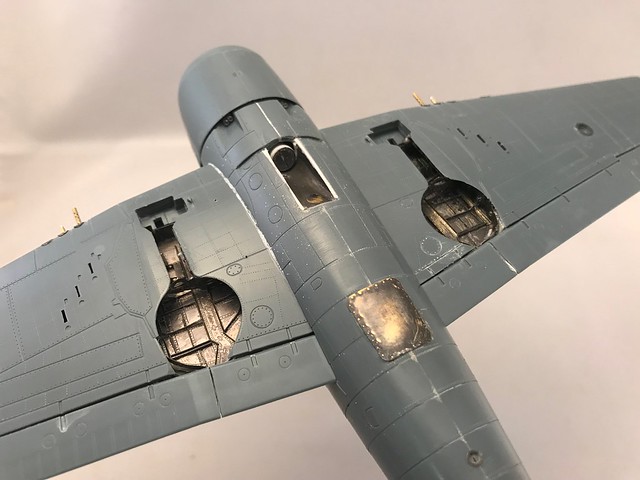
There's some extra parts to scratch out to finish up this area that Eduard leaves out. None of it such a big deal, but I think it's worth going the distance for. There's a set of 4 hydraulic lines on the inboard side to add and some extra bits for the landing gear mechanisms that amount to a few bars, a spring and such. It's worth it to thin and sand down this area to bring it to scale as well. There are some fit issues to always double check as with anything...nothing major. One other thing I went and did here was to sand and shape the flaps into their rounded appearance where they meet the wing. They are visible where the wheel would fit into the wing. I think it makes a big difference. The cut you see was done with a razor saw to help give the impression of separate flaps. I later found this cut should have been angled about 45º up. Not the end of the world though. The inboard flap was actually all metal and not doped in fabric. There's a few other things going here that are different from left wing to right concerning the flaps, but as I'm building this with the flaps up, it's not making a difference here and I won't jump in to that now.
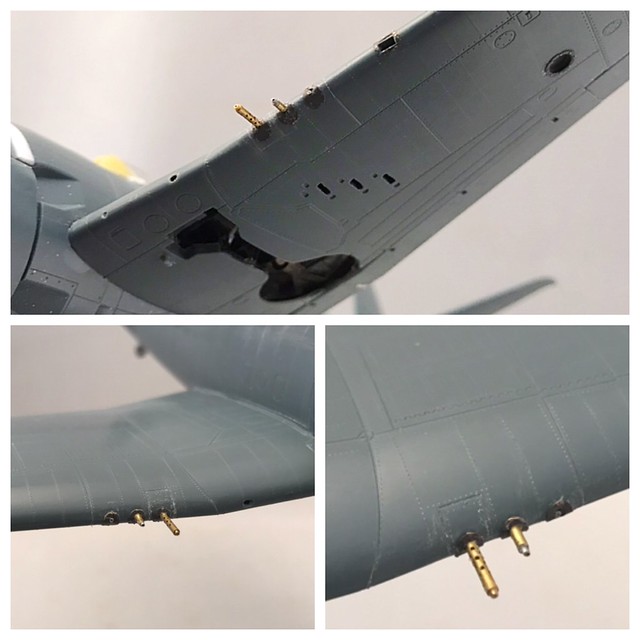
Next, before closing up the wings I wanted to address the 50 cals. I first thought I would go about this as placing the barrels in later after painting, but this process makes me nervous about trusting that nothing goes wrong along the way. I don't like doing it "blind" and I'm pretty good about not banging parts like this around anyhow. So I settled for what you see here which is pretty secured. Didn't mind the kit parts but I can do better so why not. A pair of Master Models .50s replaces the most inboard guns and Albion tube set makes the other two sets. I didn't see the need in wasting a set for the middle guns when none of the perforations in the sleeve show from the wing's leading edge. Plastic tube secured with Tamiya ETC helps keep that longer barrel pointed where it needs to be. =] This all got a liberal coat of CA within the gap I cut for the barrels.
 Untitled by Britt Vallot, on Flickr
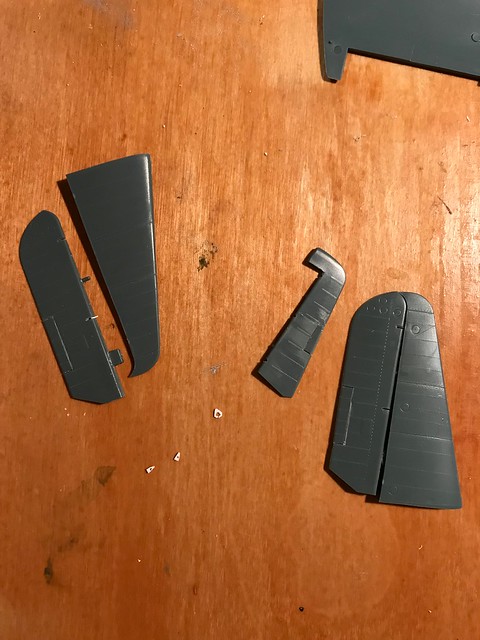
Quick view of the rudder and elevators. Nothing to see here really. I did add the actuators and replaced kit parts in a position to allow them to drop down slightly. Same for the rudder...I've often observed a bit of right rudder applied for whatever reason after being parked. Just a little thing to add some life here.
 Untitled by Britt Vallot, on Flickr
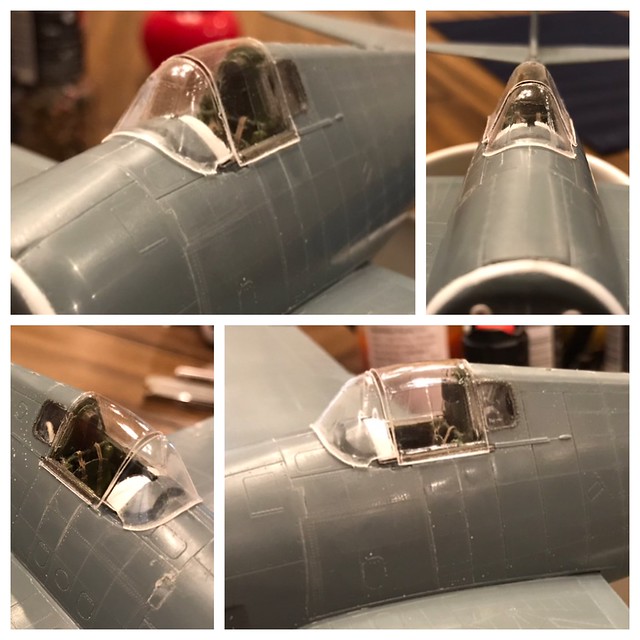
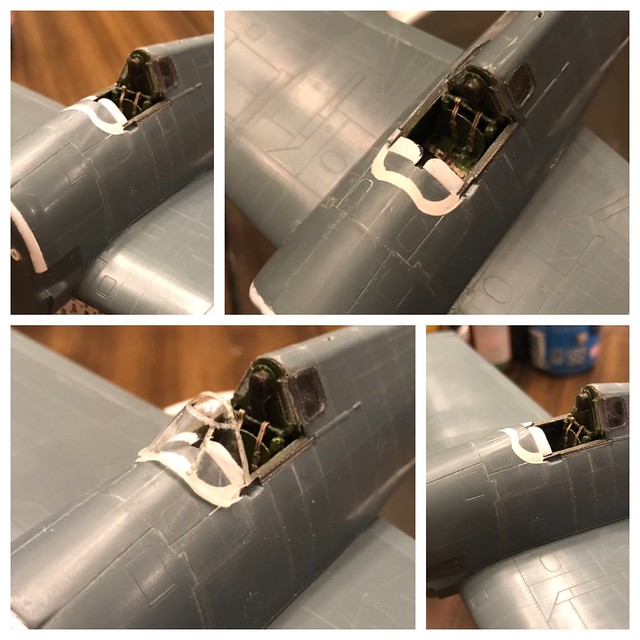
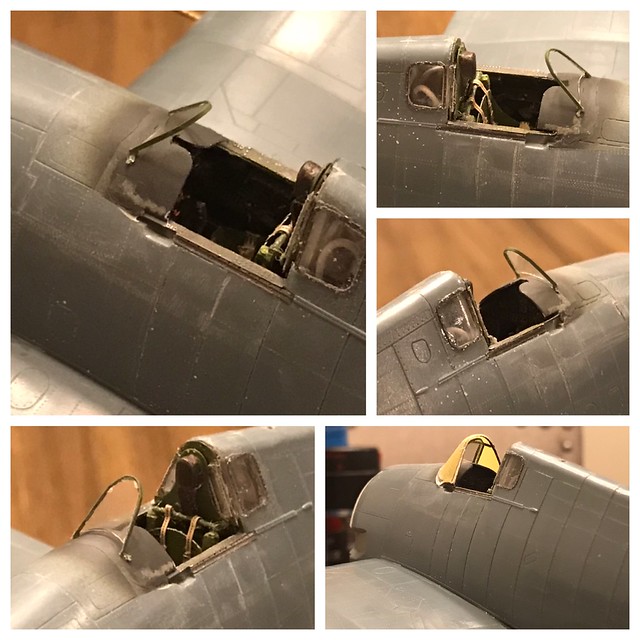
Canopy
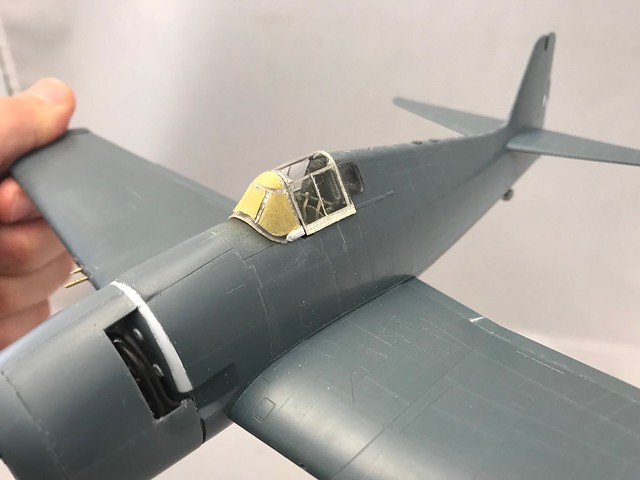
The canopy and windscreen that Eduard supplies is certainly nice enough for how these parts normally come, but they still have their limitations. Having tried a Squadron canopy once, I don't know how I can actually ever look back. The difference is worlds apart...especially when you consider the work you put into that front office for it to never be seen after the canopy goes on top. I could go on and on about it. The difference in scale alone is such a game changer. So if you ever go and look, you'll find that Squadron never made a piece for the Eduard kit. They do make one for the Arii/Otaki kit. I found a good deal on Ebay and tried it out figuring I'd still have a kit piece to use if there was just too great a difference in shape. Found out that it really wasn't bad at all. It's about as good a fit as you could get otherwise anyhow. It does take some skill and know how to release it and shape it up properly. You really can't rush any of it. I did have to make a few changes which I anticpated but they were minor. Please ask if there are any questions about this part.
 Untitled by Britt Vallot, on Flickr
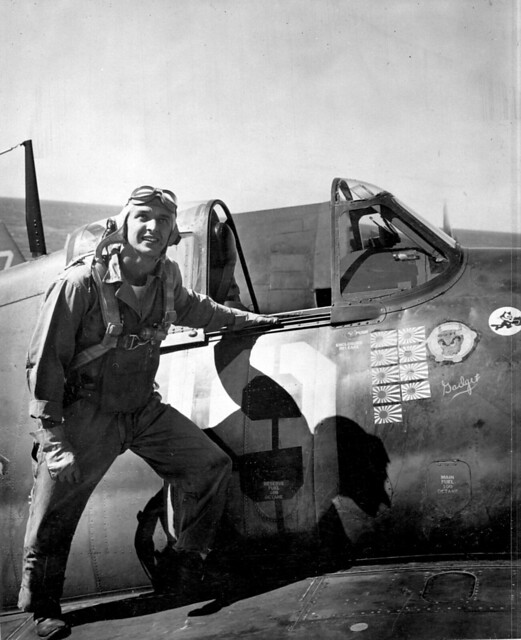
To help make all this fit proper I now have to back fill the part where the kit piece would be received by the fuselage. One other thing you'll note is the hood that extends over the IP. While researching the cockpit and IP I noticed that the IP is basically flush with the dash. I never encounted a hellcat variant that included this hood. In pictures of Vraciu smiling on his hellcat, it can be seen that the dash extends all the way to frame of the windscreen. Looking further, you can see what looks like ducttape which is likely securing some kind of cover that was added for visibility reasons I might imagine. So! Naturally, if I see it in the picture...it damn sure is going to be on that model. There's also what looks like a salt shaker on the dash. I might give that a go later on as well. =]
 Untitled by Britt Vallot, on Flickr
 Untitled by Britt Vallot, on Flickr
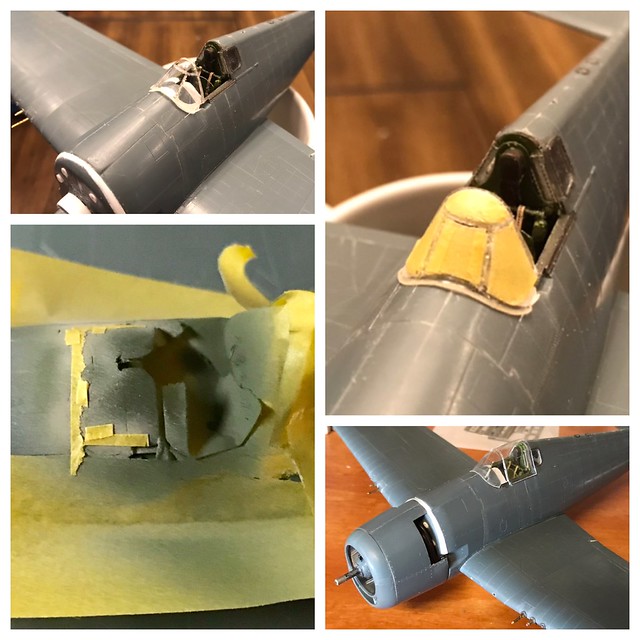
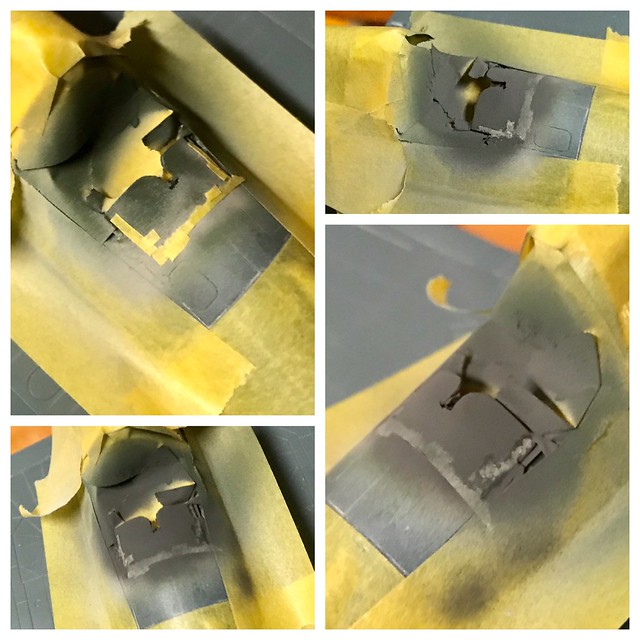
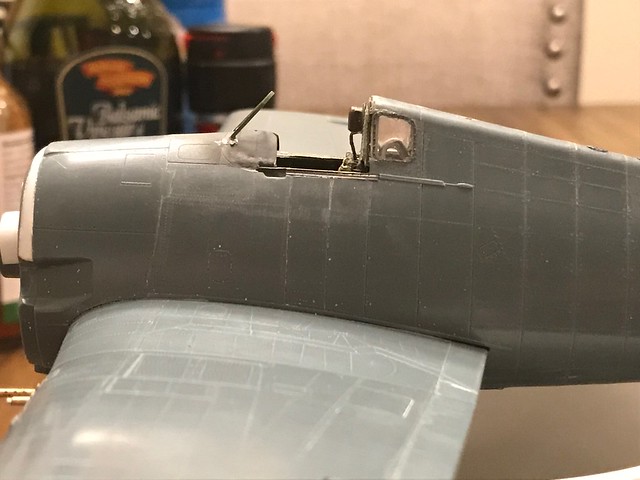
In the past, I've always secured these Squadron windscreens after painting and whatnot. Inso-doing, I found a tougher time creating a more seamless connection to the fuselage. This time around I wanted to have the windscreen fixed and primed all together with the rest of the plane. I tied up this area next so that it can be finished and masked for the rest of the build. Primer went down. Then, I built up the paint with Tamiya's Black Green, Medium Grey over the taped areas, and added Flat Black to my left over grey. Once the flat coat dried, I set up the bulletproof glass.
 Untitled by Britt Vallot, on Flickr
 Untitled by Britt Vallot, on Flickr
 Untitled by Britt Vallot, on Flickr
 Untitled by Britt Vallot, on Flickr
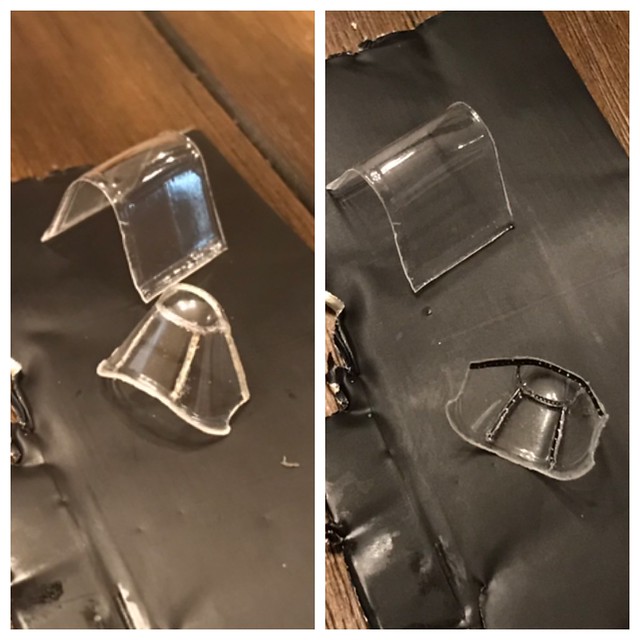
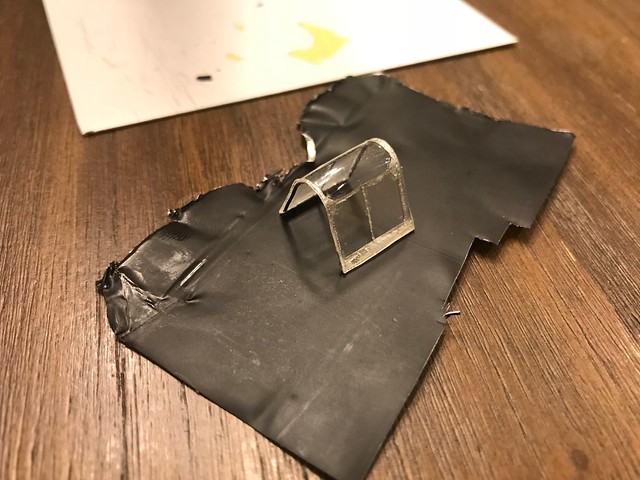
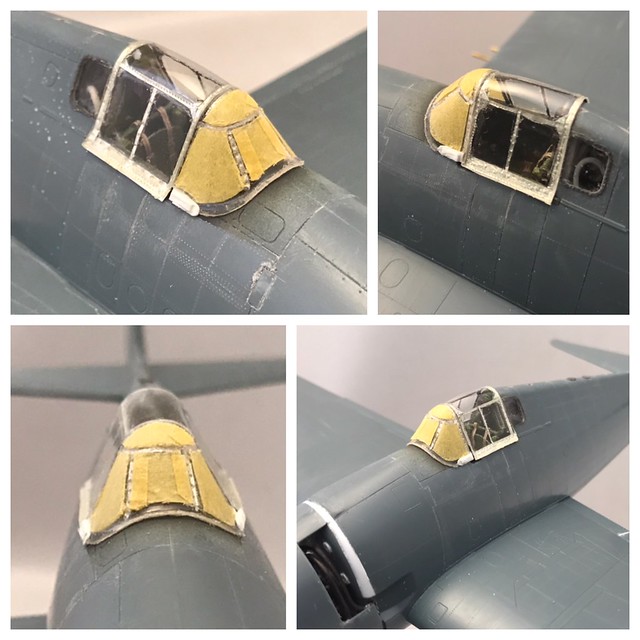
The last part in getting the canopy squared away is dealing with the interior. I've moved away from trying to paint this area as I can never seem to perfectly nail it with securing the masking. There always seems to be some issue to clean up. On my last build, a wildcat, I switched to lead foil that I glued with a white glue to treat the interior frame work of the canopy and windscreen. It was an idea that I played with for a while and finally got to see it in action and was happier with it than I ever thought I would be. Before adhering, I use a riveting tool on the shiny side to emboss the lead foil. The opposite side looks to have a raised riveted surface. If you don't get the shiny riveted dot on the outside, all it takes is a light rub or swipe of a sanding stick and you'll see a nice amount of riveted detail with virtually no fuss.
 Untitled by Britt Vallot, on Flickr
 Untitled by Britt Vallot, on Flickr
 Untitled by Britt Vallot, on Flickr
 Untitled by Britt Vallot, on Flickr
A much kinder way to treat yourself when tackling canopies...I think. The lead foil on the canopy has also served to stiffen up the fit. I've found this helpful as the plastic of the canopy is so thin that it wants to bend too much when trying to seat it down in place. The stiffer fit helps you maintain the shape you want when trying to match where to place the windscreen.
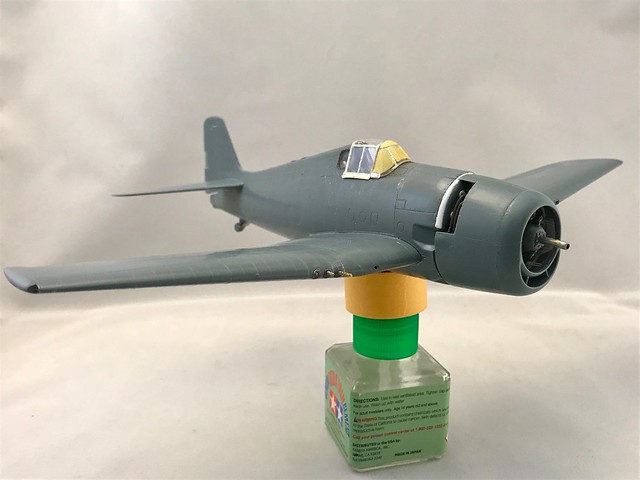
That pretty much wraps up where I am currently. Just a few details to tend to before getting a coat of primer on her. Here's a quick walkaround of how she sits.
 Untitled by Britt Vallot, on Flickr
 Untitled by Britt Vallot, on Flickr
 Untitled by Britt Vallot, on Flickr
 Untitled by Britt Vallot, on Flickr