SEARCH FINESCALE.COM

Enter keywords or a search phrase below:

Huckbein- AmTech's sweet little birdie, she's done!

9266 views
44 replies
1 rating 2 rating 3 rating 4 rating 5 rating
  • Member since
    March 2006
  • From: Boyertown, PA, USA
Posted by Dubau on Sunday, December 24, 2006 10:37 AM

Your doing a SWEET Job on that. WOW !

Bud 

" You've experienced a set back, and without set backs and learning how to fix them you'll never make the leap from kit builder to modeler "
  • Member since
    February 2005
  • From: Cleveland, OH
Posted by RadMax8 on Saturday, December 23, 2006 11:22 PM
Wow. Looks really really god from where I'm sitting. You're doing a great job on that chubby little bird. I especially like your easy method of "animating" the control surfaces!
  • Member since
    December 2002
  • From: Whidbey Island, Washington
Posted by chukw on Saturday, December 23, 2006 7:44 PM
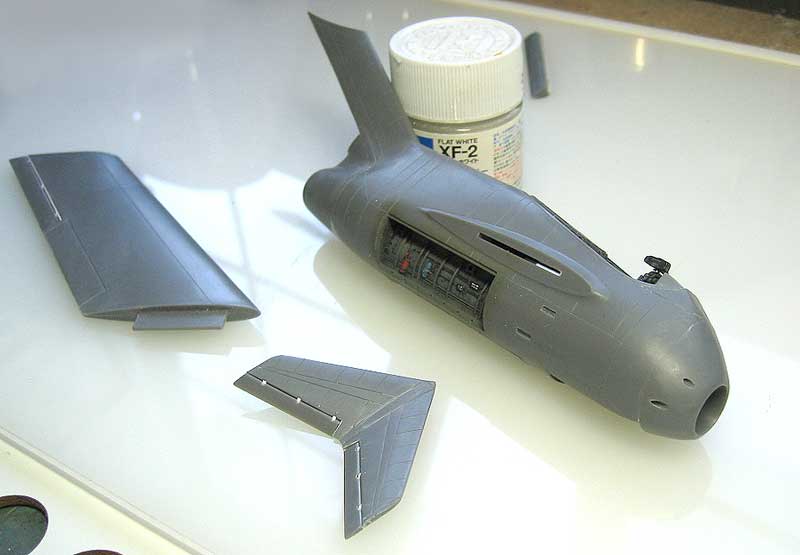
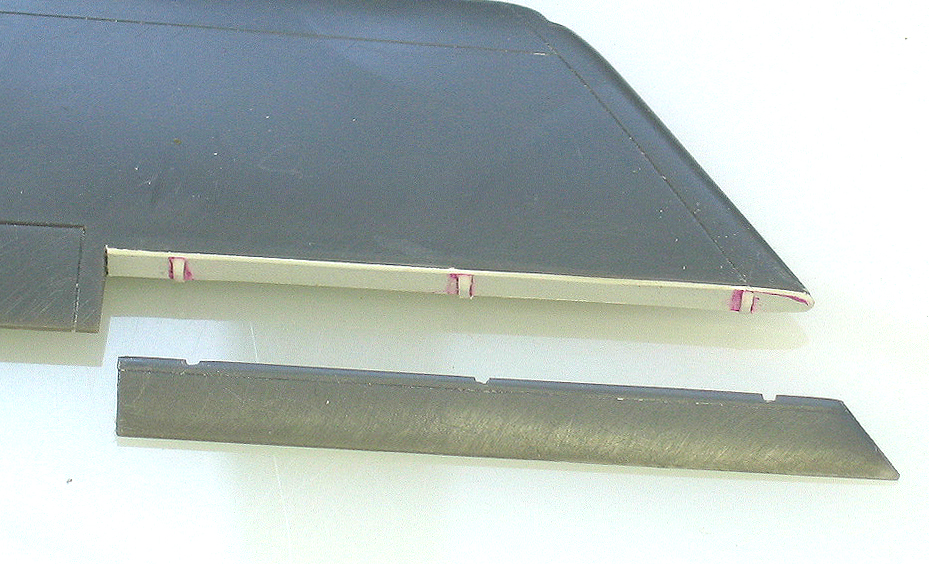
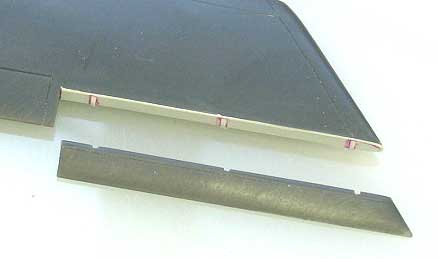
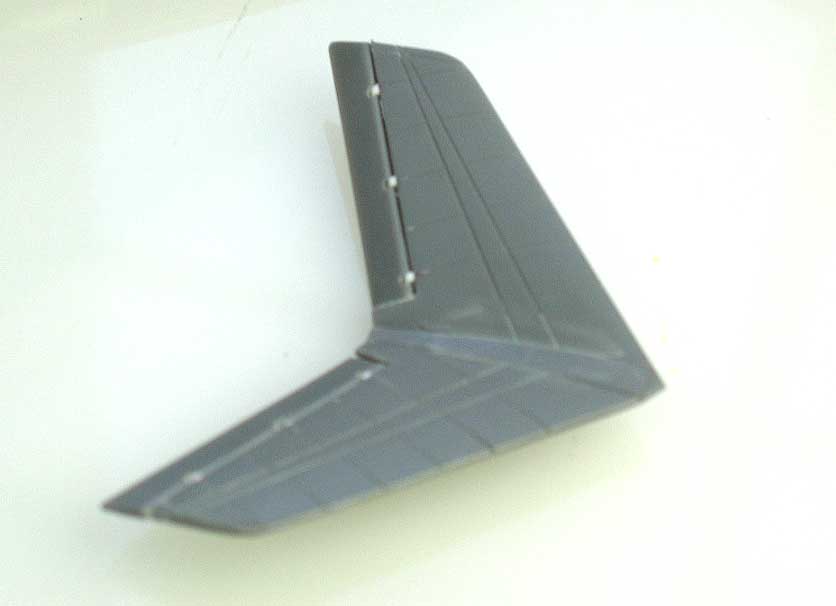
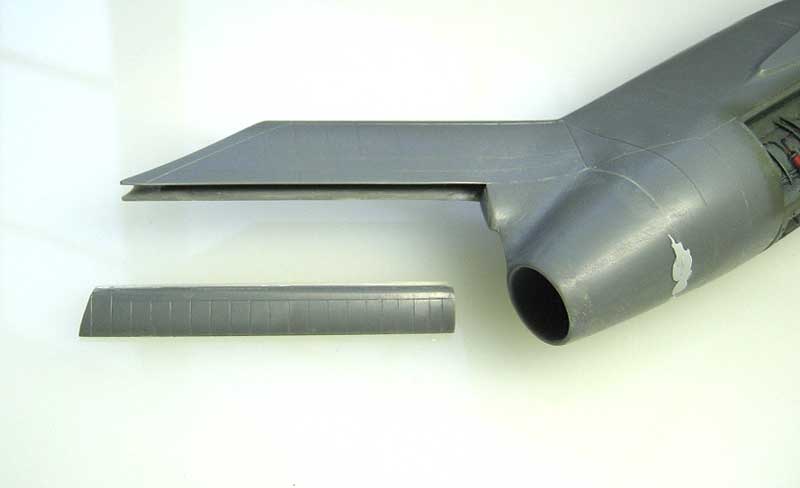
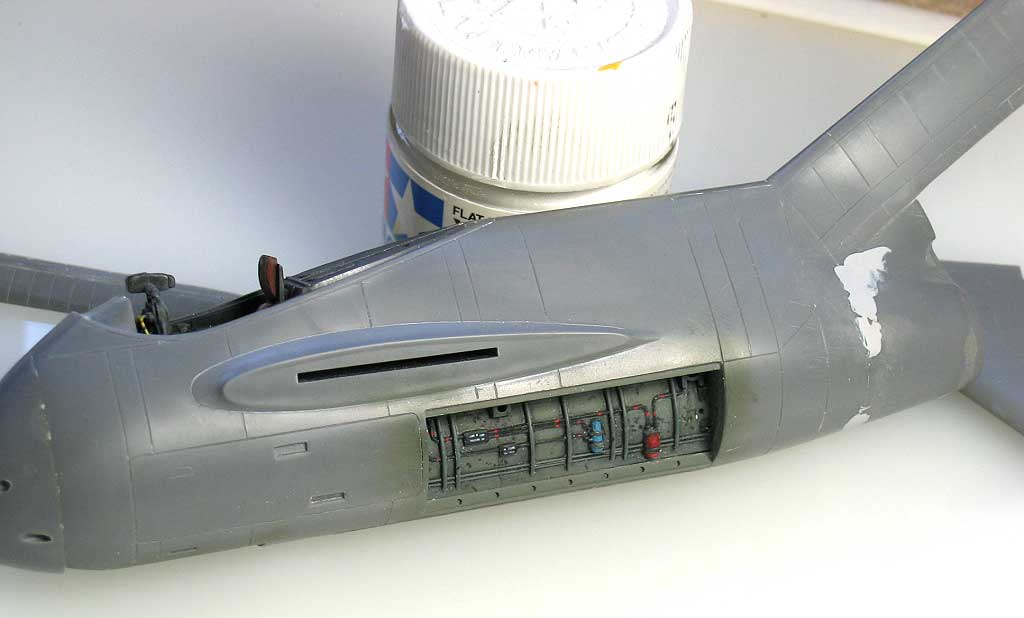
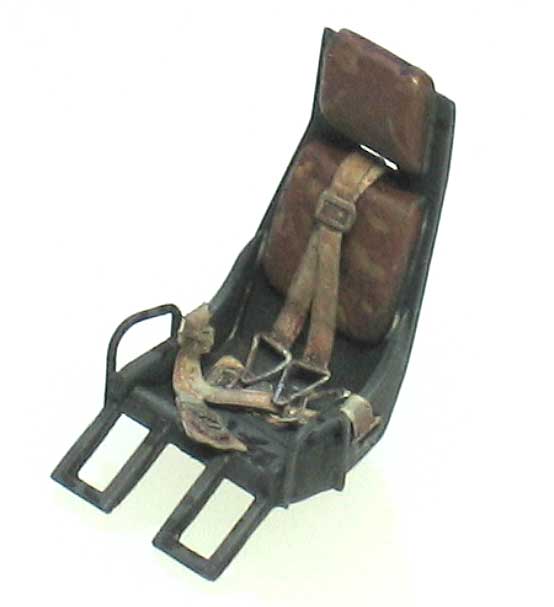
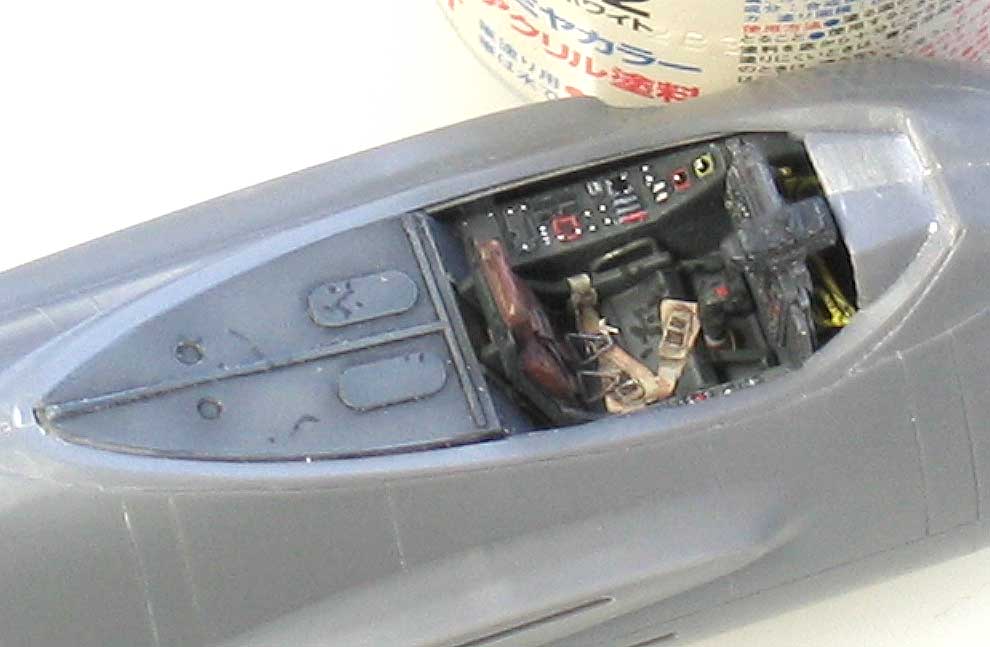
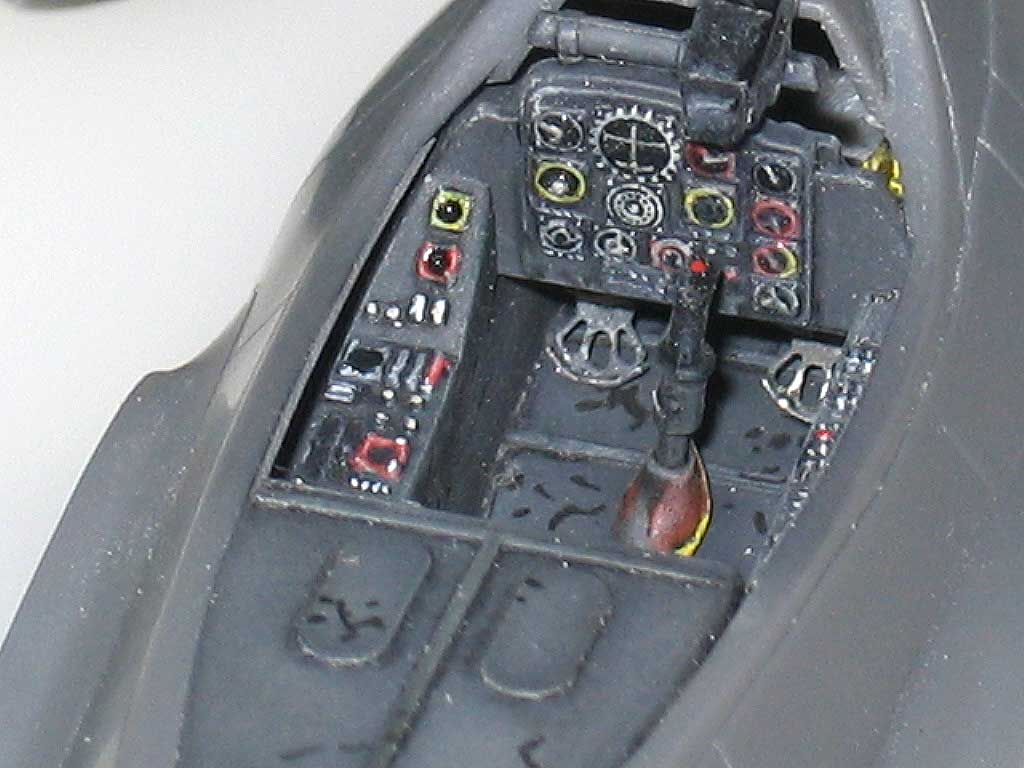
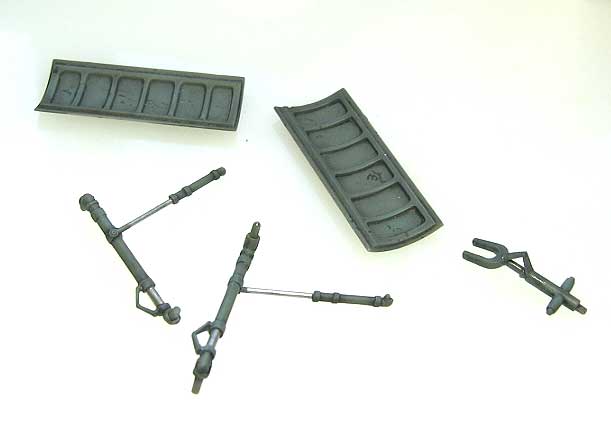
Life and work have been keeping me pretty busy as of late, but I've been able to sneak in some modeling here and there. It feels like it's been forever since I've glued two pieces together! I was kind of surprised at the niumber of subtle sink marks on this particular pressing of the kit- guess I'm just lucky. I don't mind, though- there's something theraputic about filling, sanding and enjoying the satisfaction of a nice, smooth fuselage. It was an easy job to separtate the ailerons and such- cover the gaps, some bits of styrene for hinges... ... and voila! Nicely animated flying surfaces. The Ta-183 was intended to be flown by the rudder and ailerons, with the elevators being used mostly as trim surfaces- fascinating! That said... ...I dropped the elevators a bit as well. I sanded the elevators and wings to have sharper trailing edges. That big, fat rudder got the treatment as well. I glued a length of styrene rod to it's leading edge and faired it in with putty, and thinned the vertical fin inners to fit. On a side note, I've been using Tamiya Light-Curing Putty- it works pretty well. Apply putty (quickly, mind you) and put it in direct sunight or right up close to a good fluorescent tube. Hardens up in two minutes max, just a swipe of laquer thinner and you're good to sand. Here's the port gear bay in place, with some Mr. Surfacer 500 yet to be smoothed in back on the butt end of things. I had some old fashioned, unpainted Eduard seat belts left over so I screwed up my nerve and painted them myself. :whistle: Here's how it looks in place. I had some rudder pedals left over as well- you can just see 'em in in finished 'pit. The landing gear are coming along- I added a torque link to the front strut, and may add a sway brace as well. The main gear still need brake lines, but they'll get 'em. Tomorrow's Christmas Eve- if I get my wish I'll have some more modeling time. I hope you all enjoy peaceful and joyous holidays, wherever you be!
  • Member since
    December 2002
  • From: NYC, USA
Posted by waikong on Monday, November 27, 2006 4:01 PM

Its looking real nice. That kit was one of the top kits I've built, while it doesn't have too many parts, the fit is just great and lots of room to detail.

  • Member since
    November 2006
  • From: Castro Valley.CA
Posted by TheLastPriest on Monday, November 27, 2006 3:35 PM
I gotta say that is beautiful, im working on my first model that I have ever tried to get a good amount of detail onto and its stuff like this that gives me something to strive for

It is only the intellect that keeps me sane; perhaps this makes me overvalue intellect against feeling

  • Member since
    December 2002
  • From: Whidbey Island, Washington
Posted by chukw on Monday, November 27, 2006 10:00 AM
Thanks, guys- your encouragement means a lot.  I'll post more when I've got 'em!
  • Member since
    July 2004
  • From: Northern KY
Posted by mucker on Sunday, November 26, 2006 10:13 AM
Awesome job so far, chuk. I can't wait to see more of your progress

  • Member since
    March 2004
  • From: Placerville, CA USA
Posted by Mark Joyce on Sunday, November 26, 2006 9:48 AM

Obviously well on your way to an outstanding build.  Hopefully all that beautiful work will be visible when you're done.  Looking forward to the completed project!

Too bad AMtech appears to have gone the way of the Dodo bird, though.

Mark

Ignorance is bliss
  • Member since
    February 2003
  • From: A Spartan in the Wolverine State
Posted by rjkplasticmod on Sunday, November 26, 2006 9:26 AM

Great looking pit.  Very nice detail work.

Regards,  Rick

RICK At My Age, I've Seen It All, Done It All, But I Don't Remember It All...
  • Member since
    April 2005
  • From: Piscataway, NJ!
Posted by wing_nut on Sunday, November 26, 2006 8:59 AM

Excellent work so far.  Looking forward to the final product.


 Dubau wrote:

More More More I want more pics....

Bud

The photo junkies are hereWink [;)].... we should be hearing form Ed any ol' time nowBig Smile [:D]

Marc  

  • Member since
    March 2006
  • From: Boyertown, PA, USA
Posted by Dubau on Sunday, November 26, 2006 7:51 AM

WOW Great work so for. The DB and Weathering look GREAT !

More More More I want more pics....

Bud

" You've experienced a set back, and without set backs and learning how to fix them you'll never make the leap from kit builder to modeler "
  • Member since
    May 2006
  • From: UK
Posted by David Harris on Sunday, November 26, 2006 6:52 AM

It is looking nice & am looking forward to seeing more on the build progress.

After picking up the Huma Triebflugel, this kit tops the wanted list for my Luftwaffe 46 stash.

  • Member since
    July 2003
  • From: Bicester, England
Posted by KJ200 on Sunday, November 26, 2006 4:06 AM

Great work!

That is going to be a stunning pit by the time you've finished.

Karl 

Currently on the bench: AZ Models 1/72 Mig 17PF

  • Member since
    February 2005
  • From: Cleveland, OH
Posted by RadMax8 on Saturday, November 25, 2006 10:54 PM
Wow you're off to a fantastic start!! Please keep us posted with how this goes... The huckbein is a VERY interesting aircraft.
jwb
  • Member since
    February 2006
  • From: Parkton, NC
Posted by jwb on Saturday, November 25, 2006 8:38 PM
That's gonna be an awesome looking office. Looks great! Interesting subject too.

Jon Bius

AgapeModels.com- Modeling with a Higher purpose

"For I know the plans I have for you," declares the Lord, "plans to prosper you and not to harm you, plans to give you hope and a future." ~ Jeremiah 29:11

  • Member since
    December 2002
  • From: Whidbey Island, Washington
Huckbein- AmTech's sweet little birdie, she's done!
Posted by chukw on Saturday, November 25, 2006 8:31 PM
Let's build a model airplane, shall we? :D Here are some in-progress shots of my AmTech Ta-183 in glorious 1/48 scale. Here's the back of the IP, plumbed with various bits of wire and solder. Out-of-the-Bx? What's all that about? :D Man, this seemed a lot easier when I was 15! Danged reading glasses combined with a magnifying glass nowadays... :8 Can any late-war enthusiasts tell me what kind of glass goes on this gunsight? Thanks! I drilled out an opening for the belts, dinged up and creased the cushions and added the grab handles on the seat. Here it is after and before. Ach, der shtick! Mit der Wire beadden-onnen... Here's the tub with base color enhanced by dark and light shading. Here it is after Future, a dark oil wash, flat coat, drybrushing with pale tan and details barbarically hacked in with a housepainting brush. Black makes nice paint chips, dontcha think? Silver is too harsh, and unpainted metal oxidizes and darkens quickly. I'll hit it with some pencil graphite later, tho... I've got the RLM 02 parts mostly ready to go as well. Those colorful bottles in the gear bays need some love, and here and there colors and various touches need to be worked in. I'll keep you posted.
JOIN OUR COMMUNITY!

Our community is FREE to join. To participate you must either login or register for an account.

SEARCH FORUMS
FREE NEWSLETTER
By signing up you may also receive reader surveys and occasional special offers. We do not sell, rent or trade our email lists. View our Privacy Policy.