SEARCH FINESCALE.COM

Enter keywords or a search phrase below:

OFFICAL NATURAL METAL FINISH GB V (2013-2014)

71519 views
662 replies
1 rating 2 rating 3 rating 4 rating 5 rating
  • Member since
    March 2014
  • From: Cockeysville, MD
Posted by JaySantos on Wednesday, May 7, 2014 8:45 PM

1st coat of primer, now sand and fix imperfections.

Almost ready for Alclad!!

Constructive criticism always welcome!

Jorge 

  • Member since
    March 2014
  • From: Cockeysville, MD
Posted by JaySantos on Sunday, May 11, 2014 9:12 AM

oops, looks like I deleted the photos from my album!

Anyway here is my progress.

Got the anti glare panel done, just to realize that I had left an enormous step between the windshield and fuselage. I removed the windshield carefully, dry fitted and sanded where needed, now it goes on perfect, but I will leave it out for now.

First coat of black is on and after this pic I already polished it with 12000 micromesh.

I might give it the first go with duraluminium this afternoon... but it is a beautiful day, I have 3 kids and it is mother day, so I'll probably will be away from my bench for most of the day.

Thanks for looking

Jorge 

Tags: NMF

  • Member since
    June 2013
Posted by bvallot on Sunday, May 11, 2014 9:38 AM

Jorge, that's looking great so far.  You may want to consider fitting the windscreen now before you continue. Some times it works out that you get a nice clean, even fit without any fuss.  But if not it may detract from your NMF finish.  Also, it's hard to tell from this angle with the light only hitting the leading edge of the wings, but your gloss black coat ought to really shine.  So if you're happy with it by all means leave it be...there's no sense in ruining a good thing.  If you do go over it again...keep the coats light.  I found out the hard way it doesn't take much to start losing fine surface detail.  =]

Looking forward to your next post.  I'm fast learning to appreciate jugs more.  =D  The aircraft kind of course. ;)

On the bench:  

Tamiya F4U-1  Kenneth Walsh


  • Member since
    March 2014
  • From: Cockeysville, MD
Posted by JaySantos on Sunday, May 11, 2014 11:44 AM

Thanks bvallot, I think i will take your advice on both the glossy black and the windscreen.

I really appreciate the input.

I really love jugs too... every kind! :D

Jorge

  • Member since
    June 2013
Posted by bvallot on Monday, May 12, 2014 12:31 AM

Yeah, I think it really helps to get more shine out of the Gloss Black.  Of course if you're doing a more beaten up warplane, then it may not matter too much.  The more experience you gain from using it, the more you'll know what to expect from it naturally.  I believe it's just good practice to start from there.  Maintaining the ability to keep it that standard bright gloss will give you greater consistency later in finding what you want.

I believe the only Alclads that definitely require the Gloss Black are the Polished Aluminum, Aircraft Aluminum, and Stainless Steel (The High Shine group).  There may be a couple I left out.  For the others, I still think it's generally a good idea to include the Gloss Black undersurface as it allows for you to leave some of it show through the Alclad metal paint you're using.  It creates a more believable metal surface you're seeing.  Still, there is a lot of room for artistic license and more than one right way to do something.

As it happens, I'm all moved in finally and I'll hopefully have my coat of Gloss Black on the Lightning by the weeks end.  =]


On the bench:  

Tamiya F4U-1  Kenneth Walsh


  • Member since
    March 2014
  • From: Cockeysville, MD
Posted by JaySantos on Tuesday, May 13, 2014 8:57 AM

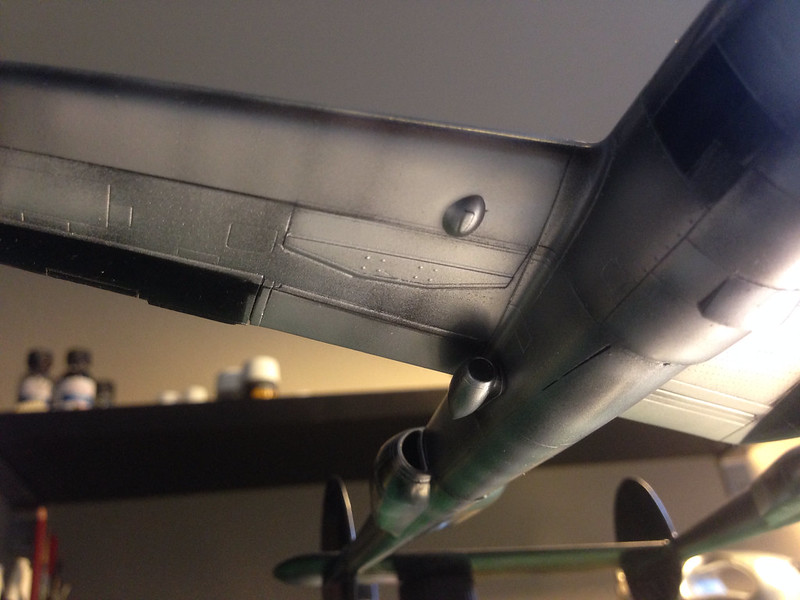
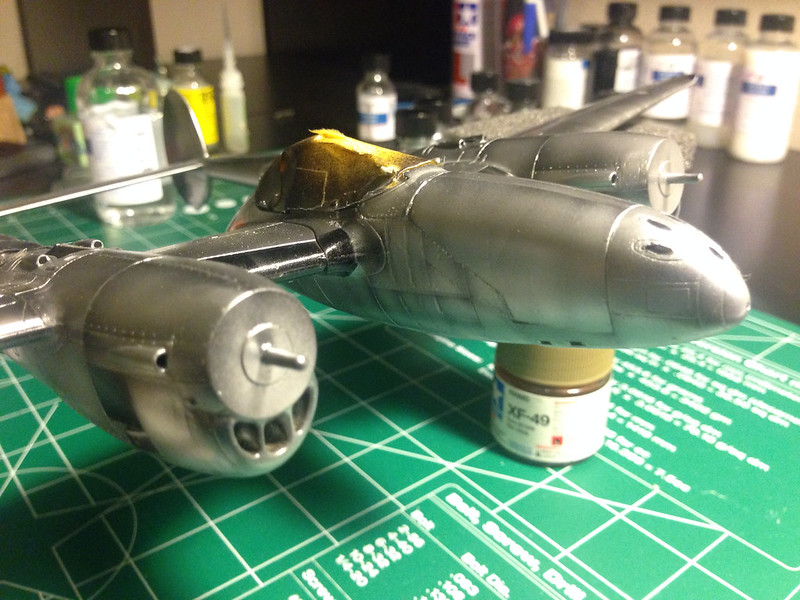
Here is my progress,

Another light coat of black and attached the front of the canopy (thank you bvallot for the advice)

First coat of duraluminium

Now I want to pick some panels for an aluminium color and maybe some for dark aluminium, the decals I picked had, in the paint instructions, a darker shade of aluminium in under belly from the front all the way to the supercharger exhaust. I haven't been able to see that in the one and only book I have for reference, did anybody seen this before?

Jorge 

  • Member since
    April 2010
Posted by Theuns on Friday, May 16, 2014 8:33 AM

Guys, here it is completed.

Trumpeter 1/72 F-100c, out the box. I just added tape seat belts and dropped the stabs like in most pix of the HUN I have seen

Alclad airframe alluminium. Alclad semi matt clearcoat over all.

An enjoyable kit, good detail and fit.

Not sure about the Sqn or "driver" of this plane, the box does not say.

I tried the heat stains, but they are a little on the "light" side

Interesting size comparason between the F-86 and the HUN

All comments welcome

Thanx

Theuns

  • Member since
    June 2013
Posted by bvallot on Saturday, May 17, 2014 12:01 AM

Jorge: I can't offer much help on the Jugs, but if you're looking to get a darker shade on some panels underneath...I would recommend the Magnesium or Dark Aluminum Alclad in light coats.  I'd even tape off everything save for what you want to work on and paint it in light coats until you're happy with what you see.  =]

Theuns:  I've never been much of a fan for some of the color schemes to come out of the Cold War at times, but what you've pulled off here is still every bit spectacular. =]  Did you put the Matte coat all over?  What did you think of it on the Alclad?  ...and how much did it affect it's shine?

On the bench:  

Tamiya F4U-1  Kenneth Walsh


  • Member since
    June 2013
Posted by bvallot on Saturday, May 17, 2014 12:10 AM

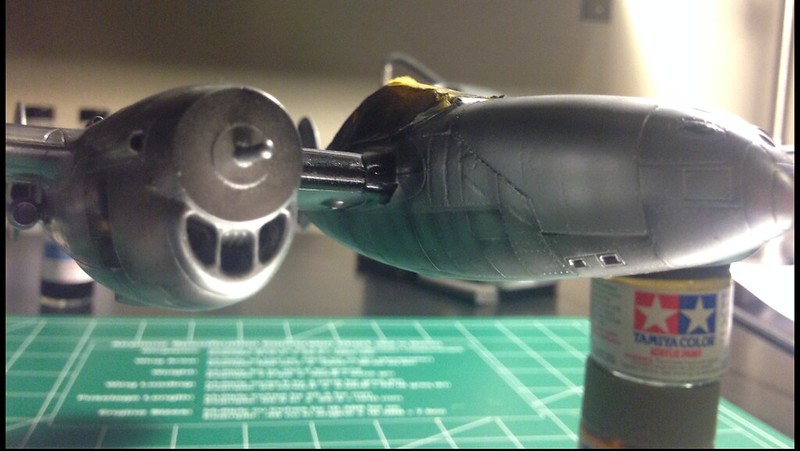
Okay! So, I've got everything riveted, sanded, and tweaked and then primed.  It took a while to finally get here but I've finally got my Gloss Black coat on.  =]

 image by brittvallot, on Flickr

 image by brittvallot, on Flickr

Even got me a new cutting mat! 

 image by brittvallot, on Flickr

I love laying down this gloss coat.  

 image by brittvallot, on Flickr

I'll let this set over night.  I'm still trying to figure out just what kind of metal scheme I'll be doing for this lightning.  Most likely Duraluminum over most of the wing surfaces...some Polished Aluminum in places...and Semi-Matte Aluminum to pick on certain high traffic areas.

Any thoughts or suggestions?  Any other NMF P38 veterans out there?

On the bench:  

Tamiya F4U-1  Kenneth Walsh


  • Member since
    April 2010
Posted by Theuns on Saturday, May 17, 2014 10:24 AM

Thanx, the semi matt toned down the shine allot! Maybe a tad to much (yes over everything incl. decals) but the alclad "effect" seems to be intact still . I can live with that. I would have liked to use the semi sheen, but no-one had stock here.

Theuns

  • Member since
    June 2013
Posted by bvallot on Saturday, May 17, 2014 3:53 PM

That's good to know!  It certainly seems to work well enough here on your Hun.  Understanding methodologies behind how you got there make a world of difference though.  It's good to see an example here of a matte finish from Alclad.  I seriously doubt I'd be the first to try it on my meticulously painted NMF =P  ...soooo you're a better man than me Theuns. lol =D

I managed to get a little painting done on one of the nacelles.  Here I'm using the White Aluminum.

 image by brittvallot, on Flickr

I've torn some Tamiya tape to mask off each panel briefly while I paint and I move from panel to panel that way.  I'll start painting in the middle of the panel and move the AB around while leaving a bit of the sides and corners alone some.  I've found this helps the paint to look more like metal bending around the aircraft.

 image by brittvallot, on Flickr

On the bottom, I move a little more quickly and since I trust my hands I can paint a little haphazardly to fill in spaces as I find needed.  I still taped off what I don't want overspray on though.

 image by brittvallot, on Flickr

 image by brittvallot, on Flickr

And that's a wrap for the weekend.  =]

On the bench:  

Tamiya F4U-1  Kenneth Walsh


  • Member since
    March 2014
  • From: Cockeysville, MD
Posted by JaySantos on Saturday, May 17, 2014 5:25 PM

Wow bvallot that is a nice painting job you have! Looking forward for the next step. What did you use as glossy black?

Theuns, very good looking F-100, great skills you have sir!

This is my progress, got a bottle of alclad magnesium and one of light sheen this morning at my LHS.

The main shade is duraluminium, the darker shade is magnesium and the lighter one is aluminium, I am not sure it is going to stay this way, I am going to step back and come back tomorrow.


On the other hand, I managed to break off three of the machine guns on the wing! Still looking for one thats misssing! Fun fun fun!!

Like always comments and suggestions are always welcome!

Jorge 

  • Member since
    June 2013
Posted by bvallot on Monday, May 19, 2014 8:25 AM

Jorge, it's from the Alclad line of paints.  It's their Gloss Black.  Some here have mentioned that they had trouble getting it shiny.  I've only experienced that minimally, and it was likely due to not having cleaned my brush well enough.  But I also think it's in part to shaking it thoroughly and applying it correctly.  I put it down very quickly over itself so that I can see the "wet" in the shine.  I am careful not to put too much.  I think if you paint a spot...move on...then come back after it's dried some then you may not see both layers play well together and your top coat never lays flat enough.  It seems to bead up making the surface look less like a glass and more like sand.  Do it all at once and they will lay down nicer.

But I'm pretty much batting a .1000 with the Alclad Gloss Black.

Excellent job on this NMF.  Those gun bays look great.  I love painting with this stuff. =D

On the bench:  

Tamiya F4U-1  Kenneth Walsh


  • Member since
    June 2013
Posted by bvallot on Wednesday, May 21, 2014 12:06 AM

Tried to get as much done as I could tonight since I'll be out of town through the weekend. As it happens, I almost couldn't have done more to make a mess, spill paint, and gunk up my AB.  =[

I did make some progress however.  I got the other nacelle painted in White Aluminum just like the other side.  The radiators were done in Polished Aluminum, but I will be masking these again and coming back over them in places with the White Aluminum as well.

 image by brittvallot, on Flickr

 image by brittvallot, on Flickr

 image by brittvallot, on Flickr

 image by brittvallot, on Flickr

Here's the top of the nacelle.  Same as before...the inner panels will get a coat of OD Green later on.

 image by brittvallot, on Flickr

I paint in the direction of how these panels would be riveted onto the frame of the aircraft.  So far I'm very happy with how it turns out.

 image by brittvallot, on Flickr

 image by brittvallot, on Flickr

 image by brittvallot, on Flickr

 That's all for now.  I am desperately trying to get this finished by the deadline!!  *fingers crossed!

Comments and suggestions are always welcome. =]

On the bench:  

Tamiya F4U-1  Kenneth Walsh


  • Member since
    March 2014
  • From: Cockeysville, MD
Posted by JaySantos on Wednesday, May 21, 2014 5:40 AM

Bvallot: Very nice paint job, I am very interested in seen the final result. Which AB are you using?  

Keep posting!

Jorge

  • Member since
    January 2012
  • From: Hatfield
Posted by Misty on Friday, May 23, 2014 5:48 PM

Bvallot- thats an awesome looking finish!!!! ill have to try that myself.

  • Member since
    June 2013
Posted by bvallot on Tuesday, May 27, 2014 11:13 PM

Thanks Misty.  I'm still not used to that lol.


Here's a quick reposting from my WIP:

So I managed to get a lot done today.  This update is a bit picture heavy.  Some of this was a step by step process so I kept a few in-betweeners in here.

This is the upper surface mostly completed.
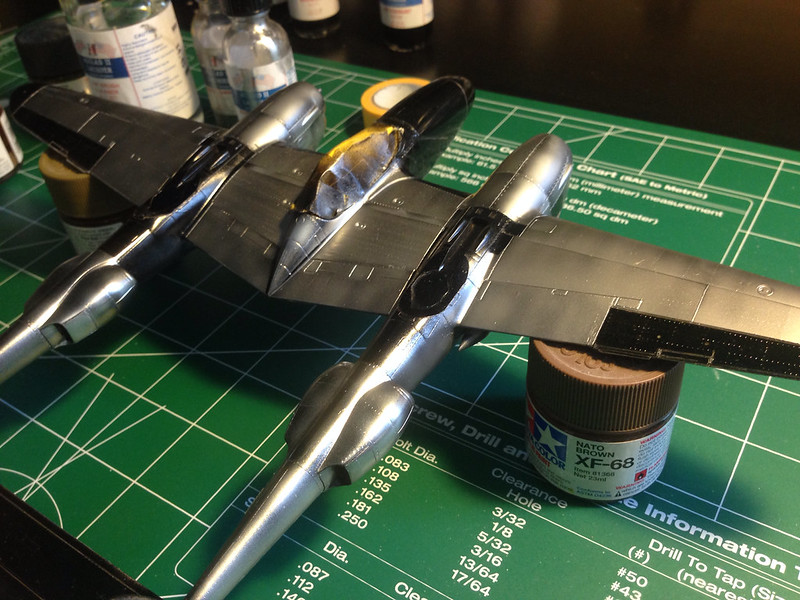
 image by brittvallot, on Flickr

As outlined before, I paint in sweeping motions in the same direction as the the rivets are riveted into the ribbing of the plane.  This is done lightly at first until I find something I'm happy with or if I'm referencing a photo until it matches what I see.  I may still go back on some of this as it nears completion.

 image by brittvallot, on Flickr

The lower surface.
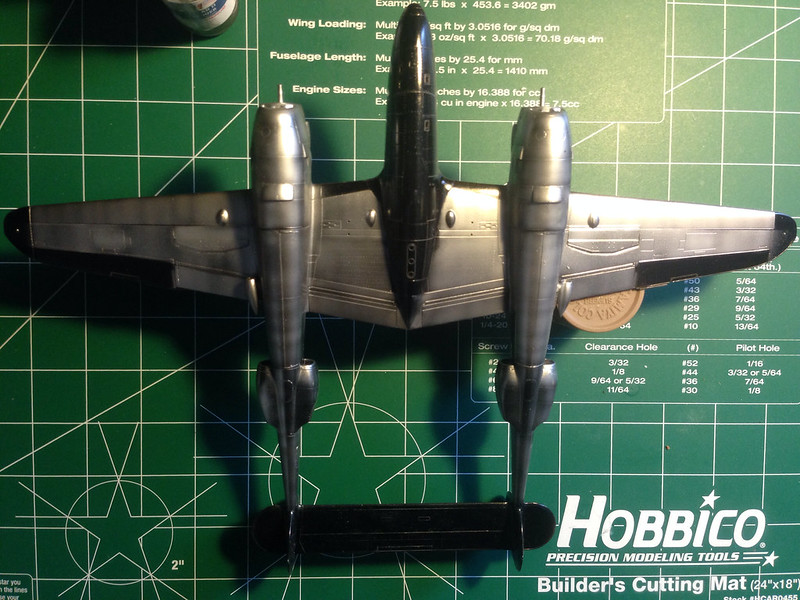
 image by brittvallot, on Flickr

Lower wing surface.
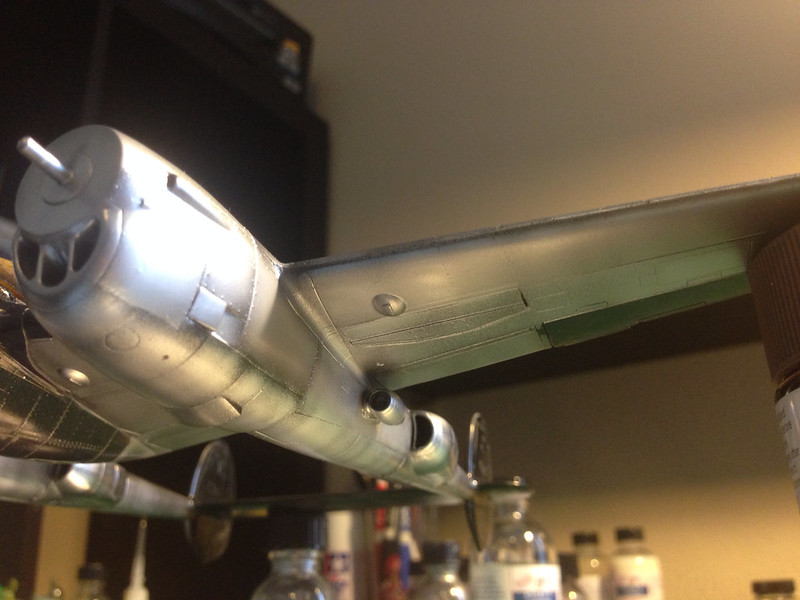
 image by brittvallot, on Flickr

 image by brittvallot, on Flickr
Finally got the nose painted.  I followed the same pattern of masking and painting as before.
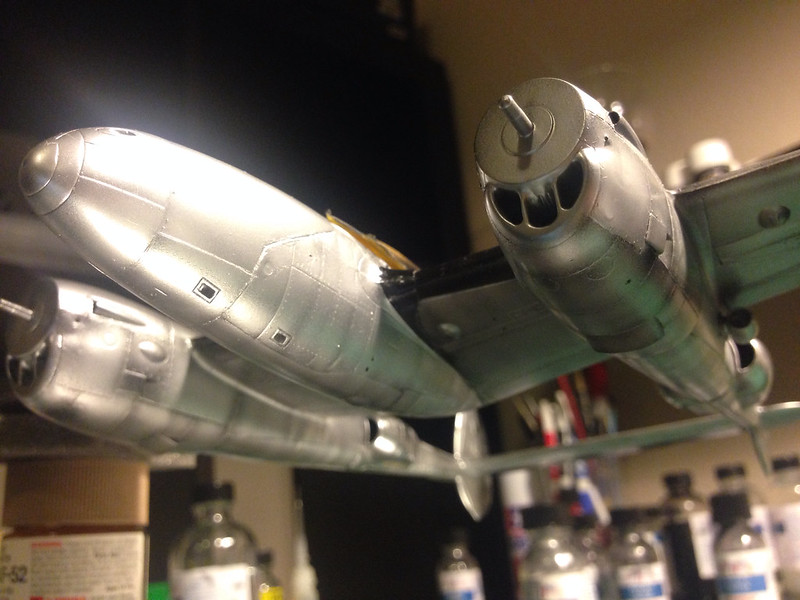
 image by brittvallot, on Flickr

 image by brittvallot, on Flickr
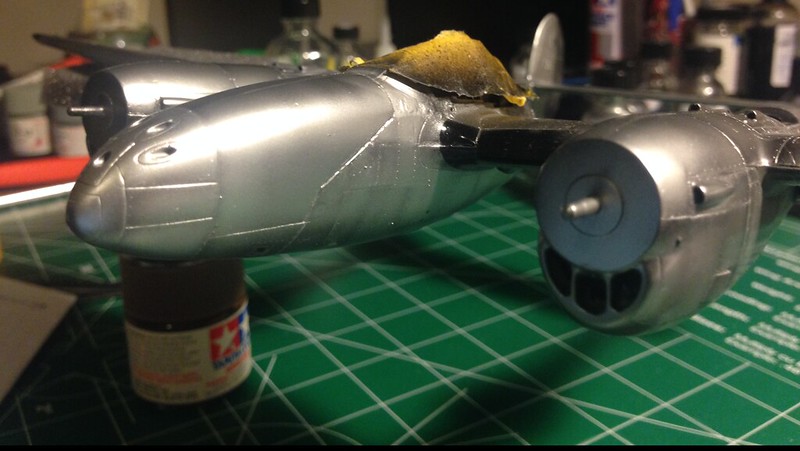
 image by brittvallot, on Flickr

 image by brittvallot, on Flickr
Detail of the upper surface.  This will all get lightly buffed to assist in weathering.  You don't need to do it, but I found it helps to create the worn look of a warplane.  Again...here less is more.
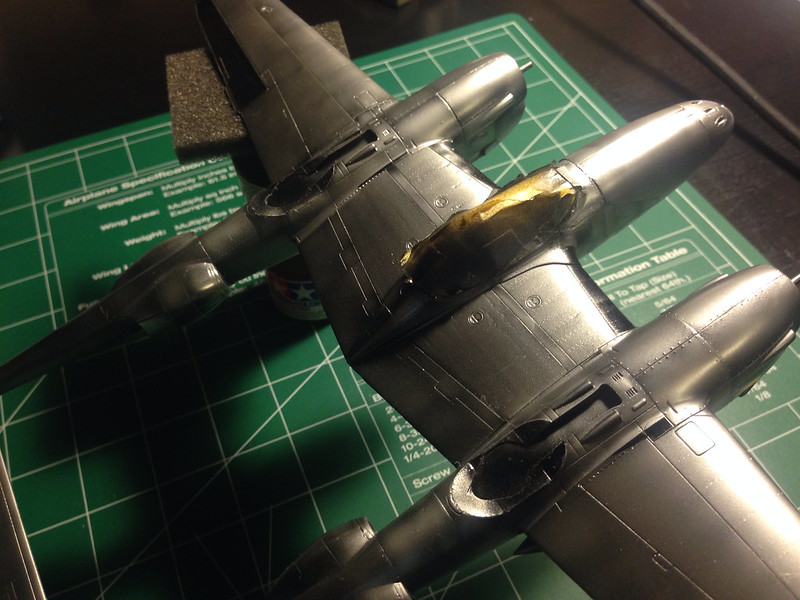
 image by brittvallot, on Flickr

Here's a good view of how masking the big panels off and painting with the rivets can help to show more of the metallic characteristics.  In the instance of the stressed skin, I think it's working quite well with it.  I do feel I could improve the stressed skin effect in it of itself.  This was the first time trying this and I was fairly confident I could pull it off so I just went all in.  I'm content with this attempt, but in the future I will try to smooth out some of these rougher edges.
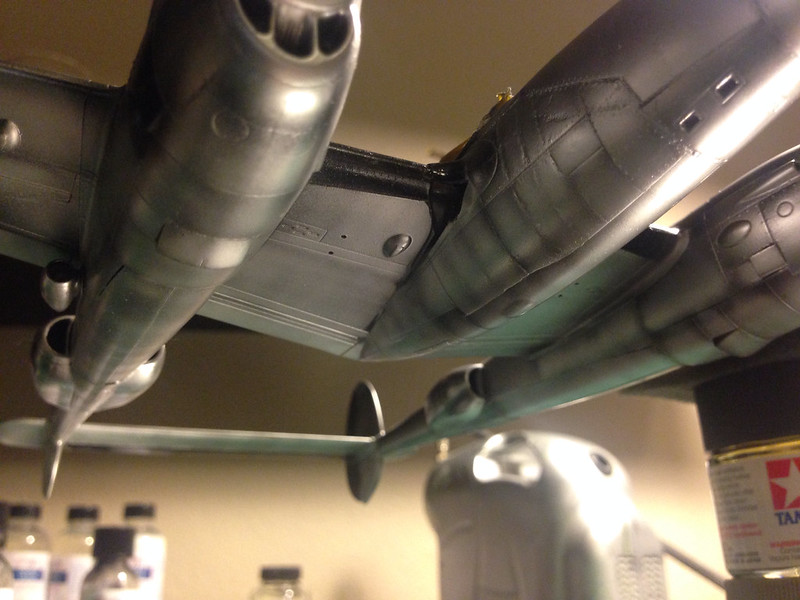
 image by brittvallot, on Flickr

Here's one thing I wanted to showcase.  In virtually every NMF Lightning I've seen, they have this bend in the metal revealing this difference in shade.  I'm not entirely sure why it occurs.  Maybe somebody out there can fill in the blanks, but here what I've done is to lightly set up the metal tones on the door...then mask over the part I need darker and with the same Alclad shade I just paint the opposite area a little thicker.  I use this same technique at various places on the wings as well.  It's an easy way to vary your panel shading without having to change Alclad colors.  =]
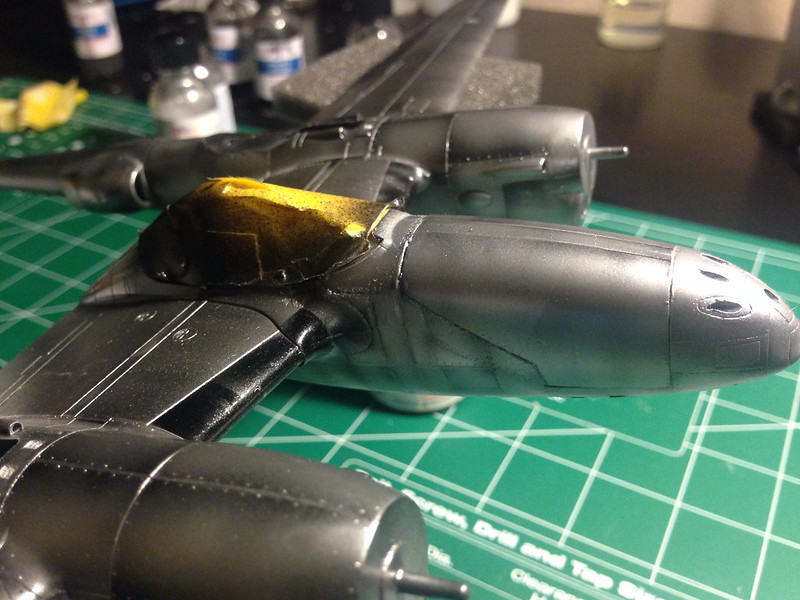
 image by brittvallot, on Flickr

And that's where I'm stopping for tonight.  I'm hoping to push through and get this wrapped up by the weekend.  Just to recap, White Aluminum on the Nose and Middle undersurfaces, and booms/nacelles, hori/vert stablizors.  Duraluminum on wings.  Polished Aluminum on radiators and top of the pod.  Helps to set if off away from the wings...purely an aesthetic choice.

Comments, critiques...

On the bench:  

Tamiya F4U-1  Kenneth Walsh


  • Member since
    March 2014
  • From: Cockeysville, MD
Posted by JaySantos on Wednesday, May 28, 2014 5:55 AM

Wow, that is looking really good bvallot

  • Member since
    March 2014
  • From: Cockeysville, MD
Posted by JaySantos on Friday, May 30, 2014 6:21 AM

Hi 

Progress report

Did all the markings/stencils, re-glued the 3 guns that I broke off the other day.

and another from the other side: 

I think I may still work a little on the guns, not sure how but I have all day to think about something.

The cowl is just holding with blue tack for now, wanted to see how it looked :)

I was also thinking about sealing the decals with future then a wash and finally a coat of alclad light sheen over everything including cowl and OD. Does anybody knows how future affects alclad? 

Jorge

Any suggestions and comments are welcome 

  • Member since
    June 2013
Posted by bvallot on Friday, May 30, 2014 7:46 AM

Definitely don't future over the Alclad.  It's not needed and I've read were it makes the finish look toy-like. It's not that you shouldn't "ever" but for warplanes in WW2...yeah, I probably wouldn't let you do that. lol.  However, I would tell you to mask off the painted areas of the cowl, OD anti-glare, and maybe the insignia and hit that with the future.  That way you can begin any weathering you plan to do.  As for the Light Sheen...start with LIGHT coats.  Can't stress that enough.  Take a moment...see what you're happy with and take it from there.  The Alclad itself doesn't need to be sealed, but the decals will.  So with a clever application of masking and patience you can protect what needs protecting and leave the shine to stand alone and shine as much as you'd like.  =]

On the bench:  

Tamiya F4U-1  Kenneth Walsh


  • Member since
    March 2014
  • From: Cockeysville, MD
Posted by JaySantos on Friday, May 30, 2014 8:27 AM

Bvallot,

Thank you for your input, always appreciated.

Would light sheen seal the decals? Like one light coat, wash and then another light coat of light sheen?

Sorry about so many questions!

Thanks

Jorge

  • Member since
    June 2013
Posted by bvallot on Friday, May 30, 2014 11:36 AM

Well, the light sheen isn't putting down the same surface as Future or a gloss product like Alclad's Aqua Klear Kote.  These will lay down super-flat onto whatever surface they adhere.  Flats, Semi-gloss, or even this Light Sheen have characteristics different from glosses in some part because of how they scatter light.  If you were to get a cutaway of it and look at these side by side on a microscopic level, then you'd see flat (glass-like) surface of your future or what have you and the bumpier surface of your flats and satins.  So think of bouncing a ball off a smooth wall...you can predict fairly well where the ball ought to land.  Now bounce the same ball off a big cinderblock wall with holes in it and now suddenly the ball can go just about anywhere.  It's sort of the same thing with light.  Also, the way filters seep into a more porous surface like a flat or satin...the future will resist it and keep it out because it's better sealed.

So, I'd steer you clear of using the Light Sheen as a sealant for a wash.  Test it out on something you won't need first.  You never know...you may find a new trick that bends the rules of how things usually work.  =]  But otherwise, just mask off your decal tightly...coat of future...wash...then coat of future/or just seal the last part with the Light Sheen.  You can even use the mask to go over the decal a little heavier if you want to make double sure.  That's what I do.  =]

Hope that helps.

On the bench:  

Tamiya F4U-1  Kenneth Walsh


  • Member since
    December 2002
  • From: Bury St Edmunds, Suffolk, England
Posted by Bish on Friday, May 30, 2014 3:15 PM

Guys, my apologies. SS sent me a message a few days ago saying he had been really busy with work these last few weeks and would be so for another couple of weeks. He only had a few mins, not really enough time to go through the threads to catch up properly.

I completely forgot he was running this GB, so sorry about that.

I am a Norfolk man and i glory in being so


On the bench: Airfix 1/72nd Harrier GR.3/Fujimi 1/72nd Ju 87D-3

  • Member since
    May 2006
  • From: Chapin, South Carolina
Posted by Shipwreck on Monday, June 2, 2014 1:33 PM

I hope to have a NMF project by August; but I do have a question. I follow this thread and I notice that most of you use Alclad II. The only NMF project that I have completed thus far is a 1/48 P-51 D which I base coated with Tamiya AS-12, then picked out various panels with shades of acrylic paint. My next project is planed to be a 1/48 B-29 Silverplate in NMF. I want to try Alclad II. Can someone recommend a Alclad II color to experiment with? I would probably want to use it as the base metal coat (over a primer) on the B-29.

Thank you for any suggestions!

On the Bench:

Revell 1/96 USS Constitution - rigging

Revell 1/48 B-1B Lancer Prep and research

Trumpeter 1/350 USS Hornet CV-8 Prep and research


  • Member since
    June 2013
Posted by bvallot on Monday, June 2, 2014 3:16 PM

Well Shipwreck, depending on the tone you want to see either the Aluminum or White Aluminum will work out well. Duralumin will give the surface a duller tone.  I use it over wings mostly. You may find a use for it for that B-29. Those three can get you thru your build. A Dark Aluminum can help out here and there but I don't think it would be absolutely necessary. Other shades of Alclads can offer you more depth as you've no doubt seen here. But that would really depend on if you were trying to accomplish something specific.  

But stick with one of those first three. You can't go wrong. =]

On the bench:  

Tamiya F4U-1  Kenneth Walsh


  • Member since
    May 2006
  • From: Chapin, South Carolina
Posted by Shipwreck on Tuesday, June 3, 2014 5:55 AM

Bvailot, thanks for the reply. I think I will order the four you mentioned: Aluminum, White Aluminum, Duralumim, and Dark Aluminum.

On the Bench:

Revell 1/96 USS Constitution - rigging

Revell 1/48 B-1B Lancer Prep and research

Trumpeter 1/350 USS Hornet CV-8 Prep and research


  • Member since
    March 2014
  • From: Cockeysville, MD
Posted by JaySantos on Wednesday, June 4, 2014 8:39 AM

I am calling this one done, still need to touch up some paint and glue the pitot tube. I like the way it came out, some things could look better, mostly because of my rookie mistakes but I am learning to not repeat them.

This model is of far inferior quality from the ones I see in this forum but it is what I came up with and I really enjoy participation on this GB and the interaction with other people that share the same interests as myself. 

Bvallot, you are a very helpful guy and I thank you for your advice!

How does this badge thing work? Do I need permission from  to get one? Can I?

Comments and sugestions are welcome

Jorge

My extensive collection LOL


  • Member since
    January 2012
  • From: Hatfield
Posted by Misty on Saturday, June 7, 2014 5:14 AM

Yes! What a beauty, and i dig the funky light switches too.

  • Member since
    March 2014
  • From: Cockeysville, MD
Posted by JaySantos on Saturday, June 7, 2014 7:46 AM

Thanks Misty.

I just realized, looking at the photos I posted, that the insignia located on the lower side of the wing has one of the white bars shorter than the other, need to fix that, maybe I'll still install the wing pylons.

Jorge, the guy with a total lack of attention to detail.

TUG
  • Member since
    December 2013
Posted by TUG on Monday, June 16, 2014 8:55 AM

Nice work on the Jug Jorge - great plane, great model.

Theuns, Misty, and Britt - I haven't been able to get much done considering the passage of time since the last post but I have kept at it whenever possible. I hope Clemens can shed some of his workload beforr too long - know just what it's like when work takes over. 

Anyway a few pics of what's been happening. 

Work began on the wings using a base coat of  White Aluminum then the pre-shading was done using Jet Exhaust. The lower surface was painted with the same mix as the lower fuse - white ally with transparent blue added to give an overall uniform 'laquered' finish. The top surfaces were masked and the main panel was painted with Duralumin. Flying surfaces, various other panels, access points etc were accented using variations of different Alclad and/or jet exhaust.

These pics show the work in stages - not as finished

The roundels masked up much better - no paint pull this time using Tamiya - the whole roundel was painted in about an hour just using a hairdryer to speed up the drying time a little.

This shows the difference between both surfaces a bit better....

And this the finished top surfaces ready to fit...

The wings were attached (only one wing being glued at a time) using 30min epoxy

That's as far as I've got - now it's time to paint and get ready to fit all the accoutrements before final assembly.

I have made the base though - my usual two layers of MDF board topped with the base material. Usually I use 'Poly Filla' for the base but following on from using picture framing mount board on the Crusader base I did the same only this time cut the card into individual 'slabs' Each slab was then 'textured' by scoring with coarse sand paper before painting with acrylic paints and then sticking down using spray photo-mount adhesive. The 'bitumen' filling was represented by hand painting in the grooves using thick-ish Humbrol satin black.

That's it for now guys - shame I didn't make the cut off date but it does look as if I'll make the next - there is going to be a next I guess?

Regards - Tug

JOIN OUR COMMUNITY!

Our community is FREE to join. To participate you must either login or register for an account.

SEARCH FORUMS
FREE NEWSLETTER
By signing up you may also receive reader surveys and occasional special offers. We do not sell, rent or trade our email lists. View our Privacy Policy.