SEARCH FINESCALE.COM

Enter keywords or a search phrase below:

Third Annual Berny Memorial Group Build

96050 views
1373 replies
1 rating 2 rating 3 rating 4 rating 5 rating
  • Member since
    June 2009
Posted by jimbot58 on Tuesday, January 20, 2015 8:54 AM

Son Of Medicine Man

jimbot58


My LP collection is sizable as well, but that's only because that's what was available at the time. I didn't like 8-tracks, cassettes were crap and the only other medium was reel to reel and that was for audiophiles. Albums were fun to acquire because the covers were just as interesting as what was inside.

I can remember my first LP purchase. It was Steely Dan's "Can't Buy A Thrill".

Back to modeling, I painted the underside of the f-8 white:

Yes, that's an open bottle of Advil in the background. The arthritis in my wrists is having it's way with me lately.

The white I painted is gloss so I may have to wait a few days or more to be able to handle it.

The A-10 is being gloss coated and will need to be cured as well before handling. Then I can decal it.

I have stepped back a bit and picked up the RF-4B to work on.

Depending on which aircraft I model, the tail may need to be black or the rudder will be white.

Jim

Hi Jim,

Nice work again!  Your attention to detail in 1/72 scale is amazing!  Yes  Yes 

On the subject of LPs, I still remember my first purchase.  It was the second album by the Monkees called "More of the Monkees" back in 1967.  I was 10 years old at the time.  My taste in music changed drastically and quickly though.  In just a couple of years I moved on to Led Zeppelin, then Black Sabbath, and Grand Funk Railroad.

Ken

Growing up, we mostly listened to what my folks listened to, which was country western of the day, with artists like Johnny Cash and Charlie Pride. Later when I was given my own AM pocket radio I found popular music of the late 60's and early 70's. When I eventually was given an FM (Stereo!) radio, did I discover a whole different world of Floyd, Zeppelin, ZZ Top, and more!

Jim

*******

On my workbench now:

It's all about classic cars now!

Why can't I find the "Any" key on my keyboard?


  • Member since
    December 2002
  • From: Bury St Edmunds, Suffolk, England
Posted by Bish on Wednesday, January 21, 2015 3:35 PM

I remembered to get the pics of the painted F-16 last night. I followed the Hase FS codes which I found confirmed by a couple of sights. But the contrast between the darker grey and the lighter on the tail and forward fuselage is not as vreat as all the pics I have seen seem to indicate. This didn't become apparent until I had taken the mask's off and I could see both colours. I can only assume that the Xtracolour FS 36270 is to dark. But I decided to leave it rather than re mask everything, but I will keep this in mind for next time.

I have also taken the canopy off as I noticed at the last minute that the instructions call for the canopy to be tinted. On doing a search, I found a suggestion for mixing some Tamiya smoke with future and spraying it on the inside. I plan on practicing on an old canopy first just to make sure my mix is not to dark. But apartt from those issues, everything else seems ok. I have started on the decals which should be done tomorrow night.

All comments welcome as always. 

I am a Norfolk man and i glory in being so


On the bench: Airfix 1/72nd Harrier GR.3/Fujimi 1/72nd Ju 87D-3

  • Member since
    November 2010
  • From: Lafayette, Indiana
Posted by Son Of Medicine Man on Wednesday, January 21, 2015 8:47 PM

Bish

I remembered to get the pics of the painted F-16 last night. I followed the Hase FS codes which I found confirmed by a couple of sights. But the contrast between the darker grey and the lighter on the tail and forward fuselage is not as vreat as all the pics I have seen seem to indicate. This didn't become apparent until I had taken the mask's off and I could see both colours. I can only assume that the Xtracolour FS 36270 is to dark. But I decided to leave it rather than re mask everything, but I will keep this in mind for next time.

I have also taken the canopy off as I noticed at the last minute that the instructions call for the canopy to be tinted. On doing a search, I found a suggestion for mixing some Tamiya smoke with future and spraying it on the inside. I plan on practicing on an old canopy first just to make sure my mix is not to dark. But apartt from those issues, everything else seems ok. I have started on the decals which should be done tomorrow night.

All comments welcome as always. 

Looking very good there Bish!  Seams are invisible.  Yes  Yes 

Ken

  • Member since
    June 2009
Posted by jimbot58 on Wednesday, January 21, 2015 11:55 PM

Bish

I remembered to get the pics of the painted F-16 last night. I followed the Hase FS codes which I found confirmed by a couple of sights. But the contrast between the darker grey and the lighter on the tail and forward fuselage is not as vreat as all the pics I have seen seem to indicate. This didn't become apparent until I had taken the mask's off and I could see both colours. I can only assume that the Xtracolour FS 36270 is to dark. But I decided to leave it rather than re mask everything, but I will keep this in mind for next time.

I have also taken the canopy off as I noticed at the last minute that the instructions call for the canopy to be tinted. On doing a search, I found a suggestion for mixing some Tamiya smoke with future and spraying it on the inside. I plan on practicing on an old canopy first just to make sure my mix is not to dark. But apartt from those issues, everything else seems ok. I have started on the decals which should be done tomorrow night.

All comments welcome as always. 

Bish, it's hard to tell from the photos and the fact that the paint is glossy just how close the colors are.

This is an old HAS F-16C I did way back when I first started back into this hobby. The kit called for FS36118 and FS36270. I used MM colors. This kit is complete with yellowed decals, some of which are silvered! I struggled with decals then.

For the tinted canopy I used thinned Gunze Sangyo smoke sprayed in several coats to the inside, spraying each coat to be slightly "wet" and allowing a few moments between coats to dry.

As you said, I would test it before you spray your canopy. I have sprayed both Tamiya and Mr. Color "clears" just thinning them for airbrushing and did not add Future. Just don't overdo it as I have several times and had to redo it.

Jim

*******

On my workbench now:

It's all about classic cars now!

Why can't I find the "Any" key on my keyboard?


  • Member since
    November 2009
  • From: SW Virginia
Posted by Gamera on Thursday, January 22, 2015 9:41 AM

Looks great Bish, as Jim said considering that the gloss makes things look darker I think you're fine with what you have.

The 'smoke' is pretty easy to use, as Jim said too just go slow so you don't build it up too fast. If you do rubbing alcohol will remove Tamiya paint even when dry.  

"I dream in fire but work in clay." -Arthur Machen


  • Member since
    December 2002
  • From: Bury St Edmunds, Suffolk, England
Posted by Bish on Thursday, January 22, 2015 3:01 PM

Jim, looking at yours, n=mine might not be that far off. The FS colours I used is the same. You are right, the gloss doesn't help especially in the pics, but it distorts the real thing as well. Decals are almost done, I forgot how many there are on these modern birds.

Thanks Gamera and thanks for the tip. I think I will get to that on Sat as its a bit to cold and damp to be spraying Acrylics in the evening.

I am a Norfolk man and i glory in being so


On the bench: Airfix 1/72nd Harrier GR.3/Fujimi 1/72nd Ju 87D-3

  • Member since
    November 2009
  • From: SW Virginia
Posted by Gamera on Saturday, January 24, 2015 5:21 PM

Weeeeeeelllllll, you guys have worked the Century Series whammy on me, a guy in our club was thinning out his collection - never seen him build anything but armour so I don't know why he had this but I ended up picking up this for five bucks...

"I dream in fire but work in clay." -Arthur Machen


  • Member since
    November 2010
  • From: Lafayette, Indiana
Posted by Son Of Medicine Man on Saturday, January 24, 2015 5:26 PM

Gamera

Weeeeeeelllllll, you guys have worked the Century Series whammy on me, a guy in our club was thinning out his collection - never seen him build anything but armour so I don't know why he had this but I ended up picking up this for five bucks...

Most excellent score Cliff!  Congratulations!  Yes  Yes 

Ken

  • Member since
    December 2002
  • From: Bury St Edmunds, Suffolk, England
Posted by Bish on Saturday, January 24, 2015 6:14 PM

Nice buy there Cliff.

I am a Norfolk man and i glory in being so


On the bench: Airfix 1/72nd Harrier GR.3/Fujimi 1/72nd Ju 87D-3

  • Member since
    November 2009
  • From: SW Virginia
Posted by Gamera on Saturday, January 24, 2015 9:33 PM

Thanks guys, already looking for replacement decals. Wish I could find a sheet for this one, might have to go for something slightly less gaudy though!

"I dream in fire but work in clay." -Arthur Machen


  • Member since
    December 2002
  • From: Bury St Edmunds, Suffolk, England
Posted by Bish on Sunday, January 25, 2015 3:54 PM

I got the decals finished and then added a flat coat this weekend and this is where things have gone a tad downhill. I have been using Microscale varnish for years, and despite a few issues now and then have stuck with it. Until a couple of years ago all my painting was done in a warm room. But then I moved everything out to the garden shed and this seem to cause problems especially in the winter. I can only assume its down to the cold but after spraying the varnish dry's to a chalky white finish.

After this happened the first time, I took to only spraying varnish earlier in the day to avoid the night cold, but I guess today must have been really cold as it did it again. I have managed to recover some of it by polishing over it and then brushing on another varnish coat in the warm. It has helped a lot, but this, along with the other small issues in the past, has now convinced me to switch to another varnish, namely Alclad.

Hopefully the washes will improve it a bit more, but this isn't going to be my best finished build ever that's for sure. The contrast between the two greys is still not great, but that's defiantly a lesson for next time. So, after my poor excuses, here is where she sits now.

I am rather pleased with the cockpit tinting, it may be a touch to dark, but overall I like it and the future dip leaves a really nice finish. But I will be glad to get this one out of the way. 

I am a Norfolk man and i glory in being so


On the bench: Airfix 1/72nd Harrier GR.3/Fujimi 1/72nd Ju 87D-3

  • Member since
    November 2009
  • From: SW Virginia
Posted by Gamera on Sunday, January 25, 2015 6:31 PM

Bish: She looks good in the photos but I think I can see a little frosting. I've had the same issues myself, don't know if it's the weather or what. I eventually switched to Alclad flat too and so far (cross your fingers) haven't had a problem.

"I dream in fire but work in clay." -Arthur Machen


  • Member since
    January 2014
  • From: Toronto
Posted by Rob S. on Sunday, January 25, 2015 6:33 PM

She looks sweet Bish...love that 2 seater!!

______________________________________________________________________________


On the Bench: Nothing on the go ATM

  • Member since
    November 2010
  • From: Lafayette, Indiana
Posted by Son Of Medicine Man on Sunday, January 25, 2015 9:03 PM

Gamera

Thanks guys, already looking for replacement decals. Wish I could find a sheet for this one, might have to go for something slightly less gaudy though!

Hi Cliff,

Now I know you only spent $5 on that kit, but if you wanted to get your hands on the decals for the "City of Jacksonville", you can "Buy It Now" on eBay for $20.99.  It comes with the Hasegawa 1/72 kit of the F-106A:  http://www.ebay.com/itm/Hasegawa-F-106A-Delta-Dart-1-72-Scale-Model-Kit-054-BONUS-Jacksonville-Decals-/151566325223 

Ken

  • Member since
    November 2010
  • From: Lafayette, Indiana
Posted by Son Of Medicine Man on Sunday, January 25, 2015 9:06 PM

Bish

I got the decals finished and then added a flat coat this weekend and this is where things have gone a tad downhill. I have been using Microscale varnish for years, and despite a few issues now and then have stuck with it. Until a couple of years ago all my painting was done in a warm room. But then I moved everything out to the garden shed and this seem to cause problems especially in the winter. I can only assume its down to the cold but after spraying the varnish dry's to a chalky white finish.

After this happened the first time, I took to only spraying varnish earlier in the day to avoid the night cold, but I guess today must have been really cold as it did it again. I have managed to recover some of it by polishing over it and then brushing on another varnish coat in the warm. It has helped a lot, but this, along with the other small issues in the past, has now convinced me to switch to another varnish, namely Alclad.

Hopefully the washes will improve it a bit more, but this isn't going to be my best finished build ever that's for sure. The contrast between the two greys is still not great, but that's defiantly a lesson for next time. So, after my poor excuses, here is where she sits now.

I am rather pleased with the cockpit tinting, it may be a touch to dark, but overall I like it and the future dip leaves a really nice finish. But I will be glad to get this one out of the way. 

Hi Bish,

Very sorry to hear the news about your build.  Sad  I can see some of the frosting in the pictures.  Hopefully it will clear up.  Other than that, it looks very nice.

Ken

  • Member since
    November 2010
  • From: Lafayette, Indiana
Posted by Son Of Medicine Man on Sunday, January 25, 2015 9:09 PM

Hi Everyone!

I thought I would ask everyone's opinion here, seeing we have a good number of you with a vast more experience than me.

I recently read somewhere that the Gunze Sangyo Mr. Mark Softer Decal Softening Solution is easier to work with than the Microscale Micro Sol.  From what I read, it works slower allowing you more time to get the decal positioned correctly.  Anybody here have any experience with using this product?

Ken

  • Member since
    November 2010
  • From: Lafayette, Indiana
Posted by Son Of Medicine Man on Sunday, January 25, 2015 9:27 PM

Hi Everyone (again)!

Believe it or not, I have actually did a little work at my bench!  Surprise  I painted the instrument panel of the Tamiya Mitsubishi A6M2 Zero with Future.  The kit comes with a decal for the instrument panel, and since I had already painted the panel with flat paint, I needed the smooth surface for the decal.

Ken

  • Member since
    November 2010
  • From: Lafayette, Indiana
Posted by Son Of Medicine Man on Sunday, January 25, 2015 9:30 PM

Forgot to include the picture!   Oops 

Ken 

  • Member since
    November 2009
  • From: SW Virginia
Posted by Gamera on Sunday, January 25, 2015 10:25 PM

Thanks Ken, but the Revell kit I picked up is 1/48th and those are 1/72nd, I'll keep looking. I'm sure they did 1/48th too and I'm not planning on building her anytime soon anyway.

And I've used both the MicroScale setting solution and Gunze and to be honest I can't really tell there's any real difference. The Gunze is a one step process so it might be a little less trouble but I think the Micro works a little bit better. Still it's only a small difference as far as I can tell.

The Gunze might work slower but I'd think you'd get the same result from just using the blue label Micro product, I use it to move the decal around and then hit it with the red to 'lock' it in place.

BTW: I got the Wildcat back out this weekend and laid down the underside colours this morning. Hopefully I'll have her masked tomorrow night and put down the upper paint sometime the middle of the week. I'll see about taking some photos then, not much to see right now.

"I dream in fire but work in clay." -Arthur Machen


  • Member since
    June 2009
Posted by jimbot58 on Monday, January 26, 2015 1:47 AM

Son Of Medicine Man

Gamera

Thanks guys, already looking for replacement decals. Wish I could find a sheet for this one, might have to go for something slightly less gaudy though!

Hi Cliff,

Now I know you only spent $5 on that kit, but if you wanted to get your hands on the decals for the "City of Jacksonville", you can "Buy It Now" on eBay for $20.99.  It comes with the Hasegawa 1/72 kit of the F-106A:  http://www.ebay.com/itm/Hasegawa-F-106A-Delta-Dart-1-72-Scale-Model-Kit-054-BONUS-Jacksonville-Decals-/151566325223 

Ken

You could probably spend that much on just the decals alone!

One time I considered doing doing a Phantom like this:

But I thought it was too ambitious. Decals can still be found:

http://www.ebay.com/itm/EAGLE-STRIKE-1-72-72085-F-4E-PHANTOM-11-/331345800853?pt=Model_Kit_US&hash=item4d25bfae95

Jim

*******

On my workbench now:

It's all about classic cars now!

Why can't I find the "Any" key on my keyboard?


  • Member since
    June 2009
Posted by jimbot58 on Monday, January 26, 2015 1:50 AM

Son Of Medicine Man

Forgot to include the picture!   Oops 

Ken 

So far, so good. I was curious about the other projects you had going, the Phantom, the SR-71, and the '86? Do you change projects like I do?

Jim

*******

On my workbench now:

It's all about classic cars now!

Why can't I find the "Any" key on my keyboard?


  • Member since
    June 2009
Posted by jimbot58 on Monday, January 26, 2015 2:20 AM

Hey gang!

Bish: Sorry your build didn't turn out like you wanted. Don't get discouraged, it happens to everyone now and then.

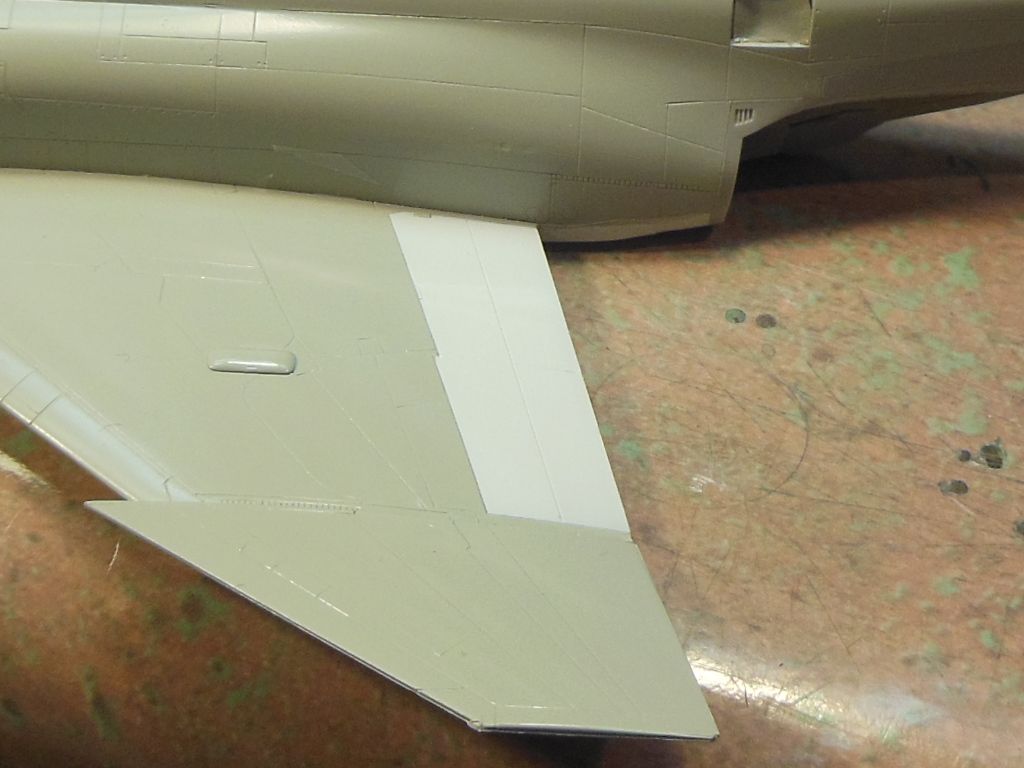
Speaking of changing gears, I ended up picking up the RF-4B. Ken, I am wondering if I should add it to the roster? Did some detail painting on it:
The A-10 is alive and well:
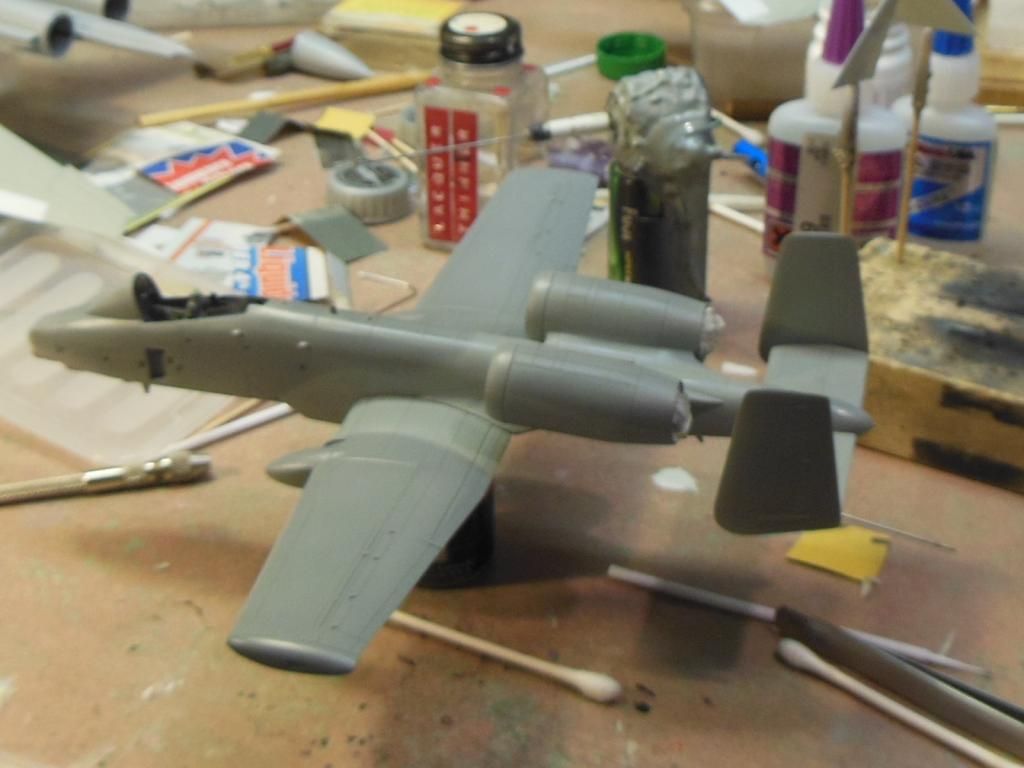
It's getting a gloss coat in preparation for decals. I tried a different approach on it. After spraying on the colors, I buffed out the paint with my toothpaste/polishing compound to give it a smooth but flat surface. I then have been overcoating it with some "Hight Gloss Clear" I found in with Testors automotive line. Jury is still out on this one. The finish is fine but still not a smooth as I had wished for.

The F-8E is getting the most attention:
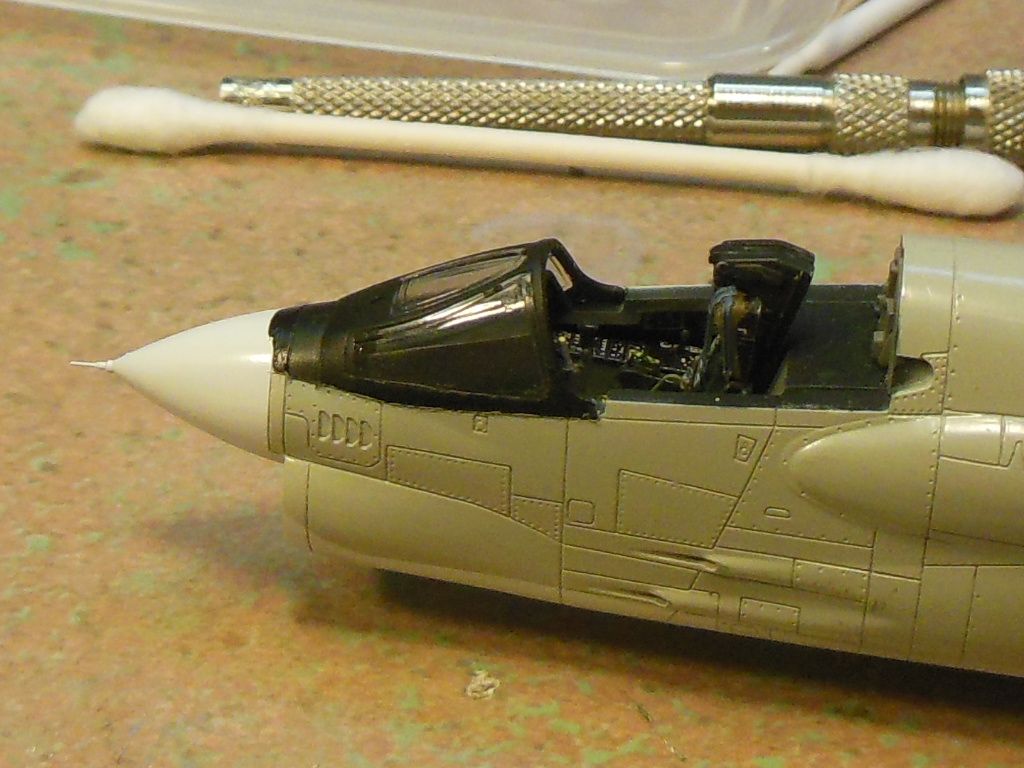
Still a few details to go in the cockpit.

Removed all the masking. The unpainted plastic gets metallic treatment: I'll have to knock down that raised edge where the tape was....
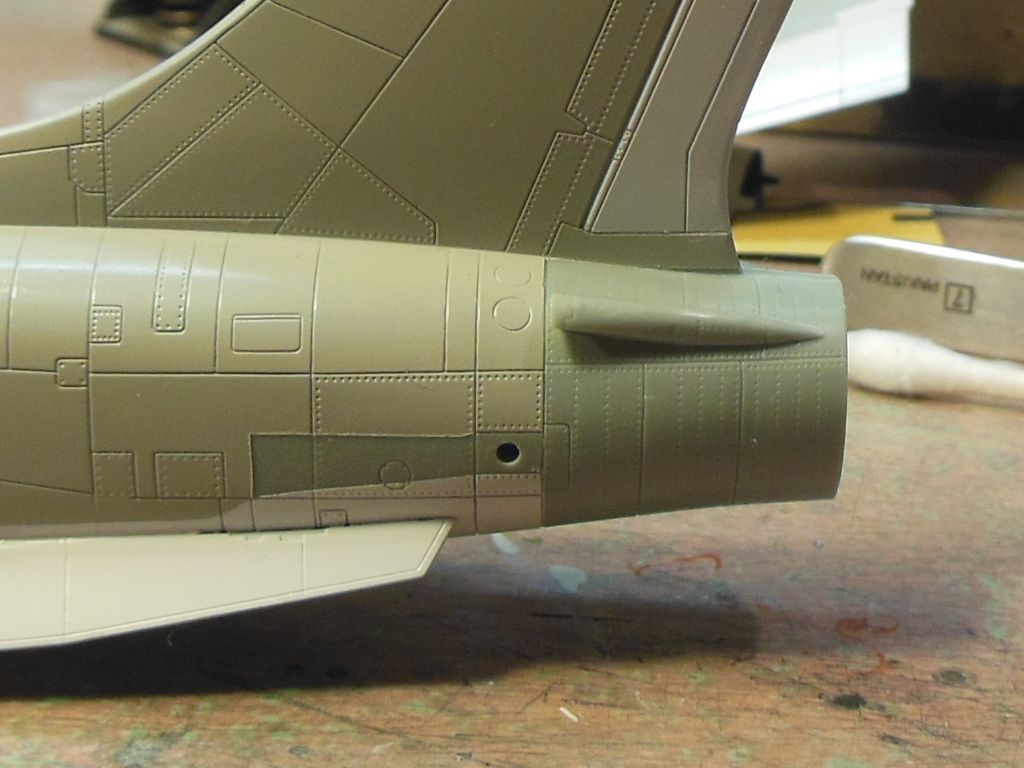
I also started a decal on the upper wing surface.
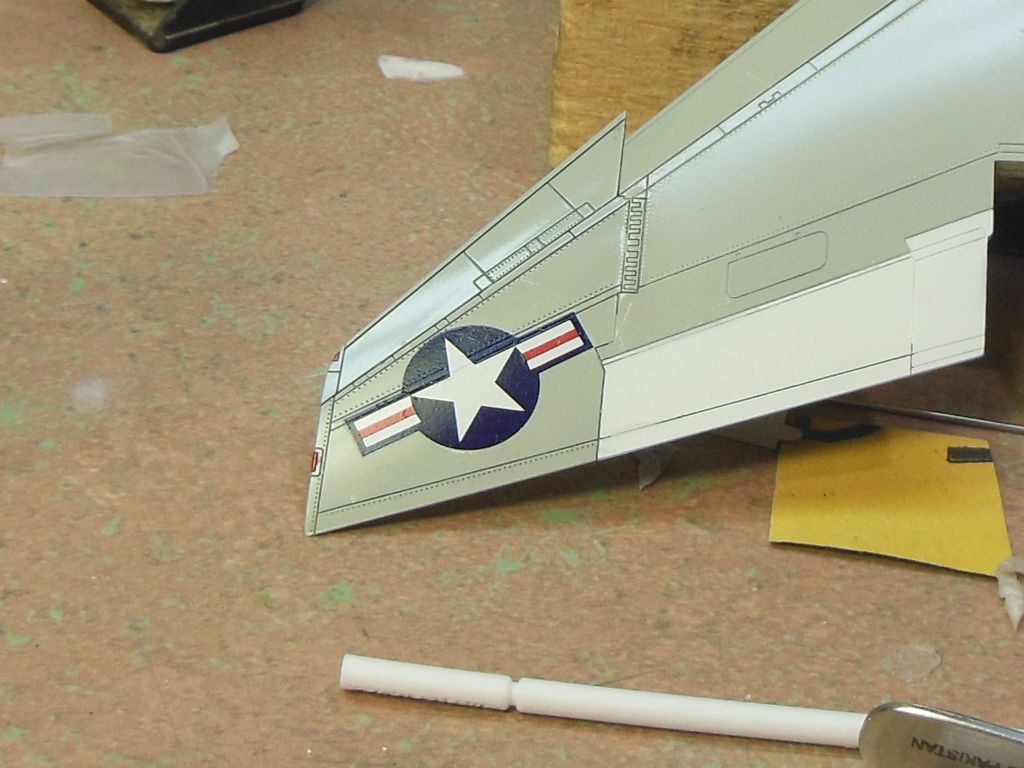
The Cartograph decals sucked down into the panel line nicely after hitting it with the Micro red. Wonder if I really even needed it though. You see I also hit up some of the panel lines and also the red lights for the wing tip.

One oddity about the decals is that they provide markings for two different aircraft, and two different numbers tail codes and numbers for each, which would actually give you a choice of 4 different aircraft to build. Also included is a couple of decals for a Marine aircraft, but no tail codes or numbers to go with them, nor are they mentioned in the instruction sheet. Just strange.....

Jim

*******

On my workbench now:

It's all about classic cars now!

Why can't I find the "Any" key on my keyboard?


  • Member since
    November 2010
  • From: Lafayette, Indiana
Posted by Son Of Medicine Man on Monday, January 26, 2015 5:50 AM

jimbot58

Son Of Medicine Man

Forgot to include the picture!   Oops 

Ken 

So far, so good. I was curious about the other projects you had going, the Phantom, the SR-71, and the '86? Do you change projects like I do?

Jim

Yes, I still have those projects sitting to the side.  I wanted to do this one as a strictly out of the box.  Then I will get back to the other projects.  Smile

Ken

  • Member since
    November 2010
  • From: Lafayette, Indiana
Posted by Son Of Medicine Man on Monday, January 26, 2015 5:55 AM

jimbot58

Hey gang!

Bish: Sorry your build didn't turn out like you wanted. Don't get discouraged, it happens to everyone now and then.

Speaking of changing gears, I ended up picking up the RF-4B. Ken, I am wondering if I should add it to the roster? Did some detail painting on it:

The A-10 is alive and well:

It's getting a gloss coat in preparation for decals. I tried a different approach on it. After spraying on the colors, I buffed out the paint with my toothpaste/polishing compound to give it a smooth but flat surface. I then have been overcoating it with some "Hight Gloss Clear" I found in with Testors automotive line. Jury is still out on this one. The finish is fine but still not a smooth as I had wished for.

The F-8E is getting the most attention:

Still a few details to go in the cockpit.

Removed all the masking. The unpainted plastic gets metallic treatment: I'll have to knock down that raised edge where the tape was....

I also started a decal on the upper wing surface.

The Cartograph decals sucked down into the panel line nicely after hitting it with the Micro red. Wonder if I really even needed it though. You see I also hit up some of the panel lines and also the red lights for the wing tip.

One oddity about the decals is that they provide markings for two different aircraft, and two different numbers tail codes and numbers for each, which would actually give you a choice of 4 different aircraft to build. Also included is a couple of decals for a Marine aircraft, but no tail codes or numbers to go with them, nor are they mentioned in the instruction sheet. Just strange.....

Jim

Wow Jim, you are really keeping your bench busy!  Everything looks fantastic!  Yes  Yes 

On the subject of your RF-4B, all I need is the manufacturer of the kit and I will add it to your roster!  Smile 

Ken

  • Member since
    November 2009
  • From: SW Virginia
Posted by Gamera on Monday, January 26, 2015 7:52 AM

Jim: They're all coming along really well, the F-8E esp looks good. That is odd that the decal sheet and instructions don't jibe, you'd think if they changed one they'd change the other.

"I dream in fire but work in clay." -Arthur Machen


  • Member since
    November 2010
  • From: Lafayette, Indiana
Posted by Son Of Medicine Man on Monday, January 26, 2015 9:02 PM

Hi Everyone,

Well I blew it!  Stupid move on my part!  Bang Head  I put the instrument decal on and the stupid thing was just a little too big.  There was a little bit hanging over the left and right edge.  No problem I thought, I will just hit it with the Micro Sol.  Just one more brush stroke should do it!  (How many times have you thought that?) 

The decal moved and bunched up.  Oops  There was no straightening it out.

So, I was planning on this being strictly out of the box.  But with that mistake I put an end to that.  I ordered an Eduard photo etch set that has the instrument panel.  Yay! 

Ken

  • Member since
    June 2009
Posted by jimbot58 on Wednesday, January 28, 2015 1:13 AM

Son Of Medicine Man

Hi Everyone,

Well I blew it!  Stupid move on my part!  Bang Head  I put the instrument decal on and the stupid thing was just a little too big.  There was a little bit hanging over the left and right edge.  No problem I thought, I will just hit it with the Micro Sol.  Just one more brush stroke should do it!  (How many times have you thought that?) 

The decal moved and bunched up.  Oops  There was no straightening it out.

So, I was planning on this being strictly out of the box.  But with that mistake I put an end to that.  I ordered an Eduard photo etch set that has the instrument panel.  Yay! 

Ken

Tough break Ken! I hate decals because so much can go wrong. Guess it's a good thing you had something to fall back on. I sort of had the same thing on my nearly forgotten Trumpeter F-105. The decals didn't quite fit the panel, so I ended up upgrading to a detail set.

Jim

*******

On my workbench now:

It's all about classic cars now!

Why can't I find the "Any" key on my keyboard?


  • Member since
    June 2009
Posted by jimbot58 on Wednesday, January 28, 2015 1:28 AM

I figured out the mystery of the "odd" Marine decals:

Here is the sheet: you can see the Marine marking in the center.

The instruction sheet, which shows no indication about these markings.

(The sheet is two sided with common markings on the back)

Notice how empty the lower 2 drawings appear?

Lets look at the real thing:

Viola! Looks like a miss print on Academy's part!

You notice the fuselage missile pylons actually cover part of the star on the side: the instructions do say to place the decals first before installing this part.

Not sure which version to build: Navy or Marine. If I go with Marine, then the nose gets repainted black.

Decisions, decisions.

Jim

*******

On my workbench now:

It's all about classic cars now!

Why can't I find the "Any" key on my keyboard?


  • Member since
    June 2009
Posted by jimbot58 on Wednesday, January 28, 2015 2:18 AM

Other updates:

Ken, RF-4B is, what else, a Hasegawa kit. 1/72 scale of course.

Painting bits and pieces: doors and more doors. Working on filling some ejector pin marks.

I'm using some of the Perfect Plastic Putty. My one complaint is that I thought I had the cap good and tight, but I ended up digging out a dried glob out of the end before I could use it. This time I wrapped the entire thing in cling wrap. Hope that helps.

I received the detail set for the 102 today. No plans to start it very soon as I need to clear up some of the other builds first

The Su-27 calls for Humbrol colors. I had trouble finding cross-overs, and decided to go with the Humbrol. My LHS carries Humbrol, but wouldn't you know they were out of the EXACT same colors I needed. I must not be the only one building this kit. I ordered some from SB. Should be here by Friday, though I actually won't be ready for them for a while.

Jim

P.S. I've never used this line of paints. Anybody have tips and advise? I read somewhere that Testors thinner works for airbrush thinner

J

*******

On my workbench now:

It's all about classic cars now!

Why can't I find the "Any" key on my keyboard?


  • Member since
    November 2010
  • From: Lafayette, Indiana
Posted by Son Of Medicine Man on Friday, January 30, 2015 6:10 AM

jimbot58


Tough break Ken! I hate decals because so much can go wrong. Guess it's a good thing you had something to fall back on. I sort of had the same thing on my nearly forgotten Trumpeter F-105. The decals didn't quite fit the panel, so I ended up upgrading to a detail set.

Jim

Yes, it seems that "scale" is a relative term when it comes to making decals, aftermarket parts, etc.  You would think that since the decals came with the kit, they would make sure they fit!  But then you always hear the phrase "it is up to the modeler to make it fit!".

Ken

JOIN OUR COMMUNITY!

Our community is FREE to join. To participate you must either login or register for an account.

SEARCH FORUMS
FREE NEWSLETTER
By signing up you may also receive reader surveys and occasional special offers. We do not sell, rent or trade our email lists. View our Privacy Policy.