SEARCH FINESCALE.COM

Enter keywords or a search phrase below:

3RD ANNUAL SECRET SANTA GROUP BUILD FOR AIRCRAFT

139672 views
1219 replies
1 rating 2 rating 3 rating 4 rating 5 rating
  • Member since
    December 2002
Posted by Bossman on Tuesday, August 4, 2009 11:45 AM

 raider83 wrote:
...And faces are tricky, just gotta keep practicing...

Agreed !   Same here.

Chris

  • Member since
    March 2008
  • From: Indy
Posted by raider83 on Monday, August 3, 2009 7:12 PM
Thanks for the suggestions bossman. I got a reserve champion which is alright. Its not going to teh state fair though... The face on the bomb is on the AM sheet with the kit that includes the bomb carts and tractor. There's loads more of those little write ons. I think it adds a bit of character. I will try your suggestions on the figgies. I was in a rush and want to drybrush and wash them some more to tone down that bright blue. And faces are tricky, just gotta keep practicingBig Smile [:D].
On the bench: Monogram 1/48 Kingfisher Cardinal Ritter- Class 1A 2008 Indiana State Football Champs
  • Member since
    June 2003
  • From: Caput Mundi
Posted by Avus on Monday, August 3, 2009 1:40 AM
Very nice work Dave, Chris and raider83!
My SSGB gift is still boxed Whistling [:-^]; I'm currently working on two "Super Cobras" for the heli GB ...

Klaus

Thanks to ImageShack for Free Image Hosting

  • Member since
    December 2002
Posted by Bossman on Sunday, August 2, 2009 7:46 PM

Raider,

So how'd ya do at the county fair ?  I'd say the presentation is very nice.  The model is very nicely built and finished.  The base and the accessories are a nice touch.  So is the face on the bomb.  I gotta disagree with you about it being too weathered though.  I've seen some WWII carrier photos that show some mighty whooped A/C.  It doesn't seem overdone to me.  Very nice !

I almost missed that little guy that only shows up in the last photo.  Since you asked about making the figures more realistic... A couple things you can still do: tone down the blue shirts with some grey wash - or just something to make them a little less "neon" blue.  You did a decent job of making the folds a little darker - that looks nice.  I usually add a very little bit of red to the flesh tone paint and use it very sparingly in spots on the people's faces just to make the skin look less uniform in color.  That seems to help a bit.  Just some suggestions.

Chris


jwb
  • Member since
    February 2006
  • From: Parkton, NC
Posted by jwb on Sunday, August 2, 2009 5:55 PM
Great Dauntless!

Jon Bius

AgapeModels.com- Modeling with a Higher purpose

"For I know the plans I have for you," declares the Lord, "plans to prosper you and not to harm you, plans to give you hope and a future." ~ Jeremiah 29:11

  • Member since
    March 2008
  • From: Indy
Posted by raider83 on Sunday, August 2, 2009 2:26 PM

Here is my Dauntless, courtesy of Aggieman for the Secret Santa GB. Thank you again Aggieman, it was a fun one. The kit was not bad. The cockpit is fantastic, as are all the other cockpits from Accurate Miniatures. Fit was alright. The wing roots were a bit tricky. Everything else went fine. I wanted to make this plane look old and beat up but i think I overdid it....US Navy carrier planes usually didn't get this dirty or chipped. And speaking of chips, I tried the salt chipping technique with sand. That didn't go over so well, so I painted on aluminum chips with enamel paint. But I forgot the turpenoid in my oil wash dilutes enamels, so the chips are kinda streaky.Whistling <img src=" border="0" width="30" height="20" />. The figures and vehicles are from AM's set of ordnance and such. I know the figures look like toys. I need to work on that. Please feel free to leave any comments or criticisms.  Merry Christmas!....in August.


On the bench: Monogram 1/48 Kingfisher Cardinal Ritter- Class 1A 2008 Indiana State Football Champs
  • Member since
    December 2002
Posted by Bossman on Monday, July 27, 2009 5:34 PM

A little more progress lately...

The base coats of the camo pattern are down and now I'm working on "fuzzifying" the edges between the colors. 

 ***edit***

Here's an in-progress photo showing the method I use for making the fuzzy edged camo pattern.  After painting the base camo colors with a plain hard edge, I go over the intersection of the two colors with a ~50/50 mix of the two colors.  A very fine brush is used to make a line ~1/16" wide.


After this I'll go back and blend a light wash of the 100% solid colors into the 50/50 area.  The two greens are so close in color that I might not even use the wash between those two.  They look pretty fuzzified already.

Chris

  • Member since
    December 2002
Posted by Bossman on Sunday, July 26, 2009 3:23 PM

Lookin good Dave,

That's gonna be some greenhouse !

Chris 

  • Member since
    July 2003
  • From: waynesboro va, via Ireland
Posted by sidure on Sunday, July 26, 2009 2:29 PM

Nice progress Dave, I am wrapping up a GB in the next day or so and then I will be starting my JU-88. Im a littlle behind on getting started but I will get it done. I think its all Daves fault. HAHA Dave thats not confined to the RA GB, its spreading.

Steve

  • Member since
    March 2008
  • From: Indy
Posted by raider83 on Sunday, July 26, 2009 10:44 AM
My SBD Dauntless from aggieman is done, but its at the county fair right now. ill post pics when i get it back next week.
On the bench: Monogram 1/48 Kingfisher Cardinal Ritter- Class 1A 2008 Indiana State Football Champs
  • Member since
    March 2007
  • From: Carmel, CA
Posted by bondoman on Saturday, July 25, 2009 2:33 AM
I'm about to start my CH-46 from Nam.
  • Member since
    September 2004
  • From: Vernon, BC, Canada
Posted by razordws on Friday, July 24, 2009 5:02 PM

Some great looking work guys.

Update on the CA 311.  One thing I love about the old Italeri kits is all the clean up of the excessive ejector pin marks!  Dead [xx(]

Here's the oob office.  Not bad detail for its day but I think I'll have to jazz it up a bit.

Dave

  • Member since
    December 2002
Posted by Bossman on Tuesday, July 21, 2009 10:26 PM

For the last few months I've been busy finishing up 3 other builds that were started last year.  They're all done, so now I can devote some time to the kits that Zip gifted me with in this GB. 

I ran into my first snag with the fit of the Phantom.  It wasn't that big a deal - an easy fix.  The intakes are really tricky on the Phantom.  I bet they're an engineering nightmare for a mold designer.  The geometry is pretty complex.  In order to make it fit on all the other surfaces at the same time, I needed to leave a gap at the bottom.  I figured this would be the easiest gap to fill, and I'm pretty sure I was right.

I trimmed a piece of 0.010" thick styrene sheet to fit the interior curve of the intake and pushed it in so that it was flush on the inside and glued it in place with liquid glue from the outside.  I left some of the sheet sticking out, and then after the glue dried I just trimmed it with an exacto and sanded it flush. 

The same operation was performed on the starboard side, but it took a thicker 0.030" sheet.  Lucky for me these are the only two thicknesses of sheet I have on hand - and they were just the ticket !  I really like it when that happens.

After painting I doubt it will be noticed.

Model On my yuletide friends !

Chris

  • Member since
    March 2008
  • From: Indy
Posted by raider83 on Thursday, July 16, 2009 1:14 PM
my SBD from aggieman is coming along well. Its all painted. It must be done by Tuesday for my county fair, so pics will be coming soonWink [;)]
On the bench: Monogram 1/48 Kingfisher Cardinal Ritter- Class 1A 2008 Indiana State Football Champs
  • Member since
    November 2006
  • From: Bedfordshire, England
Posted by ollie on Wednesday, July 1, 2009 11:20 PM

Im calling this one done for now. White is such a pain to paint and all was going well untill i had to touch up the crosses, i did the rest of the white with my airbrush and the touch ups by hand:

Im ashamed to say i cant remember now who sent this to me. 

Azgaron:

Hows the kit i sent you coming on?

www.overthefencephotography.co.uk - aircraft photos.
  • Member since
    December 2002
Posted by Bossman on Tuesday, June 23, 2009 11:21 AM

Very nice work.  No shortage of armament there !

Nice photos too !

Chris

  • Member since
    June 2003
  • From: Caput Mundi
Posted by Avus on Tuesday, June 23, 2009 1:34 AM

Very nice and clean build.

Great work!

Klaus

Thanks to ImageShack for Free Image Hosting

  • Member since
    July 2005
  • From: Texas
Posted by painklr on Monday, June 22, 2009 5:14 PM

Here it is.  My secret Santa Gift (Hawker Typhoon Mk.1B) from Raptordriver.  This was fun build.  This took me a while due to working two jobs.  By the end of the year I should be able to only have one job, which will enable me to build more.  Well here are some pics.  Comments and suggestions are always welcome.  Now I am off to finish up my F-18.

  • Member since
    September 2006
  • From: From Vernal UT OH YEA!!
Posted by raptordriver on Saturday, June 6, 2009 10:39 AM

Hey thanks everyone!Big Smile [:D] Yes I painted the white areas except for the tail.

Andrew


  • Member since
    July 2005
  • From: Texas
Posted by painklr on Friday, June 5, 2009 1:12 PM

IT'S FINALLY DONE!!!!!!!!!!!!!!  Put the last finishing touches on the Typhoon.  I will shoot my pics this weekend and post them.  This was fun.  Now I am off to my next project. 

Thanks again raptordriver and great job on the Spitfire.  Did you paint the white areas or are they decals?

  • Member since
    December 2002
Posted by Bossman on Tuesday, May 19, 2009 10:33 PM

By my rough calculations - Our friend Mike "Swingr1121" is now a married man !

Hmmmm....   seems that screen name is...   shall we say - outdated ? Wink [;)]

Congrats Man !

Chris


jwb
  • Member since
    February 2006
  • From: Parkton, NC
Posted by jwb on Saturday, May 2, 2009 2:53 PM

Andrew- Your Spitfire looks great! Very nice.

Steven- Great work on both of those! Your weathering is top notch. I like the way you did the red star over the US star.

Chris- That Phantom will look great when it's all done. Very nice work.

Jon Bius

AgapeModels.com- Modeling with a Higher purpose

"For I know the plans I have for you," declares the Lord, "plans to prosper you and not to harm you, plans to give you hope and a future." ~ Jeremiah 29:11

  • Member since
    December 2002
Posted by Bossman on Wednesday, April 29, 2009 5:38 PM

Thanks again Steve.

Here she is - a little more "dressed up".  I finished the main striping decals because I figured I had to get them on to paint right up to their edge. I wasn't really sure where the inner edge of the wingtip decals ended until I got them on the plane. 

After the decals were on, I had to paint around the edges where the decal ends at the leading and trailing edges of the wings and fin.  Dark sea blue and insignia red were both very good matches for the decal colors.  The dark sea blue is just a wee bit darker than the decal - but it's tough to see the difference even in really good lighting.  I'm pretty pleased with the way they turned out.  The rest of the decals should be a piece of cake compared to these.

Chris

  • Member since
    May 2006
  • From: Tampa, Fl
Posted by zipmeister on Tuesday, April 28, 2009 1:57 PM

 Hey Chris,

 It takes a while to get the hang of the airbrush. Once you get comfortable with it though you'll love it.

 As far as the P-38 goes it's got to be the finest kit I've ever owned. Jeff gave me one of the best 1/32 kits out there plus the book and the Big Ed set of PE for it. I don't want to mess this one up. I will have to hone my skills alittle more before I tackle this bad boy. All schemes call for a NMF. I've only done one of those so far and that was on a 1/48 Mustang. A lot more surface on the P-38. I want to do it right.

 I reallty enjoy watching your builds.

 BTW I use just a couple drops of just plain water to thin my MM acrylics. Never a problem. Just don't over do it. Experiment.

Zip

  • Member since
    December 2002
Posted by Bossman on Monday, April 27, 2009 11:53 AM

Zip,

Hey Man !   Good to hear from ya.  I've joined the ranks of those that own an airbrush - and my wife got me a compressor for Christmas this past year - but I still do quite a bit of brush painting.  Right now I'm using the airbrush for painting white (like on the F4 underside)  You can see a little overspray in the topside photo.   The Sand color is brush painted.

Honestly, I'm having a hard time with the airbrush.  I'm using MM acrylics with MM acrylic thinner and it's not working out as easily as I had hoped.  I started out just thinning the paint a little - but it clogged the nozzle very quickly.  When I use more thinner, it seems to take a really long time to dry, even with really light coats - and still the nozzle clogs up (at a slower rate).  It gives me MUCH better results than I could ever get brush painting with white - but it's a hassle unclogging and cleaning everything multiple times throughout a painting session.

I need to do more research in the airbrushing part of the forum to see if there are better ways to get acrylics to go on more easily.  I've heard of people using other thinning agents for acrylics.

Just this morning I laid down a coat of future on the white tail and wingtips on the F4 in preparation for the red white and blue striped decals. 

Have you cracked open that monster P-38 yet ?  Looking forward to seeing that one.

Chris

  • Member since
    May 2006
  • From: Tampa, Fl
Posted by zipmeister on Sunday, April 26, 2009 7:18 PM

 Yes Steven outstanding!!!!

 Chris your doing an excellent job buddy! If remember correctly don't you hand brush your models?

Zip

  • Member since
    December 2002
Posted by Bossman on Tuesday, April 21, 2009 11:16 AM

Very nice weathering work Steven.  Man you're quick !  Very nice builds.

Chris

  • Member since
    January 2015
  • From: Katy, TX
Posted by Aggieman on Monday, April 20, 2009 7:19 PM

Nice job on the Spitfire!

On Saturday we had one heckuva storm, so water-logged as we were, I was given time to spend at the bench.  I put in a bunch of hours at the bench, and was able to go through the DVD of Enemy at the Gates and then Empire of the Sun, which played twice, before I was done for the day.  In other words, I made considerable progress which I then completed tonight after work. 

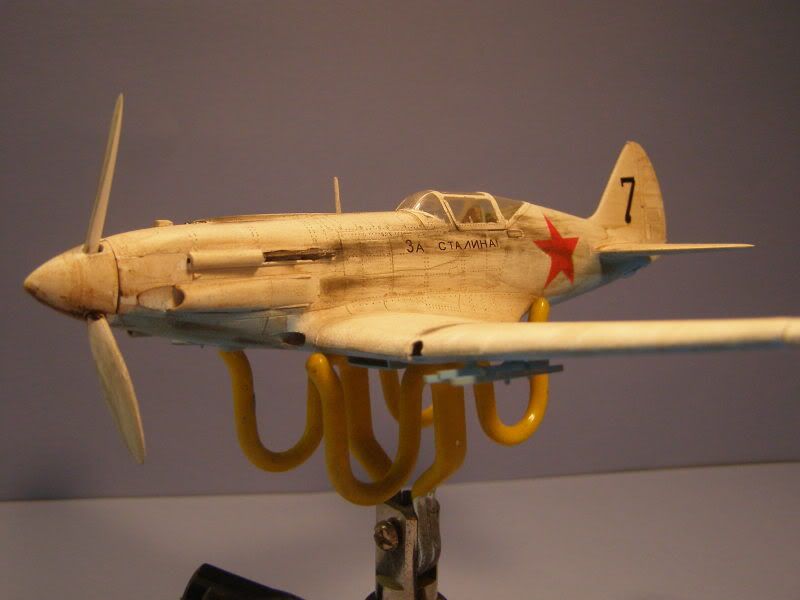
I did really enjoy both of these kits but the Eduard P-39 blew the Trumpeter out of the water.  This was my second Trumpy kit and I have been generally ho-hum about their offerings.  Decent kits to be sure but a bit too heavy on rivet detail and some unusual pieces where one might not expect to find a separate piece.  On the MiG the intake scoops located on the wing fairings were separate pieces, and they took a bit of fidgety work to get them aligned properly.

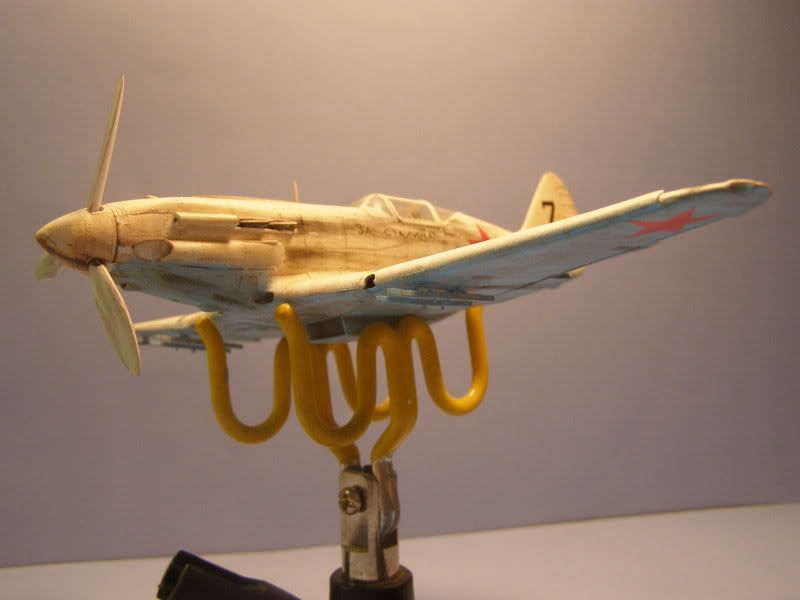
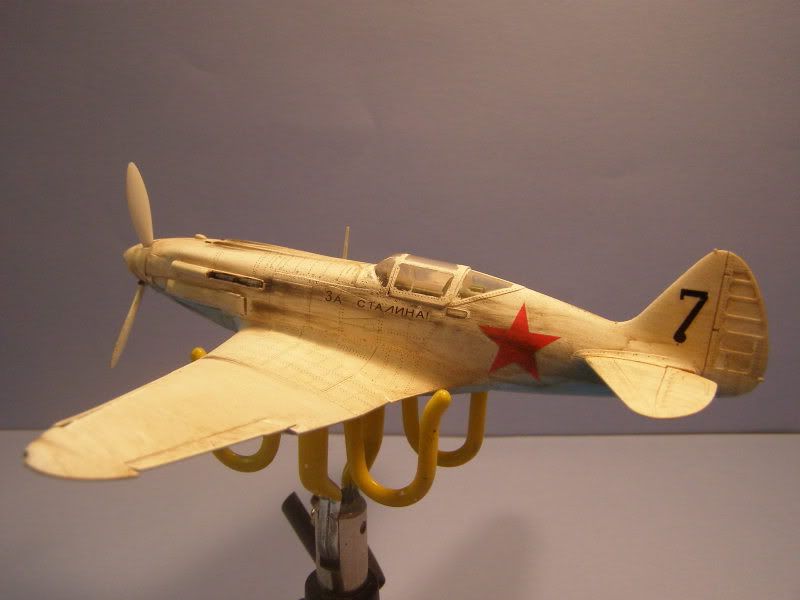
The MiG is painted with Tamiya flat white topside and Tamiya Sky Blue heavily mixed with Tamiya flat white to make it more North Carolina Tar Heel blue-like for the underside.  Model Master metallics for exhaust staining, machine guns and exhaust pipes.

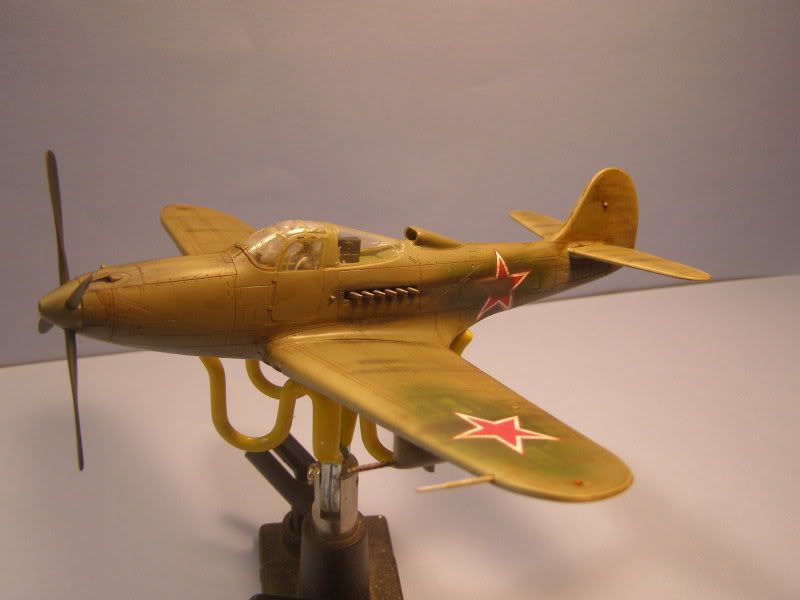
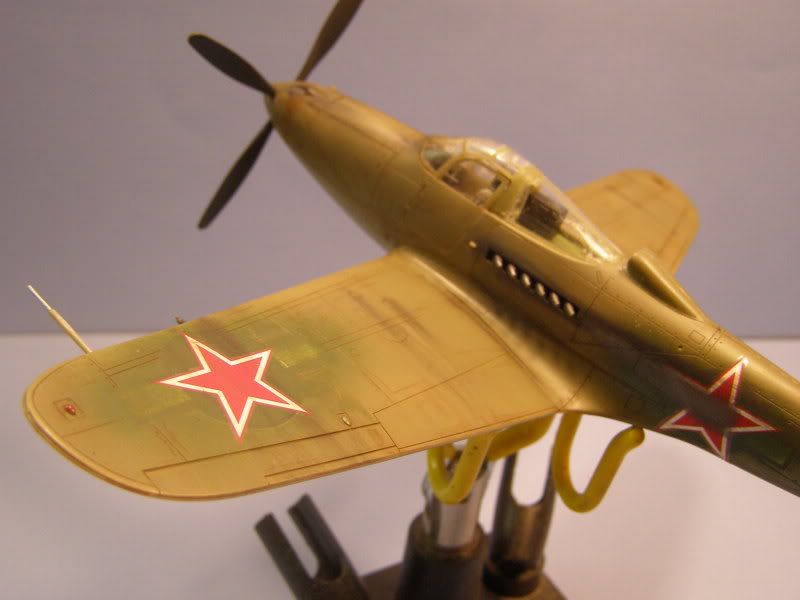
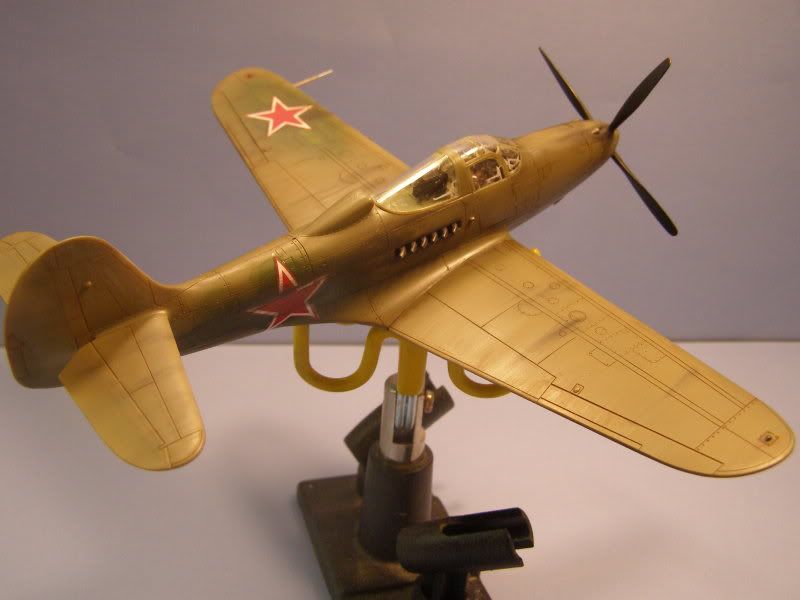
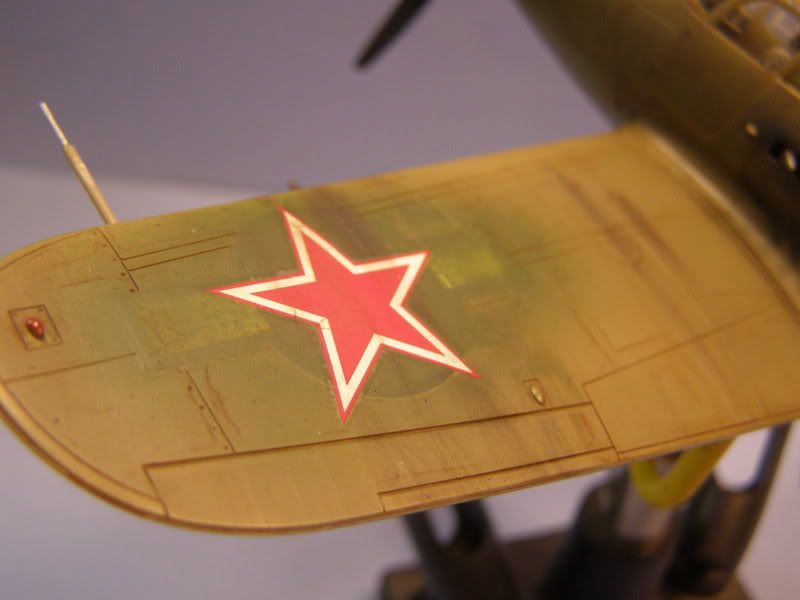
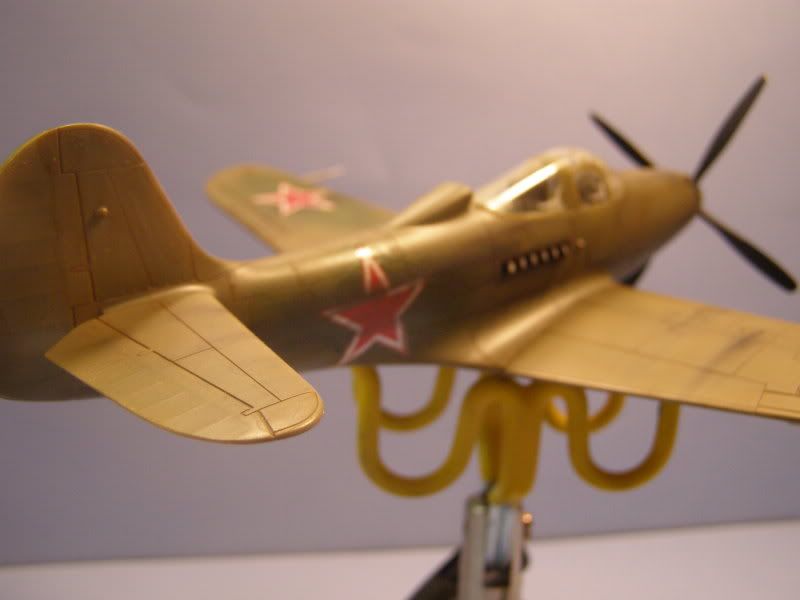
The P-39 is painted with Model Master acrylics - olive drab upper and neutral gray under.  I put on US insignia and over sprayed them with MM green drab, along with the MM metallics mentioned above for the machine guns and exhaust pipes.

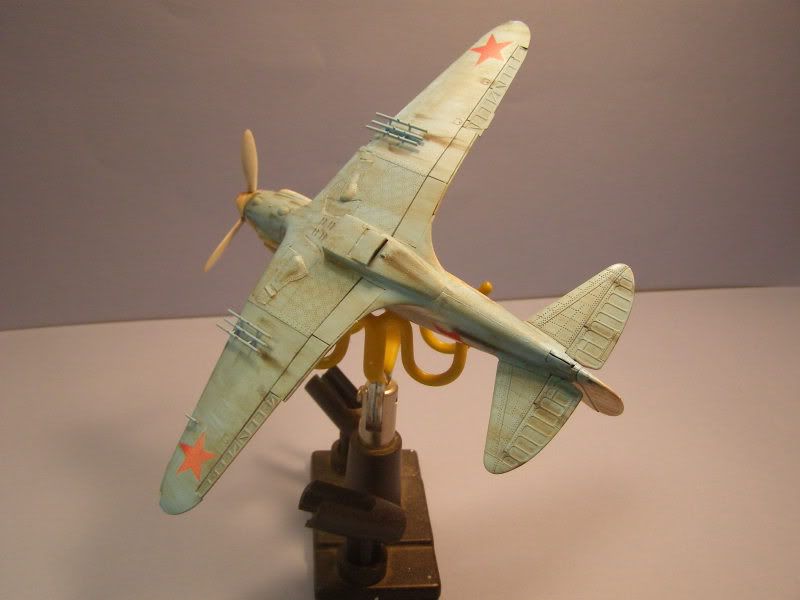
Mixed burnt umber for a wash and applied Tamiya weathering pigments, and called it a day on these builds. 

MiG-3


P-39Q

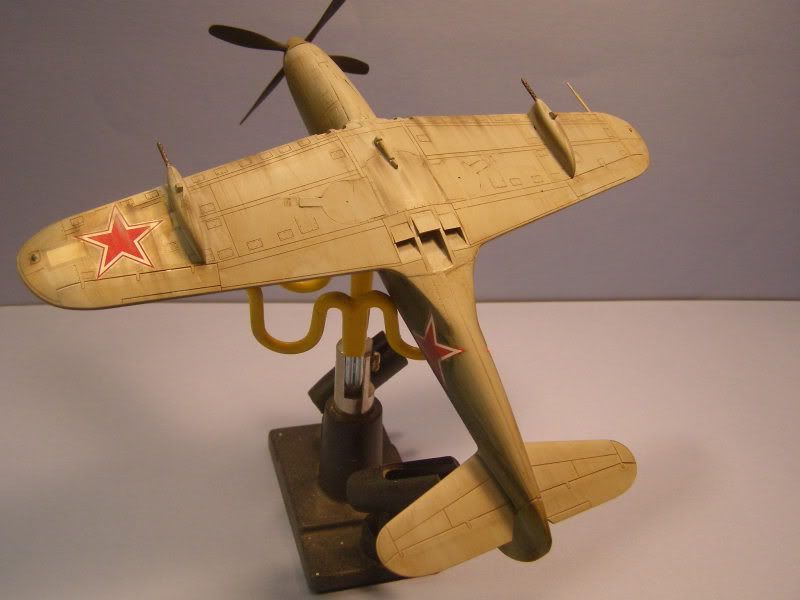
Edit:  Just noticed in looking at the photos up close of the MiG that I have not attached the lens covering the wing light, nor the wing tip light pieces.  Oops, not quite done yet!

  • Member since
    December 2002
Posted by Bossman on Sunday, April 19, 2009 4:52 PM

Andrew - nice job ! I like the looks of that clipped wing Spitfire - nice job on the camo and decals - very smooth !

Thanks Dave !

Chris

  • Member since
    September 2004
  • From: Vernon, BC, Canada
Posted by razordws on Sunday, April 19, 2009 12:17 AM

Chris, nice looking progress on the F4.  Sure is a nice looking kit!  Thumbs Up [tup]

Andrew, that is one sweet looking spitfire and you said you built it in three days!!! Shock [:O]  Incredible

Dave

JOIN OUR COMMUNITY!

Our community is FREE to join. To participate you must either login or register for an account.

SEARCH FORUMS
FREE NEWSLETTER
By signing up you may also receive reader surveys and occasional special offers. We do not sell, rent or trade our email lists. View our Privacy Policy.