SEARCH FINESCALE.COM

Enter keywords or a search phrase below:

Bf-109: Reich Defender GB The End

186214 views
1406 replies
1 rating 2 rating 3 rating 4 rating 5 rating
  • Member since
    December 2005
  • From: back seat of your car with duct tape streched out
Posted by soulcrusher on Saturday, January 31, 2009 11:37 AM

Nice job of adding some detail in a very visible area there Frank. Thumbs Up [tup]

                                                                                       SoulcrusherPirate [oX)]


  • Member since
    December 2004
  • From: Yokosuka, Japan
Posted by luftwaffle on Saturday, January 31, 2009 2:47 PM

Hey guys, been pretty busy in Japan so haven't stopped in to check on your projects lately, great work one and all.  You guys are really making it hard to keep my New Year's resolution to scale back on the 109's this year!

Frank- Great video, thanks for the link! 


aka Mike, The Mikester My Website

"He has all the virtues I dislike and none of the vices I admire."   -Winston Churchill

  • Member since
    December 2003
  • From: Indiana
Posted by hkshooter on Saturday, January 31, 2009 9:46 PM

Hey all. I just received another 109 kit, the 1/48 Fujimi G-6. I heard that just about any of the late 109's can be built from the kit but my knowledge here is very limited. I have the decal sheet from Eagle strike "In defense of the Reich" part 5, sheet 48252. The G-14 on the sheet is the one I finished earlier in the GB but would like to use the sheet again for another plane.

The only versions remaining on the sheet is a G-10 Hungarian AF and a G-2 from the Romainian AF. The group build rules say only planes of G-6 or later are legal. Would the G-10 still count? If so, it uses the Haube canopy and the kit doesn't have one. Bummer.

If that won't work will any of the kit versions count? The kit is the "Mullepux" version, # 48002. One set of markings is for Schilling, 9/jg54. 1944. To a 109 newbie like me the amount of info out there is overwhelming. Some pointers would be a great help. Thanks!

  • Member since
    September 2003
  • From: South Central Wisconsin
Posted by Daywalker on Saturday, January 31, 2009 10:14 PM

Thanks guys!  Hoping to clean up a little glue residue tonight so I can spray the rear deck gray tomorrow. 

Mike- Hmmm... we're just trying to lure you back for another build! Evil [}:)] LOL

Troy- Another 109 kit?  Outstanding!  As for your question, my knowledge of 109 stuff is still pretty limited, but I will try to shed some light on those markings for you.  The markings for Schilling 9/jg54 are perfect if you are interested in those.  The blue band is a RDV band on that one.  I have never built that kit, so I don't know about which versions could be built from it.  The G-6/G-14 and G-10 are very different animals, though the G-14/AS is VERY similar to a G-10.  All G-10's had the Erla Haube canopies, so it doesn't sound like a G-10 could be built from the kit.  Are you interested in Schilling's G-6?  If so, that would be a perfect candidate.Thumbs Up [tup]

I hope that helped and didn't make things more confusing!

Frank 


  • Member since
    December 2003
  • From: Indiana
Posted by hkshooter on Saturday, January 31, 2009 10:20 PM
Weird thing Frank. This kits markings for Schilling's plane have a yellow band. I was thinking it was supposed to be green and white. I have much to learn.
  • Member since
    September 2003
  • From: South Central Wisconsin
Posted by Daywalker on Saturday, January 31, 2009 10:28 PM
Really?  A yellow band?  I wonder if we are talking about the same plane.  Do you have a photo of the box art, instructions, or decal sheet? 

Frank 


  • Member since
    December 2005
  • From: back seat of your car with duct tape streched out
Posted by soulcrusher on Saturday, January 31, 2009 10:54 PM

I have that one in the stash. You can build a G-5 G-6 or a G-14 with all of the parts supllied in the kit. except the other canopy. The G 10 is not an option as it the flat hood with no gun breech bulges. I started the K-4 version which is the same kit with some different sprues. To be accurate you have to check all of the access panel to see if they were on the specific model you want to do as because they are all there. I botched my kit because I tried to attach the separate cowl pieces after joining the fuselage halves. The do not fit very good and I would recomend fitting them to the fuselage halves before glueing them together. This should give you the chance to fit the cowl much better. also make sure you attach the manifold shields when fitting the cowl panel as the cowl panels rest on top of them an you will not be able to fit them in afterwards. The other reason I scrapped it and the parts when into the spares box. Other than that it is not a bad kit, The radiator flaps are separate and positionable. So are the flaps. Good luck.

                                                                                     SoulcrusherPirate [oX)]


  • Member since
    December 2004
  • From: Yokosuka, Japan
Posted by luftwaffle on Sunday, February 1, 2009 3:23 AM

Friends don't let friends follow marking instructions included in the kit (except for Eduard)!  Or pay attention to crappy color profiles from that Russian site!

JG 54 - Blue RVD Band

JG 77- Green and White RVD Band 


aka Mike, The Mikester My Website

"He has all the virtues I dislike and none of the vices I admire."   -Winston Churchill

  • Member since
    September 2003
  • From: South Central Wisconsin
Posted by Daywalker on Sunday, February 1, 2009 8:16 AM
Good save fellas!  Thank you. Smile [:)]

Frank 


  • Member since
    November 2003
  • From: Nashville, TN area
Posted by bobbaily on Sunday, February 1, 2009 2:26 PM

Hey all.  A lot of great work being displayed here.  I've been following from a distance, awaiting the time to dive in.  Well, it's time.  I just boxed up an old Dragon Sherman (DOA Dead [xx(]) that was giving me fits and I need a 'quick win' to get back in the groove.  Therefore, what started out to be a somewhat detailed build will be OOB.  I had purchased an Eduard PE fret for this kit, but I can always purchase another kit to use it on later...at less than $10.00 from my LHS it makes not using the PE easier to justify.

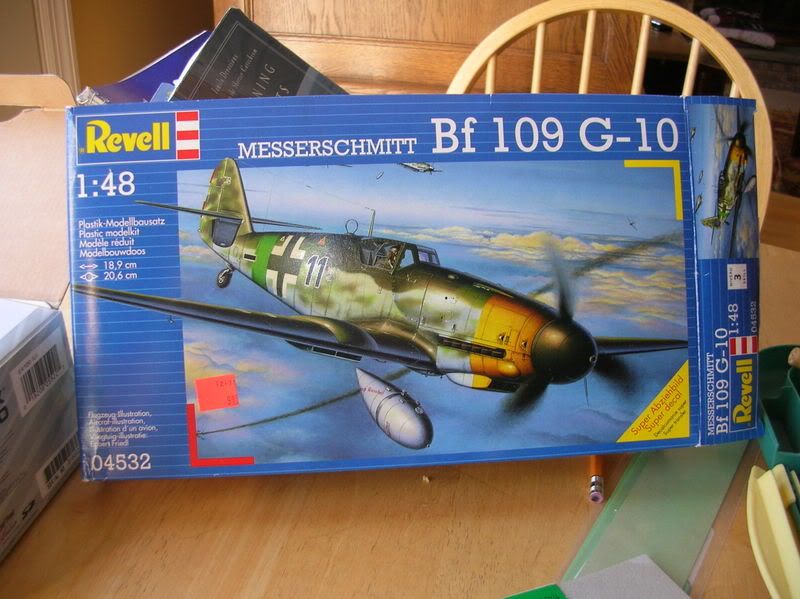
The kit is the Revell 109 G-10.  Older kit, but good exterior detail.  Interior could be better, but with a closed canopy, no one will ever know.  The seat has a nasty sink hole that needs fixed, but that's about all I'm going to do on the interior.  With the skills & time, this one could be made much nicer.

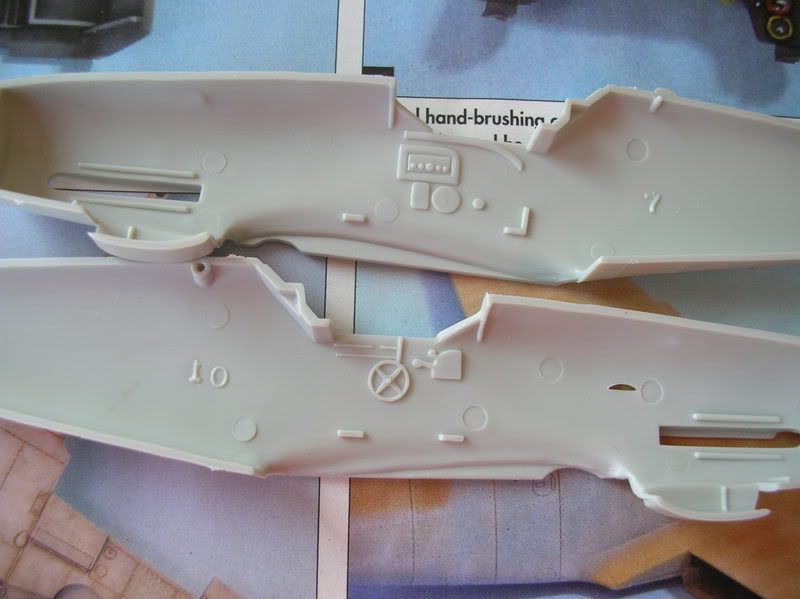
Hopefully, I'll get to spray the interior bits tomorrow pm.

The kit comes with decals for two schemes, the one shown and a solid RLM 76 w/red band low vis plane from JG1.  That's the one I'm going to attempt.

Fire in the hole!

Cheers

Bob


  • Member since
    September 2003
  • From: South Central Wisconsin
Posted by Daywalker on Sunday, February 1, 2009 2:32 PM
Glad to see you starting your 109 Bob!  Have you decided which scheme to go with?

Frank 


  • Member since
    November 2003
  • From: Nashville, TN area
Posted by bobbaily on Sunday, February 1, 2009 7:42 PM
Thanks Frank.  I think I'm going with the straight RLM 76 lo-vis scheme.  Something a bit different....

Bob


  • Member since
    December 2005
  • From: back seat of your car with duct tape streched out
Posted by soulcrusher on Sunday, February 1, 2009 9:57 PM

Ok Frank this one is for you. I have been playing with this one in between working on the      Re 2000. It is the 1/48 Pegasus Me 109 G-6 kit I bought with my Xmas gift certificate. I wanted to see for myself just what these kits were all about. The kit is not bad for the price. It comes with one choice of markings. Hartman white 1 with the tulip nose. The kit has only one bad area. The joint where the wing and fuselage join is in a bad spot high up on the fuselage and the fit is horrible. I just decided to leave it alone trying to keep it a simple build. You will have to raid the spares box for both antenna's and the control surfaec weights. That and the landing gear that is heavy duty with the doors and struts molded as one piece. You could drop this model from about a foot of the bench and the gear would not break. Now I have run into one problem. I can not find an actual photo of his G-6 with the white 1 markings. Several differnet color profiles show the camo on the fuselage completly different. Does anyone have a pic of the real plane. I would like to paint it up accuratly if I can Help!

                                                                            SoulcrusherPirate [oX)]


  • Member since
    July 2003
  • From: waynesboro va, via Ireland
Posted by sidure on Monday, February 2, 2009 12:16 AM

SC, very nice paint work on your 109. Comming along very nicely. Will it have motteling on the sides. Are you going to paint the tulips or will it be a decal

Steve

  • Member since
    September 2003
  • From: South Central Wisconsin
Posted by Daywalker on Monday, February 2, 2009 7:22 AM

SC-

Excellent work, thank you!  The paint looks very good, are your AB troubles are sorted out?  I have a sheet of decals from Eagle Cals which has four black and white photos of "White 1".  It is difficult to see the camo on the aircraft, but I would be happy to scan the photos and sned them to you.  My scanner is at work, so I shall take it with me today.  Pm me your email address and I shall get them scanned and send to you right away. Thumbs Up [tup]

Frank 


  • Member since
    February 2003
  • From: Melbourne, Australia
Posted by darson on Monday, February 2, 2009 7:23 AM
Frank great looking progress shots on your 109 I really like the scratch building efforts, your cockpit certainly leaves my pitiful effort for dead Thumbs Up [tup].

Bob I'm doing the same kit as you and only discovered that sink hole after I'd painted the thing Dead [xx(], I think you will be pleasantly surprised by the fit on that kit it's really pretty good.

SC looking good on the camo there and from a couple of pages ago congrats on your other 109 it looks excellent, I really like the unusual cam.

Cheers

  • Member since
    November 2003
  • From: Nashville, TN area
Posted by bobbaily on Monday, February 2, 2009 11:31 AM

SC-the camo looks great.  Looking forward to more progress photos.

Frank-very nice detail work.

Darson-I'm impressed with the overall fit of this kit-I threw one together a few years ago as a paint test mule. I'm a little concerned with the kit decals so I'll have to test an unused one soon.  Right now I'm fighting the urge to install the interior PE. Logic tells me that with the canopy closed, none of it will be visible, but AMS is starting to set in..... 

Bob


  • Member since
    December 2005
  • From: back seat of your car with duct tape streched out
Posted by soulcrusher on Monday, February 2, 2009 11:48 AM

Frank any pics at all would be helpfull as I can not find a single one of White 1. I will PM you with the email addy. As for the airbrush I went old school and painted all of it so far with the old Badger 350. I am going to break out the new Badger 200NH to add the mottling as soon as I can get some decent pics of what the mottleing looked like on this plane.

Steve the kit comes with the tulip decals and they do not look that hard to apply. I think carefull placement is the key so the tips do not end up in the wrong spots like over the manifold shield. like I said earlier going to add the mottling when I find a good pic.

Darren thanks for the kind works. Much appreciated.

Bob thank you also for the positive input.

Oh and by the way HAPPY BIRTHDAY TO ME!  Happy B-Day [bday]If you must know number 43. Oh the humanity!

                                                                                                  Soulcrusher Pirate [oX)]


  • Member since
    November 2003
  • From: Nashville, TN area
Posted by bobbaily on Monday, February 2, 2009 1:01 PM

Happy Birthday SC....ah...to be 43 again....

Enjoy the day!

Bob


  • Member since
    July 2003
  • From: waynesboro va, via Ireland
Posted by sidure on Monday, February 2, 2009 1:14 PM

Happy Birthday SC Happy B-Day [bday] Hope you have a great modelling day. I have one right around the corner myself

Steve

  • Member since
    September 2003
  • From: South Central Wisconsin
Posted by Daywalker on Monday, February 2, 2009 8:06 PM

Happy B-Day [bday] SC!  Hope you get lots of plastic goodies. Big Smile [:D]

Got your PM, email inbound. Wink [;)]

Frank 


  • Member since
    November 2003
  • From: Naples, FL
Posted by tempestjohnny on Tuesday, February 3, 2009 7:56 AM
Happy B-Day [bday]SC and nice work on the g-6.


  • Member since
    December 2005
  • From: back seat of your car with duct tape streched out
Posted by soulcrusher on Tuesday, February 3, 2009 11:44 AM

Thanks everyone for the birthday whishes!

Frank received the pics. The color profile for the decals you sent matches the color profile exactly in the Pegasus kit. From the one good photo you can see there is definetly some pretty heavy mottling on the fuselage that also gives me a good idea of how I want to do the fuselage camo. Thanks Frank it was exactly what I needed!

                                                                                  SoulcrusherPirate [oX)]


  • Member since
    November 2003
  • From: Nashville, TN area
Posted by bobbaily on Tuesday, February 3, 2009 7:36 PM
Against my better judgement, I shaved the necessary detail off the walls of the 109 so I can progress with the PE that I wasn't going to use.  Needless to say, I'm past the point of no return so hopefully I will have pictures to post soon.

Bob


  • Member since
    September 2003
  • From: South Central Wisconsin
Posted by Daywalker on Tuesday, February 3, 2009 7:59 PM

SC- Glad I could help!  Looking forward to seeing what you and your new AB can do. Big Smile [:D]

Bob- Ooohhh... sounds intriguing!  Interesting to see what that kit looks like with the PE interior. Thumbs Up [tup]

Frank 


  • Member since
    July 2004
  • From: Sonora Desert
Posted by stikpusher on Tuesday, February 3, 2009 8:19 PM

A bit of progress on my 109... got the fuselage halves together, sanded, and lost panel lines rescribed. I also have the wings glued together. They are only placed together in this photo. The other pics I took of the cockpit came out very blurry so I will retake at a later time.


F is for FIRE, That burns down the whole town!

U is for URANIUM... BOMBS!

N is for NO SURVIVORS...

       - Plankton

LSM


  • Member since
    September 2003
  • From: South Central Wisconsin
Posted by Daywalker on Tuesday, February 3, 2009 9:01 PM
Looking good Carlos! Thumbs Up [tup]  You're almost ready for paint by the looks of it.

Frank 


  • Member since
    December 2005
  • From: back seat of your car with duct tape streched out
Posted by soulcrusher on Tuesday, February 3, 2009 9:15 PM

Looks like a good start Carlos. Post some cockpit photos when you can.

                                                                            SoulcrusherPirate [oX)]


  • Member since
    July 2003
  • From: waynesboro va, via Ireland
Posted by sidure on Tuesday, February 3, 2009 11:42 PM

Good work Carlos and this one is well on the way. Looking forward to seeing some paint on it.

Steve

  • Member since
    February 2007
  • From: Bournemouth UK
Posted by Luftwoller on Wednesday, February 4, 2009 12:30 PM

Hia Kids. Thought id poke my nose in and have a squizz at the work thats being done. Geez, this is a proper GB. So much excellent stuff, im in awe of all of yas. Great refs as well. The Hyperscale article was great Frank and suitably saved. Ive got to get myself that DVD as well. Theres nothing in the world that gets the hairs on my back standing up...errrr.....i mean the back of my neck standing up like the sound of a Daimler V12 on song, beating up the runway.

...Guy

P.s Does Frank give you all homework?

..'Your an embarrassment to the human genus, makes me ashamed to call myself Homo'.
JOIN OUR COMMUNITY!

Our community is FREE to join. To participate you must either login or register for an account.

SEARCH FORUMS
FREE NEWSLETTER
By signing up you may also receive reader surveys and occasional special offers. We do not sell, rent or trade our email lists. View our Privacy Policy.