SEARCH FINESCALE.COM

Enter keywords or a search phrase below:

Dive Bomber Group Build (May 1 - Dec 31 2009)

38952 views
160 replies
1 rating 2 rating 3 rating 4 rating 5 rating
  • Member since
    December 2002
  • From: Bury St Edmunds, Suffolk, England
Posted by Bish on Saturday, April 11, 2009 3:39 AM
Being a big fan of the Ju-87 and 88 i am deffinatly up for this one. Pencil me in but i won't commit until i have caught up with my other GB's and i know i will have time to build it without deploying abroad. It will either be an 87 or 88 in 1/72nd scale.

I am a Norfolk man and i glory in being so


On the bench: Airfix 1/72nd Harrier GR.3/Fujimi 1/72nd Ju 87D-3

  • Member since
    May 2008
  • From: Wherever the hunt takes me
Posted by Boba Fett on Saturday, April 11, 2009 10:58 AM
I'm waaaaaaay overcommitted with GB's, but since this is ending in December, I might jump in. I have a devestator in the stash I believe. It's an old kit, but it might turn out nice. Put me down as tenative.

  • Member since
    January 2007
  • From: Cherry valley il.
Posted by invertman on Saturday, April 11, 2009 1:16 PM

hey guys,

if this gb takes off,im in.

put me down for a hasegawa 1/48 val from the battle of midway.

i've been wanting to build this one for a while now.


thanks.

jason

  if you want permission for a test flight.... the answer is "no".

  • Member since
    June 2008
Posted by lewbud on Saturday, April 11, 2009 2:31 PM

Steven,

Put me down for a Helldiver, Academy 1/72.

Buddy- Those who say there are no stupid questions have never worked in customer service.

  • Member since
    July 2005
  • From: Dayton, Ohio
Posted by warhorse3 on Saturday, April 11, 2009 6:23 PM
Put me in for a 1/48 SBD-3 off U.S.S. Yorktown CV-5 at Midway.                 Regards, Bill
Regards, Bill
  • Member since
    July 2005
  • From: Dayton, Ohio
Posted by warhorse3 on Sunday, April 12, 2009 1:48 PM

I'm doing the Accurate Miniatures 1/48 SBD-3. I plan on it being displayed in "Lefty" Holmburg's markings and in his dive on the Soryu. Started with cockpit clean-up and base coat of green chromate this morning, hopefully I'll have some time tonight to give it a dark wash to pop out the structural details. I plan on having the interior done this week in order to build the crew figures in the next couple of weeks. At this time I have limited internet access and due to job scheduling I won't be able to update you for at least 6 days.                 Happy Modeling!        Regards, Bill

Regards, Bill
  • Member since
    January 2015
  • From: Katy, TX
Posted by Aggieman on Sunday, April 12, 2009 2:00 PM
Well, actually we should probably wait to start until May 1 but if no one has any objections, then we can count your build.
  • Member since
    September 2008
  • From: World Champions! Not anymore..
Posted by swingr1121 on Sunday, April 12, 2009 2:17 PM

Steven, a dive bomber gb sounds like an awesome idea.  The dates of the build are good for me as all of the wedding stuff will come to a close on the 2nd of May.  Seems like after that time things will be good for me.  If I do indeed end up in the build, I'll probably do either an A-24 Banshee (Dauntless) or an A-36 (Mustang Dive Bomber) just to be different.  I'll defenitely let you know. 

 As far as a badge for the build, I just threw this together.  It seems to catch the essence of the build:


If you like it, great!  If not, that's ok too. Happy Modelling!


Mike

  • Member since
    February 2003
  • From: Saratoga Springs, NY
Posted by Jeeves on Sunday, April 12, 2009 5:00 PM
Sweet!  I am game and love the choice of the SBD as a badge.  I will build something else just to be different though-- sign me up for the 1/48 AM Vindicator in Midway markings...
Mike
  • Member since
    March 2008
  • From: Indy
Posted by raider83 on Sunday, April 12, 2009 6:43 PM
I haven't modeled for a while, but if I ever get around to it Aggieman, I'll enter with the Dauntless you sent me for the Secret Santa Group Build. Whistling [:-^]. I've just been really busy, but I need to get one done for 4-H and the Dauntless looks much less painful than my Kingfisher...
On the bench: Monogram 1/48 Kingfisher Cardinal Ritter- Class 1A 2008 Indiana State Football Champs
  • Member since
    December 2008
  • From: Goffstown, NH
Posted by New Hampshire on Tuesday, April 21, 2009 9:02 PM

I am heading to the LHS this weekend for their Tax Day special sale.  I'll see what I can come up with.  So put me down as a probable, but not sure what yet (most likely in 1/48th whatever it is).  My other GB will come first, but I will have no problem making the deadline for this one.

Brian

  • Member since
    July 2005
  • From: Dayton, Ohio
Posted by warhorse3 on Wednesday, April 22, 2009 1:47 PM

Oops! Maybe I should learn to read. Anyway, that's as far as I've gotten with it due to the past week and a half being completely nuts between work and having to get a new car. So I'll just hold off until the first to resume.          Regards, Bill


Regards, Bill
  • Member since
    January 2015
  • From: Katy, TX
Posted by Aggieman on Wednesday, April 22, 2009 6:32 PM
Bill, no worries.  Looking forward to seeing your progress.
  • Member since
    July 2005
  • From: Dayton, Ohio
Posted by warhorse3 on Friday, April 24, 2009 3:56 PM
Thanks for allowing my silly oversight to slide. Unforunately, with work needing  me on an unusual schedule for this coming week, I won't have much bench time or be able to get back online until saturday the second. I'll be able to update you then.       Regards, Bill
Regards, Bill
  • Member since
    December 2008
  • From: Goffstown, NH
Posted by New Hampshire on Saturday, April 25, 2009 9:36 PM

And the winner is!....... 1/48 Hasegawa's Aichi D3a1 Type 91 Val.  I got a killer deal.  I thought the Tax Special sale was on one item...nope, ALL white ticket items!  The price tag was $42.10, I paid $29.47!  My mistake was not taking better advantage of the sale. Big Smile [:D]

Anyways, The Val will be my entry, and most likely I will attempt the Eduard Photo Etch set for this kit (looks fairly simple, so I should be able to give it a good shot even though I am new to PE).

Brian

  • Member since
    January 2015
  • From: Katy, TX
Posted by Aggieman on Wednesday, April 29, 2009 4:44 PM

Nice score Brian!

Less than 2 days until we can start.

  • Member since
    February 2003
  • From: Saratoga Springs, NY
Posted by Jeeves on Saturday, May 2, 2009 7:50 AM

Guess I'll start things off!

I have the fuselage closed up-- with no major fit issues-- and the wings are attached. I have some small amount of filling in to do-- but this one is fitting like a Tamiya kit!

From topside--

The office--

The office in the back--

And-- the powerplant--

The gear assembly looks to be intimidating-- but the rest is good. I have finally got around to getting all the pieces to finish the venting for my fume hood-- so once it is done, I'll paint!!!

Mike
  • Member since
    December 2008
  • From: Goffstown, NH
Posted by New Hampshire on Saturday, May 2, 2009 11:04 AM

I got in the Photo Etch kit for the Val and just picked up the missing paint colors I needed.  I was going to wait until the first build of my other GB was done, but now I think I will do both at the same time (or close to it) once I finish my T-34 I am building which is just getting ready to go for paint.  So I would say, perhaps, my build for this GB will start withn a week or two.

Brian

  • Member since
    January 2015
  • From: Katy, TX
Posted by Aggieman on Saturday, May 2, 2009 4:27 PM

Nice work Mike!

I have also started my Stuka.

I made a decision to build this one strictly OOB.  I've put together the cockpit and buttoned up the fuselage.

Left side wall:

Right side wall:

Instrument panel:

Floorboard:

Test fitting the floorboard into the fuselage:

Buttoned up:

Engine and what makes this a dive bomber, the trapeeze bomb rack that you can see dangling:

  • Member since
    July 2005
  • From: Dayton, Ohio
Posted by warhorse3 on Saturday, May 2, 2009 7:44 PM
With only around 2 hours total benchtime, I did manage to get the fusalage sides, rear seat ring, and the pilot's instrument panel done and am now working on the crew figures. They need to be finished and installed when I join the sides together. I learned that lesson the hard way when I did my F6F-3 about 10 years ago. I'm going to see if I can get a friend to take some pics as this progresses,hopefully next week.        Regards,  Bill                                      By the way, I like what you guys have done so farThumbs Up [tup].
Regards, Bill
  • Member since
    November 2007
  • From: Potomac Falls, VA
Posted by darth_trader on Monday, May 4, 2009 11:52 AM

AggieMan,

I had so much fun in your USAAF/USAAC GB, that I'd like to join you in this one too.

Kindly, put me down for a 1/48 Accurate Miniatures SBD3 Dauntless.

I'm trying to finish my P-47N for the USAAF/USAAC GB before the 31st.  All that remains is the NMF.  While I'm waiting for paint to dry, I'll start working on the Dauntless 'pit.

Thanks & looking forward to building with everyone!

  • Member since
    March 2006
Posted by TD4438 on Monday, May 4, 2009 4:06 PM
I'd like to get in on this.I love USN carrier planes.Can you guys recommend a good kit for an armor/sci-fi guy?I really dig birds such as the Helldiver and Devastator.

  • Member since
    January 2015
  • From: Katy, TX
Posted by Aggieman on Monday, May 4, 2009 5:06 PM

Welcome Darth and TD!

As for kit recommendations, where do I start?

I once built a Hasegawa SBD-3 Dauntless that I thought was a great kit, but I've also heard the same about the Accurate Miniatures kits that are currently available.  Accurate Miniatures also does an SB3U Vindicator, and has done the Helldiver (which was a repop of the Pro-Modeler kit that I would highly recommend, having built that one a few years ago).  Monogram is the only 1/48 Devastator that I am aware of, and I've built that one probably 3 times in my life.  You'd have to find it on ebay or some other such place as I don't believe it's currently available.

For non-American subjects, Hasegawa does a Japanese Aichi Val and a Ju87 Stuka, but a Dragon or Pro-Modeler Ju88 would also qualify for this GB.

  • Member since
    June 2008
Posted by lewbud on Monday, May 4, 2009 5:22 PM

TD,

Welcome aboard.  What scale are you looking to build in?  I build, for the most part, in the divine scale of 1/72.  I have the Academy SB2C-4 Helldiver and it's a gem of a kit.  Hasegawa makes a Dauntless, you usually can't go wrong with them.  Heller makes the SBC Helldiver biplane, think Airfix quality.  Valom makes the Northrop BT-1.  Have no experience with them, but am thinking about picking one up at Squadron's open house at the end of the month.  If you decide to venture to the dark side and build in 1/48, I can't help you much.  All I can say is that the Monogram SBD in 1/48 is a hoot to build.  Not up to today's standards by most, but you can't take off, rectract the gear, deploy the dive flaps and dive bomb a target with a Hasegawa or Accurate Miniatures kit.  Plus it comes with figures. 

Buddy- Those who say there are no stupid questions have never worked in customer service.

  • Member since
    November 2007
  • From: Potomac Falls, VA
Posted by darth_trader on Monday, May 4, 2009 11:13 PM

I enjoy messing around with graphics as much as I enjoy building.  Here's my shot at the dive bomber GB badge:


  • Member since
    May 2009
  • From: Hobart, Tasmania
Posted by Konigwolf13 on Tuesday, May 5, 2009 8:28 AM

I have a go to if I may, not sure yet depends on what I can get hold of what I'll do but my thoughts are

Yokosuka D4Y Suisei (Judy)

Aichi E16A Zuiun (Paul)

Henschel Hs 123

Henschel Hs 132

depends on what I can get really.


KW

  • Member since
    March 2006
Posted by TD4438 on Tuesday, May 5, 2009 1:49 PM
I love WWII Warbirds,but hate doing the canopies.I'd like to go with a 1/48 kit.

  • Member since
    January 2015
  • From: Katy, TX
Posted by Aggieman on Tuesday, May 5, 2009 9:27 PM

Whatever kit you decide on, you should check to see if Eduard makes a canopy mask for it.  These dive bombers tended to be multi-seat airframes with big canopies and lots of panes.  In fact, come to think of it, I need a mask for my Stuka ...

I also have the Accurate Miniatures Vindicator in my stash, as well as the AM Dauntless.  I am pretty sure both kits come with canopy mask sets.  If that makes your decision any easier, and both kits are 1/48.

  • Member since
    March 2006
Posted by TD4438 on Wednesday, May 6, 2009 12:56 AM
I figured a 1/48 canopy would be easier to work with than 1/72.

  • Member since
    May 2009
  • From: Hobart, Tasmania
Posted by Konigwolf13 on Friday, May 8, 2009 4:40 AM

Well picked up an AMtech 1/48 Hs-123A today, updated version of an old ESCI kit with resin cockpit included, so thats what I'll be doing. Since she served well on the eastern front I thought I might do her with unspatted landing gear and if I get find a decent reference shot (or shots) done up in a winter cammo. (any help would be great)

 might make a little hs logo to Smile [:)]

KW


Am a little scared doing the canopy painting, could be too much detailBig Smile [:D]

  • Member since
    January 2015
  • From: Katy, TX
Posted by Aggieman on Monday, May 11, 2009 7:03 PM
I got only a couple of hours at the bench over the weekend - building a new wooden playset in the back yard for my daughter takes priority.  I basically managed to finish construction of all major components and fill the seams, of which there were only a few.  Tonight I started sanding but ahead of me lies the most daunting and least favorite part of this kind of build - masking the canopy.  I could not find a canopy mask intended for this particular version of the Stuka, so I've resigned myself to having to mask all those tiny little "glass" panels.
  • Member since
    March 2006
Posted by TD4438 on Tuesday, May 12, 2009 6:16 AM

I'll get around to finding a carrier bird as well,but put me down for an Airfix 1/72 Junkers JU-87B/R.I knew I had something in the stash that would suffice!I'm not looking forward to that canopy however!

  • Member since
    May 2009
  • From: Hobart, Tasmania
Posted by Konigwolf13 on Thursday, May 14, 2009 8:06 PM

Well since GB's are supposed to be about sharing advice along the way, I'll post this here before I try else where. THis is my first time really working with resins, I have built resin figures but they havnt required much clean up, whats the best way to remove large areas from around the parts?

The smaller one I figure just carefully trim away as one might with plastic (but a bit more careful). I tried using a grinder attachment from my engaving tool to remove a large block from the bottom of the seat, while it was ok it was slow going. I am on the right track here or is there better ways to remove large blocks or similar large areas?


KW

  • Member since
    March 2006
Posted by TD4438 on Thursday, May 14, 2009 9:43 PM
I got started on that Stuka this morning.I must admit I feel like a fish out of water.

  • Member since
    June 2008
Posted by lewbud on Friday, May 15, 2009 10:56 AM
 Konigwolf13 wrote:

Well since GB's are supposed to be about sharing advice along the way, I'll post this here before I try else where. THis is my first time really working with resins, I have built resin figures but they havnt required much clean up, whats the best way to remove large areas from around the parts?

The smaller one I figure just carefully trim away as one might with plastic (but a bit more careful). I tried using a grinder attachment from my engaving tool to remove a large block from the bottom of the seat, while it was ok it was slow going. I am on the right track here or is there better ways to remove large blocks or similar large areas?


KW

Two words-Razor Saw.  Makes quick work of the pour stubs, allows you cut fairly close so clean up is a lot easier.  Plus you don't have to breathe in all that resin dust (nasty stuff I'm told) as you grind it off.  These can be found at just about any hobby shop or craft store.  If that doesn't work or the shape doesn't allow it, you can use the back of a x-acto blade and score the area like you were cutting thick plastic, then snap off the pour stub.

Buddy- Those who say there are no stupid questions have never worked in customer service.

  • Member since
    June 2008
Posted by lewbud on Friday, May 15, 2009 10:59 AM

 TD4438 wrote:
I got started on that Stuka this morning.I must admit I feel like a fish out of water.

You can do it TD.  Just like building a TIE Fighter, only different.

Buddy- Those who say there are no stupid questions have never worked in customer service.

  • Member since
    December 2002
  • From: Bury St Edmunds, Suffolk, England
Posted by Bish on Friday, May 15, 2009 5:36 PM
Aggieman I can confirm my kit, it will be the Italeri Ju-88A-4. Not sure when i will be starting, but will get some pics up once i do.

I am a Norfolk man and i glory in being so


On the bench: Airfix 1/72nd Harrier GR.3/Fujimi 1/72nd Ju 87D-3

  • Member since
    March 2006
Posted by TD4438 on Friday, May 15, 2009 6:49 PM
 lewbud wrote:

 TD4438 wrote:
I got started on that Stuka this morning.I must admit I feel like a fish out of water.

You can do it TD.  Just like building a TIE Fighter, only different.

The biggest PITA is that I'm unfamiliar with accurate a/c colors.I also have to do some digging to find out what an Italian Stuka pilot's flightsuit looked like.Did they use German gear as well?

Anybody involved in the SW GB knows by now I can crank out TIE fighters kinda quick.I've also cranked out a couple TIE Pilot costumes.Here's one I made for the wife.

  • Member since
    January 2015
  • From: Katy, TX
Posted by Aggieman on Friday, May 15, 2009 8:42 PM

^

I would guess that an Italian pilot probably did not use German gear but I stand to be corrected on that matter.

I've made what appears to be significant progress on my own Stuka, putting down the entire paint scheme this afternoon.  But there is still a lot of work ahead of me in additional detail painting (tires, wheels, guns, etc), weathering what at this point appears as a pristine Nazi splinter camouflage job, and dealing with the canopy paint job.

I didn't photograph the painted canopy pieces as right now they are nothing more than black-green pieces.  I masked with a liquid masking solution I have had for a while now, last time I used it was on another Junkers aircraft, the big Ju52 I built about 4 years ago.  I don't know what to expect out of this effort but I'm hoping that this stuff still works.  If not I guess I'll be purchasing a canopy set.

  • Member since
    March 2006
Posted by TD4438 on Saturday, May 16, 2009 8:52 AM
I'm shooting for a nice paint scheme with a bit of weathering.With no LHS available,I'm kinda forced to use what colors I have on hand.This Stuka will not be super accurate,but I hope it comes out nice.I'll be shooting the base coat as soon as I'm done goofing around here.Thumbs Up [tup]

  • Member since
    March 2006
Posted by TD4438 on Saturday, May 16, 2009 10:21 AM

Damn!Haven't goofed like this in years!

  • Member since
    January 2015
  • From: Katy, TX
Posted by Aggieman on Saturday, May 16, 2009 1:21 PM

^

Yack!  Hate it when something like that happens!  I ran into several areas of paint lifting while completing this splinter scheme, which really annoyed me at the time.

Today - after the yard work was done - I managed to get the national insignia decals on, leaving the stencils and other such decals for later, and scraped away the masking from the canopy pieces.  I was pleasantly surprised that the masking still works, and I feel that I did a decent job with the framing.  Although the picture does show an area that needs a bit more attention.

The glistening on the decals is the decal setting solution, so hopefully some of those imperfections will settle in.  If not, more solution will be in order.  And from there it's on to weathering.

  • Member since
    July 2005
  • From: Dayton, Ohio
Posted by warhorse3 on Saturday, May 16, 2009 2:57 PM
Finally back after having to have a very dangerous Trojan removed from the computer. The pics I had wanted to post were lost in this episode. Adding insult to that injury, somehow the infamous carpet monster ran off with part of one of the crew figures so I'm having to make a new one. Until the crew is installed, I won't be closing the fuselage. While I'm waiting for the resin to cure, I'll be working on the engine and prop. I'm going to take clear sprue cut to the same length as the blades and heat it, then flatten it into a rough blade shape. Once formed, I'll drybrush them to just hint at the colors for a propblur effect.                    Welcome to all who have joined in. Looks like you're really flying along on your Stuka, Aggieman.
Regards, Bill
  • Member since
    December 2002
  • From: Bury St Edmunds, Suffolk, England
Posted by Bish on Sunday, May 17, 2009 11:11 AM
Made a start of the 88 last night, i am fitting an Aires resin cockpit, should have it painted and weathered by Tues and then i can get the fuselage halves together. I will get some pics taken as i go on during the week and try to post them next weekend.

I am a Norfolk man and i glory in being so


On the bench: Airfix 1/72nd Harrier GR.3/Fujimi 1/72nd Ju 87D-3

  • Member since
    July 2004
  • From: Sonora Desert
Posted by stikpusher on Sunday, May 17, 2009 11:25 AM
Aggie, I have a long term project of an old Monogram 1/48 SBD I have been dressing up over the years. Much of the major assembly is done but with all the mods (modified cockpit, drilled out dive flaps, replaced engine, propellor, and numerous other mods) I have made (or planned), it is still quite some time from completion. You did not specify if it has to be a new build to join here in  your ground rules. Any chance I can jump on in with mine.


F is for FIRE, That burns down the whole town!

U is for URANIUM... BOMBS!

N is for NO SURVIVORS...

       - Plankton

LSM


  • Member since
    January 2015
  • From: Katy, TX
Posted by Aggieman on Sunday, May 17, 2009 4:47 PM
Sure, welcome aboard!
  • Member since
    July 2004
  • From: Sonora Desert
Posted by stikpusher on Sunday, May 17, 2009 6:37 PM
Cool! I will add my old SBD to your GB.


F is for FIRE, That burns down the whole town!

U is for URANIUM... BOMBS!

N is for NO SURVIVORS...

       - Plankton

LSM


  • Member since
    January 2007
  • From: Cherry valley il.
Posted by invertman on Sunday, May 17, 2009 7:01 PM

what up guys,

i'll be starting my val in the near future.

i'm waiting for a p.e. kit and some masks then i'll be ready to go.

great looking builds going on so far.


jason.

  if you want permission for a test flight.... the answer is "no".

  • Member since
    March 2006
Posted by TD4438 on Monday, May 18, 2009 6:21 AM

Current progress.

  • Member since
    March 2006
Posted by TD4438 on Monday, May 18, 2009 12:15 PM

Couple shots of the crew.I'm very happy with these results so far.I'd like to add a spot of color if possible.I'd appreciate any advice.

  • Member since
    March 2006
Posted by TD4438 on Tuesday, May 19, 2009 5:31 PM

Current progress.

  • Member since
    January 2015
  • From: Katy, TX
Posted by Aggieman on Tuesday, May 19, 2009 9:29 PM

Nice work TD.  Looking forward to seeing more (and how your Stuka stacks up against mine, not that anyone is scoring points here...)

On that note I got a little time at the bench tonight and was able to do an initial layer of weathering.  Weathering is so so so easy to over-do but most of the time I feel that I get the look I aim at.  Some of my work has been over-done though, most notably according to some on here my Ju 88 that I completed a couple of years ago, so I'm intentionally attempting to tone it down with the Stuka.  So far I think I have accomplished this goal (pictures will be forthcoming) but I really don't like to do my builds as if they are right off the factory floor - given that these were war machines operating out of quite often muddy, dirty fields where appearance was not always the primary factor for ground crews.

  • Member since
    June 2008
Posted by lewbud on Tuesday, May 19, 2009 10:22 PM
 TD4438 wrote:

Current progress.

TD,

Nice work so far. 

Buddy- Those who say there are no stupid questions have never worked in customer service.

  • Member since
    March 2006
Posted by TD4438 on Wednesday, May 20, 2009 4:45 PM

Thanks guys.BTW,how does one go about weathering an a/c?I plan on adding a bit of rust color to the exhausts (which are curently painted black) and some exhaust residue on the sides of the cowling/fuselage.Also maybe some chipped paint on the leading edge of the wings.A little dirt on the landing gear wouldn't hurt either.

As for the overall body of the a/c,I'm clueless.

  • Member since
    January 2015
  • From: Katy, TX
Posted by Aggieman on Wednesday, May 20, 2009 8:16 PM

As for the weathering, I look for places where oil or other fluids might pool and leak, and then get blown away in the slipstream (I think that's the word I'm looking for).  Exhaust staining and gun stains are a must, as is paint chipping.  I nearly always make my models look dirty via earth-tone pastels, Tamiya weathering pastels, etc - I go after the tires and wheel wells and I will often go for the look of dried mud swept across the underside of an aircraft.

On the top side, I have often tried to vary painting among panels to depict sun fading or perhaps in-the-field repair jobs (pirating panels from non-functional aircraft to repair damaged parts on functional birds, for instance).

With my Stuka, I purposefully toned down the dirty look, but it's still gonna be a dirty warbird. 

  • Member since
    March 2006
Posted by TD4438 on Thursday, May 21, 2009 8:04 AM
Thanks.Got a pic or two you could post for illustration?

  • Member since
    January 2015
  • From: Katy, TX
Posted by Aggieman on Thursday, May 21, 2009 5:24 PM

Yeah sure!

Ju-88

Do-217

F4U-1A Corsair

Hawker Hurricane

P-36

F7F Tigercat

P-61 Black Widow

B-26 Marauder

  • Member since
    March 2006
Posted by TD4438 on Thursday, May 21, 2009 7:20 PM
Thanks.I guess a/c's get pretty funky too!This will help greatly.

  • Member since
    July 2004
  • From: Sonora Desert
Posted by stikpusher on Thursday, May 21, 2009 11:50 PM

Heres a couple more ideas for ya...


F is for FIRE, That burns down the whole town!

U is for URANIUM... BOMBS!

N is for NO SURVIVORS...

       - Plankton

LSM


  • Member since
    March 2006
Posted by TD4438 on Friday, May 22, 2009 8:19 AM
I can safely assume German a/c's did not have zimmerit applied,correct?Smile [:)]

  • Member since
    January 2015
  • From: Katy, TX
Posted by Aggieman on Friday, May 22, 2009 3:28 PM
Uh ... noSmile [:)]
  • Member since
    July 2004
  • From: Sonora Desert
Posted by stikpusher on Friday, May 22, 2009 4:45 PM
Mischief [:-,] Only when they were forward based in partisan infested locales... then it was field applied on all vertical surfaces that could be reached by an average sized man... Smile,Wink, & Grin [swg]


F is for FIRE, That burns down the whole town!

U is for URANIUM... BOMBS!

N is for NO SURVIVORS...

       - Plankton

LSM


  • Member since
    May 2008
  • From: Wherever the hunt takes me
Posted by Boba Fett on Friday, May 22, 2009 8:21 PM

Lol!!!!


Hey, guys. I am just too busy with GB's to join this one. But I wish you all the best of luck in your builds and I'll drop by every once in a while.

  • Member since
    December 2002
  • From: Bury St Edmunds, Suffolk, England
Posted by Bish on Saturday, May 23, 2009 3:07 AM

 Heres some progress pics on my 88. The Aires cockpit is all in, boy was it a tight fit, i don't think they measured it quite right as i have sanded as much as i can and the pilots seat is still to far over to the right, almost on top of the bomb aimer. I hope to get soem paint on it later this week.

TD Ju-87's were known for getting mud clogged around the wheel spats, so if you wanted to apply some heavy mud you could do it there. It is easy to over do weathering on aircraft, i know i have in the past, but the examples posted by others look spot on to me.

I am a Norfolk man and i glory in being so


On the bench: Airfix 1/72nd Harrier GR.3/Fujimi 1/72nd Ju 87D-3

  • Member since
    January 2015
  • From: Katy, TX
Posted by Aggieman on Saturday, May 23, 2009 1:12 PM
Looking forward to seeing your 88, always one of my favorite German aircraft.
  • Member since
    January 2015
  • From: Katy, TX
Posted by Aggieman on Saturday, May 23, 2009 1:26 PM

My Stuka is complete.  This was essentially a shake-and-bake job.  The only problem I encountered was self-inflicted - while test fitting the landing light cover along the leading edge of the port wing, I managed to not get it set just right and it slid right through the hole and into the wing.  Never to be seen again, but it can be heard rattling around in there.  I took a piece of clear plastic I have been using to fashion engine nacelles for another build I'm working on, a B-35 Flying Wing that did not include a whole lot of parts (gift from my mother-in-law who bought it for a buck at a garage sale, so I can't complain) to fashion a new light cover.  It looks okay from a distance but no so good close up.

Paints are all Model Master Acrylics - German dunkle grun and schwarz grun for the top side, hellblau for the underside.  Applied a coat of Future to set the decals, did the weathering and then sealed it all with a clear flat coat.

Weathering is burnt umber and black oil paints heavily watered down and applied sparingly in this case.  I also added a bit of Tamiya weathering pastels along the tires and under the big chin of this beast.

Decals are kit supplied.  I cut out each of the identification letters and trimmed as much as I could from around the edges.

I'm done for now with the group build but am considering adding another build for later in the year.  I have a few kits to choose among but until the wife agrees to let me get some additional shelves installed into my curio cabinet, I am stuck building kits that can easily be built wheels up or are fixed landing gear aircraft like the Stuka.


  • Member since
    March 2006
Posted by TD4438 on Saturday, May 23, 2009 2:32 PM
Looks awesome.I'll get some updated pics of my feeble attempt posted soon.

  • Member since
    July 2004
  • From: Sonora Desert
Posted by stikpusher on Saturday, May 23, 2009 2:42 PM
Aggieman, your Stuka looks great! A nice, lightly weathered, clean bird!


F is for FIRE, That burns down the whole town!

U is for URANIUM... BOMBS!

N is for NO SURVIVORS...

       - Plankton

LSM


  • Member since
    March 2006
Posted by TD4438 on Saturday, May 23, 2009 5:52 PM
Anybody got any tips on painting a 1/72 Stuka canopy?What's the best method?This is the part I hate and the soul reason I don't do more a/c's.

  • Member since
    December 2002
  • From: Bury St Edmunds, Suffolk, England
Posted by Bish on Saturday, May 23, 2009 7:49 PM
How i paint my canpoies depends on the fit. If it,s a bad fit and will need filling i apply the canopy before painting. If its a good fit i tac my canopies onto wooden pegs and paint on there. I used to use masking fluid to mask the canopies but now i prefer masking tape.

I am a Norfolk man and i glory in being so


On the bench: Airfix 1/72nd Harrier GR.3/Fujimi 1/72nd Ju 87D-3

  • Member since
    March 2006
Posted by TD4438 on Saturday, May 23, 2009 8:46 PM
I tried painting it by hand and it is working well so far.The canopy is too small and intricate for the masking tape I have.I should have this thing finished some time this weekend.

  • Member since
    November 2007
  • From: Potomac Falls, VA
Posted by darth_trader on Thursday, May 28, 2009 7:05 AM

Aggie, excellent job on the Stuka, looks great!  Nice work on the antenna wire.  I love the weathering on the underside, looks terrific!

  • Member since
    March 2006
Posted by TD4438 on Thursday, May 28, 2009 11:55 AM

DONE!!!

I really enjoyed this build.Except for the canopy that is.What a PITA!!!!

  • Member since
    June 2008
Posted by lewbud on Thursday, May 28, 2009 1:21 PM

Steven and TD, nice jobs on the Stukas.  Thumbs Up [tup] for both of you.  Steven, please tell me that your camera just took some funky pics and your tailplanes aren't that twisted.

Buddy- Those who say there are no stupid questions have never worked in customer service.

  • Member since
    January 2015
  • From: Katy, TX
Posted by Aggieman on Thursday, May 28, 2009 4:06 PM

Wish I could but unfortunately my quality control was taking a potty break or something when I put on those tailplanes.....

It's actually a combination of both causes, in that my camera was angled toward the subject and not pointing head on, and the tail planes are actually slightly off level.  Grrr.  Gotta fire that quality control guy ....

  • Member since
    January 2015
  • From: Katy, TX
Posted by Aggieman on Thursday, May 28, 2009 4:13 PM

I really enjoyed this build.Except for the canopy that is.What a PITA!!!!

I doubt that anyone who would say they enjoy doing these kind of canopies, especially in 1/72, would be that truthful about the matter.... But it looks like you did an admirable job free-handing it.  I like the Stuka being in Italian markings since we don't normally see those and would generally associate the Stuka with the Luftwaffe.  Good job!

  • Member since
    June 2008
Posted by lewbud on Thursday, May 28, 2009 8:59 PM
 Aggieman wrote:

Wish I could but unfortunately my quality control was taking a potty break or something when I put on those tailplanes.....

It's actually a combination of both causes, in that my camera was angled toward the subject and not pointing head on, and the tail planes are actually slightly off level.  Grrr.  Gotta fire that quality control guy ....

Instead of firing maybe get him to lay off the schnapps until after work perhaps.  I've seen your work, I knew they couldn't be that bad.

Buddy- Those who say there are no stupid questions have never worked in customer service.

  • Member since
    March 2006
Posted by TD4438 on Friday, May 29, 2009 8:00 AM

I can't believe I didn't go blind trying to paint the canopy.Because it's a clear part,it sort of throws off depth perception.Ofcourse the paint went on very thin,so it took numerous coats to get a solid look.Total PITA!!!

But I'd do it again in a heartbeat.I really enjoyed the overall build.

  • Member since
    July 2005
  • From: Dayton, Ohio
Posted by warhorse3 on Sunday, May 31, 2009 5:52 PM
Canopies are the biggest challenge I have on an aircraft build. I'll be getting to that on my SBD in the near future. I managed to get a great deal on a digital camera so I'll be able to post pics soon. I like what you have done on the Stukas, Aggieman and TD4438.
Regards, Bill
  • Member since
    November 2008
  • From: Hatboro, PA
Posted by Justinryan215 on Monday, June 1, 2009 10:26 AM

I as just wondering if it is too late to join this build...I just got laid off on Friday, and now, aside from keeping my eleven-month-old occupied (nap times), and in between cleaning, I finally have some building time.

I have the semi-crappy testors 1/72 Dauntless, and the Revellogram Stuka to contribute...


Justin

"...failure to do anything because someone else can do better makes us rather dull and lazy..."

Mortal as I am,I know that I am born for a day.  But when I follow at my pleasure the serried multitude of the stars in their circular course, my feet no longer touch the Earth...


  • Member since
    March 2006
Posted by TD4438 on Monday, June 1, 2009 12:58 PM
It says join any time on page one.You are good to go.

  • Member since
    January 2015
  • From: Katy, TX
Posted by Aggieman on Monday, June 1, 2009 4:50 PM
Justin, it is not too late to join.  Welcome aboard!  And I'm sorry to hear about your job situation.  But keep your chin up and it will get better, as I've experienced that same thing over the course of my career a couple of times and always come out of the experience better than I went in.
  • Member since
    November 2008
  • From: Hatboro, PA
Posted by Justinryan215 on Monday, June 1, 2009 8:42 PM

I'm not too concerned...at least not for the first 26 weeks...I look at it as a "State Sponsored Summer Vacation Plan"...until the slow season at area bodyshops is over, I am collecting.  Dont get me wrong, I am looking for a job, but I am not stressing just yet!


Justin 

"...failure to do anything because someone else can do better makes us rather dull and lazy..."

Mortal as I am,I know that I am born for a day.  But when I follow at my pleasure the serried multitude of the stars in their circular course, my feet no longer touch the Earth...


  • Member since
    November 2008
  • From: Hatboro, PA
Posted by Justinryan215 on Monday, June 1, 2009 8:52 PM
I will get pics up sometime tomorrow...

"...failure to do anything because someone else can do better makes us rather dull and lazy..."

Mortal as I am,I know that I am born for a day.  But when I follow at my pleasure the serried multitude of the stars in their circular course, my feet no longer touch the Earth...


  • Member since
    March 2008
  • From: Indy
Posted by raider83 on Wednesday, June 3, 2009 6:17 PM
Now that summer is here and school is done, I can finally get some bench time. I have to get this SBD done in about a month anyways for 4-H....it'll be my fastest build ever if I can pull it off and hopefully my best. THe AM kit is great. I've started the cockpit and its a beauty. Lots of little stuff to detail..my favorite!
On the bench: Monogram 1/48 Kingfisher Cardinal Ritter- Class 1A 2008 Indiana State Football Champs
  • Member since
    February 2003
  • From: Saratoga Springs, NY
Posted by Jeeves on Saturday, June 6, 2009 9:16 AM
I was hoping to get this one done by the 4th for the anniversary of the battle of Midway-- but I guess if you count the fact that the Mikuma sunk on this day. 

I had canopy and gear issues-- I guess I didn't get everything on the interior seated exactly correct so it came back to haunt me.  I overdid the weathering on the fabric parts a bit-- I was trying to recreate the fact that it was practically falling off and was due to be redone after the battle.  As a quick fix, it was held together with medical tape...so I may still work on this a bit to tone it down...but here she is nonetheless...


Thanks for letting me join- it was a blast!

Mike
  • Member since
    January 2015
  • From: Katy, TX
Posted by Aggieman on Saturday, June 6, 2009 2:04 PM
Good looking Vindicator!
  • Member since
    March 2006
Posted by TD4438 on Saturday, June 6, 2009 5:29 PM
Saweeeet!!!

  • Member since
    November 2008
  • From: Hatboro, PA
Posted by Justinryan215 on Sunday, June 7, 2009 8:21 PM

I have pics coming, but my Stuka's flight crew is painted, sparse cockpit installed, the fuselage is assembled with all of the seams filled and sanded, and the wings have been installed.

So far, aside from sparse detail, the kit is going together fairly well, with minimal flash, although someof the sprue trees are a bit thick where they join to the model. 

My Testors Dauntless is moving along nicely as well, with next to no detail in the 'pit, Ihave the fuse halves joined, and the one piece wings assembled, withany root seams filled and sanded and ready for a second coat of primer.


Justin

"...failure to do anything because someone else can do better makes us rather dull and lazy..."

Mortal as I am,I know that I am born for a day.  But when I follow at my pleasure the serried multitude of the stars in their circular course, my feet no longer touch the Earth...


  • Member since
    November 2008
  • From: Hatboro, PA
Posted by Justinryan215 on Monday, June 8, 2009 2:08 PM

Here is a bunch of progress pics...

"...failure to do anything because someone else can do better makes us rather dull and lazy..."

Mortal as I am,I know that I am born for a day.  But when I follow at my pleasure the serried multitude of the stars in their circular course, my feet no longer touch the Earth...


  • Member since
    November 2008
  • From: Hatboro, PA
Posted by Justinryan215 on Monday, June 8, 2009 2:14 PM

Some pics of the Dauntless:

"...failure to do anything because someone else can do better makes us rather dull and lazy..."

Mortal as I am,I know that I am born for a day.  But when I follow at my pleasure the serried multitude of the stars in their circular course, my feet no longer touch the Earth...


  • Member since
    March 2006
Posted by TD4438 on Monday, June 8, 2009 11:28 PM
Nice progress so far.Can't wait to see these done.

  • Member since
    June 2008
Posted by lewbud on Tuesday, June 9, 2009 2:45 AM

Mike,

Good looking Vindicator!  How did you do the tail?  I've got to do that effect on a Wildcat.  Did you just mist coats of blue, or is it a series of very thin coats?

Buddy- Those who say there are no stupid questions have never worked in customer service.

  • Member since
    February 2003
  • From: Saratoga Springs, NY
Posted by Jeeves on Wednesday, June 10, 2009 5:31 AM
Its actually the kit decal-- AM does a pretty good job on their Vindicator and Dauntless kits of recreating the painted over red and white areas and the red dot on the insignia as well...
Mike
  • Member since
    May 2009
Posted by modelbuilder12 on Wednesday, June 10, 2009 4:53 PM
I am interested, I will build a 1/32 scale Revell Germany Stuka.  The seatbelts are aftermarket and the guns are taken from another kit.
MODELBUILDER12 "If the wings are traveling faster than the fuselage, it's probably a helicopter -- and therefore, unsafe."-Unknown "Tyrants have always some slight shade of virtue; they support the laws before destroying them." -Voltaire "Aim towards the Enemy." -Instruction printed on US Rocket Launcher
  • Member since
    March 2006
Posted by TD4438 on Thursday, June 11, 2009 9:37 AM
Would a Hawker Typhoon be considered a dive-bomber,or just ground attack?

  • Member since
    November 2008
  • From: Hatboro, PA
Posted by Justinryan215 on Thursday, June 11, 2009 4:02 PM
All of the main assembly is finished for the Stuka, almost ready for paint, just need to finish sanding a couple of seams, and off to the booth she goes...

"...failure to do anything because someone else can do better makes us rather dull and lazy..."

Mortal as I am,I know that I am born for a day.  But when I follow at my pleasure the serried multitude of the stars in their circular course, my feet no longer touch the Earth...


  • Member since
    January 2015
  • From: Katy, TX
Posted by Aggieman on Thursday, June 11, 2009 4:16 PM

Would a Hawker Typhoon be considered a dive-bomber,or just ground attack?

I know the Typhoon was designed as a fighter but proved its worth as a ground attack.  I'm not sure that would include the dive bombing role, though.  They may have been able to fix bombs to hard points on the wings but the Typhoon did not have a trapeze as found on many dive bombers, nor did it have dive brakes to my knowledge.

  • Member since
    May 2009
Posted by modelbuilder12 on Thursday, June 11, 2009 4:54 PM
What is the badge hosting site???
MODELBUILDER12 "If the wings are traveling faster than the fuselage, it's probably a helicopter -- and therefore, unsafe."-Unknown "Tyrants have always some slight shade of virtue; they support the laws before destroying them." -Voltaire "Aim towards the Enemy." -Instruction printed on US Rocket Launcher
  • Member since
    October 2004
  • From: League City, Texas
Posted by sfcmac on Thursday, June 11, 2009 6:25 PM

 Hello fellows. Been following along with intrest. Over at the FAA GB I have been struggling with an interesting pair. The Special Hobby 1/48 Roc and Skua. Both these birds were used as dive bombers and fighters. The Skua really reminds me of a Dauntless and has been compared to it and the Jap Val.

Thought you may like to see some progress as these are tough kits to get together and something not so commonly built.


Slowly but surely getting there!  Been working about 3 weeks on them.  Doing some PE stuff and arming them up!  Thanks for looking!Bow [bow]

  • Member since
    January 2015
  • From: Katy, TX
Posted by Aggieman on Thursday, June 11, 2009 9:13 PM

The badge hosting site is Photobucket.  Generally I think everyone copies these to their own accounts, but you're welcome to use this one.

http://i75.photobucket.com/albums/i306/Aggieman/Models/DauntlessGB.jpg

  • Member since
    January 2015
  • From: Katy, TX
Posted by Aggieman on Thursday, June 11, 2009 9:14 PM

Aaron,

your Skua and Roc are looking good.  Those are seldom seen subjects to be sure.  Do you want to enter them into this GB?

  • Member since
    October 2004
  • From: League City, Texas
Posted by sfcmac on Thursday, June 11, 2009 9:18 PM
 Aggieman wrote:

Aaron,

your Skua and Roc are looking good.  Those are seldom seen subjects to be sure.  Do you want to enter them into this GB?

If you think them and I worthy I would be happy to jump in. Looks like a great bunch of fellows! Can you stand another Texan? Wink [;)] They do qualify as They were started after May 1st.

  • Member since
    May 2009
Posted by modelbuilder12 on Friday, June 12, 2009 5:19 PM

Thanks,

This is my Stuka progress...


MODELBUILDER12 "If the wings are traveling faster than the fuselage, it's probably a helicopter -- and therefore, unsafe."-Unknown "Tyrants have always some slight shade of virtue; they support the laws before destroying them." -Voltaire "Aim towards the Enemy." -Instruction printed on US Rocket Launcher
  • Member since
    May 2009
Posted by modelbuilder12 on Saturday, June 13, 2009 1:50 PM
Good job sfcmac!
MODELBUILDER12 "If the wings are traveling faster than the fuselage, it's probably a helicopter -- and therefore, unsafe."-Unknown "Tyrants have always some slight shade of virtue; they support the laws before destroying them." -Voltaire "Aim towards the Enemy." -Instruction printed on US Rocket Launcher
  • Member since
    November 2008
  • From: Hatboro, PA
Posted by Justinryan215 on Monday, June 15, 2009 1:15 PM

Here are some shots of my Stuka, fresh Splinter Camo...waiting for a coat for future. 

I freehand drew the masks for thecamo pattern, which took forever, but with being laid off, I cant really spend any money, so you gotta do what you gotta do!

I am still debating on whether ornot I want to give it a winter camo wash over top...


Justin

"...failure to do anything because someone else can do better makes us rather dull and lazy..."

Mortal as I am,I know that I am born for a day.  But when I follow at my pleasure the serried multitude of the stars in their circular course, my feet no longer touch the Earth...


  • Member since
    March 2006
Posted by TD4438 on Monday, June 15, 2009 4:15 PM
Lookin' good.Another Stuka for the Squadron.Can't wait to see this finished.

  • Member since
    October 2004
  • From: League City, Texas
Posted by sfcmac on Tuesday, June 16, 2009 6:10 PM

 Great looking pair of Stukas fellows! One wicked looking aircraft! 

Thanks so much for letting me include the FAA builds here!

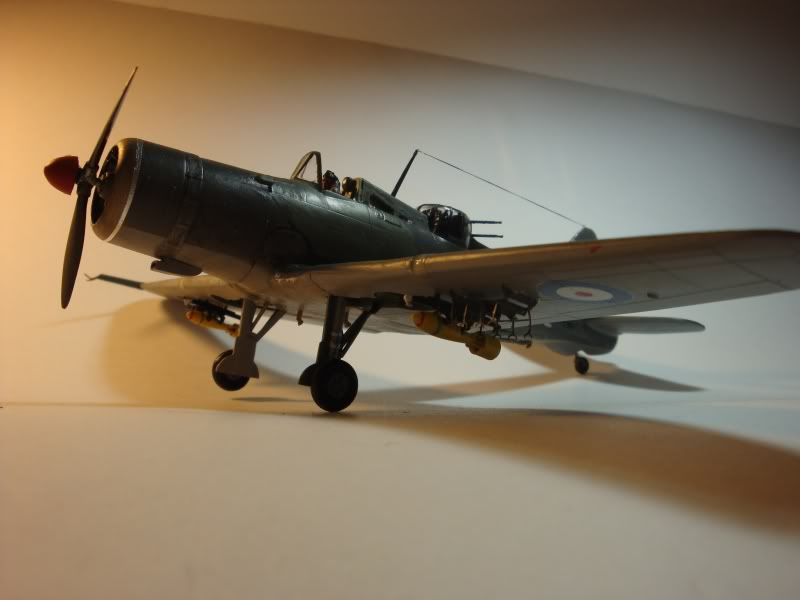
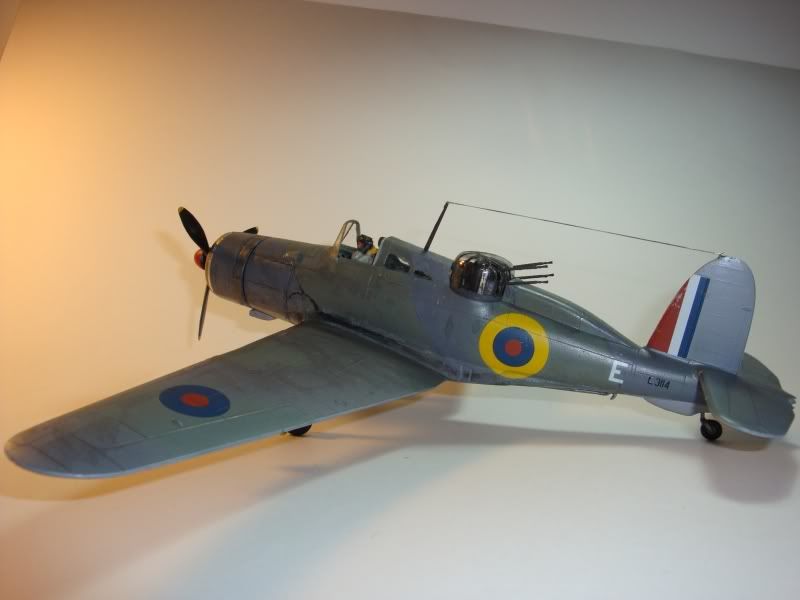
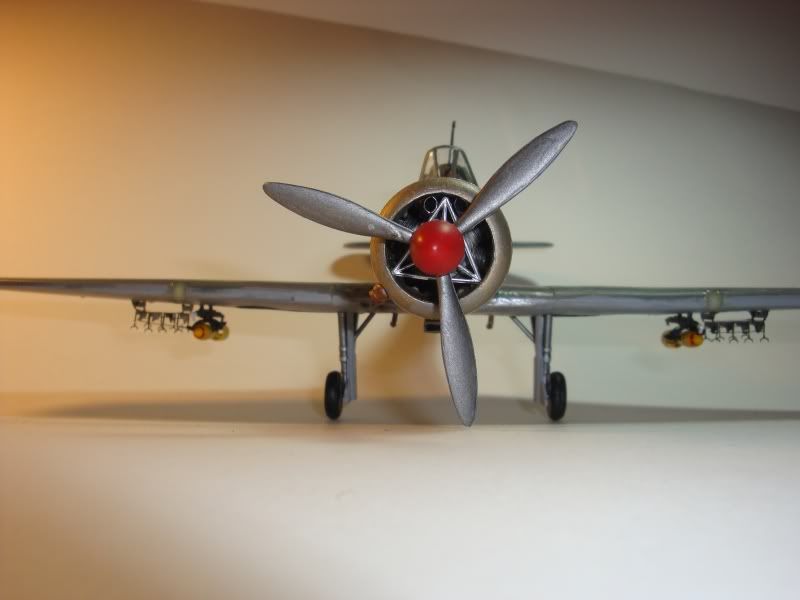
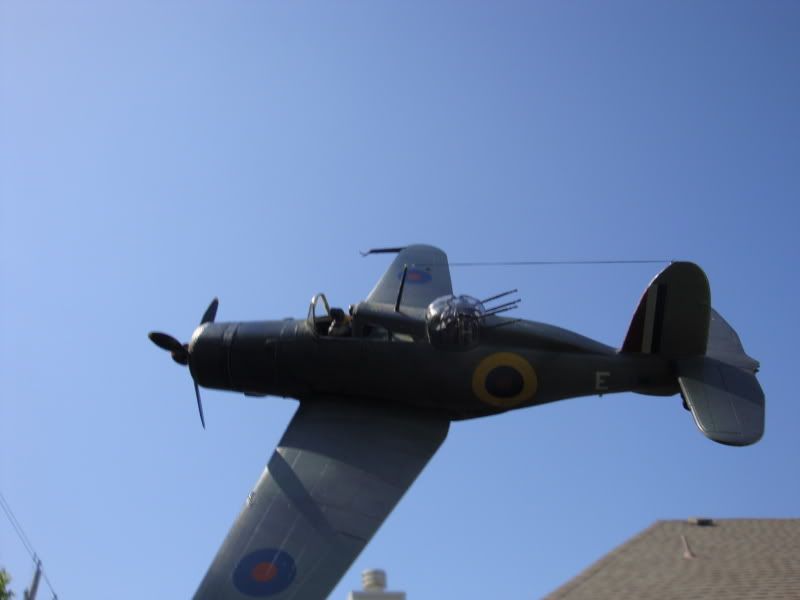
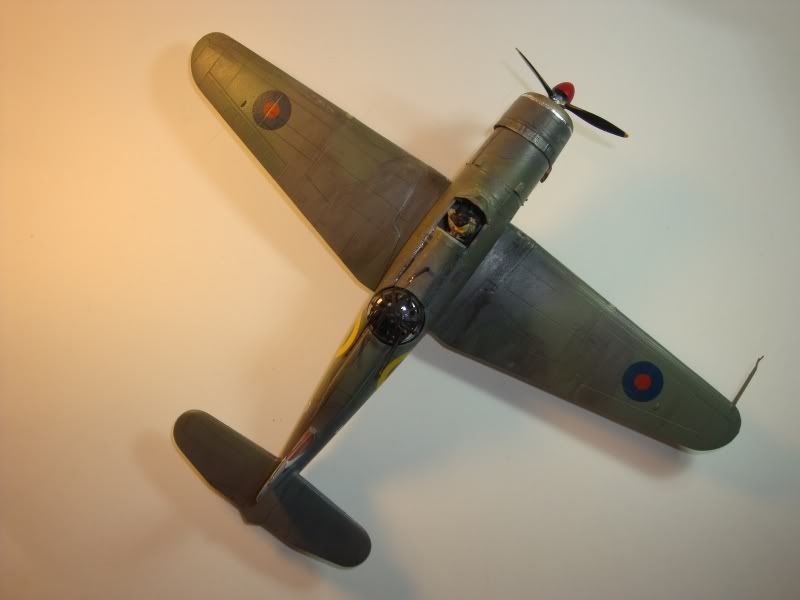
The 1/48 scale Special Hobby kits of the Blackburn Skua and Roc are getting called done. Both these aircraft were meant to and indeed served along side each other during probably the darkest time in FAA history.  Scorned for their lack of performance they were victims of flawed tactics and the assumption that Ships could fight off air attack with their AAA. Also being designed during the depression as multirolled jack of all trades for budget reasons.
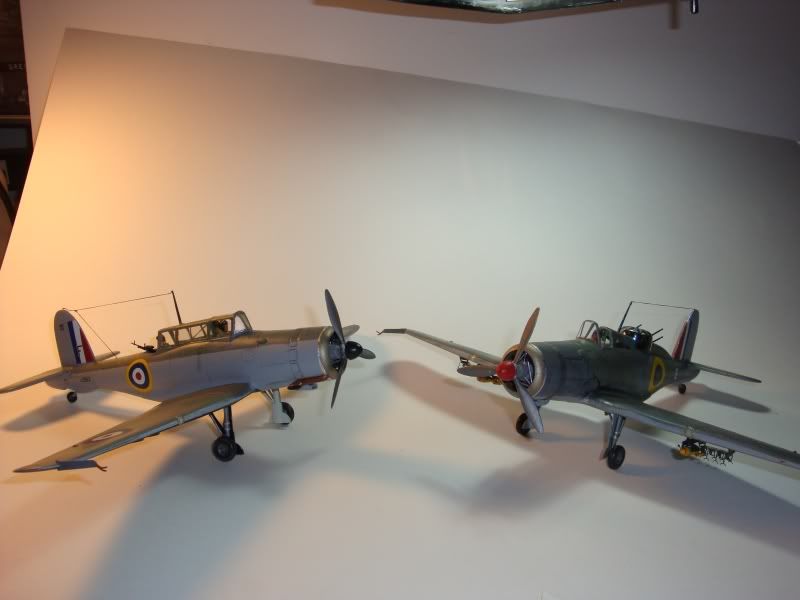


Still  The Skua earned an intense loyalty from her crews and given the smaller production numbers when compared to other types just makes it's feats all the more outstanding to me. The first Enemy aircraft of the war a Do-18 was shot down by the Skua.  On Apr 10th 1940 ,The German cruiser Konigsburg Was sunk by an attack of 11 divebombing Skua's at their maximum range. 3 direct hits and 5 near misses with no dive bombing training due to the prewar economy.
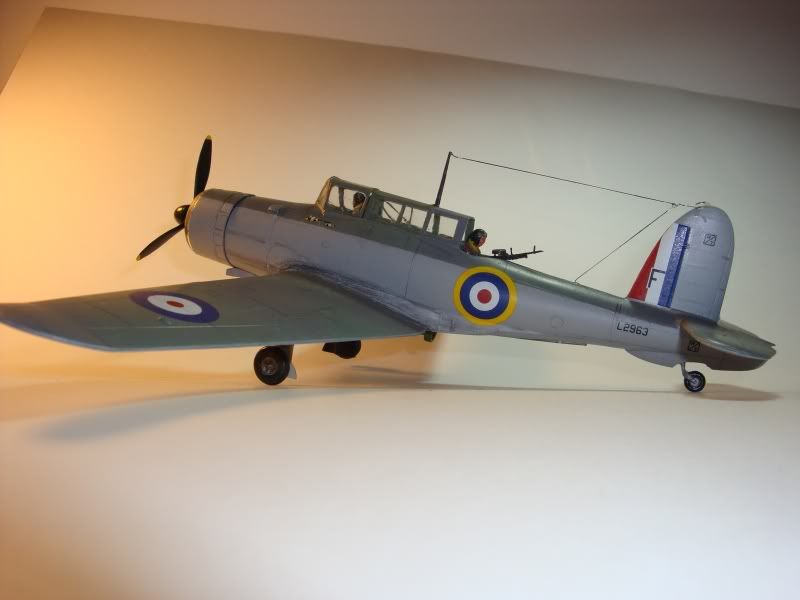


This is how I represented my Skua in triumph. Because all the kit options for markings represnt them at the time such an attack was repeated on the Scarnhorst where 15 aircraft were lost with no result as the Germans had learned their lesson.  All kit markings are of aircraft lost in this ill fated raid.
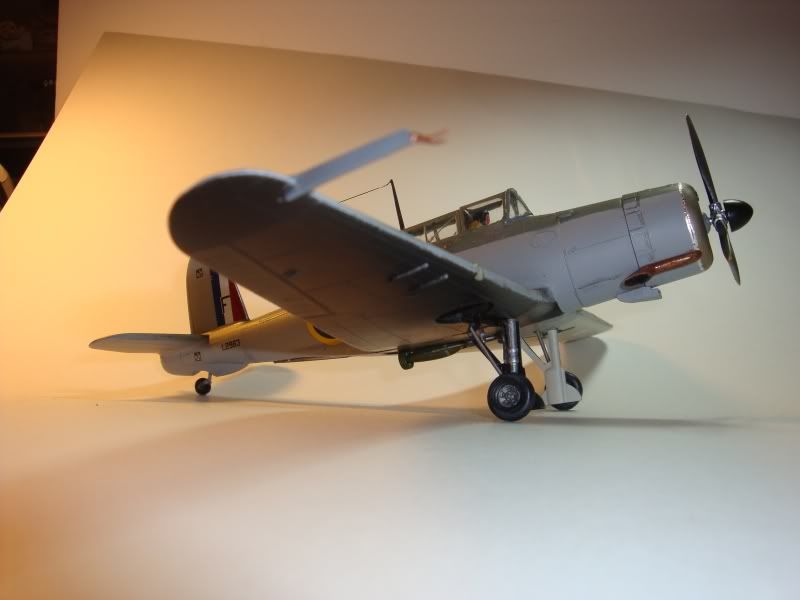


 The pressing need for long range fighters ended the Skua's divebombing career and many heroic battles were fought by remarkably brave and resourceful crews. It is so often noted how many of the best of them were lost, but man what a fight they gave!
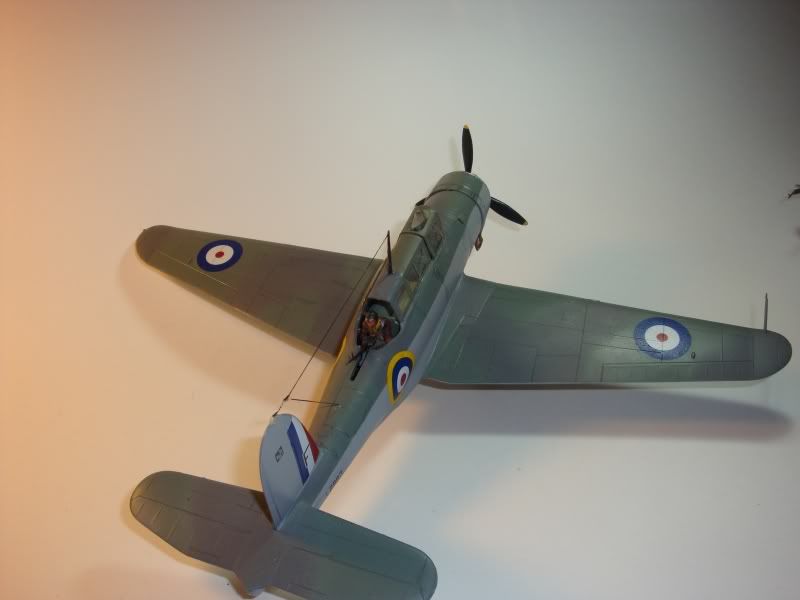
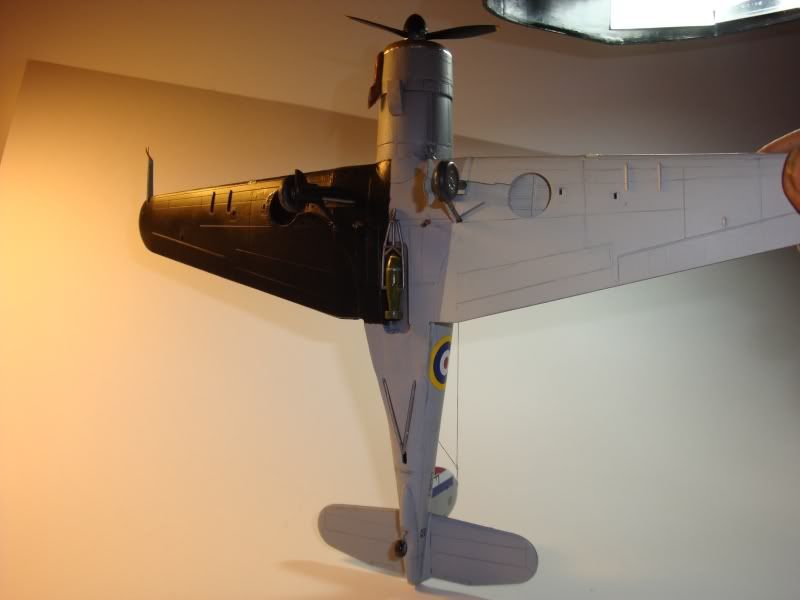


Reading up on the trials and handicaps these early FAA crews had to endure and overcome is unreal. The only radio they had was morse code. No voice coms between aircraft at all!  Still they achieved so much.
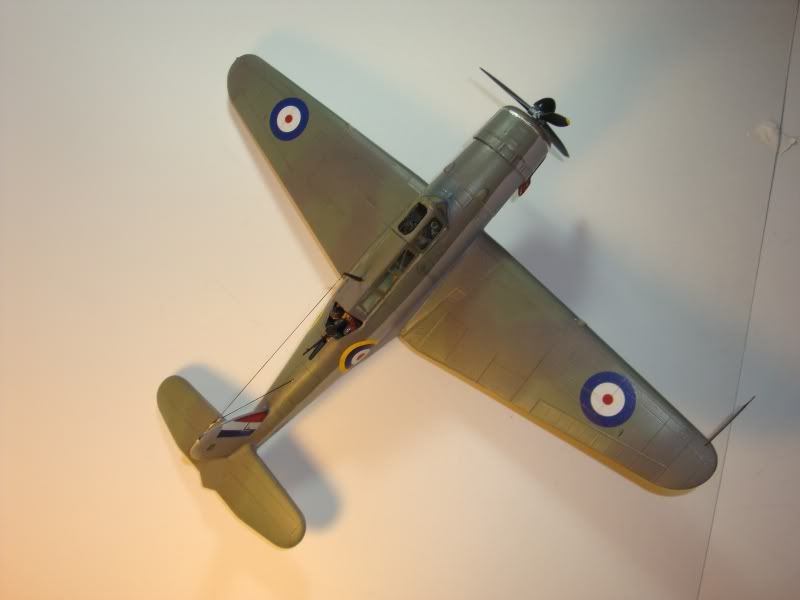


 The Roc was sound enough but far to slow in performance to actually catch the enemy aircraft. Can't shoot what you can't catch up too so the fighting career of the Roc was limited to only one kill and one maybe.

 However again it had a redesigned wing to cure stability problems found in the Skua which made it extremely stable and accurate in a dive bomb.  This was only really noted during the Evacuation at Dunkirk where in desparate moments the Rocs armed with pairs of 250lb bombs attacked and diverted  German ground forces pressing in. The quad .303's proved to be a nasty surprise for German fighters who steered clear of the low flying Roc's.   A lot of credit was given to the ROc here but not widely hailed as it was supposed to be a fighter!  The Admiralty being strictly by the book wanted it used as a fighter! 


 Took a very long time for them to accept a turreted fighter concept was not practical. Even the Firefly had originally been conceived as having a turreted counterpart twin.


Well getting long winded so I'll wrap it up by saying England may not have won the war on guts and determination alone but after reading into the early history of the FAA, I do feel that it is the reason it was not lost! Bow <img src=" border="0" width="29" height="15" />

Thanks fellows! Thumbs Up <img src=" border="0" width="15" height="15" />


  • Member since
    January 2015
  • From: Katy, TX
Posted by Aggieman on Tuesday, June 16, 2009 8:25 PM

Aaron, nice work on the Skua and Roc.  I'm not actually that familiar with either of these aircraft, mostly just knew that they existed and that the Skua, I believe, was used alot against shipping around Norway.

Anyway, I'm happy to include them in this GB as they do a nice job of off-setting our growing fleet of Stukas ... Wink [;)]

  • Member since
    November 2008
  • From: Hatboro, PA
Posted by Justinryan215 on Tuesday, June 16, 2009 8:28 PM

MORE PICS!!!!

I have the main camo finished, most of the decals applied,and a topcoat of future...after a day or two, I will test out the winter camo...

"...failure to do anything because someone else can do better makes us rather dull and lazy..."

Mortal as I am,I know that I am born for a day.  But when I follow at my pleasure the serried multitude of the stars in their circular course, my feet no longer touch the Earth...


  • Member since
    March 2006
Posted by TD4438 on Wednesday, June 17, 2009 8:16 AM
Fantastic builds guys.I can't wait to get to my second entry.Whatever it turns out to be.

  • Member since
    January 2015
  • From: Katy, TX
Posted by Aggieman on Wednesday, June 17, 2009 9:32 PM
Looking good Justin.
  • Member since
    July 2005
  • From: Dayton, Ohio
Posted by warhorse3 on Saturday, June 20, 2009 5:20 PM

Finally back after a life interfering with hobby episode. Haven't been able to get much done other than getting the crew just about ready for installation and test fitting the fuselage and wing. I know, not much progress, but most of my builds are of the dead slow variety. Nice job on the FAA birds sfcmacThumbs Up [tup]. The Stukas look good also guys.

Regards, Bill
  • Member since
    November 2008
  • From: Hatboro, PA
Posted by Justinryan215 on Sunday, June 21, 2009 1:52 PM

well, the Stuka is just about done...a bit ofstretched sprue for an antenna, replace the pitot tube that broke off early in the assembly, and the same for the gunbarrels, and a bit of weathering and exhaust staining and she is 100% complete.

Here's the shots!


"...failure to do anything because someone else can do better makes us rather dull and lazy..."

Mortal as I am,I know that I am born for a day.  But when I follow at my pleasure the serried multitude of the stars in their circular course, my feet no longer touch the Earth...


  • Member since
    March 2006
Posted by TD4438 on Sunday, June 21, 2009 5:36 PM
Certainly not what I was expecting from your earlier pics.Great job.

  • Member since
    January 2015
  • From: Katy, TX
Posted by Aggieman on Sunday, June 21, 2009 8:44 PM
Excellent winter scheme on that Stuka.
  • Member since
    July 2005
  • From: Dayton, Ohio
Posted by warhorse3 on Sunday, July 19, 2009 6:10 PM
Finally closed the fuselage and got the wing on this week. Next, I've got to build the base so that I can mount it. This is necesary so that I can rig the released bomb and prop blur effect. Very cool winter scheme on the Stuka.
Regards, Bill
  • Member since
    February 2005
  • From: Cleveland, OH
Posted by RadMax8 on Sunday, July 26, 2009 5:00 PM
Mind if I join? I've just started on two Ju-87D's, the original Revell release, both will be OOTB.
  • Member since
    March 2006
Posted by TD4438 on Friday, July 31, 2009 10:38 AM
Jump in any time.

  • Member since
    February 2005
  • From: Cleveland, OH
Posted by RadMax8 on Saturday, August 1, 2009 2:47 PM
OK! Count me in with two OOTB Monogram Ju-87D's. I'll post photos shortly!
  • Member since
    January 2015
  • From: Katy, TX
Posted by Aggieman on Sunday, August 2, 2009 8:02 AM

Max, welcome to the build!  I've added you to the front page listing.  Looking forward to your photos.

  • Member since
    March 2007
Posted by KAYSEE88 on Sunday, August 2, 2009 8:55 AM

hello....i think i'll like to join,,,, if thats OK ????

I got a Revell 1/32 DAUNTLESS thats has a sheet of dust on the box.....will do just OOB. we'll see

as for pics,,,,,maybe just the finished ones only......still looking around for my first camera Blush [:I]

please let me know......THANKS!!!!


  • Member since
    January 2015
  • From: Katy, TX
Posted by Aggieman on Sunday, August 2, 2009 2:04 PM
Ken, welcome aboard!  I'm adding your build to the front page.
  • Member since
    March 2008
  • From: Indy
Posted by raider83 on Sunday, August 2, 2009 2:24 PM

Here is my Dauntless, courtesy of Aggieman for the Secret Santa GB and the dive bomber GB. Thank you again Aggieman, it was a fun one. The kit was not bad. The cockpit is fantastic, as are all the other cockpits from Accurate Miniatures. Fit was alright. The wing roots were a bit tricky. Everything else went fine. I wanted to make this plane look old and beat up but i think I overdid it....US Navy carrier planes usually didn't get this dirty or chipped. And speaking of chips, I tried the salt chipping technique with sand. That didn't go over so well, so I painted on aluminum chips with enamel paint. But I forgot the turpenoid in my oil wash dilutes enamels, so the chips are kinda streaky.Whistling <img src=" border="0" width="30" height="20" />. The figures and vehicles are from AM's set of ordnance and such. I know the figures look like toys. I need to work on that. Please feel free to leave any comments or criticisms. I entered this in my county fair for 4-H. It got a reserve champion which is alright. Unfortunately, it will not be going to the state fair.


On the bench: Monogram 1/48 Kingfisher Cardinal Ritter- Class 1A 2008 Indiana State Football Champs
  • Member since
    July 2004
  • From: Sonora Desert
Posted by stikpusher on Sunday, August 2, 2009 6:04 PM

OK, today I pulled my SBD kit (The Confederate Air Force Ghost Squadron issue) out of the "in waiting" area and resumed work. Of course half the day was spent trying to find my Detail and Scale SBD book. Which after hours of searching my house I finally did. So, I first added some detail to the inner faces of the landing gear doors- "step ledges" along the lengths, and lightening cut outs as well. I glued the doors to the struts after completeing the mods. Next I scratch built from sprue a new mounting pivot for the bomb displacment crutch. The kit one was angular and on the actual SBD it is cylindrical. I also scratch built an oil cooler from a piece of sprue and brass screen as this area I opened and is empty when seen. My final task was to create a new face for the instrument panel. The kit supplies a decal so I took some very thin sheet plastic, cut it to shape, the marked and drilled out holes to match the locations of the instruments. I also added some stretched sprue for knobs on the panel. 

Here are a few pics of my work from today. It's kind of hard to see the work, but it is the best my camera would show.

New IP face with kit decal and new oil cooler

View of landing gear door mods after being glued in place

View of opened oil cooler scoop and new mount for bomb crutch.


F is for FIRE, That burns down the whole town!

U is for URANIUM... BOMBS!

N is for NO SURVIVORS...

       - Plankton

LSM


  • Member since
    February 2005
  • From: Cleveland, OH
Posted by RadMax8 on Monday, August 3, 2009 10:12 PM

Stukas stukas everywhere! I've finally got to posting some of my work. Granted, these kits aren't very heavy on the assembly. Here's what I've done so far:

I just found out the kit canopies will be unusable, so I'm going to cheat and get the Squadron replacements. The pilots in one of the planes are short shot and they look stupid, so I might have to write Revel for some new ones!

Does anyone know what color German bombs should be?

  • Member since
    December 2002
  • From: Fort Bragg
Posted by CTrill09 on Tuesday, August 4, 2009 2:33 AM

Hi,

i just saw the build thread, and im really excited, althought im joining late i would really like to join on and build an accurate minatures, SBD Dauntless Dive Bomber.  Alli have to do is order what i need so i can get started right away.  I look forward to it. Thanks  -Chris

Photobucket
  • Member since
    January 2015
  • From: Katy, TX
Posted by Aggieman on Tuesday, August 4, 2009 5:23 AM
Nice work on those Stukas!
  • Member since
    January 2015
  • From: Katy, TX
Posted by Aggieman on Tuesday, August 4, 2009 5:23 AM
Chris, I've added you to the front page.  Welcome aboard, and looking forward to seeing your Dauntless.
  • Member since
    November 2007
  • From: Potomac Falls, VA
Posted by darth_trader on Wednesday, August 5, 2009 11:47 AM

Raider, excellent job on the Dauntless!  Diorama looks great too!  Hope my SBD turns out as well as yours. 

I finished up the cockpit, although after looking at this photo, I need to hit the instrument panel.

This is my first kit by Accurate Miniatures, the detail is great, however, the cockpit requires alot of patience.  I've spent alot of time on the gunner's chair & trying to get the deck to fit into the bottom of the fuselage.  At least all of the small parts are done now Smile [:)]


  • Member since
    December 2008
  • From: Goffstown, NH
Posted by New Hampshire on Saturday, August 29, 2009 8:48 PM

Just wanted to drop in and say I have not forgotten this GB.  I have started the Val and already have the fuselage buttoned up (I forgot to take pics of the cockpit building.....you'll just have to take my word it looks decent Big Smile [:D] ).  I will try and get some pics of current build status if I remember (an iffy proposition with my memory Blush [:I]

Brian

  • Member since
    July 2005
  • From: Dayton, Ohio
Posted by warhorse3 on Sunday, August 30, 2009 2:28 PM
I feel your pain. NH. It's been a busy summer for me, not much time at the bench. I've gotten the base ready for final paint after test fitting my SBD. I still have some final assembly work plus decals and weathering to do.     Nice dio raider.    Regards, Bill
Regards, Bill
  • Member since
    October 2006
  • From: Rochester, NY
Posted by silentmodeler on Monday, August 31, 2009 4:19 AM
aww!!  i just finished my SBD dive bomber and didnt realized abt this gb!  dang!!!  i might dont have the time to other one now til dec since i have serveral of dive bombers to build.  Hopefully in the future.
"Do, do not, theres no try" ~Yoda
  • Member since
    September 2008
  • From: World Champions! Not anymore..
Posted by swingr1121 on Sunday, September 6, 2009 10:51 AM

I have finally gotten some bench time.  Haven't finished my "man cave" yet but decided I needed to do some modelling.  I ended up choosing the A-36 over the A-24.  I'm just about to close up the fuselage and snapped a couple of photos. 

This is the Accurate Miniatures kit.  I picked it up at a show and it came with some PE that I'm attempting to use (first for me).  There are also some white metal parts too that may or may not be used.  We'll see.  Anyhow, how bout a couple of pics?


In the second pic you can see that I decided to add some wire to liven that area up a bit.  Enjoy.


Mike

  • Member since
    February 2005
  • From: Cleveland, OH
Posted by RadMax8 on Sunday, September 6, 2009 9:50 PM
One of my absoulute favorite planes. Be careful on fitting the rear radiator scoop thingy. It's really difficult to understand in the instructions. If you need help I'll try to post pictures of how it's supposed to go in!
  • Member since
    September 2008
  • From: World Champions! Not anymore..
Posted by swingr1121 on Sunday, September 13, 2009 7:52 PM

Still plugging away on the A-36.  Not too much progress to report on.  The pit is installed, the fuselage is together.  It looks like an early mustang.  Doing some filling and sanding on it and that's about it.  Will put some pics up soon.

Max, if I need some help I'll be sure to give you a shout.  I remembered that you like the Allison Mustangs.  The Wildcat is next up!


Mike

  • Member since
    November 2007
  • From: Potomac Falls, VA
Posted by darth_trader on Monday, October 5, 2009 9:36 PM

Fellow Dive Bombers,

I've been making progress here & there.  Whenever I walk past the workbench, I try to get something glued or painted or sanded.  Almost ready for the clearcote & some weathering.


  • Member since
    January 2015
  • From: Katy, TX
Posted by Aggieman on Tuesday, October 6, 2009 4:52 PM
Darth, your Dauntless looks good.  Looking forward to seeing the finished result.
  • Member since
    May 2009
  • From: Hobart, Tasmania
Posted by Konigwolf13 on Saturday, October 17, 2009 6:42 AM

Well long time, no post. I got my Hs-123 cockpit painted, ready to start getting really serious, when things had to be packed up ready for a big move, 4-5 months later, its not going to happen Sigh [sigh]. So have unpacked all my stuff again, heres where I'm up to. Have to pick up a couple of replacement airbrush tips next week then shall be off and racing again, till then I have the cockpit finish off etc.


Andrew

  • Member since
    May 2009
  • From: Hobart, Tasmania
Posted by Konigwolf13 on Saturday, October 24, 2009 7:07 AM

Well got some time to work on my Hs-123 today and gotta say, what a failure Oops [oops].

 My first go with resins and it was messy to say the least, but it was a good learning curve, so thast at least one positive.

See pics Blush [:I]

well cockpits about 90% painted, Have put the fuselage together,will do the rest of the cockpit, and clean up as much error from out side, as its pretty roomy in the areas I need access to. 

  • Member since
    December 2002
  • From: Bury St Edmunds, Suffolk, England
Posted by Bish on Saturday, October 24, 2009 10:33 AM
Aggieman Afraid i am going to have to drop out of this. I have been able to get most of the painting done, but then found out i have lost a couple of parts. I have been trying to get them replaced but with no success, and now its a bit late and theres no way i will be able to finish in time. I do hope to get it finished some time next year, have been wanting to build this for years. Sorry about that.

I am a Norfolk man and i glory in being so


On the bench: Airfix 1/72nd Harrier GR.3/Fujimi 1/72nd Ju 87D-3

  • Member since
    January 2015
  • From: Katy, TX
Posted by Aggieman on Saturday, October 24, 2009 10:34 PM
Bish, it's fine to finish whenever you can.  Be sure to post pictures when you are able to finish.  Sorry to hear about the frustrating loss of parts, that really stinks when that happens.
  • Member since
    September 2008
  • From: World Champions! Not anymore..
Posted by swingr1121 on Sunday, October 25, 2009 4:44 PM

Alright.  I guess I have to prove that I'm actually working on the A-36.  It's coming along, slowly, but surely.  I installed the pit and closed her up.  Wings have been installed.  Then I got the idea to cut out the molded in dive flaps and install some PE ones.  Lucky me.  Figured I'd challenge myself. 

As you can see, things have also been painted.  I filled some gaps, sanded said gaps, primed it all up, and started the painting process.  I'm still doing some work on the landing gear, but here is how she sits right now, waiting for some touching up.  The yellow ID bands are painted on.  I figured I needed another challenge.

Hopefully by the end of the day I'll have a coat of future on it waiting for decals.

Enjoy

Mike

  • Member since
    March 2008
  • From: New Jersey
Posted by Dirkpitt289 on Monday, October 26, 2009 10:24 PM

 Hi everyone

I just finished this Testors 1/72 SBD Dauntless for the the "War in the Pacific Group Build." I'm not usually a fan of one plane for multiple GB's but since this easly fits the requirements I thought I'd at least show you guys. Its Lt Stanley W. "Swede" Vejtasa's SBD Dautless as I believe it may have looked as he brought it back to the USS Yorktown that fateful day back on 08 May 1942.


This kit was a staggering $7 and has been dubed "El-Cheap-O POS Testors kit" because of its lack of detail. Detail like A COCKPIT!!!! I would never sugest this kit to anyone, but I have to admit I got my moneys worth when you consider how long it kept me occupied. It also was a good test bed for some scratch building, PE application and weathering techniques.

Thanks for taking the time to look.

Dirk

On The Bench:

B-17F "Old 666" [1/72]

JU-52/53 Minesweeper [1/72]

Twin Me 262's [1/72] Nightfighter and Big Cannon

  • Member since
    July 2005
  • From: Dayton, Ohio
Posted by warhorse3 on Sunday, November 1, 2009 2:23 PM
I know it's been awhile since my last post here, but the last two months have left me very little benchtime. Apparently my kit had some incorrectly molded dive flap actuators that I've had to correct and the bomb crutch is too weak to suspend the bomb at full extension so I'm making a new one out of brass rod. Hopefully I'll be finished with this build by the deadline and get the time to figure out how to post the pics I've taken. Yeah I know it's not quantum physics but for me to get a half hour or longer a week online for the past three months has been difficult.
Regards, Bill
  • Member since
    November 2007
  • From: Potomac Falls, VA
Posted by darth_trader on Wednesday, November 4, 2009 10:15 AM

Dirk,

Excellent job on your Dauntless, I love the battle damage!  You definitely got your money's worth, display her with pride!

Swede was indeed a true hero, I saw a bio of him on the Military Channel.  In one hop, he took on 3 Zeros in his Dauntless. 


  • Member since
    May 2009
  • From: Hobart, Tasmania
Posted by Konigwolf13 on Tuesday, November 17, 2009 6:19 AM

Hs-123 update, What a truly borked build...

But I'm still going

Well, I must say for my first resin experience, it was, I think somewhat successful. I only broke the control stick at both ends, bottom end while trying to trim the control handle, the control hand while trying to glue the stick to the floor, very fragile isnt it?

Aftergetting the fusaluge together I have to fill and sand a few small seam problems, and end up taking off some of the raised panel lines. So time to try panel engraving (for the first time). I must agree with most of what I read, should be done BEFORE joining aircraft parts together, didnt do a great job there, but no doubt could of been worse.

 Then I decided to build the unspated version, shave off the bulges for attaching the spats and then find the unspated leg frame has gone westSign - With Stupid [#wstupid]. So build up the spats, all together and milliputted the shaved bulges back in, along with a few other gaps on the wings and struts

Pics below are before the milliputing of spats and wheels, lets just say been a learning curve. (also engine cowling is no fixed on yet...


I must say, since getting back in modeling with real intent, it has been a huge learning curve since building kits as a kid and older teen OOB and brush only


Andrew

  • Member since
    September 2008
  • From: World Champions! Not anymore..
Posted by swingr1121 on Monday, November 23, 2009 7:45 PM

Time for a bump.....with pictures!

I haven't forgotten about this GB, just have some family stuffs going on.  Anyway, without further adieu, here's where I sit with my A-36..  Just some fiddly parts and some weathering and I may just call it complete.


Hope you enjoy.


Mike

  • Member since
    January 2015
  • From: Katy, TX
Posted by Aggieman on Tuesday, November 24, 2009 7:55 PM
Mike, the Apache looks great!
  • Member since
    May 2009
  • From: Hobart, Tasmania
Posted by Konigwolf13 on Tuesday, December 1, 2009 12:54 AM

Well first of December here, one month to go and about 90% done on painting.

I have to touch up a few parts where the oaint came off with the masking tape, where it wasnt a 100% perfect job with the eastern front strip and the inside of the engine cowling/engine highlights. After that its just adding the final bits and decals. May or may not weather it as SWMBO has lay'd claim to it(shes wanted a biplane for a while), LOL. Not to worried about the time limit


  • Member since
    May 2009
  • From: Hobart, Tasmania
Posted by Konigwolf13 on Wednesday, December 2, 2009 8:32 AM

Well calling this one a wrap, SWMBO says not to bother with the weathering, she doesnt want the nice paint job looking dirty. On the plus side shes donated a large bottle of gloss laquer to me as long as I get some and thinner and seal it for her.

Did have one small problem at the end, one of the decals tore and disintegrated.

So here's the pics

  • Member since
    January 2015
  • From: Katy, TX
Posted by Aggieman on Wednesday, December 2, 2009 9:20 PM
That's a good looking Hs123.  You made it well before the deadline!
  • Member since
    September 2008
  • From: World Champions! Not anymore..
Posted by swingr1121 on Friday, December 4, 2009 6:53 PM

The Apache is now waiting for some weathering.  She's armed and sits on her own landing gear now..


Just a little bit of paint to shoot on the canopy and windscreen, and a bit of weathering.  I'm particularly worried about that part as I don't think that I've weathered an aircraft before.  In fact, this is the first build that I'll complete in probably 18 years or so.  And back then, I was just helping my dad.  I guess we'll see what happens.  


Mike

  • Member since
    July 2004
  • From: Sonora Desert
Posted by stikpusher on Sunday, December 6, 2009 7:47 PM

This weekend I borrowed a twin .30 flex mount from a Hasegawa A-24 (gonna put in a single    .30 instead) and built it up. I then installed several other "borrowed" interior details- radios, top decking between pilot/gunner, DF homing loop on top of top decking. Here is how the cockpit is coming along to this point.


F is for FIRE, That burns down the whole town!

U is for URANIUM... BOMBS!

N is for NO SURVIVORS...

       - Plankton

LSM


  • Member since
    November 2007
  • From: Potomac Falls, VA
Posted by darth_trader on Tuesday, December 8, 2009 10:35 PM

I finished Accurate Miniatures SBD-3 Dauntless a few weeks ago, but hadn't gotten around to taking some photos...until today.  This is a beautifully detailed kit.  The cockpit required alot of care & patience.  I liked the kit so much that I picked up AM's TBM Avenger on eBay.

This kit represents the plane flown on 8 May 1942 by Ensign John Leppla and ARM3c John Liska during the Battle of the Coral Sea. Leppla was credited with four kills over a two-day period, while Liska claimed three. It is perhaps the best known and documented of all Dauntlesses to be flown during The Coral Sea action - 2-S-12 (BuNo 4547) of VS-2, USS Lexington (CV-2) during the Spring of 1942.

  • Member since
    July 2004
  • From: Sonora Desert
Posted by stikpusher on Sunday, December 13, 2009 9:48 PM

I installed a scope/sight taken from an old Monogram TBD kit and also installed the instrument panel I made. I also dipped the canopy pieces in future during the week. Almost ready for main painting.


F is for FIRE, That burns down the whole town!

U is for URANIUM... BOMBS!

N is for NO SURVIVORS...

       - Plankton

LSM


  • Member since
    July 2005
  • From: Dayton, Ohio
Posted by warhorse3 on Thursday, December 24, 2009 4:39 PM

Merry Christmas to all. Finally finished my SBD-3 last week, that's the good news. The bad news is that I'm having problems loading the pics into Photobucket. I've noticed other members saying that they have had problems also. Hopefully I'll be able to get this resolved in the next few days. The Apache looks great and the Hs-123is no slouch eitherYes.

Regards, Bill
  • Member since
    June 2008
Posted by lewbud on Monday, December 28, 2009 12:22 AM

Steven,

A change in kits is in order if I'm to bang this one out before the deadline, the new kit is the Revell Germany Vultee Vengeance Mk. II.  Having trouble deciphering the paint call outs, but it looks like Dk Earth, Dk Green over Sky.  Would this be correct for an aircraft serving in India 1943?  Any help mucho appreciated.

Buddy- Those who say there are no stupid questions have never worked in customer service.

  • Member since
    September 2008
  • From: World Champions! Not anymore..
Posted by swingr1121 on Thursday, December 31, 2009 3:08 PM

Ok, I'm going to call this one complete at the deadline. 

While trying to finish this one up, everything seemed like it was acting against me.  The weathering didn't go as I had planned.  Apparently a tube of white acrylic got mixed in with my oils and I started doing a pinwash with it.  Then I wondered why the mineral spirits wouldn't work on the white..  That was fun.  Then as I was getting everything all ready and applying the dull coat, I accidentally oversprayed the canopy.  After that I decided I was going to open it up so you could at least see inside.  Anyway, here's the A-36 that was fun to build, and a bit different.  Don't worry, the HS decals have been applied to the prop, I just don't have a photo of it yet...


JOIN OUR COMMUNITY!

Our community is FREE to join. To participate you must either login or register for an account.

SEARCH FORUMS
FREE NEWSLETTER
By signing up you may also receive reader surveys and occasional special offers. We do not sell, rent or trade our email lists. View our Privacy Policy.