SEARCH FINESCALE.COM

Enter keywords or a search phrase below:

Dive Bomber Group Build (May 1 - Dec 31 2009)

38905 views
160 replies
1 rating 2 rating 3 rating 4 rating 5 rating
  • Member since
    March 2006
Posted by TD4438 on Friday, July 31, 2009 10:38 AM
Jump in any time.

  • Member since
    February 2005
  • From: Cleveland, OH
Posted by RadMax8 on Saturday, August 1, 2009 2:47 PM
OK! Count me in with two OOTB Monogram Ju-87D's. I'll post photos shortly!
  • Member since
    January 2015
  • From: Katy, TX
Posted by Aggieman on Sunday, August 2, 2009 8:02 AM

Max, welcome to the build!  I've added you to the front page listing.  Looking forward to your photos.

  • Member since
    March 2007
Posted by KAYSEE88 on Sunday, August 2, 2009 8:55 AM

hello....i think i'll like to join,,,, if thats OK ????

I got a Revell 1/32 DAUNTLESS thats has a sheet of dust on the box.....will do just OOB. we'll see

as for pics,,,,,maybe just the finished ones only......still looking around for my first camera Blush [:I]

please let me know......THANKS!!!!


  • Member since
    January 2015
  • From: Katy, TX
Posted by Aggieman on Sunday, August 2, 2009 2:04 PM
Ken, welcome aboard!  I'm adding your build to the front page.
  • Member since
    March 2008
  • From: Indy
Posted by raider83 on Sunday, August 2, 2009 2:24 PM

Here is my Dauntless, courtesy of Aggieman for the Secret Santa GB and the dive bomber GB. Thank you again Aggieman, it was a fun one. The kit was not bad. The cockpit is fantastic, as are all the other cockpits from Accurate Miniatures. Fit was alright. The wing roots were a bit tricky. Everything else went fine. I wanted to make this plane look old and beat up but i think I overdid it....US Navy carrier planes usually didn't get this dirty or chipped. And speaking of chips, I tried the salt chipping technique with sand. That didn't go over so well, so I painted on aluminum chips with enamel paint. But I forgot the turpenoid in my oil wash dilutes enamels, so the chips are kinda streaky.Whistling <img src=" border="0" width="30" height="20" />. The figures and vehicles are from AM's set of ordnance and such. I know the figures look like toys. I need to work on that. Please feel free to leave any comments or criticisms. I entered this in my county fair for 4-H. It got a reserve champion which is alright. Unfortunately, it will not be going to the state fair.


On the bench: Monogram 1/48 Kingfisher Cardinal Ritter- Class 1A 2008 Indiana State Football Champs
  • Member since
    July 2004
  • From: Sonora Desert
Posted by stikpusher on Sunday, August 2, 2009 6:04 PM

OK, today I pulled my SBD kit (The Confederate Air Force Ghost Squadron issue) out of the "in waiting" area and resumed work. Of course half the day was spent trying to find my Detail and Scale SBD book. Which after hours of searching my house I finally did. So, I first added some detail to the inner faces of the landing gear doors- "step ledges" along the lengths, and lightening cut outs as well. I glued the doors to the struts after completeing the mods. Next I scratch built from sprue a new mounting pivot for the bomb displacment crutch. The kit one was angular and on the actual SBD it is cylindrical. I also scratch built an oil cooler from a piece of sprue and brass screen as this area I opened and is empty when seen. My final task was to create a new face for the instrument panel. The kit supplies a decal so I took some very thin sheet plastic, cut it to shape, the marked and drilled out holes to match the locations of the instruments. I also added some stretched sprue for knobs on the panel. 

Here are a few pics of my work from today. It's kind of hard to see the work, but it is the best my camera would show.

New IP face with kit decal and new oil cooler

View of landing gear door mods after being glued in place

View of opened oil cooler scoop and new mount for bomb crutch.


F is for FIRE, That burns down the whole town!

U is for URANIUM... BOMBS!

N is for NO SURVIVORS...

       - Plankton

LSM


  • Member since
    February 2005
  • From: Cleveland, OH
Posted by RadMax8 on Monday, August 3, 2009 10:12 PM

Stukas stukas everywhere! I've finally got to posting some of my work. Granted, these kits aren't very heavy on the assembly. Here's what I've done so far:

I just found out the kit canopies will be unusable, so I'm going to cheat and get the Squadron replacements. The pilots in one of the planes are short shot and they look stupid, so I might have to write Revel for some new ones!

Does anyone know what color German bombs should be?

  • Member since
    December 2002
  • From: Fort Bragg
Posted by CTrill09 on Tuesday, August 4, 2009 2:33 AM

Hi,

i just saw the build thread, and im really excited, althought im joining late i would really like to join on and build an accurate minatures, SBD Dauntless Dive Bomber.  Alli have to do is order what i need so i can get started right away.  I look forward to it. Thanks  -Chris

Photobucket
  • Member since
    January 2015
  • From: Katy, TX
Posted by Aggieman on Tuesday, August 4, 2009 5:23 AM
Nice work on those Stukas!
  • Member since
    January 2015
  • From: Katy, TX
Posted by Aggieman on Tuesday, August 4, 2009 5:23 AM
Chris, I've added you to the front page.  Welcome aboard, and looking forward to seeing your Dauntless.
  • Member since
    November 2007
  • From: Potomac Falls, VA
Posted by darth_trader on Wednesday, August 5, 2009 11:47 AM

Raider, excellent job on the Dauntless!  Diorama looks great too!  Hope my SBD turns out as well as yours. 

I finished up the cockpit, although after looking at this photo, I need to hit the instrument panel.

This is my first kit by Accurate Miniatures, the detail is great, however, the cockpit requires alot of patience.  I've spent alot of time on the gunner's chair & trying to get the deck to fit into the bottom of the fuselage.  At least all of the small parts are done now Smile [:)]


  • Member since
    December 2008
  • From: Goffstown, NH
Posted by New Hampshire on Saturday, August 29, 2009 8:48 PM

Just wanted to drop in and say I have not forgotten this GB.  I have started the Val and already have the fuselage buttoned up (I forgot to take pics of the cockpit building.....you'll just have to take my word it looks decent Big Smile [:D] ).  I will try and get some pics of current build status if I remember (an iffy proposition with my memory Blush [:I]

Brian

  • Member since
    July 2005
  • From: Dayton, Ohio
Posted by warhorse3 on Sunday, August 30, 2009 2:28 PM
I feel your pain. NH. It's been a busy summer for me, not much time at the bench. I've gotten the base ready for final paint after test fitting my SBD. I still have some final assembly work plus decals and weathering to do.     Nice dio raider.    Regards, Bill
Regards, Bill
  • Member since
    October 2006
  • From: Rochester, NY
Posted by silentmodeler on Monday, August 31, 2009 4:19 AM
aww!!  i just finished my SBD dive bomber and didnt realized abt this gb!  dang!!!  i might dont have the time to other one now til dec since i have serveral of dive bombers to build.  Hopefully in the future.
"Do, do not, theres no try" ~Yoda
  • Member since
    September 2008
  • From: World Champions! Not anymore..
Posted by swingr1121 on Sunday, September 6, 2009 10:51 AM

I have finally gotten some bench time.  Haven't finished my "man cave" yet but decided I needed to do some modelling.  I ended up choosing the A-36 over the A-24.  I'm just about to close up the fuselage and snapped a couple of photos. 

This is the Accurate Miniatures kit.  I picked it up at a show and it came with some PE that I'm attempting to use (first for me).  There are also some white metal parts too that may or may not be used.  We'll see.  Anyhow, how bout a couple of pics?


In the second pic you can see that I decided to add some wire to liven that area up a bit.  Enjoy.


Mike

  • Member since
    February 2005
  • From: Cleveland, OH
Posted by RadMax8 on Sunday, September 6, 2009 9:50 PM
One of my absoulute favorite planes. Be careful on fitting the rear radiator scoop thingy. It's really difficult to understand in the instructions. If you need help I'll try to post pictures of how it's supposed to go in!
  • Member since
    September 2008
  • From: World Champions! Not anymore..
Posted by swingr1121 on Sunday, September 13, 2009 7:52 PM

Still plugging away on the A-36.  Not too much progress to report on.  The pit is installed, the fuselage is together.  It looks like an early mustang.  Doing some filling and sanding on it and that's about it.  Will put some pics up soon.

Max, if I need some help I'll be sure to give you a shout.  I remembered that you like the Allison Mustangs.  The Wildcat is next up!


Mike

  • Member since
    November 2007
  • From: Potomac Falls, VA
Posted by darth_trader on Monday, October 5, 2009 9:36 PM

Fellow Dive Bombers,

I've been making progress here & there.  Whenever I walk past the workbench, I try to get something glued or painted or sanded.  Almost ready for the clearcote & some weathering.


  • Member since
    January 2015
  • From: Katy, TX
Posted by Aggieman on Tuesday, October 6, 2009 4:52 PM
Darth, your Dauntless looks good.  Looking forward to seeing the finished result.
  • Member since
    May 2009
  • From: Hobart, Tasmania
Posted by Konigwolf13 on Saturday, October 17, 2009 6:42 AM

Well long time, no post. I got my Hs-123 cockpit painted, ready to start getting really serious, when things had to be packed up ready for a big move, 4-5 months later, its not going to happen Sigh [sigh]. So have unpacked all my stuff again, heres where I'm up to. Have to pick up a couple of replacement airbrush tips next week then shall be off and racing again, till then I have the cockpit finish off etc.


Andrew

  • Member since
    May 2009
  • From: Hobart, Tasmania
Posted by Konigwolf13 on Saturday, October 24, 2009 7:07 AM

Well got some time to work on my Hs-123 today and gotta say, what a failure Oops [oops].

 My first go with resins and it was messy to say the least, but it was a good learning curve, so thast at least one positive.

See pics Blush [:I]

well cockpits about 90% painted, Have put the fuselage together,will do the rest of the cockpit, and clean up as much error from out side, as its pretty roomy in the areas I need access to. 

  • Member since
    December 2002
  • From: Bury St Edmunds, Suffolk, England
Posted by Bish on Saturday, October 24, 2009 10:33 AM
Aggieman Afraid i am going to have to drop out of this. I have been able to get most of the painting done, but then found out i have lost a couple of parts. I have been trying to get them replaced but with no success, and now its a bit late and theres no way i will be able to finish in time. I do hope to get it finished some time next year, have been wanting to build this for years. Sorry about that.

I am a Norfolk man and i glory in being so


On the bench: Airfix 1/72nd Harrier GR.3/Fujimi 1/72nd Ju 87D-3

  • Member since
    January 2015
  • From: Katy, TX
Posted by Aggieman on Saturday, October 24, 2009 10:34 PM
Bish, it's fine to finish whenever you can.  Be sure to post pictures when you are able to finish.  Sorry to hear about the frustrating loss of parts, that really stinks when that happens.
  • Member since
    September 2008
  • From: World Champions! Not anymore..
Posted by swingr1121 on Sunday, October 25, 2009 4:44 PM

Alright.  I guess I have to prove that I'm actually working on the A-36.  It's coming along, slowly, but surely.  I installed the pit and closed her up.  Wings have been installed.  Then I got the idea to cut out the molded in dive flaps and install some PE ones.  Lucky me.  Figured I'd challenge myself. 

As you can see, things have also been painted.  I filled some gaps, sanded said gaps, primed it all up, and started the painting process.  I'm still doing some work on the landing gear, but here is how she sits right now, waiting for some touching up.  The yellow ID bands are painted on.  I figured I needed another challenge.

Hopefully by the end of the day I'll have a coat of future on it waiting for decals.

Enjoy

Mike

  • Member since
    March 2008
  • From: New Jersey
Posted by Dirkpitt289 on Monday, October 26, 2009 10:24 PM

 Hi everyone

I just finished this Testors 1/72 SBD Dauntless for the the "War in the Pacific Group Build." I'm not usually a fan of one plane for multiple GB's but since this easly fits the requirements I thought I'd at least show you guys. Its Lt Stanley W. "Swede" Vejtasa's SBD Dautless as I believe it may have looked as he brought it back to the USS Yorktown that fateful day back on 08 May 1942.


This kit was a staggering $7 and has been dubed "El-Cheap-O POS Testors kit" because of its lack of detail. Detail like A COCKPIT!!!! I would never sugest this kit to anyone, but I have to admit I got my moneys worth when you consider how long it kept me occupied. It also was a good test bed for some scratch building, PE application and weathering techniques.

Thanks for taking the time to look.

Dirk

On The Bench:

B-17F "Old 666" [1/72]

JU-52/53 Minesweeper [1/72]

Twin Me 262's [1/72] Nightfighter and Big Cannon

  • Member since
    July 2005
  • From: Dayton, Ohio
Posted by warhorse3 on Sunday, November 1, 2009 2:23 PM
I know it's been awhile since my last post here, but the last two months have left me very little benchtime. Apparently my kit had some incorrectly molded dive flap actuators that I've had to correct and the bomb crutch is too weak to suspend the bomb at full extension so I'm making a new one out of brass rod. Hopefully I'll be finished with this build by the deadline and get the time to figure out how to post the pics I've taken. Yeah I know it's not quantum physics but for me to get a half hour or longer a week online for the past three months has been difficult.
Regards, Bill
  • Member since
    November 2007
  • From: Potomac Falls, VA
Posted by darth_trader on Wednesday, November 4, 2009 10:15 AM

Dirk,

Excellent job on your Dauntless, I love the battle damage!  You definitely got your money's worth, display her with pride!

Swede was indeed a true hero, I saw a bio of him on the Military Channel.  In one hop, he took on 3 Zeros in his Dauntless. 


  • Member since
    May 2009
  • From: Hobart, Tasmania
Posted by Konigwolf13 on Tuesday, November 17, 2009 6:19 AM

Hs-123 update, What a truly borked build...

But I'm still going

Well, I must say for my first resin experience, it was, I think somewhat successful. I only broke the control stick at both ends, bottom end while trying to trim the control handle, the control hand while trying to glue the stick to the floor, very fragile isnt it?

Aftergetting the fusaluge together I have to fill and sand a few small seam problems, and end up taking off some of the raised panel lines. So time to try panel engraving (for the first time). I must agree with most of what I read, should be done BEFORE joining aircraft parts together, didnt do a great job there, but no doubt could of been worse.

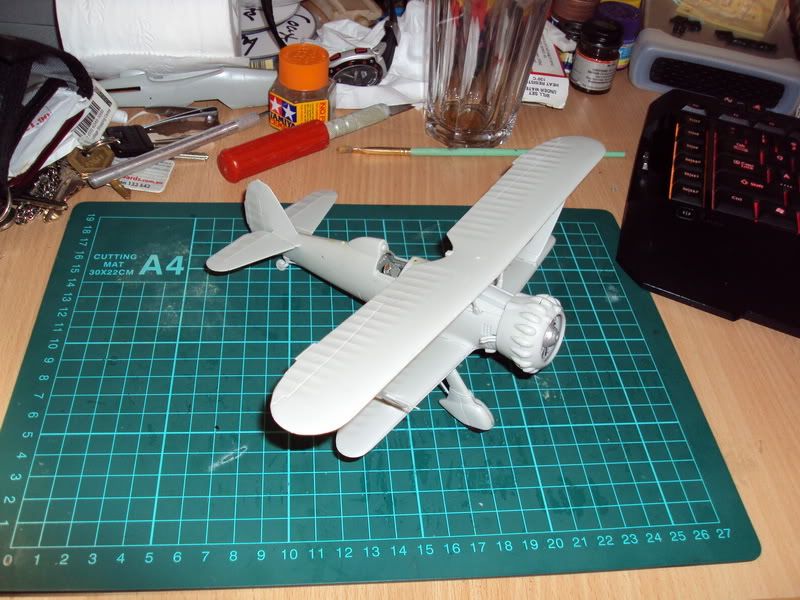
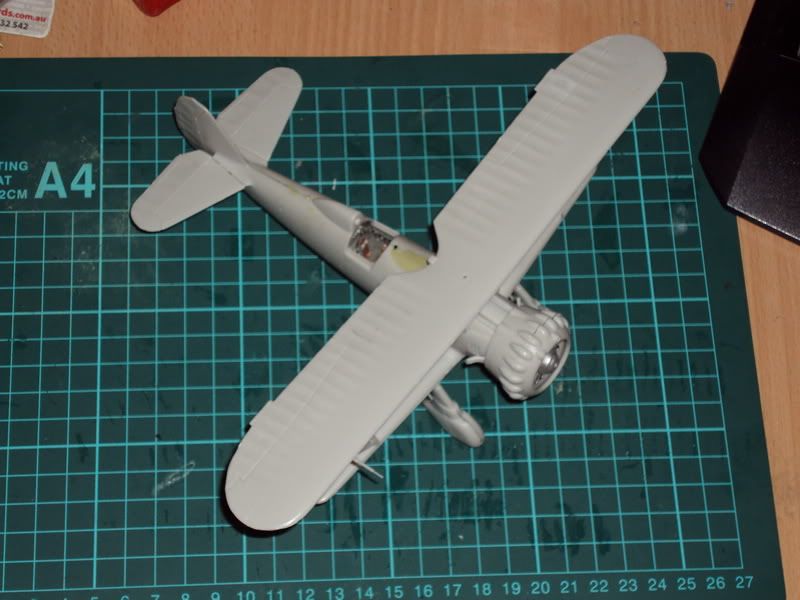
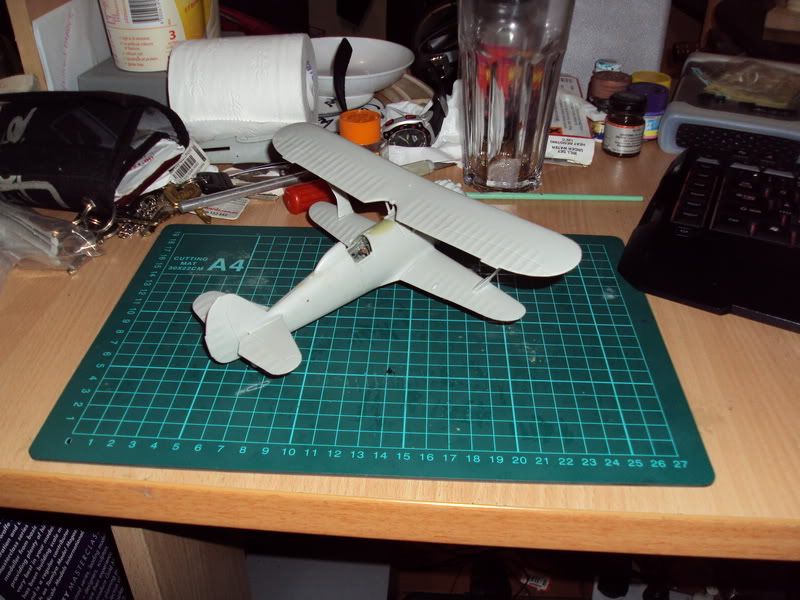
 Then I decided to build the unspated version, shave off the bulges for attaching the spats and then find the unspated leg frame has gone westSign - With Stupid [#wstupid]. So build up the spats, all together and milliputted the shaved bulges back in, along with a few other gaps on the wings and struts

Pics below are before the milliputing of spats and wheels, lets just say been a learning curve. (also engine cowling is no fixed on yet...


I must say, since getting back in modeling with real intent, it has been a huge learning curve since building kits as a kid and older teen OOB and brush only


Andrew

  • Member since
    September 2008
  • From: World Champions! Not anymore..
Posted by swingr1121 on Monday, November 23, 2009 7:45 PM

Time for a bump.....with pictures!

I haven't forgotten about this GB, just have some family stuffs going on.  Anyway, without further adieu, here's where I sit with my A-36..  Just some fiddly parts and some weathering and I may just call it complete.


Hope you enjoy.


Mike

JOIN OUR COMMUNITY!

Our community is FREE to join. To participate you must either login or register for an account.

SEARCH FORUMS
FREE NEWSLETTER
By signing up you may also receive reader surveys and occasional special offers. We do not sell, rent or trade our email lists. View our Privacy Policy.