SEARCH FINESCALE.COM

Enter keywords or a search phrase below:

Anti-aircraft GB

29876 views
119 replies
1 rating 2 rating 3 rating 4 rating 5 rating
  • Member since
    March 2003
  • From: Fort Worth, TX
Posted by RESlusher on Sunday, March 14, 2010 9:11 PM

Whew!  At long last, here's the Tamiya "Gepard" flakpanzer! 


 For an older kit it was really cool!  You can pick one up on eBay for about $20 or so.  It's not a perfect kit; but it was still a fun build! 

Of course your comments are welcome!


Richard S.

On the bench:  AFV Club M730A1 Chaparral

On deck:  Tamiya Marder 1A2

In the hole:  Who knows what's next!


  • Member since
    March 2007
  • From: NJ
Posted by JMart on Thursday, February 18, 2010 9:24 AM

cheers

I decided on the LAV-25 AD (Italieri version, not the newer Trumpeter). 1:35 with eduard zoom PE (just the grills and couple handles). Not sure what finish I will give it; either a "museum" finish as this example:

or a "used" finished, based on this build by an OIF vet:

Depends how much time I have available, since I got a late start!


  • Member since
    July 2008
  • From: Vancouver, the "wet coast"
Posted by castelnuovo on Friday, February 5, 2010 9:19 PM

Hi JMart, wellcome to the GB. I put both of your choices on the list. Thanks for the good comment Smile

Welcome Sign

  • Member since
    March 2007
  • From: NJ
Posted by JMart on Friday, February 5, 2010 2:40 PM

Cheers – I would like to join in, if possible.  I still have to decide between the old Tamiya 1:35 Flakpanzer IV Mobelwagon OOB, or go modern with the Italieri 1:35 LAV 25 Air Defence with some PE.  Depends how soon I can  start.

PANZERJAGER – nice start! Look forward to your build. Weird to see German bucket helmets in a T34, cool J And great reference pics. Did the fender damage came built into the CYberHobby kit? Or did you created it yourself? Great job all around, love the cans…   and that is one AMAZING figure!  Cab is looking great, the added details bring it to life. Nice recovery on the wheels and ejector pins.. what a pain! I hate when a manufacturer puts an ejector pin in a pita location. And hey, you got scammed, I only see a penny in that pic ;) talk about small details! Really nice job on the truck, just looks the part! You also managed to make a great finished product of a suck-y kit, the difference is amazing!  My thoughts to you and your family; my own clan has been hit hard at all fronts this past year, one of the main reasons I have not been able to post or build too much at all lately.  Flak gun looks great!  Amazing amount of PE….


Sherman – look forward to your build, great concept. And yes, part of the reason I was away from building (and the forums) was that dreaded Doctor/Lawyer combination. Ugh!  Your build looks great so far… I would hate to be a Phantom driver and have one of those things up my (jet) arse!

Castelnuovo – That is what I call internal details… great job!  Rest of  build looks great..bummer about the fender… I tried once just putting the model close to my light.. takes some time (and patience) but I think gives you more control over the process). I tried the sponge/chip technique once.. I think the key is to make the sponge tip (that touches the kit) a tad smaller, and I kept rotating the sponge so I could “plant” different (and random) patterns of scratches. I followed Ron Goins’ (Biffa) article in Armorama about weathering Soviet armor.

Justinryan215 – Great start… looks like the Dragon 88 is miles ahead of the old Tamiya one…

Hey, we all have real life intrude in our modeling, the humanity! ;)

cheers


  • Member since
    July 2008
  • From: Vancouver, the "wet coast"
Posted by castelnuovo on Friday, January 15, 2010 12:54 AM

I am here...I have been watching what is going on here (great work everybody) but doing very little as far as building goes. Between a full time work and a six months old baby there is very little time to build anythingSad. So, I didn't leave this GB, but yes, I did start another one. I thought I'll have time for both but I just don't. I guess Panzerjeger is right, I shouldn't have started a new GB. Oops...I was too eager. Boo Hoo I'll hold back the next GB untill this one and the "turetless GB"s are done.  If I have time I'll even build another AA model.

Cheers all....hope we are still friends Whistling

  • Member since
    December 2007
  • From: Eagle River, WI
Posted by PANZERJAGER on Thursday, January 14, 2010 1:43 PM

Anyone know what happened to our host, Castelnuovo????

He has been A.W.O.L. for a long time!

Though, I'm not sure but, I thought I saw him starting another G.B. awhile back...

Just thought that it isn't right to start a new G.B. and leave before this one is over.

Kind of wondering if you guys noticed???

Tom F.  (PANZERJAGER)

 PANZERJAGER


  • Member since
    December 2007
  • From: Eagle River, WI
Posted by PANZERJAGER on Thursday, January 14, 2010 1:31 PM


RESlusher, good luck with the barrels!

Why not post some photos, maybe someone here can help?

Trabi, crazy cool stuff you are doing there!

Hope to finish this one sssssooooooonnnnn!!!!!!!

I think that after this one I need to build something easier.

Who ever thought a "little" 20mm flak gun would be soooo_ complicated!

No wonder the Germans lost the war!!!!

Any way, Here is a little update for you folks!

Got the Travel lock and tool box done and it is all soldered as one piece...

Next up is the sight.

The insanity continues!!!

Tom F.

 PANZERJAGER


  • Member since
    September 2007
  • From: Finland funland
Posted by Trabi on Monday, January 11, 2010 12:17 PM

Some update. More plastic rod/tube/strip, led/brass wire and thin sheet metal.


There wasn´t any pattern in tyres. I think minor layer of putty and rolling along a file made the trick.


There was only ammo boxes in the kit, so I made supports from sheet.


I think primer would be the next.

"Space may be the final frontier, but it´s made in Hollywood basement." RHCP, Californication

  • Member since
    March 2003
  • From: Fort Worth, TX
Posted by RESlusher on Monday, January 11, 2010 11:53 AM

Thanks Tom!  Yours is lookin' pretty "high speed" too!  Bow Down

I'm just getting back into it after a Christmas break.  The wife bought me a new airbrush and I used the Home Depot card my in-laws gave me to buy a Porter-Cable compressor with a 4 gallon tank!  I'm finally getting away from canned proplellant.  Yeah

I've still got an issue with one of the barrels on the Gepard.  Gonna have to remake part of the bird cage if I can't find someone willing to part with a spare.  Bang Head

Richard S.

Richard S.

On the bench:  AFV Club M730A1 Chaparral

On deck:  Tamiya Marder 1A2

In the hole:  Who knows what's next!


  • Member since
    December 2007
  • From: Eagle River, WI
Posted by PANZERJAGER on Monday, January 11, 2010 8:52 AM

RESlusher, camo is lookin' good!

Mobious, Thanks for the compliments!

Now for an update.

I am finally getting back in the saddle!

I got in a few good hours of photo-etch on the flak gun this weekend.

Here are some photos of the progress and a photo of the resin flak sled that I purchased too.

More to come soon!

Tom F.

 PANZERJAGER


  • Member since
    September 2007
  • From: Relocating
Posted by Mobious on Monday, January 11, 2010 3:49 AM

 Panzerjaeger, the Cat is Cool. Really like the looks of the blade and the rust, especially the exhaust manifold. Nice work and glad that your father enjoyed it and appreciated it too.

 REslusher, looking forward to seeing more updates on the Gepard.

 Mobious

"It's a problem of applied physics" Roy Brown

  • Member since
    March 2003
  • From: Fort Worth, TX
Posted by RESlusher on Sunday, January 10, 2010 9:14 PM

Here's my Gepard.

I got the 3 color NATO camo done.  I'm gonna let it cure a couple days then start doing the detail work.

More pics to follow.

Richard S.

On the bench:  AFV Club M730A1 Chaparral

On deck:  Tamiya Marder 1A2

In the hole:  Who knows what's next!


  • Member since
    December 2007
  • From: Eagle River, WI
Posted by PANZERJAGER on Friday, January 8, 2010 2:51 PM

1st, let me wish everyone a belated Merry Christmas & a Happy New Year!

Sorry that I dropped of the radar for a few weeks...

Christmas shopping was very lean this year for us (as it probably was for most).

So my wife Marie and I made many of our gifts this year.

As my wife was knitting some stuff, I was building things.

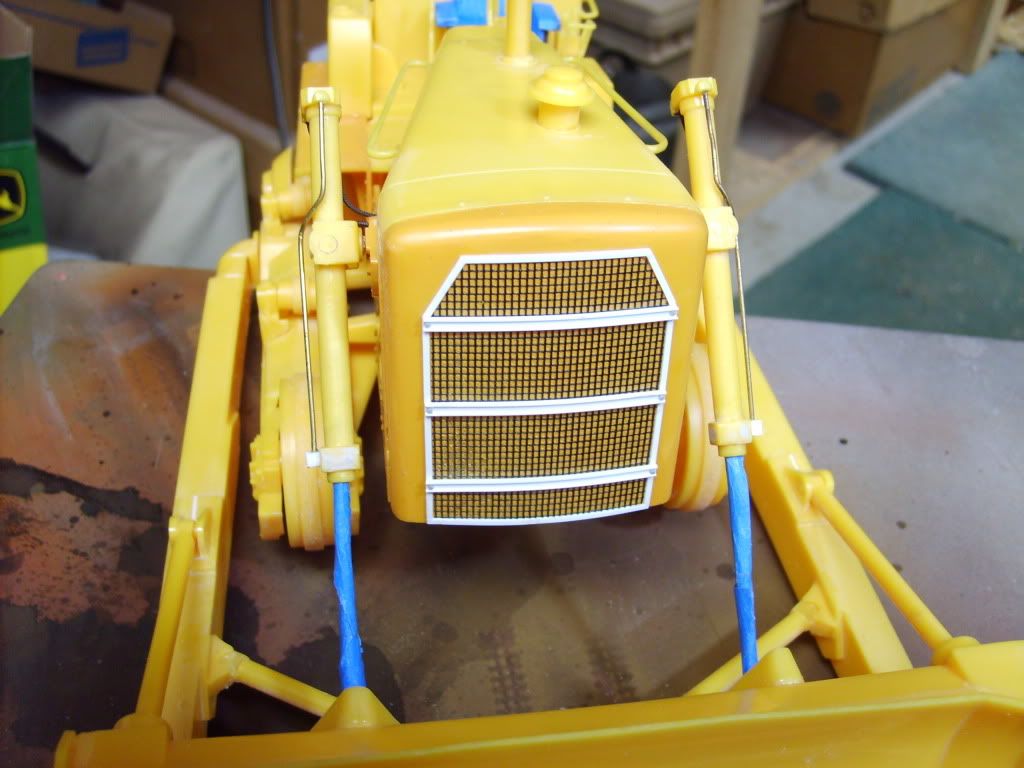
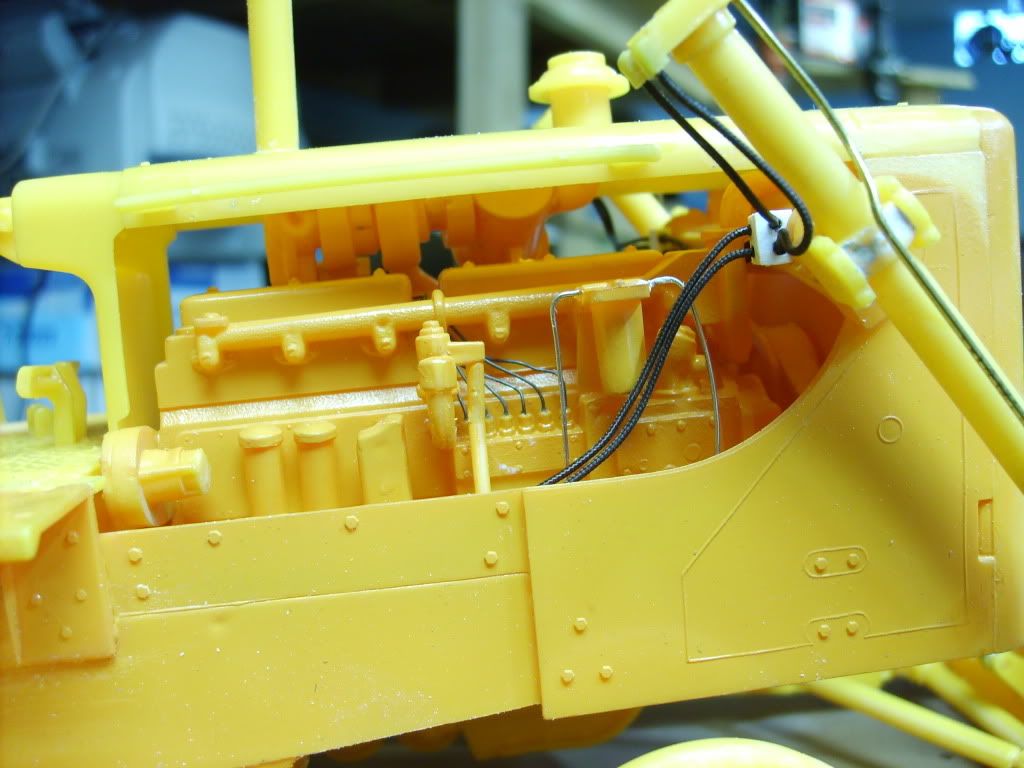
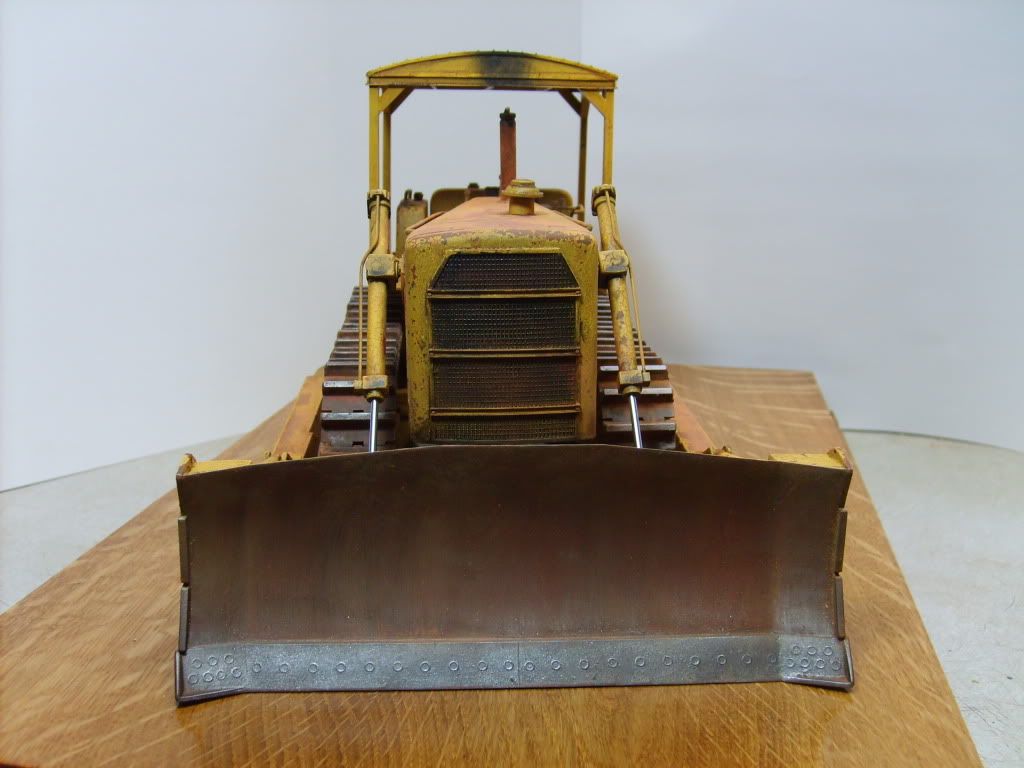
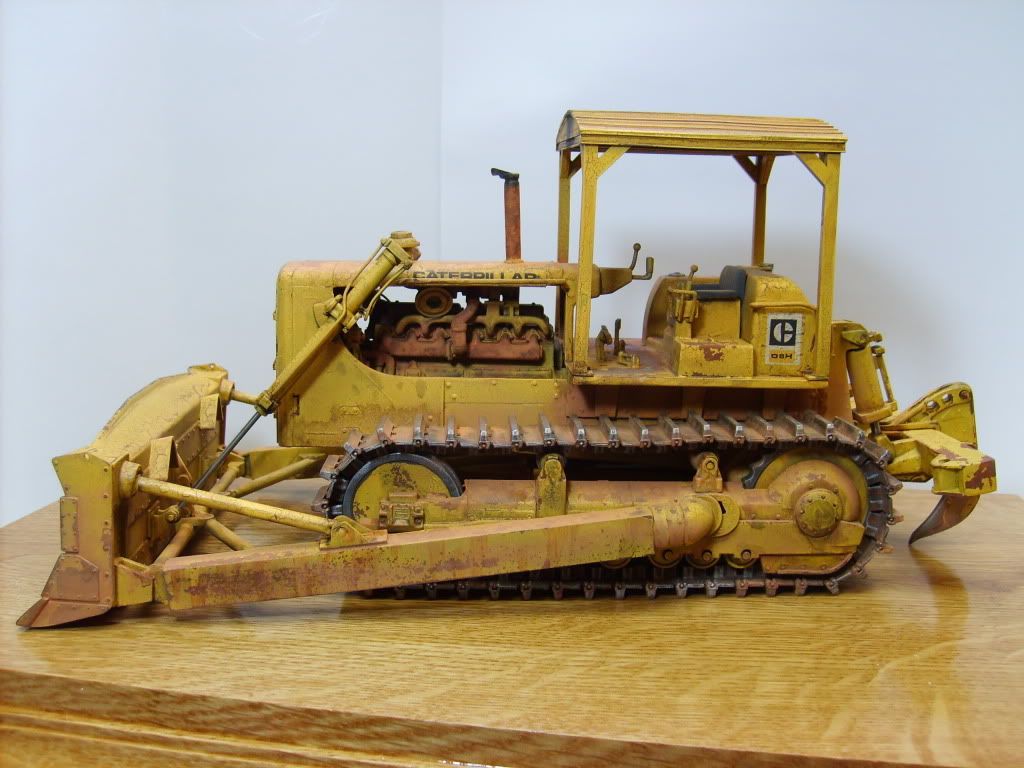
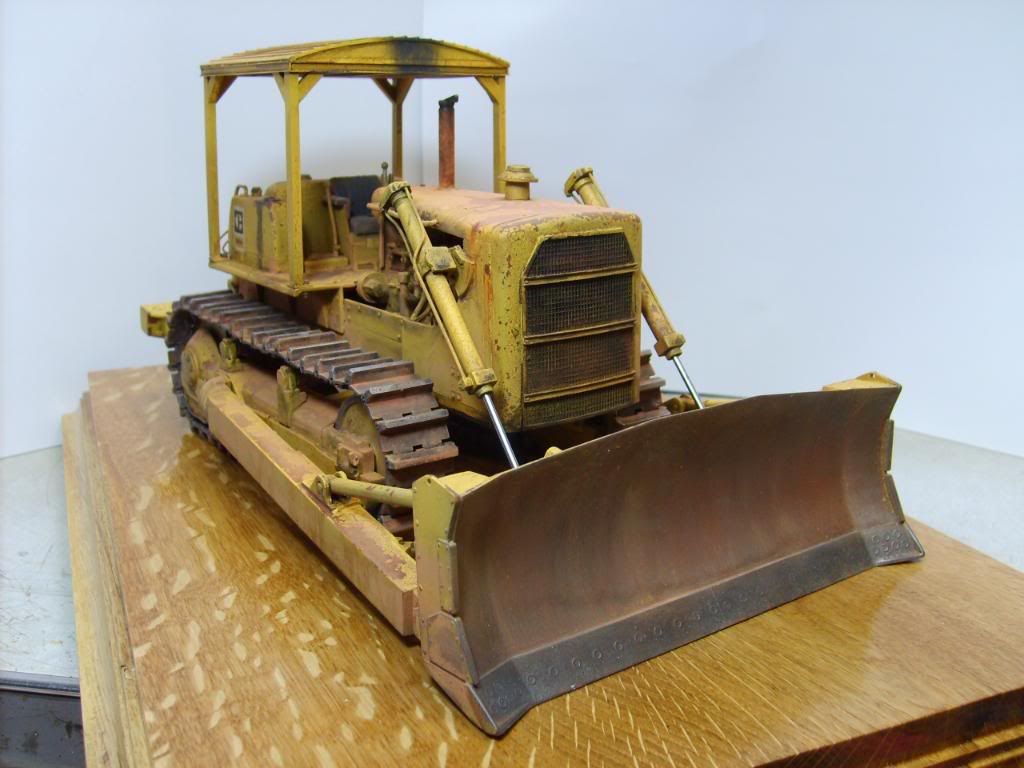
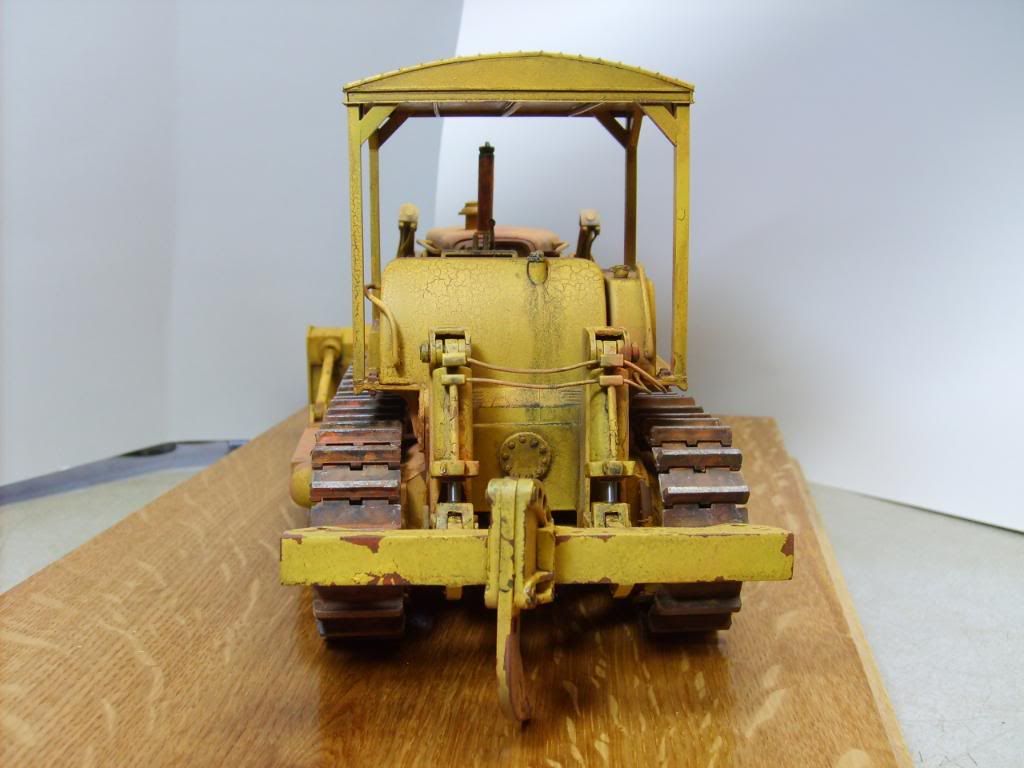
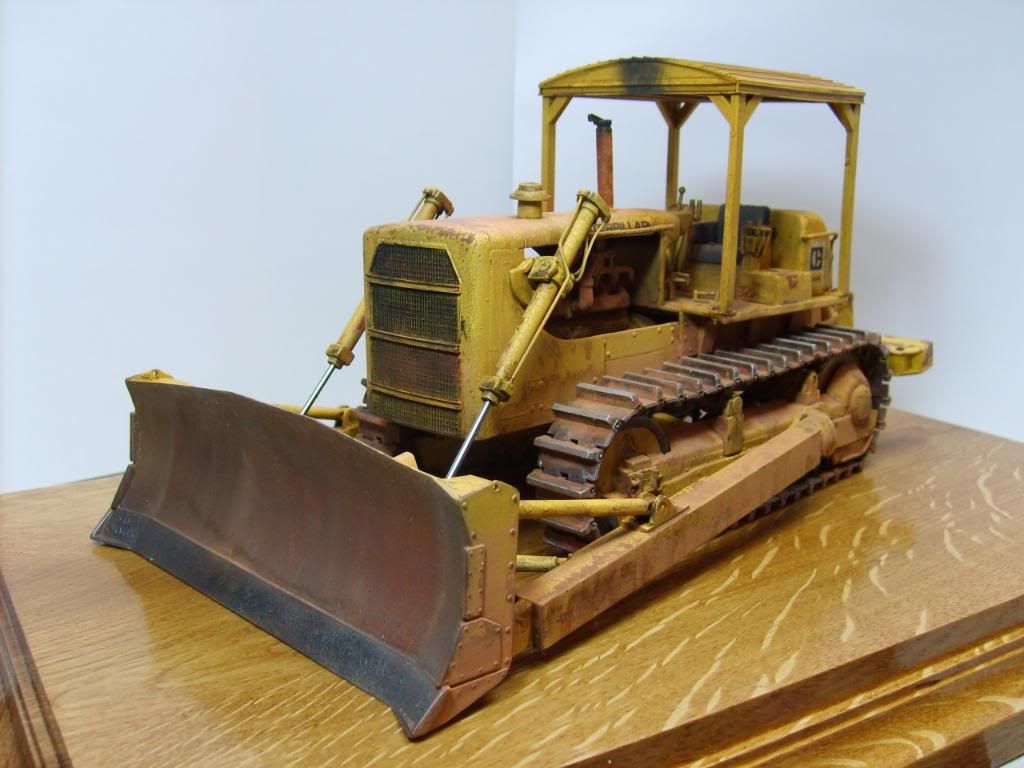
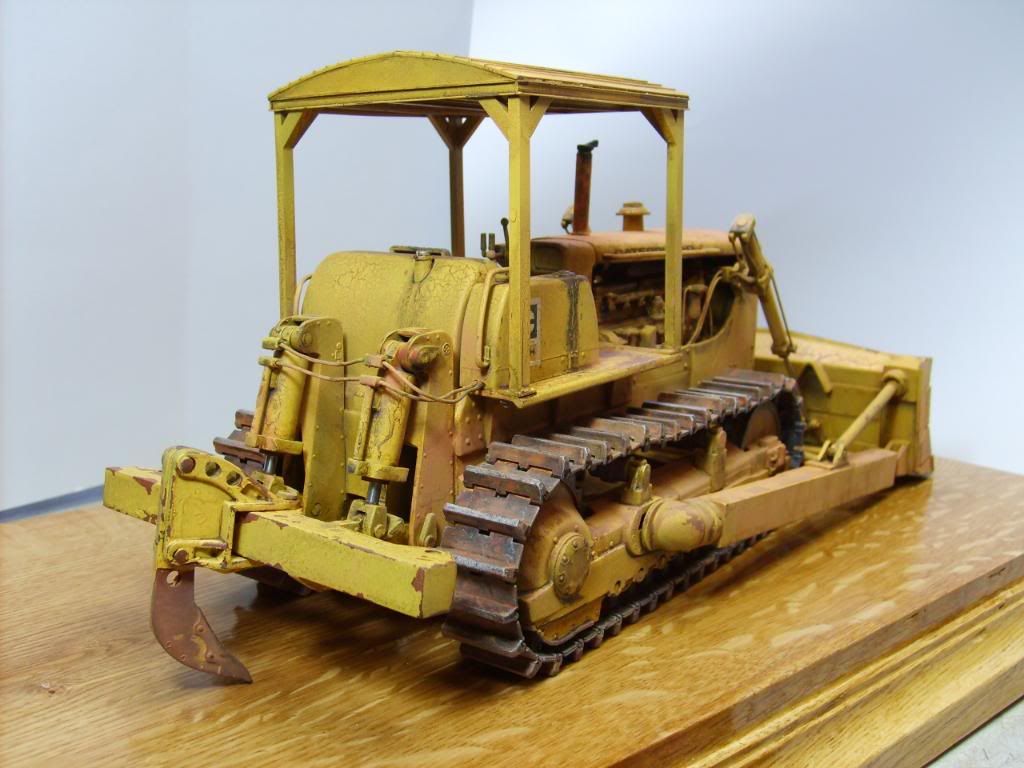
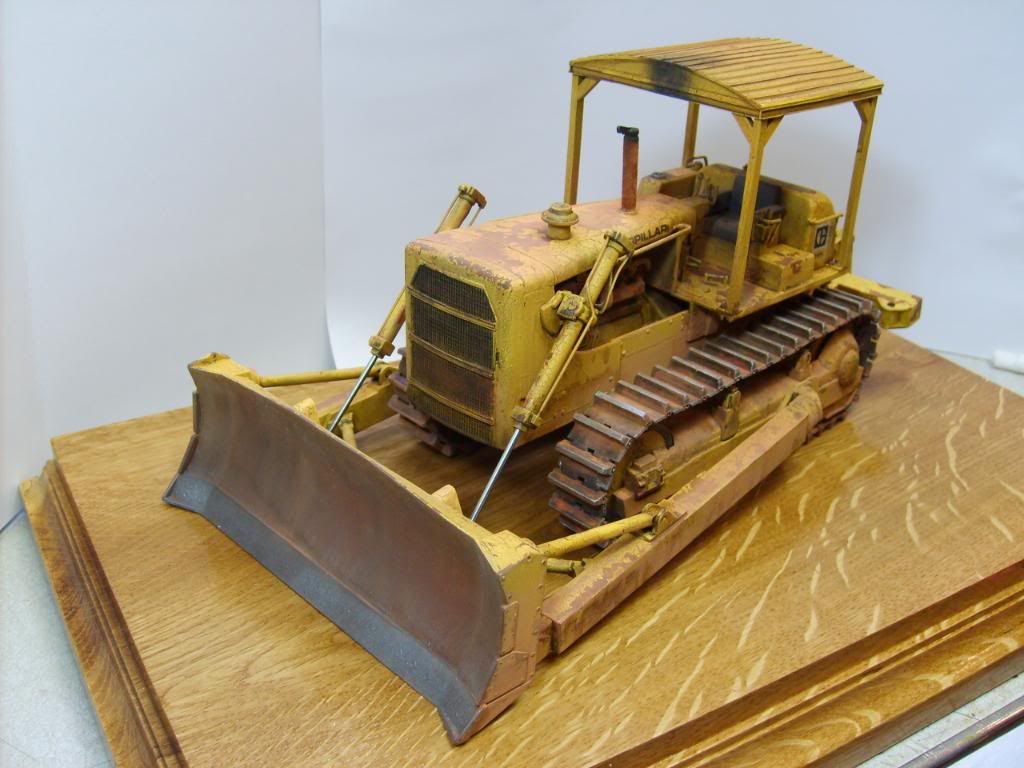
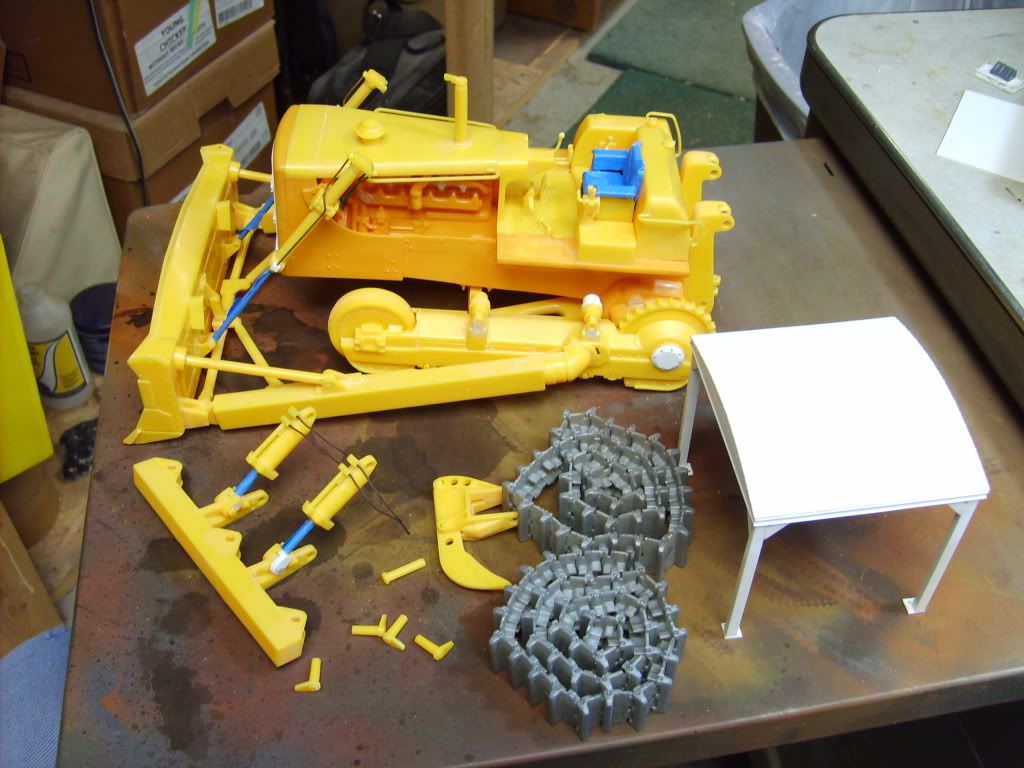
One of the "things" was an AMT D8H Cat bulldozer for my Father.

For those of you who are not familiar with this kit, "IT SUCKS!!!".

Also the kit I had was missing some parts.

Here are some WIP shots;
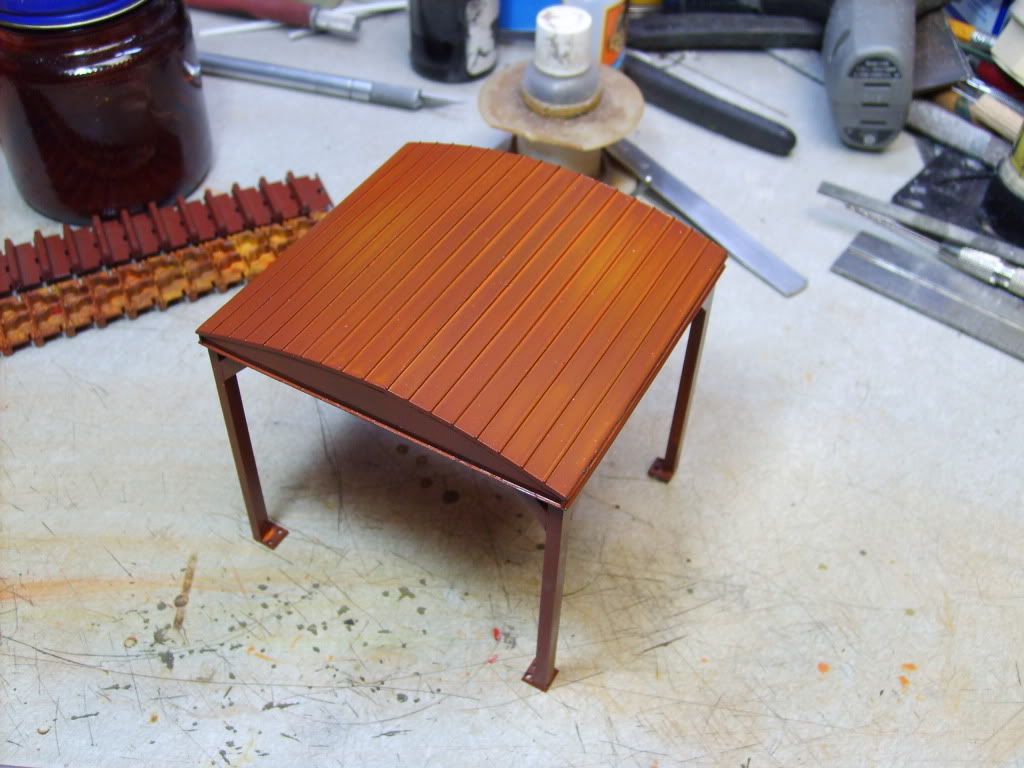
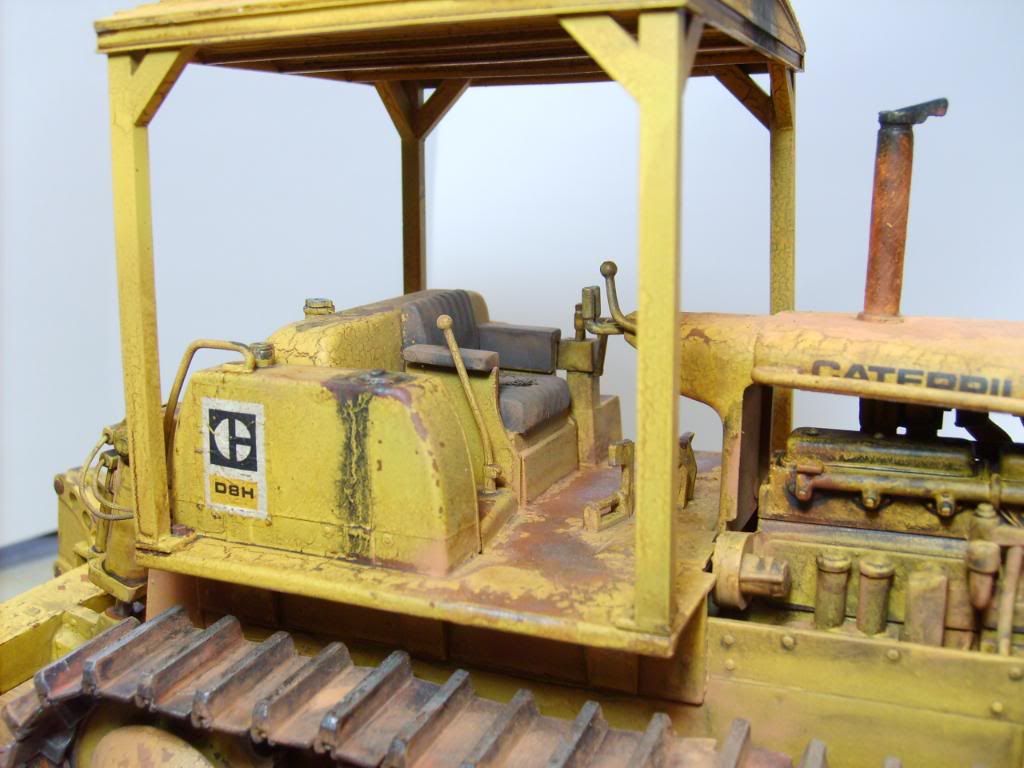
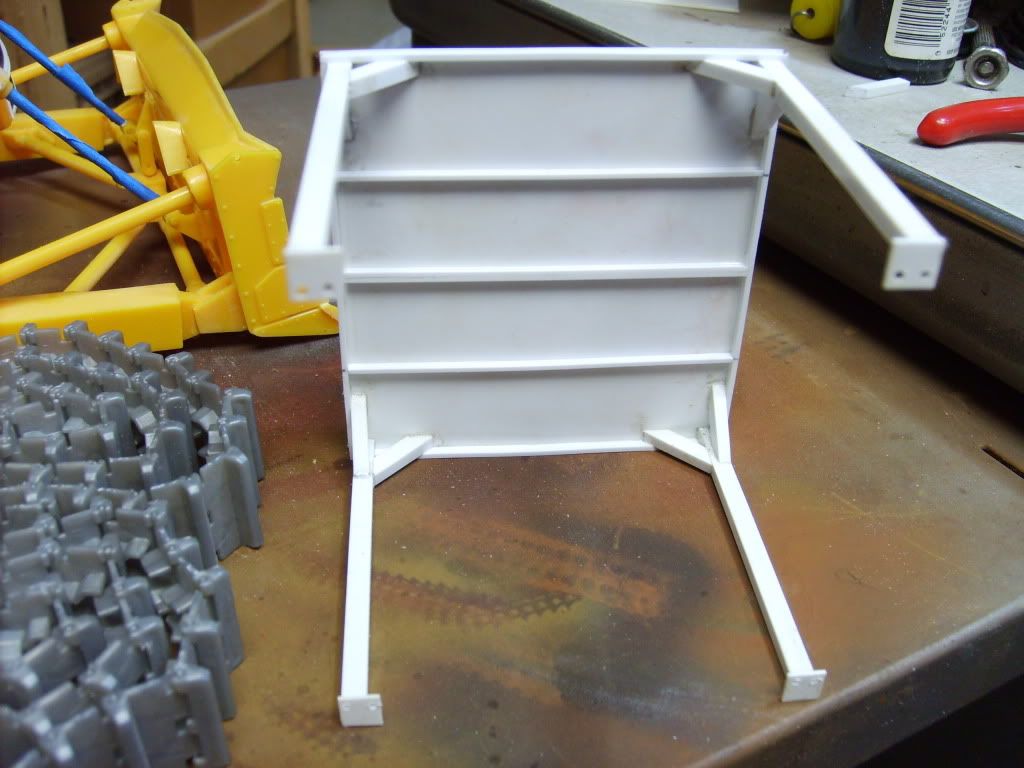
I also scratched up a canopy/ROPS;
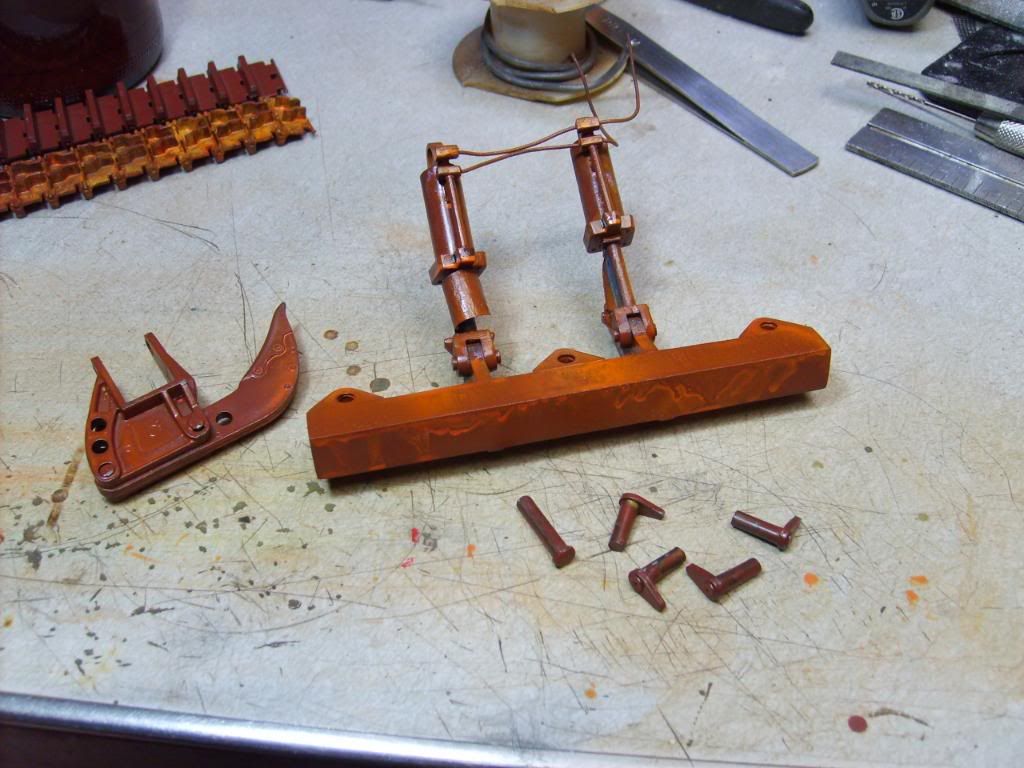
Next I wanted to try that new fanged "Hair Spray Technique", so I weathered everything with Floquil paint and artist oils:
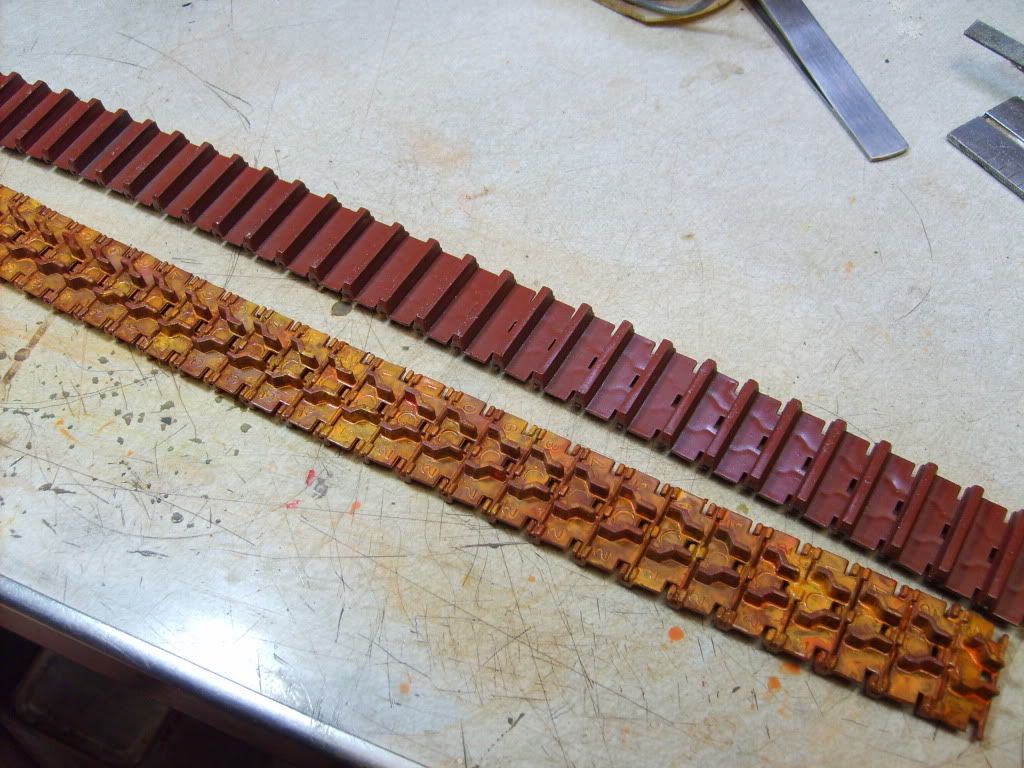
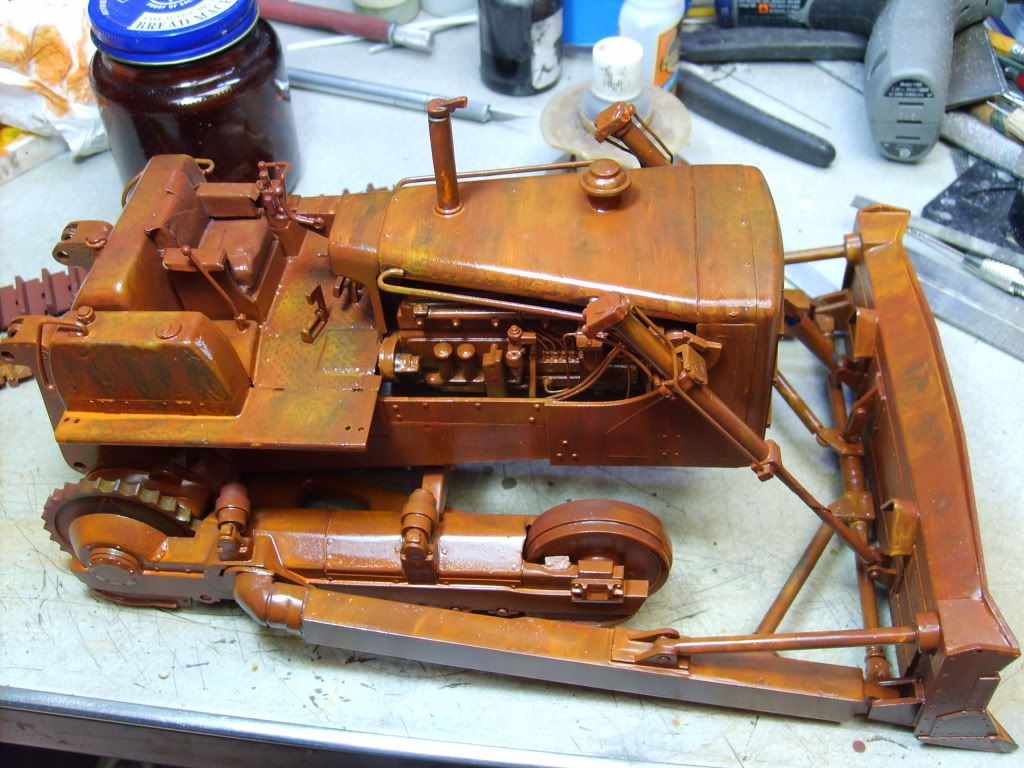
Next I painted it with Model Master Acryl Chrome Yellow, and continued weathering.  I then mounted it on a base made from 100 year old oak that I planed and my step-dad and I routed;
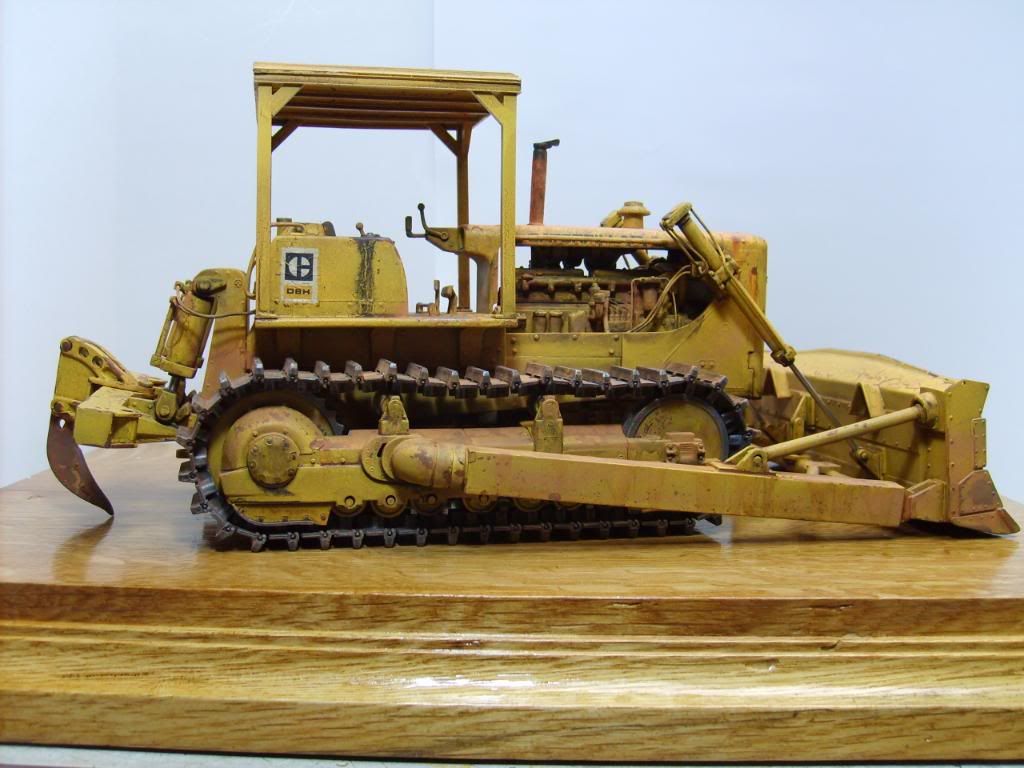
Also of note, I replaced the hydraulic cylinder rods with drill rod, made the lines from led core fly fishing line and bolted the ROPS on with 00-90 brass hex bolts and nuts.

When my Father opened his peasant, he sat with it on his lap for about 45 minutes reminiscing about operating one of these "Old Man Killers" and telling stories about the old days.  It was very gratifying!

There were many other things made in my work shop such as some oak frames for some of Marie's mosaic pictures and a Hand built AR-15 target rifle for my step-brother Rich, that were big hits too.

It would have been a great holiday season, but the day after my father received his gift ( December 27th) I came down with a terrible Flue.  A few days later I found out that my Grand mother's kidneys took a turn for the worst and Marie's sister  lost the battle to take over the mortgage of there Father's house who passed away this time last year.

This week I am going to be assisting in moving Marie's sister and helping to care for my Grand mother.

I hope to be back at things soon, with updates on the Opel Maltier project as well as other things on or about the bench.

As for now I am going to be treading water to keep from drowning from all the stuff put on us at this point.

Sorry for the long post, enjoy the photos and here's wishes for a better new year for everyone!

For more on this ;

/forums/t/124224.aspx

I want to thank Andy and Kentucky Colonel for chiming in!

With any luck I will be back to posting WIP shots this weekend.

Stay tuned!

Tom F (PANZERJAGER)

 PANZERJAGER


  • Member since
    September 2007
  • From: Finland funland
Posted by Trabi on Thursday, December 10, 2009 10:29 AM

Thank you Mobius. I found line draw from above and copied that shape from there. I forced it to shape with wooden stick against some sort of foam board, Kapa board http://www.karthaeuser-breuer.de/en/Produkte/Kapa-Platten/Allgemeine_Informationen/allgemeine_informationen.html


Yes, the lower cannon is bit warped at this moment, but I think it will straighten when it is in it´s place. I try to avoid bending those parts as much as possible. I haven´t ever seen this crispy polystyrene before. Almost like bad resin.

"Space may be the final frontier, but it´s made in Hollywood basement." RHCP, Californication

  • Member since
    September 2007
  • From: Relocating
Posted by Mobious on Thursday, December 10, 2009 4:19 AM

Hey Trabi, the sheet metal seats are cool. nicely done. Were they formed from the kit pieces?  The lower cannon in the photo looks to be a bit warped. Course it may be just the photo. Keep posting. 

"It's a problem of applied physics" Roy Brown

  • Member since
    September 2007
  • From: Finland funland
Posted by Trabi on Wednesday, December 9, 2009 3:10 PM

OK. Let´s see how I deal with this new forum... Ick!


Minor update. Evergreen, brass wire and sheet metal from mustard tube Stick out tongue

"Space may be the final frontier, but it´s made in Hollywood basement." RHCP, Californication

  • Member since
    July 2008
  • From: Vancouver, the "wet coast"
Posted by castelnuovo on Thursday, December 3, 2009 12:39 AM

Wellcome RESlusher....I added you to the list.

Cheers....

  • Member since
    March 2003
  • From: Fort Worth, TX
Posted by RESlusher on Wednesday, December 2, 2009 1:26 PM

UPDATE:  I've applied the black to the base coated NATO Green "Gepard" flakpanzer.

Here's a pic of what I've got done so far...

The wife was gone last night and I couldn't find the Honey-Do list so I had some time to get the black put on.  I'm gonna try to get the brown put on this weekend and seal it so I can start the detail work.

For those of you too young to remember there was a time when there was an East AND a West Germany!!  Clown [:o)]

I'm still looking for a spare barrel if anybody has one lying around too.

Richard S.

On the bench:  AFV Club M730A1 Chaparral

On deck:  Tamiya Marder 1A2

In the hole:  Who knows what's next!


  • Member since
    November 2008
  • From: Hatboro, PA
Posted by Justinryan215 on Tuesday, December 1, 2009 8:17 PM

looking good, Castelnuovo!


I have been waiting to see some updates in this group build!  I haventhad time to get out into thegarage/workzone, but I have a bonus build,  Tamiya's quad cannon 3.7mm Flakvierling...updates to come! 

"...failure to do anything because someone else can do better makes us rather dull and lazy..."

Mortal as I am,I know that I am born for a day.  But when I follow at my pleasure the serried multitude of the stars in their circular course, my feet no longer touch the Earth...


  • Member since
    July 2008
  • From: Vancouver, the "wet coast"
Posted by castelnuovo on Monday, November 30, 2009 3:23 PM

This one is...well...sort of finished. The right fender was arrived damaged and I e-mailed Dragon (who made it) and Squadron (who sold it) asking if it is possible to get a new part. Dragon never responded and Squadron responded within a day asking if the parts have arrived damaged or didi I damaged them. I said that they were damaged uppom arrival...and never heard back from them. That was more then a week ago so I kept working on it with what I had. This was also my first attempt to create paint chips with a sponge method...I don't know...not sure what to think.

  • Member since
    December 2007
  • From: Eagle River, WI
Posted by PANZERJAGER on Monday, November 30, 2009 9:28 AM
Thanks for the great compliment.

Justinryan215

I will be posting more pics soon.

Havin' some hard times with the gun shields on the flak gun, Dragon realy dropped the ball here!

Tom

 PANZERJAGER


  • Member since
    November 2008
  • From: Hatboro, PA
Posted by Justinryan215 on Thursday, November 26, 2009 8:17 PM
NOT BAD Panzer! not bad at all!

"...failure to do anything because someone else can do better makes us rather dull and lazy..."

Mortal as I am,I know that I am born for a day.  But when I follow at my pleasure the serried multitude of the stars in their circular course, my feet no longer touch the Earth...


  • Member since
    December 2007
  • From: Eagle River, WI
Posted by PANZERJAGER on Thursday, November 26, 2009 11:25 AM

Thanks Mobious!

Happy Thanks Giving everyone!!!!!!

Now for an update;

PE done on the cargo bed.

Track on, cargo bed painted and on and the cab is now mounted.

Next comes the final detailing of the cab and weathering, then on to the flak gun!

Tom

 PANZERJAGER


  • Member since
    September 2007
  • From: Relocating
Posted by Mobious on Tuesday, November 24, 2009 4:15 PM

 Hey Panzerjaeger, the Maultier is looking very nice indeed, amazingly insane stuff...lolThumbs Up [tup]

 Mo


"It's a problem of applied physics" Roy Brown

  • Member since
    December 2007
  • From: Eagle River, WI
Posted by PANZERJAGER on Monday, November 23, 2009 8:30 PM

Another update!

After finally getting the drivers door done, Igot the windsheeld an back window.

Then some camo.

Now back to the cargo bed tomarrow.

Tom

 PANZERJAGER


  • Member since
    September 2007
  • From: Finland funland
Posted by Trabi on Wednesday, November 18, 2009 1:51 PM

Here we go...


ZU-23-2 (Zenitnaja Ustanovka)


Parts

Some cleaning & filling. Quite crispy plastic Grumpy [|(]


Have to do something for these. Those are awful!


Quick test. Method: found. Result: not satisfied


"Space may be the final frontier, but it´s made in Hollywood basement." RHCP, Californication

  • Member since
    December 2007
  • From: Eagle River, WI
Posted by PANZERJAGER on Wednesday, November 18, 2009 9:28 AM

Hi all,

Still trying to get this thing done.

Now for the updates!

A "friend" from work jokingly suggested that since I now had working hinges, that I should also have working door latches!

Damn him!, So I did it....

The insanity continues........

Tom

 PANZERJAGER


  • Member since
    September 2007
  • From: Finland funland
Posted by Trabi on Wednesday, November 18, 2009 3:11 AM
Thank You! Bow [bow]

"Space may be the final frontier, but it´s made in Hollywood basement." RHCP, Californication

  • Member since
    July 2008
  • From: Vancouver, the "wet coast"
Posted by castelnuovo on Tuesday, November 17, 2009 10:57 PM

Hi Trabi....Sign - Welcome [#welcome]

The more the merrier...I added you to the list. No problem with the Soviet Union GB, you can enter both as far as I am concerned.

  • Member since
    December 2007
  • From: Eagle River, WI
Posted by PANZERJAGER on Tuesday, November 17, 2009 1:27 PM

Just got my package from Scale Hardware.

Man, this stuf is AWSOME!!!!!

How about stainless steel cap screws .020" diameter!

Here is the "best" way to attach Your door hinges!

More soon!

Tom

 PANZERJAGER


JOIN OUR COMMUNITY!

Our community is FREE to join. To participate you must either login or register for an account.

SEARCH FORUMS
FREE NEWSLETTER
By signing up you may also receive reader surveys and occasional special offers. We do not sell, rent or trade our email lists. View our Privacy Policy.