SEARCH FINESCALE.COM

Enter keywords or a search phrase below:

Variable Geometry: the Swing Wing GB

149203 views
1140 replies
1 rating 2 rating 3 rating 4 rating 5 rating
  • Member since
    March 2010
  • From: Buffalo, NY
Posted by macattack80 on Friday, December 31, 2010 11:09 PM

Medicman71

Ok....Tomcat stuff was ordered on Wednesday and may be getting some if not most of it today!! Toast So ready to get started.

Woot Woot!!!

Kevin

[


  • Member since
    October 2009
  • From: Houston, Texas
Posted by Medicman71 on Friday, December 31, 2010 1:10 PM

Ok....Tomcat stuff was ordered on Wednesday and may be getting some if not most of it today!! Toast So ready to get started.

Building- (All 1/48) F-14A Tomcat, F-16C Blk 30, He 129


  • Member since
    March 2010
  • From: Buffalo, NY
Posted by macattack80 on Thursday, December 30, 2010 2:38 PM

I got the rest of the decals on.  They were troublesome just like round 1.  At least they are on.  I expect a l little silvering on a few as they had to be moved around a bit to fix/place them on the model.  I used MicroSol and MicroSet on most.  A little Solvaset was needed on the decals on the nose gear strut.  It looks like a plane all of sudden.

I also got the extra antenna and sensors done too.  They look okay and will pass my inspection.  May not be perfect close enough for government work...

Kevin

[


  • Member since
    December 2002
  • From: Bury St Edmunds, Suffolk, England
Posted by Bish on Wednesday, December 29, 2010 2:00 PM

I think painting them before fitting is the way to go next time.

I am lucky in that i can get home this Fri for the weekend, so going to put my pics up then. Hopefully the 424 will be done as a dio, not much left to do there. And i am also hopeing the MiG will be done. The decals are on, just to to add the matt varnish tonight. And then i am hopeing to get it finished off tomorrow. Then next week i can just concentrate on the MiG dio.

I am a Norfolk man and i glory in being so


On the bench: Airfix 1/72nd Harrier GR.3/Fujimi 1/72nd Ju 87D-3

  • Member since
    March 2010
  • From: Buffalo, NY
Posted by macattack80 on Wednesday, December 29, 2010 1:07 PM

Bish, At first I painted the wings seperate from the fuselage to make sure I got coverage in all the nooks and crannies but I repainted the wings because I didn't like how they turned out.  I repainted them in the manner in which you did.

Looking forward to seeing you completed Me 424

Kevin

[


  • Member since
    December 2002
  • From: Bury St Edmunds, Suffolk, England
Posted by Bish on Wednesday, December 29, 2010 6:49 AM

I have a question for you guys regarding painting the wings. I started off painting with the wings swept forward and then swept them back to paint the area that had been covered by the wing glove. After that i just painted the other colours with the wings swept back, the position it will be displayed in. What do you guys do. Do you just leave the area that will be un seen unpainted. I am thinking that next time i build a swing wing i will paint the wings before i fit them into the fuselage.

Just got the nose cone on the MiG. Got some comparison pics with the Me 424 that i will post at the weekend. Just waiting for some touch up painting to dry before i add the decals.

I am a Norfolk man and i glory in being so


On the bench: Airfix 1/72nd Harrier GR.3/Fujimi 1/72nd Ju 87D-3

  • Member since
    December 2002
  • From: Bury St Edmunds, Suffolk, England
Posted by Bish on Tuesday, December 28, 2010 4:43 PM

Makes two of us. Got the MiG painted this morning. Just got to do the nose and tip of the tail. Hopefully i can get the decals on tomorrow.

As for the Me 424, the board is just about done, just got to finish the figures. I only have till Fri so got to get a move on.

I am a Norfolk man and i glory in being so


On the bench: Airfix 1/72nd Harrier GR.3/Fujimi 1/72nd Ju 87D-3

  • Member since
    March 2010
  • From: Buffalo, NY
Posted by macattack80 on Tuesday, December 28, 2010 4:38 PM

I managed to get the underside gloss coated with Future.  While that is drying I will get working on making the various antenna not included in the kit.   I'm gettin' there....

Kevin

[


  • Member since
    December 2002
  • From: Bury St Edmunds, Suffolk, England
Posted by Bish on Monday, December 27, 2010 4:30 PM

Doesn't seem to take long. Sort of goes against whats being said about the site not being used as much.

I am a Norfolk man and i glory in being so


On the bench: Airfix 1/72nd Harrier GR.3/Fujimi 1/72nd Ju 87D-3

  • Member since
    March 2010
  • From: Buffalo, NY
Posted by macattack80 on Monday, December 27, 2010 4:24 PM

We cant be on the second page......

Kevin

[


  • Member since
    December 2002
  • From: Bury St Edmunds, Suffolk, England
Posted by Bish on Sunday, December 26, 2010 10:36 AM

I can't find it in any of my refeance books and it is a higher number than any other Me, and possably from any other German aircrfat, so it fits. As i also have the night fighter kit, which has a T tail i am thinking of calling the current build the Me 424A-1 and the NF version the Me 424A-2/U1

I am a Norfolk man and i glory in being so


On the bench: Airfix 1/72nd Harrier GR.3/Fujimi 1/72nd Ju 87D-3

  • Member since
    March 2010
  • From: Buffalo, NY
Posted by macattack80 on Sunday, December 26, 2010 7:17 AM

Bish

As the designation P.1101 was a project number, and i am building a production aircraft, i am looking to give it a production designation. I am thinking of Me 424, which i don't think was given to any other aircraft.


Cool idea Bish!  I don't know a whole lot about german aircraft so I can't verify that 424 was used but I like the designation for you production model.  Good choice.  Yes

Kevin

[


  • Member since
    December 2002
  • From: Bury St Edmunds, Suffolk, England
Posted by Bish on Saturday, December 25, 2010 5:20 PM

As the designation P.1101 was a project number, and i am building a production aircraft, i am looking to give it a production designation. I am thinking of Me 424, which i don't think was given to any other aircraft.

I am a Norfolk man and i glory in being so


On the bench: Airfix 1/72nd Harrier GR.3/Fujimi 1/72nd Ju 87D-3

  • Member since
    March 2010
  • From: Buffalo, NY
Posted by macattack80 on Saturday, December 25, 2010 5:18 PM

Thanks for the info Don.  That punch set is becoming a must have tool for my workbench.  Have a safe trip to Philly.  I should be finishing up my build by next week.  I hope.

Bish, like Don said, congrats on completing your build.  Can't wait to see it on the base.

Kevin

[


  • Member since
    October 2007
  • From: Louisville, KY
Posted by pordoi on Saturday, December 25, 2010 3:01 PM

macattack80

Hey Don, when you are done punching holes in everything imaginable, let me know what you think of the MicroMark punch set.  I was thinking of getting one soon.


Kevin, I'm a hole punching fiend... Yeah

The MicroMark kit works pretty well.  I've just punched .010 card so far but the discs are sharp and uniform.  The fit of the plastic cover on the metal base is very snug, which is good.  A little difficult to remove, but then there is no need to remove it; just separate enough to slide the plastic sheet between.  If you get one, remember to get a mallet with a delrin or hard rubber head so that you don't damage the punch rods.


Bish, congrats on finishing the P.1101.  Look forward to seeing it on the base.  I'm traveling to Philadelphia for the next few days to visit family but will stop in occasionally to see the photos.  Will be back to hopefully finish up the Bone next Friday. 

Happy Holidays to all Swing Wingers!  Toast


Don

  • Member since
    December 2002
  • From: Bury St Edmunds, Suffolk, England
Posted by Bish on Saturday, December 25, 2010 1:59 PM

Got the 1101 finished today. Going to hold off on the pics until the end of the week. I want to see if i can get the board done and have it finished as a Diorama.

As for the MiG. I got the underside painted last week and the first top colour done yesterday. I got the missiles painted today and am now working on the under carrage. Hopefully tomorrow i can get the second top colour painted and the third on Tues. I will get some pics up then.

I am a Norfolk man and i glory in being so


On the bench: Airfix 1/72nd Harrier GR.3/Fujimi 1/72nd Ju 87D-3

  • Member since
    March 2010
  • From: Buffalo, NY
Posted by macattack80 on Saturday, December 25, 2010 9:41 AM

vetteman42

Macattack  I cant see a thing wrong with the decals, looks great to me Toast And I love the nose art you have chosen " Trilogy of Terror "

I have been making progress on the F-14 but nothing worth showing, mostly filling and sanding. I did find a very  interesting and unexpected history on my subject I will share with the finished pictures.

Thanks Vettman, much appreciated. 

Hey Don, when you are done punching holes in everything imaginable, let me know what you think of the MicroMark punch set.  I was thinking of getting one soon.

Kevin

[


  • Member since
    July 2008
  • From: USA California
Posted by vetteman42 on Friday, December 24, 2010 12:12 AM

Macattack  I cant see a thing wrong with the decals, looks great to me Toast And I love the nose art you have chosen " Trilogy of Terror "

I have been making progress on the F-14 but nothing worth showing, mostly filling and sanding. I did find a very  interesting and unexpected history on my subject I will share with the finished pictures.

Randy So many to build.......So little time

  • Member since
    October 2007
  • From: Louisville, KY
Posted by pordoi on Thursday, December 23, 2010 8:04 AM

macattack80

I found a pretty cool webpage with some good info and pics on the B-1 Lancer.

http://www.aviationspectator.com/resources/aircraft-profiles/b-1b-lancer-aircraft-profile


Nice find, Kevin.  Sort of a compilation of information that I've seen at other sites along with some stuff that I've not seen before.  Very detailed history of the development of the B-1 and lots of photos of early Bones.  Some great photos for you to see how that SAC tri-color weathers.  I also got a laugh at the "commercial" like statement at the beginning;  effective against any adversary, anywhere, any time... Smile

I've bookmarked the site.  Thanks.


Don


  • Member since
    March 2010
  • From: Buffalo, NY
Posted by macattack80 on Wednesday, December 22, 2010 10:11 PM

I found a pretty cool webpage with some good info and pics on the B-1 Lancer.

http://www.aviationspectator.com/resources/aircraft-profiles/b-1b-lancer-aircraft-profile

Kevin

[


  • Member since
    March 2010
  • From: Buffalo, NY
Posted by macattack80 on Wednesday, December 22, 2010 4:03 PM

I sealed the decals in with another blast of Future.  Gonna give it a day or 2 to fully dry then spray some future on the underside.  Now its just waiting for stuff to dry so I can proceed. 

Kevin

[


  • Member since
    October 2007
  • From: Louisville, KY
Posted by pordoi on Tuesday, December 21, 2010 8:12 PM

macattack80

Thanks for the kind comment Don.    If you look at the longhorn skull you can see a few vertical lines.  Thats where that particular decal didn't cooperate. 

Yes, I saw that.  But it's a minor flaw that doesn't detract from the overall build.


macattack80

The light at the end of the tunnel is getting brigher.  What a good looking aircraft!


Oh yes, isn't it!   Beautiful bird.  Even though it was a difficult build, one really begins to appreciate the Bone.  It's a cool lookin' aircraft with an attitude (given the payload that it can carry).  It would be a shame if the AF moth balled the fleet.


Don


  • Member since
    March 2010
  • From: Buffalo, NY
Posted by macattack80 on Tuesday, December 21, 2010 3:38 PM

Thanks for the kind comment Don.    If you look at the longhorn skull you can see a few vertical lines.  Thats where that particular decal didn't cooperate.  All the other I was able to fix without too much fuss.  I just wish I could have placed them a little closer to their intended targets. Angry Namely the squadron insignias.  I tried to get them centered under the rear window but that obviously didn't work out.

I put a few of the stencil data decals on last night and those were the worst.  I think the only thing holding the decals together is the ink.  The film doesn't want to stay together.  I won't stress myself out and attempt to put on decals that won't be seen anyway, either because they will be lost in the camo or broken apart. 

All the big colorful decals are on the upper half and I hope to get the few on the underside either tonight or tomorrow night.  Big Smile

The light at the end of the tunnel is getting brigher.  What a good looking aircraft!

Kevin

[


  • Member since
    October 2007
  • From: Louisville, KY
Posted by pordoi on Tuesday, December 21, 2010 3:17 PM

macattack80

I was going through the photobucket album and noticed a pic that I forgot to post so here it is.

[View:/themes/fsm/utility/http://i961.photobucket.com/albums/ae98/macattack80/71410001.jpg:550:0]
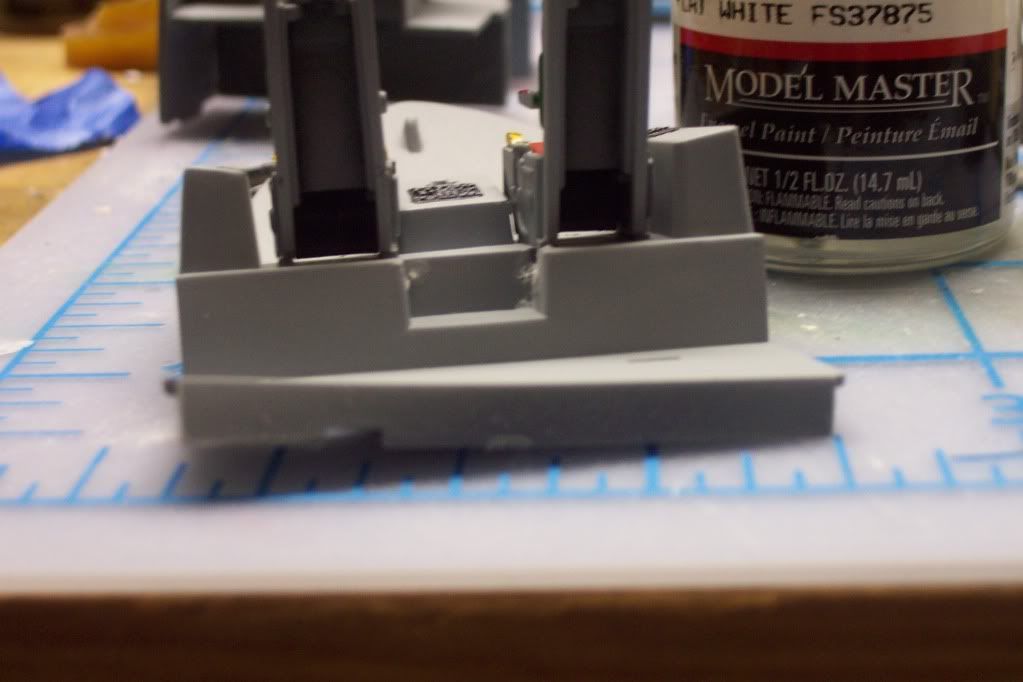
 

This is the flight deck, that was of course, warped.  I fixed that by heating it up over a candle and reshaping it.

I figured if it was worth taking a photo of I may as well post it. 


Hey, that's one serious warp.  Good job with the candle  Bow Down  

And regarding your problems with the decals;  I find it difficult from the photos to see where they split, even on the starboard rudder.  Nice job. 

Who knows, you might beat me to the finish line yet, Kevin.  I'm stalled waiting for Xmas day so that I can get my hands on the punch set.  After that, it's only one or two more steps before it will be done...


Don


  • Member since
    March 2010
  • From: Buffalo, NY
Posted by macattack80 on Monday, December 20, 2010 3:46 PM

For the most part I was able to get the decals looking OK after they broke apart.  A few like the flag on the starboard side of the tail was as good as I could do. 

Kevin

[


  • Member since
    March 2010
  • From: Buffalo, NY
Posted by macattack80 on Monday, December 20, 2010 3:43 PM

Here are a few pics of the few decals I put on the other day.  I hope to get the rest of the decals on tonight.

[View:/themes/fsm/utility/:550:0]

 [View:/themes/fsm/utility/:550:0]

[View:/themes/fsm/utility/:550:0]

[View:/themes/fsm/utility/:550:0]


Kevin

[


  • Member since
    March 2010
  • From: Buffalo, NY
Posted by macattack80 on Sunday, December 19, 2010 5:49 PM

pordoi

Cursed be thy name, Revell B-1B.  Whether it is kit parts or aftermarket goodies.  I don't think that I've ever used Superscale decals before, so can't comment on whether your experience was the norm or exception.  So let me just say what I have said to you in prior posts;  hang in there and you'll solve this problem just as you've dealt with other issues in this build. 

The Trilogy of Terror; maybe we should define it as Aggie's desert camo bone; my "Hard Rain" and your "Trilogy". 


Don


You are right about the issues.  But I look forward to working on it.  I'm not too frustrated with the decals because  I don't think it's from my doing.   At least I didn't have to trash them.  I know now to be extra careful when applying them. 

We do have quite the trilogy don't we?.  Kind of fitting as I will probably finish last of the the 3 Bone builds to complete the "Trilogy of Terror".

Kevin

[


  • Member since
    March 2010
  • From: Buffalo, NY
Posted by macattack80 on Sunday, December 19, 2010 5:40 PM

I was going through the photobucket album and noticed a pic that I forgot to post so here it is.

[View:/themes/fsm/utility/:550:0]


This is the flight deck, that was of course, warped.  I fixed that by heating it up over a candle and reshaping it.

I figured if it was worth taking a photo of I may as well post it.


Kevin

[


  • Member since
    October 2009
  • From: Houston, Texas
Posted by Medicman71 on Sunday, December 19, 2010 5:24 PM

Well I asked for money for X-mas so that I could order all the stuff I needed.......ok, wanted. Whistling So after I order them and they get here, the Tomcat will begin. Toast

Building- (All 1/48) F-14A Tomcat, F-16C Blk 30, He 129


  • Member since
    October 2007
  • From: Louisville, KY
Posted by pordoi on Sunday, December 19, 2010 5:01 PM

macattack80

Well, I applied some decals last night.  It didn't go as well as I had hoped.  The Superscale decals are very brittle.  I used a set from them before and they were quite good.  Every decal seemed to break apart.  Angry So needless to say I didn't get them exactly where I wanted them. Bang Head  Luckily, I was able to piece them all back together.  I didn't want to mess with it to take any photos until they dried completely.  So hopefully I will be able to snap a few pix tomorrow.  The Trilogy of Terror is being just that    Stick out tongue


Cursed be thy name, Revell B-1B.  Whether it is kit parts or aftermarket goodies.  I don't think that I've ever used Superscale decals before, so can't comment on whether your experience was the norm or exception.  So let me just say what I have said to you in prior posts;  hang in there and you'll solve this problem just as you've dealt with other issues in this build. 

The Trilogy of Terror; maybe we should define it as Aggie's desert camo bone; my "Hard Rain" and your "Trilogy". 


Don


JOIN OUR COMMUNITY!

Our community is FREE to join. To participate you must either login or register for an account.

SEARCH FORUMS
FREE NEWSLETTER
By signing up you may also receive reader surveys and occasional special offers. We do not sell, rent or trade our email lists. View our Privacy Policy.