SEARCH FINESCALE.COM

Enter keywords or a search phrase below:

60th Anniversary Korean War Group Build- extended for the duration

764949 views
3335 replies
1 rating 2 rating 3 rating 4 rating 5 rating
  • Member since
    September 2003
  • From: Australia
Posted by Helo H-34 on Sunday, February 26, 2012 11:40 PM

Sanderson 91 , I must say the cockpit detail on both builds is absolutly awesome Bow Down

Like everyone else , I look forward to more great WIP pic's .

Stik your H-13 build is coming along really well ; The engine looks like a mini build in it's self Yes

Andy , great stuff on the kit bash P2V-5 Neptune . The WIP tips will help a lot when I do my build and it looks like you got a reall good fuselage join between the vacu-form front section and Hasegawa mid/rear piece ;

Excellent work Sir Toast

John .

  • Member since
    December 2010
  • From: Yangju, Gyeonggi-Do, Korea
Posted by the_draken on Tuesday, February 28, 2012 8:03 PM

"Commando to General Kirby!  Commando to General Kirby!"  ~Rae Don Chong in the movie "Commando"


The C-46 Commando made it safely to work on the bus!  And the .7Km walk along the road and up THE HILL to the school.  Here's the pics, I don't think that any one is better than another so take your pick of them for the front page, Stik!

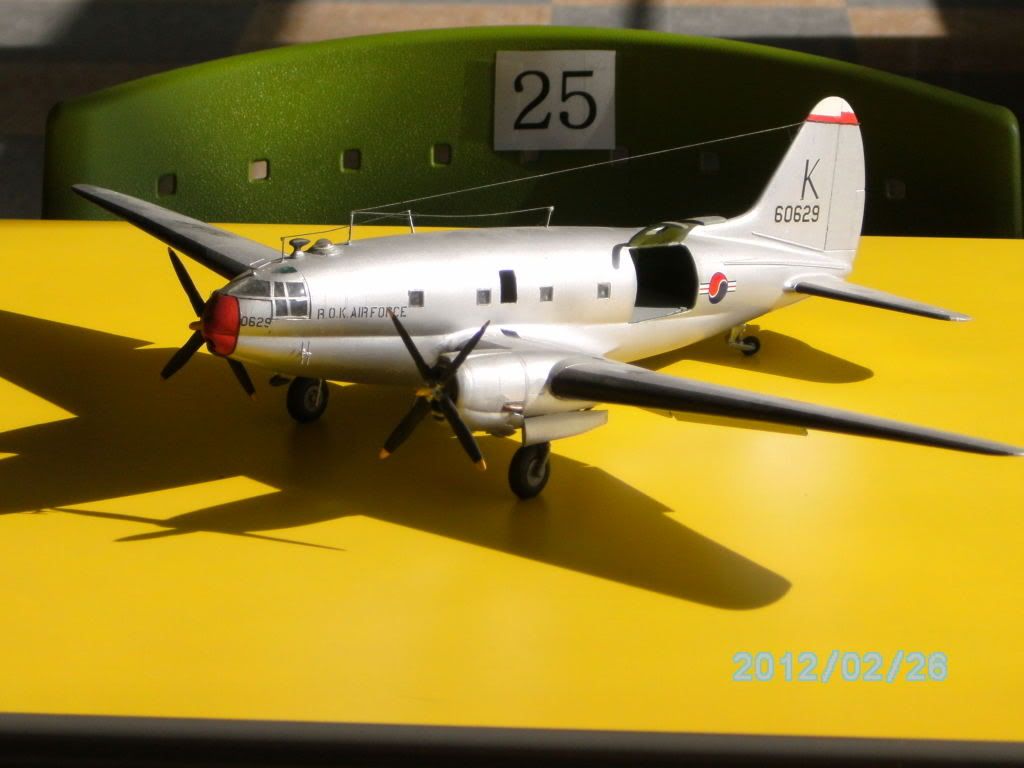
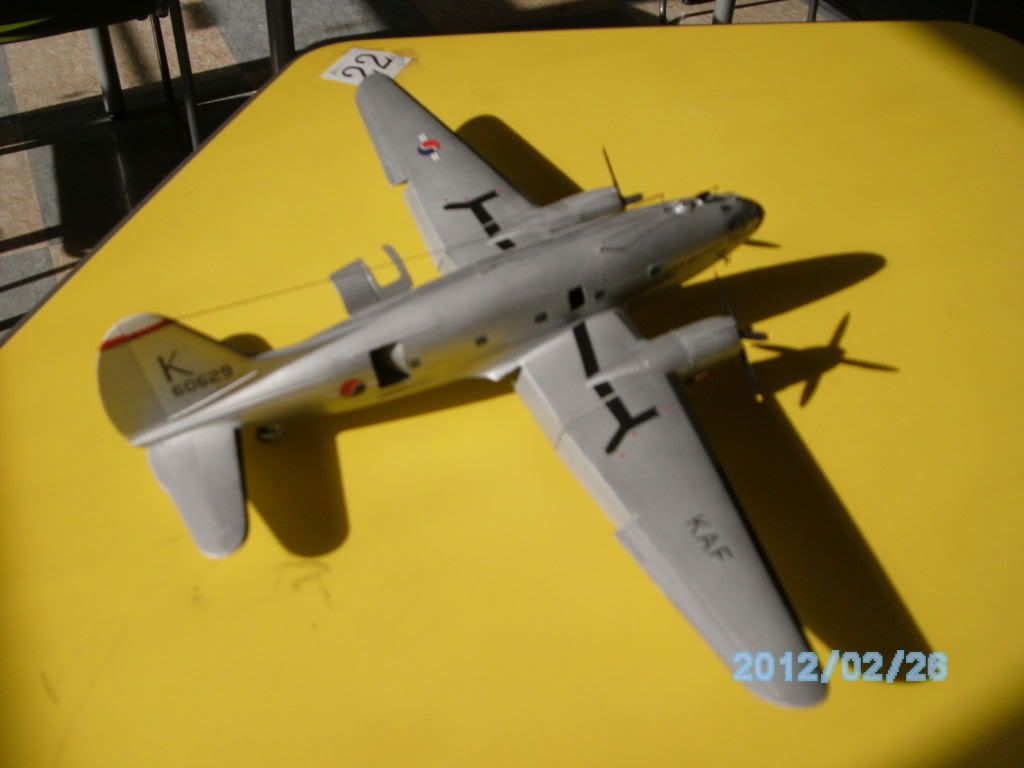
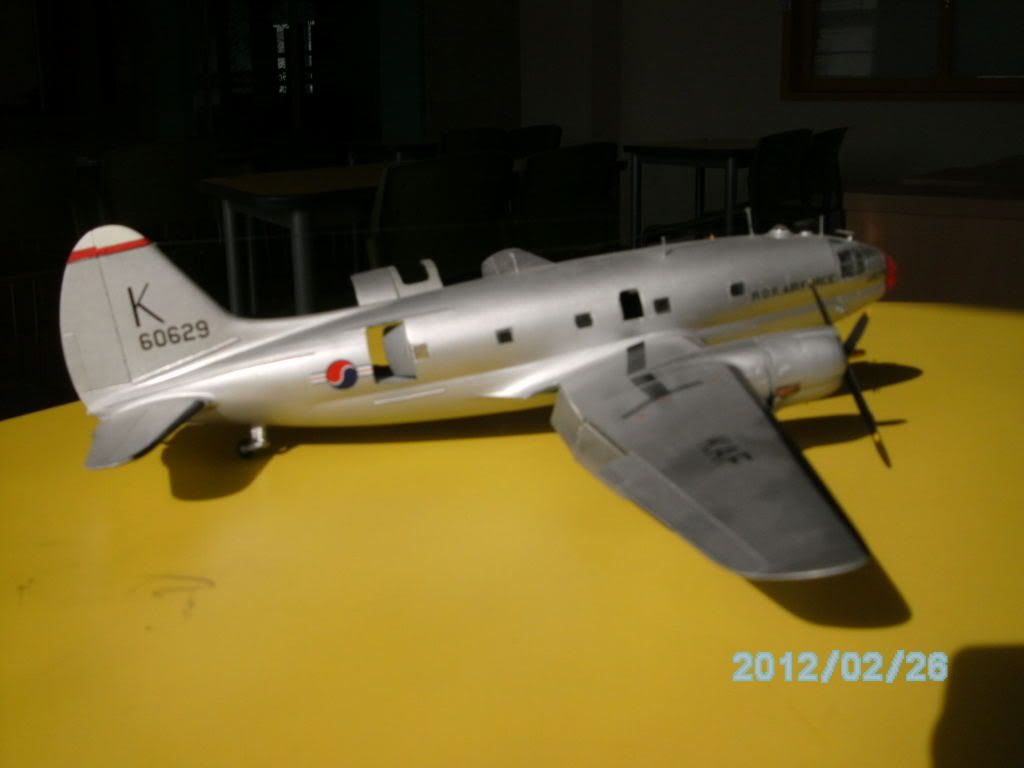
On second thought, only the first one seems to be in focus...  Not sure what the heck is going on there...


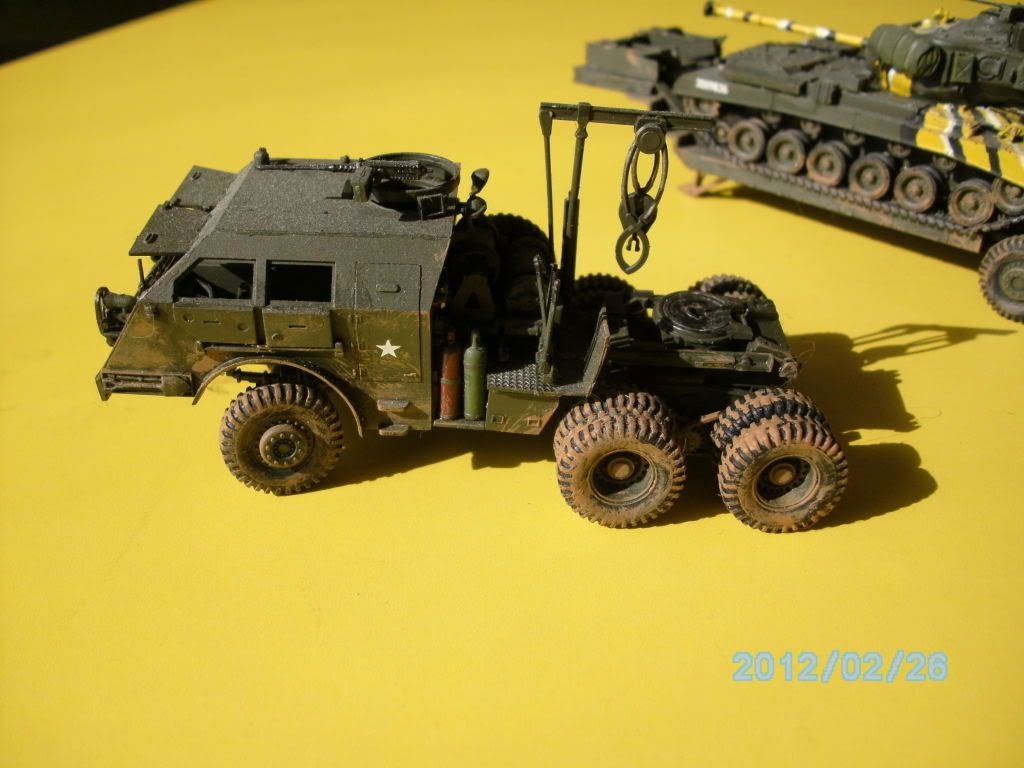
Here's some pictures of other things I've done during the build that I've posted before but for some reason didn't make it to the front page.  I'm pretty sure with the artillery that I've never asked for them, since I wanted to be done with ALL of the artillery.  Unfortunately I've shipped some kits home since I won't be finishing them all by Sept. 3 when I leave.  And I'm also pretty sure that I never posted final pics of the Dragon Wagon, so it's likely that they're all my fault. 

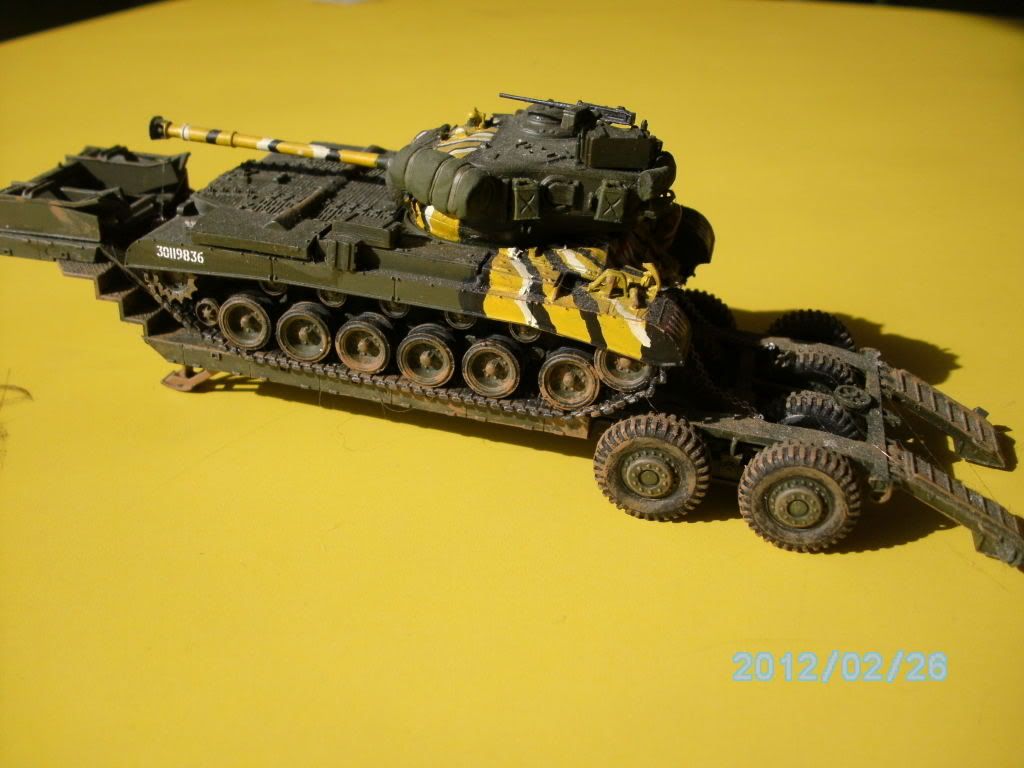
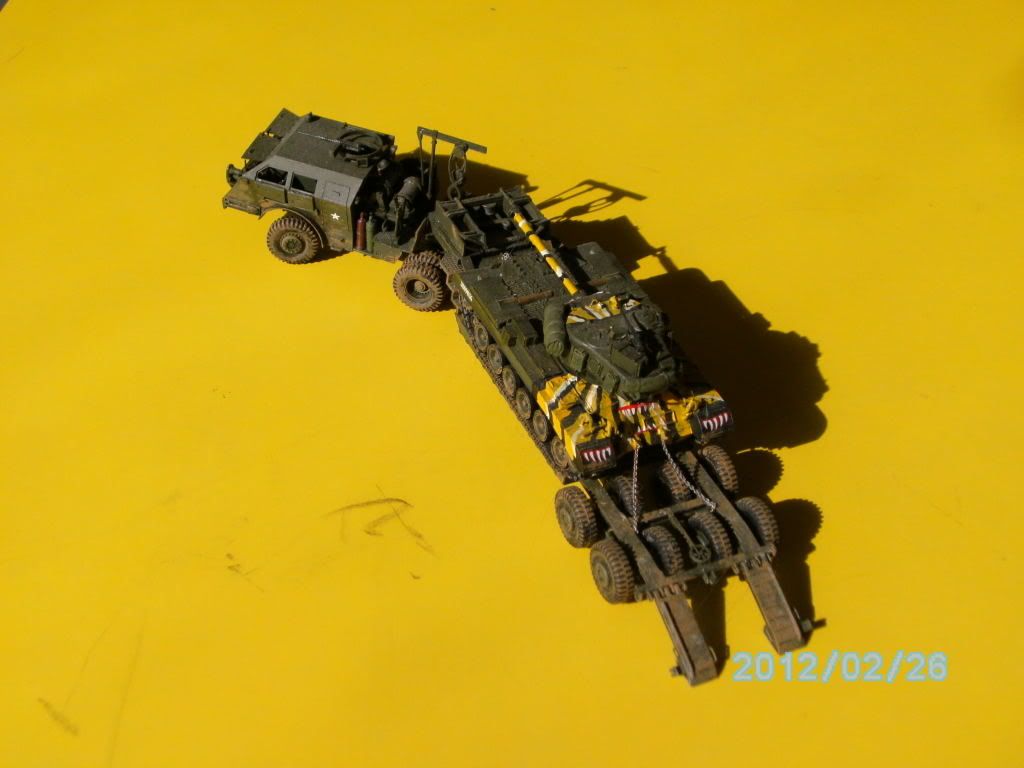
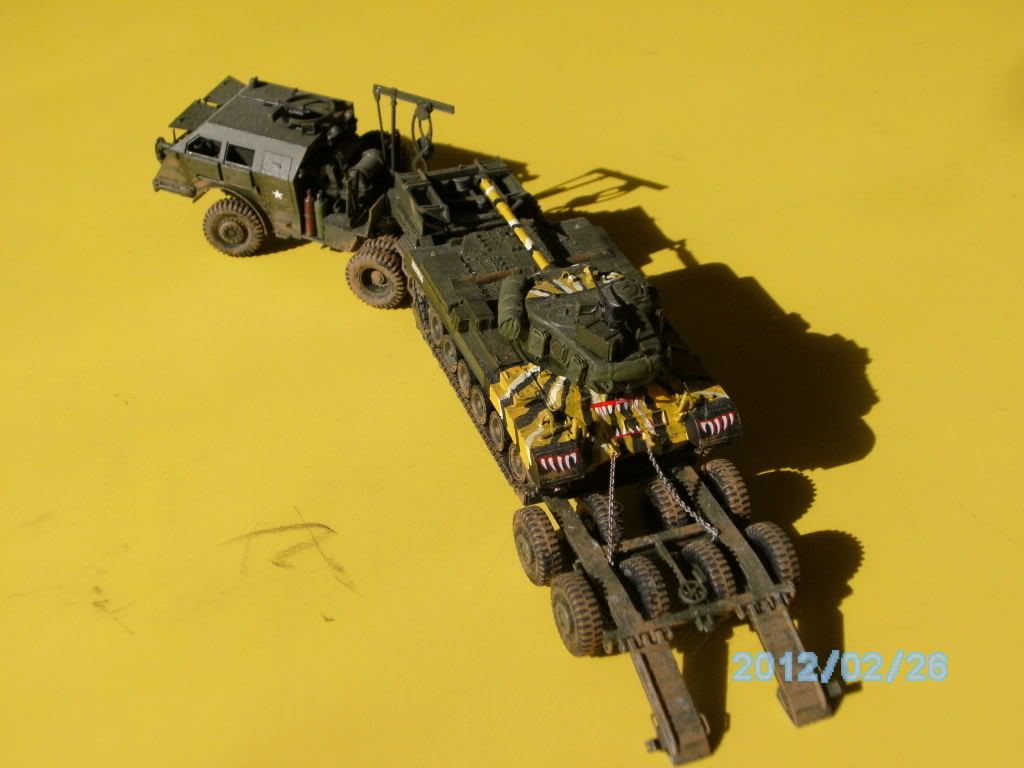
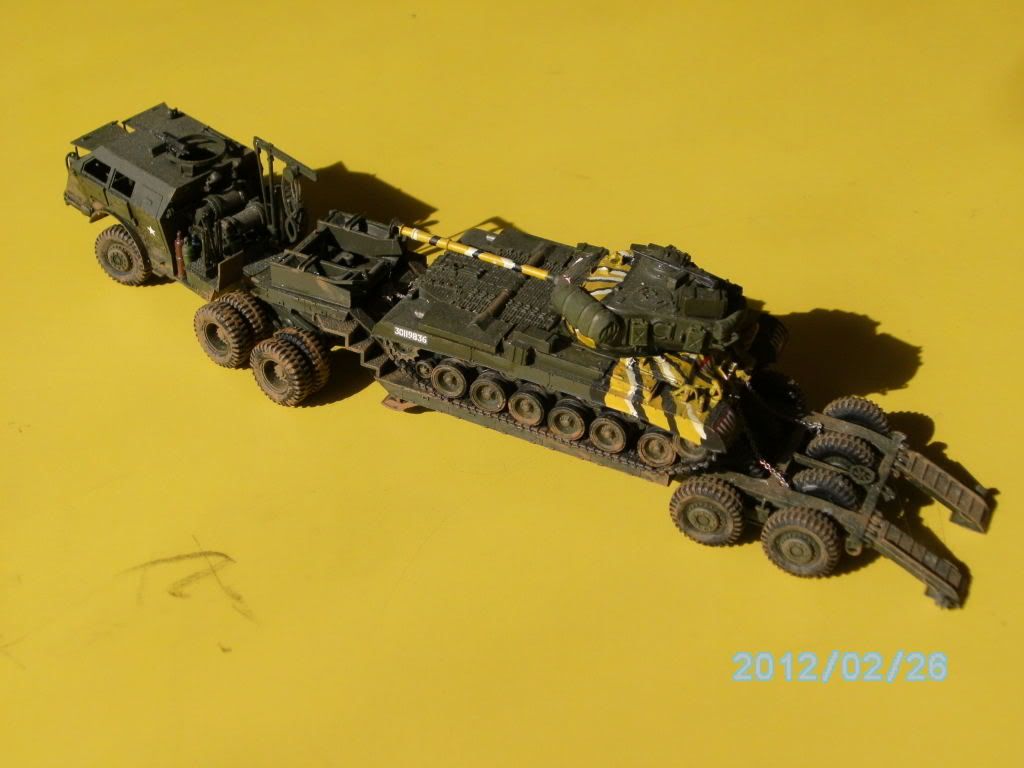
Here's the Academy Dragon Wagon and Trumpeter M-26:


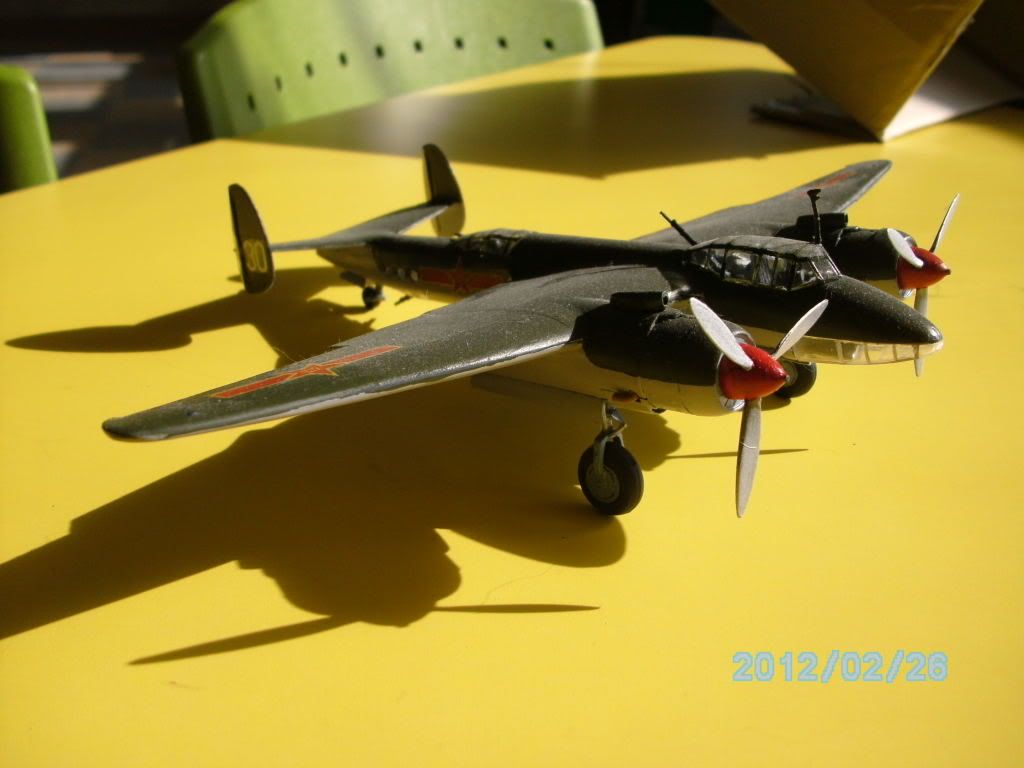
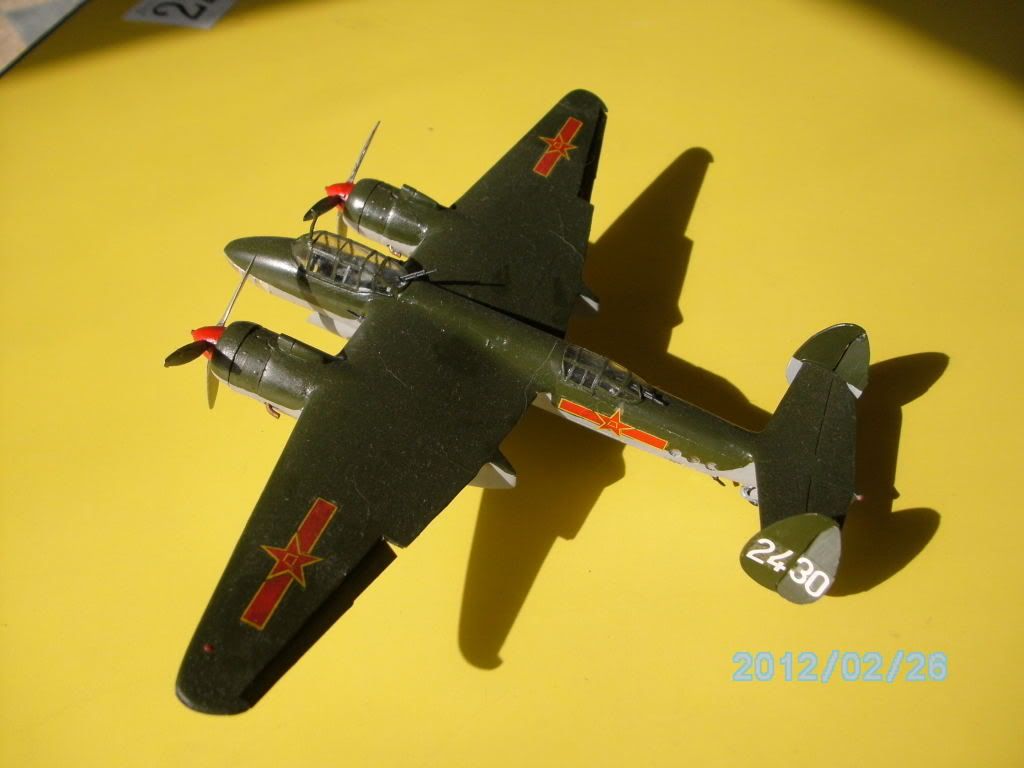
Here's the ICM Tu-2 that comes in their "Korean War" box with a Yak-9D/P kit.  This is an absolute bugger to build!  Nothing fits, too much flash, and the parts are WAY too thick.


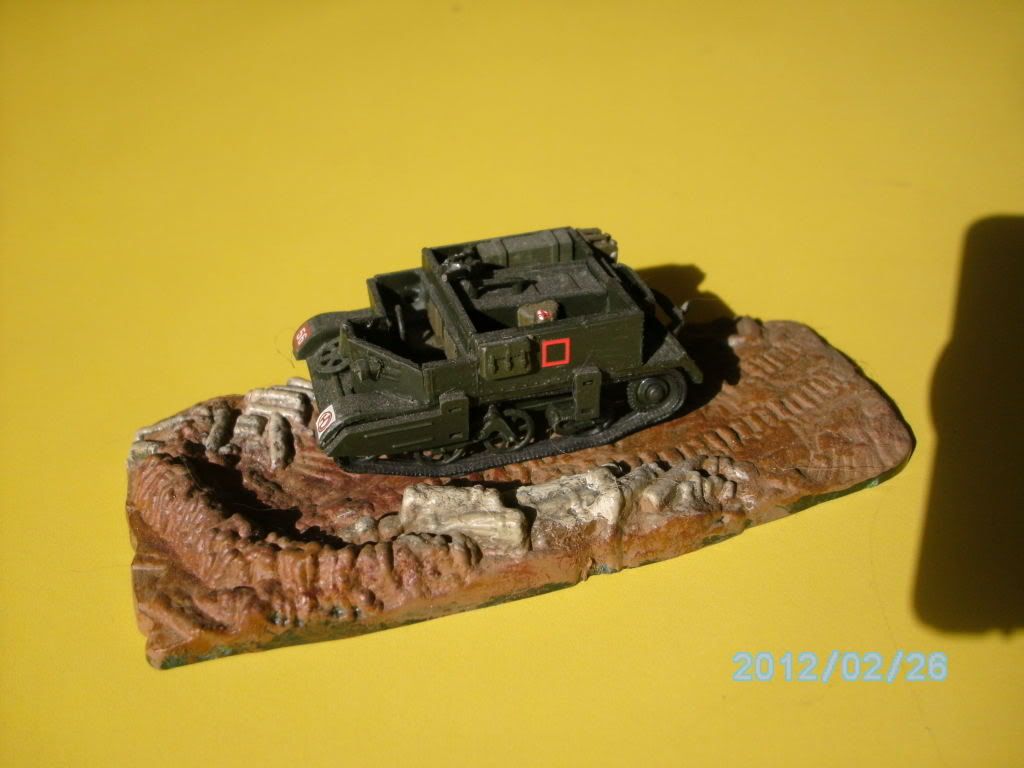
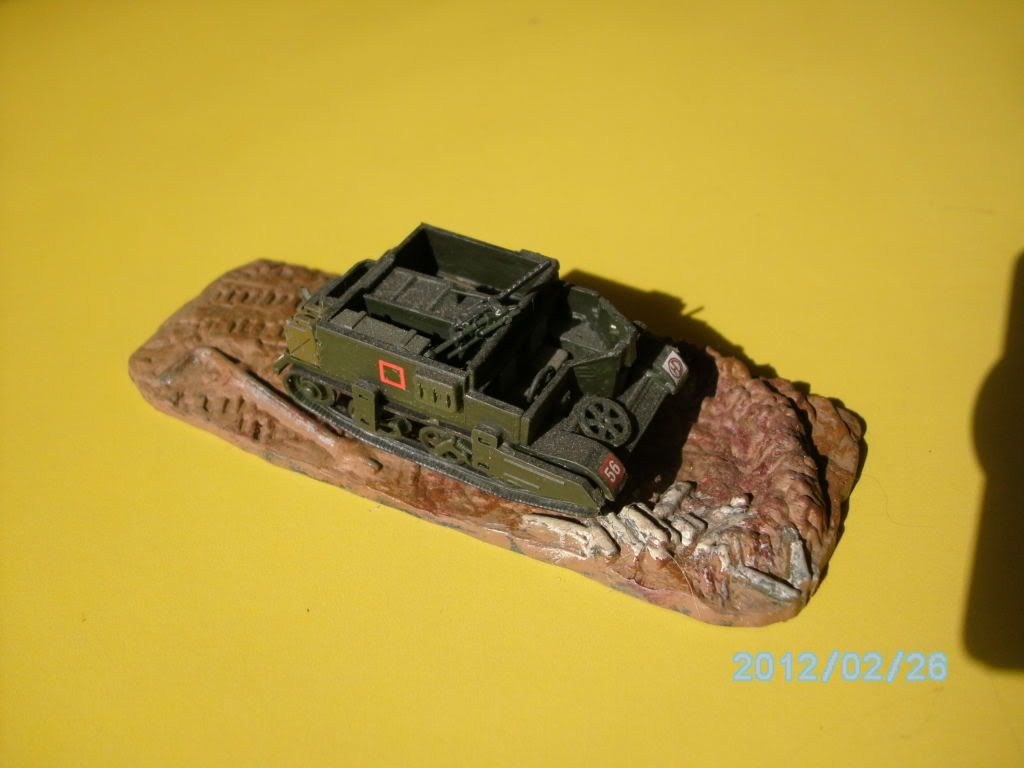
And I had to make a second Airfix Universal "Bren Gun" Carrier after the little weasels at my last school stole mine.  Here's the result positioned on a Matchbox 'mini-diorama' base.  I think it's the one for the Humber scout car.


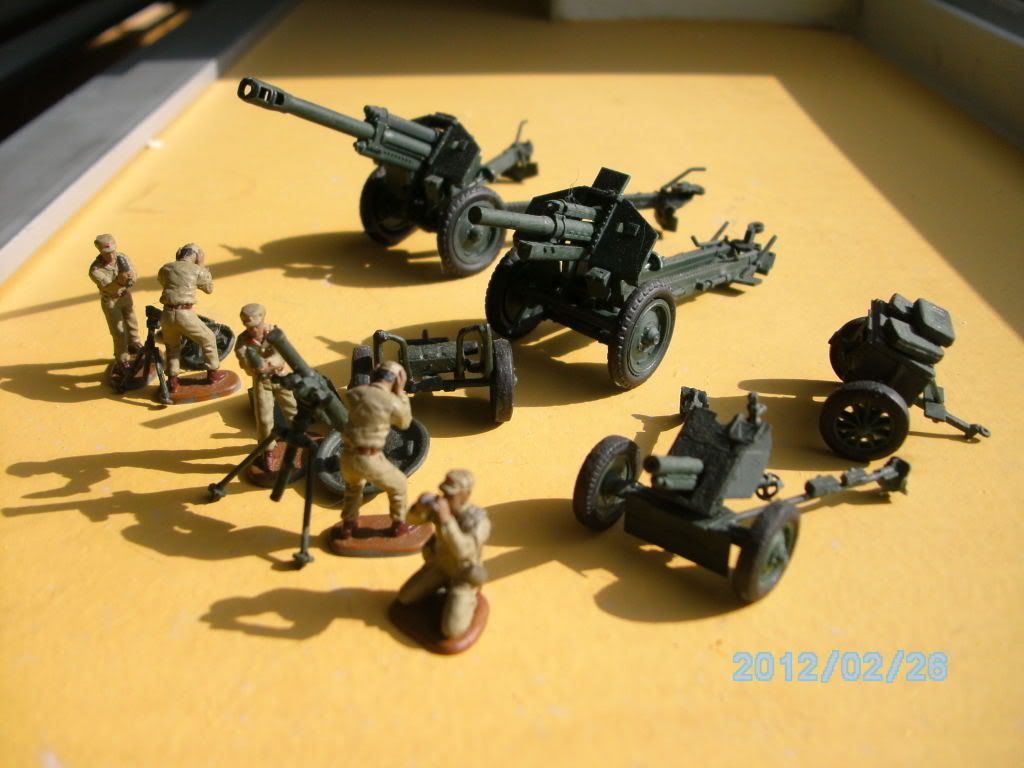
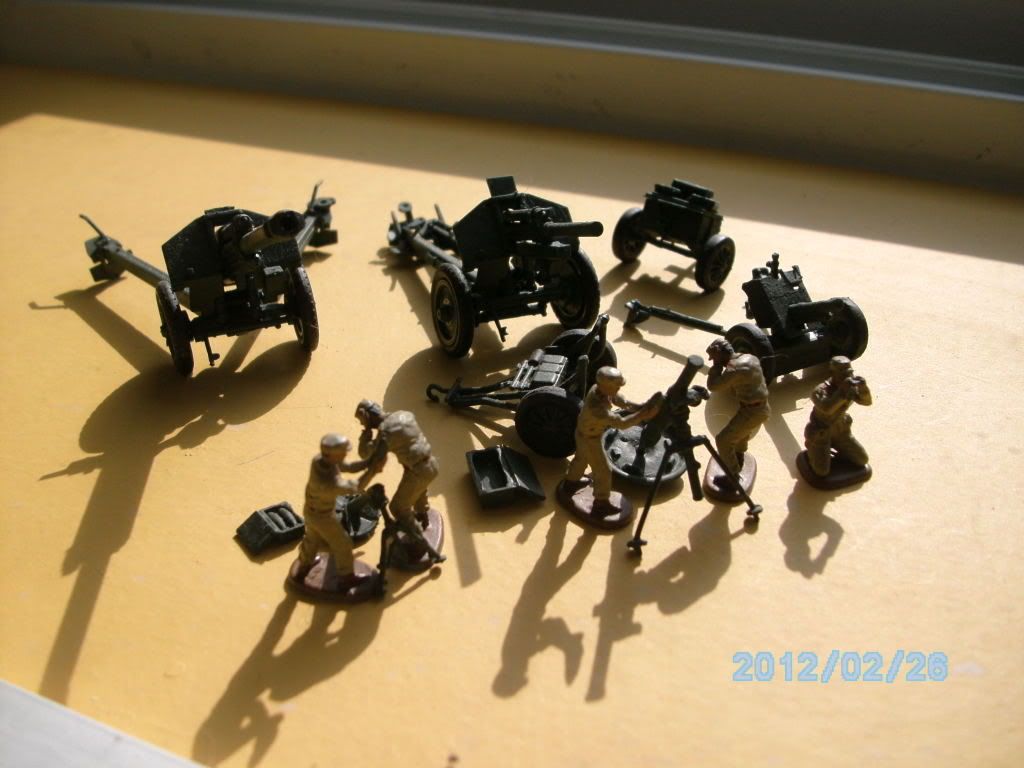
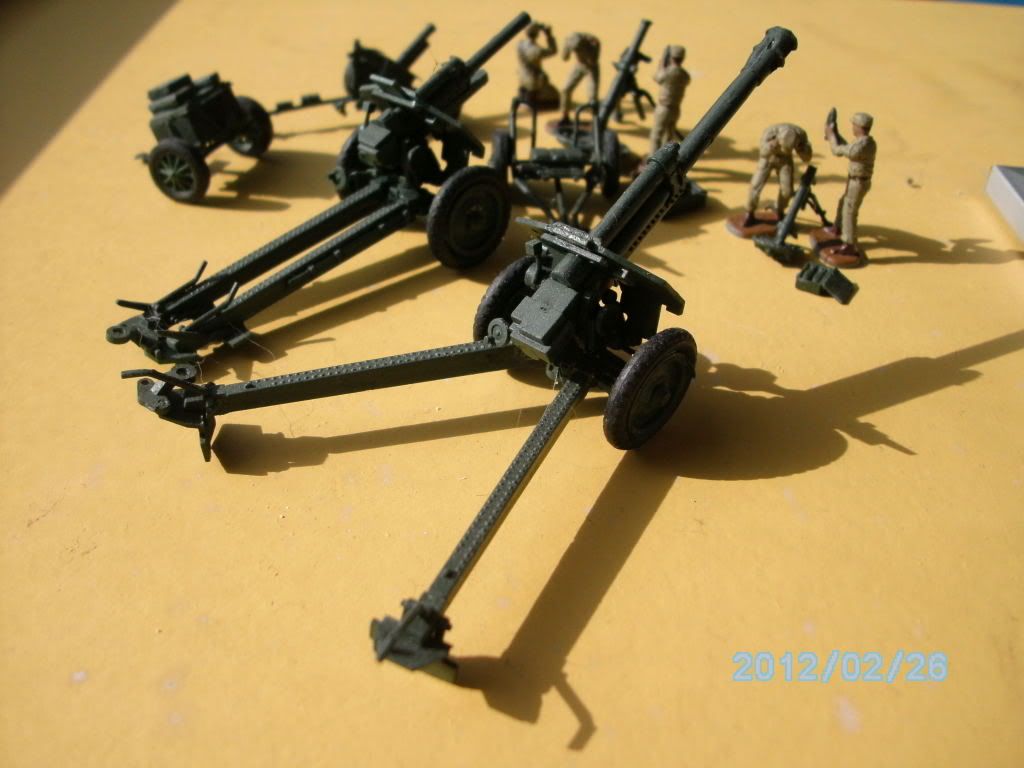
And here's all of my allied artillery that I've done with the build.  The Airfix 40mm Bofors, the SHQ 105mm Airborne Howitzer, the Revell/Aurora 105mm M-1, and the ACE 105mm M-1/M-101 with SHQ figures.


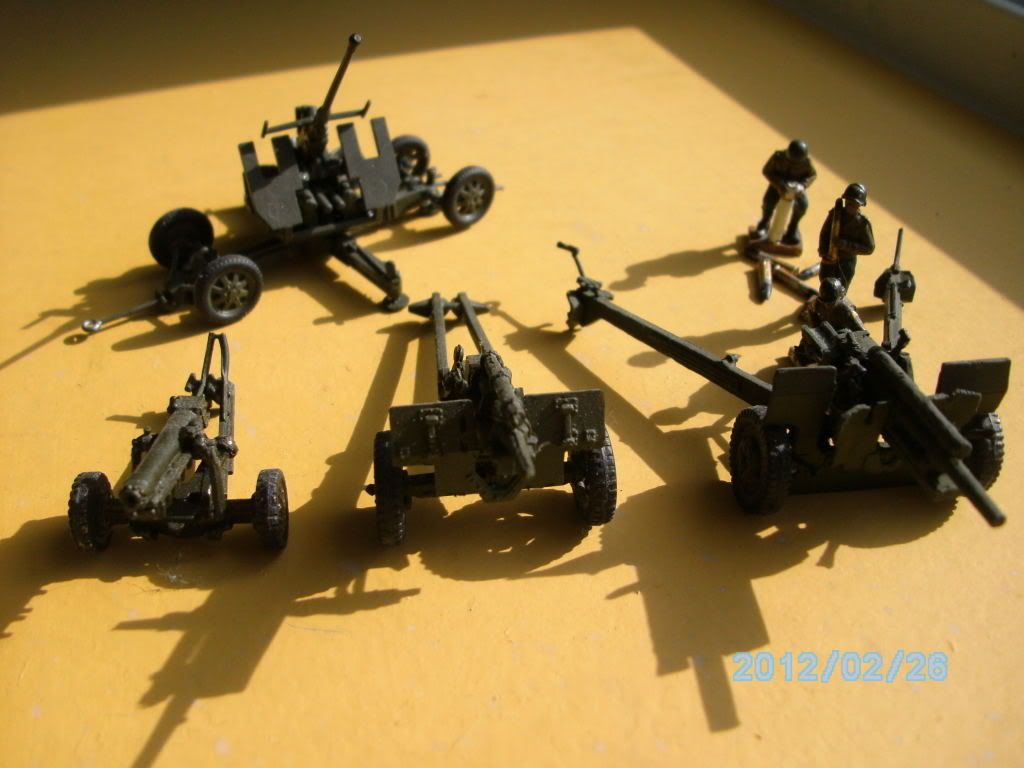
This set is Communist Artillery:  The PST 152mm Gun, the PST 122mm Gun, the PST 76mm Gun and limber, the UM 122mm Mortar, and the Imex 82mm mortar and figures.  It's really fun doing the figures!

So, tonight it's up north for fried chicken and beer, tomorrow is a trip to the War Memorial Museum to take some other teachers on a guided tour, and then to a Saffie (South African) restaurant!  A friend of mine just got back from a trip home to Jo-burg and brought me some Ostrich jerky!  Delicious!  I'm going to have my wife bring some bison jerky as a return gift. 

Big Smile

________________________________________________________________________________

Andy Hill (the_draken) landrew.hill(at)live.com <*> ASE Master Auto Tech, Imaca certified.  >^.^<

PADI OWSI Certified, BA Poli Sci (NDSU), BS Secondary ED-Social Studies MSUM (Sigma *** Laude)

  • Member since
    July 2004
  • From: Sonora Desert
Posted by stikpusher on Tuesday, February 28, 2012 9:13 PM

Ok Draken, your latest bevy of builds has been added to the front page. I really like the Dragon Wagon/Patton comboStick out tongue Very sharp work there.

As for me, I have just been finishing up a few 1/350 ships that I have been working on for awhile- the Graf Spee and a couple of Type VII U-Boats. I should have them all finished tomorrow evening and then can resume work on my H-13 and F-86. Wink


F is for FIRE, That burns down the whole town!

U is for URANIUM... BOMBS!

N is for NO SURVIVORS...

       - Plankton

LSM


  • Member since
    November 2009
  • From: SW Virginia
Posted by Gamera on Wednesday, February 29, 2012 9:01 AM

Draken Andy & SP: Hooray!!! Great work guys! Yes

"I dream in fire but work in clay." -Arthur Machen


  • Member since
    April 2009
  • From: Carmel, IN
Posted by deafpanzer on Wednesday, February 29, 2012 10:01 AM

Stik- Outstanding work on the ships... wondering how long did it take you?  I want to build ships again but my biggest concern is that it will take me a whole year just to build one while I can few armor builds a year. Big Smile

Andy the Draken- Jeez, you are a building machine!  Lovely work on the M-26 and hauler... Yes

Andy

  • Member since
    July 2004
  • From: Sonora Desert
Posted by stikpusher on Wednesday, February 29, 2012 11:34 AM

Andy, the Graf Spee has been in the works for nearly two years. But roughly over half of that time period was sidelined for various reasons with no work going on what so ever. It is my first 1/350 large ship and was a learning process all the way thru. Conceivably I could see it taking 3 months if it was my only project going, I had all my research done ahead of time, no snags were hit in the finishing process(the biggest cause of my work delays), and if I was more experienced in ships. Don't get me wrong, this is a great kit for the novice ship builder, but planning ahead of time cuts down on delays in ships more than in armor or aircraft. It also looked more intimidating than it turned out to be. And beware of Model Master Marine Acryl colors- worst adhesion ever on those. Primer is certainly a requirement with them. Something different in the formulation compared to my experiences with Model Master Acryls. For ever 3 to 4 steps forward on painting it was often 1 to 2 steps back due to adhesion problems.Bang Head But as you can see, stubborn persistence pays off.


F is for FIRE, That burns down the whole town!

U is for URANIUM... BOMBS!

N is for NO SURVIVORS...

       - Plankton

LSM


  • Member since
    April 2009
  • From: Carmel, IN
Posted by deafpanzer on Wednesday, February 29, 2012 11:53 AM

Stik- Thanks for the information!  One day I will build either Bismarck or Arizona... I absolutely agree with you about MM Acrylic... worst ever. No  I had about ten bottles when I first returned to my hobby few years and I got rid of them last year even tho most of them were unopened. 


Andy

  • Member since
    July 2004
  • From: Sonora Desert
Posted by stikpusher on Wednesday, February 29, 2012 2:36 PM

I have a 1/350 Arizona in my stash and will tackle it one day. Once I have gotten better with PE, because that kit certainly needs the upgrades. I want to do her proper justice in the build. MM Acryls I find to be hit and miss in quality. Some are good, some bad. But the the Testors Acryl Marine Colors are just uniformly difficult. Unfortunately no LHS stock the White Ensign paint line and I am not a fan of mail order for paints. So I went with what was available at the LHS. Between Polly Scale (a far superior acrylic line IMO), Testors Acryl Marine colors, and Tamiya, pretty much all of my ship paint color needs (not very big) are met.


F is for FIRE, That burns down the whole town!

U is for URANIUM... BOMBS!

N is for NO SURVIVORS...

       - Plankton

LSM


  • Member since
    December 2003
  • From: Charleston, SC
Posted by sanderson_91 on Wednesday, February 29, 2012 8:26 PM

Wow! Some really nice work here! I'm almost done with the decals on the F-84 and will post some new pics soon.

Steve


  • Member since
    December 2010
  • From: Yangju, Gyeonggi-Do, Korea
Posted by the_draken on Sunday, March 4, 2012 8:48 AM

P2V-5 has the wings on, tail fins on, wing tip fuel tanks on, and everything painted.  Also working on the front turret.  Decided to use:

A) base units of the .30 cals guns fro the Italeri H-31.  B) seat from the driver of the M-30 by Nitto/Fujimi.   C) barrels from the wing pods of the Heller F-94B. 

It's looking a beaut!


Pics when I can upload them


________________________________________________________________________________

Andy Hill (the_draken) landrew.hill(at)live.com <*> ASE Master Auto Tech, Imaca certified.  >^.^<

PADI OWSI Certified, BA Poli Sci (NDSU), BS Secondary ED-Social Studies MSUM (Sigma *** Laude)

  • Member since
    July 2010
  • From: Tornado Alley
Posted by Echo139er on Wednesday, March 7, 2012 10:02 PM

Great builds happening here.

  • Member since
    December 2010
  • From: Yangju, Gyeonggi-Do, Korea
Posted by the_draken on Thursday, March 8, 2012 5:05 AM

Well guys, the Neptune is at a standstill.  The cat srsly did send my engine cowling into another dimension.  I've got two more of these birds back in the states, I can rob at least one for a cowling.  But thne I have to wait for it to get here in the mail with other stuff.  So, until  that happens, I'm going to finish up what I can and hold off on decals and final finish until I can get that cowl!

The fuselage is assembled, painted, wings and ailerons attached, the Wing tanks assembled and attached, the landing gear mostly assembled, and all but one engine cowl of the engines is assembled.  I still need to put together the props...

I tell ya.  Leave the cat alone for a week and stuff just DISAPPEARS!  Devil

________________________________________________________________________________

Andy Hill (the_draken) landrew.hill(at)live.com <*> ASE Master Auto Tech, Imaca certified.  >^.^<

PADI OWSI Certified, BA Poli Sci (NDSU), BS Secondary ED-Social Studies MSUM (Sigma *** Laude)

  • Member since
    December 2010
  • From: Yangju, Gyeonggi-Do, Korea
Posted by the_draken on Thursday, March 8, 2012 7:39 AM

Landing gear assembled and on!  Gotta paint the anti glare for the cockpit ant the interior of the canopy then it goes on.  Last few steps will be the rear guns and glass followed by gear bay doors and one prop installed, the other assembled and waiting.

Some things to watch out for, Helo:

1)  LOTS AND LOTS OF WEIGHT!  I'd added far more than anticipated and then when the gear were on had to add a ton and a half more!  This is a serious tail sitter here.  Thank goodness that there's plenty of room in the nose.

2)  PAY ATTENTION TO THE EXHAUST LOCATIONS!  I didn't find any A, B, C markings on my sprue sheets.  It makes a freaking difference!  They not only will not fit correctly, the cowl flaps won't either.

3)  Make sure which parts and which direction their pointing for the landing gear.  I have one minor f-up, I'm not saying what...

4)  I couldn't find any easy to locate pictures of the search light in the starboard wing tip, I just used the kit part.  It looks quite small for the location...

5)  DO NOT discard any other parts until you're sure that they're no longer to be needed.  I was glad because I'd used the stabilizing fins from the -7 wing tip fuel tanks to go onto the -5.  The -5 has TWO per tank, the -7 only has one, and only one is provided.  Looks a lot nicer now.  :)

Hope that this helps!  Pictures when I take them and upload them.

________________________________________________________________________________

Andy Hill (the_draken) landrew.hill(at)live.com <*> ASE Master Auto Tech, Imaca certified.  >^.^<

PADI OWSI Certified, BA Poli Sci (NDSU), BS Secondary ED-Social Studies MSUM (Sigma *** Laude)

  • Member since
    September 2003
  • From: Australia
Posted by Helo H-34 on Thursday, March 8, 2012 3:20 PM

Great info Andy , on the Neptune build .

Especially about the amount of weight reguired and the exhaust locations .

I picked up the Warpaint series Lockheed Neptune book and sadly I'm quite disappointed .

Most of the reference pictures are of the later 7 series with only a few on the prototype and early series neptune's . There is vertually nothing on the Korean War based Neptune and quite little in general on the 5 version .

The only thing of any great use is the giant fold out 1/72 scale plans ;

There is only one cockpit pic , which is really just the instrument panel , no pic's of the fuselage interior , no close-ups of the nose or tail guns or their mounts ....very , very , disappointed .

I'm not sure what other books are out there regarding the P2V-5 Neptune but I would really like to find something  better .

On a brighter note , the milicast  M119 GMC  arrived yesterday and I ordered the Centaur dozer at the same time but they were currently out of stock but will be shipped ASAP once they arrive in store .

Great Pic's of the Commando Andy and the Howitzer's ; My Ace M-101 and M-102 arrived yesterday as well , so I look forward to getting those built .

John .

  • Member since
    October 2009
  • From: Texas
Posted by Gregbbear on Monday, March 12, 2012 7:05 PM

I fell behind a few pages, and WOW!!!!!  Some more really great stuff going on (as always).  Steve, I am really liking the Invader and T-Jet.  Draken, awesome as always!  Stik, was the battleship for the BofA Gb?  Don't feel bad, I still have my Ju-290 about 90% from that GB.  Oh yea, and I like the chopper too.

I can't seem to make much progress on my Corsair.  It seems everytime I look at it, I have to re-do a seam or something.  If I do another Italeri -5 in the future, I will take a different approach to correcting the length!  I decided to do something quick and easy, so I could feel like I actually build models.  I am building the Airfix Mig15 in night fighter guise.  It has gone quickly, so quick that I didn't even think to take any pictures until the other day.

Here, it has worms!

And, here is how it sits now.  I have to let it dry a few days (used enamels) and then I can shoot the black for the bottom. 

Cheers,

Greg


- yat yas!


  • Member since
    November 2009
  • From: SW Virginia
Posted by Gamera on Monday, March 12, 2012 10:52 PM

Greg:

Love the cwazy camo! I assume that's Silly Putty? Tried it for the first time about a year ago and wish I'd tried it earlier.

"I dream in fire but work in clay." -Arthur Machen


  • Member since
    July 2004
  • From: Sonora Desert
Posted by stikpusher on Tuesday, March 13, 2012 2:58 PM

Greg, your MiG looks good to me. I did a 1/48 one like that a few years back. Certainly one of the sharpest paint jobs that those ever wore. In 1/72 the silly putty camo masking makes sense for that scheme. In 1/48 free hand works but in Braille Scale... Surprise Yes, I had entered my Graf Spee in the Battle of the Atlantic/Shiver me Timbers GBs. Had I not had to move last summer and had it sidelined since then, it would have been finished much sooner. I basically put 2 days work into the finish... go figure...Hmm


F is for FIRE, That burns down the whole town!

U is for URANIUM... BOMBS!

N is for NO SURVIVORS...

       - Plankton

LSM


  • Member since
    September 2003
  • From: Australia
Posted by Helo H-34 on Sunday, March 18, 2012 5:41 PM

Greg , Awesome work on the camouflage finish of your Mig-15 Yes

I started some preliminary interior painting on the Korean War C-119C Flying Boxcar

I'm hoping it will look something similar to this pic ;

John

  • Member since
    July 2004
  • From: Sonora Desert
Posted by stikpusher on Wednesday, March 21, 2012 6:15 PM

I do look forward to seeing that C-119 completed. A very impressive bird to see up close! I heard that they were a doozy to jump from.

 They have one on display at Ft Benning at Airborne Walk along with a C-47. A nice way to keep in touch with the paratooper history/heritage while going thru jump school there.

Me in front of the C-47 many moons ago... I should gotten one in front of the C-119 too,,,

anyways back to our regularly scheduled build... I begain to paint the H-13 today- Polly Scale interior Green in the ccockpit and Tamiya Metallic Gray on the Engine.


F is for FIRE, That burns down the whole town!

U is for URANIUM... BOMBS!

N is for NO SURVIVORS...

       - Plankton

LSM


  • Member since
    September 2003
  • From: Australia
Posted by Helo H-34 on Wednesday, March 21, 2012 8:13 PM

Nice progress on the H-13 build and awesome reference pic's you posted Stik .

Am I to understand that you also served in the Army Airborne Corps .

I have the fuselage halves glued together alomg with the wings and tail booms .

I have a another C-119 going as well as an USAF Thunderbirds support aircraft ; I'm running into some minor fit issue's with the first build as I discovered while trying to get the fuselage halves glued together that the cockpit instrument panel seemed to be too wide and the join along the nose kept opening up . In the end I pulled the instrument panel out and have filed down the sides to fit it back in later .

The table that fits behind the pilots is also positioned too high it should be flush the cockpit window sill .

I started searching around the internet for build reviews on the C-119 , which is something I should of done before starting ; A modeller on another web site filed down the raised detail on the cockpit rear wall so the table can be positioned lower , I've followed the same approach on the second C-119 build .

I'll sand the seams next and then putty and sand again .

More updates shortly

John .


  • Member since
    November 2009
  • From: SW Virginia
Posted by Gamera on Friday, March 23, 2012 11:38 AM

Great work guys!!!

Great photos SP!

And spiffy new avatar Helo!

"I dream in fire but work in clay." -Arthur Machen


  • Member since
    September 2003
  • From: Australia
Posted by Helo H-34 on Friday, March 23, 2012 3:10 PM

Gamera

Great work guys!!!

Great photos SP!

And spiffy new avatar Helo!

Ahh , so Cliff you noticed the new avatar pic .....

Along with military helicopters , I have a great interest in military cargo planes and of late have taken to the DHC-4 Caribou . As usual my timing isn't the best as some of the on-line hobby stores in my neck of the woods tell me that wholesaler is no longer distributing Hobbycraft kits in Australia and the Caribou seems to be out of stock just about everwhere . This lead me to buying from ebay and I had to bid between $50-$60 for each kit to win the auction ....''ouch''

Anyway I was planning on building a fleet of Caribou's some for the U.S.Army/USAF and the Australian Army/RAAF .  Aussie decals has a nice sheet out for the RAAF ;

Wolfpak Decals has a sheet which covers a USAF bird 72-026 ;

Hobbycraft's kit has Australian markings which match the avatar pic , so I'm thinking about three Aussie Caribou's and four for the U.S . I don't suppose anyone has a Caribou kit they wnt to trade ?

Back to the C-119 , I puttied the seams yesterday and I'll sand this morning . The fuselage join wasn't the best , I'm hoping I won't loose to much raised detail while sanding .

caribou johnny.

  • Member since
    July 2004
  • From: Sonora Desert
Posted by stikpusher on Friday, March 23, 2012 5:32 PM

Helo, I served 24 years between active and guard/reserve in the Army, of which 17 years was in airborne units. I have a fondness for transport aircraft as well. We actually had a couple of C-7s assigned to support us when I was with 19th SFG. I think they were some of the last in the inventory and were replaced by C-21 Sherpas before I left that unit in 1992. I cant believe that a 1/72 Hobbycraft C-7 is going for that much on the Ebay.Super Angry  I hope for your sake that they re issue the kit soon. I have never seen one built up. Would love to see some in Army OD and USAF SEA Camo. Those Aussie schemes look pretty cool tooYes The C-119 is looking great too... Hmmmaybe someday we will see one in 1/48, the one true aircrft scaleWink


F is for FIRE, That burns down the whole town!

U is for URANIUM... BOMBS!

N is for NO SURVIVORS...

       - Plankton

LSM


  • Member since
    March 2007
  • From: Carmel, CA
Posted by bondoman on Friday, March 23, 2012 6:42 PM

Stik- on the C-119 wasn't there a jump door on the back right hand side? So you didn't have to run out the open clam shell? I've seen from pics of the Paras at Dien Bien Phu sort of stepping out sideways.

  • Member since
    November 2009
  • From: SW Virginia
Posted by Gamera on Friday, March 23, 2012 6:55 PM

Helo: Oh cool John, the avatar is small enough I wasn't able to tell what sort of aircraft it is. Those are some nice looking schemes.

"I dream in fire but work in clay." -Arthur Machen


  • Member since
    December 2010
  • From: Yangju, Gyeonggi-Do, Korea
Posted by the_draken on Friday, March 23, 2012 7:16 PM

RE:  Caribou pricing

That's _WAY_ too much for that kit!  I'd definitely do some searching around on the internet.  It wasn't even that high of a price when it first came out!  I picked up mine for $12 as a swap meet, but I do see it on eBay for around $15-20 when it's available.  Weird but true!  There was an incident during the Vietnam War where a US Army C-7 was climbing out of a fire support base and was hit by and outgoing 105mm shell!  THIS WAS CAUGHT ON FILM!  If you search around you should find the images.  Wild as freaking all get out!  I don't recall that anyone survived the crash.


RE:  C-119 assy.

WAY TO GO!  Love that lime green colour.  The book that comes with the kit shows the floor as being a tiled dark green, doesn't it?  anyway, love that kit, I'm thinking it may be my next one, or else I'll do the Sunderland.  I've REALLY got to get some of these big kits our of the way before I go home!  And yes, the troops had TWO doors, one on either side, that they could jump out of.  Kind of like the C-130/141's.  What's really cool is the beaver tail version that was used to catch satellites/film cannisters as they parachuted down from space.  There's a video about it on Youtube.  I found it helping one of my friends do research for a Vod-cast he's making in review of an old '50's film.  This would be an awesome version to scratchbuild...


________________________________________________________________________________

Andy Hill (the_draken) landrew.hill(at)live.com <*> ASE Master Auto Tech, Imaca certified.  >^.^<

PADI OWSI Certified, BA Poli Sci (NDSU), BS Secondary ED-Social Studies MSUM (Sigma *** Laude)

  • Member since
    July 2004
  • From: Sonora Desert
Posted by stikpusher on Friday, March 23, 2012 7:52 PM

The C-119 had one door on each side of the clamshell. Due to their placement the jumpmaster had to stagger the jumpers out each door otherwise the possibility of collision and entanglements could result from a jumper exiting the left and right doors at the same time. With the aerodynamics of the placement of the doors on the tapering of the tail, I heard from guys who jumped those it happened more than a few times.


But the rear clamshell doors also could be removed for heavy drops or "ramp" jumps.

File:434th TCW Bakalar Air Force Base C-119.jpg


F is for FIRE, That burns down the whole town!

U is for URANIUM... BOMBS!

N is for NO SURVIVORS...

       - Plankton

LSM


  • Member since
    November 2011
  • From: Near Houston, TX
Posted by GeneK on Friday, March 23, 2012 8:31 PM

stikpusher

The C-119 had one door on each side of the clamshell. Due to their placement the jumpmaster had to stagger the jumpers out each door otherwise the possibility of collision and entanglements could result from a jumper exiting the left and right doors at the same time. With the aerodynamics of the placement of the doors on the tapering of the tail, I heard from guys who jumped those it happened more than a few times 

Yep I can verify that! My third jump in Airborne training at Ft. Benning we used a C-119 (Texas ANG). I went out the left door, and a friend went out the right door, and we cross behind the aircraft as the chutes were opening. We were very lucky in that they didn't actually tangle, but it had us both climbing the risers in a hurry! Stick out tongue And no, the jumpmaster wasn't staggering us.


Gene

  • Member since
    July 2004
  • From: Sonora Desert
Posted by stikpusher on Friday, March 23, 2012 9:13 PM

And there you have it...Wink I know in my jump school class we had one guy who got knocked out when he collided beneath the C-130 with the jumper from the opposite door, Black Eye and another pair who entangled, but  followed their training properly and came down ok.Surprise But never meBig Smile


F is for FIRE, That burns down the whole town!

U is for URANIUM... BOMBS!

N is for NO SURVIVORS...

       - Plankton

LSM


  • Member since
    December 2010
  • From: Yangju, Gyeonggi-Do, Korea
Posted by the_draken on Saturday, March 24, 2012 8:25 AM

Whelp, I'm to the point of putting decals on the Neptune.  Might do that later tonight, maybe not.  I'll still have to wait for two parts from the states with my wife's next mailing.  I have no idea when that will happen.  Here's what I've got for pictures, sorry about the exposure.  The camera is only giving me two options:  Over exposed, under exposed.


One free internet to whomever can tell me what's wrong with the nose (Helo_34 isn't allowed to play, he already knows.  Cool)!


Here's a closeup of the wing search light.  I just used the kit part instead of building a new one.  Okay, I also had no detail pics of it, and was feeling lazy.

________________________________________________________________________________

Andy Hill (the_draken) landrew.hill(at)live.com <*> ASE Master Auto Tech, Imaca certified.  >^.^<

PADI OWSI Certified, BA Poli Sci (NDSU), BS Secondary ED-Social Studies MSUM (Sigma *** Laude)

JOIN OUR COMMUNITY!

Our community is FREE to join. To participate you must either login or register for an account.

SEARCH FORUMS
FREE NEWSLETTER
By signing up you may also receive reader surveys and occasional special offers. We do not sell, rent or trade our email lists. View our Privacy Policy.