SEARCH FINESCALE.COM

Enter keywords or a search phrase below:

60th Anniversary Korean War Group Build- extended for the duration

764949 views
3335 replies
1 rating 2 rating 3 rating 4 rating 5 rating
  • Member since
    September 2003
  • From: Australia
Posted by Helo H-34 on Saturday, February 18, 2012 11:04 PM

Awesome "War Booty" Greg Stick out tongue

I can't belive everything was so cheap , I'n not aware of any type of model Fiesta here in Sydney , I would go to something like that for sure and with a 5 litre V8 ute at my disposal I could really load up and make off like a bandit like you . I like the small scale armor / vehicles especially the resin wesp stuff and the Night Fighter kits are very cool .

Great score buddy Yes

John .

  • Member since
    August 2010
  • From: Beaverton, OR
Posted by Ghostrider114 on Saturday, February 18, 2012 11:34 PM

stikpusher

Ghostrider, your F-86 is coming along very nicely. Rather bold to paint the wings before attaching them, isn't it?Hmm

I thought it would be easier to paint as two pieces, for one thing, that gives me something to hold the model by that's not going to effect the visible finish.

I'm still waiting for clear weather so I can paint the stripes.

  • Member since
    April 2010
Posted by Theuns on Sunday, February 19, 2012 1:31 AM

No the South  African Gov only sent air support, no ground troops.

Interestingly when the pilots arrived in Korea they were sent to go learn to fly fast jets, but the insrtuctors were surprized to find that all o them already were good F-51 drivers and most if not all had flown DH Vampires back in SA so no real training was needed.

The use of the T-33 was mostly for some instrument training and I have a pix of T33 # TR-978 used by SAAF flyers.

I will post some pix just for interest.

Theuns

  • Member since
    November 2009
  • From: SW Virginia
Posted by Gamera on Monday, February 20, 2012 8:12 AM

Greg: Wow looks like Christmas came a little late but when it did arrive it hit with a bang! Congrads!

John: I'm not sure there are any shows near where you live but check IPMS Australia's website.

"I dream in fire but work in clay." -Arthur Machen


  • Member since
    April 2010
Posted by Theuns on Monday, February 20, 2012 8:31 AM

Here are just a few pix of the SAAF in Korea #2 sqn

SAAF Korea

SAAF Korea

SAAF Korea

S-51 IIRC ,not S-55


Theuns

  • Member since
    July 2004
  • From: Sonora Desert
Posted by stikpusher on Monday, February 20, 2012 5:31 PM

Nice pics there Theuns!Yes

Well today I decided to take a little side trip to see if a local chain hobby store, Hobby People, was having a Presidents Day sale. HmmYes they were. Big Smile All plastic model kits 25% off. Pirate Well I had a look around to see what they had that was affordable, tickled my fancy- and did not already have in my stash! Lo and behold I chose the recent Revell reissue of the 1/35 H-13

Opening it up, it looks like a nice simple build that I can knock out easily.  I will be building it in the Korean War MASH Medevac option. More to follow over the next few days as I feel a bit of model building madness coming on... Whistling


F is for FIRE, That burns down the whole town!

U is for URANIUM... BOMBS!

N is for NO SURVIVORS...

       - Plankton

LSM


  • Member since
    September 2003
  • From: Australia
Posted by Helo H-34 on Tuesday, February 21, 2012 1:45 PM

Nice score on the 1/35 MASH Medevac Stik Yes

I look forward to seeing her come together .

A little while back Andy (Draken) sent me a tip on some 1/72  C-54 decals on ebay for auction .

I was lucky and won them , so I have now some nice markings to use on the Mach 2 C-54 build

I just need to clean up the engine nacelles , landing gear struts , wheels and doors and I can get her masked ready for airbrushing .

I found a nice color pic in one of my reference books , 'Military Air Transport Service' by Nicholas M Williams of a C-54 Skymaster at Tokyo , Japan 1953

John .

  • Member since
    July 2004
  • From: Sonora Desert
Posted by stikpusher on Tuesday, February 21, 2012 4:06 PM

Thanks Helo.

Here are the beginnings. This thing sure looks insect like so far.

The fuselage framing so far

And front and rearviews of the engine. I still need to sand down the gluing seams.


F is for FIRE, That burns down the whole town!

U is for URANIUM... BOMBS!

N is for NO SURVIVORS...

       - Plankton

LSM


  • Member since
    July 2004
  • From: Sonora Desert
Posted by stikpusher on Tuesday, February 21, 2012 7:16 PM

more updates

engine completed

and placed (not glued) into the fuselage


F is for FIRE, That burns down the whole town!

U is for URANIUM... BOMBS!

N is for NO SURVIVORS...

       - Plankton

LSM


  • Member since
    April 2009
  • From: Carmel, IN
Posted by deafpanzer on Tuesday, February 21, 2012 7:49 PM

stikpusher

Here are the beginnings. This thing sure looks insect like so far.

That was a good one... agree with you.  I am building a Huey right now and I am having too much fun that I want to build more helicopters in the future.  This is definitely on my wish list... wondering if there is a 1:35 scale out there?  I watched M.A.S.H. a lot with my dad when I grew up... great show!

Andy

  • Member since
    July 2004
  • From: Sonora Desert
Posted by stikpusher on Tuesday, February 21, 2012 8:01 PM

DP, this kit is 1/35, and MRC makes the H-13D (the more common Korea War varaint) in 1/35 as well. Italeri makes on in 1/48. I shudder to think of one in 1/72... way too fragile!Surprise I keep hearing the MASH theme in my mind as I work on this thing...Wink


F is for FIRE, That burns down the whole town!

U is for URANIUM... BOMBS!

N is for NO SURVIVORS...

       - Plankton

LSM


  • Member since
    November 2009
  • From: SW Virginia
Posted by Gamera on Wednesday, February 22, 2012 7:54 AM

Theuns: Nice, those SAAF Sabres are sharp looking planes.

SP: Nice looking chopper. I assume the 2 in 1 refers to the medivac option and the rocket armed version on the box lid?

"I dream in fire but work in clay." -Arthur Machen


  • Member since
    April 2009
  • From: Carmel, IN
Posted by deafpanzer on Wednesday, February 22, 2012 9:16 AM

Thanks Stikpusher! Beer  Who knows Dragon will release one?  They have been releasing helicopters recently... 

Andy

  • Member since
    July 2004
  • From: Sonora Desert
Posted by stikpusher on Wednesday, February 22, 2012 11:34 AM

Gamera, yes the 2 in 1 refers to a gunship or medevac options. Although it technically is a 3 in 1 because it can also be built as a straight trainer or observation type.Wink Now after doing a bit of research on the type I have learned that they were used early on in Vietnam as armed scouts with 2 x M-60 machine guns on the skids until replaced by the OH-6. I may have to buy and build another...Stick out tongue

If Dragon was to release one I would be surprised. The few 1/35 chopper kits they have are actually 10-20 years old now. The UH-1 is originally a Panda release from the late 90s and the OH-6/MH-6/MD-500 dates back to the early/mid 90s. The MRC kit is supposed to be better but, I don't think I can find those so easily or so inexpensive.

More progress will happen today. I just need to find a detail shot of an intake to see if it needs to be hollowed out, left as is, or screened off before I begin my next steps.


F is for FIRE, That burns down the whole town!

U is for URANIUM... BOMBS!

N is for NO SURVIVORS...

       - Plankton

LSM


  • Member since
    September 2003
  • From: Australia
Posted by Helo H-34 on Wednesday, February 22, 2012 1:52 PM

Excellent progress on your H-13 build Stik Yes

Squadron Signals H-13 Mini book is a great reference to the different versions of the H-13 and there are some nice close-up shots of the different types of machine gun and rocket mounts on the H-13

Here's a pic of the engine intake pipe

Some more pic's of the H-13D Korean War version

The boxed in version type looks interesting .

HTH

John

  • Member since
    November 2009
  • From: SW Virginia
Posted by Gamera on Wednesday, February 22, 2012 2:09 PM

Guess I'm a wuss but in a gunship I'd like at least a metal cab around me instead of an entirely open cockpit. Not sure if an UH-1 had any armour around the cockpit but anything would be better than flying around with your butt exposed to ground fire Indifferent

Pretty cool, not sure it was entirely MASH but the H-13 is almost an icon of the Korean War.

"I dream in fire but work in clay." -Arthur Machen


  • Member since
    September 2003
  • From: Australia
Posted by Helo H-34 on Wednesday, February 22, 2012 4:14 PM

I'm with you Cliff , at least with a Huey the metal doors offer some protection against ground fire .

I went looking through my old aircraft photo's I took many years ago at HMAS Albatross Naval Air Base just south of Sydney and found some pic's of the Bell model H-13H . There not the best quality as I only had a pocket 35mm camera in those day's , pre digital camera era .

H-13H undergoing restoration

I tried zooming in when I scanned the photo for a closer look at the intake pipe

I can't tell if there is any type of mesh screen over the opening ?

Finished restoration photo's

The only other pic I have of the flexible intake hose is a NASA 3 bladed H-13G

Unfortunatly it's the other end of the pipe that we're interested in ...Sad

Wish I could of been of more help .

John .

  • Member since
    September 2003
  • From: Australia
Posted by Helo H-34 on Wednesday, February 22, 2012 4:30 PM

You guy's might find this pic interesting from Squadron Signals Bent and Battered Rotors Vol 3

Does the U.S. Army still use Mules ! ....................Whistling

  • Member since
    July 2004
  • From: Sonora Desert
Posted by stikpusher on Wednesday, February 22, 2012 7:29 PM

Gamera, I am with you on wanting my gunship to be armored as well as armed. Hueys, Kiowas, and Loaches at least had armored seats. The Sioux has nothing...Surprise When every pound counts I guess even a flak vest or steel pot for the family jewels is out...

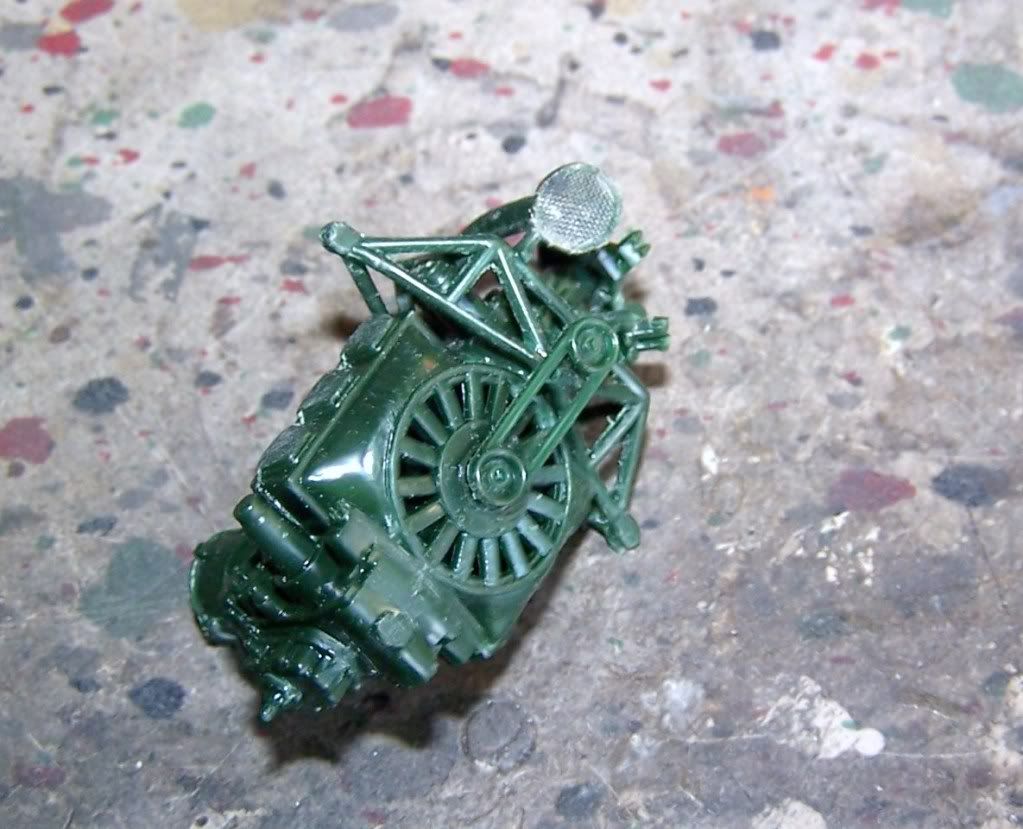
Helo, thanx for the pics. I went with a SWAG on my intake and screened it off. Of course first I hollowed out the intake with my Dremel, but with the screen on you really cannot see anything. Green Tea bags from Starbucks are made out of a very fine nylon mesh I discovered and make excellent 1/35 screens,helmet nets, etc. Geeked I figured that rotor wash in forward areas would kick up a lot of dust, debris, plant stuff, etc and all could be sucked into the intake and make for a bad day.

Anywayshere is todays update:

completed motor with hollowed and meshed intake

cockpit bubble solid parts

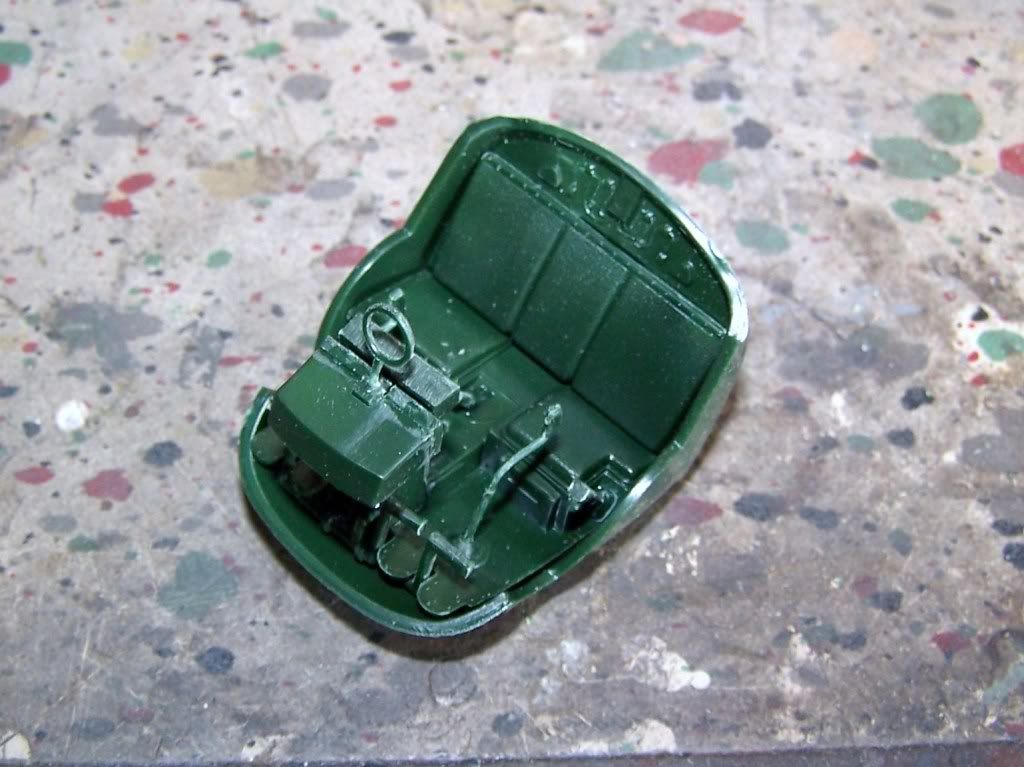
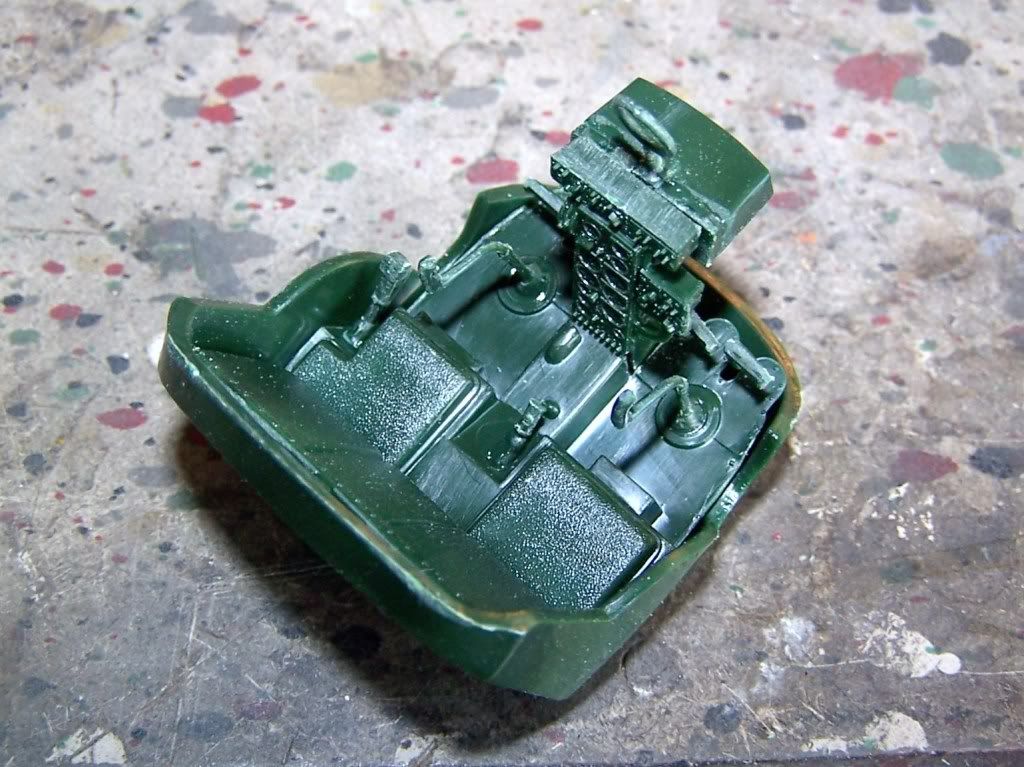
Looks like I will have to scratch some belts if I do not use the pilot figure
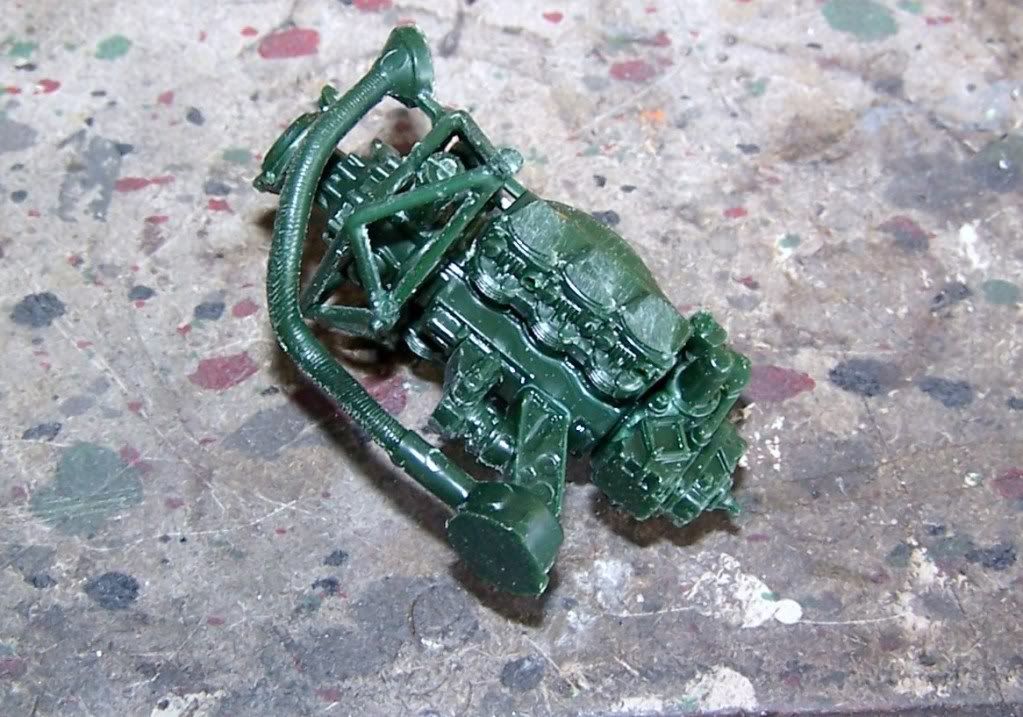
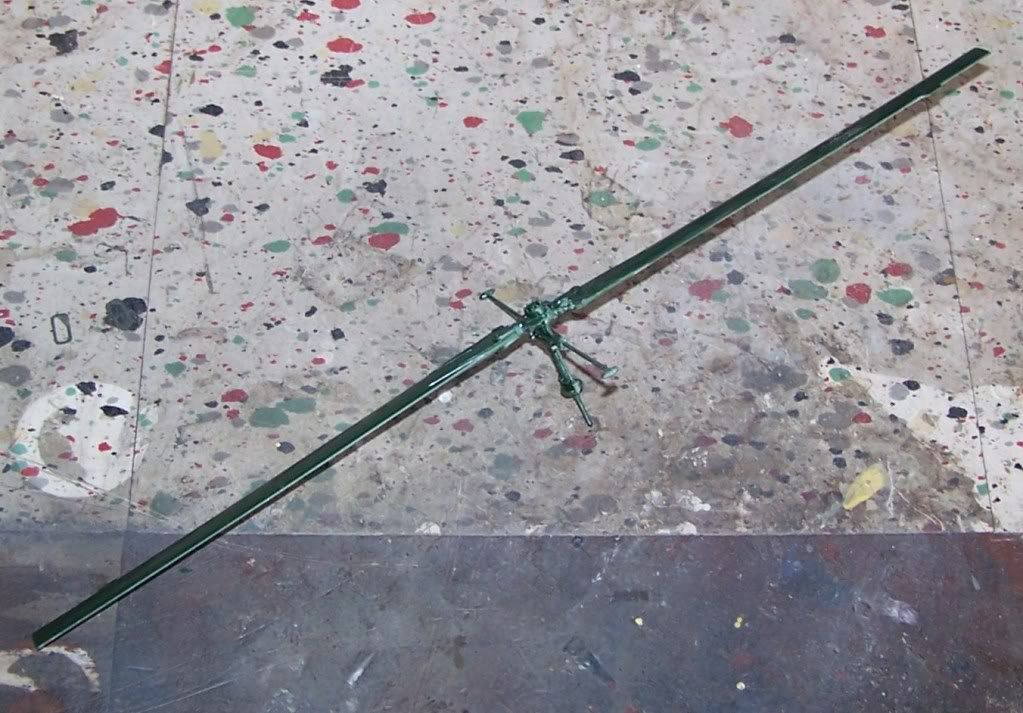
main rotor

and everything placed on the framework for a pic

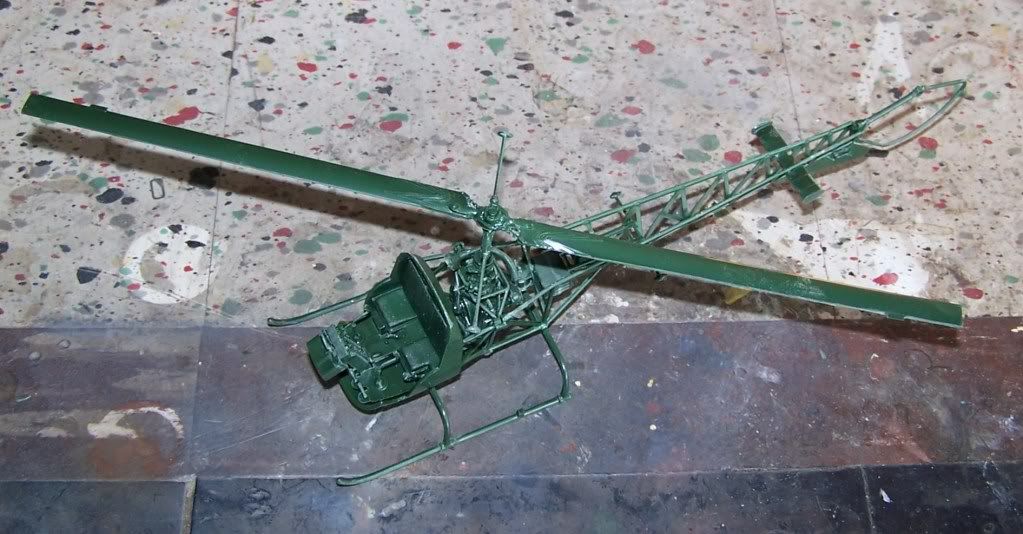
I still need to add intake and exhaust manifolds on the engine, the top framing to the boom, the tail rotor and tail rotor shaft, and the ground wheels on to the skid... almost ready for initial painting.


F is for FIRE, That burns down the whole town!

U is for URANIUM... BOMBS!

N is for NO SURVIVORS...

       - Plankton

LSM


  • Member since
    December 2010
  • From: Yangju, Gyeonggi-Do, Korea
Posted by the_draken on Thursday, February 23, 2012 6:31 AM

Here's just one of the detail pics I took of one that was hanging out over last summer at the Fargo Air Museum.

This is the weblink to the photobucket page for that pic, just keep clicking <PREVIOUS> to see the rest of them.  There's some really interesting details on this bird that You'll want to look at!


________________________________________________________________________________

Andy Hill (the_draken) landrew.hill(at)live.com <*> ASE Master Auto Tech, Imaca certified.  >^.^<

PADI OWSI Certified, BA Poli Sci (NDSU), BS Secondary ED-Social Studies MSUM (Sigma *** Laude)

  • Member since
    December 2010
  • From: Yangju, Gyeonggi-Do, Korea
Posted by the_draken on Thursday, February 23, 2012 6:50 AM

the_draken

Here's just one of the detail pics I took of one that was hanging out over last summer at the Fargo Air Museum.

http://i1193.photobucket.com/albums/aa345/the_tunnan/Aircraft%20and%20equipment%20-%20Photos/PICT0357.jpg

This is the weblink to the photobucket page for that pic, just keep clicking <PREVIOUS> to see the rest of them.  There's some really interesting details on this bird that You'll want to look at!


Let's try that p-bucket link again...


http://s1193.photobucket.com/albums/aa345/the_tunnan/Aircraft%20and%20equipment%20-%20Photos/?action=view&current=PICT0357.jpg


________________________________________________________________________________

Andy Hill (the_draken) landrew.hill(at)live.com <*> ASE Master Auto Tech, Imaca certified.  >^.^<

PADI OWSI Certified, BA Poli Sci (NDSU), BS Secondary ED-Social Studies MSUM (Sigma *** Laude)

  • Member since
    November 2009
  • From: SW Virginia
Posted by Gamera on Thursday, February 23, 2012 9:31 AM

Helo John & Draken Andy: Great photos guys, thanks for posting them. I love the mule toting the tail assembly, that would make a great diorama.

SP: I'd heard about Sioux crewmen packing flak jackets into the floor and on the seats to give a little protection but wasn't sure if later models got some sort of light plating around the vulnerable areas. Looking forward to seeing her all painted up.

BTW: Started reading Allen R. Millett's 'The War for Korea' that I picked up at the MacArthur Museum last year. If anyone wants an in-depth treatment of the subject Millett starts with various anti-Japanese resistance groups that sprung up with the occupation in 1910. So much detail I think my eyes are starting to glaze over.   

"I dream in fire but work in clay." -Arthur Machen


  • Member since
    July 2004
  • From: Sonora Desert
Posted by stikpusher on Thursday, February 23, 2012 4:26 PM

Gamera, I am looking forward to paint on her as well. But I have a couple or three builds at the 98.5% mark that I want to knock out first. Last night I did complete the engine by adding the intake and exhaust manifolds. I also hollowed out the exhausts better than the indents that the kit had molded in them.


F is for FIRE, That burns down the whole town!

U is for URANIUM... BOMBS!

N is for NO SURVIVORS...

       - Plankton

LSM


  • Member since
    December 2010
  • From: Yangju, Gyeonggi-Do, Korea
Posted by the_draken on Thursday, February 23, 2012 9:17 PM

Off Topic

So, I'm back from my week long vacation on Guam.  Had a good time, got some awesome dives in, had a great time with friends.  I'm going to go way off topic here, but I took some photos of a Japanese WWII Type A two man sub while I was there.  It's sitting outside the War In The Pacific National Park T. Stell Newman guest visitors' center.  I really did search for a group on this topic and came up with nothing.  I know that there's only two of these above ground, one in Texas and the one on Guam.  I'm noticing that some of the details on the Guam unit are gone (small periscope on the conning tower, the wire guides on top of the tower, antenna on the top of the tower, etc.) based on some older photos of it on Guam that I found on the web.

If you or someone you know is working on this kit here's some awesome photos.  I know that there's two in 1/72 scale (A Japanese production and a Vac-Form.  I have both.) and might be others (Lindbergh? Resin?).  So pass this info around.  If someone wants to use my photos, that's great, just give credit where it's due.  :)

http://s1193.photobucket.com/albums/aa345/the_tunnan/Japanese%202-Man%20Sub%20Guam/?action=view&current=PICT0291.jpg


________________________________________________________________________________

Andy Hill (the_draken) landrew.hill(at)live.com <*> ASE Master Auto Tech, Imaca certified.  >^.^<

PADI OWSI Certified, BA Poli Sci (NDSU), BS Secondary ED-Social Studies MSUM (Sigma *** Laude)

  • Member since
    December 2003
  • From: Charleston, SC
Posted by sanderson_91 on Saturday, February 25, 2012 7:24 PM

Hey Guys!

I've been lurking for a while as my Invader build has lost steam.  I haven't had a lot of time to build over the last five months or so, but have been loosely following this Group Build.  The panel line re-scribe and the the attachment of he Ozmods resin gun nose have caused various issues but I think I've gotten them all resolved.  Since I'm planning a NMF, the model needs to be free of any blemishes or else they will stand out.  In the pics, the wings are not attached yet, just locked in place.  I'm tring to decide if I want to paint and then attach or attach then paint.  The issue here is the extensive exhaust staining which will be hard to add if the wings are attached first.  Here are a few shots:

Since the cockpit is masked for now, here's a few pics of it:

Still lots to do, but I've gotten re-energized to finish this build.  Thanks for looking.

Steve


  • Member since
    December 2003
  • From: Charleston, SC
Posted by sanderson_91 on Saturday, February 25, 2012 7:25 PM

Ok, wrong link on that first photo.  It's supposed to be this:


  • Member since
    December 2003
  • From: Charleston, SC
Posted by sanderson_91 on Saturday, February 25, 2012 7:32 PM

I've also started another model for this Group Build.   While I was tired of the Invader, I picked up the Tamiya 1/48 F-84G.  This is a sweet little kit.  It's OOB with the exception of Eduard set belts and a few additions to the ejection seat.  Getting ready to start the decals.  I plan on using the kit decals for "Four Queens" which was a 58th FBS in Taegu in 1952.  Here are some pics:

Cockpit:

Guns:

Overall:

Thanks for looking!

Steve


  • Member since
    December 2010
  • From: Yangju, Gyeonggi-Do, Korea
Posted by the_draken on Sunday, February 26, 2012 5:26 AM

On topic again!  Whistling

Getting over my Chamorru Croup and finally able sit at the hobby desk for a while without coughing up a lung.  Not that sanding helps my situation any...  I'm back working on the P2V-5 Neptune.  It's the 1/72 Hasegawa/Revell-Germany bird with the Falcon Triple Conversion.  I had the fuselage assembled when I left (I can't remember if I even took pics or not.  I know I didn't post any.) and now I'm filling and sanding.  The upper nose (anti glare area) split right before I'd left so I had to re-glue it and figured I'd just leave the whole sanding job until I came back.  Three days later I'm on it!  Apart from my cat deciding to lose one of the engine cowls for me (ARGH!) everything is progressing quite well.  I learn something new from every kit that I build.

Suggestions for Helo_34 and everyone after me who does this:

Gunner's seat:  Use extra seat (no nose observer seat in -5) and trim HEAVILY on both sides, install support and use as rear gunner observer seat.

1:  DO NOT install the cockpit and nose gear bay until after assembling the fuselage.  I'll get to why in just a moment.

2:  Trim the hole for the nose gear bay prior to assembling the fuselage.

3:  Slide the cockpit into place, from through the nose gear hole mark where supports should be placed to hold it properly.  You can't use the fuselage bulkhead as a guide because it is too low for the -5.  The -7 has a higher cockpit floor and a bulged canopy not found on the -5.

4:  Install nose gear bay from above.

5:  Install supports and cockpit floor/bulkhead.  Install instrument panel, install seats.

Hope this helps ya John!


Assembled fuselage:


Dry-fitting wings, horizontal stabilizers and tip tanks:

________________________________________________________________________________

Andy Hill (the_draken) landrew.hill(at)live.com <*> ASE Master Auto Tech, Imaca certified.  >^.^<

PADI OWSI Certified, BA Poli Sci (NDSU), BS Secondary ED-Social Studies MSUM (Sigma *** Laude)

  • Member since
    July 2004
  • From: Sonora Desert
Posted by stikpusher on Sunday, February 26, 2012 1:56 PM

Sanderson, nice Invader and Thunderjet. Keep up the great work and keep the progress pic updates coming!Yes

Draken, I like that NeptuneWink Good luck on finding that cowl. Perhaps some scotch tape applied to your cat's paws until he reveals what he did with it might be in order...Devil I wish that Revell made one in 1/48.  I will be watching the updates here too! I am glad to hear that you are feeling better. ToastSalud!


F is for FIRE, That burns down the whole town!

U is for URANIUM... BOMBS!

N is for NO SURVIVORS...

       - Plankton

LSM


  • Member since
    November 2009
  • From: SW Virginia
Posted by Gamera on Sunday, February 26, 2012 6:03 PM

Sanderson: Wow, that's some sharp work on those cockpits Yes Very nice!

Draken Andy: Thanks for the photos of the Japanese mini-subs. Seems like you could almost do them in 1/48th scale considering the size. And nice work on the Neptune too.

"I dream in fire but work in clay." -Arthur Machen


JOIN OUR COMMUNITY!

Our community is FREE to join. To participate you must either login or register for an account.

SEARCH FORUMS
FREE NEWSLETTER
By signing up you may also receive reader surveys and occasional special offers. We do not sell, rent or trade our email lists. View our Privacy Policy.