SEARCH FINESCALE.COM

Enter keywords or a search phrase below:

Early Jets Group Build 2010

41301 views
443 replies
1 rating 2 rating 3 rating 4 rating 5 rating
  • Member since
    March 2007
  • From: Atlanta, Ga.
Posted by MrSquid2U on Saturday, February 5, 2011 12:11 AM

Thanks for the kind words on the progress gents.

 I'm pretty much calling this one done. After the sludge wash for the panel lines I dusted the plane to dull down the decals with pastels. While this was just a developmental airframe it was also the most used of them all. It started as airframe number one in glider trials before eventually being fit with the four Argus engines. So I wanted it to look rather faded but of course not battle weary. Excuse the washed out pictures. I just got lazy with the camera!

Hope you like it okay?


  • Member since
    April 2005
Posted by Thunderbolt379 on Saturday, February 5, 2011 5:01 PM

Squidy -- terrific work in every way! This has been a demonstration in scratchbuilding and finishing skills as much as kit-building, and I think we've all learned from it! Thanks for taking part!

Are you happy to have one of these pics on page 1, or do you want to take something sharper? JLMK!

Cheers, Mike/TB379

http://worldinminiature.blogspot.com/

  • Member since
    November 2009
  • From: SW Virginia
Posted by Gamera on Saturday, February 5, 2011 10:37 PM

Wow MrSquid, turned out great! Nice job of making a silk purse out of a sow's ear.

Funny, never really saw it before but from looking at her from the different angles you posted I can clearly see the lineage that lead from her up to the Me-262.

"I dream in fire but work in clay." -Arthur Machen


  • Member since
    March 2007
  • From: Atlanta, Ga.
Posted by MrSquid2U on Sunday, February 6, 2011 1:40 PM

Mike^^^

 Let me take a better pic?

 Thank you for those kind words. They make the whole project that much better to think that others can 'identify' with the work invested.Cool


  • Member since
    March 2007
  • From: Atlanta, Ga.
Posted by MrSquid2U on Sunday, February 6, 2011 4:21 PM

Gamera,

 The ME 262 was the direct rival to the HE 280 and some historians point to inside politics as why the Messerschmit won out. Regardless I like both planes and just consider it a shame that the Heinkel which came first and outperformed the ME in trials never actually entered production.

 Thanks for the kind words.

Mike-

 Is this one any better. I've either lost the touch with my own camera, dropped it or maybe my eyes aren't themselves lately?


  • Member since
    November 2009
  • From: SW Virginia
Posted by Gamera on Sunday, February 6, 2011 4:42 PM

Really? Funny I just assumed Messerschmitt had 'borrowed' the overall plan from Henkel. I'm going to have to do some more reading on the subject, interesting stuff.

The new photo looks good to me.

"I dream in fire but work in clay." -Arthur Machen


  • Member since
    April 2005
Posted by Thunderbolt379 on Sunday, February 6, 2011 5:05 PM

Squidy -- that one is excellent! I'm heading out shortly, so I'll update page 1 tonight. Thanks for such an interesting and unusual subject, and carrying it off so darn well!

Cheers, Mike/TB379

http://worldinminiature.blogspot.com/

  • Member since
    March 2007
  • From: Atlanta, Ga.
Posted by MrSquid2U on Sunday, February 6, 2011 8:40 PM

Thunderbolt379

Squidy -- that one is excellent! I'm heading out shortly, so I'll update page 1 tonight. Thanks for such an interesting and unusual subject, and carrying it off so darn well!

Cheers, Mike/TB379


Thank YOU Mike for allowing me in to enjoy this GB filled with so many fine projects and results. It was all my pleasure I assure you.Yes


  • Member since
    March 2010
  • From: Brisbane
Posted by Julez72 on Friday, February 11, 2011 9:25 PM

Squidy, lovely build buddy and a very unusual subject...Well done sirYesYesYes

Well i'm still worried about this 262 squiggle camo but i can't put it off forever so i'll have a crack at it this weekend, the guy at my LHS reckons the maskol will dry in the needle but i think if i keep it moving through constantly it won't have a chance to dry....we'll see i guess...


  • Member since
    June 2003
  • From: Garland, TX
Posted by pepper kay on Tuesday, February 22, 2011 4:17 PM

Hi Guys:

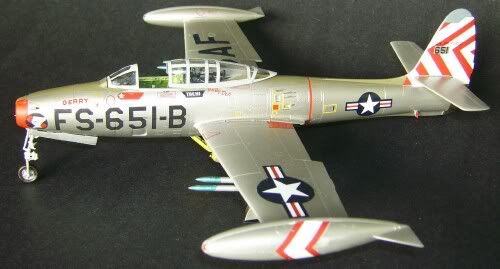
Here's a photo of the F-84G Thunder Jet I built for the Korean War GB ... I was followinng the Early Jets GB at the same time, but wasn't sure if I could use the same airplane in both, hence I never posted in any WIP or finished photos of the bird ...

Nonetheless,, here's an Early Jet ...
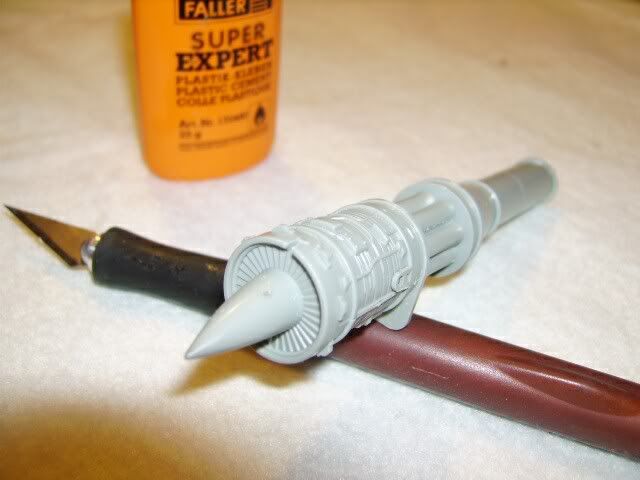
Now, here's the F-86 F-30 Sabre Jet I've underway now ...

I started with the engine - out of sequence from the instructions, but what the hechk!! ..

.
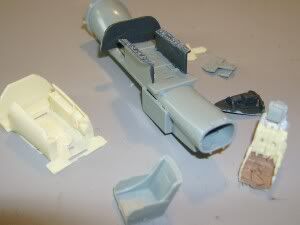
Next, the cockpit tub and engine trunk ... I was going to use a resin cockpit, but only 2 pieces would fit (from all the aftermarket parts) - the panel and the seat ... so, the kit parts came into use ..

.
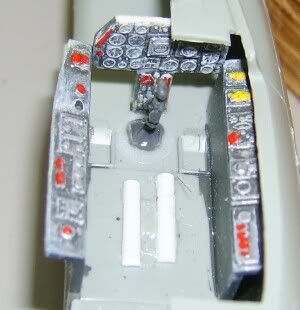
First blush at drybushing the consoles on the sides ..

.

Used the resin panel and got a start on the interior ...
Here's the cockpit tub so far ...
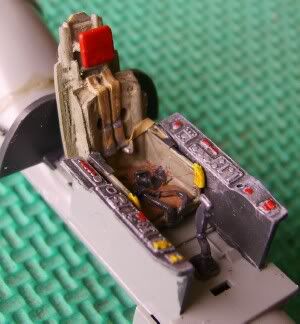
Coming together at last ... should have it standing on its legs tonight and if we don't get the Winter Weather Warning come blowing in tomorrow as forecast, I'll be able to start painting ...

pepper

  • Member since
    June 2003
  • From: Garland, TX
Posted by pepper kay on Wednesday, February 23, 2011 9:38 AM

Some more progress ...

Cockpit tub installed and fuse glued up ...

Right wing attached - left wing now on and all the fuselage hatches installed ...

Landing gears, struts, doors, etc. assembled and to be installed ... then, to the paint booth, weather permitting ...

It's getting mighty cold again, so I might have to hold off any major painting until it warms up once more ...

pepper


  • Member since
    March 2010
  • From: Brisbane
Posted by Julez72 on Friday, February 25, 2011 11:07 PM

Looking really nice Pepper, lovely cockpitYes


  • Member since
    March 2007
  • From: Atlanta, Ga.
Posted by MrSquid2U on Friday, February 25, 2011 11:19 PM

Yup- nice job on that office Pepper.Yes


  • Member since
    June 2003
  • From: Garland, TX
Posted by pepper kay on Saturday, February 26, 2011 9:45 AM

[quote user="MrSquid2U"]

Yup- nice job on that office Pepper.Yes

[/quote

Thank you, guys ... a bit of paiint works wonders and only 2 parts are from the resin aftermarket parts I bought - the seat and panel ... the panel  will disappear when the canopy goes on, but the seat and kit interior went together nicely ...

pepper]

  • Member since
    June 2003
  • From: Garland, TX
Posted by pepper kay on Thursday, March 3, 2011 5:29 PM

Hi All:

Finally had some time to work on the Sabre Jet ... the first 2 photos show it ready for prime ...


The next 2 are after the prime coat ... hard to tell that it's now Tamiya White Primer, but it really is ...


Finish coats on tonight with the balance of the fiddly pieces and decals tomorrow ...

pepper

  • Member since
    December 2009
  • From: Weirton, West Virginia
Posted by xradio81 on Monday, March 21, 2011 8:53 PM

I painted with model master enamels, a few coats of future, let dry for weeks and weeks, applied some kit decals, which are really too big Hobbycraft and replaced the kit crosses with these from a scalemaster sheet. Same decals went on my 190 with no problems, same paint etc. They looked fine until I sprayed the Dullcoat, then the film turned a grainey white. Has this happened to anyone else?

  • Member since
    June 2003
  • From: Garland, TX
Posted by pepper kay on Saturday, April 2, 2011 12:11 PM

xradio81

. They looked fine until I sprayed the Dullcoat, then the film turned a grainey white. Has this happened to anyone else?

I've only had a DullCote problem when I've sprayed over pastels/chalks ...

Is this GB still on-going ? ... if so, I've photos of the Sabre jet to post ...

Thanks,

pepper

  • Member since
    June 2003
  • From: Rowland Heights, California
Posted by Duke Maddog on Saturday, April 2, 2011 2:33 PM

This means your decals were silvered. Puncture tiny holes in the clear part of the film with the tip of a very sharp exacto blade. Then apply Future with a brush and make sure it 'wicks' underneath the decal. Then, when it is all dry, try again to shoot the dullcoat.


Pepper, I hope it is; I've been following all these great builds and I am interested in seeing them finished!

  • Member since
    April 2015
Posted by spadx111 on Saturday, April 2, 2011 5:41 PM

enjoyed all the great pics great work going on hereYes.

Ron

  • Member since
    April 2005
Posted by Thunderbolt379 on Sunday, April 3, 2011 6:27 AM

Pepper -- the build oficially ended on Decenber 31st, but with the proviso that anyone who wanted to press on and finish their projects was entirely welcome to post their progress and collect their badge -- so no new projects but old ones can go til they're done.

Cheers, love to see those Sabre pics,

Mike/TB379

http://worldinminiature.blogspot.com/

  • Member since
    June 2003
  • From: Garland, TX
Posted by pepper kay on Sunday, April 3, 2011 7:07 PM

Thunderbolt379

 but old ones can go til they're done.

Cheers, love to see those Sabre pics,

Mike/TB379

.Hi Mike:

'Preciate it ... this is the Sabre jet i started last year, then had an emergency surgery and a round of pneumonia and pancreatitis, followed by two most unusual snow storms in our area ... for quite some time, it was way too cold to paint, so progress came to a halt ...

I've now just recently returnd from the hospital and have gotten the F-86 painted and almost all the decals on ... give me a few more days and I'm going to call it finished :-) ...

Thanks for keeping the GB open for we slow-pokes ...

pepper

  • Member since
    April 2005
Posted by Thunderbolt379 on Sunday, April 3, 2011 7:22 PM

A pleasure, my friend -- I have far less drastic reasons, but my Meteor is still waiting for her third camo colour. mostly because hard masking the curved shaped does my head in! Looking forward to seeing that Sabre,

Cheers, Mike

http://worldinminiature.blogspot.com/

  • Member since
    June 2003
  • From: Garland, TX
Posted by pepper kay on Wednesday, April 13, 2011 4:49 PM

Hi All:

After 2 hospital stays and a host of maladies, I'm finally back at 'em and hoping to be finished by this weekend with my Sabre Jet ...

Here are some WIP shots ... I should have her up on her wheels and the rest of the decals applied in just a few days and then can call this one - 'DONE' ...

   Prime coat applied ...

   A splash of the NMF on ...

   A wee bit of masking ...

   Upside down view to check for areas needing work ... yes, I certainly see them in the middle of the bottom :-) ...

   Some of the decals now in place ...

Thanks,

pepper


  • Member since
    June 2003
  • From: Garland, TX
Posted by pepper kay on Sunday, April 24, 2011 4:52 PM

Hi Guys:

1 photo to show WIP from my last post ... I'll have the nose wheel and weight on in just a bit - the rest of the decals to follow and then, the canopy and windscreen ...

I'll then call this one DONE ... longest build I've ever had, but didn't plan on hospital stays and other sundries :-) ...

pepper

Almost there ... this is a SAAF F-86 ... note the odd markings ... will 'splain when finished in a day or two ...

JOIN OUR COMMUNITY!

Our community is FREE to join. To participate you must either login or register for an account.

SEARCH FORUMS
FREE NEWSLETTER
By signing up you may also receive reader surveys and occasional special offers. We do not sell, rent or trade our email lists. View our Privacy Policy.