SEARCH FINESCALE.COM

Enter keywords or a search phrase below:

The Ostfront (eastern front) GB 2010/11

107108 views
900 replies
1 rating 2 rating 3 rating 4 rating 5 rating
  • Member since
    June 2009
  • From: Netherlands
Posted by kermit on Monday, April 11, 2011 11:24 PM

Rob,

Just loooove the shading you did on that destroyer! I prefer this technique over preshading myself as it never turns out the way this technique does. So... wouldn't this be called post shading?

Been thinking about doing another armor build myself and try that dot filter thing...

Anyways, great job sofar buddyYesBig Smile

Richard

"Success is the ability to go from one failure to another with no loss of enthusiasm." - Sir Winston Churchill

  • Member since
    September 2008
  • From: Ancaster, Ontario
Posted by maxfax on Monday, April 11, 2011 9:37 PM

I got the base coat on using a slightly darkened MM Russian Armour Green, lightened with white in the centres of the panels. Finished making the tracks today at work (it was a slow day- good for doing stuff like this but bad for business!) and tried one on to verify the number of links. I'll place a coat of Future tomorrow, then start the washing. Hopefully by this week-end I'll get to try that "Blacken it" solution for the tracks.


thanks,

Rob

On the bench:  Revell 1/72 HCMS Snowberry


  • Member since
    June 2009
  • From: Netherlands
Posted by kermit on Monday, April 11, 2011 12:52 PM

Ozzman,

You got it!Wink Are you planning something in terms of diorama work with it? My LHS has one in the window to attract customers with groundwork and figures and all that. Looks great. Is 1/144 the two foot big a*s one?Stick out tongue

Anyways... Leningrad or Sevastopol.... it's both russian front innit. Have funn Ozz!Yes

Richard

"Success is the ability to go from one failure to another with no loss of enthusiasm." - Sir Winston Churchill

  • Member since
    April 2005
Posted by Thunderbolt379 on Sunday, April 10, 2011 7:15 PM

Small correction, unless new information has come to light -- the 80cm K(E) participated only in the seige of Sevastopol, where it's operational career totalled 48 rounds.

Cheers, Mike/TB379

PS: Am about to get back to my Bf 109, at last!

http://worldinminiature.blogspot.com/

  • Member since
    February 2010
Posted by ozzman on Sunday, April 10, 2011 6:59 PM

Hello kermit,

can you please add me for a Fujimi 1/144 Dora. This was the 80cm railway gun. It participated in the battle for Stalingrad

  • Member since
    March 2009
  • From: East Bay, CA
Posted by Lundergaard on Wednesday, April 6, 2011 10:06 AM

Rob the SU-100 is looking great!  Look forward to seeing the paint on her.

cheers

andy (lundergaard)

  • Member since
    March 2010
  • From: Brisbane
Posted by Julez72 on Wednesday, April 6, 2011 4:50 AM

Lundergaard, excellent work on the T-34, very cool mud mix...Well done sirYesYesYes

Rob, Very nice work mate, as always a pleasure to watch your builds as they progressYesToast


  • Member since
    September 2008
  • From: Ancaster, Ontario
Posted by maxfax on Tuesday, April 5, 2011 8:15 PM

Here is an update. Hopefully next week I can start painting.I did most of the PE in the kit, but some wasn't worth the effort. I also have Fruil tracks, and I finally got some of the "Blacken it" solution, so I am interested to see how it goes.


Rob

On the bench:  Revell 1/72 HCMS Snowberry


  • Member since
    December 2002
  • From: Bury St Edmunds, Suffolk, England
Posted by Bish on Sunday, April 3, 2011 7:56 AM

No, it deffintaly life gets in the way of the hobby. If tghings change and i can do it i will add it back to the list. But i will wait until the 251 is built before comitting.

I am a Norfolk man and i glory in being so


On the bench: Airfix 1/72nd Harrier GR.3/Fujimi 1/72nd Ju 87D-3

  • Member since
    June 2009
  • From: Netherlands
Posted by kermit on Sunday, April 3, 2011 4:00 AM

Bish,

Sorry to hear about your time management issue... Would have loved to see you do that JU87 but life sometimes gets in the way of our beloved hobby (or was it the other way around....LOL). I have every bit of understanding for that. I will remove the Junkers from the list for youYes

Richard

"Success is the ability to go from one failure to another with no loss of enthusiasm." - Sir Winston Churchill

  • Member since
    December 2002
  • From: Bury St Edmunds, Suffolk, England
Posted by Bish on Saturday, April 2, 2011 6:57 AM

Richard, i think i may have to pull one of my builds out of this GB. Its going to be the end of May before i get back to the bench to start on the B-17 for my own GB. Then it looks like i am off to the States for 5 weeks from mid June. With that and leave it will be the end of August before the 17 is finished and i can start on my builds for this GB. If i do have to pull one out it will be the Ju 87. I am sure i can get the 251 done in time so i will leave that one in. Looking like its going to be a hectic year what with working and preparing to leave the army at the end of next year.

I am a Norfolk man and i glory in being so


On the bench: Airfix 1/72nd Harrier GR.3/Fujimi 1/72nd Ju 87D-3

  • Member since
    March 2009
  • From: East Bay, CA
Posted by Lundergaard on Monday, March 21, 2011 12:59 PM

richard and rob thanks for the nice comments on the T-34.  glad i could salvage it!

rob, the color is just MM acrylic "Russian Green".  i know it's not exact and lots of debate on it but i just pre-shaded with NATO black then the russian green and then various coats of base with drops of white and vallejo varnish.  just kind of made it up as i went so not recalling exactly what i did very well but that sounds about right.  Big Smile

take it easy

andy (lundergaard)

  • Member since
    September 2008
  • From: Ancaster, Ontario
Posted by maxfax on Monday, March 21, 2011 10:09 AM

Wow, I haven't been on for awhile and lots of excellent work has been done!

Bufflehead: Man, that looks great! I have to say I love being able to see the driver in his seat- usually figures are seen hanging out of hatches.

Lundergaard: Excellent work on the T-34- the mud looks realistic. What colour /brand of paint did you use for the base coat?

I am still plugging away on the Su-100. Having a hard time getting back into it after vacation. I'll post a WIP pic in a week or so.


Rob


On the bench:  Revell 1/72 HCMS Snowberry


  • Member since
    June 2009
  • From: Netherlands
Posted by kermit on Saturday, March 19, 2011 12:15 AM

Hey guys,

After some leave from the eastern front due to commitments elsewhere i am back to get things sorted inhereWink...

Ozzman,

Congratulations with your t34! Love the markings on it and i can see this one has been severely beaten up in the muddy russian countrysideBig Smile Looks great man!Yes I will put you on the board as finished with this one.

Lundergaard,

Very impressive indeed and a nice save. I can't tell at all from the pictures that there ever has been any problem with itYesYesYes Especially like the weathering on the hull. Looks very real and the mud looks realistic too. Simply love this modelBow Down Same for you, i will put yours on the board too!

Richard

"Success is the ability to go from one failure to another with no loss of enthusiasm." - Sir Winston Churchill

  • Member since
    March 2009
  • From: East Bay, CA
Posted by Lundergaard on Friday, March 18, 2011 12:18 PM

somehow i recovered my broken track (super glue) and put things right.  I'm calling this one COMPLETE.  (Ignore that purple cast on top of turret.  Came from the lighting setup somehow.)  Going to start on a base and figures once i finish another kit i'm in the middle of.  Thanks for looking.

Andy

------------------------

Dragon T-34/76 Factory 112 with Friul tracks.

  • Member since
    March 2009
  • From: East Bay, CA
Posted by Lundergaard on Wednesday, March 16, 2011 10:42 AM

Minor disaster on my T-34.  Done with mud under fenders and on tracks and wheels... went to attach Friuls and wheels all at once and pulled too hard while manipulating the whole assembly... The soft metal of a Friul link ripped apart... a PE rear fender busted off... and one of the rear gas tanks fell off.  This was all under pretty light handling!

I got the gas tank on and glued the fender back on (lost some paint in the process) but the Friuls i'm really concerned about.  I guess i can cut off some of the metal and try and glue the links together.  i dont have a lot of faith in that method.  anyone face this?

thanks

andy

  • Member since
    March 2010
  • From: Brisbane
Posted by Julez72 on Monday, March 14, 2011 6:40 AM

Ozzman, Very cool buddy, i especially like the look of your mud mixYesYesYes


  • Member since
    February 2010
Posted by ozzman on Sunday, March 13, 2011 11:03 AM

My T-34 is officially finished! here's the photos, sorry for the low quality.


enjoy :)

  • Member since
    March 2010
  • From: Brisbane
Posted by Julez72 on Saturday, March 12, 2011 5:24 AM

Tony, Ozzman. Great work guys good to se some progress....I need to get moving with my K-4 again i thinkYes


  • Member since
    February 2010
Posted by ozzman on Thursday, March 10, 2011 8:21 PM

here is yet another update of my T-34/76. Added paint decals, gonna add the tracks tomorrow.

  • Member since
    April 2005
  • From: Australia
Posted by taxtp on Wednesday, March 9, 2011 4:21 AM

Hi all,

Here's a couple more photos of my 1/48 Panther, the first with tracks added, then with the skirts too. The tracks look heavily rusted, but it will be toned right down by the time it's done. The next step is camo.

Cheers

Tony

I'm just taking it one GB at a time.

  • Member since
    April 2009
  • From: Carmel, IN
Posted by deafpanzer on Tuesday, March 8, 2011 9:36 PM

Ernest, outstanding work!  Looks like you got the rivets bug too...

Andy

  • Member since
    February 2010
  • From: Berkeley CA/St. Paul MN
Posted by EBergerud on Tuesday, March 8, 2011 9:32 PM

Actually knew the connection. I've written about the Pacific War but it was remarkable how much LW and VVS fighter trivia I picked up playing Warbirds and Aces High. (Still have an account, but modeling has killed game time.) LA-5 wasn't the only fighter that started in a bad neighborhood and ended up okay. Hawker Hurricane pushed an obsolete platform to its limit - didn't hurt having a Merlin. (Merlin didn't help the P40 though.) Wildcat's first cousin was a biplane. The Stuka was just the Stuka but the LW thought there was no future in the plane in early 1939. P47 was another example. (Might have been the best Russian designed aircraft of the war - course Seversky was a White. P47 would have been a perfect plane for the Ost - wonder why it wasn't Lend Lease late in the war.) It's closest ancestor was a little like the Brewster Buffalo of all things - decent performance but not tough enough. Republic had to fight hard to get their mits on a PW-2800: what a difference a good engine can make. The thing that's odd though, is that Stalin was directly involved. Guy loved airplanes or anything that went fast. Hitler was a gun nut, but I don't think he poached on LW development until the war started. That was Goering's backyard and Hitler actually deferred to the guy before 1939. The rockets were funded by the Army as I recall. Chamberlain etc knew about "airplanes", as did FDR but it's tough to imagine anyone like that talking rates of climb.

Eric


A model boat is much cheaper than a real one and won't sink with you in it.

  • Member since
    June 2010
  • From: Austin, TX
Posted by DoogsATX on Tuesday, March 8, 2011 9:00 PM

EBergerud

Looks neat. LIttle like the  P-40 - looks better than it flew. And if you don't see a cockpit, neither do I. Hope you have those neat crylic numbers. Guess if you put a radial in the buggy it begins to look like a LA5 razorback. Like the looks of the inspiration kit too - something about the Russian Front that calls out for heavy weather.

Eric

Oh, it definitely looked better than it flew! Pilots had a play on the name that stood for something like "varnished guaranteed coffin" - hardly a vote of confidence!

And it more than begins to look like the La-5 - the La-5 is literally the LaGG-3 airframe with a radial grafted onto the front! The story goes that the LaGG-3 was so bad that Stalin started giving its factory capacity to Yakovlev, so Lavochkin spent the winter of 1941 literally grafting a Shvetsov M-82 radial onto the LaGG-3 airframe. The result was the La-5. Strangely similar to the development of the Mustang and the move from the Allison to the Merlin.

My favorite design feature is the ghetto-tastic single exhaust tube running down each side. Looks like some of the kludge jobs I saw back in my offroading days! But it's distinctive enough that I'm getting some Quickboost exhausts to really show them off:

On the Bench: 1/32 Trumpeter P-47 | 1/32 Hasegawa Bf 109G | 1/144 Eduard MiG-21MF x2

On Deck:  1/350 HMS Dreadnought

Blog/Completed Builds: doogsmodels.com


  • Member since
    February 2010
  • From: Berkeley CA/St. Paul MN
Posted by EBergerud on Tuesday, March 8, 2011 7:14 PM

Looks neat. LIttle like the  P-40 - looks better than it flew. And if you don't see a cockpit, neither do I. Hope you have those neat crylic numbers. Guess if you put a radial in the buggy it begins to look like a LA5 razorback. Like the looks of the inspiration kit too - something about the Russian Front that calls out for heavy weather.

Eric


A model boat is much cheaper than a real one and won't sink with you in it.

  • Member since
    June 2010
  • From: Austin, TX
Posted by DoogsATX on Tuesday, March 8, 2011 3:26 PM

My ICM LaGG-3 came in today...after several fairly high-parts-count kits I did a double-take at this one's few sprues. Detail is quite good despite the low parts count, though. 

I'd planned to hold this one for a few months...but I'm thinking now I may start it early and just go slow. Either way, I'll be building it up as this plane. If you look close...White 25 appears to be one of the many LaGG-3's that removed its canopy. Less masking = no complaints!

Hoping to use this build as inspiration...http://sztarbala.com/?page_id=5&album=1&gallery=65

On the Bench: 1/32 Trumpeter P-47 | 1/32 Hasegawa Bf 109G | 1/144 Eduard MiG-21MF x2

On Deck:  1/350 HMS Dreadnought

Blog/Completed Builds: doogsmodels.com


  • Member since
    July 2006
  • From: San Francisco Bay Area
Posted by bufflehead on Tuesday, March 8, 2011 3:15 PM

Wow!  I had to break away from the hobby  and group build for a few weeks, but I can see there’s some great stuff going on here!  I’ll post some comments later as I’m currently at work and I need to post this update on the Russian T-26T artillery tractor before I have to disappear again!

At my last post I was faced with having to modify the upper cabin by cutting it in two and adding a strip of stryrene to make it a little bit longer to fit the lower cabin.  Here’s the modified cabin with new rivets:

And a couple shots of the new cabin fitted to the hull and all removed rivets replaced.  The .032 Grandt Line rivets are a little oversized, but they were the smallest I could find

Since I decided to depict this tractor towing artillery I figured it should at least have a driver!!  With the driving hatch open I figured I better add some interior details.  Just enough to give it the impression of an interior since I still plan on painting the inside black

For the driver I stole a figure from my MiniArt T-70 and modified it slightly to fit into the driving compartment.  I haven't painted a figure since I was a teen over 30 yrs ago....yikes!!

Here’s how he’ll look with the cabin in place and the lower hatch closed.  I just want to open the upper hatch, otherwise I’ll have to add an entire interior! 

Remember that missing towing assembly?   I had to completely scratchbuilt one from stryrene, but at least I found some good photos at this site, http://www.armchairgeneral.com/rkkaww2/galleries/T-26/T-26T.htm , which allowed me to make this:

Here it is on the rear plate (held in place with some blue-tac).  I won’t glue it on until most of assembly is done…..I have a tendency to knock stuff like that off during the build!!  Also, I installed the exhaust which I mofified and detailed for a better look.

I really like how that tow hook came out!

Ernest

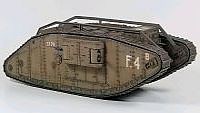
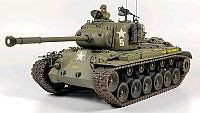
Last Armor Build - 1/35 Dragon M-26A1, 1/35 Emhar Mk.IV Female
     

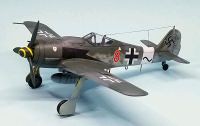
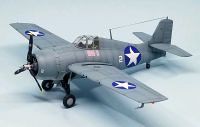
Last Aircraft Builds - Hobby Boss 1/72 F4F Wildcat & FW-190A8
     

  • Member since
    February 2010
  • From: Berkeley CA/St. Paul MN
Posted by EBergerud on Friday, March 4, 2011 7:34 PM

This is an easy thing to compromise on. Depending upon the modeler, pigments are used for many different things. (Some very good modelers don't use them at all. Others use them for almost all weathering - certainly can be done if you treat pigments mixed with spirits/turnpenoid as a kind of paint. Want a wash - forget oils, just mix in black pigments with mineral spirits and give it a mix with a Badger electric mixer. It would work.) If you have anything around to practice on you'll see what I mean. You can get your kit to a place where you like it. Seal it. And then give it a light "dusting" to create - dust. Indeed, you'd want to seal it if you have used pigments to fade the surface color. There you're not trying to duplicate dust as much as weather worn paint. Unless your finish is very flat a straight pigment is easy to wash off with water. (You can always get it off with water if you rub it out a little. MIG pigments come off the easiest but chalks or Doc O'Briens just take a little more rubbings.)The last stage for a tank for me is exactly that - a pure pigment dusting. No thinners, just rub on some pigments. Only problem would come if it got lots of handling. If not, you've got a nice dusty finish which is the way tanks look. The one thing you have to like about straight pigments is that you can get them off if you don't like what you see and no harm done.

Might not be a good idea if you put a radio control motor on board so you can take your kit out for a spin. I'm beginning to like that idea. I think you can still find 1/16 scale Tamiya Tigers with full RC for about $1000 - that would make a statement to your friends and family. (Might get divorce papers at my house, but it's still a neat idea.) A big Tiger driving around my living room. Wow. Now if you scratch built a huge RC ship people would call you a master modeler: do it with a huge tank and folks might think you're nuts. Oh well. Don't think you could get one inside your T-34.

Eric


A model boat is much cheaper than a real one and won't sink with you in it.

  • Member since
    March 2009
  • From: East Bay, CA
Posted by Lundergaard on Friday, March 4, 2011 4:29 PM

hi eric

thanks for the kind words.  i am definitely at the point of trying to REALLY take my time, take days off and keep looking at it, thinking about it, no rushing, no overdoing.  i kind of improvised all this stuff based on the thousands of techniques i have read about and just practiced on some scrap pieces that i have painted and weathered the same along the way.  that way if it's wrong i see it before i commit it to the tank.  saved me a few times now!

ok, i will consider no clear coat after pigments.  so maybe wise to finish all of the oil and paint applications, let cure, acrylic clear flat coat and then finally pigments to finish it off?

thanks for your input!

cheers

andy

  • Member since
    February 2010
  • From: Berkeley CA/St. Paul MN
Posted by EBergerud on Friday, March 4, 2011 4:11 PM

Very sweet T-34 coming here, especially if this is only your third tank. You've obviously made a lot more progress on chipping and weathering the wood than I have. (I've got five under the belt so know the subject from top to bottom.) Don't know if you've done it, but you might try leaving the kit alone after the last blast of pigments - even if it's only a light one. The reason to seal the kit is pretty obvious - it keeps the pigments on the kit. In practice, unless the kit gets handled a lot, if pigments are well rubbed in they'll be there for a really long time. Some folk leave their kits alone after applying pigments - I do. I don't know of any kind of seal that's not going to cause you to lose that "dusty" quality that only pigments can give. And tanks got really dusty. Just a thought. You've got a nice buggy there regardless.

Eric


A model boat is much cheaper than a real one and won't sink with you in it.

JOIN OUR COMMUNITY!

Our community is FREE to join. To participate you must either login or register for an account.

SEARCH FORUMS
FREE NEWSLETTER
By signing up you may also receive reader surveys and occasional special offers. We do not sell, rent or trade our email lists. View our Privacy Policy.