SEARCH FINESCALE.COM

Enter keywords or a search phrase below:

The Ostfront (eastern front) GB 2010/11

106902 views
900 replies
1 rating 2 rating 3 rating 4 rating 5 rating
  • Member since
    June 2010
  • From: Austin, TX
Posted by DoogsATX on Monday, May 16, 2011 9:28 AM

Andy, Ernest - lookin' good, gents! 

FINALLY got one side of friuls assembled last night. Dragon's instructions for 98 links per side turned out to be off...when I lined up 96 of them, they overlapped! Cut it back down to 93, I believe. Looks a lot better, but I'm contemplating adding a link back for just a big more sag. What do y'all think?

On the Bench: 1/32 Trumpeter P-47 | 1/32 Hasegawa Bf 109G | 1/144 Eduard MiG-21MF x2

On Deck:  1/350 HMS Dreadnought

Blog/Completed Builds: doogsmodels.com


  • Member since
    July 2006
  • From: San Francisco Bay Area
Posted by bufflehead on Monday, May 16, 2011 12:48 AM

Andy -  The metal shurzen looks fantastic!  I especially like how the all panels each sit slightly different, just like the real thing!  As for your dirty metal,  I would think any good cleaner, like windex or simple green would work on brass PE, or maybe some Brasso?

This is probably the last update until after I move in a couple of weeks. 

All remaining components are finally installed and some last minute details added on.  I temporarily attached the front driver's hatch with blue tac.

Several reference photos showed some type of rail on the front of the driver side fender so I scratched one from leftover PE.  I'm not sure what it is or does, but it looked interesting so I added it.  Maybe a handrail for climbing on the tractor?  Anyone know for sure?

I really glad I added the driver, it looks so much better with him there even if he is kinda ugly! 

and with a little primer......

I think I'll hold off painting the base coat until the F22 gun is also ready for paint.

Here's that Bronco kit again.  Its a very recent release so quality, accuracy and engineering should be WAY better than the clunky RPM tractor, at least that's what I'm hoping because I really want an easy build!!

Only 4 sprue trees in 3 bags:


Only 6 steps involved, but they are some of the most complex I've seen!  No easy steps here.....

Lastly, painting and marking instructions.

Its my FIRST EVER artillery build, hope I don't do something stoopid like glue the gun shield on backwards!!Dunce


Ernest

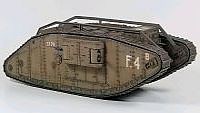
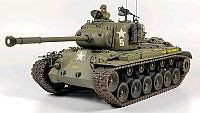
Last Armor Build - 1/35 Dragon M-26A1, 1/35 Emhar Mk.IV Female


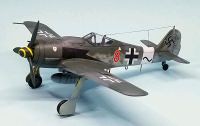
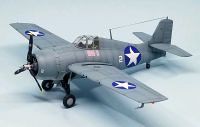
Last Aircraft Builds - Hobby Boss 1/72 F4F Wildcat & FW-190A8


  • Member since
    June 2009
  • From: Netherlands
Posted by kermit on Sunday, May 15, 2011 1:15 AM

Andy,

That's some amazing work there buddy! Loooove the barrel. And man..... those schurtzen look fantastic on your modelYesYes Carry on soldier....

Richard

"Success is the ability to go from one failure to another with no loss of enthusiasm." - Sir Winston Churchill

  • Member since
    April 2009
  • From: Carmel, IN
Posted by deafpanzer on Sunday, May 15, 2011 1:04 AM

Another update... never spent so much time bending metal.  Here's why... each sheet has three loops.


Yeah, you can see my fingerprints everywhere.  Gonna clean them real good before I apply primer.  What would be the best method to clean metal?

I am afraid there will be no update for a week... leaving for Miami for a national conference.  Thanks for looking!


Andy

  • Member since
    April 2009
  • From: Carmel, IN
Posted by deafpanzer on Saturday, May 14, 2011 12:06 AM

Randy- Many thanks for dropping by!  So much fun with this OLD kit...

Ernest- Thanks for the compliment.  I wish the Armorscale barrel was a perfect fit or my old Tamiya kit.  I think it was designed for later Tamiya release but it wasn't hard to make it fit.  I had to cut large piece of inner mantlet of Tamiya off.  Yes, I plan to apply zimm and I sure hope it comes out as good as yours! 

I plan to use this putty recommended by peers here in the forum.  They were out of blue type but their book showed me that this would be a good substitute.  Bought it at an auto shop for $17 and it comes in a HUGE tube. 

Quick update on my Pz IV... schurzen holders have been added.  I didn't enjoy that part that much but glad it is over. 

 I am going to use aftermarket set for the schurzen because they look alot thinner and realistic.  I am using old plastic part as a template to bend metal parts.

I hope to finish rest of the schurzen set before I leave for Miami on Sunday for five days long national conference.  Paradise  Thanks for looking!

Andy

  • Member since
    July 2006
  • From: San Francisco Bay Area
Posted by bufflehead on Friday, May 13, 2011 3:42 PM

Andy - Way to go on your Tamiya Pz IV!!  Yes The Armorscale barrel and mantlet looks awesome, gotta love that detail!  I'm pleasantly surprised it fits as well as it does...is it designed for the old Tamiya kit?

Yep, most of the zim on my old sad kit is putty, but I also experimented with the hot knife method in some spots.  Are you going to apply zimmerit to yours?

Ernest

Last Armor Build - 1/35 Dragon M-26A1, 1/35 Emhar Mk.IV Female


Last Aircraft Builds - Hobby Boss 1/72 F4F Wildcat & FW-190A8


  • Member since
    July 2008
  • From: USA California
Posted by vetteman42 on Friday, May 13, 2011 10:02 AM

WOW!!!!!!!!!!

Deafpanzer and Doogs those tanks are over the top guys Bow Down

Randy So many to build.......So little time

  • Member since
    April 2009
  • From: Carmel, IN
Posted by deafpanzer on Friday, May 13, 2011 12:41 AM

Doogs- I have to agree about the difference in both kits we are building especially they are 35 years apart.  I bet that Tamiya was the best out there in 1975 when it was released.  Wondered what will kits look like in 2045? 

Bufflehead- Nice work on your Pz IV.  Let me guess... you used putty to make zimm?  It looks great! 

Guys, I have been able to work on Pz IV every night this week... almost there.  It has been a pleasant experience except for the armor skirts.  It wasn't a perfect fit... it still needs more work so no picture was taken. 

Used aluminum barrel from Armorscale...

Again thanks for comments.  Beer

Andy

  • Member since
    July 2006
  • From: San Francisco Bay Area
Posted by bufflehead on Thursday, May 12, 2011 2:50 PM

Hey guys, thanks for all the positive comments!  I’m very surprised about the comments on the figure….I haven’t painted a figure in 30 years, since I was 17 or 18!  There’s so many great figure painters out there, I don’t feel my first effort even comes close to the work I’ve seen.

Lundergaard – wow, hints or tips for figure painting?  Like I said I’m just getting started again in figure painting so I’m no expert.  If I have time I’ll post some WIP photos and text when I paint the commander figure.

Kermit – what you said about brushes!  Otto ze tank commander looks pretty good!  I hope my first full sized figure looks as good!

Andy, Doogs – those two Pz IVs are coming along nicely! Yes  I’ve built both and agree that the DML kit is definitely more detailed and accurate, but the Tamiya kit goes together quicker and is usually quite a bit cheaper!!  The sad thing is my Tamiya kit as been sitting like this for almost 4 yrs:

So sad…Dead…..I know the two of yours will be awesome!!

Ernest

Last Armor Build - 1/35 Dragon M-26A1, 1/35 Emhar Mk.IV Female


Last Aircraft Builds - Hobby Boss 1/72 F4F Wildcat & FW-190A8


  • Member since
    June 2010
  • From: Austin, TX
Posted by DoogsATX on Wednesday, May 11, 2011 11:07 AM

Have to say, you can definitely see a difference in the crispness of the detail b/t the Tamiya and DML kits. Here's where my IV stands at the moment. Hopefully I will be wrapping up principal construction in the next night or two. Definitely a far more involved build-up than Tamiya kits I've played with in the past!

The friuls continue to come along as well. I've been assembling lengths of four four at a time...calculated I have to do about 24/25 4-links per side. They're tedious, but I love how workable they are, and they look awesome!


On the Bench: 1/32 Trumpeter P-47 | 1/32 Hasegawa Bf 109G | 1/144 Eduard MiG-21MF x2

On Deck:  1/350 HMS Dreadnought

Blog/Completed Builds: doogsmodels.com


  • Member since
    April 2009
  • From: Carmel, IN
Posted by deafpanzer on Tuesday, May 10, 2011 1:01 PM

Ernest & RichardYes Great work on the figures! Yes I am one of those who like to include a figure or more to each build if possible.  Looking forward to more of those!  Big Smile

DoogsATX- I build one similar to this when I was only 14 or 15 years old and I STILL have it.  Missing few wheels and MG snapped off of course. Stick out tongue I will post the picture of it later when I have the chance...

Guys, update on my old Tamiya kit...

I thought you would like to see a big difference in details between my old kit and Doogs' new DML kit... huge improvement I have to say.

I nearly lost this piece to the carpet monster... looked for it more than half hour... no luck. Angry  Went back to my workbench this morning for a minute and I found it instantly right by my chair.   I swore it wasn't there last night...

I am planning to apply zimm putty on the chassis so I am holding off fragile parts until a coat of zimm is on.  Hull was a perfect fit... in some way it was expected when you are building a Tamiya kit. Big Smile

Did I mention that I hate wheels?  I am thinking about building a plane next...

Comments are always welcome... thanks for looking!

Andy

  • Member since
    June 2010
  • From: Austin, TX
Posted by DoogsATX on Tuesday, May 10, 2011 11:19 AM

One of these days, I'll try my hand at figures...

On the Bench: 1/32 Trumpeter P-47 | 1/32 Hasegawa Bf 109G | 1/144 Eduard MiG-21MF x2

On Deck:  1/350 HMS Dreadnought

Blog/Completed Builds: doogsmodels.com


  • Member since
    June 2009
  • From: Netherlands
Posted by kermit on Tuesday, May 10, 2011 10:43 AM

Ditto

Firgure painting is fun. And a very fine brush as well as a steady hand will get you a long way. Not as good as Bufflehead but people were quite taken away with my last figure over at the armor corner. I named him Otto ze tank commander:

Richard

"Success is the ability to go from one failure to another with no loss of enthusiasm." - Sir Winston Churchill

  • Member since
    June 2010
  • From: Austin, TX
Posted by DoogsATX on Tuesday, May 10, 2011 9:56 AM

Ernest - that's looking fantastic!

On the Bench: 1/32 Trumpeter P-47 | 1/32 Hasegawa Bf 109G | 1/144 Eduard MiG-21MF x2

On Deck:  1/350 HMS Dreadnought

Blog/Completed Builds: doogsmodels.com


  • Member since
    March 2009
  • From: East Bay, CA
Posted by Lundergaard on Tuesday, May 10, 2011 9:52 AM

bufflehead that looks great!!!

for those of us "figure challenged", do you have any hints or tips to help achieve results similar to what you got?

thanks!

andy (lundergaard)

  • Member since
    September 2008
  • From: Ancaster, Ontario
Posted by maxfax on Tuesday, May 10, 2011 8:52 AM

Really nice work!

Rob

On the bench:  Revell 1/72 HCMS Snowberry


  • Member since
    July 2006
  • From: San Francisco Bay Area
Posted by bufflehead on Monday, May 9, 2011 11:40 PM

wow, has it been two months since I last posted anything??Sad  So much great stuff going on here, I'm really sorry to have missed so much.Embarrassed 

As it is I HAVE been slowly working on the T-26T and I'm happy to say assembly is almost complete.  Unfortunately I'm in the process of moving so I really have get this build done before I finish moving and then I can start working on the BT-5 for this GB before it ends!!

On my last post I was working on the interior and figure.  Below is a photo of the interior after painting followed by a pic of the painted driver figure.  Be kind fellas, its my first figure after 30 yrs....Hmm

PEEKABOO!

In these photos assembly is mostly done, just need to add the completed tools, boxes and accessories, oh and that tow assembly I completed so long ago!!

I'm planning on adding another figure in the top hatch so I made it workable.  That way I can easily paint both sides of the hatch and add the figure later.  Detail was added with some photoetch and a little scratchbuilding.

I used the indy tracks that came with the kit and they worked out OK, the only problem is that they are a little flat and two dimensional and lacking serious detail.  For this build I decided to try gluing the tracks to the suspension, but not gluing the suspension to the hull.  This allowed me to pull the track/suspension assembly off for painting.  I've always wanted to try this method with indy tracks to see if its easier than assembling and painting the tracks separately.  We'll see.....

Storage boxes cleaned up and detailed with spare PE and scratchbuilt handles.

Tools and details:  Almost everything in this photo is scratchbuilt with styrene strip, rod and bits of leftover PE.  Most of the molded kit items were crap so I scratched new tools, horn, jack, light and mount, and detailed the interior of the front driver hatch.  The only kit items are the bowl-shaped headlight cover (heavily reworked) and the driver hatch.

Once all the little bits are glued down I'll primer it and set it aside so I can start working on the towed F22 76.2mm Divisional Gun.  That I will build OOB so I'm hoping its a quick build!  Hoping is the key word!!Whistling


Ernest

Last Armor Build - 1/35 Dragon M-26A1, 1/35 Emhar Mk.IV Female
     

Last Aircraft Builds - Hobby Boss 1/72 F4F Wildcat & FW-190A8
     

  • Member since
    June 2010
  • From: Austin, TX
Posted by DoogsATX on Monday, May 9, 2011 7:17 PM

Andy...that Pz.IV H looks mighty familiar. Oh yeah:

It actually has the unique distinction of being the only armor model I built as a kid to survive into my adulthood. Had a King Tiger around for awhile, too, but it got crunched in a move. 

Granted, the side skirts are long gone, the MG barrel's broken off, etc, but for the most part it survives.

On the Bench: 1/32 Trumpeter P-47 | 1/32 Hasegawa Bf 109G | 1/144 Eduard MiG-21MF x2

On Deck:  1/350 HMS Dreadnought

Blog/Completed Builds: doogsmodels.com


  • Member since
    April 2009
  • From: Carmel, IN
Posted by deafpanzer on Monday, May 9, 2011 6:28 PM

DoogsATX- Looking good so far.  It will be fun watching how your latest DML Pz IV comes out against my very old Tamiya Pz  IV. LOL 

sub revolution- Looking forward to follow your WIP on T34... I am afraid to find out its chance to survive against two Pz IVs rolling out of the factory at the same time. 

Guys-  I don't know what happened... I signed up for four GBs and I thought I can manage. Bang Head I realize I only have about 7 weeks to finish my Panzer IV Ausf H.  Normally it takes me 3 months to finish one so I will do my best to finish it in time.  Don't be surprised if I beg for an extension... Big Smile

Here's my Tamiya kit... I think it was made in 1975.  No printed date but saw it somewhere on website.  I was only FIVE years old when it came out!!!  It was part of a very large stash I bought via eBay.  Like 20 kits for $130 making this kit only less than $7.  Whistling

 I always liked Tamiya for few reasons... fewer parts and it doesn't require alot of cleaning & sanding.

I wish I could buy more aftermarket sets but there was none or very few for this very old kit.  I was able to find aluminum barrel and skirts sets.  I don't think I will use the kit figure... I am going to shop around for a resin figure.   More to come...

Andy

  • Member since
    February 2010
Posted by ozzman on Monday, May 9, 2011 6:24 PM

Im am done building my Dora. All I have to do is paint the model!

  • Member since
    June 2010
  • From: Austin, TX
Posted by DoogsATX on Friday, May 6, 2011 7:28 AM

Alrighty...the friuls are underway! Inserting track pins is extremely tedious, but pretty easy. This is pretty much my first time working with these things (got a few links in on my Achilles before discovering the T-51s didn't fit onto the AFV Club drive sprocket), and I love 'em!

On the Bench: 1/32 Trumpeter P-47 | 1/32 Hasegawa Bf 109G | 1/144 Eduard MiG-21MF x2

On Deck:  1/350 HMS Dreadnought

Blog/Completed Builds: doogsmodels.com


  • Member since
    June 2009
  • From: Netherlands
Posted by kermit on Thursday, May 5, 2011 11:54 PM

Sub revolution,

I did that same kit a few months back! Starts on page 26Wink. Did a tamyia 34 twice now and both time i had the greatest fun and lots of satisfaction. You just gotta love all the extra bits like cases, logs and bags you get. Also options for early and late style tanks...figures too..... Fine kit to do. Have fun m8Big Smile

Richard

"Success is the ability to go from one failure to another with no loss of enthusiasm." - Sir Winston Churchill

  • Member since
    June 2010
  • From: Austin, TX
Posted by DoogsATX on Thursday, May 5, 2011 7:29 PM

sub revolution

Looks pretty straight forward, just lots of parts.

As we say in Texas, "bless your heart" Stick out tongue

That's not a lot of parts. THIS is a lot of parts!

...and it's still short by four sprues and the Friul tracks.

Sprue cutters are getting a good workout this time around!

On the Bench: 1/32 Trumpeter P-47 | 1/32 Hasegawa Bf 109G | 1/144 Eduard MiG-21MF x2

On Deck:  1/350 HMS Dreadnought

Blog/Completed Builds: doogsmodels.com


  • Member since
    September 2009
  • From: Guam
Posted by sub revolution on Thursday, May 5, 2011 7:16 PM

Thanks Rich,

Here's what I got. I only recently discovered the wide variety of T-34's there are! I just grabbed the one that happened to be at the hobby store.

photo

photo

Gotta get my A10 to the painting stage, then I will start on this guy. Looks pretty straight forward, just lots of parts.

Thanks,   Budd

NEW SIG

  • Member since
    June 2009
  • From: Netherlands
Posted by kermit on Thursday, May 5, 2011 2:35 PM

Hi Sub revolution,

The advice you got is rock solid! The tamyia T34's are starting to age but cheap, well detailed and well fitting. Could you tell me which kit exactly it is? Then i can add you to the roster on page 1Smile

Richard

"Success is the ability to go from one failure to another with no loss of enthusiasm." - Sir Winston Churchill

  • Member since
    September 2009
  • From: Guam
Posted by sub revolution on Thursday, May 5, 2011 2:28 PM

Hey guys,

Sorry I'm a little late, but I would like in on this build. I actually got an itch a while back to try my first armor, so I bought a Tamiya T-34 based on peoples recomendations. Now I have just been waiting for an excuse to build it! So I will be slow, and pretty much following the directions to the letter, but I also got some nice "how to" articles collected. Anyway, been reading through the posts to this point and looks like a very active group! Can't wait to get started.

NEW SIG

  • Member since
    June 2010
  • From: Austin, TX
Posted by DoogsATX on Wednesday, May 4, 2011 10:57 AM

The Pz.IV continues its build-up. I'm amazed at the number of bits that go into the lower hull, but when I compared it with the old Tamiya Pz.IV I've got on the shelf (built it close to 20 years ago now), the level of detail is just night and day.

Not a ton to show so far, but here's a quick look:

On the Bench: 1/32 Trumpeter P-47 | 1/32 Hasegawa Bf 109G | 1/144 Eduard MiG-21MF x2

On Deck:  1/350 HMS Dreadnought

Blog/Completed Builds: doogsmodels.com


  • Member since
    June 2009
  • From: Netherlands
Posted by kermit on Monday, May 2, 2011 10:19 AM

Maxfax,

Woops... I am terribly sorry, my apologiesEmbarrassed. I will sort it out right away! Good luck on the Il2Yes

Richard

"Success is the ability to go from one failure to another with no loss of enthusiasm." - Sir Winston Churchill

  • Member since
    September 2008
  • From: Ancaster, Ontario
Posted by maxfax on Monday, May 2, 2011 8:07 AM

Kermit! I think you missed my post a couple of days ago. Please mark both tanks as finished and add an Accurate Miniatures 1/48 Il-2 on skis.

Thanks

Rob

On the bench:  Revell 1/72 HCMS Snowberry


  • Member since
    September 2008
  • From: Ancaster, Ontario
Posted by maxfax on Monday, May 2, 2011 8:04 AM

Hi Eric,

I haven't started it yet- most likely this week while I'm waiting for canopy masks for the Spitfire I'm doing. Just bought the paints for it on Friday. I hope that is not the case- there are a few build logs on the net, and it seems to be OK, or at least I hope!

Rob

On the bench:  Revell 1/72 HCMS Snowberry


JOIN OUR COMMUNITY!

Our community is FREE to join. To participate you must either login or register for an account.

SEARCH FORUMS
FREE NEWSLETTER
By signing up you may also receive reader surveys and occasional special offers. We do not sell, rent or trade our email lists. View our Privacy Policy.