SEARCH FINESCALE.COM

Enter keywords or a search phrase below:

Hunting After Dark, 2011-2012 Night Fighter Group Build

251623 views
1422 replies
1 rating 2 rating 3 rating 4 rating 5 rating
  • Member since
    June 2010
Posted by Night Fighter Nut on Sunday, October 28, 2012 7:32 PM

That ground set up looks great.  Where did you find it?  

Before you glue on the back cone, remember there is a plexiglass "A" frame inside it to prevent it from imploding during dives.  The Maam website has a great picture of it.  It can be made with stretched clear sprue and its pretty easy.  I had this photo handy to show you what I'm talking about.

P-61A 123

  • Member since
    August 2009
  • From: Borlando Fla home of the rat
Posted by TREYZX10R on Sunday, October 28, 2012 9:09 PM

NFN thanks I got it off evil bay from a Railroad hobby supplier. I remember you building the A frame for yours and it came out great. I had already gone as far as I was going to go scratching interior bits and have sealed the cones on already.

Wings are on

Obvious gaps need to be filled

Filler sanded ready for some primer

Booms up next

  • Member since
    June 2010
Posted by Night Fighter Nut on Monday, October 29, 2012 4:39 PM

Check the fit on your booms.  Sometimes they can be kattywampus on you.  One side higher or lower than the other.

  • Member since
    August 2009
  • From: Borlando Fla home of the rat
Posted by TREYZX10R on Tuesday, October 30, 2012 8:12 PM

Thanks NFN the fit on these booms is down right aweful to say the least.

After much test fitting I went for it and they ligned up ok after some tweaking as the glue set. There is still an ugly gap on all sides that needs a lot of filler. Good thing I bought 2 tubes of green putty last time at the LHS!

After a lot of tedious sanding I've got a join I can at least live with

Ship one is ready for some fine finish sanding.


  • Member since
    August 2009
  • From: Borlando Fla home of the rat
Posted by TREYZX10R on Thursday, November 1, 2012 7:29 PM

Ship 2 booms needed new firewalls and the port boom will require an extension to make up for the nacelle area that was donated to ship 1.

Test fit shows the same ugly gaps ,as if I was expecting something different!

Finish sanded ship 1 and its real close to being 'paint' ready


  • Member since
    October 2010
  • From: Hobart, Australia
Posted by Casper the Chihuahua on Friday, November 2, 2012 10:32 PM

Ok, I've officially started on the Nighthawk. A lot of plastic and she's a big plane and at the moment I seriously have nowhere to display her when she's done Huh?

Cheers

On the bench: A-4F 1/32 Hasegawa

Just deployed: F6F-5N Hellcat Nightfighter 1/48 Eduard

Up next: A6-E Intruder 1/48 Revell

  • Member since
    August 2009
  • From: Borlando Fla home of the rat
Posted by TREYZX10R on Saturday, November 3, 2012 4:20 PM

Casper thats going to be a Monster,looking forward to seeing it build out!

I had a long airbrush session and got quite a bit painted today.

Started with a green zinc coat over the canopies

I applied some OD green on ship 2 as a gude coat and it still needs some sanding around the seams and canopy join areas.

Finally some black goes down on ship 1. First glance looks pretty clean and no seams or blems showing!

This calls for a tall frosty pint me thinks!

  • Member since
    August 2009
  • From: Borlando Fla home of the rat
Posted by TREYZX10R on Sunday, November 4, 2012 8:18 PM

Wheels are ready

Booms for ship 2 need some weight before attaching to the Pod

  • Member since
    June 2010
Posted by Night Fighter Nut on Monday, November 5, 2012 9:03 PM

That's a really nice job with the painting Trey.  I see that you are going to put weight just behind the engines.  Don't miss out on putting weight behind the gunners chair since you have the turret location open.  The weight just needs to be in front of the rear wheels, as far as possible, to be effective.  A lot of weight will fit behind the gunners chair and since you have the wings already attached, you don't have to worry about interference with them later.  :)  Just be carefull you don't over load the legs.  :)  How are you going to weather your wheels?  I used oil pastels for mine but everyone is different.

  • Member since
    June 2010
Posted by Night Fighter Nut on Monday, November 5, 2012 9:10 PM

Forgot to mention, black widows were notorious for chipped paint along the leading edges of the wings and even on the window's window frames.  The OD green widows didn't chip as much, better paint, but they did wear a bit.  Majority of the chipping would be within the span of the propellers, not so much beyond them.

  • Member since
    October 2010
  • From: Hobart, Australia
Posted by Casper the Chihuahua on Tuesday, November 6, 2012 8:51 PM

Ok, some slow progress on the Nighthawk. Slow work as i want to get this monster just right.

IP and rear cockpit wall;

Cheers

On the bench: A-4F 1/32 Hasegawa

Just deployed: F6F-5N Hellcat Nightfighter 1/48 Eduard

Up next: A6-E Intruder 1/48 Revell

  • Member since
    October 2010
  • From: Hobart, Australia
Posted by Casper the Chihuahua on Wednesday, November 7, 2012 6:03 PM

Some work on the control surfaces. I masked off and sprayed Tamiya X-18 semi-gloss black.

I then used the Flory white wash and slopped that over pretty heavy handed;

Once that was dry then with a cue tip I removed most of the excess;

This will be then cleaned with a 000 brush and then detailed. Once finished it hopefully gives the illusion of some wear and grime and also a slight suggestion of lettering and labels above the controls as you normally get in a cockpit.

Cheers

On the bench: A-4F 1/32 Hasegawa

Just deployed: F6F-5N Hellcat Nightfighter 1/48 Eduard

Up next: A6-E Intruder 1/48 Revell

  • Member since
    October 2010
  • From: Hobart, Australia
Posted by Casper the Chihuahua on Wednesday, November 7, 2012 7:21 PM

Completed office without the HUD or ejector seat

Cheers

On the bench: A-4F 1/32 Hasegawa

Just deployed: F6F-5N Hellcat Nightfighter 1/48 Eduard

Up next: A6-E Intruder 1/48 Revell

  • Member since
    June 2010
Posted by Night Fighter Nut on Thursday, November 8, 2012 7:35 AM

Very well done...  :)  the detail is great.  

  • Member since
    October 2010
  • From: Hobart, Australia
Posted by Casper the Chihuahua on Thursday, November 8, 2012 10:40 PM

Cockpit complete. I was a bit annoyed that Trumpeter neglected to include PE harnesses on such an expensive kit. I'd expect for the money I paid to get some more detail. Anyway I had some spare buckles left over from my Tammy F-16CJ build so I used lead foil to make the harnesses.

Cheers

On the bench: A-4F 1/32 Hasegawa

Just deployed: F6F-5N Hellcat Nightfighter 1/48 Eduard

Up next: A6-E Intruder 1/48 Revell

  • Member since
    October 2010
  • From: Hobart, Australia
Posted by Casper the Chihuahua on Friday, November 9, 2012 6:25 PM

Now the dreaded parts that need gloss white! Actually I used to really scared of air brushing light gloss colours but I've gotten a lot better at it now.

The landing gear and bomb bay are all meant to be gloss white. I've chosen an off-white because I just like the colour depth a little more. Also to achieve some more depth I primed all of these parts with black so when the white is applied there is subtle shading where the white hasn't quite gotten into. it also creates a nice depth through the white areas as well.

Cheers

On the bench: A-4F 1/32 Hasegawa

Just deployed: F6F-5N Hellcat Nightfighter 1/48 Eduard

Up next: A6-E Intruder 1/48 Revell

  • Member since
    August 2009
  • From: Borlando Fla home of the rat
Posted by TREYZX10R on Friday, November 9, 2012 7:53 PM

Casper office looks outstanding!Very nicely done Sir!


NFN Thanks! I loaded up the gunner area with weight as well. I'm using powdered pastels and washes on the wheels seems to work for me. I'm doing the salt method for the chipping on the black ship,probably do the same for the green one,appreciate the tips that will help a lot deciding how much and where.

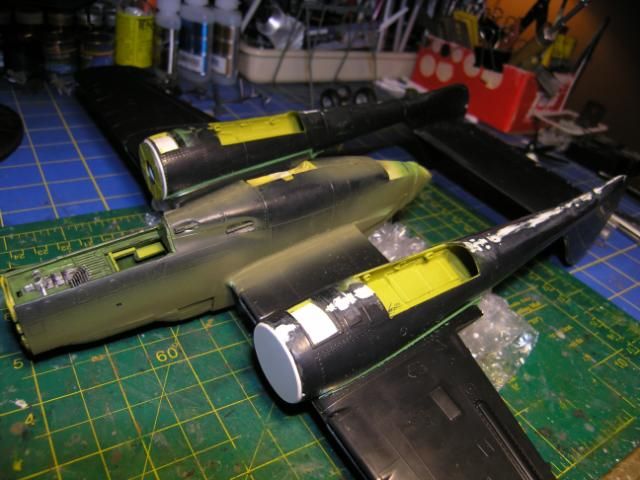
I let the black paint sit in the sun for a few days and the filled areas did shrink a bit as I knew they would. I wet sanded those areas down and got rid of a few dust blems .

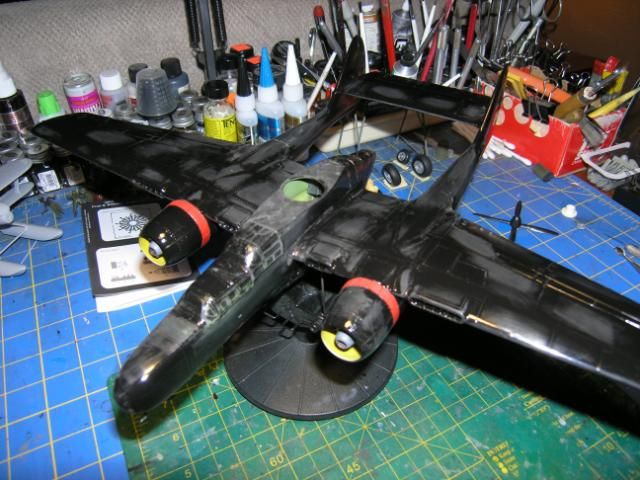
I then based it with some testors silver so I can salt chip the leading edges and canopy frames a bit. I'm hoping to be able to spot sand a few rivet and panel details as well showing some maintenance wear. Some blems around the canopy showed up after the silver base geuss I'm not done sanding.

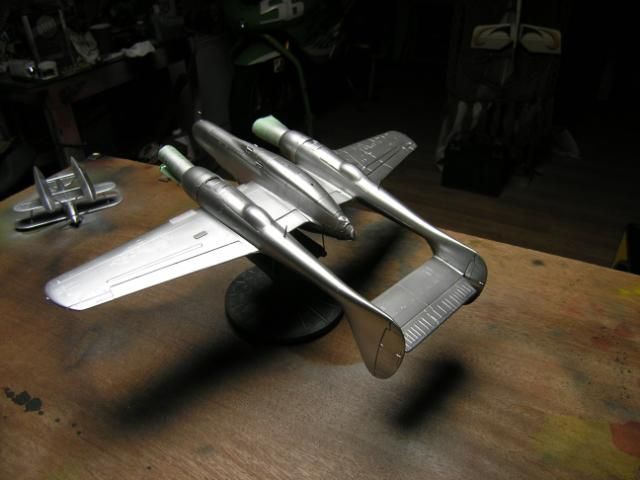
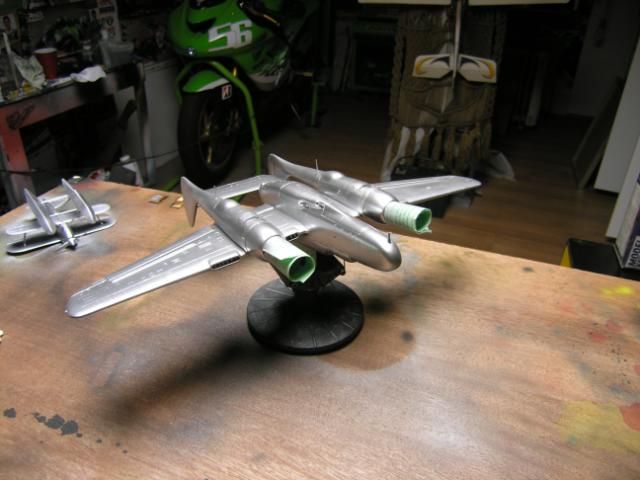
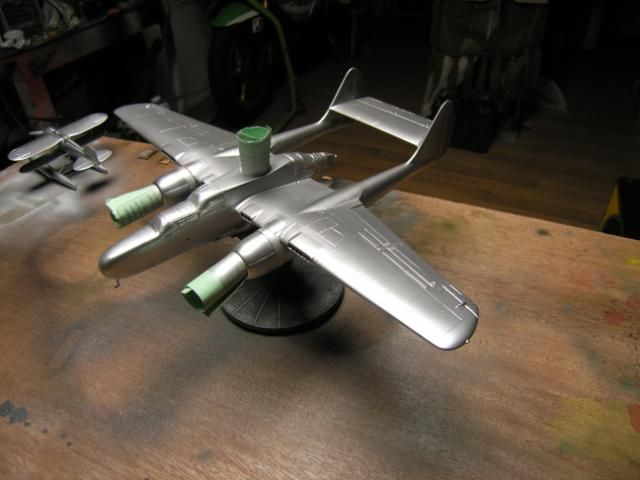
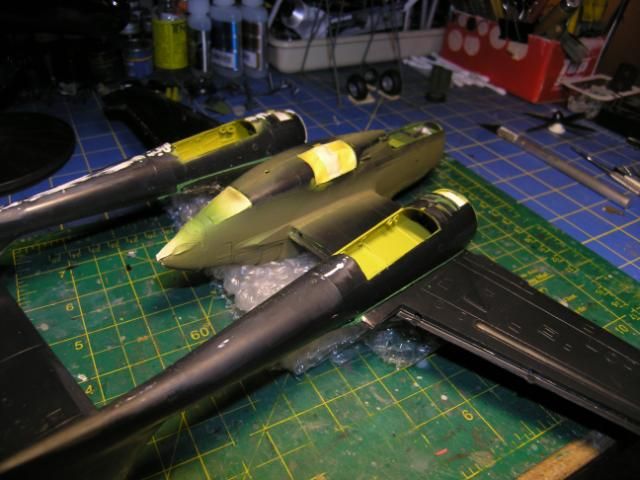
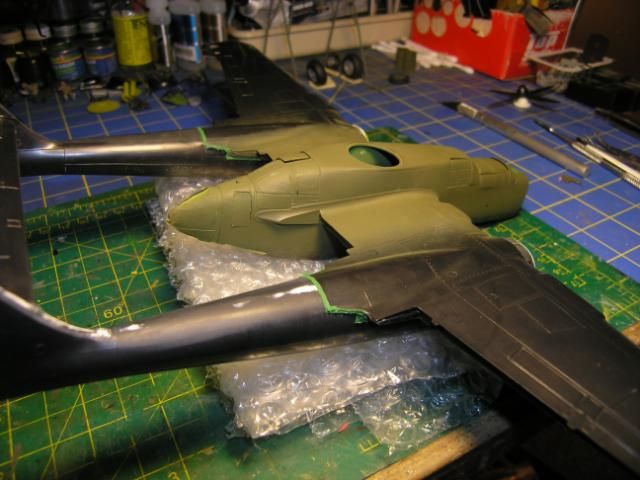
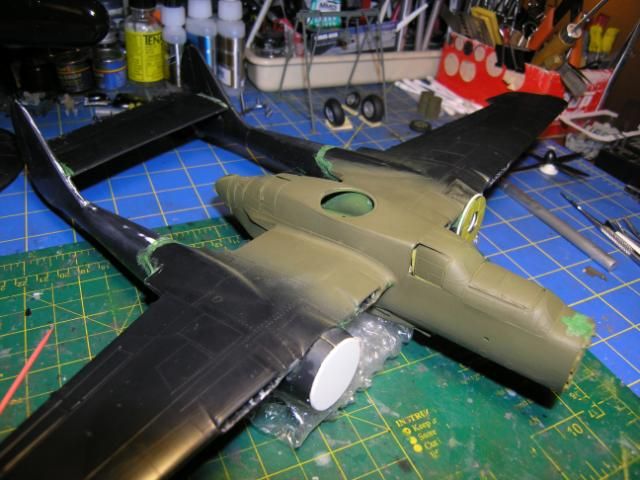
Ship 2 booms on aligned and seams filled

  • Member since
    December 2010
  • From: Memphis TN
Posted by Heavens Eagle on Friday, November 9, 2012 8:47 PM

Something I used to do for gloss white,  (have not done much model related lately)  is to airbrush FLAT white as it covers much better than the gloss equivalent and then do staining.  After all is dry and I am satisfied with the base finish, I airbrush clear gloss or future over the flat paint to get the gloss effect.  I have found that gloss paints tend to draw back from details on the parts where the flat paints will tend to cover with a thinner and more consistent coat.

  • Member since
    October 2010
  • From: Hobart, Australia
Posted by Casper the Chihuahua on Saturday, November 10, 2012 11:10 PM

Cockpit and front camera housing attached;

Front undercarriage and underneath camera housing attached;

Cheers

On the bench: A-4F 1/32 Hasegawa

Just deployed: F6F-5N Hellcat Nightfighter 1/48 Eduard

Up next: A6-E Intruder 1/48 Revell

  • Member since
    August 2009
  • From: Borlando Fla home of the rat
Posted by TREYZX10R on Sunday, November 11, 2012 7:21 PM

After fixing some missed blems I started using the salt method for ship one


Then some Testors gloss black reduced 30%

After rinsing and scrubbing with an old tooth brush

Ship 2 progress engines and nacelles in place

  • Member since
    October 2010
  • From: Hobart, Australia
Posted by Casper the Chihuahua on Monday, November 12, 2012 9:04 PM

Getting the internal structures fitted into the Nighthawk.

Bomb bays and front wheel cabin and bottom camera;

Engines, cockpit and front camera. The instructions called for the painting of the whole engine. I decided only to paint the intake fans as they are the only thing you will see and I didn't want to waste the paint on unseen parts. Makes me wonder why the supplied such detailed engines at all.

I painted in intake fans in Alclad chrome, this will be just visible through the PE intake grates.

Cheers

On the bench: A-4F 1/32 Hasegawa

Just deployed: F6F-5N Hellcat Nightfighter 1/48 Eduard

Up next: A6-E Intruder 1/48 Revell

  • Member since
    August 2009
  • From: Borlando Fla home of the rat
Posted by TREYZX10R on Tuesday, November 13, 2012 8:02 PM

Trying something new for the 'spiining prop' effect. I started with some sheet plastic and using a circle cutter and some masking added some rings


added some sprue to the spinners in place of the props and tapered the ends

masked the reverse side for the 'prop'

after the color on one side the mask was pulled back to allow for a blend area for the black

masked removed

then some rubbing compound on the color side,this leaves only a trace amount of color toning down the effect.

Finished results

What do you all think ? Is it passable or should I bin it and stick in the static props?


  • Member since
    June 2010
Posted by Night Fighter Nut on Wednesday, November 14, 2012 8:29 AM

Interesting.  :)  I think the yellow on the end would be present but very transparent.  The sticker for the center of the blade, not the middle of the disk, would be even lighter than you have represented in the middle pictures.  I seem to remember someone doing something similar but they cut out the area around were the expaned blade was and left the outside circle intact.  Do you understand what I mean?

  • Member since
    January 2003
  • From: Hancock, Me USA
Posted by p38jl on Wednesday, November 14, 2012 12:52 PM

humm.. interesting... the more I look.. the more it looks......Huh?Wow

[Photobucket]

  • Member since
    October 2010
  • From: Hobart, Australia
Posted by Casper the Chihuahua on Thursday, November 15, 2012 9:10 PM

Well, this is everything. All parts have been cut off the sprues and have been glued, painted or drying from glue and painting. For such a large kit, there didn't seem to be a lot of parts, not like the Tammy 1/32 F-16 which had endless sprues to deal with.

Next job is to sew the bird up once the refuelling bay has been fitted just behind the cockpit.

Cheers

On the bench: A-4F 1/32 Hasegawa

Just deployed: F6F-5N Hellcat Nightfighter 1/48 Eduard

Up next: A6-E Intruder 1/48 Revell

  • Member since
    October 2010
  • From: Hobart, Australia
Posted by Casper the Chihuahua on Friday, November 16, 2012 7:06 PM

Well she's a big girl, got her sewn together. Nice to have the seam underneath and not cutting the fuselage in two!

Cheers

On the bench: A-4F 1/32 Hasegawa

Just deployed: F6F-5N Hellcat Nightfighter 1/48 Eduard

Up next: A6-E Intruder 1/48 Revell

  • Member since
    October 2010
  • From: Hobart, Australia
Posted by Casper the Chihuahua on Saturday, November 17, 2012 7:50 PM

Masking complete. This took quite a longtime to do but because the F-117A utilises non-reflective radar technology, the panels and shapes are all straight and saw toothed with no curves. made it much easier to mask. Also decided there wasn't a tight enough seal between the canopy and office sill. I decided to paint the canopy separate and mask off the office.

Also the exhausts ports are painted matt black but the plane will be painted in tyre black. The subtle blue shade matches the real planes skin quite nicely.

Cheers

On the bench: A-4F 1/32 Hasegawa

Just deployed: F6F-5N Hellcat Nightfighter 1/48 Eduard

Up next: A6-E Intruder 1/48 Revell

  • Member since
    August 2009
  • From: Borlando Fla home of the rat
Posted by TREYZX10R on Saturday, November 17, 2012 11:21 PM

Coming together nicely Casper!

NFN thanks ,I'm just going to go with a clear disc. Sometimes less is more.

  • Member since
    August 2009
  • From: Borlando Fla home of the rat
Posted by TREYZX10R on Saturday, November 17, 2012 11:29 PM

Aires R2800 kits in themselves!

Anyone have a picture of a shipping container or pallet they would have put these on by chance,thanks in advance

  • Member since
    August 2009
  • From: Borlando Fla home of the rat
Posted by TREYZX10R on Sunday, November 18, 2012 4:18 PM

Ship 1 has been decaled and cleared


JOIN OUR COMMUNITY!

Our community is FREE to join. To participate you must either login or register for an account.

SEARCH FORUMS
FREE NEWSLETTER
By signing up you may also receive reader surveys and occasional special offers. We do not sell, rent or trade our email lists. View our Privacy Policy.