SEARCH FINESCALE.COM

Enter keywords or a search phrase below:

Hunting After Dark, 2011-2012 Night Fighter Group Build

252241 views
1422 replies
1 rating 2 rating 3 rating 4 rating 5 rating
  • Member since
    October 2009
  • From: Texas
Posted by Gregbbear on Sunday, May 20, 2012 7:37 PM

This place in a massive state of disarray is my work area as of this evening.  I still have to get my compressor and paint booth, and a ton more organizing, but it is getting there.  I might actually glue a couple of pieces of styrene together tonight.....

My doberman's must think it is pretty interesting.  They have been sniffing the heck out of it for a while!

Cheers,

Greg

- yat yas!


  • Member since
    October 2009
  • From: Texas
Posted by Gregbbear on Sunday, May 20, 2012 11:18 AM

Trey, your awesome late-night, Betty hunting, hose-nose is on the front page!  It came out great.  I like all the chipping and different shades for fading.  The south Pacific was hard on the equipment, and you captured that very well.

John, the camo came out great on the Stinger.  I really like your technique, that seems the perfect way to do SEA camo unless you are one of the super talented freehand painters.  Your Stinger is awfully cool, and will definetly be a stand out in your already awesome collection.

Caspar, the Phantom is coming along nicely,  Excellent detail on the canopy too.

Alright guys, I am jealous!  You are turning out some awesome stuff.  Not only are you building high quality models, but some of my absolute favorite aircraft!  I still haven't got my work area together yet.  Slowly, but surely it is coming together.

Cheers,

Greg

- yat yas!


  • Member since
    October 2010
  • From: Hobart, Australia
Posted by Casper the Chihuahua on Sunday, May 20, 2012 4:31 AM

Nice Corsair, Trey! YesBeerPizza

Cheers

On the bench: A-4F 1/32 Hasegawa

Just deployed: F6F-5N Hellcat Nightfighter 1/48 Eduard

Up next: A6-E Intruder 1/48 Revell

  • Member since
    October 2010
  • From: Hobart, Australia
Posted by Casper the Chihuahua on Saturday, May 19, 2012 9:41 PM

Canopy times today.

I've masked off all canopies and attached the various amounts of Eduard PE. They look great with all the locking systems and stuff in place. I've also masked the inside, it's better in 1/32 and larger scales to see paint on the inside as well.

Cheers

On the bench: A-4F 1/32 Hasegawa

Just deployed: F6F-5N Hellcat Nightfighter 1/48 Eduard

Up next: A6-E Intruder 1/48 Revell

  • Member since
    August 2009
  • From: Borlando Fla home of the rat
Posted by TREYZX10R on Saturday, May 19, 2012 12:20 PM

John great looking cammo it looks spot on!

Casper the gear looks great nice work so far!

Heavens Eagle thanks,looking forward to your next update. I'm sure it will be worth the wait with your attention to fine details.

I'm calling it done,overall not a bad kit except the decals but that might be due to age.

  • Member since
    December 2010
  • From: Memphis TN
Posted by Heavens Eagle on Saturday, May 19, 2012 10:41 AM

Gee whiz guys! You are making me feel like I am a slow poke.  I have been building, just that it takes some time to do the updates in "my style".  Also been doing the newsletter for the local club, so you know that I have been busy.

Too many irons and not enough fire!   Dead  My stumbling block isn't the building, it is the painting. Stick out tongue

Anyway, all the builds I have been seeing on here lately have bee fabulous!  Love how the camo is turning out on that gunship John!  TREYZX10R that Corsair is looking good!

Never fear, I am still (lurking) here and building, just need to make some time to do the new posts and I have a bunch to do.

One other thing, if any of you are in driving distance to Memphis, My local club is hosting it's annual model contest next Saturday at Briarcrest School.  Last year we had quite a few vendors as well as nicely build kits.  If you are interested, PM me and I will send you a link to our club site for info.

  • Member since
    September 2003
  • From: Australia
Posted by Helo H-34 on Saturday, May 19, 2012 3:02 AM

I got too nervous and couldn't wait for after dinner to inspect the camo scheme

Overall , I'm quite happy with the results Smile

There are a couple of areas that will need a little touch up but I expected that .

Anyway I'm happy .

John .

  • Member since
    September 2003
  • From: Australia
Posted by Helo H-34 on Saturday, May 19, 2012 2:25 AM

Great work so far on the F-4D Casper and that's a good idea about leaving the intake splitter plate's off so you can paint the area behind first .

The landing gear struts and wheels look awesome as well  Yes

I airbrushed the underside of the Stinger with some flat black this afternoon

I also managed to get some dark green on the B-57G canberra as well ; Tomorrow  I'll give her a few coats of flat black on the underside also .

After dinner I'll pull the mask's from the upper surface's of the Stinger . I hope the camouflage looks okay , I spent lot's of time masking !

John .

  • Member since
    October 2010
  • From: Hobart, Australia
Posted by Casper the Chihuahua on Saturday, May 19, 2012 2:02 AM

Ordinance assembled, there sure is a lot of it!

Cheers

On the bench: A-4F 1/32 Hasegawa

Just deployed: F6F-5N Hellcat Nightfighter 1/48 Eduard

Up next: A6-E Intruder 1/48 Revell

  • Member since
    October 2010
  • From: Hobart, Australia
Posted by Casper the Chihuahua on Friday, May 18, 2012 11:29 PM

Phantom's coming together. I was thinking about how to paint the gap between the intake vents and the fuselage so I've ended up painting that part of the fuse first. I've also painted the flaps and will mask those off when I attach the intakes. That way when I paint the rest of the bird I should get a nice clean result.

I've also attached any of the ordinance pylons that share the same colour as the underside. ie. the Sidewinder/TER racks, MER rack and the external fuel tanks.

Also got the undercarriage done.

Cheers

On the bench: A-4F 1/32 Hasegawa

Just deployed: F6F-5N Hellcat Nightfighter 1/48 Eduard

Up next: A6-E Intruder 1/48 Revell

  • Member since
    September 2003
  • From: Australia
Posted by Helo H-34 on Thursday, May 17, 2012 10:26 PM

Your Corsair is really look great Trey Yes

Especially the paint chipping and nice job getting those difficult decals into position .

As for me , my progress has been a little slow as things at home have been quite busy but I am slowly getting the paint laid down on the Stinger

I like to use BluTack for masking my camouflage pattens , here you can see that I roll the Blu-Tack into thin strips of spaghetti into the camo patten I want and mask the area I wish to leave tan (FS30219)

I then airbrushed the remaining area's mid green (FS34102)

And just now I completed the dark green (FS34079)

Tomorrow , I'll cover the remaining top area's and airbrush the flat black to the fuselage sides / bottom and under wings . So I'm slowly but surely getting there .

John .

  • Member since
    August 2009
  • From: Borlando Fla home of the rat
Posted by TREYZX10R on Thursday, May 17, 2012 9:48 PM

NFN thanks, You're correct about the radom and I've repainted the chips out, much appreciated! I totally dropped the ball there! The chipping on the leading edges will remain just that chipping. However the areas that are heavily trod upon will hopefully after the layers of weathering be just that and toned down quite a bit, You are absolutely correct about the Japanese paint adhesion problems and I've not got any photo evidence of that on the Corsair.  I've seen it on other airframes from shoulder straps being flung out and just climbing in and out of the office,just hoping it shows as wear in the end and not total paint failure,we'll see;)

The first wash after a hair raising decal session. The decals were very brittle and the port side fuse star came apart,did my best to save it.

Buffed off the first wash then applied a second especially heavy underneath

Then the second wash is starting to tone things down and bring the panel line details out

  • Member since
    June 2010
Posted by Night Fighter Nut on Wednesday, May 16, 2012 9:26 PM

Very nicely done.  I've still not tried it but you have done a great job around the aircraft.  However, I would not  have done it on or around the radome.  The radome was made of fiberglass, not metal.  The metal chipping around the engine and on wings near the engine seem correct to me.  The chipping on one side of the cockpit seems ok but I think it was more prevelent on the Japanese planes.  Their paint adhesion was not as good as the U. S. planes.  What do you think?  Have you seen photos of Corsairs with that kind of chipping near the cockpit?

  • Member since
    August 2009
  • From: Borlando Fla home of the rat
Posted by TREYZX10R on Wednesday, May 16, 2012 6:15 PM

John thanks, I've lightly wet sanded raised panel lines before after painting a contrasting color before top coating and get a good effect from it,I'm sure you can do something along the same lines with your idea. The Stinger is coming along nicely and I really like the action picture with the guns blazing!

Vance yea it looks different enough to leave that way lol,had to top coat it tho;)

Greg thanks,I would rather slam my dangly bits in a rusty truck door than move! Hope you get the work bench up and running soon would love to see more of your builds!

Here is the salt application

Then after layers of varying shades of blue

the underside

after touching up the white and adding some staining

Well whats the verdict too much,not enough or just about right and leave it alone? Thanks


  • Member since
    October 2009
  • From: Texas
Posted by Gregbbear on Tuesday, May 15, 2012 5:49 PM

Good looking stuff going on!  That is one great looking cockpit Caspar.  Lots of detail in there!  I really liked the size comparison earlier too.  What a monster it will be when finished!

John, the stinger is looking good.  It is quite impressive.  Your photos you bought look great too.  That stinger shot while firing is especially cool.

I swear that I think some joints mysteriously suck in any type of filler. I have used different putties, super glue, Mr Surfacer, etc, and sometimes, despite my best efforts, and even after a primer coat, a seam shows up on the color coat. 

Trey, that is really cool what you are doing with the Corsair.

I haven't done anything myself.  We moved over the weekend, and I haven't unpacked my stuff yet, or set up a work area.  I have too many orders from the wife I must complete first!

Cheers,

Greg

- yat yas!


  • Member since
    February 2003
  • From: Rothesay, NB Canada
Posted by VanceCrozier on Tuesday, May 15, 2012 7:18 AM

TREYZX10R

...

http://img.photobucket.com/albums/v710/treyzx10r/Aircraft%20kits%20part2/Corsairpreshade005.jpg

http://img.photobucket.com/albums/v710/treyzx10r/Aircraft%20kits%20part2/Corsairpreshade003.jpg

...

Stop right there, I like it that way!!!!

On the bench: Airfix 1/72 Wildcat; Airfix 1/72 Vampire T11; Airfix 1/72 Fouga Magister

  • Member since
    March 2010
  • From: Democratic Peoples Republic of Illinois
Posted by Hercmech on Tuesday, May 15, 2012 6:32 AM

Trey...I am anxious to see how she turns out over that preshade you have going on!


13151015

  • Member since
    September 2003
  • From: Australia
Posted by Helo H-34 on Monday, May 14, 2012 11:52 PM

There is a seller on ebay called prettyplanes.com , who has hundreds of military aircraft photo's available in different sizes and I have bought quite a few photo's from them including these three gunship pic's ...

The images are on high quality photo paper and I think they are all excellent

The photo's should look good next to my finished builds .

John

  • Member since
    September 2003
  • From: Australia
Posted by Helo H-34 on Monday, May 14, 2012 7:44 PM

Nice work Trey , I'm yet to try any type of pre-shading on my builds . The Stinger is molded in black plastic , so I'm thinking of buffing with some kitchen paper towel after the painting has finished and given the kit has raised panel lines , I'm hoping I might get some type of darker effect ?

Anyway , I'm not too happy with the fuselage join on the roof , so I have had to re-sand and now touch up the Tan colour before starting the medium green and dark green colours

Oh well , only a slight set back .

John .

  • Member since
    August 2009
  • From: Borlando Fla home of the rat
Posted by TREYZX10R on Monday, May 14, 2012 6:04 PM

John Stinger is really coming together ,nice fix on the nose cone! Looking forward to the Neptune a subject not modelled often nice choice!

Casper great looking office!

I'm trying a more agressive approach to the preshade this time and doing a little salt chipping as well,so some silver went down first

Then the shading with black ,zinc and red brown staining

Then put some white down thinned 50% and just enough applied to not bury the preshade


  • Member since
    June 2010
Posted by Night Fighter Nut on Monday, May 14, 2012 12:01 PM

Dude!  that looks awesome!  Very well done.  Hey gang, I have finally gotten settled somewhat and will now atttempt to get back into posting what I'm working on... barring any mishaps with the camera.  :)  Currently I'm trying to finish up with Fiat Cr 42 Cn  Italian night fighter and have just started a Pe-3 Bis WW2 Russian night fighter. 

  • Member since
    March 2010
  • From: Democratic Peoples Republic of Illinois
Posted by Hercmech on Monday, May 14, 2012 10:59 AM

Casper:

Nice work on the pit!


13151015

  • Member since
    October 2010
  • From: Hobart, Australia
Posted by Casper the Chihuahua on Sunday, May 13, 2012 6:33 AM

Got the upper cockpit on the fuselage painted and dry-brushed. Cockpit fits in like a dream. Screwed in instead of glued. Also got the lower wing/fuselage screwed and glued on. Never attached wings to a fuse with such little fuss (well perhaps excepting the Tamiya Spitfire)

Cheers

On the bench: A-4F 1/32 Hasegawa

Just deployed: F6F-5N Hellcat Nightfighter 1/48 Eduard

Up next: A6-E Intruder 1/48 Revell

  • Member since
    October 2010
  • From: Hobart, Australia
Posted by Casper the Chihuahua on Saturday, May 12, 2012 10:10 PM

Got the office done except for the top rear IP and the HUD assembly. The Eduard details really help with the look. I'm also adding Brassin ejector seats which should complete the busy look.

Cheers

On the bench: A-4F 1/32 Hasegawa

Just deployed: F6F-5N Hellcat Nightfighter 1/48 Eduard

Up next: A6-E Intruder 1/48 Revell

  • Member since
    September 2003
  • From: Australia
Posted by Helo H-34 on Saturday, May 12, 2012 2:59 AM

Nice start with the cockpit and exhaust Casper ...Yes

With the Stinger , I decided to paint the gear wells , landing gear struts/doors , wheels and props first , using Tamiya's AS-12 Silver
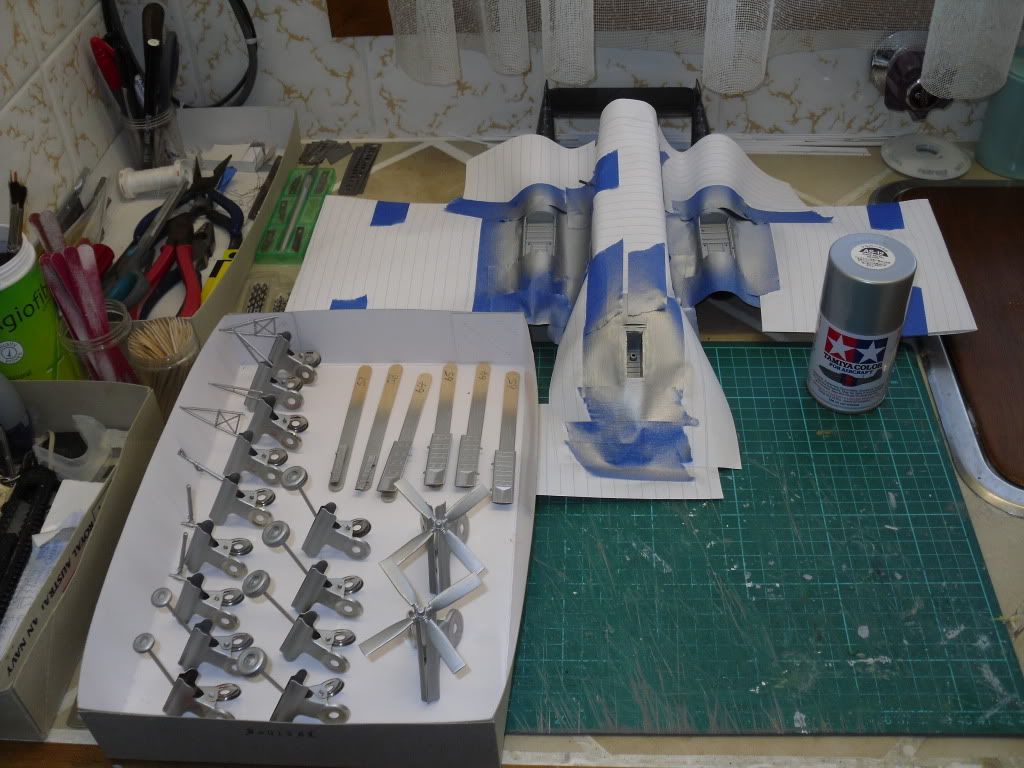
Tomorrow , I'll airbrush the colour Tan (Gunze H-310) to the top surface's

While in-between coats of silver paint , I started looking at the Hasegawa P2V Neptune along with Falcon's AP-2H Vac AP-2H
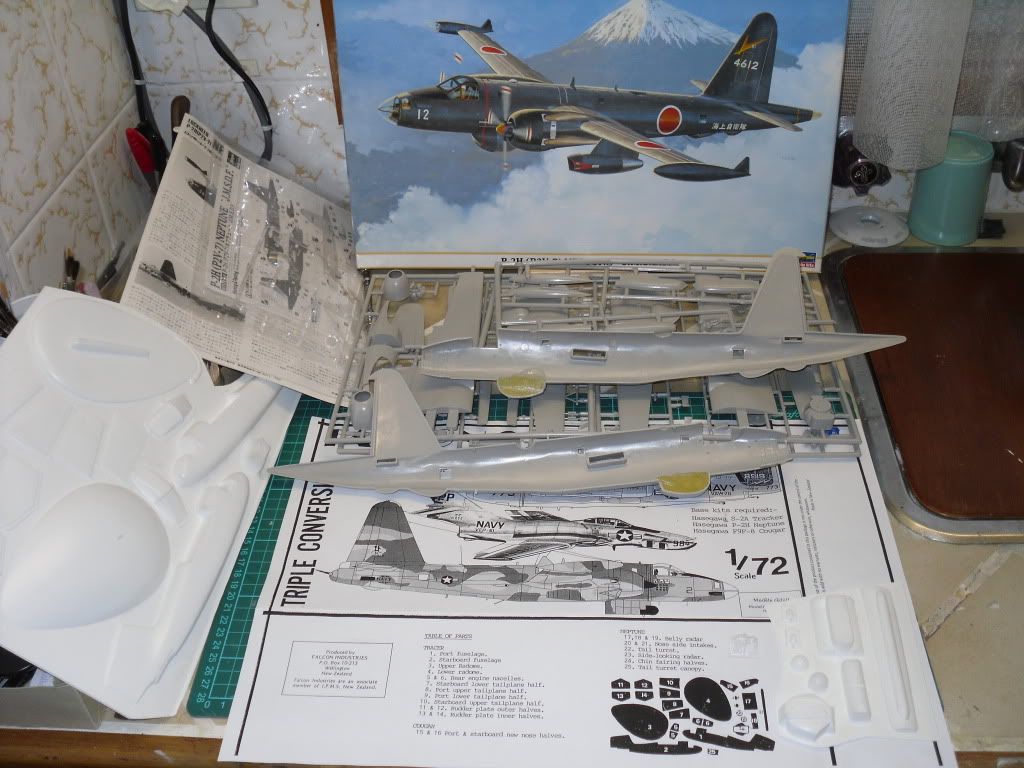
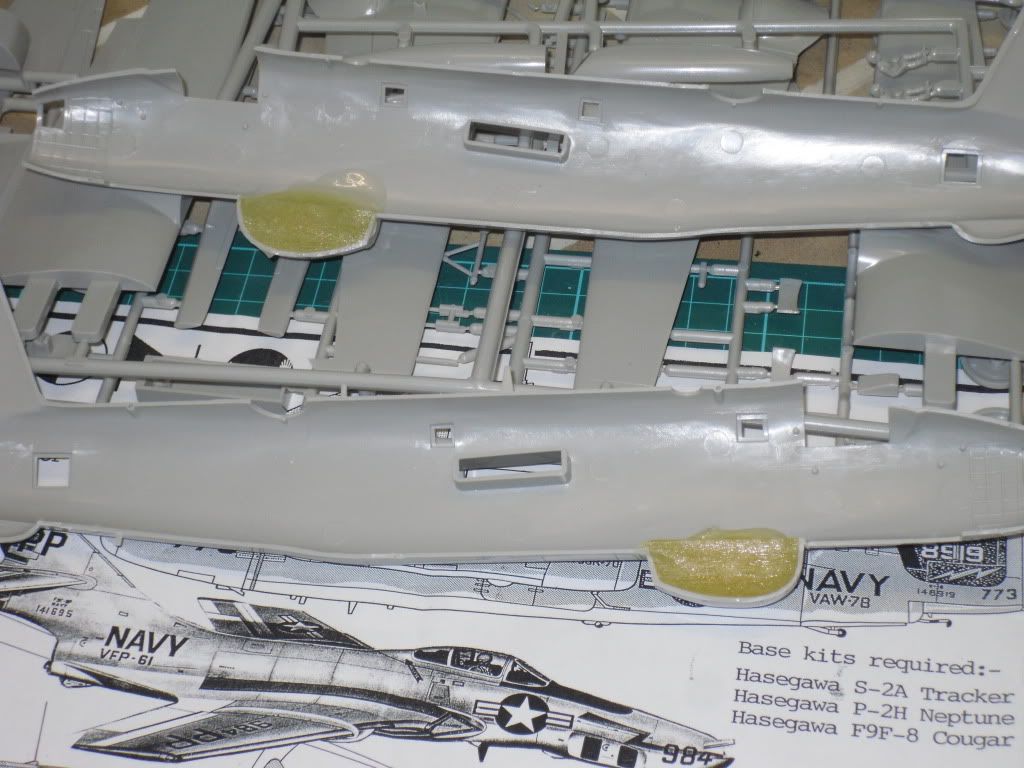
I mixed up some two part epoxy and filled the belly radome halves
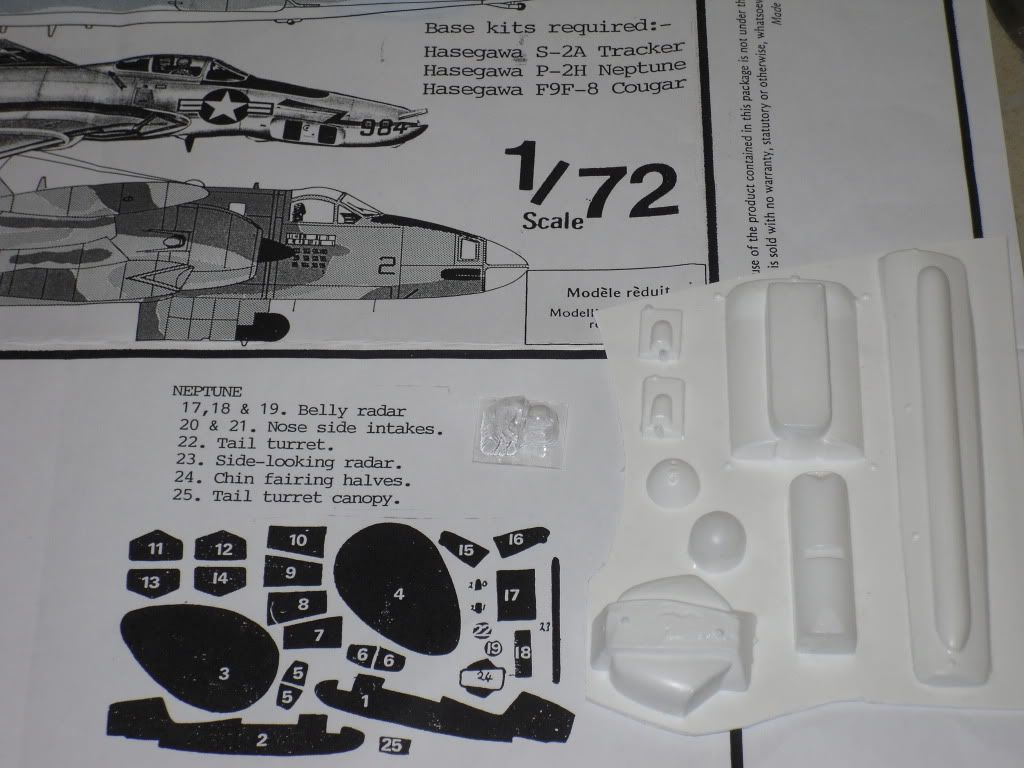
Here's a pic of the Vacuform conversion pieces
I was reading through the AP-2H article Greg kindly sent me and the under wing weapons consisted of a pair of SUU-11A Gun pods with Mk. 82 & 77 bombs .

Haseegawa's weapons sets don't have any SUU-11A gun pods but I found some in an AMT AH-1G Cobra kit from the stash
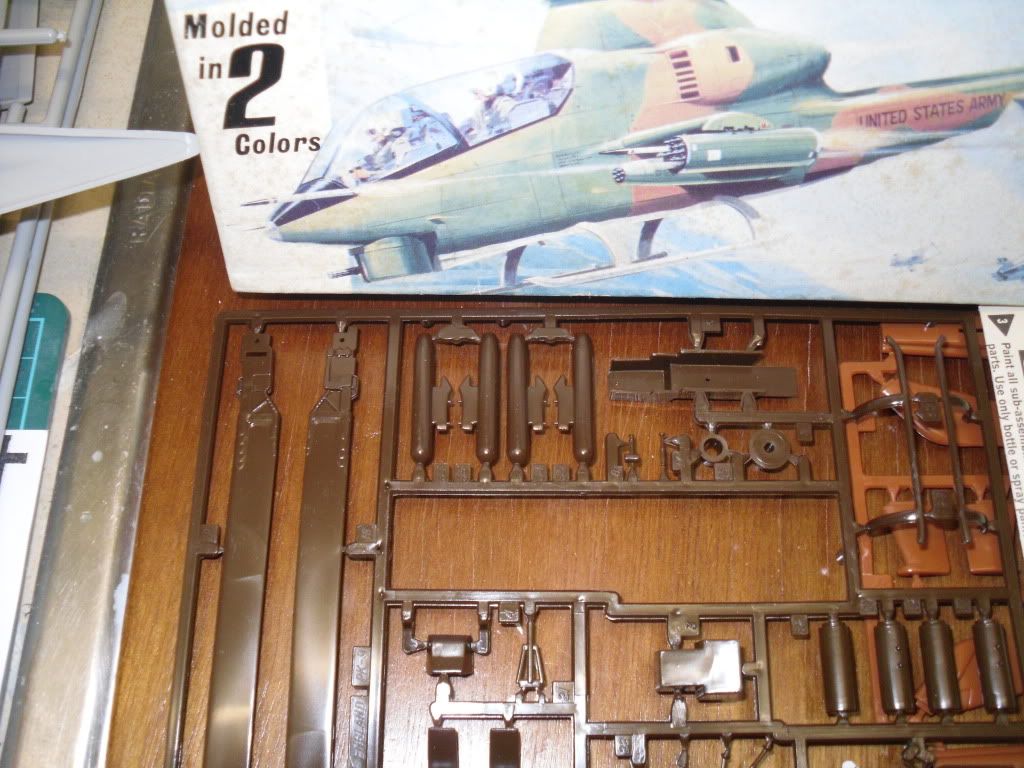
I guess they will have to do for the Neptune .

Anyway I'll continue on painting the Stinger .

John

  • Member since
    October 2010
  • From: Hobart, Australia
Posted by Casper the Chihuahua on Friday, May 11, 2012 8:35 PM

Almost ready for some painting. Been prepping parts and cutting and glue bits of PE.

The exhausts really look nice with the Eduard details;

Some paneling for the office;

...and the lower halves of the canopy locking systems

Cheers

On the bench: A-4F 1/32 Hasegawa

Just deployed: F6F-5N Hellcat Nightfighter 1/48 Eduard

Up next: A6-E Intruder 1/48 Revell

  • Member since
    September 2003
  • From: Australia
Posted by Helo H-34 on Friday, May 11, 2012 7:50 AM

The canopy is fitted in place and the Stinger is ready for masking

The nose cone is a little undersize , especially on the sides , the top and bottom were close to being flush with the front of the aircraft but I needed a couple of sessions of puttying and sanding to blend the nose cone in . I hand brushed some acrylic silver over the sanded putty to fill in any tiny little pin holes you sometimes get after wet sanding Tamiya putty . So after masking it will be a light sand with some 2000 grade wet & dry just to smooth out the silver and then onto airbrushing the first colour first thing tomorrow .

John

  • Member since
    August 2009
  • From: Borlando Fla home of the rat
Posted by TREYZX10R on Wednesday, May 9, 2012 8:54 PM

John thanks for the kind words. The Stinger is really taking shape,the interior came out awesome.

Casper I'm looking forward to the F4 build,that thing is HUGE!

Greg thanks,you could pull the nav lights off I'm sure. Maybe even in 1/72 it would be feasable me thinks;)

I got the Radom on and the gear fitted,slowly getting close to paint time

  • Member since
    October 2010
  • From: Hobart, Australia
Posted by Casper the Chihuahua on Tuesday, May 8, 2012 10:20 PM

Helo H-34

Looking forward to seeing your F-4D come together Casper .

I'm just blown away at the level of skill and detail you are able to accomplish with your builds Sir  ...

John .

Thanks John, kind words indeed, Ser. I try my best, this is a hobby I returned to after some 30 years. I am constantly trying to better my skills but still often fall short of my own goals. But practice makes perfect and words of encouragement are always good!

Cheers

On the bench: A-4F 1/32 Hasegawa

Just deployed: F6F-5N Hellcat Nightfighter 1/48 Eduard

Up next: A6-E Intruder 1/48 Revell

  • Member since
    September 2003
  • From: Australia
Posted by Helo H-34 on Tuesday, May 8, 2012 8:59 PM

Greg , Thank's for the info on the AP-2H Neptune ...Yes

I didn't realise that the AP-2H had those exhaust /jet engine silencer's fitted , so that was good info to find out .

While the putty is drying on the Stinger Gunship , I'm thinking of mixing up some two part epoxy and fill in part of the molded in under fuselage radar on the Hasegawa Neptune kit .  That way by the time I start the build I can cut away the old radar dome staright away .

John

JOIN OUR COMMUNITY!

Our community is FREE to join. To participate you must either login or register for an account.

SEARCH FORUMS
FREE NEWSLETTER
By signing up you may also receive reader surveys and occasional special offers. We do not sell, rent or trade our email lists. View our Privacy Policy.