Well guys, here's an update on the Emhar Mk.IV Whippet tank that I started in October:
In my previous post I had removed all the major components from the sprues, cleaned them up, and gave them a soapy wash.
The first thing I decided to do before assembly was replace the molded on bolt/nut for the idlers. The molded on parts just bugged me so I had to improve this area!! Removing the plastic was relatively easy using a Mission Models 2 MM Micro Chisel. I then used the same chisel to scrape away the plastic to create a deeper recess for the replacement bolt/nut. To smooth out the recess I brushed on some Tamiya Extra Thin liquid cement.

To replace the molded parts I used some 00-90 size brass screws and nuts that I found at a local hobby store. I used my Dremel tool to cut the screws down to size, then drilled a suitably sized hole using a pin vise/drill bit. Because I had to drill at an angle (so as not to damage the recess's surrounding lip) I made sure the hole was ovesized. Medium ZAP-A-GAP CA glue helped fill the hole when I glued the brass screw/nut in place.

Much better (IMHO!) !! I mentioned that the molded on engine vents needed to be replaced as well. I used the Airwaves PE set for this. Early on I decided that the best way to accomplish this was to assemble each vent off the hull and glue on when complete. My first attempt was with soldering and this proved to be an utter failure. I just couldn't get the multiple parts to stay together when the heat was applied!! ARRRGH!! Instead I simply used super thin CA glue and this method was much more successful. Although not designed correctly, they still offer a vast improvement over the clunky molded on vents. I also added some small nuts made from salami sliced hex styrene rod (.05 dia). When done I decided to glue the vents on after the main hull assembly was done.

The next step was to glue the hull parts together. smeagol was spot on when he advised CAUTION when lining up all the panels and gluing together!! The lower hull wasn't a problem , but for the upper hull and crew compartment it took several atttempts to get everything lined up and even then there were still some decent sized gaps that I had to fill. Overall though, the hull assembled relatively easy. I used styrene strip rod to fill in all the major gaps and Mr. Surfacer 500 for smaller gaps. Instead of sanding these Mr. 500 filled areas smooth I used an cotton swab dipped in 90% alcohol to remove excess filler.

When dry I installed the inner sponson plates, followed by gluing on the PE engine vents. Then I assembled the fuel tank assembly, which turns out is the "nose" of the tank! Here the gaps we just too big to fill. Time for some scratchbuilding; turns out the kit's lower plate assembly for the fuel tank is just designed poorly so I made a new lower plate from sheet stryrene and Grandt Line rivets.

After making sure the fuel tank assembly would fit ont the hull correctly, I turned my attention to the suspension/track area. I finally busted open the Model Cellar's indy tracks and read the instructions. WHOA!!I It was a good thing I did this BEFORE installing the outer sponsons because it turns out that you are instructed to add a "lip" to the insidesof the sponsons all round the perimeter so that the track will fit properly. I won't bore you with details other than I had to glue 5mm x 4mm styrene rod all around as instructed. Although somewhat tedious I can see why this neede to be done, else the tracks would drop too much into the sponson causing the track links to rub agains the sponson plates.


That's it for now, I'll post more updates tomorrow!
Ernest
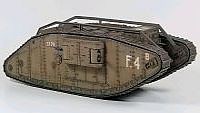
Last Armor Build - 1/35 Dragon M-26A1, 1/35 Emhar Mk.IV Female


Last Aircraft Builds - Hobby Boss 1/72 F4F Wildcat & FW-190A8

