Mike - parasol wing...never heard that before! I learned something new today! Thanks!
Marc - what the?? Cigars and margaritas in warm climes while we're hard a work chopping plastic and breathing enamel fumes? hehe!! JK!! Hope you had a great time in Florida!
Weekend update fellas: Not much done. Had to work Saturday and then watched "Red Tails" today followed by the 49ers/Giants game. Strangely, I'm NOT a 49ers fan, but I enjoyed the game nonetheless. It was a close one!
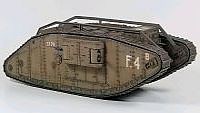
Got the decals on:

Whooo Nelly those decals were a pain! At first things went pretty smoothly. I trimmed away some of the excess carrier film for the decals on the right side and had no problems. On the left side, things didn't go so smoothly. I tried to trim the film even closer and for some reason all the decals started to curl really badly once the paper backing was removed. I ripped off the "/" on the B/6 decal and promptly lost it somewhere, but was able to make a new one from the remaining kit decals. The "IX" curled so badly I couldn't get it to lay flat. I almost gave up from shear frustration (and a little  ), but calmed down and used very warm water to "reconstitute" them and then I was able to finish them off. WHEW.....
 . Not only are they thick, but they're also qutie a bit oversized. In the end I guess they look OK.
And completed the tracks (for now)
After some serious thought and studying the pics from the previous track experiment, I decided that the test tracks were way too dark for a vehicle that spent most of its time on dirt, mud and sod. I don't believe there were that many paved roads in the French countryside in 1917-1918. The tracks just looked too new and clean in my previous attempt, so I tossed that method out the window and tried a different one.
- Painted them a dark chocolate brown with Tamiya acrylics.
- Stippled black paint (Vallejo) on them using a piece of packing foam
- Stippled Tamiya Flat Earth on them
- Mixed a slurry of MIG Pigments Dark Mud and Russian Earth (80/20) with water and applied using a medium brush.
- Dabbed away the excess pigments using a moisted soft cloth around my fingertip
- Drybrushed Vallejo Black/Brown on all the highpoints
- Drybrushed Humbrol Metal Cote Polished Steel (not Gunmetal) on the highpoints (let dry overnight)
- Buffed the Metal Cote with a soft cloth

Sorry, didn't take any pics for steps 5-8. The finished product.:


I'll add some final weathering after they're installed.
Ernest
Last Armor Build - 1/35 Dragon M-26A1, 1/35 Emhar Mk.IV Female


Last Aircraft Builds - Hobby Boss 1/72 F4F Wildcat & FW-190A8

