Terry-great work on the Marder. Very nice camo. Not to mention the rate of progress that you've achieved.....you're making me look bad....just kidding....I don't need any help there....
Back a few pages, someone requested a pic of the interior of the Jagdpanzer-here it is:
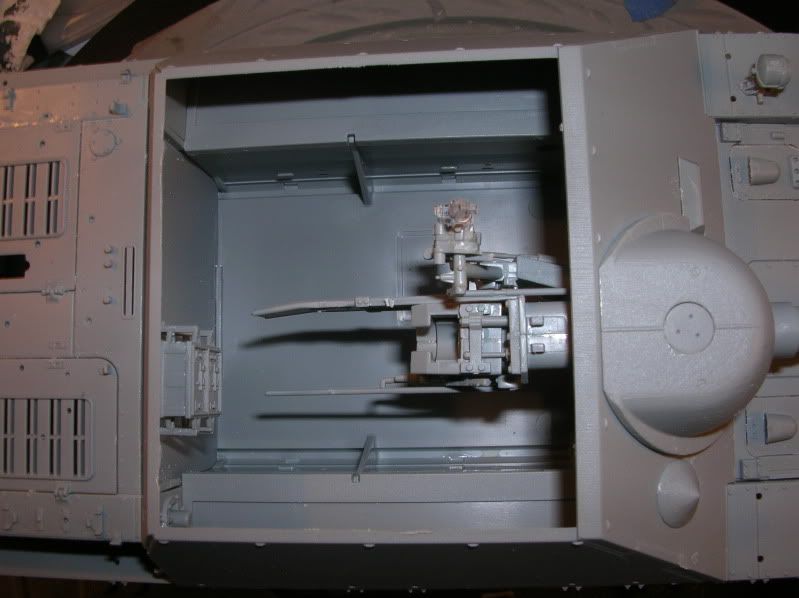
Gun & radio detail are great....but that's about it. Guess it keeps the aftermarket folks in business.
Working a bit on the turret top (is it still a turret since it doesn't turn?)....anyway, you know what I mean.
My goal is to get it to the point that I can primer it this weekend and maybe work on the tracks. We'll see.