SEARCH FINESCALE.COM

Enter keywords or a search phrase below:

Official Harrier GB

32343 views
168 replies
1 rating 2 rating 3 rating 4 rating 5 rating
  • Member since
    October 2010
  • From: Hobart, Australia
Posted by Casper the Chihuahua on Wednesday, August 31, 2011 6:49 PM

Picked up the Airfix Sea Harrier yesterday, Gods it's a monster!

Note the pot of Tamiya paint to demonstrate scale.

Cheers

On the bench: A-4F 1/32 Hasegawa

Just deployed: F6F-5N Hellcat Nightfighter 1/48 Eduard

Up next: A6-E Intruder 1/48 Revell

  • Member since
    October 2010
  • From: Hobart, Australia
Posted by Casper the Chihuahua on Tuesday, August 30, 2011 5:12 PM

Hi jetmodeler, are crossovers allowed? I'm doing a Airfix Harrier FRS.1 1/24 for the Airfix GB.

Cheers

On the bench: A-4F 1/32 Hasegawa

Just deployed: F6F-5N Hellcat Nightfighter 1/48 Eduard

Up next: A6-E Intruder 1/48 Revell

  • Member since
    October 2008
  • From: italy
Posted by bsyamato on Tuesday, August 30, 2011 10:49 AM

Thanx for comments, good harrier vance! the kit seems recent, i'll try to get a copy but actually out of sold on my favourite customers

  • Member since
    August 2009
  • From: Borlando Fla home of the rat
Posted by TREYZX10R on Monday, August 29, 2011 6:57 PM

Looking great Vance!

  • Member since
    December 2006
  • From: Kennewick, WA
Posted by kbuzz01 on Monday, August 29, 2011 6:46 PM

Nice work on the Harriers, folks!  Just finished a book about a Marine Harrier pilot's experience in Afghanistan that you might be interested in reading.  "A Nightmare's Prayer" written by retired Lt. Col. Michael Kranzak.  Those guys are amazing!

Keep up the good work,

Ken

animation6.gif image by kbuzz_photos
  • Member since
    February 2003
  • From: Rothesay, NB Canada
Posted by VanceCrozier on Monday, August 29, 2011 2:53 PM

EDIT!! pics etc up now! The cockpit, oob, including the decals for instrument panel & side consoles. The pics make my highlight on the buckles look REALLy bright, not like that in person. And not much of this will be visible once she's all sealed up anyway.

Underside looked fine except for a couple of sinkholes (the glob of putty near the nose gear!), and a gap at the wingroot, apparently I trimmed too much when making that fit. A little CA & nobody will ever see it anyway I suppose.

Topside - the wing-to-fuselage joint has one "up-step" and one "down-step", making me think some pilot error is at work here.Embarrassed

Nose-cone? Does anyone here know for sure... is the nose-cone supposed to have the same profile all-around? Mine looks like it is flatter on one side than the other...

The exhaust nozzles - nicely moulded, but the 2 halves join right in the middle of the fins. I ended up running a little CA over top of the fins, then a rather thick coat of black paint. Not perfect, but it'll do. (Aden guns installed here already, I drilled out the muzzles. Some things I'm going out of order on...)

My little Japanese friend was doing pics with some IJN and IJA aircraft, he stuck around to pose with the Sea Harrier...

On the bench: Airfix 1/72 Wildcat; Airfix 1/72 Vampire T11; Airfix 1/72 Fouga Magister

  • Member since
    February 2003
  • From: Rothesay, NB Canada
Posted by VanceCrozier on Monday, August 29, 2011 8:00 AM

Looking good so far gang. Summer has been largely keeping me away from the bench, but I found some time to get into my Sea Harrier over the past two weeks. If I get a chance I'll get my photos caught up here today or tomorrow.

On the bench: Airfix 1/72 Wildcat; Airfix 1/72 Vampire T11; Airfix 1/72 Fouga Magister

  • Member since
    August 2009
  • From: Borlando Fla home of the rat
Posted by TREYZX10R on Sunday, August 28, 2011 2:10 PM

Bsyamato thats great scratch building,looks like some surgical skills on the ip panel nicely done !

  • Member since
    October 2008
  • From: italy
Posted by bsyamato on Sunday, August 28, 2011 5:58 AM

Back on harrier finally, working on the cockpit and ip between 1:20 - 3:00 am Dead

I'm not sure did the right choice to glue the cockpit panels before to finish it but i did so:

reinforcement was needed, on the left consolle i glued the base for throttles

the most complicated thing was to drill all instruments holes without break the tiny ip sheet, successfully put on only a frame for one of left instrument

after take the picture above i clean the holes, man the ip are really little Tongue Tied

Now the more hard thing to do is to fix all in right mode ;need to scratch the rear bulkheads of the cockpit.

soon more updates (i hope)

  • Member since
    June 2009
  • From: Florida
Posted by STFD637 on Saturday, June 25, 2011 7:42 PM

"She's a beaut Clark!" Big Smile Very nice work. I hope mine turns out that nice.


"If a lie is told often, and long enough, it becomes reality!"

Travis/STFD637

make an avatar

  • Member since
    August 2009
  • From: Borlando Fla home of the rat
Posted by TREYZX10R on Friday, June 24, 2011 3:41 PM

Thanks Jetmodeler, I really should've known better with the decals on a kit that old lol

  • Member since
    October 2009
  • From: South Carolina
Posted by jetmodeler on Friday, June 24, 2011 3:36 PM

Excellent job on such an old kit. Sorry to hear about the thick decals.

Your finished build has been posted on the first page.


  • Member since
    August 2009
  • From: Borlando Fla home of the rat
Posted by TREYZX10R on Friday, June 24, 2011 3:26 PM

bsyamato

well done Yes

Thanks, and again appreciate the help !

  • Member since
    October 2008
  • From: italy
Posted by bsyamato on Friday, June 24, 2011 4:14 AM

well done Yes

  • Member since
    August 2009
  • From: Borlando Fla home of the rat
Posted by TREYZX10R on Thursday, June 23, 2011 8:31 PM

I finished it up this evening ,not a bad kit for a $12 ebay deal. I'll get some better pics this weekend.

  • Member since
    August 2009
  • From: Borlando Fla home of the rat
Posted by TREYZX10R on Thursday, June 23, 2011 4:03 PM

bsyamato

updating black book entries.. Decals  chapter :" monogram often have bad decals".

I think academy is already at the first place for decals Cool .... looking at the list upside down.

Actual your harrier have original decals or aftermarket is on?

I used the original kit ones, I wo'nt be doing that again!

  • Member since
    October 2008
  • From: italy
Posted by bsyamato on Thursday, June 23, 2011 3:27 AM

updating black book entries.. Decals  chapter :" monogram often have bad decals".

I think academy is already at the first place for decals Cool .... looking at the list upside down.

Actual your harrier have original decals or aftermarket is on?

  • Member since
    August 2009
  • From: Borlando Fla home of the rat
Posted by TREYZX10R on Wednesday, June 22, 2011 8:15 PM

These Decals sucked! I sprayed them with decal bond good thing too as  that was the only thing that made them useable. They are thick as phone books and took repeated applications of  micro sol to lay down and rid the silvering. I should've bought aftermarket ,oh well they're on now.

  • Member since
    October 2008
  • From: italy
Posted by bsyamato on Wednesday, June 22, 2011 3:48 AM

Was a pleasure, this is the advantage of GB, on the falkland GB someone help me to use right color with my super etendard Yes (waith to finish it to continue my gr3)

Whow the camo is really pop up with clear layer Stick out tongue


  • Member since
    August 2009
  • From: Borlando Fla home of the rat
Posted by TREYZX10R on Tuesday, June 21, 2011 7:33 PM

jetmodeler

 TREYZX10R:

Bsyamato,huge thanks I fixed it and thankfully I had'nt primed it yet! I owe ya one BroToast


Nice save.Yes

Thanks to Bsyamato!

I got the basic cammo done followed by some klear ,ready for decals

  • Member since
    October 2009
  • From: South Carolina
Posted by jetmodeler on Monday, June 20, 2011 6:16 AM

TREYZX10R

Bsyamato,huge thanks I fixed it and thankfully I had'nt primed it yet! I owe ya one BroToast

Nice save.Yes


  • Member since
    August 2009
  • From: Borlando Fla home of the rat
Posted by TREYZX10R on Saturday, June 18, 2011 9:57 PM

Bsyamato,huge thanks I fixed it and thankfully I had'nt primed it yet! I owe ya one BroToast

  • Member since
    October 2008
  • From: italy
Posted by bsyamato on Saturday, June 18, 2011 6:55 PM

jetmodeler


~Bsyamato~ I see you went with the vertical takeoff.Big Smile Looks good so far.

no no ! all these work was done before gb starts Surprise  with shared time with others kits on workbench they take about a month to reach this step.. was not vertical take off Smile

TREYZX10R thanx for comments but pay attention at the little auxiliars intakes on the av-8, i fear you glued it in reverse posiion, click here to take a look, is the italian version but don't think harriers have these function different .

TREYZX10R

added a brass tube for the cannon barrel

http://img.photobucket.com/albums/v710/treyzx10r/Aircraft%20kits%20part2/av8bII007.jpg

i hope you not already put on the primer


  • Member since
    October 2009
  • From: South Carolina
Posted by jetmodeler on Friday, June 17, 2011 4:20 PM

Looks like some good progress. I see there wasn't many fit issues.Big Smile


  • Member since
    August 2009
  • From: Borlando Fla home of the rat
Posted by TREYZX10R on Thursday, June 16, 2011 8:39 PM

Bsyamato thanks, nice find with the seat and scratching a 1/72 office takes some eye warping skills better you than me !

Jetmodeler thanks glad I'm not the only one that struggles with those colors

More prgress, the intake took some persuading but finally went in

wing fit was decent ,small amount of filling will be required

gun pod fit was really good thankfully

added a brass tube for the cannon barrel

  • Member since
    October 2009
  • From: South Carolina
Posted by jetmodeler on Thursday, June 16, 2011 8:28 AM

TREYZX10R


Why is it that yellow and white always give me a hard time ? Anybody else have trouble with these colors?

~TREYZX10R~ Looking good so far. The project that I'm repainting for my step-dad is the old Monogram kit. He even used the same markings. 
Yellow likes to give me the most trouble. White gives me trouble but not as much as the yellow.

Why can't all colors just cover like grey paint does.Smile Dots

~Bsyamato~ I see you went with the vertical takeoff.Big Smile Looks good so far.


  • Member since
    October 2008
  • From: italy
Posted by bsyamato on Wednesday, June 15, 2011 3:58 PM

TREYZX10R this is vertical take of Big Smile nce cockpit painting

White for me is the enemy number one for modellers Super Angry

just finished five layer on my super etendard (falkland gb as the harrier i'll post here) and seems again not so good Bang Head yellow are more human but need a underlayer of light gray or... white to work better.

so.. here's my harrier gr3, previous wip resume

the kit is the old good Esci harrier, with some improving by italeri. panels are fortunately engraved.

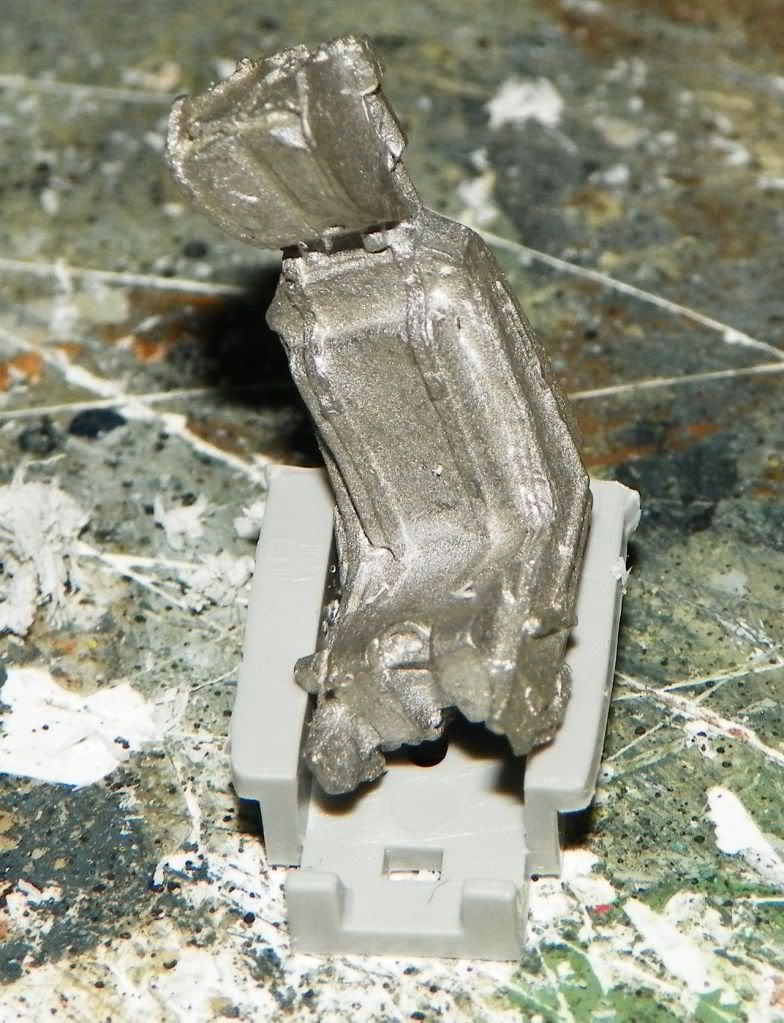
Cockpit will be scratched, on my magazine fortunately i had an old aeroclub martin baker for this plane.

Nozzles will be totally drilled and improved

By the kit main gear will be glued before to close fuselage, then i glued some plastic piece to allow gear glued after finishing all.

worded even on secondary intakes 

and main parts glued

the cockpit work till now

that's all, now i can continue on it 


  • Member since
    August 2009
  • From: Borlando Fla home of the rat
Posted by TREYZX10R on Wednesday, June 15, 2011 2:56 PM

The office was pretty basic

The Intake and nose wheel housing done,took more coats of white than I would've liked came out ok tho

Why is it that yellow and white always give me a hard time ? Anybody else have trouble with these colors?

  • Member since
    August 2009
  • From: Borlando Fla home of the rat
Posted by TREYZX10R on Tuesday, June 14, 2011 7:40 PM

Okay I can live with the decals, not real good but useable  so its going to be VMA-331 .Dry fit of the big bits revealed a warped wing and fuselage no biggie easy fix

  • Member since
    October 2009
  • From: South Carolina
Posted by jetmodeler on Tuesday, June 14, 2011 10:26 AM

bsyamato

we can start with a brief rolling on the track or we need to start in vertical take off? Big Smile


You can start however you want.Big Smile

Just get that bird in the air.Stick out tongue


JOIN OUR COMMUNITY!

Our community is FREE to join. To participate you must either login or register for an account.

SEARCH FORUMS
FREE NEWSLETTER
By signing up you may also receive reader surveys and occasional special offers. We do not sell, rent or trade our email lists. View our Privacy Policy.