SEARCH FINESCALE.COM

Enter keywords or a search phrase below:

No More Excuses GB: Part Deux. Closed to New Entries But Finish What You Signed Up For

82200 views
690 replies
1 rating 2 rating 3 rating 4 rating 5 rating
  • Member since
    February 2010
  • From: New Jersey
Posted by 68GT on Saturday, October 27, 2012 9:00 AM

There have been some really nice kits finally coming together.

I did a bunch more to the EF-111A and played around with the Testors F-4G.

On Ed's bench, ???


  • Member since
    August 2005
  • From: Los Angeles, CA
Posted by corvettemike on Saturday, October 27, 2012 11:22 PM

I should get back to work on my ZX-14 but my M1A1 for the Gulf War GB is keeping a stranglehold on my short attention span. Not too far to go, just the paint problems I discussed earlier is putting me in a funk over the build, think I'll just do the bare minimum to finish it and donate it to my local hobby mart as a display model. I have 2 more ZX-14's and a ZZR 1400 in the stash so I can rebuild the special color edition no problem.

Rise my brothers we are blessed by steel in my sword I trust...

Arm yourselves the truth shall be revealed In my sword I trust...

Havoc Models

  • Member since
    February 2010
  • From: New Jersey
Posted by 68GT on Monday, October 29, 2012 3:18 PM

I got some more work done over the weekend and today because work was closed due to the hurricane.  The EF-111A got the rest of the decals and today I gave it a good coating of future.  The F-4G got the bottom painted as well as the brown parts (also did some inert missiles and the tanks).  Not sure how much more will get done with power going on and off.

On Ed's bench, ???


  • Member since
    October 2008
  • From: italy
Posted by bsyamato on Tuesday, October 30, 2012 4:32 AM

Good work on both planes 68GT

  • Member since
    July 2004
  • From: Sonora Desert
Posted by stikpusher on Thursday, November 8, 2012 6:59 PM

The Weasel is coming along very nicely 68.Stick out tongue Another one of my favorite jets (any Weasel is) Yes

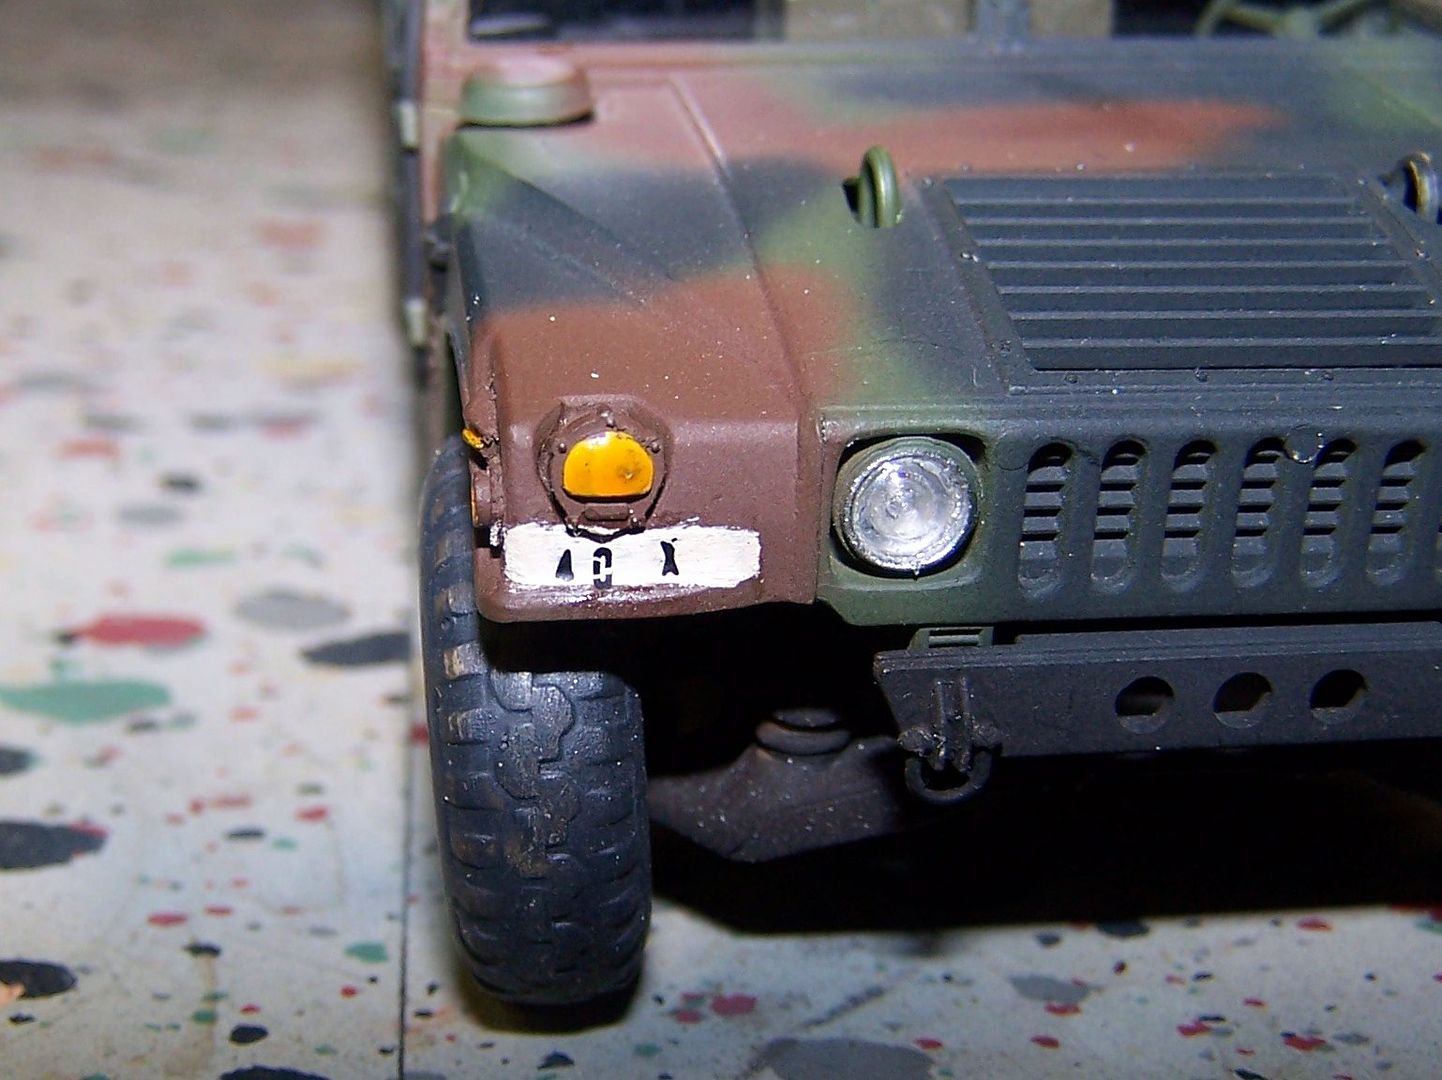
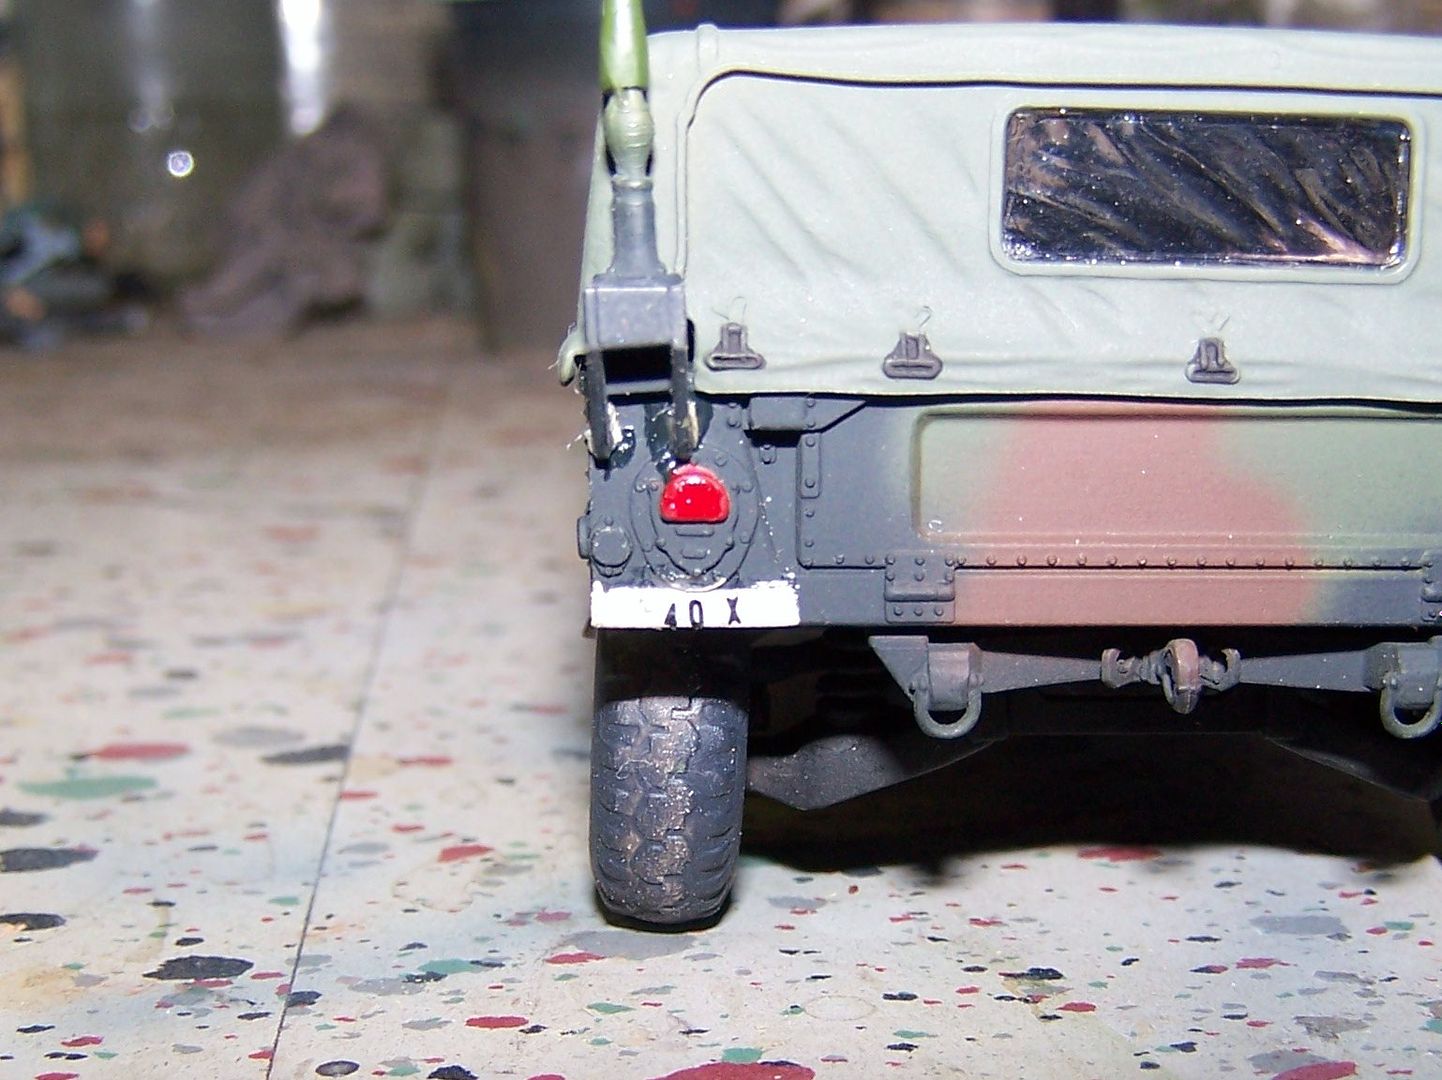
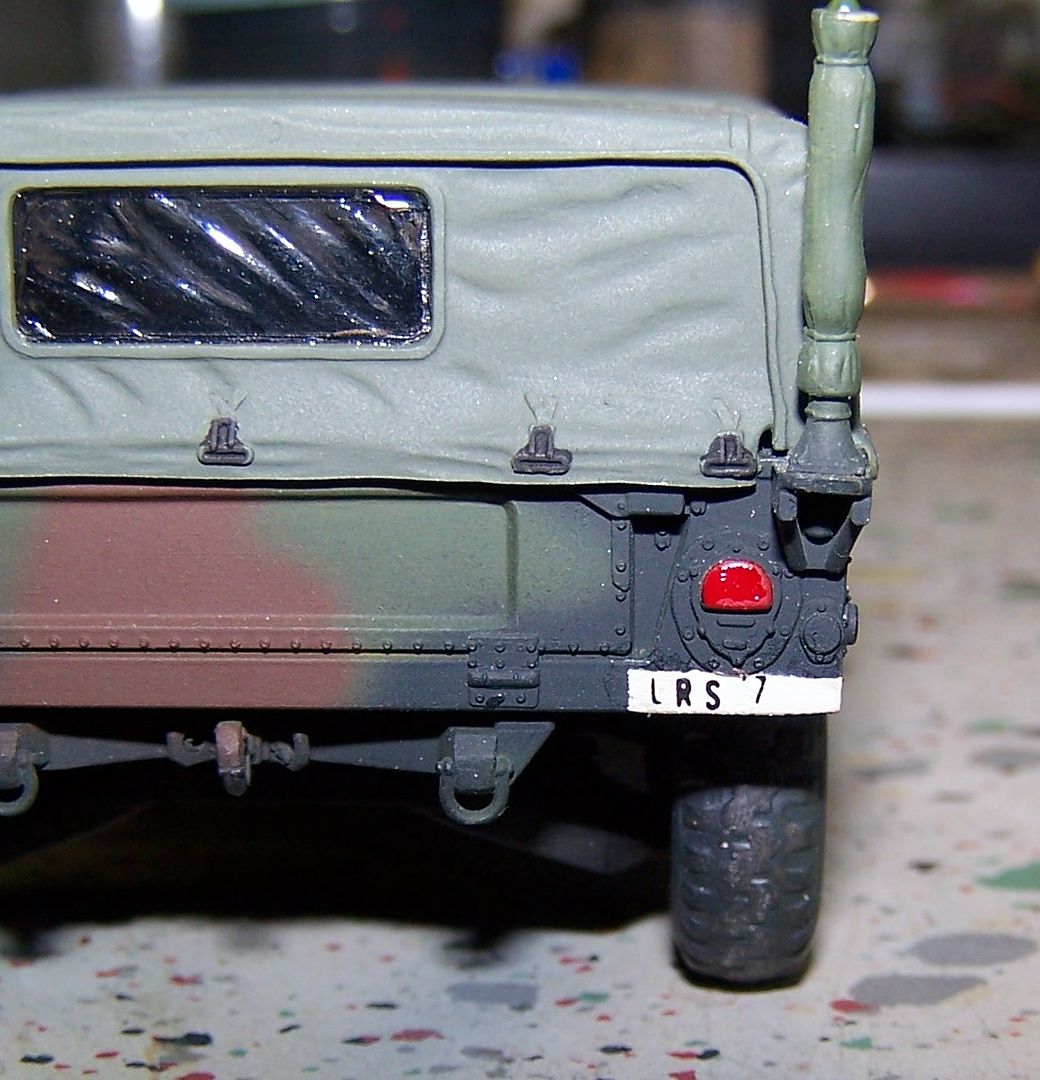
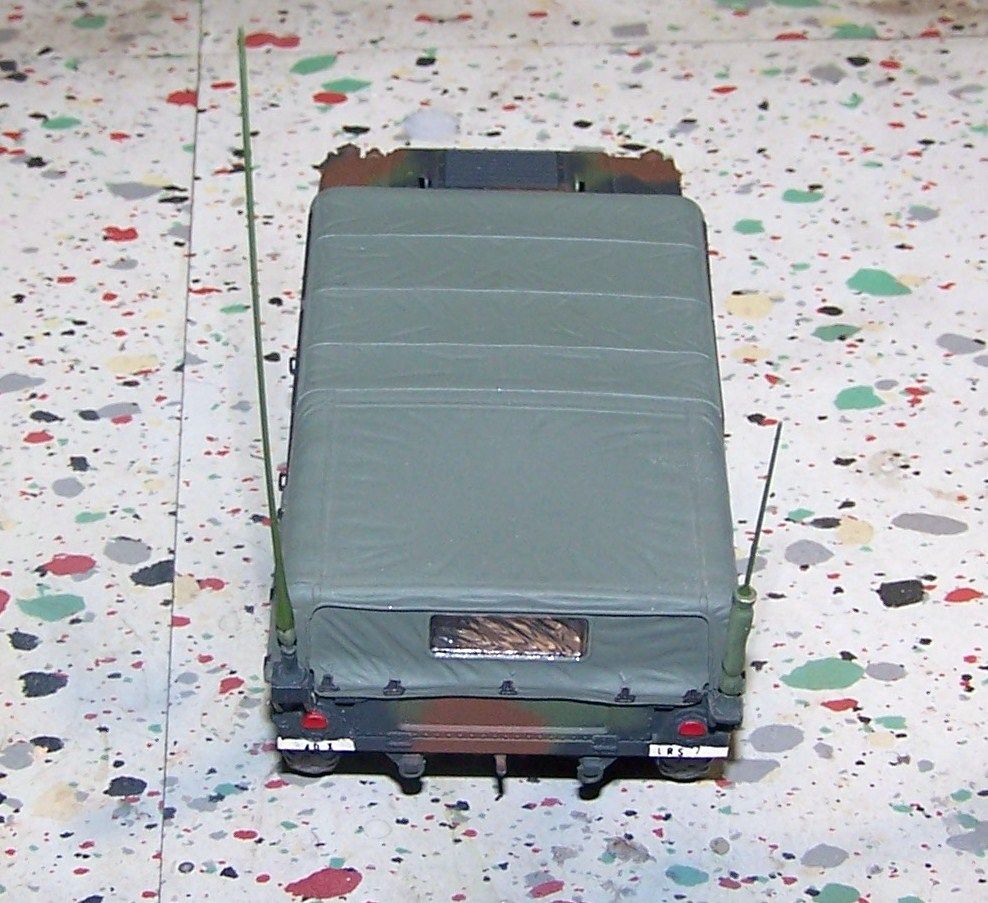
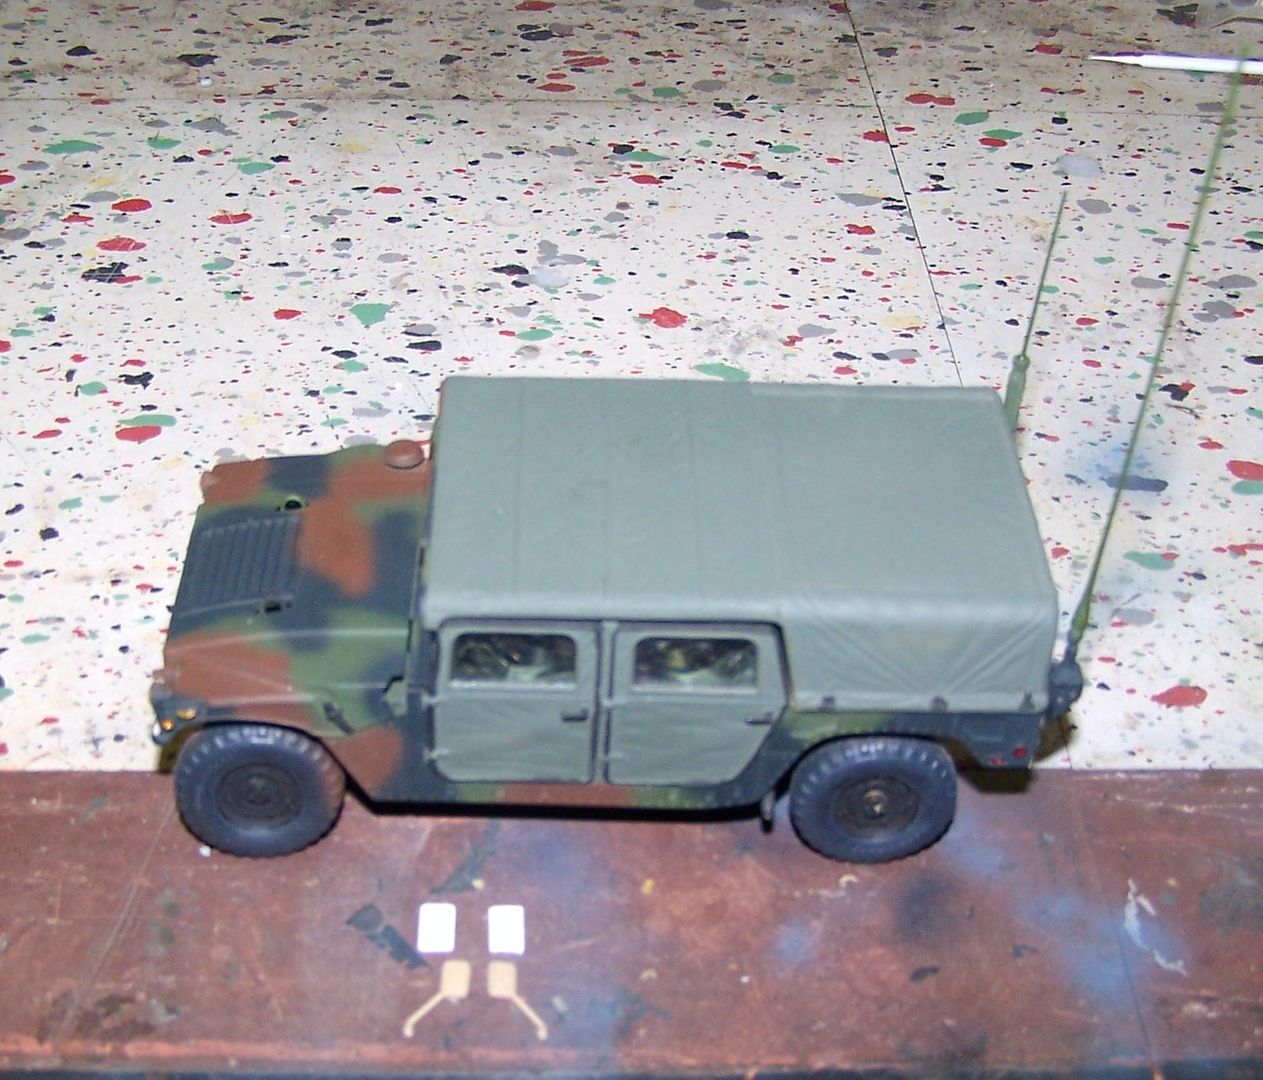
Well I am pulling another almost done Armor build off the shelf and finishing it up here. As you can see from these photos it is almost done, about 98%. It is an Italeri 1/35 M998 HMMWV which I started for a veterans GB on here couple of years ago...Black EyeWhistling I stalled out in the finishing stage. This was a particular vehicle that I was personally well acquainted with, occasionally driving, as well as regularly installing, operating, maintaining, and removing the vehicles radio systems. it was the Detachment Sergeant's vehicle from my old LRS outfit, LRS-7.

so first up, I added the bumper codes using some Verlinden Dry Transfers. The things are something of a  beast to get aligned properly and the codes on the front took two attempts to get this half arsed badly done...

"40X" was the bumper code for a Division level unit, and "LRS-7" the code for the vehicle within the unit itself, 160th Infantry Detachment (Long Range Surveillance).
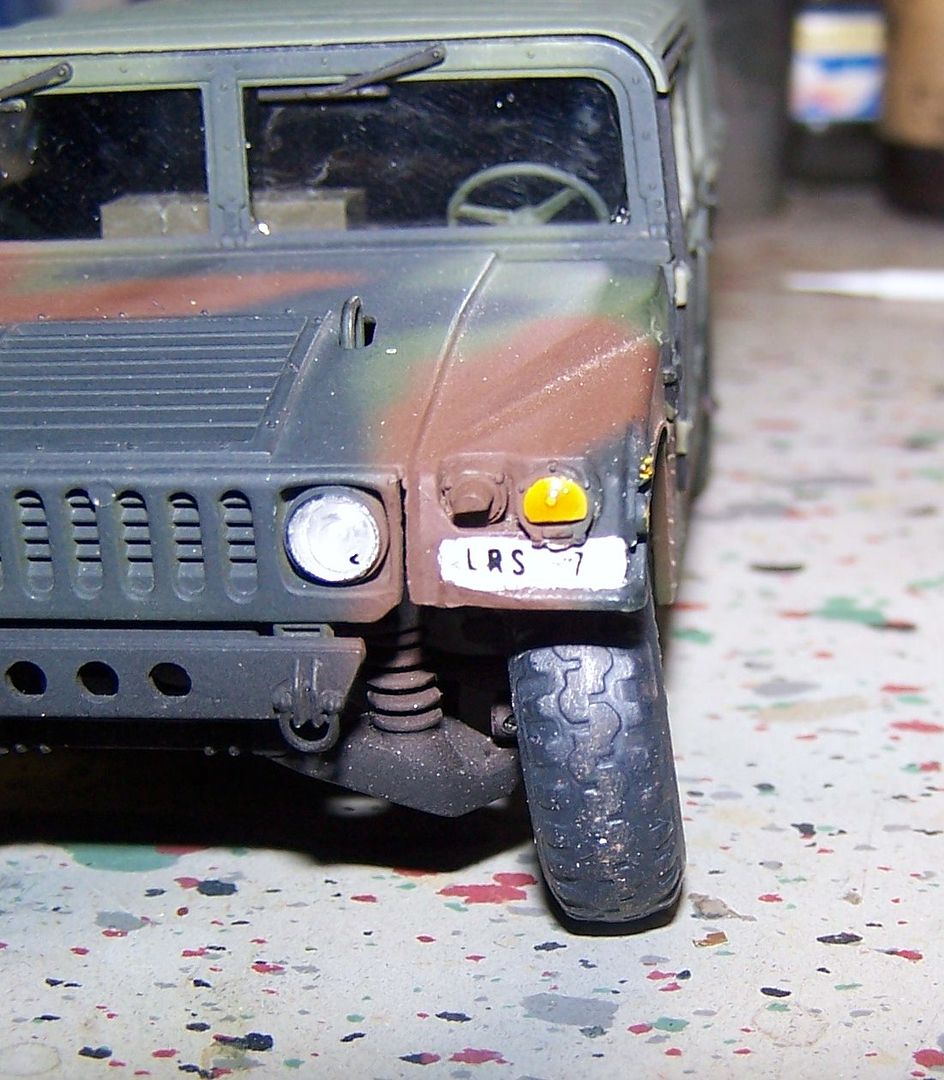
Once I had the bumper codes on, I made some antennas from stretched sprue, glued them on, and them painted them. The longer antenna is for the RT-524 transmitter and the short antenna for the R-442 receiver on a VRC-47 FM system (yeah everybody here knows that SargeGeeked)

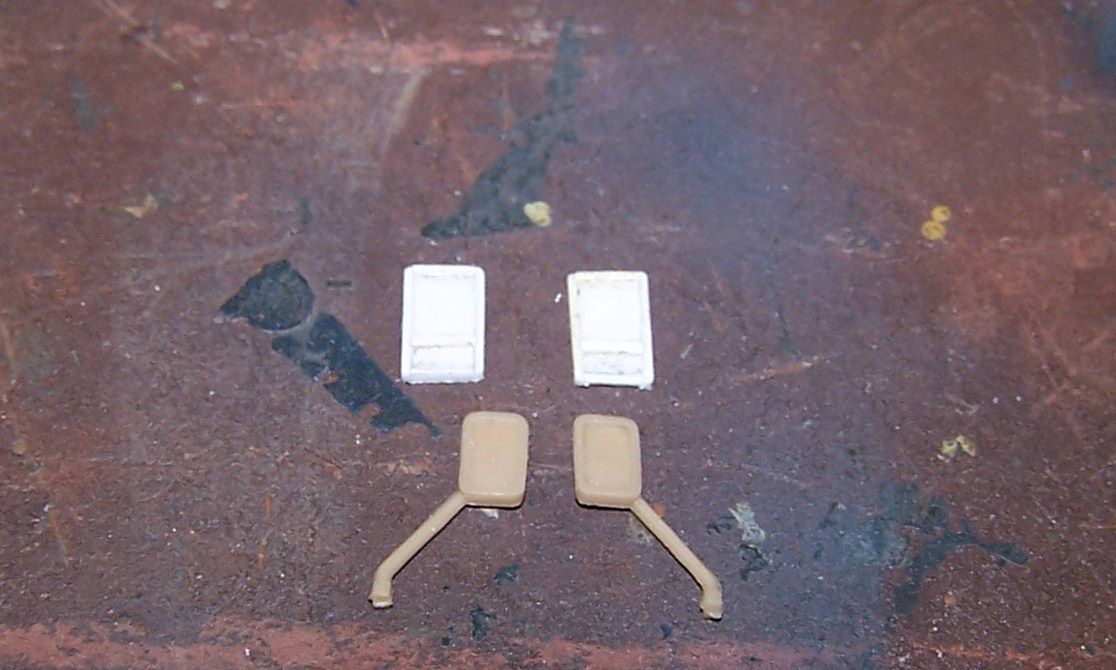
and finally, I started scratchbuilding some of the newlarger side mounted rear view mirrors that this vehicle had mounted. I do not have the actual mirror dimensions  but using the old kit mirrors as a guide, I am using ProfessorDeath's TLAR method...Wink

So then I just need some proper TLAR thickness copper wire or brass rod to bend to proper shape for the mounts, paint them up,and glued them on,and then I can weather and call this one done!Eats


F is for FIRE, That burns down the whole town!

U is for URANIUM... BOMBS!

N is for NO SURVIVORS...

       - Plankton

LSM


  • Member since
    September 2009
  • From: Guam
Posted by sub revolution on Friday, November 9, 2012 3:55 PM

That's pretty cool, Stik!

NEW SIG

  • Member since
    July 2004
  • From: Sonora Desert
Posted by stikpusher on Friday, November 9, 2012 7:40 PM

Thanks. I have been going thru my online photos too see how the mirror mounts look.


F is for FIRE, That burns down the whole town!

U is for URANIUM... BOMBS!

N is for NO SURVIVORS...

       - Plankton

LSM


  • Member since
    August 2005
  • From: Los Angeles, CA
Posted by corvettemike on Sunday, November 11, 2012 10:23 PM

My build is packed up for the move to Sacramento. After I left it be for awhile looks like the finger prints kind of leveled out, however the paint on the frame is still a bit on the thick side. I'll get going on it again ASAP after I get my shop set up, have to see how the weather is since it generally snows over the winter up in the eastern mountains I may have to adjust some of my regimine to cope with a situation I'm not really used to being in.

Rise my brothers we are blessed by steel in my sword I trust...

Arm yourselves the truth shall be revealed In my sword I trust...

Havoc Models

  • Member since
    March 2010
  • From: Buffalo, NY
Posted by macattack80 on Tuesday, November 13, 2012 12:54 AM

68GT, nice work on both of your planes.  I especially like the preshading on the EF-111.  

Stik, I dig the paint on your HMMWV.  On the rare occasion I make anything from scrap plastic, the TLAR method is my SOP.  

Mike, good luck with the move bro.  Take your time.  No hurry.

Kevin

[


  • Member since
    July 2004
  • From: Sonora Desert
Posted by stikpusher on Monday, November 19, 2012 11:09 PM

Thanks Mac.

Well, I am gonna take another left turn here. Next months IPMS theme is "Small Nations". Any Non: US/UK/Russian/German/Italian/Japanese subject. And I have one sidelined build that fits the bill, if I can get it done in time-a 1/35 ESCI Ti-67/Tiran 5 (Israeli captured and modified T-55)

So I pulled it off the sidelines on Saturday, examined it,and resumed work yesterday with cleaning up ejector pin marks on the tracks and painting yesterday today on the tracks, lower hull, and suspension/running gear.

I am substituting a metal barrel on the 105mm main gun for the poor one that comes in the kit.

I plan to make my Tiran like one of these seen in the Sinai during the Yom Kippur War of Oct 1973. So it is not going to be an exact OOB build


F is for FIRE, That burns down the whole town!

U is for URANIUM... BOMBS!

N is for NO SURVIVORS...

       - Plankton

LSM


  • Member since
    March 2010
  • From: Buffalo, NY
Posted by macattack80 on Tuesday, November 20, 2012 1:37 AM

Sweet tank Stik!  I like the theme for the build too.  Nice to see some different markings.

Kevin

[


  • Member since
    July 2004
  • From: Sonora Desert
Posted by stikpusher on Tuesday, November 20, 2012 12:44 PM

Thanks Mac! I do like the looks of the T-55. And considering how many were made and that they have served in combat on almost all the continents for over 50 years now the choices for markings are boundless. Well I am curious to see what shows up next month. I am gonna pull my Dutch MICV off the shelf as well. If I had planned ahead better I could have done the Dutch Leopard II that I have but not enough time to get it done up right I think... I think....

I love seeing different markings on stuff as well and have several that I plan to do as "now for something completely different".


F is for FIRE, That burns down the whole town!

U is for URANIUM... BOMBS!

N is for NO SURVIVORS...

       - Plankton

LSM


  • Member since
    April 2006
  • From: Denver, Colorado
Posted by waynec on Tuesday, November 20, 2012 1:01 PM

i have the TIRAN-6 (T-62) chassis from tamiya on the idf/arab shelves. the TI designation for all of these (4, 5, 6) was a jounalsim thing and not a designation in the idf.

btw since i don't have enough partials this year i am working on a tamiya JGPZ-IV from 2006 and a tamiya STG-IIIG from '84. that one is older than my CHALLENGER I which won a 3rd against the german  big cats and a 1st in post '45. i probably mentioned it before but these are the awards i am most proud of.

Никто не Забыт    (No one is Forgotten)
Ничто не Забыто  (Nothing is Forgotten)


  • Member since
    July 2004
  • From: Sonora Desert
Posted by stikpusher on Tuesday, November 20, 2012 4:00 PM

Oh the Chally is a beautiful tank. Far more handsome than a Jagdpanzer IV or Sturmgeschutz III. Yup... I am quite aware of the Ti vs. Tiran nomenclature.... This Tiran build is gathering steam in my mind... I need to get back to the bench now and convert that mind steam in to action...


F is for FIRE, That burns down the whole town!

U is for URANIUM... BOMBS!

N is for NO SURVIVORS...

       - Plankton

LSM


  • Member since
    July 2004
  • From: Sonora Desert
Posted by stikpusher on Tuesday, November 20, 2012 10:54 PM

Well, here is today's bit of work, more pre painting on the suspension and roadwheels. Plus a bit of construction on the upper hull. 


F is for FIRE, That burns down the whole town!

U is for URANIUM... BOMBS!

N is for NO SURVIVORS...

       - Plankton

LSM


  • Member since
    July 2006
  • From: San Francisco Bay Area
Posted by bufflehead on Sunday, December 2, 2012 1:04 AM

Oh man I totally forgot about this GB...I can't believe its been over a year since it started!!  I need to finish up at least one of my shelf queens before the GB ends this year so I pulled this one off the shelf and starting working on it:

Tamiya Sherman M4A3.  When the GB started it just needed markings, detail painting and weathering...here's a photo way back when:  

After sitting around for so long I managed to drop it a couple of times and moved it upteenth times back and forth so some of the more delicate PE parts broke off and the paint has chipped in several places, not to mention there's greasy fingerprints all over now.  I fixed all the broken off parts in preparation for a major paint overhaul!

The kit vinyl tracks are ready for paint, but I'm thinking of using something else.  I'll check the stash to see if there's anything that looks interesting! 

BTW stikpusher, that Ti67 looks very cool!   

Ernest

Last Armor Build - 1/35 Dragon M-26A1, 1/35 Emhar Mk.IV Female


Last Aircraft Builds - Hobby Boss 1/72 F4F Wildcat & FW-190A8


  • Member since
    July 2006
  • From: San Francisco Bay Area
Posted by bufflehead on Sunday, December 2, 2012 7:22 PM

I washed the entire model with soapy, lukewarm water and used a hair dryer on low to help dry it.  I spent quite a bit of time adding the tow cable before hitting the paint booth. Then I airbrushed dark green on all the lower areas and suspension, followed by spraying all the highlights with a light OD.  Applied another preshade of black then blended it all together with a base coat of OD (Tamiya OD XF-62 mixed with Dark Yellow XF-60, 3:1 ratio).   

Here's how she looks now:

Before/After:

Not much difference, but it needed it before it could be finished.  I think I'll let it sit overnight before I apply markings.  I'll start painting the tracks tonight. 

*NOTE*

I realize the first pic isn't necessary, but I can't figure out how to remove it!  When I try to edit the "unlink" action doesn't do anything.....

Ernest

Last Armor Build - 1/35 Dragon M-26A1, 1/35 Emhar Mk.IV Female


Last Aircraft Builds - Hobby Boss 1/72 F4F Wildcat & FW-190A8


  • Member since
    April 2005
Posted by Thunderbolt379 on Monday, December 3, 2012 12:04 AM

Am back from my overaseas trip but find myself in the throes of moving house and I have the greatest doubts I'll get to my T-72 before the end of ther year... GRRRR!!!

Mike/TB379

http://worldinminiature.blogspot.com/

  • Member since
    March 2010
  • From: Buffalo, NY
Posted by macattack80 on Tuesday, December 4, 2012 3:13 AM

Bufflehead, paint looks great.  I like how you made the OD green look less monochromatic.

Mike,  No hurry sir.  I haven't been at the work bench in months.  As long as you signed up take as long as needed to finish.  

Kevin

[


  • Member since
    April 2005
Posted by Thunderbolt379 on Tuesday, December 4, 2012 6:34 PM

Thanks, Mac! I'm sure she'll be an excellent model when finished, but it'll be in the New Year before I have a chance. Oh, and buffle, great work on the paint, you freshened the job and brought it up as an excellent canvas for detailing and weathwering.

Mike/TB379

http://worldinminiature.blogspot.com/

  • Member since
    February 2010
  • From: New Jersey
Posted by 68GT on Tuesday, December 4, 2012 7:10 PM

That Sherman looks great!  I have a M108 that I want to try that paint techniqu on since it is all green.

Got some green on the F-4G in between the others on the bench.

On Ed's bench, ???


  • Member since
    July 2004
  • From: Sonora Desert
Posted by stikpusher on Thursday, December 6, 2012 9:00 PM

Buffle, I cant wait to see that Shermie finished! I love those! (but wont marry them) Well today I got the tracks pretty much put on my Tiran/Ti-67. I think the tracks were the major weak point of the kit. I will get some pics up tomorrow.


F is for FIRE, That burns down the whole town!

U is for URANIUM... BOMBS!

N is for NO SURVIVORS...

       - Plankton

LSM


  • Member since
    July 2004
  • From: Sonora Desert
Posted by stikpusher on Friday, December 7, 2012 10:51 PM

as stated yesterday...

track work up to last night. I still have a gap to close on each side. ESCI's engineering is not the best here. Not an easy fit. One extra link is too big, and as I did them one less is not enough (obviously)

Today I added most of the remaining fiddly bits to the upper hull

and on to the turret... it's a 1973 era Tiran, so the bins commonly seen on Tirans were not yet fitted...

and a photo of how it all looks placed together

more to follow soon...


F is for FIRE, That burns down the whole town!

U is for URANIUM... BOMBS!

N is for NO SURVIVORS...

       - Plankton

LSM


  • Member since
    April 2006
  • From: Denver, Colorado
Posted by waynec on Friday, December 7, 2012 11:02 PM

the TI designation was from a reporter and not used by the idf. why not put the gap on the bottom. when finished mount it on a small base and hide the gap with the ground cover. i did that with a MK-II before i learned the trick to rubber band tracks, which i like.

PS may have another 1 or 2 shelf queens done before the end of the month.

Никто не Забыт    (No one is Forgotten)
Ничто не Забыто  (Nothing is Forgotten)


  • Member since
    July 2004
  • From: Sonora Desert
Posted by stikpusher on Saturday, December 8, 2012 2:12 PM

I have not done a base for model since I was in high school 30 years ago... I really do not have room for them in my display area these days. I can close the gap but I need some glue that sets super fast and holds VERY well.

Yup, I know about the bogus Ti nomenclature already. I like the name Tiran better anyways.


F is for FIRE, That burns down the whole town!

U is for URANIUM... BOMBS!

N is for NO SURVIVORS...

       - Plankton

LSM


  • Member since
    April 2006
  • From: Denver, Colorado
Posted by waynec on Saturday, December 8, 2012 4:12 PM

i understand. not talking a big base just big enough for the hull with maybe an inch more on all 4 sides. gun barrel can hang over the edge. a relatively smooth surface (i use modeling clay painted to the ground cover color) add the ground cover and put the vehicl on it. look for gaps to hide and work in some putty and touch up with white glue and ground cover.

might try cya and hit it with accelerator. just make sure it's where you want it because the accelerator works faster than it took to type this sentence. may have to get it at the LHS.

Никто не Забыт    (No one is Forgotten)
Ничто не Забыто  (Nothing is Forgotten)


  • Member since
    March 2010
  • From: Buffalo, NY
Posted by macattack80 on Sunday, December 9, 2012 12:56 PM

68GT, nice work on spraying the camo so far.  Looking good.

Stik, to bad those tracks don't quite fit.  I am sure you will be able to make it look good anyway.

Waynec, thanks for the info on the designation.  Nice to learn new things.  I look forward to seeing more of your work.  Keep em coming!

Kevin

[


  • Member since
    July 2006
  • From: San Francisco Bay Area
Posted by bufflehead on Sunday, December 9, 2012 2:35 PM

68GT - Thanks for the kind words!  Your F4 is coming along nicely....luv the camo!

stik - Glad you like how the Shermie's coming along!  Sorry to see your problems with the Ti-67's tracks. Sad  I usually have that problem with indy links after I've assembled them into two track runs and the glue has dried!  For some reason I end up a half link short....Angry!!  I've learned to add a bit of slack in the run to compensate for that.  Fortunately I stuck with the vinyl tracks for the M4A3!  Smile   Other than your track problem the Tiran is looking mighty fine! 

waynec - one of these days I'm going to put one of my tank models on a base, but like stik I just plan on displaying them on the glass shelf in the display case.

Kevin - glad that the GB is still rolling along.  I might just get one shelf queen done, but at least its better than none!

Not much of an update on the Tamiya M4A3 Sherman.  I mulled over using workable tracks for this kit, but decided that the vinyl tracks were actually pretty nice so I stuck with them.  Shot them with a base coat of MM Flat Black Enamel, then drybrushed with MM Helo Drab mixed with a bit of White.  I wanted some contrast in preparation for the weathering to come.  For the end connectors/teeth I used Lifecolour Acrylic Dark Rust, which I think looks perfect for aged steel.  I thinned the paint a bit more than normal with water so that the underlying black would show through.  I'm not sure how much weathering I'll do, so at least they'll look the part if I decide to go light with dirt/dust.

When the tracks were done I decided I didn't like the look of the tank itself.  I felt it needed more contrast so I fired up the AB and hit the upper surfaces with even more highlights!  I think it looks much better now.

I spent a couple of evenings messing around with decal vs transfers vs spray templates and in the end decided on mostly templates.  Here are the results:

The left side came out pretty good, but the right side....well I goofed pretty good!  Not only did I misalign the registration, I reversed the U.S.A marking!  Dunce  I'll let that one dry a bit and then redo tonight!!

I still need to add the unit markings on the front and rear and I'm thinking of adding a number to the sides;  I'll probably use transfers for those.  Once the markings are done I'll give it a gloss coat so that I can give it a nice dark wash and then on to final weathering!

Ernest

Last Armor Build - 1/35 Dragon M-26A1, 1/35 Emhar Mk.IV Female


Last Aircraft Builds - Hobby Boss 1/72 F4F Wildcat & FW-190A8


  • Member since
    July 2004
  • From: Sonora Desert
Posted by stikpusher on Sunday, December 9, 2012 4:35 PM

Buffle, I do like that M4 even more now! Just a thought, but sometimes the depot guys who applied the serial number stencils were in a hurry as well. There alignment was not always perfect.Hmm

Well last night was AMPS Chapter meeting and after input from a couple really good guys who have also built Tirans and T-55s, I decided to add the fuel tank plumbing- not perfect, but at least it is there now- Curse you Jim and John!Wink

so...

I closed up the gap on one side of the upper tack run

and then one more add on I had planned to do, teh spare track breackets on the turret

I was not happy witht he ammo can for the kit's .30 Cal, so I took an Academy one from my spares bin and started scratch building a cradle around to to replace the kit part.

and everything in place for a photo

tomorrow I want to prime up the metal parts, finish the ammo can cradle and get the other side upper track run fixed.


F is for FIRE, That burns down the whole town!

U is for URANIUM... BOMBS!

N is for NO SURVIVORS...

       - Plankton

LSM


  • Member since
    July 2004
  • From: Sonora Desert
Posted by stikpusher on Monday, December 10, 2012 4:04 PM

Mac, the American way... if something don't fit, make it fit Wink

Today I closed up the gap on the right side upper track run- I used the wire as track jacks to keep it in place while the glue sets and dries.

and I primed up the metal main gun barrel and copper wire fuel tank plumbing with some Tamiya White Surface Primer

then I completed the ammo can cradle for the turret roof .30 cal.

and finally a photo with everything in place as it looks now

I still need to glue the upper hull to the lower hull and add the rear most fender braces, but that will only take a few and then I can begin main painting tomorrow.


F is for FIRE, That burns down the whole town!

U is for URANIUM... BOMBS!

N is for NO SURVIVORS...

       - Plankton

LSM


JOIN OUR COMMUNITY!

Our community is FREE to join. To participate you must either login or register for an account.

SEARCH FORUMS
FREE NEWSLETTER
By signing up you may also receive reader surveys and occasional special offers. We do not sell, rent or trade our email lists. View our Privacy Policy.