SEARCH FINESCALE.COM

Enter keywords or a search phrase below:

B-36 Peacemaker Group Build

173796 views
818 replies
1 rating 2 rating 3 rating 4 rating 5 rating
  • Member since
    November 2013
Posted by Teutonic222 on Thursday, November 7, 2013 6:23 PM

Geez, more questions. The "City of Forth Worth" is a B-36J-III (Featherweight). I understand that the nose turret and internal turrets were removed, and the six blister windows were replaced with flush windows. However, looking at the photos of the plane parked at the old GD-FW site shows at least the top blisters in tact (can't say for sure about the bottom ones, although they appear to be flush). Is this a case where they couldn't find flush windows during restoration and used blisters, or something else?

  • Member since
    September 2011
  • From: North Texas
Posted by lajntx on Thursday, November 7, 2013 8:25 PM

Teutonic222

Geez, more questions. 

What a good time to come back... lots of questions I can answer or put you into the right direction. As far as the painting aspect goes.... You`ll have to get those answers from someone else as painting isn`t my thing. Now as to the City of Ft Worth......  Here`s some " News you can use."

I`ll do  a multiquote of all your posts rather than do them one by one. :

I have a few questions.

1. What is the best color to use for the cockpit? I've visited the Virtual Tour of cybermodeler online and the green almost has a blue cast. Is this real or is it just a bad white balance during the photo shoot or band rendering on my monitor (I know cameras and monitors tend to lean towards the blue). I would suspect the color should be olive drab. If so, any particular Testor color?

The walls, floor, & seat frames should be OD Green with the seat cushions either some sort of red or blue. The panels, consuls, equipment should be black. There should be plenty of pictures in the resources links.

2. Should the landing gear bays and landing gear doors (insides) be olive drab too, zinc chromate green, or something else?

The were OD Green in real life... How new or weathered & used you want them to look is up to you.

1. Did the B-36 have a white light mounted on the vertical stab? I know they had port and starboard wing lights (at least I think I knew that). 

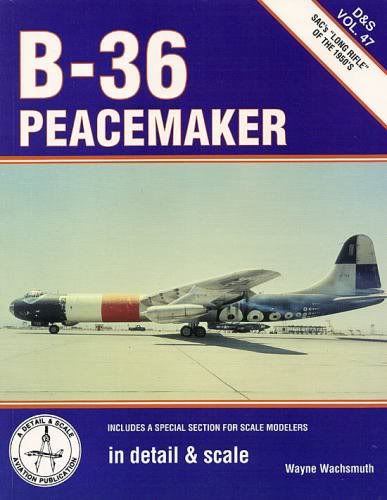
The 4 tail navigation lights had two each on both sides of the horizontal stabilizers. White inner, and Amber outer. The complete USAF technical drawing of the B-36`s exterior lighting is found on p.62 of B-36 Peacemaker in detail & scale by Wayne Wachsmuth. I cant repost the page on here due to copyright issues. You can find this book used fairly cheaply on ebay
2. I read in this post about some wing sagging in the model. Is this common and has anyone come up with a good solution? I was thinking of epoxying some brass U-channels in the wing and trying to figure out how to meld those up to the wing spars during assembly of the wings. I'm open to any suggestions.

Some have said it is a problem, and others have said they didnt have a problem. I think it comes down to certain kits and production runs. Considering this is a plastic model, any kind of support is going to give it help. On mine I simply found some # 2 pencils and used epoxy to attach them. A bonus is the lead stick is going to help as well. The biggest issue with this kit however is the center of gravity issue which needs to be fixed by putting some sort of ballast behind the cockpit to keep it from tilting back when sitting it on the table.


4. Has anyone super detailed the landing gear bays? I'm going bomb bays closed, but most gear bays look really devoid of detail, even though in real life they have a fair amount going on. The only shots I've seen are two photos on the cybermodeler site of the B-36J walk around (my plane). At a minimum I thought I could fake in some picture frame-type wire to duplicate hydraulic lines inside the bay.

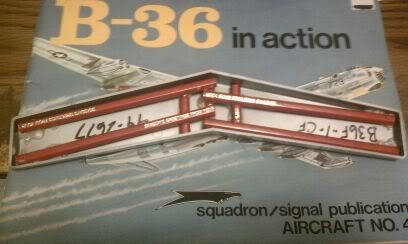
The Wachsmuth book has the pictures you need in it.

Four more things.

1. My kit had only one broken propeller blade. The plastic gods must have been on my side.

You havent tried to build it yet, and you have insulted the plastic gods whom will teach you a lesson when it comes time to do the delicate work. Devil

2. On the www.planesofthepast.com/b36-pima-air-museum.htm site there is a photo of the port side of the plane near the pitot tube. There is some stenciling that says:

B-36-J-111-10-CF-52-2027

SERVICE THIS AIRCRAFT WITH GRADE

I 15/145 FUEL. IF NOT AVAILABLE T.O

NO. 06-41-1 WILL BE CONSULTED FOR

EMERGENCY ACTION.

SQ1

AUG-0

Unfortunately, some of the words are clipped off in the photo and I can't guess what is missing. I wanted to print out some of these types of decals, but needed the rest of the words.

Scratch what I posted earlier, there`s more too it and it`s going to take alot more squinting than I can do. You might want to send an email to PIMA and ask them to send you a copy of the text.

Here is another site that might help you

http://www.angelfire.com/dc/jinxx1/B36/B-36.html

3. Are there any other notices on the aircraft in addition to the ones included in Warbird decal sheet no. 72 003? The Warbird sheet has the "no step," "do not walk between lines," "fuel tank" and "oil tank" notices.

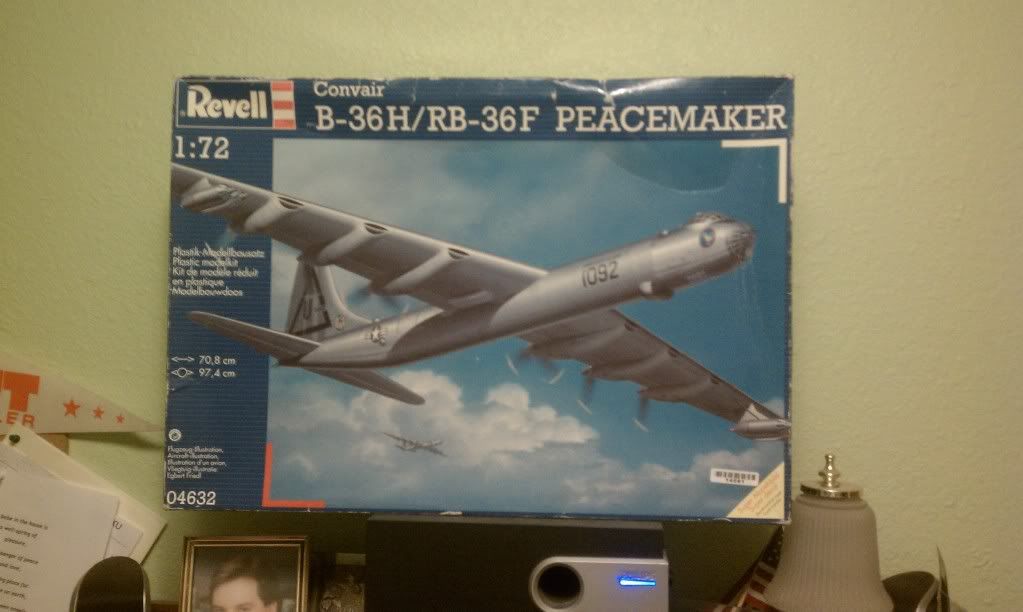
There are more such as plug indiacators, emergency exits, cut here in case of emergency, etc. There is no way to get these other than getting ahold of a 2002 Revell-Mongram Germany Kit with the decal sheet intact and in good useable condition. Expect to pay $75-$150 for this kit in that condition when it comes up on ebay. Also included will be the servicing & seriel stencils for the two craft the kit will produce. You can modify them or use them as templates to make your own

4. Where can one find some additional seated figures to augment the four that come with the model? It would be nice to fill out a few more of the seats.

Simple... They dont exhist unless you make them. If you will notice the seats in the lower bay are much smaller than the cockpit and the figures included. Thus, that is why I dont use the figures due to the scale issues with the lower nagation/radio deck. Ive got about 10 kits worth of figures if you want any of them.

Geez, more questions. The "City of Forth Worth" is a B-36J-III (Featherweight). I understand that the nose turret and internal turrets were removed, and the six blister windows were replaced with flush windows. However, looking at the photos of the plane parked at the old GD-FW site shows at least the top blisters in tact (can't say for sure about the bottom ones, although they appear to be flush). Is this a case where they couldn't find flush windows during restoration and used blisters, or something else?

Keen the eyes are with this one! All of your questions there are correct. You have also probably noticed that the craft as it currently sits at PIMA has even more blisters on it than were ever on it when it was in actual  serice. Most of the blisters were removed during the Featherweight program, and the J`s came out of the factory built on the Featherweight III standard with only the lower rear blisters so the engines could be monitored from the aft compartment. What happened happend was over the years as the plane  was moved from Amon Carter, to outside the gates of Carswell, and later into a storage hangar to undergo restoration was that the blisters were added to replace the flush ones until the flush ones could be restored/repaired/replaced. As you know, the museum in Ft Worth never happened, and it was carted up to PIMA where it was reassembled with the blisters on it. I`m told the actual flush pannels were sent with it, and PIMA never bothered to correct the issue when they put it back together.

B-36 Peacemaker Builds 

On the Bench: B-36 paint test  fusealge & RB-36E assembly test build

In Que: YB-36 Conversion Build & B-36 carries B-58 Airframe to Wright Patterson

Conceptual Planning: RB-36 X-15 Mothership

  • Member since
    September 2011
  • From: North Texas
Posted by lajntx on Thursday, November 7, 2013 8:28 PM

Another thing to get if you are going to build the City of Ft Worth is this new sheet from warbirds which will give you all the insignias & numbers needed to build it as it was during it`s 1959 retirement

www.ebay.com/.../131032537646

B-36 Peacemaker Builds 

On the Bench: B-36 paint test  fusealge & RB-36E assembly test build

In Que: YB-36 Conversion Build & B-36 carries B-58 Airframe to Wright Patterson

Conceptual Planning: RB-36 X-15 Mothership

  • Member since
    February 2011
  • From: Bent River, IA
Posted by Reasoned on Thursday, November 7, 2013 8:50 PM

Hey lajntx, it's great to see a post from you!  I've been checking in now and then on FSM and saw this "new" entry in the B-36 GB, tried to answer best I could, glad you stopped by to clear things up since you're the resident B-36 expertWink.  After reading this, I'm getting motivated to complete the paint removal and finish the beast up.

Science is the pursiut of knowledge, faith is the pursuit of wisdom.  Peace be with you.

On the Tarmac: 1/48 Revell P-38

In the Hanger: A bunch of kits

  • Member since
    September 2011
  • From: North Texas
Posted by lajntx on Thursday, November 7, 2013 8:57 PM

I`m coming back as well. I finally replaced my computer ( lost everything - files, pictures, etc).

Oh BTW... The OSHA man was here today making sure my build area was up to spec to work on this kit. He said he was coming by your place in the next week or two to clear you as well. He did say that this kit does come with new safety posters which much be displayed prior to building it. Here is one of them:

B-36 Peacemaker Builds 

On the Bench: B-36 paint test  fusealge & RB-36E assembly test build

In Que: YB-36 Conversion Build & B-36 carries B-58 Airframe to Wright Patterson

Conceptual Planning: RB-36 X-15 Mothership

  • Member since
    February 2011
  • From: Bent River, IA
Posted by Reasoned on Friday, November 8, 2013 6:52 AM

LOL

Science is the pursiut of knowledge, faith is the pursuit of wisdom.  Peace be with you.

On the Tarmac: 1/48 Revell P-38

In the Hanger: A bunch of kits

  • Member since
    November 2013
Posted by Teutonic222 on Saturday, November 9, 2013 9:15 PM

Hello lajntx! Thanks for all of the helpful info.

If your offer still stands, I would be happy to take six crew members off of your hands. I'll be turning some into amputees and major rework, but I want to ensure that the aircraft coming in for a landing (which will be cruising at about 7-1/2') is not without a full crew (at least in the front pressurized cockpit. Can't make any promises for the a** end of the plane. Let me know how you would like to handle it.

I found a copy of Wachsmuth's book on eBay and it's on it way to me. I only saw three used and the best price was $29. There was, of course, a new one out there for about $200 in case anyone feels compelled to get a fresh copy.

I have both Warbirds decal sheets (City of Fort Worth and the walkway detail). I was not looking forward to masking black lines all over the place.

Once I determine more of the little notices, I'll trying printing them on inkjet decal sheet. If I recall from some photos, they would put the names of the crew on the side of the aircraft. If that's accurate I think I'll use my dad's name and his best friend as the lead pilots in honor of their contribution to the B-36.

I'm not yet sure how I'll handle the blisters. Out of the factory: 0 up; 2 below. At GD/FW: 4 up, none below. At Pima: 4 up, none below. I guess this is where I take artistic license.

Thanks for the wing "tip." I was thinking of adding brass U-channel for strengtheners. Sounds like it's not a bad idea. I have lead for the nose weight, so I'm ready for it. Just gotta figure out how many pounds to through in there. :)

I think my wife and I may take a drive to Wright-Pat to check out their B-36 live. Should be able to get a lot more pictures of notices and landing gear bays if they let me get that close. We used to live in Columbus (I worked for an aerospace and defense contractor there), but never got to the Dayton museum. It's about 3-1/2 hours from home now, but that's not too bad.

  • Member since
    November 2013
Posted by Teutonic222 on Saturday, November 9, 2013 9:20 PM

Hey Reasoned. I'm glad I offered some inspiration to get back working on the paint removal. Have you tried Earl Scheib?

I also plan to conduct some test sprays using the Dura-color paints and see how they turn out. I'll post photos. It might be a couple of weeks.

Unrelated to the B-36, but I just docked my Space Shuttle to the Intermountain ISS kit yesterday. I'll post some shots to prove I have at least built two models before the B-36.

I appreciate everyone's interest in this spectacular aircraft, model and my personal efforts on bringing one of these models to life. My wife thinks I'm a goof, but it keeps me from carousing around.

BTW lajntx, I like the OSHA warning sign. I live in metro Detroit. We invented stupid.

  • Member since
    September 2011
  • From: North Texas
Posted by lajntx on Saturday, November 9, 2013 9:49 PM

NP.

For the figures, just send me a message with your address and I`ll drop them in the mail in the next week or two when I get home.

The Wachsmuth book is a bit pricy but generally can be found on ebay in the $15-$30 range used -- pending of course how many listings there are at the time.

Go to b-36.net and join the discussion board. You`ll find B-36 veterans there than can answer most of your questions on the stenciling

Here`s some interesting things for you:

http://www.youtube.com/watch?v=VmG5uTVvS2c

Scroll to the 46:13 mark and you will see the actual delivery ceremony and take off of The City of Ft Worth when delivered to the AF and assigned to the  92nd BW

You will notice that the aft fuselage isignias have not yet been painted on.

Here is a photo of it ( on the right ) early in service and painted in 92nd BW colors flying over the Pacific to Guam

You will notice that the FWD upper flat doors have boxes on them. Those were used to collect upper atmosphere samples of residual radiation fallout from all the atomic tests there were going on in the Pacific in the 1950`s

B-36 Peacemaker Builds 

On the Bench: B-36 paint test  fusealge & RB-36E assembly test build

In Que: YB-36 Conversion Build & B-36 carries B-58 Airframe to Wright Patterson

Conceptual Planning: RB-36 X-15 Mothership

  • Member since
    September 2011
  • From: North Texas
Posted by lajntx on Saturday, November 9, 2013 9:56 PM

Teutonic222

Hello lajntx! Thanks for all of the helpful info.

 I want to ensure that the aircraft coming in for a landing (which will be cruising at about 7-1/2') is not without a full crew (at least in the front pressurized cockpit. Can't make any promises for the a** end of the plane. Let me know how you would like to handle it.

Are you going to add in the exhaust smudge on the engine pods and fuel leak stains to the white anti-flash underbelly for a real-life experience? Stick out tongue

B-36 Peacemaker Builds 

On the Bench: B-36 paint test  fusealge & RB-36E assembly test build

In Que: YB-36 Conversion Build & B-36 carries B-58 Airframe to Wright Patterson

Conceptual Planning: RB-36 X-15 Mothership

  • Member since
    November 2013
Posted by Teutonic222 on Saturday, November 9, 2013 11:23 PM

lajntx. I think I sent you a message (or started a conversation) with my address. Let me know if you don't get it and I'll go back to the drawing board on how to send a message in this forum.

Regarding realism, I thought I might add some lighter fluid to an engine nacelle and periodically set it on fire to get that realistic B-36 look.

  • Member since
    February 2011
  • From: Bent River, IA
Posted by Reasoned on Sunday, November 10, 2013 8:26 AM

Teutonic222

Hey Reasoned. I'm glad I offered some inspiration to get back working on the paint removal. Have you tried Earl Scheib?

Ha!  Not yet but I've thought of (or tried) just about everything else.  My advice after going through this is……Don't!  Big Smile

Looking forward to seeing some action in here to inspire me to push this across the goal line.

Science is the pursiut of knowledge, faith is the pursuit of wisdom.  Peace be with you.

On the Tarmac: 1/48 Revell P-38

In the Hanger: A bunch of kits

  • Member since
    September 2011
  • From: North Texas
Posted by lajntx on Sunday, November 10, 2013 5:37 PM

Reasoned

Teutonic222

Hey Reasoned. I'm glad I offered some inspiration to get back working on the paint removal. Have you tried Earl Scheib?

Ha!  Not yet but I've thought of (or tried) just about everything else.  My advice after going through this is……Don't!  Big Smile

Looking forward to seeing some action in here to inspire me to push this across the goal line.

Now, Now, This kit isnt THAT bad....Not easy, and definately not for the casual builder. But like I said in an earlier post..... If you have a saddistic side an really want to torture yourself with a kit that mocks you with insults every step of the way, then this is the one.....

The first Mocking you will get is under the US Air Force Jet Bomber it claims to be " Easy to assemble" 

Ive thought about at some point doing a GB of that and calling it: " Inside the Belly of the Beast Build " Big Smile

B-36 Peacemaker Builds 

On the Bench: B-36 paint test  fusealge & RB-36E assembly test build

In Que: YB-36 Conversion Build & B-36 carries B-58 Airframe to Wright Patterson

Conceptual Planning: RB-36 X-15 Mothership

  • Member since
    September 2011
  • From: North Texas
Posted by lajntx on Sunday, November 10, 2013 5:42 PM

Teutonic222

lajntx. I think I sent you a message (or started a conversation) with my address. Let me know if you don't get it and I'll go back to the drawing board on how to send a message in this forum.

Regarding realism, I thought I might add some lighter fluid to an engine nacelle and periodically set it on fire to get that realistic B-36 look.

I got it, and will get those out via USPS as soon as I can in the next couple of weeks. I dont think that will be enough realism though. Though the B-36 was often referred to as : "Six turnin` & 4 burnin`" the inside joke with many that were around them was it was really: " 2 turning, 2 burnin`, 2 chokin`, 2 jokin`,  & 2 smokin` "

B-36 Peacemaker Builds 

On the Bench: B-36 paint test  fusealge & RB-36E assembly test build

In Que: YB-36 Conversion Build & B-36 carries B-58 Airframe to Wright Patterson

Conceptual Planning: RB-36 X-15 Mothership

  • Member since
    November 2013
Posted by Teutonic222 on Sunday, November 10, 2013 9:37 PM

I remember building a B-47 model when I was a kid, but don't think it was a Hasegawa. It seemed to go together rather easily. I actually saw one fly at Roosevelt Roads in Puerto Rico in 1972. In 15 minutes, 7 different aircraft took off including a B-47. Didn't even know they were still flying them then, but found out recently that was either the last year or just about so. Didn't think the thing would clear the trees at the end of the runway. The best part was that I was standing just outside the taxi way watching it all. The benefits of having a brother in the Navy Air Corps.

  • Member since
    November 2013
Posted by Teutonic222 on Sunday, November 10, 2013 9:37 PM

Thanks lajntx. For added realism I thought about sticking one crew member in the wing looking for blown fuses or kicking down the landing gear. Now that I typed that last line, the concept of peering up into the main gear bay and seeing a guy in there isn't a half bad idea. Bet there isn't anyone else who's modeled that concept.

  • Member since
    September 2011
  • From: North Texas
Posted by lajntx on Monday, November 11, 2013 12:20 PM

Teutonic222

I remember building a B-47 model when I was a kid, but don't think it was a Hasegawa. It seemed to go together rather easily. I actually saw one fly at Roosevelt Roads in Puerto Rico in 1972. In 15 minutes, 7 different aircraft took off including a B-47. Didn't even know they were still flying them then, but found out recently that was either the last year or just about so. Didn't think the thing would clear the trees at the end of the runway. The best part was that I was standing just outside the taxi way watching it all. The benefits of having a brother in the Navy Air Corps.

What makes that kit hard is you have to get the wings attached perfectly otherise you`ll have one wing higher/lower than the other, and since the model rests on the outrigger wheels on the wings... If that balance isnt right, you`ll have a model that leans to one side and doesnt look good. Also, if you dont put the fuselage together perfectly.... Forget about getting the wings right. Pretty much it`s once you mess something up ( like putting the wing spar in upside down LOL!  Stick out tongue  )..... The rest of the build from then on will be off and the final product will sit lopsided.

The B-47 was used by the Navy as a test bed craft until 1976, with the Air Force phasing them out  starting in 1963 with most operational aircraft out of service by 1965. The last USAF B-47 was grounded in 1969. The final flight was in 1986 with one of the Navy`s retired ones when it was decided it was easier to simply make the craft flyable and fly it to the museum rather than disassemble it  to move and reassemble it at the museum.

I picked up 3 of those kits for a song and a dance a few years ago at an overstock place for a song and a dance. I looked at one, dry fitted it together...and havent touched it since. I gave the other two to Chris at Click2detail so he could use them to make parts for some aftermarket kits he`s going to put out.

B-36 Peacemaker Builds 

On the Bench: B-36 paint test  fusealge & RB-36E assembly test build

In Que: YB-36 Conversion Build & B-36 carries B-58 Airframe to Wright Patterson

Conceptual Planning: RB-36 X-15 Mothership

  • Member since
    September 2011
  • From: North Texas
Posted by lajntx on Monday, November 11, 2013 12:24 PM

Teutonic222

Thanks lajntx. For added realism I thought about sticking one crew member in the wing looking for blown fuses or kicking down the landing gear. Now that I typed that last line, the concept of peering up into the main gear bay and seeing a guy in there isn't a half bad idea. Bet there isn't anyone else who's modeled that concept.

What you might do is send an email to Chris at click2detail. He makes a piece you add to the upper wings for the 110"  wheels that has the wheel well details and the port hole which crewmen would crawl out of to inspect the landing gear. It would require MAJOR amputation surgery on the top part of the wing to install it. You wouldnt need the lower wing part because you are keeping the roller skate wheels and not doing a big wheel build.  Not sure what he would charge for that though.... Doesnt hurt to ask if it interests you.

B-36 Peacemaker Builds 

On the Bench: B-36 paint test  fusealge & RB-36E assembly test build

In Que: YB-36 Conversion Build & B-36 carries B-58 Airframe to Wright Patterson

Conceptual Planning: RB-36 X-15 Mothership

  • Member since
    November 2013
Posted by Teutonic222 on Monday, November 11, 2013 1:47 PM

Sounds like you ought to ask Chris at Click2detail to redraw the whole model on AutoCad and 3D print the kit. It is a beautiful airplane, even though its take off run was on par with a Canada Goose. I think new aircraft are a lot like new autos, they all look the same nowadays (I'm sounding like an old guy and I'm not that old). The Cold War era and earlier seemed to have more style. Unfortunately, design optimization for aerodynamics and performance will tend to make everything look similar after a while.

I've been lucky to have worked on a lot of military aircraft and spacecraft in my time; more than most  (F-15, F-16, F/A-18C/D, F/A-18E/F, F-22, F117, F35, B2, C130, C5, A-12, A-29, E-8, X-29, AH-1S, CH-47, UH-60, AH-64D, AW109, Lynx, International Space Station, Space Shuttle, and lot of satellites, to name a few). Starting with the JSF they started to look alike. I was even involved with a concept to begin producing an up-engined version of the P-51 as a fighter aircraft for developing nations. I suspect the biggest problem was that when they started the new more powerful engine the plane almost wanted to flip over due to torque.

  • Member since
    November 2013
Posted by Teutonic222 on Monday, November 11, 2013 1:53 PM

Thanks. I'll reach out to Chris and see what he says.

  • Member since
    September 2011
  • From: North Texas
Posted by lajntx on Monday, November 11, 2013 11:09 PM

lajntx

Teutonic222

Thanks lajntx. For added realism I thought about sticking one crew member in the wing looking for blown fuses or kicking down the landing gear. Now that I typed that last line, the concept of peering up into the main gear bay and seeing a guy in there isn't a half bad idea. Bet there isn't anyone else who's modeled that concept.

What you might do is send an email to Chris at click2detail. He makes a piece you add to the upper wings for the 110"  wheels that has the wheel well details and the port hole which crewmen would crawl out of to inspect the landing gear. It would require MAJOR amputation surgery on the top part of the wing to install it. You wouldnt need the lower wing part because you are keeping the roller skate wheels and not doing a big wheel build.  Not sure what he would charge for that though.... Doesnt hurt to ask if it interests you.

I made it home tonight, and it looks like that idea isnt a really good one because those XB/YB conversion pieces are for a conversion of the kit to the 110" main landing gear. The piece ( with major surgery & grafting  will fit and give you that inner detail you are looking for

BUT.........

You lose the big dimple on the topside of the wing, that had to be added when the roller skate landing gear was adopted

Here is the stock wing showing both sides ( Ignore the lower larger wheel well part that is being shown ) :


Now with the part sitting on top of the wing in the approximate position that will have to be removed to install:

B-36 Peacemaker Builds 

On the Bench: B-36 paint test  fusealge & RB-36E assembly test build

In Que: YB-36 Conversion Build & B-36 carries B-58 Airframe to Wright Patterson

Conceptual Planning: RB-36 X-15 Mothership

  • Member since
    November 2013
Posted by Teutonic222 on Tuesday, November 12, 2013 8:08 AM

Thanks for the background on the mod. Is it possible to thin down the Click2detail bay before installing it into the wing? I guess unless the Click2detail bay has a lot more detail beyond just the port, it might not be worth it.

  • Member since
    November 2013
Posted by Teutonic222 on Tuesday, November 12, 2013 10:27 AM

How do you post photos on in this forum? I intended to write a New Post for this Group Build and include some photos of my ISS & Space Shuttle model. However, I found out New Post does not create a new post within the Group Build forum. Secondly, I followed their instructions and linked to my Flickr page with the appropriate URLs to get the photos, but they don't show up. This seems to be a very technically awkward forum from my experience.

  • Member since
    February 2011
  • From: Bent River, IA
Posted by Reasoned on Tuesday, November 12, 2013 3:59 PM

Yeah, trying to post pics here can be a challenge, you have to post link after clicking the "insert image" icon in the "Use rich formatting" section.

Science is the pursiut of knowledge, faith is the pursuit of wisdom.  Peace be with you.

On the Tarmac: 1/48 Revell P-38

In the Hanger: A bunch of kits

  • Member since
    November 2013
Posted by Teutonic222 on Tuesday, November 12, 2013 4:39 PM

That's what I thought I did the last time. I'll try it again.

  • Member since
    November 2013
Posted by Teutonic222 on Tuesday, November 12, 2013 4:44 PM

Here goes my second attempt at posting pics. I'm using Flickr, so I hope that works.

Thought I would share some photos of my completed International Space Station and docked Space Shuttle Endeavor. The Shuttle orbiter at least had five motors; a lot more than the B-36 if you count the control thrusters too. (Forgive the broken office window -- the mower nailed the outer glass with a really big rock - or - it could have been a meteorite). I hope my photo posts below work.

  • Member since
    November 2013
Posted by Teutonic222 on Tuesday, November 12, 2013 4:46 PM

Okay. What am I doing wrong. I go into "Use rich formatting." I click on the "Insert Pic" icon. I get the pop up window to paste in the URL link to my photos (3 total). The links show up in the box. I click on "Post" and I get nothing but the text above.

  • Member since
    February 2011
  • From: Bent River, IA
Posted by Reasoned on Tuesday, November 12, 2013 9:17 PM

Not sure how to explain (because I'm a tech noob) but when I use Flickr, I have to make sure I click on the photo, then in the far lower right of the photo screen, there are icons and one that looks like 3 dots (furthest to right)- if you click on it it has multiple choices, choose "view all sizes".  Once the photo is in the "large 1024" format, copy that URL link (which is a heck of a lot easier for us Mac users).  Hope that helps. Geeked

Science is the pursiut of knowledge, faith is the pursuit of wisdom.  Peace be with you.

On the Tarmac: 1/48 Revell P-38

In the Hanger: A bunch of kits

  • Member since
    September 2011
  • From: North Texas
Posted by lajntx on Tuesday, November 12, 2013 10:14 PM

The simplest way is to open a photobucket account, upload the pic on there, then copy & past  the direct link URL into the insert picure box. Time consuming at first yes, but you get the hang of it quicky, and you also build a safe free way to save your pictures from loss.

B-36 Peacemaker Builds 

On the Bench: B-36 paint test  fusealge & RB-36E assembly test build

In Que: YB-36 Conversion Build & B-36 carries B-58 Airframe to Wright Patterson

Conceptual Planning: RB-36 X-15 Mothership

  • Member since
    September 2011
  • From: North Texas
Posted by lajntx on Tuesday, November 12, 2013 10:18 PM

Teutonic222

Thanks for the background on the mod. Is it possible to thin down the Click2detail bay before installing it into the wing? I guess unless the Click2detail bay has a lot more detail beyond just the port, it might not be worth it.

It has the inner wing detail, but you are probably going to better off by crafting those details with materials you can build into the wing " as is " to replicate them. It just seems very time consuming to do that major of a surgery, then only have to replace the lost details on the landing gear dimple on the wing.

B-36 Peacemaker Builds 

On the Bench: B-36 paint test  fusealge & RB-36E assembly test build

In Que: YB-36 Conversion Build & B-36 carries B-58 Airframe to Wright Patterson

Conceptual Planning: RB-36 X-15 Mothership

JOIN OUR COMMUNITY!

Our community is FREE to join. To participate you must either login or register for an account.

SEARCH FORUMS
FREE NEWSLETTER
By signing up you may also receive reader surveys and occasional special offers. We do not sell, rent or trade our email lists. View our Privacy Policy.