SEARCH FINESCALE.COM

Enter keywords or a search phrase below:

The unOFFICIAL 2011/20012 Veteran's Group Build

52130 views
309 replies
1 rating 2 rating 3 rating 4 rating 5 rating
  • Member since
    October 2005
  • From: New Port Richey
Posted by deattilio on Friday, January 13, 2012 11:48 PM

I’ve only done some light sanding on my AAV but, I have picked up both of Voyager’s AAV PE sets as well as the E.T. Models offering.  Each has something a little bit different to offer, a nice touch from E.T. is a brass Mk19 barrel.  I will make more progress next weekend when I am done with school and can go back to enjoying my weekends.


WIP:
Trying to get my hobby stuff sorted - just moved and still unpacking.


"Gator, Green Catskill....Charlie On Time"


  • Member since
    December 2006
  • From: Kennewick, WA
Posted by kbuzz01 on Friday, January 13, 2012 7:22 PM

Thanks, Jon.  I've built the Tamiya and the Revell and now working on the Hasegawa.  Wish it was a littIe warmer here so I could do some painting.  I actually think that the previous two were both better builds than the Hasegawa.  Had some fit problems here with the left wing and fuselage bottom.  I guess I like the Tamiya best, probably because of the dropped flaps.  (Too lazy to cut and drop on the others.)  Whistling  Gosh, just noticed the Tammy doesn't have wing walkways.  Indifferent  Oh, well .......

Here's the Revell

DSC00641.jpg Done4

And the Tamiya

DSC00482.jpg P-51-1.jpg

Best of luck to you with your upcoming deployment!

Ken


animation6.gif image by kbuzz_photos
  • Member since
    October 2008
  • From: New Jersey
Posted by oddmanrush on Friday, January 13, 2012 9:27 AM

Ken, nice looking Mustang so far. I've only done the Revell kit a few times, how does the Hasegawa compare?

Jon

My Blog: The Combat Workshop 

  • Member since
    December 2006
  • From: Kennewick, WA
Posted by kbuzz01 on Thursday, January 12, 2012 10:52 PM

Received my F-102 to TF-102 conversion kit from C & H Aero today.  Holy crap - what did I get myself into this time?!  Indifferent

Some progress on the Hasegawa P-51D:

DSC01734.jpg mains1

DSC01732.jpg top view1

DSC01737.jpg Bot view1

Ken


animation6.gif image by kbuzz_photos
  • Member since
    October 2008
  • From: New Jersey
Posted by oddmanrush on Monday, January 9, 2012 4:21 PM

I agree Stik, that is why I like to highlight panels and panel lines...perhaps a bit too much in some people's opinions. But I like to add depth and contrast to a model though I've never really gotten down the dot filtering or the NMF for that matter. 

Jon

My Blog: The Combat Workshop 

  • Member since
    July 2004
  • From: Sonora Desert
Posted by stikpusher on Monday, January 9, 2012 3:00 PM

It  gives more visual interest. Contrasting colors to break up what can be a monotone paint scheme. I think that is one reason that chipping and dot filters are so popular these days. Like super shiny NMF on aircraft, it is not "realistic" on operational service equipment, but it does make for an eye catching model. At least as things have been for me.


F is for FIRE, That burns down the whole town!

U is for URANIUM... BOMBS!

N is for NO SURVIVORS...

       - Plankton

LSM


  • Member since
    October 2008
  • From: New Jersey
Posted by oddmanrush on Monday, January 9, 2012 2:49 PM

Thanks Stik...I guess I'll leave them painted as they are for the time being. I guess leaving them in wood and steel color adds a bit more character, if not realism. 

Jon

My Blog: The Combat Workshop 

  • Member since
    July 2004
  • From: Sonora Desert
Posted by stikpusher on Monday, January 9, 2012 2:37 PM

Not to sound like Manny, but yes and no. Tools come new like you would pick them up from Sears or elsewhere, bare wood handles, some parts such as the tankers bar bare steel, and some parts such as the axe shovel and pick mattock heads painted- black, red, blue, etc. After each field usage the tools, and everything else, are cleaned. At that point, depending on the unit, they may be repainted. Ours were always painted. Supply provided us with cans of GI black and OD spray paint. Sometimes we painted them solid in one color, and sometimes we painted them with black wood and OD steel, or vice versa. After which we would stencil the vehicles' bumper number onto each tool. GIs are notorious for roaming the motor pool to snatch up a "replacement" item for something they have lost in the field so they will not have to go out and buy one out of their own pocket. The OD GI spray paint we were issued was not FS# 34087. Nor was it the Forest Green 34079 MERDC base color that was on all vehicles until the NATO CARC Green came along. It was darker, greener, and semi gloss compared to 34087.

I have seen photos of WWII vehicles being camouflaged at Engineer Painting points specificly for that purpose. In those cases, the camo paint was sprayed on over all items in place including tools, spare road wheels, sandbags, etc.

Now here we have a photo of a M4 straight out of a Manual opr some other sort of official publication. If you look at the stowed tools they appear to be in the same OD as the rest of the tank. So based on this photo, you could safely paint your tools in that manner
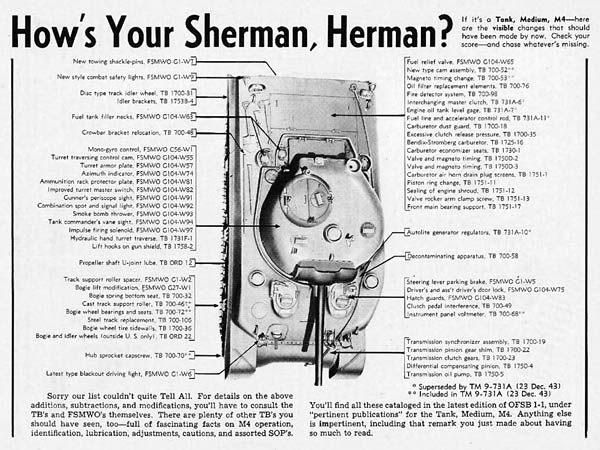
As far as our British Cousins go, I suppose you could PM Bish or Hinksy for information from them about their practices. But it would be safe to go with bare steel and wood weathered appropriately.


F is for FIRE, That burns down the whole town!

U is for URANIUM... BOMBS!

N is for NO SURVIVORS...

       - Plankton

LSM


  • Member since
    October 2008
  • From: New Jersey
Posted by oddmanrush on Monday, January 9, 2012 1:36 PM

stikpusher

I think it depends upon the tools and how they mount. In this case since I needed to create a little extra mounting channel, glue them directly to the top deck with no locater pins,  and since I will be painting the tools in OD and Black like we used to, gluing ahead of time was the only way to go.

That brings me to another question...in real life, are the tools painted the same colors as the fighting vehicle (like you say, OD and black)? I'm asking this because I am finishing up an AFV Club Centurion and I glued the tools down before painting. But I painted them with wood colored handles and steel heads....I understand the Centurion is not an American tank so maybe painting practices are different, or perhaps you'd know? Seems to me that if you could paint them the same as the base color, that takes some of the difficulty out of the process.

Jon

My Blog: The Combat Workshop 

  • Member since
    July 2004
  • From: Sonora Desert
Posted by stikpusher on Monday, January 9, 2012 1:03 PM

I think it depends upon the tools and how they mount. In this case since I needed to create a little extra mounting channel, glue them directly to the top deck with no locater pins,  and since I will be painting the tools in OD and Black like we used to, gluing ahead of time was the only way to go.


F is for FIRE, That burns down the whole town!

U is for URANIUM... BOMBS!

N is for NO SURVIVORS...

       - Plankton

LSM


  • Member since
    October 2008
  • From: New Jersey
Posted by oddmanrush on Monday, January 9, 2012 9:29 AM

Oops, didn't even see you posted pics Stik. Lookin' good! Do you prefer to glue the tools on the hull first prior to painting them? I do it that way too but wasn't sure if that's the best way to go about it. 

Jon

My Blog: The Combat Workshop 

  • Member since
    October 2008
  • From: New Jersey
Posted by oddmanrush on Monday, January 9, 2012 9:27 AM

Thanks guys, glad you like it! It was a fun build that I really can't complain much about. Thanks for the well wishes Stik, I now have 37 days left. It's creeping up on me. Any how, thanks for a good group build and I'll be popping in here to comment along the way! Who'll be next to finish? Who'll be next to start?

Jon

My Blog: The Combat Workshop 

  • Member since
    July 2004
  • From: Sonora Desert
Posted by stikpusher on Sunday, January 8, 2012 11:26 PM

Some minor progress on my M163 today. Thanks to asistance from a couple members here, I was able to properly place the pioneer tools on the top deck. Some came from my spares bins, some from an Academy Accesory set, and then I added the locator slots around the tankers bar from strip styrene.

I also scratch built the washers and bolts that secure the spare track shoes to the glacis using those little extra round plastic nubs you trim off and some hexagonal styrene rod. Both were glued in place, then once dry sanded to appropriate thickness. The bolts are a bit bigger than the 3/4" bolts would be in 1/35, but they look the part.

I also added a shelf where I can put a drivers top torso/head in the drivers hatch

I think she is ready for the base coat of Forest Green 34079 now....


F is for FIRE, That burns down the whole town!

U is for URANIUM... BOMBS!

N is for NO SURVIVORS...

       - Plankton

LSM


  • Member since
    July 2004
  • From: Sonora Desert
Posted by stikpusher on Sunday, January 8, 2012 2:05 AM

Oddman, your F-16 looks great!Yes I really like what you did with the Academy kit. Congrats on being the first completed build here. She is added to the front page. Take your GB Badge and the best of luck to you at training. I know that since the bad times of that part of my life have faded from memory I only have fond memories of the best parts of that stuff.

Dupes, looking forward to the progress shots of your 1037.

Ski, thanks for the additional photos of your work. You have been added to the front page roster and I suspect you will be the next across the finish line here.


F is for FIRE, That burns down the whole town!

U is for URANIUM... BOMBS!

N is for NO SURVIVORS...

       - Plankton

LSM


  • Member since
    November 2006
  • From: Coastal Maine
Posted by dupes on Saturday, January 7, 2012 10:41 PM

Nice looking viper to me, Jon!

Cracked into my M1037 today - with playoff football on, I hope to have it ready for the paint stage tomorrow afternoon some time! Started with Academy kit 1362 (the M998 cargo hummer) and applied the Real Model conversion from there. Pics once I've got something to show.

  • Member since
    January 2012
  • From: Camp Pendleton CA
Posted by usmcski on Thursday, January 5, 2012 10:52 PM

Yes Looks GREAT, Jon!  I'm stoked to try your technique on the Huey, thanks again for the tip!  I'm hoping to get some paint sprayed this weekend, I'll post pics when I do!

Semper,

Ski

"For the veteran, every day is Memorial Day."

  • Member since
    October 2008
  • From: New Jersey
Posted by oddmanrush on Thursday, January 5, 2012 10:21 PM

Ski, great lookin' Huey so far. I definitely recommend that post-shading technique and I'm excited to see your UH-1 once you've finished it.

Speaking of finished, the Viper is complete! I don't have a fancy photo set up but I did you a real digital camera for these so they won't be as nasty as the WIP pics. I don't have a dedicated model space like a lot of you guys do, so I do every thing from the kitchen table....

Took some with the flash on, some without. Without a photo booth, sometimes having the flash on brings out a bit more of the detail...

Those are the nice decals from Afterburner Decals...representing the 177th Fighter Wing, 119th Fighter Squadron out of Atlantic City New Jersey!

I generally do not like having to paint ordnance which is why I try to stick mainly to WWII aircraft, but I thought I did a half decent job with the AIM 9s. I used some scrap decals for the yellow and black stripes.

And that's it folks, first model for me in 2012. This will be going to my father as a bit of a late Christmas gift. Something cool for him to have while his son is in basic training I think. Let me know what you guys think of the Viper!

Thanks! Keep the models coming!

Jon

My Blog: The Combat Workshop 

  • Member since
    January 2012
  • From: Camp Pendleton CA
Posted by usmcski on Wednesday, January 4, 2012 2:00 PM

Stik,

Yep, WAY out of sequence, my apologies for screwing up the order, but it (obviously) took me a little bit to figure out the Flickr thing!  From here on, I should be able to post the correct way...

That said, I was a little hesitant to pre-shade the Huey before the base coat, so I'm thrilled that Jon posted his method of post-shading (or is it lightening?).  That's exactly what I was going to try on my UH-1N, thanks so much for posting your technique!  Now that I see how great your Viper looks, I'm excited to give it a try!Yes

Semper,

Ski

"For the veteran, every day is Memorial Day."

  • Member since
    July 2004
  • From: Sonora Desert
Posted by stikpusher on Wednesday, January 4, 2012 1:40 PM

oddmanrush

Good to see people are gettin' busy. Feeling better Stik?

Yes it's great to see activity here again. I figured with the holidays everyone would have a lot of various activities cut into their model building time. I did and knuckled down on the projects I wanted to finish by New Years. I got one done... LOL! And yes I am feeling better Oddman. Thanks for asking. I was back in the groove within 4-5 days after the bug hit. I'm very happy to hear that Afterburner took care of you and that your decals arrived. I know the personal connection will be much better there now. Its one thing to make a model of a military subject. Its another to make one of a military subject you have personal knowledge of.... I have a couple Air Guard F-16s in my stash, but no connection.... I am gonna do a 1st Gulf War ODS NY ANG F-16A, ( Boys from Syracuse) and a ADF F-16A that I will be doing in ND ANG markings (The Happy Hooligans with Teddy Roosevelt tail artwork). One day...Whistling

Ski, I know it's all out of sequence, but its great to see your Work In Progress shots and the effort you have put in to your helo. Great stuff!Yes

I will be resuming work on my Vulcan track on my days off this weekend. I think I have gathered enough photos now where I can fake the camo I am wanting to paint mine. One thing I have noticed is that at first it seems there was not pattern to the scheme I will be doing and that the tracks had variations of it applied in the same colors in a similar style, but varying manner.


F is for FIRE, That burns down the whole town!

U is for URANIUM... BOMBS!

N is for NO SURVIVORS...

       - Plankton

LSM


  • Member since
    January 2012
  • From: Camp Pendleton CA
Posted by usmcski on Wednesday, January 4, 2012 11:48 AM

[View:/themes/fsm/utility/Right Front:550:0]


Here's an "in progress" shot before the base coat was sprayed.  After I sanded off all the HUGE rivets and replaced them with Archer Transfer rivets, I sprayed the whole model with Mr. Surfacer to highlight any blemishes and smooth out the surface.  Hoping to get some serious work done this weekend, if my new compressor regulator/water trap shows up by then!

Semper,

Ski

"For the veteran, every day is Memorial Day."

  • Member since
    March 2003
  • From: Fort Worth, TX
Posted by RESlusher on Wednesday, January 4, 2012 11:42 AM

Paydirt!  Ya got it!  Toast

Richard S.

On the bench:  AFV Club M730A1 Chaparral

On deck:  Tamiya Marder 1A2

In the hole:  Who knows what's next!


  • Member since
    January 2012
  • From: Camp Pendleton CA
Posted by usmcski on Wednesday, January 4, 2012 11:42 AM

Success!  Thanks a million, Richard!

Ski

"For the veteran, every day is Memorial Day."

  • Member since
    January 2012
  • From: Camp Pendleton CA
Posted by usmcski on Wednesday, January 4, 2012 11:41 AM

[View:/themes/fsm/utility/Full View:550:0]

"For the veteran, every day is Memorial Day."

  • Member since
    March 2003
  • From: Fort Worth, TX
Posted by RESlusher on Wednesday, January 4, 2012 11:38 AM

usmcski

http://www.flickr.com/photos/73595836@N08/6635726113/in/photostream

The main rotor system installed.  You can see where I built up inside the area where the main rotor drive shaft enters the transmission area.  This is just a gaping hole in the original Panda molds...

Ski

Close!  When you move your mouse over the "film strip" icon it will say, "insert Media".

Richard S.

On the bench:  AFV Club M730A1 Chaparral

On deck:  Tamiya Marder 1A2

In the hole:  Who knows what's next!


  • Member since
    January 2012
  • From: Camp Pendleton CA
Posted by usmcski on Wednesday, January 4, 2012 11:30 AM

http://www.flickr.com/photos/73595836@N08/6635726113/in/photostream

The main rotor system installed.  You can see where I built up inside the area where the main rotor drive shaft enters the transmission area.  This is just a gaping hole in the original Panda molds...

Ski

"For the veteran, every day is Memorial Day."

  • Member since
    January 2012
  • From: Camp Pendleton CA
Posted by usmcski on Wednesday, January 4, 2012 11:26 AM

photostream


Okay, last attempt before I start over!  Flickr is not being nice to me right now, my apologies for the multiple posts....

Ski

"For the veteran, every day is Memorial Day."

  • Member since
    March 2003
  • From: Fort Worth, TX
Posted by RESlusher on Wednesday, January 4, 2012 11:22 AM

Click on the little film strip icon then cut and paste the URL to the location where your picture is

For example:

This pic is located at:  http://i640.photobucket.com/albums/uu126/RESlusher/Models/In%20Progress/Trumpeter%20Up-Armored%20BMP-3/BMP-3-12.jpg 


Richard S.

On the bench:  AFV Club M730A1 Chaparral

On deck:  Tamiya Marder 1A2

In the hole:  Who knows what's next!


  • Member since
    January 2012
  • From: Camp Pendleton CA
Posted by usmcski on Wednesday, January 4, 2012 11:21 AM

"For the veteran, every day is Memorial Day."

  • Member since
    January 2012
  • From: Camp Pendleton CA
Posted by usmcski on Wednesday, January 4, 2012 11:16 AM


second attempt!

"For the veteran, every day is Memorial Day."

  • Member since
    January 2012
  • From: Camp Pendleton CA
Posted by usmcski on Wednesday, January 4, 2012 11:14 AM

Okay, got my Flickr account established, here goes nothing:

This is the reworked main rotor gearbox/drive shaft, mast, hub and blades from my UH-1N.  Most parts were donated from an old UH-1C I had in the stash.  I removed the stab bar from the head in order to make a SCAS Huey.  The mast is aluminum tubing, as the stab bar Hueys have additional hardware that is not present on the mast of the SCAS birds. 

Ski

"For the veteran, every day is Memorial Day."

JOIN OUR COMMUNITY!

Our community is FREE to join. To participate you must either login or register for an account.

SEARCH FORUMS
FREE NEWSLETTER
By signing up you may also receive reader surveys and occasional special offers. We do not sell, rent or trade our email lists. View our Privacy Policy.