SEARCH FINESCALE.COM

Enter keywords or a search phrase below:

The Official F-4 Phantom II Group Build 2012: Rhinomania III

81250 views
290 replies
1 rating 2 rating 3 rating 4 rating 5 rating
  • Member since
    January 2009
  • From: San Antonio
Posted by paintsniffer on Thursday, May 31, 2012 8:38 PM

Time to get us back on the front page.


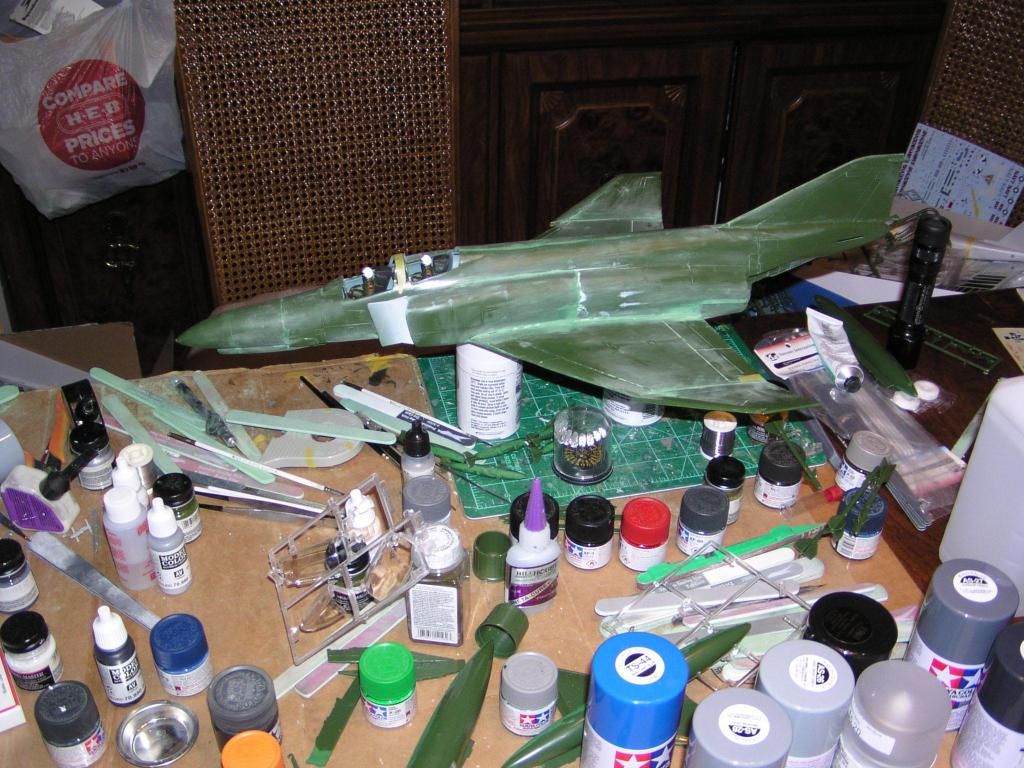
I messed with the Rhino from hell tonight and got a lot done. As with everything on this build, every step forward uncovers a few new problems. Tonight, I did the metal on the back end.

I shot my basecoat of Tamiya Gloss black, Tamiya clear gloss, and Mr. Color leveling thinner. I let that sit 5 days. Then I sprayed Alclad semi-matte aluminum. The cans and scorched metal is Alclad burnt iron. The darker metal on the stabilators is Alclad airframe aluminum. Then I misted the whole mess with Tamiya smoke mixed with a little alcohol. I needed to dirty the gray, but I am not sure I like how it came out. I will buff the gray with a very fine polishing stick and that should help blend things a bit.


So now she is pretty much assembled and looks great from the side.


However, on closer review, while fitting the tailpipes.. I found this gem. Yes, that is light you can see through where there should be a smooth transition from airplane to exhaust. I REALLY don't feel like getting out the putty and taking that many steps backwards. I am going to do some thinking about what to do here.


Next up will be clear gloss and decals.. Unless I decide to undertake major surgery on that gap.

Excuse me.. Is that an Uzi?

  • Member since
    April 2005
Posted by Thunderbolt379 on Saturday, May 26, 2012 10:12 PM

Jeez, you'd be forgiven for thinking they weren't even depicting the same thing...! And that's Tamiya at 1:32? Hmmm, corners cut...

Mike/TB379

http://worldinminiature.blogspot.com/

  • Member since
    October 2010
  • From: Hobart, Australia
Posted by Casper the Chihuahua on Saturday, May 26, 2012 10:00 PM

Time to look at the seats. The Tamiya seats on the left really don't cut it compared to the Eduard resin.

Once the PE is on and painted they should look amazing.

Cheers

On the bench: A-4F 1/32 Hasegawa

Just deployed: F6F-5N Hellcat Nightfighter 1/48 Eduard

Up next: A6-E Intruder 1/48 Revell

  • Member since
    February 2010
  • From: New Jersey
Posted by 68GT on Saturday, May 26, 2012 9:14 PM

Paintsniffer,


I remember building that kit back in the 70s and that think is a beast in more ways than one.

On Ed's bench, ???


  • Member since
    April 2005
Posted by Thunderbolt379 on Saturday, May 26, 2012 8:14 PM

Paintsniffer -- I think this build qualifies for what we've come to call Rhinoplasty -- radical cosmetic surgery! Well done, there should be awards for this kind of fight! I find myself more amazed than ever that the factory craftsmen managed to make these old kits look so good in the catalog photos.

Casper -- You're working at the opposite end of the spectrum, and twenty years of advancement in kit engineering certainly tells. Tamiya won the Phantom game hands down -- if you can go the big bucks.

Cheers, Mike/TB379

http://worldinminiature.blogspot.com/

  • Member since
    October 2010
  • From: Hobart, Australia
Posted by Casper the Chihuahua on Saturday, May 26, 2012 7:53 PM

Canopies painted inside and fitted, areas masked off and wheelbays filled. Almost time to prime this beast!

Cheers

On the bench: A-4F 1/32 Hasegawa

Just deployed: F6F-5N Hellcat Nightfighter 1/48 Eduard

Up next: A6-E Intruder 1/48 Revell

  • Member since
    January 2009
  • From: San Antonio
Posted by paintsniffer on Saturday, May 26, 2012 7:48 PM

I did rub down almost the entire hull. The raised detail remains on the tail.. and well, the tail. There may be 1 or 2 surviving lines elsewhere. The side was sanded over a wide area in an attempt to blend the intakes. It still isn't perfect. There was also a lot of sanding on the wings to make the fuselage, wings, and wingtips all blend. It didn't work so well.. But the raised detail was massive and won't be missed. The nose also gets honorable mention for not fitting really at all.

This thing will be displayed in flight so the landing gear doors are closed. making those look decent also took a lot of putty, and the massive seam running down the center of the bottom took a lot of sanding to get right, further obliterating any underside detail. 

The tail was warped. I got it pretty much straight. There was a large gap on the leading edge of the tail even after straightening. Repairing that killed the two pitots on the leading edge. I will add those in with wire at the end.

Excuse me.. Is that an Uzi?

  • Member since
    April 2005
Posted by Thunderbolt379 on Saturday, May 26, 2012 6:33 PM

68GT -- don't ya love that Hasegawa engineering? The decals don't exactly fit the panels, but when trimmed up with a razor blade the cockpit seems to spring to life at that stage. She'll be a beauty!

Paintsniffer -- I can see why you'd consider knitting in future, but seriously you're doing manly battle with this monster and winning! I remember that kit on the shelf thirty years ago and being sorely tempted -- now I'm glad I never tried coming up with the $$. She's going to loook the business, that's for sure, and your friend should be very happy with the result. The filling operation alone was terrifying. It looks like you rubbed down the entire hull, was that to remove raised panel lines? Did you rescribe?

Looking forward to the finished beast! I'll adjust your p1 listing.

Cheers, Mike/TB379

http://worldinminiature.blogspot.com/

  • Member since
    January 2009
  • From: San Antonio
Posted by paintsniffer on Saturday, May 26, 2012 6:19 PM

Well, I was going to build a 1/48 Monogram F-4C.. But a friend of mine wanted a 1/32 F-4E built, so that took the C model's build slot.

I am not talking the nice, new, modern, nice 1/32 F-4E. I mean the 1980 vintage monster.
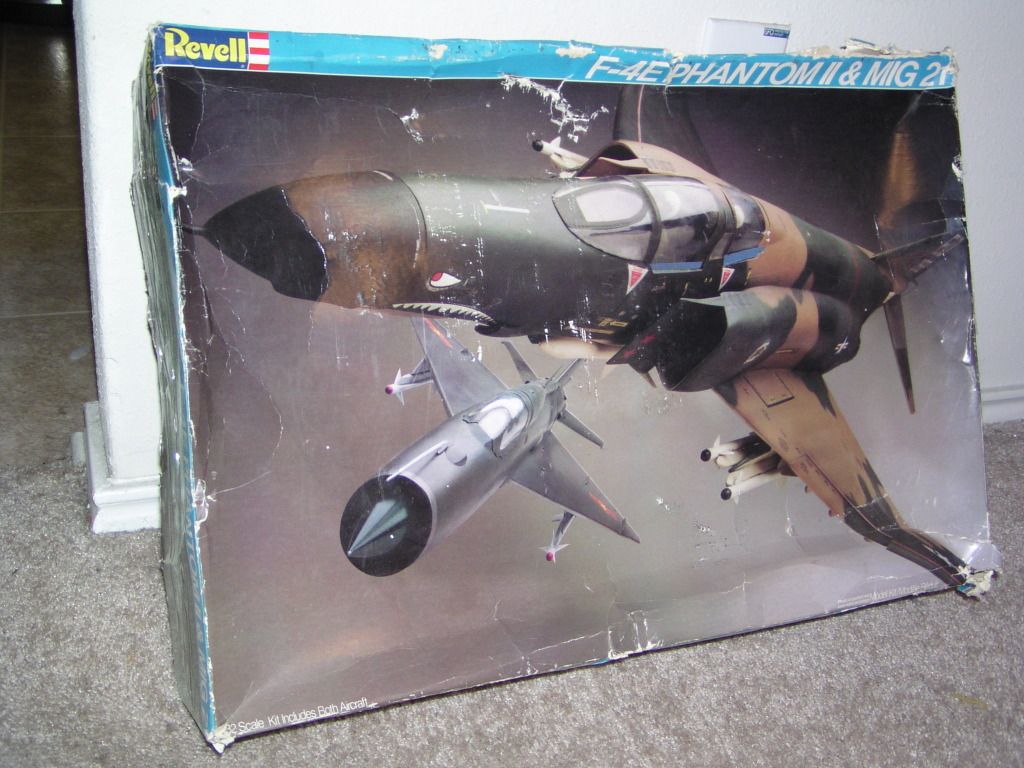
Everything was bagged, so I accepted the challenge. I have ruled the Mig-21 unbuildable for the sake of my sanity, and due to a missing canopy and instrument panel.

I quickly determined the decals were likely unserviceable.
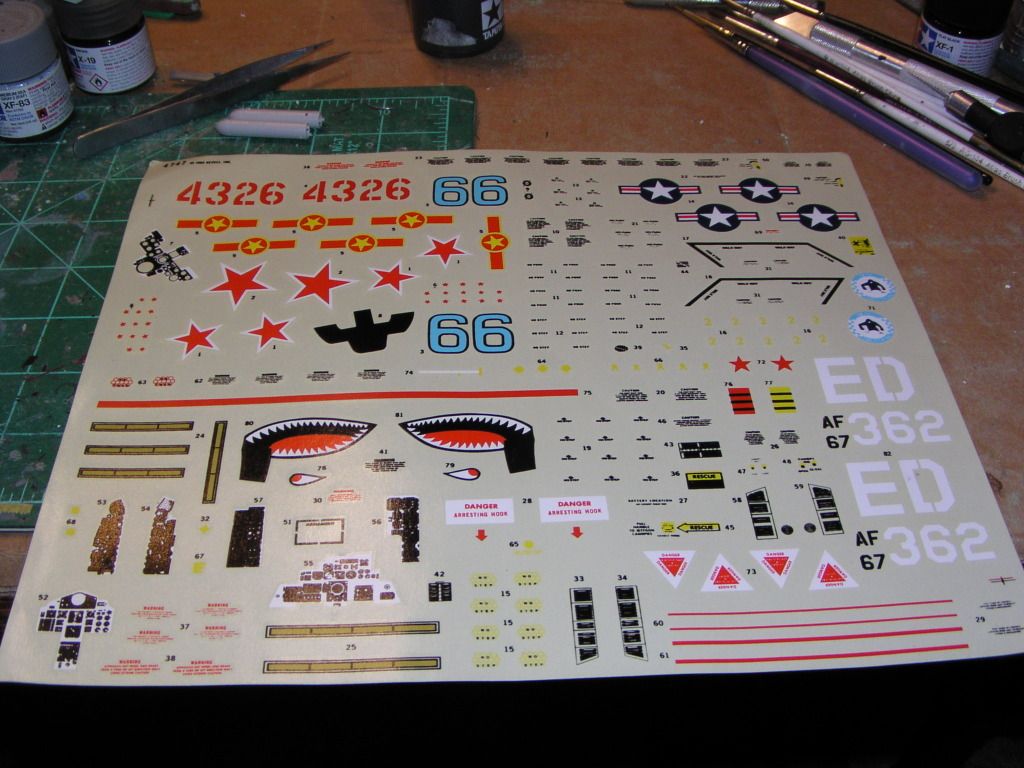
 

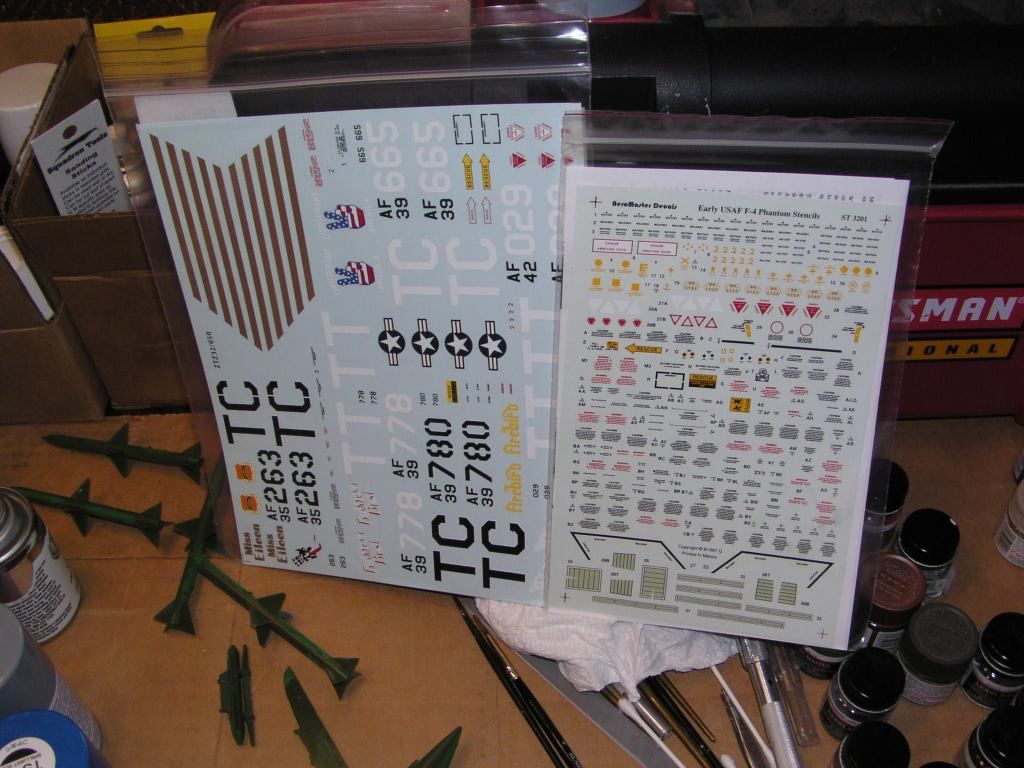
I was able to score some stencils, and some tail markings. This guy isn't an airplane nut so I think the indiscretion with tail markings will go unnoticed.
Before we get started, I need to make it clear. This tube was full before I started and has not been used on anything else. 

Normally, those things last me over a year.


The cockpit was totally blank and because I am doing this for someone else and for free I refused to buy an aires cockpit. I also kicked around aftermarket crew figures and weapons, again I didn't want to spend the money.

After a lot of fighting I got it together.
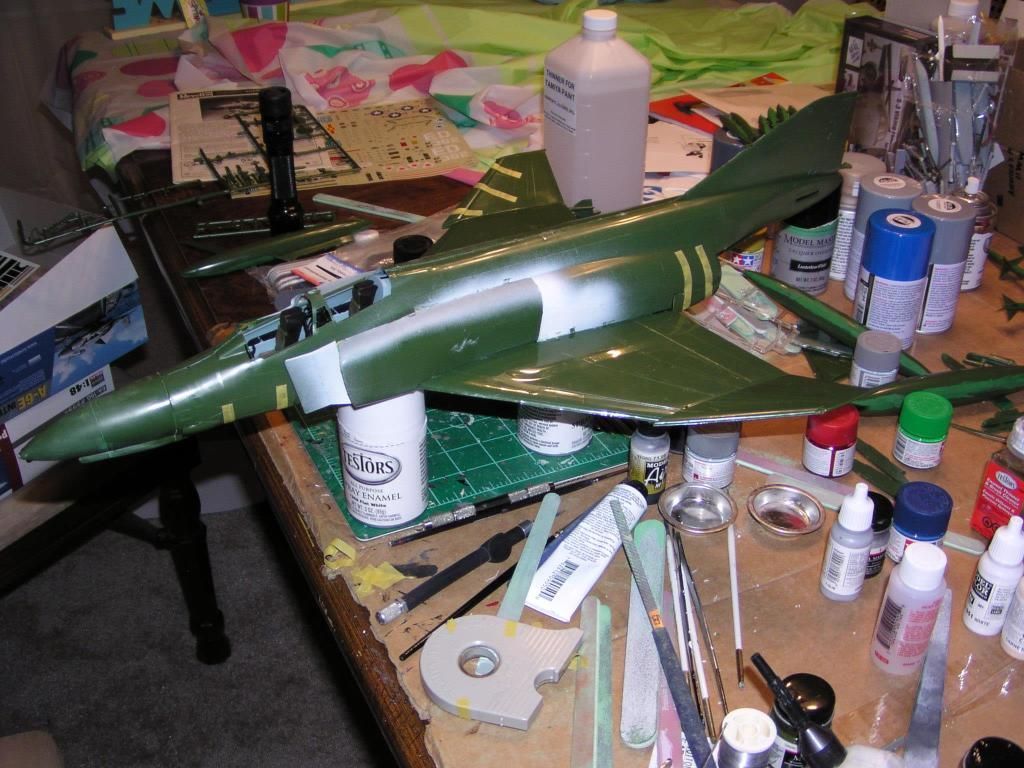
 

And then the fun began. I have not touched another model project until today other than this one. I started the paint prep a month ago. Here are some puttied pictures.
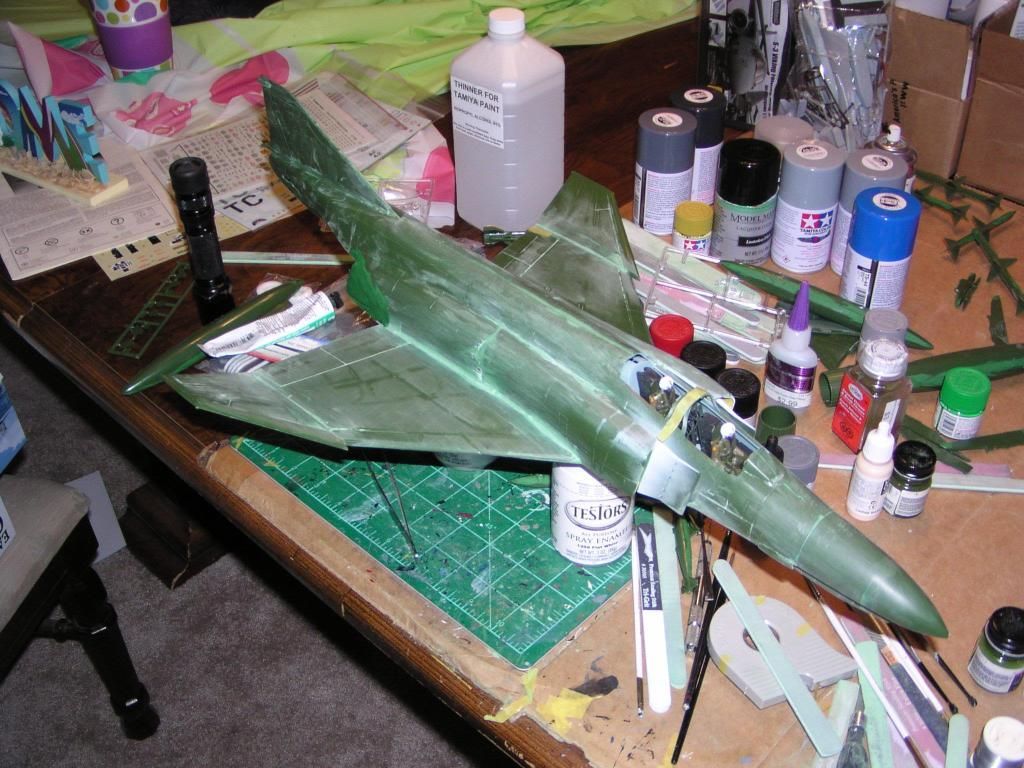
Then, during sanding, I decided to take some pictures with its smaller brothers.Some of which I have had to reference for some things. Not pictured is the scratch work I did behind the WSO's panel, and the overhead handles for the seats.
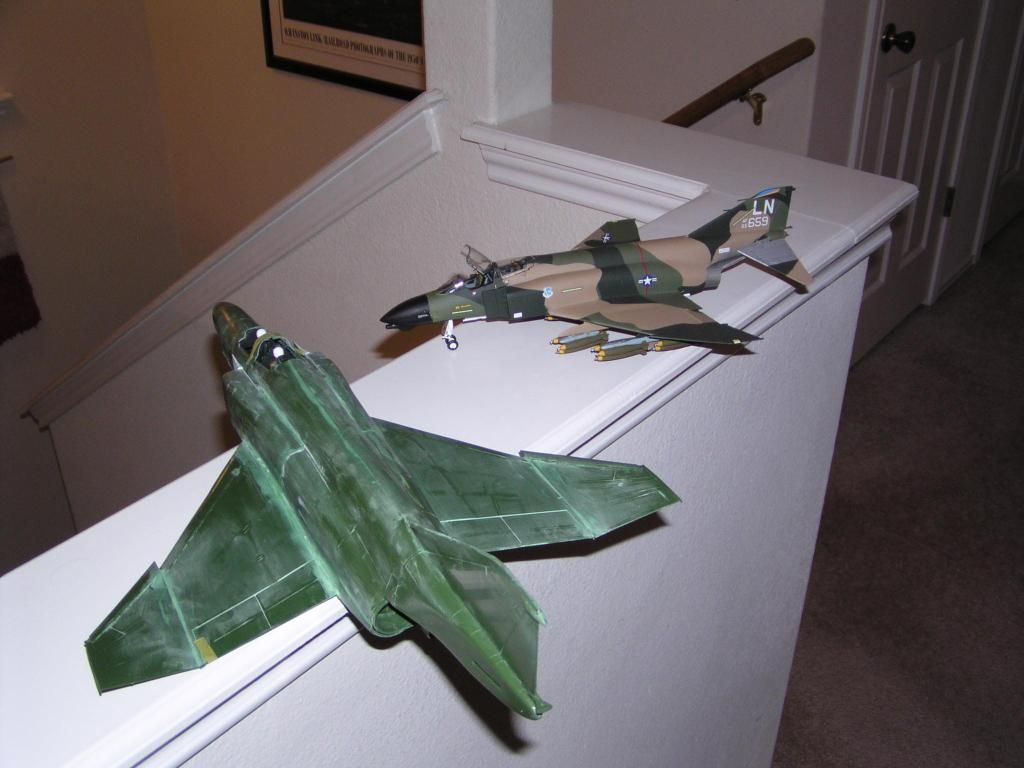
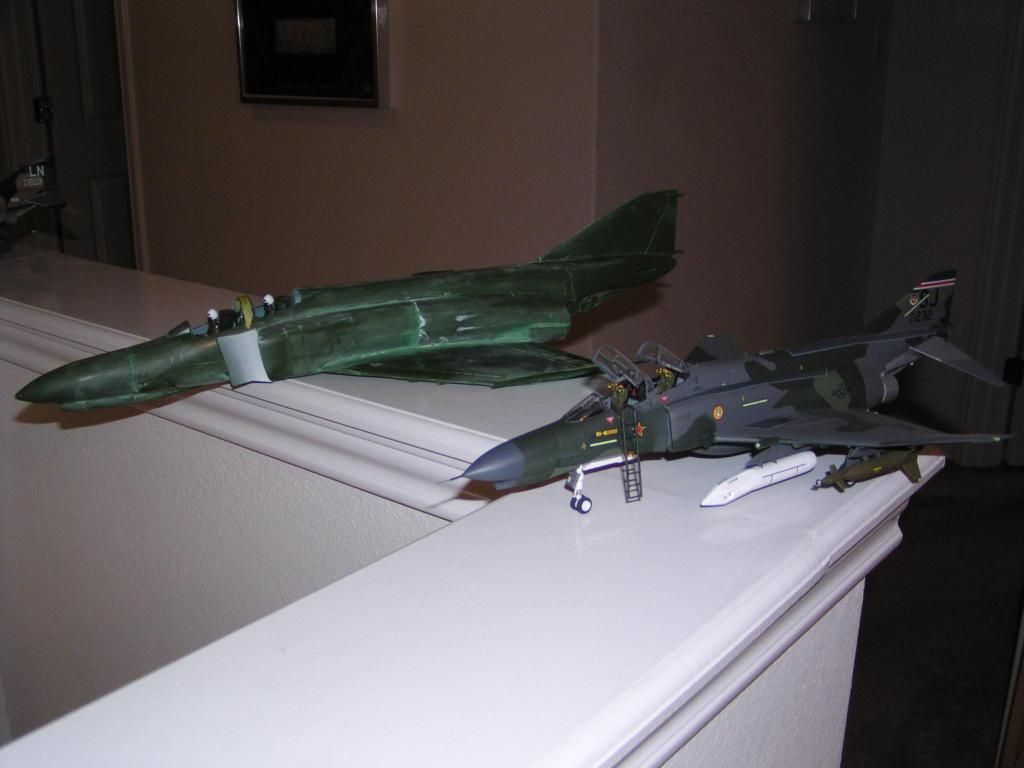
When I got the glass masked and fitted I sprayed it with black. Hopefully, that will keep things looking decent on the inside- well, what is visible of it.

Then, to assist in hiding some of the sanding scars I proceeded to go through about a whole can of Mr. Surfacer 500. This gave me an excellent surface to begin painting.
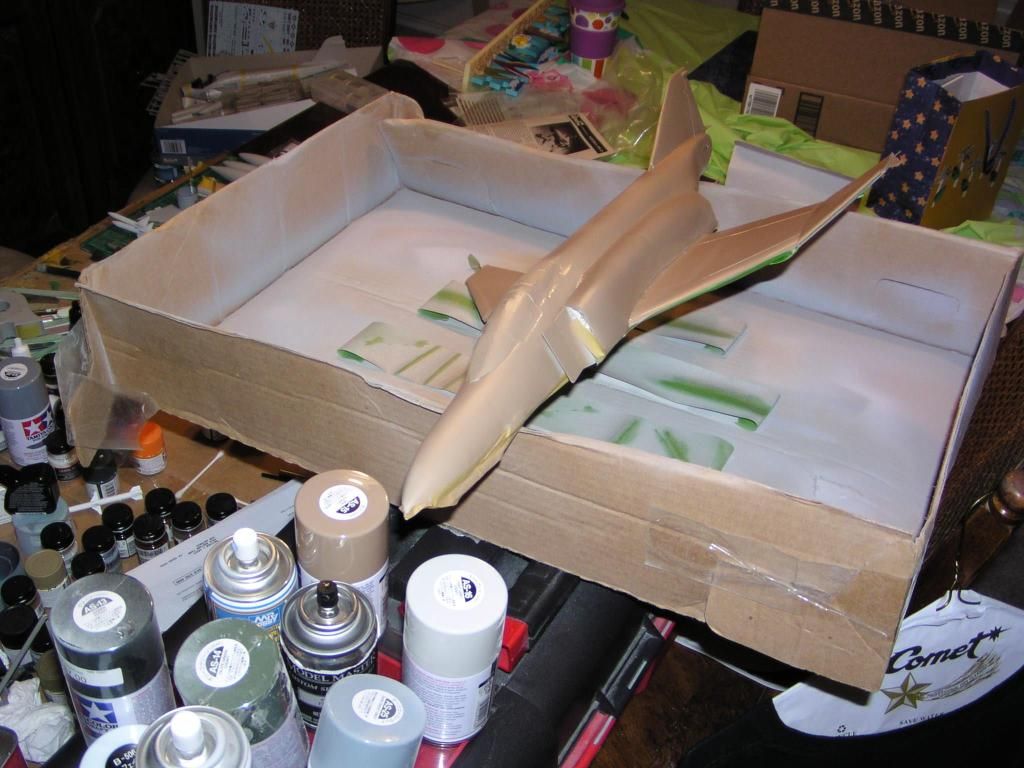
I am using Tamiya rattle cans for this. Due to the humidity airbrushing in Texas this time of year is a bit of a pain and I get good enough results with a can.
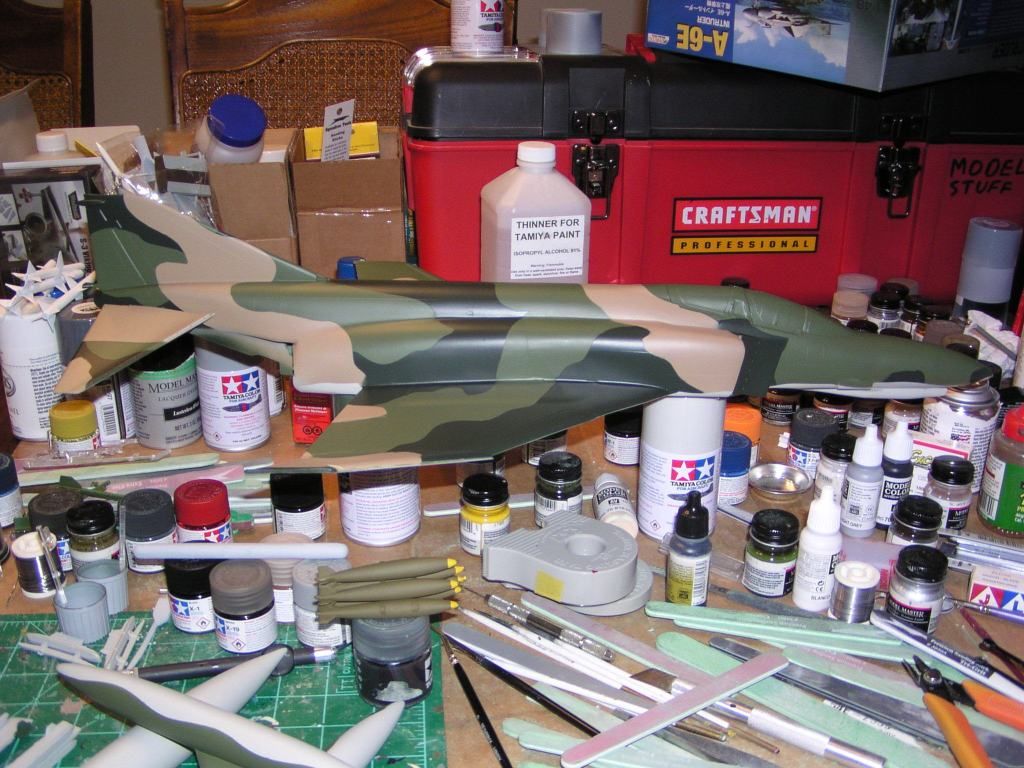
So there she is with the camo on. 

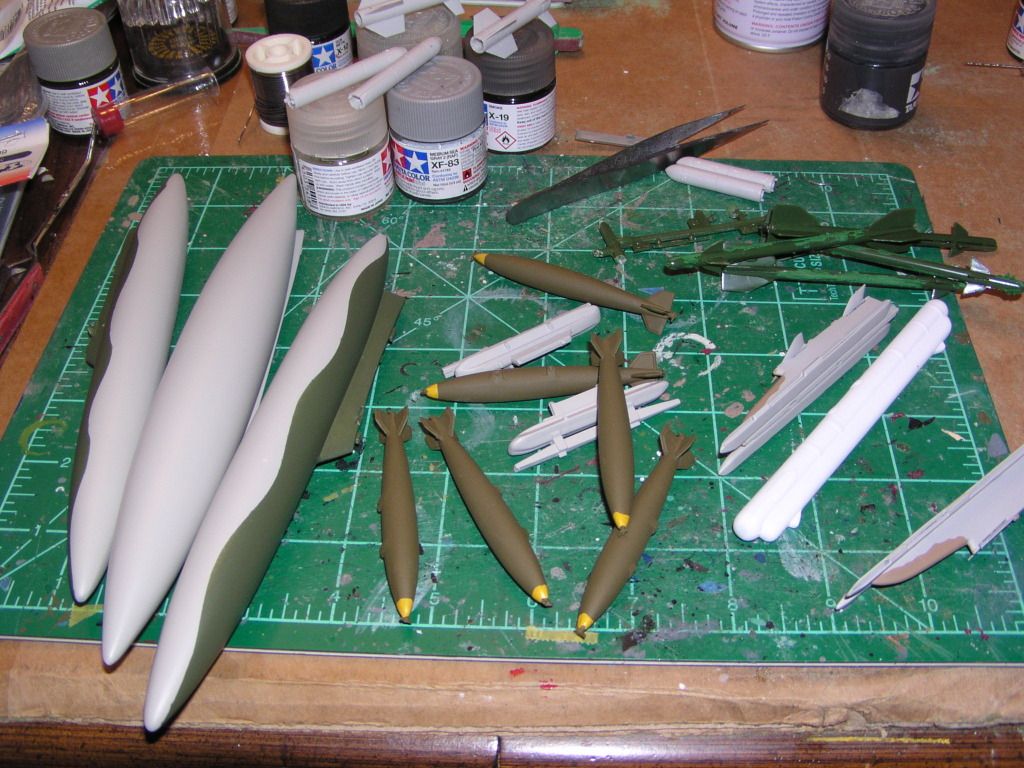
I had an ECM pod in 1/32 scale in my spares. I had no idea where it came from, and this seemed like a great opportunity to get rid of it. It will be carried in a forward sparrow recess. I also have the bombs painted, the sparrows mostly painted, and the tanks painted. The AIM-9s make my head hurt to look at. They are horrible. They are maybe an AIM-9B and fit horribly. I think I have a good day of work ahead of me making them work.
 

Today, I bit the bullet and sprayed down my base coat for Alclad. I also painted the nose cone. My airbrush did sneeze once, but it didn't seem to screw anything up.
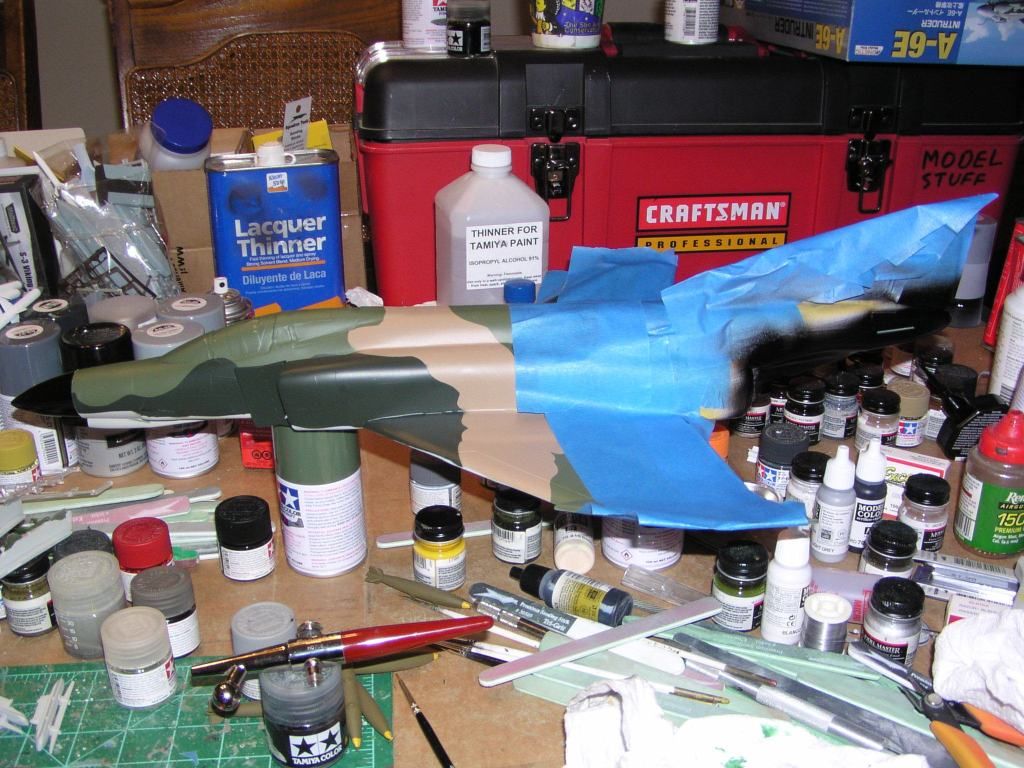
 

And now I will leave this thing alone for 3-5 days while the black gets nice and solid.


I keep joking I may sell all my crap and take up knitting after this kit.

Excuse me.. Is that an Uzi?

  • Member since
    February 2010
  • From: New Jersey
Posted by 68GT on Saturday, May 26, 2012 12:00 PM

I started the Hasegawa RF-4C the other day and things are building pretty quickly on it.  Goint to go atraight out of the box with the kit decals on this one.

I have the fuselage together and the wings are on but the camera needs a charge.

On Ed's bench, ???


  • Member since
    January 2012
  • From: Arlington, VA
Posted by maverickut on Sunday, May 20, 2012 8:05 AM

Hi all.  So I finally got some free time to work on my F-4B.  I started an old Revell F-4B.  It has alot of deficiencies, so I am doing it mostly OOB since I am getting back into modelling.

Revell 4302 F-4B


Doing most of the basic work right now.  The kit cockpit is horrible, just a tub with two chairs and the nose well is just a giant cavern.  I decided to just overlook the cockpit since it is 1/72 scale with a closed cockpit and didn't want to scratch build one as my first model back into the hobby.  


002


One of the "joys" of this build is the raised panel lines.  Again just working with it.  Gonna start the putty application and styrene strips needed in a few spots where the bottom meets the fuselage.  Hopefully I will get some more completed in the next few weeks and can post some more.

Cheers.


On the bench -  Revell 1/72 F-16A Viper


  • Member since
    April 2005
Posted by Thunderbolt379 on Saturday, May 19, 2012 10:32 PM

Wow -- I'm doing that at 72, but it looks a lot easier and more visible on the big guys!

M/TB379

http://worldinminiature.blogspot.com/

  • Member since
    October 2010
  • From: Hobart, Australia
Posted by Casper the Chihuahua on Saturday, May 19, 2012 9:40 PM

Canopy times today.

I've masked off all canopies and attached the various amounts of Eduard PE. They look great with all the locking systems and stuff in place. I've also masked the inside, it's better in 1/32 and larger scales to see paint on the inside as well.

Cheers

On the bench: A-4F 1/32 Hasegawa

Just deployed: F6F-5N Hellcat Nightfighter 1/48 Eduard

Up next: A6-E Intruder 1/48 Revell

  • Member since
    April 2005
Posted by Thunderbolt379 on Saturday, May 19, 2012 7:18 PM

Casper -- this is going to be a masterwork! Really sensational, one can already see the quality of both kit and workmanship. GREAT STUFF!

Mike/TB379

http://worldinminiature.blogspot.com/

  • Member since
    October 2010
  • From: Hobart, Australia
Posted by Casper the Chihuahua on Saturday, May 19, 2012 2:03 AM

Ordinance assembled, there sure is a lot of it!

Cheers

On the bench: A-4F 1/32 Hasegawa

Just deployed: F6F-5N Hellcat Nightfighter 1/48 Eduard

Up next: A6-E Intruder 1/48 Revell

  • Member since
    October 2010
  • From: Hobart, Australia
Posted by Casper the Chihuahua on Friday, May 18, 2012 11:29 PM

Phantom's coming together. I was thinking about how to paint the gap between the intake vents and the fuselage so I've ended up painting that part of the fuse first. I've also painted the flaps and will mask those off when I attach the intakes. That way when I paint the rest of the bird I should get a nice clean result.

I've also attached any of the ordinance pylons that share the same colour as the underside. ie. the Sidewinder/TER racks, MER rack and the external fuel tanks.

Also got the undercarriage done.

Cheers

On the bench: A-4F 1/32 Hasegawa

Just deployed: F6F-5N Hellcat Nightfighter 1/48 Eduard

Up next: A6-E Intruder 1/48 Revell

  • Member since
    December 2010
  • From: New Zealand
Posted by Rough as guts on Sunday, May 13, 2012 3:38 PM

Mighty fine pit Casper. 

I think I'll get a Tamiya S or J. Will look good next to their 1/32 Mustang'

Of course I still have 3  1/72 Phantom's  to build first - which might not be to far away because I finally got an airbrush ...........................................just need to learn how to drive it  Propeller


www.kiwimodeller.com

  • Member since
    October 2010
  • From: Hobart, Australia
Posted by Casper the Chihuahua on Sunday, May 13, 2012 6:32 AM

Got the upper cockpit on the fuselage painted and dry-brushed. Cockpit fits in like a dream. Screwed in instead of glued. Also got the lower wing/fuselage screwed and glued on. Never attached wings to a fuse with such little fuss (well perhaps excepting the Tamiya Spitfire)

Cheers

On the bench: A-4F 1/32 Hasegawa

Just deployed: F6F-5N Hellcat Nightfighter 1/48 Eduard

Up next: A6-E Intruder 1/48 Revell

  • Member since
    October 2010
  • From: Hobart, Australia
Posted by Casper the Chihuahua on Saturday, May 12, 2012 10:11 PM

Got the office done except for the top rear IP and the HUD assembly. The Eduard details really help with the look. I'm also adding Brassin ejector seats which should complete the busy look.

Cheers

On the bench: A-4F 1/32 Hasegawa

Just deployed: F6F-5N Hellcat Nightfighter 1/48 Eduard

Up next: A6-E Intruder 1/48 Revell

  • Member since
    April 2005
Posted by Thunderbolt379 on Friday, May 11, 2012 10:43 PM

Casper -- looking very intricate, as always!

Jimbot -- sorry, man, I clean forgot to get your -F onto the Honour Wall, but it's there now. A thousand appologies, too much on my plate and all that...

Cheers, Mike/TB379

http://worldinminiature.blogspot.com/

  • Member since
    October 2010
  • From: Hobart, Australia
Posted by Casper the Chihuahua on Friday, May 11, 2012 8:34 PM

Almost ready for some painting. Been prepping parts and cutting and glue bits of PE.

The exhausts really look nice with the Eduard details;

Some paneling for the office;

...and the lower halves of the canopy locking systems

Cheers

On the bench: A-4F 1/32 Hasegawa

Just deployed: F6F-5N Hellcat Nightfighter 1/48 Eduard

Up next: A6-E Intruder 1/48 Revell

  • Member since
    August 2009
  • From: Toledo Area OH
Posted by Sparrowhyperion on Wednesday, May 9, 2012 9:38 AM

My Mom and Dad both died when I was in my 20s, so I didn't have to go through that with them, unfortunately.  But we did have to take care for my Grandmother for quite a while.  She was 87 when she died and kept trying to do everything herself, even after a heart attack, and three pacemaker installations.  This was back in the late seventies, when pacemakers were not all that reliable.  We loved her very much.  She taught me how to cook (Italian Grandma so learning to cook was NOT optional), and was always there to cheer us up if we had a bad day.  Eventually her care became such that we had to place her in a managed care facility (they used to call them nursing homes.)   We didn't want to, but her medical needs became more than we were able to handle, and it was for her own safety after she tried to reach something in the cabinet, fell over and we found her on the floor with a concussion.

It's a sad fact of life that the ones we love, will eventually need that kind of care, but we need to ask ourselves what is in the best interest of that person.  We could have continued to try and care for Grammy at home, but it would be risking her life and we knew it.  She needed to be somewhere that they could give her around the clock care, and somewhere that could handle any emergencies.

It's hard to think of placing your parent, or grandparent in a home.  But ask yourself a couple of questions?

1.  What would happen if there was an emergency and you were at work?

2.  What is her quality of life like?  Does she have friends that she sees regularly?

3.  What happens when her health deteriorates more and endangers her life?

I'm just offering some advice Jim.  I am not saying you should shove her in a home and forget about her.  But maybe it's time to consider somewhere that can handle her needs, and give her as long a life as possible, with people her own age, and a caring staff.

Some of us are lucky.  My Wife's Great-Great-Grandmother lived into her upper nineties.  She got to know her great-great-great Granddaughter.  She was active and healthy until the last few weeks of her life and was a wonderful and healthy individual.  But some of us do have relatives we love and care for that we have to make hard decisions about.

As for your Sister.  I don't know her so I don't know the situation, but it sounds like you need to give her a few choice words and a reminder of all of the sacrifices that your Mom made when raising her, to give her the best possible life.

Don't give up on building.  I know that sometimes, being mostly housebound, that it's the only thing keeping me sane.

Good luck.


Rich

jimbot58

I guess it's time to toss in the towel on participating in this or any other build. Looking after my 81 year old Mother with advanced COPD, has gotten to the point where I have no time to myself for anything. I have no choice but to go look in on her first thing in the morning  before work to give her all her meds, breathing treatments, and to be sure she has something to eat, then off across town to work, which is usually about occupies another10 hours of time. After work I go back to moms again to see to her needs, feed her, feed her dog and so on. I"m now getting up around 6 in the morning to be at moms by 8:30 a.m. and often don't see my house before midnight that evening, leaving me less than 6 hours to sleep. My sister is of little help, and incapable of more than casually dropping in on her sometime in the afternoon, believing that she is doing the "best she can". Ironically, she has not worked in almost 14 years.

As to myself, I have no time to eat anything other than fast foods, I no longer exercise, and my weight has jumped back up to over 300 pounds. Perhaps mom may yet outlive me at this point....

In the Hangar: 1/48 Hobby Boss F/A-18D RAAF Hornet,

On the Tarmac:  F4U-1D RNZAF Corsair 1/48 Scale.

  • Member since
    April 2005
Posted by Thunderbolt379 on Wednesday, May 9, 2012 7:54 AM

Hell's bells, Jim -- that's more than most could cope with under any circumstances, it's amazing you've handled it this far. I'm co-carer with an aged Mom too, but she's a breeze by comparison. You have my sympathies and understanding, and I'm sure everyone here wishes you only the best of luck with both your carer responsbilities and employment situation.

We'll be here and you're always welcome, building or not!

Cheers, bud,

Mike/TB379

http://worldinminiature.blogspot.com/

  • Member since
    December 2010
  • From: New Zealand
Posted by Rough as guts on Wednesday, May 9, 2012 3:32 AM

That sounds pretty rough Jimbot - life can be a *** sometimes.

I'm afraid I can't offer any help, but keep your chin up mate and take care.

Family comes first in my book and it sounds like your doing your bit looking after your Mom like that. It says a lot about your character and I'm sure she appreciates it. 

John.

www.kiwimodeller.com

  • Member since
    June 2009
Posted by jimbot58 on Wednesday, May 9, 2012 2:44 AM

I guess it's time to toss in the towel on participating in this or any other build. Looking after my 81 year old Mother with advanced COPD, has gotten to the point where I have no time to myself for anything. I have no choice but to go look in on her first thing in the morning  before work to give her all her meds, breathing treatments, and to be sure she has something to eat, then off across town to work, which is usually about occupies another10 hours of time. After work I go back to moms again to see to her needs, feed her, feed her dog and so on. I"m now getting up around 6 in the morning to be at moms by 8:30 a.m. and often don't see my house before midnight that evening, leaving me less than 6 hours to sleep. My sister is of little help, and incapable of more than casually dropping in on her sometime in the afternoon, believing that she is doing the "best she can". Ironically, she has not worked in almost 14 years.

As to myself, I have no time to eat anything other than fast foods, I no longer exercise, and my weight has jumped back up to over 300 pounds. Perhaps mom may yet outlive me at this point....

*******

On my workbench now:

It's all about classic cars now!

Why can't I find the "Any" key on my keyboard?


  • Member since
    April 2005
Posted by Thunderbolt379 on Tuesday, May 8, 2012 7:23 PM

DDDRRROOOOOOLLL!!! Seriously, I'm salivating...

M/TB379

http://worldinminiature.blogspot.com/

  • Member since
    October 2010
  • From: Hobart, Australia
Posted by Casper the Chihuahua on Tuesday, May 8, 2012 6:53 PM

Time to look at the F4-D. This is a BIG kit. As you would expect, the F-4s in 1/48 are about the size of a 1/32 BF-109 so in 1/32 it's a monster.

I'm adding the Eduard interior and exterior sets. I'll be retaining the Tamiya IP decals and using Eduard colour PE for the rest. I see no point in spoiling the effect of the decals by hand paining the other dials. Stick out tongue I'm also adding Brassin ejector seat set The amazing detail on these seats should help sell the rest of the office.

As mentioned before, this is a big kit! So here's a comparison shout of the fuselage (without the nose BTW) next to my recently completed Sea Harrier in 1/24

Apart fro the Harriers front aerial, these two will be the exact same length. The F-4 is truly a large bird.

Cheers

On the bench: A-4F 1/32 Hasegawa

Just deployed: F6F-5N Hellcat Nightfighter 1/48 Eduard

Up next: A6-E Intruder 1/48 Revell

  • Member since
    February 2010
  • From: Ontario, Canada
Posted by Bockscar on Tuesday, May 1, 2012 4:25 PM

Jimbot:

A real beauty! Well done! YesToast

  • Member since
    December 2010
  • From: New Zealand
Posted by Rough as guts on Tuesday, May 1, 2012 3:27 AM

Hey Jimbot, She's a beauty - well done  Yes


Not much happening here - as usual Indifferent

www.kiwimodeller.com

  • Member since
    June 2009
Posted by jimbot58 on Tuesday, May 1, 2012 3:18 AM

Going through my files and kind of like this one:

Or this one:

Although a bit cluttered, it's the best focus I seemed to be able to get....

Multiple sizes included again this time.

Thanks Mike TB379

*******

On my workbench now:

It's all about classic cars now!

Why can't I find the "Any" key on my keyboard?


JOIN OUR COMMUNITY!

Our community is FREE to join. To participate you must either login or register for an account.

SEARCH FORUMS
FREE NEWSLETTER
By signing up you may also receive reader surveys and occasional special offers. We do not sell, rent or trade our email lists. View our Privacy Policy.