SEARCH FINESCALE.COM

Enter keywords or a search phrase below:

Steel Cats (Sept. 2012-Aug. 2013)

322435 views
3330 replies
1 rating 2 rating 3 rating 4 rating 5 rating
  • Member since
    March 2003
  • From: Rain USA, Vancouver WA
Posted by tigerman on Saturday, August 24, 2013 1:02 PM

Nice save SS.

   http://i7.photobucket.com/albums/y269/wing_nut_5o/PANZERJAGERGB.jpg

 Eric 

  • Member since
    April 2013
Posted by SchattenSpartan on Saturday, August 24, 2013 4:49 PM

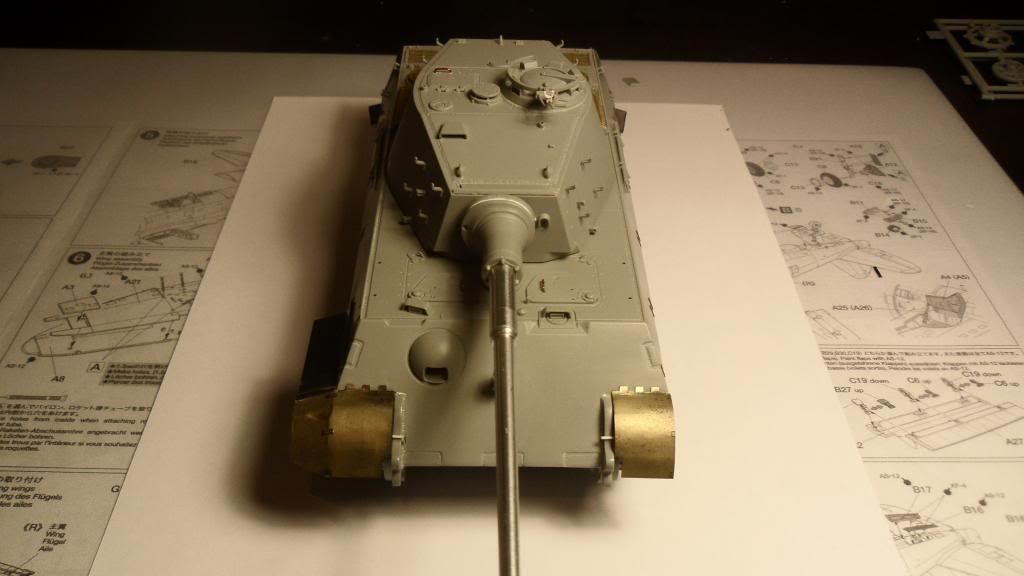
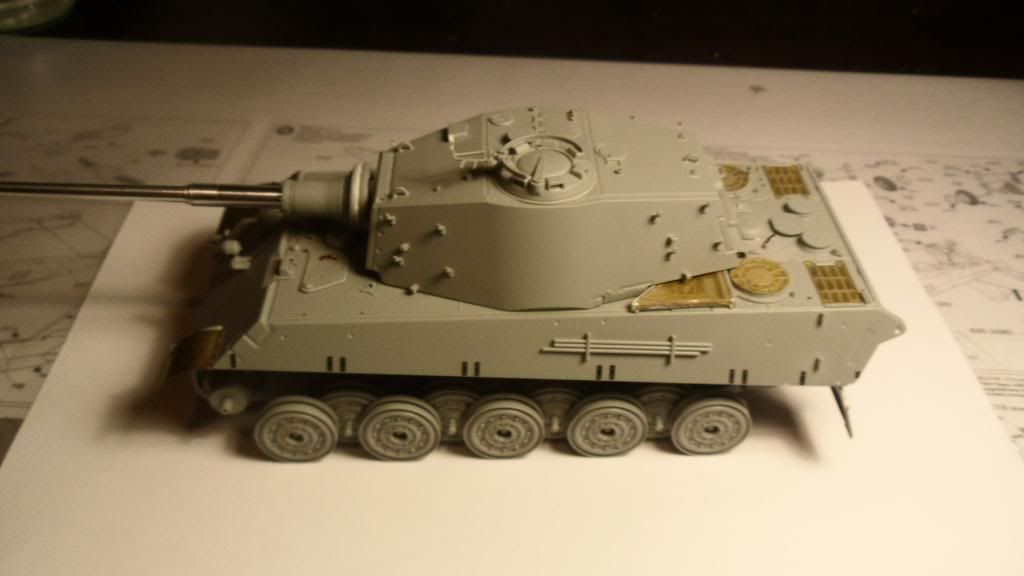
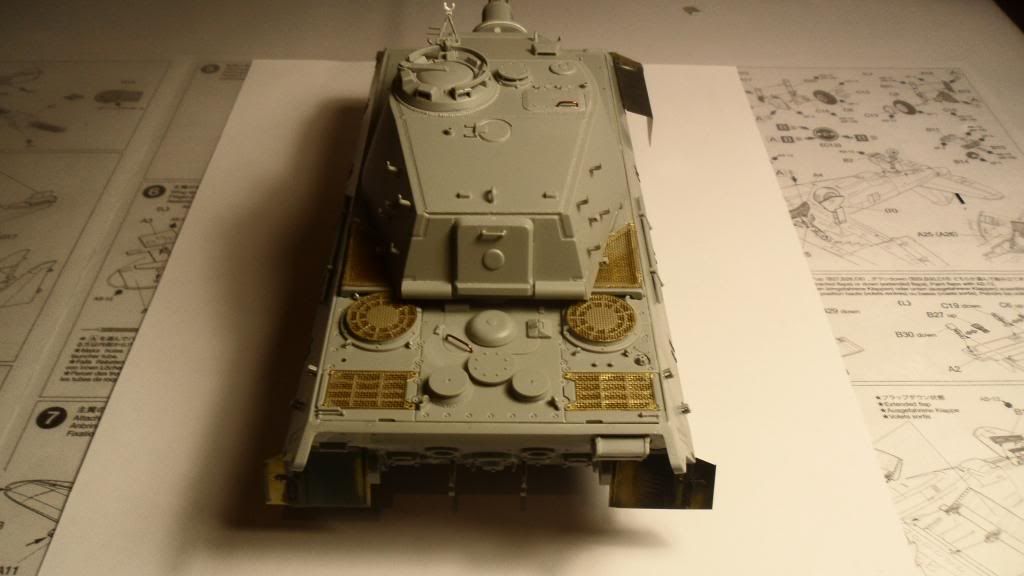
Ok, here are a few pics. Construction is nearly done: The only things to add are the wire handles and the rear fenders (I'll assemble them tomorrow)

Mounting points for the fenders in place:

Close-up of the mounting brackets:

I kinda managed to save the weld seams. They are far from being perfect, but I think it looks good enough. What do you think?

The other weld seam looks similar, but I have no pic of it (my camera's batteries were empty...)

More pics tomorrow! The kitten should have some paint on untill then! 

  • Member since
    November 2009
  • From: SW Virginia
Posted by Gamera on Saturday, August 24, 2013 9:13 PM

Looks good to me Clemons! The weld beads look pretty darn close to the real thing.

"I dream in fire but work in clay." -Arthur Machen


  • Member since
    March 2003
  • From: Rain USA, Vancouver WA
Posted by tigerman on Saturday, August 24, 2013 11:56 PM

I think the beads look great. Again, fine save.

   http://i7.photobucket.com/albums/y269/wing_nut_5o/PANZERJAGERGB.jpg

 Eric 

  • Member since
    April 2005
Posted by Thunderbolt379 on Sunday, August 25, 2013 4:20 AM

Quick update -- it seems I've spent days working on details you can't see without a magnifying glass (well,I cant!) but she's closing in on the finish line. I completed the graphite work on the rims (tried for a photo but I don't seem to be able to hold focus that close in these days), and pulled out some old enamels to paint the exterior fittings -- I need to mix some wood shade to complete that job tomorrow. The wheel hubs turn out to need some more spray work, or I'd be mounting the running gear right now. Here's a couple of shots of where she's at. The cable is just laid on to get a feel for the placement, the painting and weathering will take a while longer, and I have to drill out locators in the zimmerit for each item in turn. I worked on the treads today but acrylic washes were 99% invisible when dry, thus the enamels... I might have been a bit heavy with the drybrushing here and there, if it needs toning down I'll get to it in due course.

M/TB379

http://worldinminiature.blogspot.com/

  • Member since
    April 2013
Posted by SchattenSpartan on Sunday, August 25, 2013 6:32 AM

Thanks guys!

Excelllent work, Mike! Looking forward to more pics!

  • Member since
    November 2003
  • From: Nashville, TN area
Posted by bobbaily on Sunday, August 25, 2013 7:16 AM

SS-you're making great progress-zim & camo look great-keep the pics coming.

Bob


  • Member since
    April 2013
Posted by SchattenSpartan on Sunday, August 25, 2013 4:39 PM

Sorry guys, no update today. I got no bench time at all... I should be able to paint her tomorrow (3-tone camo scheme + white camo on top). I'll post some pics when she has some paint on (hopefully tomorrow). I won't go crazy with chipping and restrict weathering to washes and streaking, just because I'm lacking the time for anything else. (maybe some minor chipping in certain spots...)

  • Member since
    November 2009
  • From: SW Virginia
Posted by Gamera on Sunday, August 25, 2013 5:27 PM

Nice! Looks like you're almost done Mike. I can't really see the washes either but I'll wait for the final 'beauty' shots!

"I dream in fire but work in clay." -Arthur Machen


  • Member since
    November 2003
  • From: Nashville, TN area
Posted by bobbaily on Sunday, August 25, 2013 6:28 PM

bobbaily

SS-you're making great progress-zim & camo look great-keep the pics coming.

Embarrassed...oops....what I meant to say was...

TB-great job on the zimm & camo

SS-good save on the weld seams..

sorry guys....

Bob


  • Member since
    April 2013
Posted by SchattenSpartan on Sunday, August 25, 2013 6:54 PM

No worries! I knew what you meant to say and I think Mike figured it out as well!

The other weld seam has a similar texture, but it is a bit less pronounced, because I had to sand some of the plastic away to save it...

  • Member since
    July 2012
Posted by Hasenpfeffer on Sunday, August 25, 2013 9:09 PM

I'll apologize up front that I haven't had time to read and comment on what's goin' on 'round these parts. I'll try to catch up this week. Sports are winding down, so I should have a little more time on my hands. A 4 day weekend coming up doesn't hurt matters either! Stick out tongue

Good to see ya back Mike.

Well, I took a couple quick shots so I could show some forward progress. The tracks are on... there was a lot of grumbling and general swearing during the installation. Let me just say this: The Bronco indies look great and are fairly easy to assemble and are reasonably priced. The strength during assembly was very trying indeed. They came apart on a few occasions and where they did it weakened the little "pins" that hold them together. I had them on-off-on-off and on again fixing this. It is almost impossible to assemble the final link as needed, but liquid glue to the rescue. They don't fit the drive sprocket properly either. They only snug down on the teeth about halfway. Annoying to me, but maybe not noticeable unless pointed out. Still a lot of little things to touch up before I call it done. More to come this week. I should meet the deadline, which is a great relief to me to say the least. Anyway, here are the couple overall shots I took a few minutes ago.

  • Member since
    April 2005
  • From: Australia
Posted by taxtp on Sunday, August 25, 2013 11:41 PM

I really like it Dave. Great weathering too.

Cheers

Tony

I'm just taking it one GB at a time.

  • Member since
    April 2005
Posted by Thunderbolt379 on Monday, August 26, 2013 4:26 AM

Thanks, Hasen! That Panther of yours is really looking the business!

Progress today, she's lumbering toward the finish line a job at a time. The running gear is installed and the external fittings are in a fairly advanced state, there's some rust and dirt to add to the cables:

Remaining jobs -- fit that lot, last drybrushing and dirt, decals, dust... I think I'm going to respray the tracks, the shade of umber I chose before is too dark, washes are vanishing into it. I've never had tracks fight me on the finish like this before, so a fresh basecoat might be the answer.

The jack block and crowbars should have been attached to the hull before painting, it seems they were probably overpainted in camo... Not sure what to do about that, I didn't want to start camo painting again at this stage, not for a few tiny fittings...

Cheers, M/TB379

http://worldinminiature.blogspot.com/

  • Member since
    November 2009
  • From: SW Virginia
Posted by Gamera on Monday, August 26, 2013 7:33 AM

Dave: She looks good to me! The zimmerit esp turned out great!

Mike: Nice work there on all the fiddly bits! I guess the jack block and crowbars could have been replaced so I wouldn't worry too much about a precise match.  

"I dream in fire but work in clay." -Arthur Machen


  • Member since
    July 2004
  • From: Sonora Desert
Posted by stikpusher on Monday, August 26, 2013 11:20 AM

Hasen, your Panther looks great! I love the finish.

TB, you are only a few steps behind for a nice build yourself! Love the camo job!


F is for FIRE, That burns down the whole town!

U is for URANIUM... BOMBS!

N is for NO SURVIVORS...

       - Plankton

LSM


  • Member since
    December 2002
  • From: Bury St Edmunds, Suffolk, England
Posted by Bish on Monday, August 26, 2013 1:24 PM

Dave, that's a sweet looking Panther. The Zimm looks great.

Clemens, Mike, those big kitty's look to be coming on nicely. Great paint work Mike.

I am a Norfolk man and i glory in being so


On the bench: Airfix 1/72nd Harrier GR.3/Fujimi 1/72nd Ju 87D-3

  • Member since
    April 2013
Posted by SchattenSpartan on Monday, August 26, 2013 1:47 PM

Thanks mate!

I just sat down at my nench and began construction on the rear fenders (I have to add them prior to painting the kitten). More pics later tonight...

  • Member since
    April 2013
Posted by SchattenSpartan on Monday, August 26, 2013 6:03 PM

Ok gents, I'm calling construction work on this one done!

Those damn fenders took way longer to assemble than I thought...

Fenders aside, here are some pics for you:
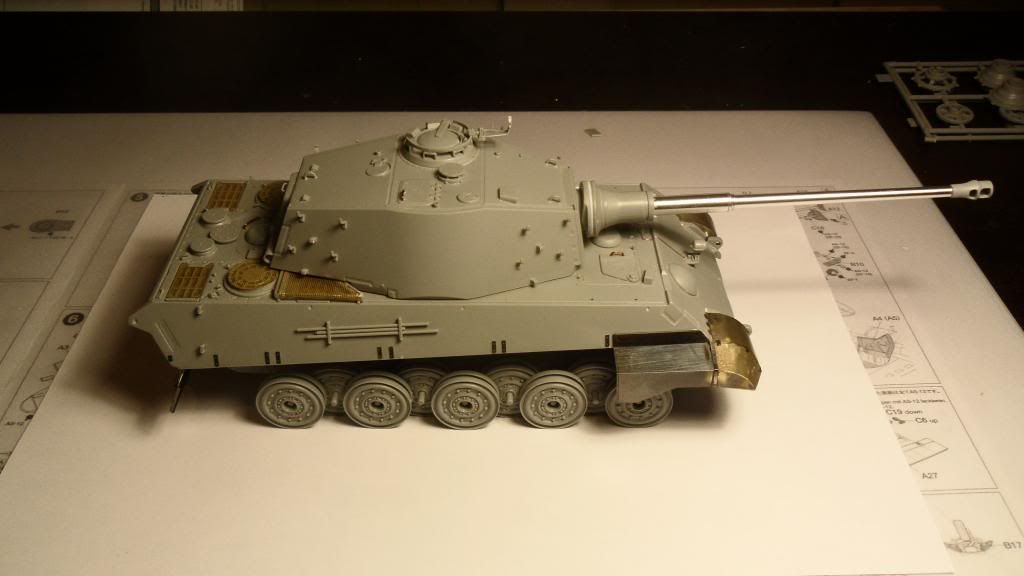
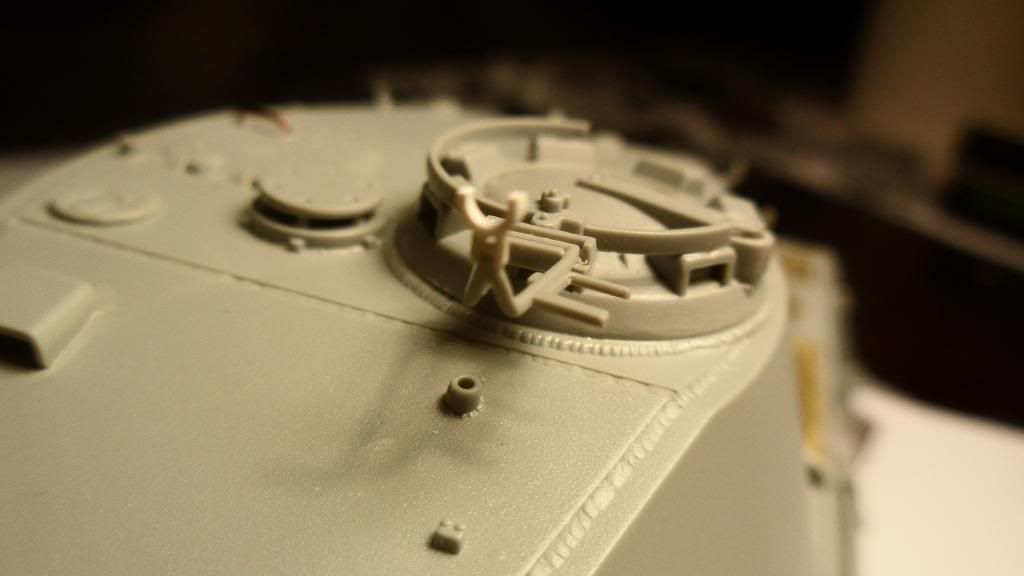
I managed to break the "tip" of the turret MG mount off and wasn't able to find it again, so I simply took some Evergreen plastic profiles (H-profile and plastic tubing) to build one from scratch. I think it actually looks a bit better than the kit part...
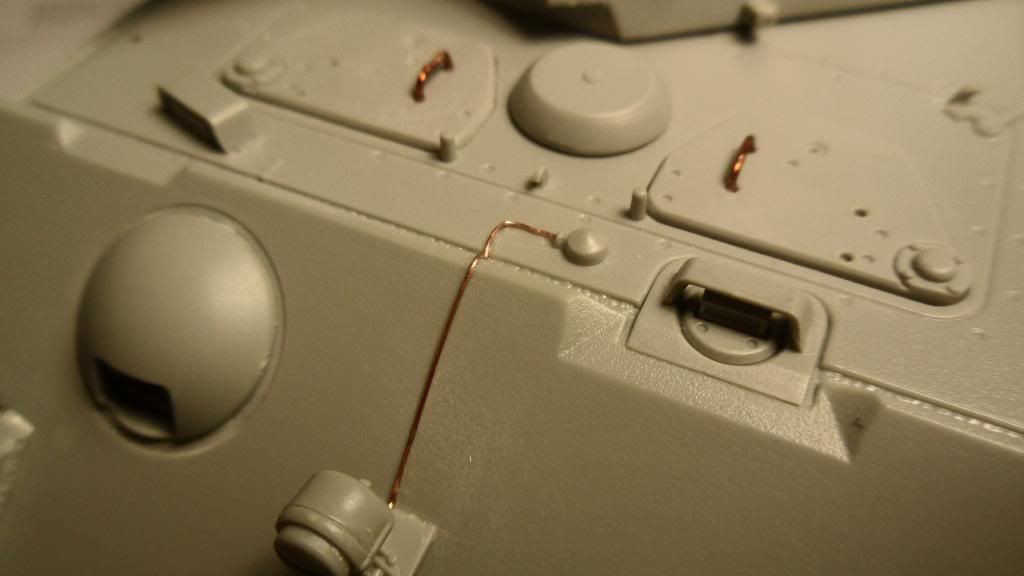
I replaced all the handles on the hatches with 0.6mm copper wire (only 4 handles in total) and adde some wiring to the headlight:
I also glued the front fenders in place:
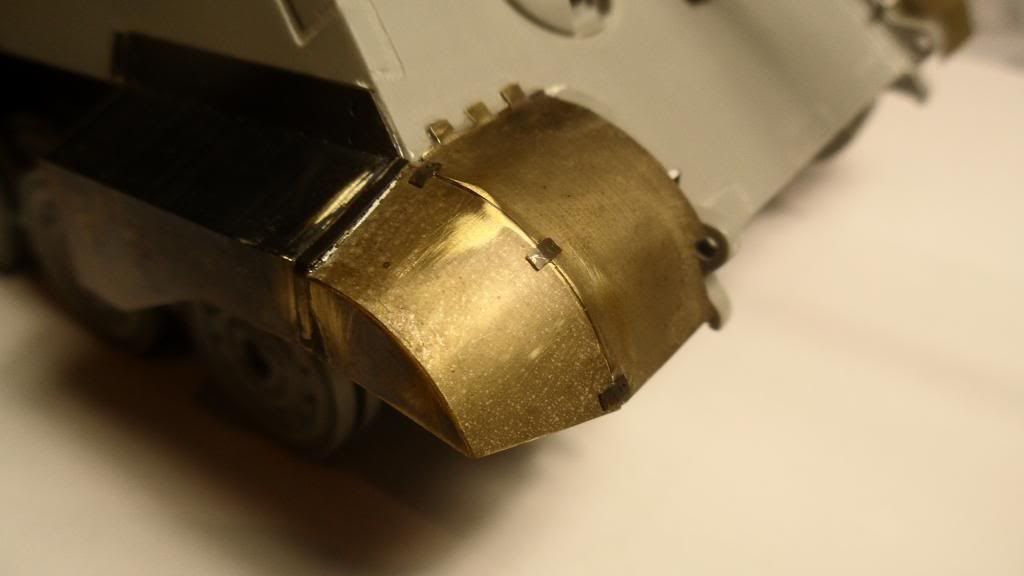
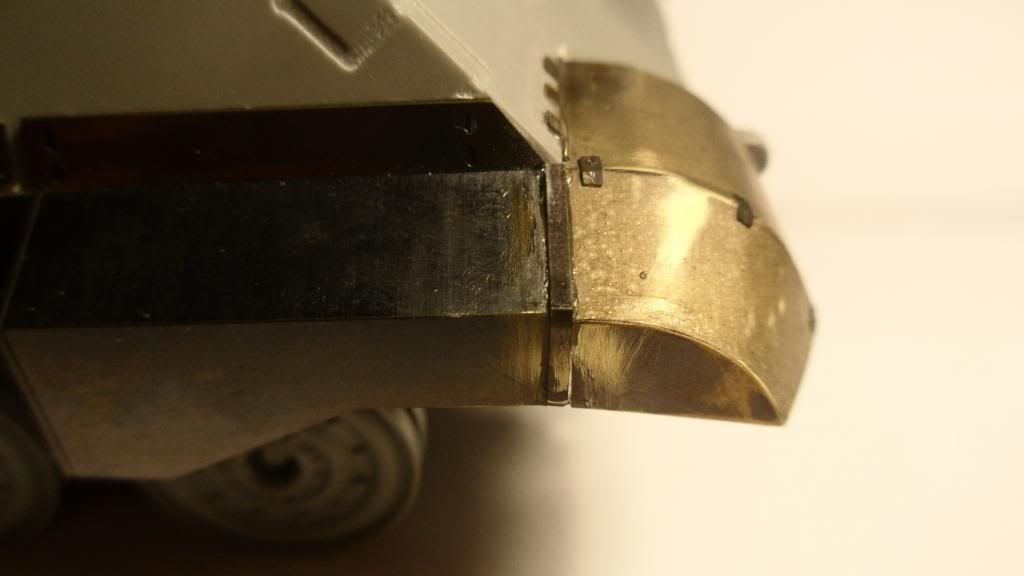
I had to glue one of the side fenders on as well, because the fit of those 2 fenders was rather poor. There was a 1mm gap between them, but I think I managed to cover that one up with the PE strips "connecting" the fenders.

Next thing to add were the rear fenders. Those things were a royal pain to assemble, because I was restricted to superglue only. I don't have any soldering equipment and also none of the required skills...
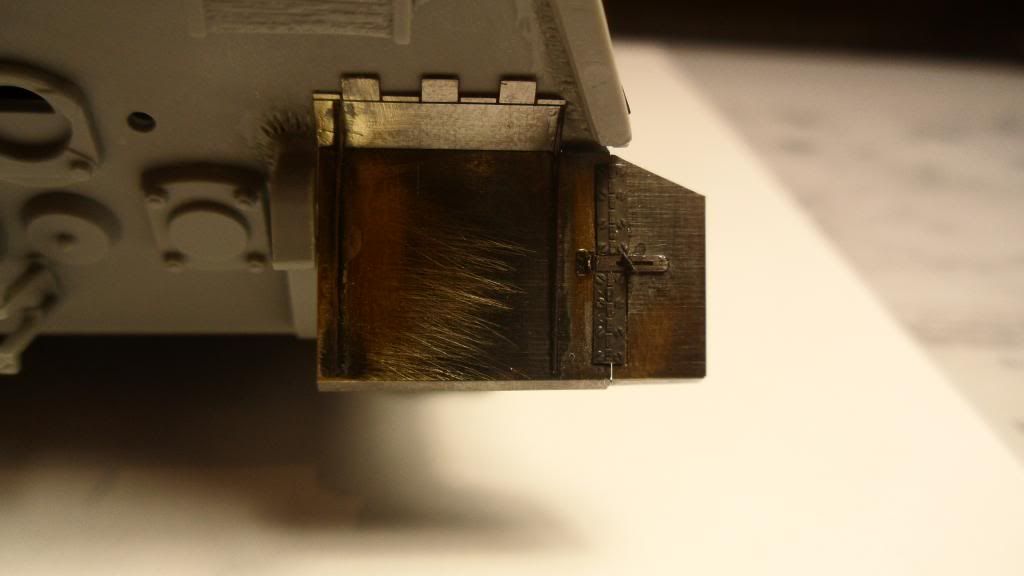
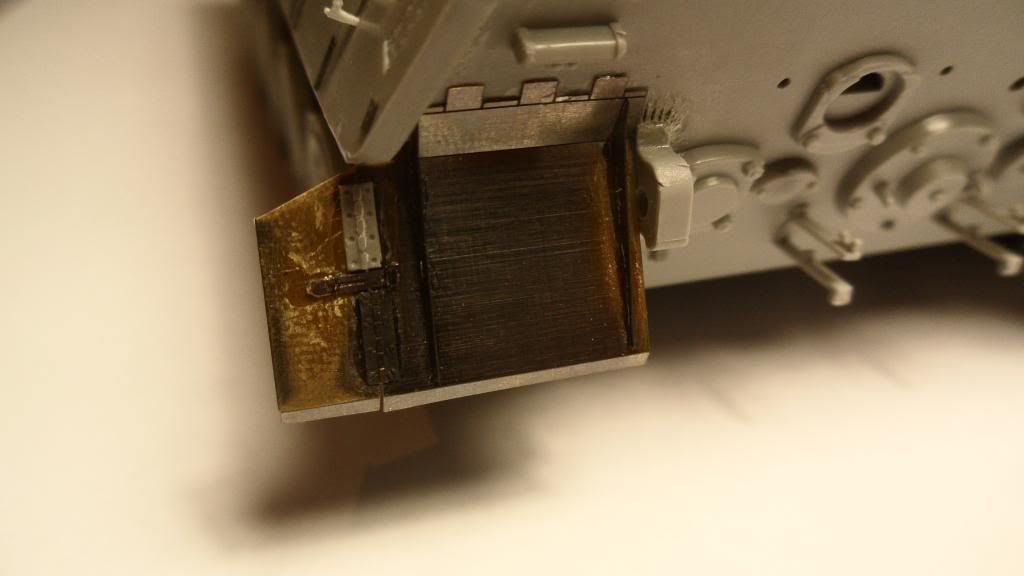
I dropped one of the PE hinges and wasn't able to find that one either (what a surprise!). I decided to shave off the hinge detail from the kit part and use that one instead of the PE hinge. I don't think the difference will be too obvious when it is painted. Most of that stuff will have at least a slight amount of mud on it, so I can hide some of that area anyway...

It's time to spray some paint on this Cat, so off I go to my bench again to get some paint in my AB! I won't post pics of the painted model today, because it's already 1 AM here in Austrai and I'll go to bed immediately after finishing this painting session. I'll post some pics tommorrow evening...

Cheers, Clemens

  • Member since
    July 2004
  • From: Sonora Desert
Posted by stikpusher on Monday, August 26, 2013 10:48 PM

Nice save on the lost detail Clemens. I am looking forward to seeing the paint on your KT.


F is for FIRE, That burns down the whole town!

U is for URANIUM... BOMBS!

N is for NO SURVIVORS...

       - Plankton

LSM


  • Member since
    November 2009
  • From: SW Virginia
Posted by Gamera on Monday, August 26, 2013 10:50 PM

Clemons: Those fenders look like they'd be a pain to assemble- but the results are well worth it!

"I dream in fire but work in clay." -Arthur Machen


  • Member since
    April 2013
Posted by SchattenSpartan on Tuesday, August 27, 2013 6:16 PM

Thanks a lot! I managed to break off another PE piece on the rear fenders (one of the struts reinforcing them), but that one was easy to replace with a piece of thin styrene sheet.

I can't show you any pics because I just got home (already 1 AM here) and just placed my King Tiger in a box and sealed it (to transport her to my LHS for some weathering tips). I realized that I forgot to take the pics before that and I'm way too tired to get her on my bench again and take pics for you.

I'll take some pics tomorrow before spraying all the white paint on and some before/after the weathering though.

I have a question to you regarding the white paint: Was the whitewash applied to the suspension and roadwheels as well? Do you have any pics of that area?

  • Member since
    July 2004
  • From: Sonora Desert
Posted by stikpusher on Tuesday, August 27, 2013 6:31 PM

whitewash on the running gear could go either way- it is often covered up by mud, etc, and only a crew with lots of time and whitewash would really be able to cover that area.


F is for FIRE, That burns down the whole town!

U is for URANIUM... BOMBS!

N is for NO SURVIVORS...

       - Plankton

LSM


  • Member since
    April 2013
Posted by SchattenSpartan on Tuesday, August 27, 2013 6:32 PM

Thanks a lot for that info! I'll go to bed now...

  • Member since
    July 2013
  • From: Talent, OR
Posted by bitbite on Tuesday, August 27, 2013 7:42 PM

No sleep! Build! Build!

"Resist the urge to greedily fondle the parts . . ." - Sheperd Paine "Modeling Tanks and Military Vehicles" Page 5

  • Member since
    April 2005
Posted by Thunderbolt379 on Tuesday, August 27, 2013 7:58 PM

10.30am in Aus, I'm attaching tools and cables before I head out to work at the uni... More painting to blend things in later...

http://worldinminiature.blogspot.com/

  • Member since
    November 2009
  • From: SW Virginia
Posted by Gamera on Wednesday, August 28, 2013 7:52 AM

I don't think there were any official standards for applying whitewash. Some was applied with large brushes, brooms, in some cases buckets were just poured over the vehicle. No sure there is any way you can go wrong here.

"I dream in fire but work in clay." -Arthur Machen


  • Member since
    April 2005
Posted by Thunderbolt379 on Wednesday, August 28, 2013 8:08 AM

I made some progress today, I have all tools and fittings attached baring the jack block (for which painting is underway) and the MGs. I've done a round of painting to blend the fittings in better, general touch-ups, and at this time there's not a lot left to do, if I could get a few hours clear she'd be done. That's not easy, I'm working the next two days but will do some in the evenings. The big job is respraying the tracks and working them from scratch, other than that there's the decals -- only a few but I've noticed the crosses are off register and possibly incorrect for the intended vehicle -- there's no time to get correct ones by mail order, and my spares box is notably lacking in German tank insignia... Then there's the dust coat to go, make the radio antenna, and at that point I'd be willing to call her done.

Pics to follow as the finish line approaches...

M/Tb379

http://worldinminiature.blogspot.com/

  • Member since
    November 2003
  • From: Nashville, TN area
Posted by bobbaily on Wednesday, August 28, 2013 8:20 AM

Hasen-great photos of a great build-job well done

TB-your KT is looking good-love the camo and your tools look great-can't wait to see the finished product.

Clemmons-the PE adds so much to your build-looking forward to more progress pics-can't wait to see your camo/weathering scheme

Bob


  • Member since
    July 2004
  • From: Sonora Desert
Posted by stikpusher on Wednesday, August 28, 2013 10:37 AM

Gamera

I don't think there were any official standards for applying whitewash. Some was applied with large brushes, brooms, in some cases buckets were just poured over the vehicle. No sure there is any way you can go wrong here.

Exactly! it's all up to the crew and circumstances.


F is for FIRE, That burns down the whole town!

U is for URANIUM... BOMBS!

N is for NO SURVIVORS...

       - Plankton

LSM


JOIN OUR COMMUNITY!

Our community is FREE to join. To participate you must either login or register for an account.

SEARCH FORUMS
FREE NEWSLETTER
By signing up you may also receive reader surveys and occasional special offers. We do not sell, rent or trade our email lists. View our Privacy Policy.