SEARCH FINESCALE.COM

Enter keywords or a search phrase below:

Steel Cats (Sept. 2012-Aug. 2013)

322430 views
3330 replies
1 rating 2 rating 3 rating 4 rating 5 rating
  • Member since
    March 2003
  • From: Rain USA, Vancouver WA
Posted by tigerman on Saturday, August 31, 2013 5:14 PM

Nice white-wash Clemens.

   http://i7.photobucket.com/albums/y269/wing_nut_5o/PANZERJAGERGB.jpg

 Eric 

  • Member since
    April 2013
Posted by SchattenSpartan on Saturday, August 31, 2013 5:37 PM

Thank you very much, gents!

Jack: I thought about the rust being a bit out of place as well (that's why I asked), but I'll apply some rust to the spare tracks on the turret and the exhausts as well, so I thought some rust near the engine grills (and maybe along the large weld seams on the hull/turret top) would add a bit of interest and contrast without being too unrealistic...

  • Member since
    July 2004
  • From: Sonora Desert
Posted by stikpusher on Saturday, August 31, 2013 5:56 PM

Clemens that well worn whitewash is looking wunderbar! I can picture it under some good weathering for a very sweet looking finish.


F is for FIRE, That burns down the whole town!

U is for URANIUM... BOMBS!

N is for NO SURVIVORS...

       - Plankton

LSM


  • Member since
    April 2013
Posted by SchattenSpartan on Saturday, August 31, 2013 6:00 PM

Thanks a lot!

  • Member since
    April 2005
Posted by Thunderbolt379 on Saturday, August 31, 2013 6:20 PM

Thanks for the kudos, guys, it's much appreciated! I must say I'm pleasantly surprised with the overall result, the depth and variety in texture is pleasing to the eye, even if it doesn't all register in pics -- the graphite work, for instance, seems to be too subtle to carry very clearly.

Clemens, that whitewash looks tremendous! I must have a go, if I could get a result that looks anything like that I'd be more than happy! I must revisit your methods...

Jack -- good idea, but stretching sprue is a technique that has always eluded me -- I've tried many times over the years and all it ever does for me is snap. I've tried varying the distancing from the flame, drawing slower, twisting as I draw, nothing seems to work... It's a knack I never managed to get! I'll have a good look for the wire today, if I can't find it I can hit the LHS tomorrow -- I need thinner anyway, and might as well throw in some paint...

I forgot to dust the right fender last night, so that's on the list for today, plus do the right cross, and I would be willing to call it done right there, leaving the way open for exchanging the decals at some point if I decide... Will let you know, and work up the gallery pics in the near future.

Cheers, Mike/TB379

http://worldinminiature.blogspot.com/

  • Member since
    April 2013
Posted by SchattenSpartan on Saturday, August 31, 2013 6:30 PM

Thanks, Mike!

I'll write a short tutorial on how I applied the whitewash. I have almost all the pics I need for it (I'm just missing a pic of the end result with the weathering), so you can expect me to post it as soon as I finish my kitten. I WILL get her done untill Thursday, because I'm off to a 3-week trip on Friday...

  • Member since
    April 2005
Posted by Thunderbolt379 on Sunday, September 1, 2013 2:44 AM

Clemens -- looking forward to it! Winter armour is definitely on my agenda.

Well, I'm calling her done. I went with the decals after all, with persuasion they snugged down into the zimmerit entirely satisfactorily. I was going to shoot some flat but then looked at the lightening effect and compared it to the "frosting" reported by others, and decided I don't want milky patches on that camo, not at this stage. I've lived with shiny decals this long, I can live with them a bit longer.

The final dusting is done and the AA MG and main gun are now attached permanently. I'm hoping to do the gallery photos this evening, then into the display case with her -- this kitty is a wrap!

Cheers, Mike/TB379

http://worldinminiature.blogspot.com/

  • Member since
    April 2005
Posted by Thunderbolt379 on Sunday, September 1, 2013 7:36 AM

And here she is, gentlemen, in her tired and dirt-smeared glory:

Tamiya's 1990s retool of the King Tiger has been called "a good kit in its day" but I think it still is, given the building pleasure it provides. A kit is a there dimensional canvas on which we perform our art, and in the end, the art is what matters, at least I think so.

Any suggestions would be gladly taken on board -- if you can spot anything that needs a tweak, I'd love to hear about it.

Tigerman, thanks for a great GB, it's been a world of fun taking part!

Cheers, Mike/Thunderbolt379

http://worldinminiature.blogspot.com/

  • Member since
    July 2004
  • From: Sonora Desert
Posted by stikpusher on Sunday, September 1, 2013 10:40 AM

I really like it TB. If I must give one critique, I would say that the declas appear a bit too shiny in a couple of photos. But really everything else looks done 'just right'. Not overdone, not underdone.


F is for FIRE, That burns down the whole town!

U is for URANIUM... BOMBS!

N is for NO SURVIVORS...

       - Plankton

LSM


  • Member since
    July 2012
Posted by Hasenpfeffer on Sunday, September 1, 2013 10:49 AM

Excellent work, guys. Dan I love the way your Tiger came out. It was the execution of the dust layer that you and Jack put down that gave me the courage to try it on my Panther. Eric, you put together one heck of a Tiger as well. With Kursk being one of my favorite research subjects. I have no doubt that all of the AFVs in this action would have been subjected to all kinds of dust, dirt and grime. I've often thought of trying to replicate a close call with an artillery barrage. Chunks of earth and shrapnel... just have to test it out sometime. I also wonder what kind of effect would be produced by being in close proximity to fire or thick oily smoke.

Clemens - the WW is looking very neat indeed. I'm looking forward to where this take ya. Cool

Mike -  KT looks superb. Yes

Jack -  Thanks, man. The dust was kind of a new practice for me. Like I said, it has really grown on me. Next time, however, I will be building the layers up. I scared myself this time - big time. When the layer of (what looks fairly clear) diluted pigments dried I could barely make out the turret numbers. I did really spend a couple hours toning it down and removing what I could. Stiff brushes to the extent of a tooth brush were used along with fresh spirits, etc. Whew! Glad it worked out okay. Having a disaster that late would have been a real kick in the butt. The screens over the intake/exhaust fans - yes, I did use some "black smoke" pigments. A little goes a long way. I need to get my hands on some darker rust color pigments as the ones I have and used (medium) looked too reddish for my taste and thus the black to nullify it a bit. I also removed some of this with fresh spirits, but it still appears pretty dark in the pics. It isn't very realistic from what pictures I've seen... but in this case I went with what looks good. I wanted a little contrast there. As for the B&W photo and the grain, yes, you are very perceptive. I spent all of two minutes with Photoshop adding B&W and grain layers. Nothing special considering all of the software/filters available. Making some of the shots look like old postcards or pictures on beat up paper is kinda fun.

So here are the extra pictures I promised:

Here ya go... to show you what you can do with just a couple filters.

And here is a shot I took with both of my GB builds so you can see them together.

  • Member since
    May 2011
  • From: Illinois
Posted by armor86 on Sunday, September 1, 2013 12:04 PM

Dave - final photos / modal turn out great - dusting looks good - fyi AK Interactive offers now a Kursk color dirt/mud ...  Wink

It's been a great year with the GB and lots great tank builds.  Armor86


Dan

  • Member since
    March 2003
  • From: Rain USA, Vancouver WA
Posted by tigerman on Sunday, September 1, 2013 12:16 PM

Mike, superb job on the KT. I really like how the camo came out and the weathering nicely tied everything together. I do agree with Carlos that the crosses look too new compared to the rest of the vehicle. Maybe some pigments to tone it down some. Thanks for being part of our little family for the past year.

   http://i7.photobucket.com/albums/y269/wing_nut_5o/PANZERJAGERGB.jpg

 Eric 

  • Member since
    July 2006
  • From: San Francisco Bay Area
Posted by bufflehead on Sunday, September 1, 2013 1:59 PM

Its over, its over , its over.  Sad

Alas, I wasn't able to finish the Panther F.  After moving I ended up in a deep funk and just couldn't get back into modeling, even though my work bench was ready a month ago.  But I decided to force myself back, so last week I started working on the resin F turret, hoping I might complete the kit in time.  I realized that the IR assembly couldn't be fitted in the cupola because the resin turret is solid, not hollow, and there was no rim underneath to attach it to.  So I spent the better part of two nights slowing hollowing out the inside of the cupola and turret with a Dremel to create a rim underneath so I could glue in the IR mount and also because the hatch would be open and I needed to create some depth under the cupola.

Not being able to access the interior of the cupola rim so that I could scrape out enough resin, I decided to drill a large hole from the bottom so that could I insert a micro-chisel and try scraping from underneath.  I was very careful to make sure the drill bit was in the right spot and drilled very slowly.  I didn't want the drill to go too far and drill right into the cupola!  So guess what I did??  Yep, despite my best intentions, the drill bit pulled itself too far, before I could stop it, and chewed away part of the cupola......Bang Head

(sigh)  This happened last week.  I was so disgusted I just walked away and couldn't return to the bench for a few days.  I knew I couldn't fix this in time, if even I could fix it.  I can't use the kit turret because I already used it for some painting experiments....its too far gone.

The kit is too far along to give up on.  I'll add it to my shelf queens and try to find another resin Panther F turret for it.  Maybe it will grace the FS Forums before too long!

Sorry to all for my absence.  Looking back over the last couple of pages I can't believe the great work you've all done!  Kudos to all of you for the outstanding work and to Eric for another fine Group Build.


Ernest

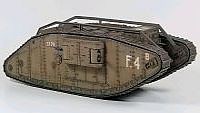
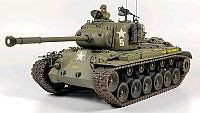
Last Armor Build - 1/35 Dragon M-26A1, 1/35 Emhar Mk.IV Female
     

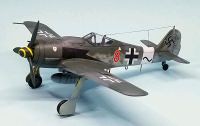
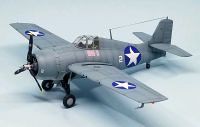
Last Aircraft Builds - Hobby Boss 1/72 F4F Wildcat & FW-190A8
     

  • Member since
    April 2006
  • From: ON, Canada
Posted by jgeratic on Sunday, September 1, 2013 3:19 PM

Mike -  fine build there, and the over all look is very appealing.  I think we could better critique the finer details  if the photos were larger.  A few things I think I'm seeing: the cables are a solid metallic colour?   Next time try adding some rust brown, you can either add it as a wash, or paint them brown and then dry brush a gray colour and then add a few metallic highlights here and there.   You can also add some black powder on the ends of the muffler openings (and inside).    I noticed streaking on the turret top, so in that regard,  the more acute angles of the vehicle surfaces should have some semblance of this too, ie. all mud guards/flaps.  For the decals, as pointed out, you can use weathering powders to eliminate the sheen.   They can be applied dry, or make a wash/glaze by first diluting in water and a drop of dish soap.         hth

Dave - sweet additional photos, again fab work there and great rendering of the bucket hanging in the rear.  Seems to be a mainstay for German stowage, wonder what they were used for?

Ernest - that is too bad as I was looking forward to seeing some more of your style of work.   I think that resin turret is still salvageable.  If I had to fix something like that, I'd cut two layers of sheet styrene to match the contours of the hatch opening, and then just use putty to fill in the rest of the boo boo.

regards,

Jack

  • Member since
    April 2005
Posted by Thunderbolt379 on Sunday, September 1, 2013 6:16 PM

Thanks for the comments, guys! Carlos and Eric -- you're right! -- pigments ground into the decals was a trick I used to use to knock down the shine a bit and tone the white toward the overall dustiness, so I'll do that today -- I should have thought of that! Jack -- actually many of the techniques you mention are already there, they just didn't copy into photographs due to being a bit too subtle -- black pigment in and on the exhausts, streaking on the skirts and rear fenders, and the cables were given a brown wash to create a patina of dirt/rust -- again, not heavy enough to carry through. None of the graphite work registers in these images, either... Maybe I'm being a bit too restrained? Or I need a better lighting settup! I can go over these elements and firm them up -- thanks for the steer! There's nothing like a fresh pair of eyes -- or many pairs!

Cheers, Mike/TB379

http://worldinminiature.blogspot.com/

  • Member since
    March 2003
  • From: Rain USA, Vancouver WA
Posted by tigerman on Sunday, September 1, 2013 9:47 PM

That's a bummer Ernest,  I so look forward to your finished builds.

   http://i7.photobucket.com/albums/y269/wing_nut_5o/PANZERJAGERGB.jpg

 Eric 

  • Member since
    November 2009
  • From: SW Virginia
Posted by Gamera on Monday, September 2, 2013 8:14 AM

Clemons: The white wash is spectacular!

Mike: Beautiful work! The only little nitpick I'd give is like Jack I noticed how bright and shiny the tow cables are, a little brown wash etc would tone them down a little. Otherwise fantastic job!

Dave: That's just perfect! Wow, I love both of them.

Ernest: Ouch, been there, done that, got the T-shirt. Looks like you should be able to fix it without too much work though. Or heck, have the commander looking at the road ahead - leaning over to cover that damaged area!

If not I suppose you could cut the cupola off and replace with one from the spare parts box. I'm sure you have one, if not I've got some junked Panthers you could have the part off of.  

"I dream in fire but work in clay." -Arthur Machen


  • Member since
    April 2013
Posted by SchattenSpartan on Monday, September 2, 2013 11:36 AM

Thank you very much, Cliff!

Dave: Both of them look absolutely gorgeous!

Mike: Really nice work! The only thing i don't quite like are the glossy decals, but it seems like you're working on that already!

Ernest: That hole looks pretty bad, but I shouldn't be too hard to fix it. I could send you a replacement cupola as well, but I think Cliff's offer is the better one (I'm living in Austria...)

  • Member since
    November 2003
  • From: Nashville, TN area
Posted by bobbaily on Monday, September 2, 2013 2:38 PM

Mike-your final photos really make your King Tiger stand out-great job-I agree with you on the Tamiya kits-they may be not be up to current Dragon standards, but they are great pallets for adding detail, camo, weathering-you did good!

Dave-great to see both Panthers together-both outstanding builds-you did a great job of bringing the Italeri kit up to and surpassing current Dragon standards.

Ernest-sorry for your misfortune-I know that feeling...however, there is no doubt that you'll be able to recover and complete.

Well, here's my Dragon 1/35 Late Panther G-still needs some weathering, pins attached for the spare links (I reached my breaking point while trying to open up the holes to insert the pins earlier today), finding the lower mounting point for the jack, finding the parts I broke off attempting to attach the cables...you get the picture.  For this GB, she's done......however, I may go back and clean up a few details-some dry brushing of the tracks, adding some dust, etc.

This has been a great place to hang out & participate the last year-you guys have completed some very impressive builds-the attention to detail has been over the top-I learned a lot just watching.

Eric-job well done-you did a great job on your Jagdpanther and ran a great GB-thank you.

On that note, hope to see you fine folks on the next go round.

Cheers

Bob


  • Member since
    March 2006
  • From: Right Side of a Left State
Posted by Shellback on Monday, September 2, 2013 5:22 PM

I browsed thru the pages to get caught up ....................Impressive builds here guys .

  • Member since
    November 2009
  • From: SW Virginia
Posted by Gamera on Monday, September 2, 2013 7:05 PM

Bob: Nice!!! A little dirt and rust and she'll be perfect!

"I dream in fire but work in clay." -Arthur Machen


  • Member since
    July 2012
Posted by Hasenpfeffer on Monday, September 2, 2013 7:18 PM

Looks great, Bob. Just a little more finishing touches and she'll be a beauty! Thanks for all the great encouragement along the way. I'm sure I'll see ya around these parts. Wink

  • Member since
    May 2010
Posted by Shawker on Monday, September 2, 2013 10:58 PM

Ernest I know a lot of the guys are telling you it is not the end of that turret and believe them it is not.  The  nick is small and i would wager that putting on the IR would obstruct most of it then use it to your advantage, making it look like when they were installing the IR they banged up the cupola add some primer or rust showing through and bam fixed,  I have seen brand new armored vehicles with dents and dings straight from the factory so it would not be off even if you did it as a new tank.

I hereby ask Eric the Master of the Group Build to extend the time for you to get her up to speed and represent how a master can use an oops to their advantage.

Sgt Shawker

  • Member since
    November 2003
  • From: Nashville, TN area
Posted by bobbaily on Tuesday, September 3, 2013 6:16 AM

Dave & Gamera-thanks...I agree...it needs some dirt and maybe a little rust (this was a very late war Panther) but at least some chipping/wear on some surfaces....maybe the next rainy day I'll address it...

Bob


  • Member since
    March 2003
  • From: Rain USA, Vancouver WA
Posted by tigerman on Tuesday, September 3, 2013 10:45 AM

Bob, glad to see that  you perservered. Just some more weathering and you'll have a well done build. I like whatever you did on the wood.

   http://i7.photobucket.com/albums/y269/wing_nut_5o/PANZERJAGERGB.jpg

 Eric 

  • Member since
    November 2003
  • From: Nashville, TN area
Posted by bobbaily on Tuesday, September 3, 2013 10:49 AM

Thank you Eric....and again, another great GB that you've hosted.

The wood was a coat of Vallejo Dark Sand followed by a Burnt Umber Oil wash.

Are you thinking about running another GB in the near future?

Bob


  • Member since
    July 2004
  • From: Sonora Desert
Posted by stikpusher on Tuesday, September 3, 2013 12:37 PM

Bob, that is a very good looking Panther! I really like the dark late war colors on it.

Ernest, all is not lost, and I have a possible solution. IF the F turret used the same cupola and the Panthers A & G, you can get one of those from Dragon's "Achtung Jabo!" figure set. It just happens to come with a Panther cupola in the set. I can certainly comprehend being in a modeling funk after moving. I moved twice in the past two years, neither time by choice or under good circumstances. Don't force anything and the urge to build again will come back.


F is for FIRE, That burns down the whole town!

U is for URANIUM... BOMBS!

N is for NO SURVIVORS...

       - Plankton

LSM


  • Member since
    November 2003
  • From: Nashville, TN area
Posted by bobbaily on Tuesday, September 3, 2013 1:04 PM

Thank you Stik

Bob


  • Member since
    March 2003
  • From: Rain USA, Vancouver WA
Posted by tigerman on Wednesday, September 4, 2013 12:09 AM

Bob, I might, but it probably won't be for a couple of months or until next year.

This GB has exceeded all expectations.

   http://i7.photobucket.com/albums/y269/wing_nut_5o/PANZERJAGERGB.jpg

 Eric 

  • Member since
    April 2006
  • From: ON, Canada
Posted by jgeratic on Thursday, September 5, 2013 2:46 PM

Bob - great looking panther.  Yes Beer

It's cool to see a German armour piece finished in something other than panzer grey or dark yellow.  Looking at the the linked photos, you really have solved the wood grain look, and thanks for explaining your method.

regards,

Jack

JOIN OUR COMMUNITY!

Our community is FREE to join. To participate you must either login or register for an account.

SEARCH FORUMS
FREE NEWSLETTER
By signing up you may also receive reader surveys and occasional special offers. We do not sell, rent or trade our email lists. View our Privacy Policy.