SEARCH FINESCALE.COM

Enter keywords or a search phrase below:

Steel Cats (Sept. 2012-Aug. 2013)

322302 views
3330 replies
1 rating 2 rating 3 rating 4 rating 5 rating
  • Member since
    September 2005
  • From: beacon falls , Ct.
Posted by treadwell on Saturday, December 29, 2012 6:18 PM

Heya Marc Smile

Panther looks terrific, and thanks for the link to the JLC saw. My wife,Pati, snagged me one for Christmas.  I am slowly trying to work on something, and that dam saw has been used so many times.... you were right, how did I ever live without it ?

Happy New Year to you man ;-)

tread[H]


  • Member since
    April 2011
  • From: imperial beach, ca
Posted by malone duke on Saturday, December 29, 2012 7:53 PM

Hassenpfeffer. Thanks man. I'm gonna make the corrections. Don't know if I can get the one closest to the turret to stay on. At one point I had all four covered. But the turret measurements are a little off so that's why I just had the two aft ones covered. I'll have it right one way or the other by my next pics.

 Shellback. I have to say your Kt is great. I'm really impressed with the weathering. I'm gonna try and keep mine subdued like yours. I imagine at least some of these kitties were cruising the autobahn at some point.

  • Member since
    March 2003
  • From: Western North Carolina
Posted by Tojo72 on Saturday, December 29, 2012 8:31 PM

Your really on a roll Marc,that looks great.

I tried out the AK Chipping fluid on the whitewash for  my Tiger turret,no pics yet,but I think it worked out okay.I should get to do the hull tomorrow.

  • Member since
    April 2009
  • From: Carmel, IN
Posted by deafpanzer on Saturday, December 29, 2012 9:09 PM

Guys- Trust you all had nice Christmas!  Mine was just great and relaxing.  I had to catch up here... great work everybody.  I am seeing a lot more aftermarket especially PE work in this GB... loving 'em! 

My week long vacation started yesterday so I hope to make alot of process on my Tiger.  

Winter camo has been sprayed if I was at scale of 1/35 after using silly putty for the camo scheme.  

I think I shouldn't have left silly putty on the Tiger for too long.  Left it on after being painted on for several hours so I could see the movie The Hobbit.  It was harder removing the silly putt... LOL

I spent a lot of time chipping the paint off today... here's a preview.

Please keep in mind I am going for weary winter camo as if the Tiger has survived the harsh winter in Russia.  

Andy

  • Member since
    August 2009
  • From: MOAB, UTAH
Posted by JOE RIX on Saturday, December 29, 2012 11:08 PM

Deaf - Oh Man that's really turning out awesome. I personally love silly putty. Use it often. A hint for removing silly putty after it has sat for a good while and has gotten kinda gooey and sticky is to put it the fridge for awhile. Get 'er good and cold and the stuff pops right off. I particularly like the effect you did on your wheels. how you get the chipping effect. Again, NICE!

"Not only do I not know what's going on, I wouldn't know what to do about it if I did". George Carlin

  • Member since
    March 2003
  • From: Western North Carolina
Posted by Tojo72 on Sunday, December 30, 2012 11:06 AM

Andy,the Tiger loks great,but I'm looking at those figures and they look even better !!

  • Member since
    May 2011
  • From: Illinois
Posted by armor86 on Sunday, December 30, 2012 1:44 PM

Andy - Tiger winter paint camo looks great, figures on there way too! - updated photos - fire ext. added and finished the filter system ... Armor86


Dan

  • Member since
    November 2003
  • From: Nashville, TN area
Posted by bobbaily on Sunday, December 30, 2012 2:37 PM

Malone-I too depend on the instructions for details like the vent covers-I mean, if you can't trust the kit manufacture, who can you trust...but it does get frustrating with some of the Dragon kits that I've encountered that show the options but provide little or no insight.  I'm still amazed at your ability to do 1/72 scale PE....and do it well.

Andy-winter camo looks great. 

Armor-again, the PE work is outstanding...can't wait to see more.

Bob


  • Member since
    November 2009
  • From: SW Virginia
Posted by Gamera on Sunday, December 30, 2012 5:18 PM

Great work everyone!!!

Andy: Really like the 'tiger' stripes on the Tiger! The road wheels turned out great! And really nice work on the figures.

"I dream in fire but work in clay." -Arthur Machen


  • Member since
    April 2005
  • From: Piscataway, NJ!
Posted by wing_nut on Monday, December 31, 2012 5:17 PM

Andy... come do my wheels.   Please, please, pleaseStick out tongue

A86... that looks real nice.

Spent the day at the bench working at the white wash. And it was work. I sprayed the white, over the dry hairspray, last night to be ready for today. i have never waited that long and it was VERY hard to get off. So here is it and want some real honest opinions. What do you think? No washes at all yet so that's still to come.

I hope my hangover isn't to bad so I can do some more work on this.

Marc  

  • Member since
    July 2012
Posted by Hasenpfeffer on Monday, December 31, 2012 6:12 PM

Andy - Nice! Likin' it... Yes

Armor86 - Those Feifels look awesome. They were definitely worth the work you put into them. You sure you didn't shrink yourself and bolt that up? Minus the coming paint, it looks real, man.

Marc - I kinda like it. It looks like it's worn off... maybe early spring? You could easily put this one in muddy situation. Or thawing? I take it you have reservations on how it came out? My only critique would be what you're probably gonna remedy in the near future anyway, and that's it is way too clean/white on the lower hull. (and thanks for the tip to not let it sit over night.. but the results are pretty cool) I appreciate the comments on painting metal as well.

Here's my NYE update... Maker's Mark in hand... Stick out tongue I've kinda been all over the place with this one. I'm sure it's because of the lack of detail, etc. I've spent a lot of time planning how to add that. There have been a lot of sink holes and ejector marks to take care of as well. Let's see what we got here:

Wheel detail - Italeri above, Dragon below. Gotta live with what I've got here. Cleaned up and scruffed.

Spare wheel made from Tamiya extras. I think the middle one is from the very first armor kit I ever made ~12 years old. A Jagdpanther! Surprise Spray painted that monotone brown... what a beauty! LOL Anyway, I cut the "axle" off, trimmed off the bolts and drilled the holes out. Plan is to mount on the turret like is so often seen.

I decided to replace the kit fenders with the ones I cut off (per the directions) and replaced on my last Panther. They look way better. Here's one side done...

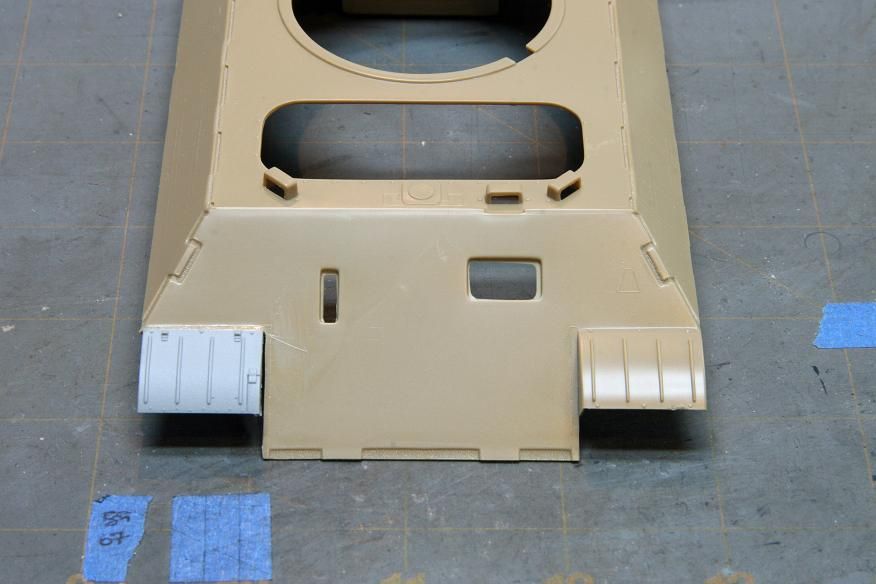
Here I cut off the blob of a turret vent and shield and replaced it with the spare parts from the CH kit I just finished. I also cut out a hole for a periscope. Dragon was nice enough to supply enough extras in their kit that I can use them here... lower hull will have them too. I just haven't come up with any solution to the cupola periscopes. I may have to live without them. Also, started on the weld seams. One done on the rear using stretched sprue and liquid glue/back of exacto blade.

Also attached some more of the zimmerit. I've spent quite a bit of time fixing bubble pockets. I'm using CA since that's what I have... What's the best stuff to use here? I've heard Gator Glue works well... as long as it doesn't look wavy under the paint I'll be happy.

Happy New Year fellas! Stick out tongue See ya in 2013. Have fun and be safe! Toast

EDIT - Necessary since two of the pics didn't show up for some reason...

  • Member since
    April 2005
  • From: Piscataway, NJ!
Posted by wing_nut on Monday, December 31, 2012 7:02 PM

Dave, Thanks buddy.  It's not that I am unhappy with it, because of the difficulty it's not what I envisioned.  The plan all along was a more or less muddy situation. Not knee deep in the mud, but a wet dirt road at least.

Yours is looking quite nice.

I have fallen in love with Markers this year.  I have been a Woodford Reserve guy until I finally got to try the Makers. WOW.  I got a bottle of that and 1 of Patron for Christmas.  I ordered whiskey stone so I can drink it chilled but not water down.  I'll have a full report on that soon.

Marc  

  • Member since
    March 2003
  • From: Rain USA, Vancouver WA
Posted by tigerman on Tuesday, January 1, 2013 12:07 AM

Wonderful work fellas.

Marc, it looks fine. My only issue is the big chip on the right rear of the turret. It looks a little odd.

Dave, swell work. You are on a roll.

I hope to get some bench time tomorrow. Bowl Games or modeling? Hmm

   http://i7.photobucket.com/albums/y269/wing_nut_5o/PANZERJAGERGB.jpg

 Eric 

  • Member since
    December 2006
  • From: t.r.f. mn.
Posted by detailfreak on Wednesday, January 2, 2013 9:52 AM

Wingnut the panther looks very nice,I was just looking at a vehicle on E-Bay that the builder had chipped off large areas of zim. although we do not see it much I can see that it could happen. In reality I would say that there could have been some surface contamination to prevent the zim from properly adhereing or any number of reasons.

Some really great builds happenin here.This post would be several pages long if I attempted to comment on them all so for the sake of saving time and space I'll just give this.YesYes


                                          Greg"Detailfreak"Rowley


[View:http://s172.photobucket.com/albums/w1/g-earl828/]  http://i158.photobucket.com/albums/t104/cycledupes/1000Roadwheels4BuildBadge.jpg

  • Member since
    November 2009
  • From: SW Virginia
Posted by Gamera on Wednesday, January 2, 2013 10:06 AM

Well, anyway here I am, guess she looks ok, but nothing like all the fantastic work everyone else is doing. Embarrassed

The model is still shiny, haven't hit her with any clear flat yet. Haven't dry brushing her at all, seems it's out of vogue lately- I guess she looks ok without it, should I dry brushing her at all or just skip that step? 

BTW: still working on the right side tow cable while I was taking the photos so you can still see it sticking out.  

"I dream in fire but work in clay." -Arthur Machen


  • Member since
    March 2003
  • From: Rain USA, Vancouver WA
Posted by tigerman on Wednesday, January 2, 2013 10:13 AM

Great to see your King tiger again Cliff. Looks cool without the fenders.

Got my second color on with mixed results. Part of me likes it and the other half doesn't. I haven't done the wheels yet. ho hum, I'll have to touch some of it up and see what I think.

   http://i7.photobucket.com/albums/y269/wing_nut_5o/PANZERJAGERGB.jpg

 Eric 

  • Member since
    November 2009
  • From: SW Virginia
Posted by Gamera on Wednesday, January 2, 2013 11:44 AM

Thanks Eric! Looking forward to your photos.

Now I just need to find the friggin'  loader's hatch...

"I dream in fire but work in clay." -Arthur Machen


  • Member since
    September 2006
  • From: Dripping Springs, TX, USA
Posted by RBaer on Wednesday, January 2, 2013 1:47 PM

This is probably the most active GB I've ever participated it, no doubt. Lots of nice work going on.

I have a few pics, not much of progress shots but enough to get the idea, I hope.

Here's a shot of the tracks, painted and weathered. I shot them with automotive gray primer, then they got a black acrylic wash followed with dry pigments, semi-mixed for some variation, mainly earth tones.

A shot of the tank itself, with dark pigments only. I stayed away from any rust or chipping, since this thing was probably in action for a few weeks, maybe days. My reasoning is that there would have been no time for wear, only dust and dirt. According to Osprey's caprion, this tank (or one very much like it) was delivered w/o markings and went straight into the thick of it, apparently close to the Henschel plant in Kassel.

And an overhead view of the completed model.

I will get some good, clean background shots soon, but I'm calling this one done...... unless of course something in the pics catches my notice, or anyone else's. Big Smile

Apprentice rivet counter.

  • Member since
    December 2002
  • From: Bury St Edmunds, Suffolk, England
Posted by Bish on Wednesday, January 2, 2013 2:36 PM

No doubt about that RBaer, deffinatly an active GB. And that camo scheme, i like it. I am deffinatly going to have to do one of those. She is very very nice.

I am a Norfolk man and i glory in being so


On the bench: Airfix 1/72nd Harrier GR.3/Fujimi 1/72nd Ju 87D-3

  • Member since
    May 2005
Posted by pyrman64 on Wednesday, January 2, 2013 6:12 PM

RB: stunning KT.....always loved the "octopus" camo! Toast

Greg H

"There is many a boy here today who looks on war as all glory, but, boys, it is all hell." Gen. Wm T. Sherman (11 April 1880, Columbus, Ohio)

  • Member since
    April 2005
  • From: Piscataway, NJ!
Posted by wing_nut on Wednesday, January 2, 2013 7:00 PM

RB... Oh my!  Great looking KT going there.  And you are that "kight atthe end of the tunnel" stage.

I applied some AK winter streaking grime. It's greener that the color the bottle describes. And much thinner than it appears in the videos too. I do like the way it had the effect of a pin wash between the squares of the zim. The top is the pic form above a previous post the grime.

I've started going over the entire model adding some highlights/contrast to the zimmed surface. Little dabs of white oil paint was touched to the lightest spots in each square then "stumped" as the AK videos calls it. The right side of the pic shows the effects. It's subtle but I am really liking the way it's turning out. The 2nd pic is another before/after. I plan to go back again and do some at random instead every tile. Don't think I am going to do much more than that.

Marc  

  • Member since
    March 2003
  • From: Rain USA, Vancouver WA
Posted by tigerman on Thursday, January 3, 2013 1:49 AM

RBaer, that is a catchy scheme. You just don't see many of those. Fine job on the weathering as well. Yes

Marc, she just keeps a getting better.

   http://i7.photobucket.com/albums/y269/wing_nut_5o/PANZERJAGERGB.jpg

 Eric 

  • Member since
    July 2012
Posted by Hasenpfeffer on Thursday, January 3, 2013 6:32 AM

Gamera - You've got nothing to be ashamed of, it looks great. The pics make the DY look a little dark, but it's coming along nicely. I see you have the basic groundwork done for your barrel cleaning scene. Care to share how you made it?

RBaer - Cool! Nifty scheme that you pulled of in expert fashion. Yes I remember seeing a pic or two of this scheme... You could plop that thing down on a rubble strewn street and it would look right at home.

Marc - It's really looking the part now. You've continued the worn look quite well. I'm taking notes on those techniques. I'll have to look up the AK how to stuff. "Stumping" is a new word for me... I'm, well... stumped. This is gonna look sweet with the tracks on. (Are the turret numbers painted? Me likey Wink)


  • Member since
    August 2009
  • From: MOAB, UTAH
Posted by JOE RIX on Thursday, January 3, 2013 9:37 AM

Gamera - Man I agree. Do not sell yourself short as that KT is exquisitely done.

RBaer - I too really like the unique scheme. You have certainly done it justice.

Marc - Aw Heck what can I say, DANG!!!. That is simply an awesome effect.

 Alright, I've gotten settled in a bit at home and with a new work schedule now maybe I can get something going today. Target today is spraying on the wheels. Good to be back at the bench. 

"Not only do I not know what's going on, I wouldn't know what to do about it if I did". George Carlin

  • Member since
    November 2009
  • From: SW Virginia
Posted by Gamera on Thursday, January 3, 2013 9:55 AM

Dave & Joe: Thanks! I like how she looks but still she lacks a certain omph to me that most of the other guys have done to take their builds from good to spectacular. Or maybe I'm just more critical of my own work-  I dunno...

The KT may be too dark, I hit the zimmerit with a brown wash that may have been too strong. The base is pretty simple, just an oak plaque from the craft store with some cellu-clay, brown paint, and a thick layer of static grass. Not that crazy about how it turned out, used a dark brown paint and it didn't look right so I put on a lot of grass to cover up the brown. Now it's so lush it looks like a golf course to me. I'm going to toss in some longer dead grass in hopes it helps some. Maybe the KT is in someone's cow pasture and the manure made the grass so lush. That's my story and I'm sticking to it.

Now I just need something to fill the dead corner, I have some ammo boxes I might use but thinking maybe a Kubelwagon or small truck/lorry or something might work better. Will have to see how it goes.

RBaer: Did you call that an 'octopus' camo? Whatever it is it looks cool to me, love the dusty and worn but otherwise straight from the factory look.

Marc: So you're highlighting random panels of the waffle pattern? A lot of work but so far really looks good to me.  

"I dream in fire but work in clay." -Arthur Machen


  • Member since
    September 2006
  • From: Dripping Springs, TX, USA
Posted by RBaer on Thursday, January 3, 2013 11:55 AM

Gamera, don't knock yourself, looks great. I get concerned about my own stuff a lot, but have to keep on going, because I know the end result is worth it.

Marc, digging the finish. Looks like each zim square is an individual canvas.

All, I had a few moments of "what have I done?!" thoughts doing this scheme. The circles really looked clownish and rough right after application, and I seriously considered stripping the whole thing and starting over. Glad now that I didn't.....    The display for this one will be a street scene, lots of debris and junk laying around. I haven't fixed the turret hatches in place yet, so figgies are an option.

Apprentice rivet counter.

  • Member since
    December 2002
  • From: Bury St Edmunds, Suffolk, England
Posted by Bish on Thursday, January 3, 2013 2:07 PM

Marc, that is looking stunning. Great job on the Zim.

Gamera, doesn't look anything wrong with that to me.

RBaer, that scheme looks just fine to me. Sometimes a camo scheme on a model can just be to neat. I have seen some schemes i would like to do that have clearly been brushed on by the crews. But i am alwasy worried that on a model that will look like they were done by a 5 year old. But sometimes you have to put that ashide and remember thats how it was done in the field.

I am a Norfolk man and i glory in being so


On the bench: Airfix 1/72nd Harrier GR.3/Fujimi 1/72nd Ju 87D-3

  • Member since
    March 2003
  • From: Western North Carolina
Posted by Tojo72 on Thursday, January 3, 2013 5:18 PM

I whitewashed my Early Tiger using AK Chipping Fluid which worked pretty well.I figured that anything white in the field wouldn't stay white long,so I applied Mig Productions "Cold Gray Wash" to tone down the white,and Mig Productions "Brown Dirt for White Camo" Filter to dirty it up a bit.I like the results.I still have more detail weathering and painting to do and perhaps some pigments.So I think it looks okay,any thoughts ? Thanks for sharing

  • Member since
    November 2003
  • From: Nashville, TN area
Posted by bobbaily on Friday, January 4, 2013 6:43 AM

Andy-your Tiger is coming along nicely-nice winter camo scheme.

Marc-another winner in progress

Dave-You're doing a great job of upgrading-amazing how much difference the fender swap makes.

Cliff-your KT looks great to me.....I would be thrilled if my builds turned out that nicely.

RBaer-WOW-love the camo scheme & weathering.

Tojo-very nice job on the winter scheme & weathering.

Bob


  • Member since
    November 2009
  • From: SW Virginia
Posted by Gamera on Friday, January 4, 2013 7:55 AM

Tojo: Looks awesome to me, I'm going to have to try some of that AK Chipping Fluid myself, DoogsATX has done some really cool stuff on aircraft with it too. I like how you've rubbed more whitewash off on the skirts and high traffic areas that should get more wear.

Bish & Bob: Thanks guys!

I'm not at all unhappy with my results. It's just I learned to paint the model, wash, drybrush, done. I'm still trying to assimilate all these new techniques like pin washes, filters, colour modulation etc etc etc. I've been trying but I still need more practice with them. I get a little grouchy when they don't work out like other guys have been getting them to look. 

"I dream in fire but work in clay." -Arthur Machen


JOIN OUR COMMUNITY!

Our community is FREE to join. To participate you must either login or register for an account.

SEARCH FORUMS
FREE NEWSLETTER
By signing up you may also receive reader surveys and occasional special offers. We do not sell, rent or trade our email lists. View our Privacy Policy.