SEARCH FINESCALE.COM

Enter keywords or a search phrase below:

FineScale Modeler WWI Aeroplane Group Build 2013

139961 views
1262 replies
1 rating 2 rating 3 rating 4 rating 5 rating
Moderator
  • Member since
    September 2011
Posted by Tim Kidwell on Friday, May 17, 2013 10:02 AM

Gentlemen!

What can I say that hasn't already been said? All of you are doing great work, and we've got some stunning paint jobs in the works!

Marc - I'm going to use your trick for shading on my wing. I hope that it comes out even half as nice as the shading on yours. I love that mauve and green scheme.

Bish - You're blowing us away with the 0/400. Can't wait to see the final result.

Gamera - How are things on your end?

Jack - I have to agree with Gamera on the color. I look at it and wish a candy company would make chocolate biplanes.

OK, so Aaron is out of the office today, and I sprained my ankle in the most cutthroat game of tag last night that you've ever seen. Neighborhood kids ranging from 16 to 5 (Dark Powers) trying to take out the old guy (me). I showed them, but in spectacular fashion, I leapt a rose bush, misjudged my landing, turned my ankle and went down like Frasier. I did, however, get up and continued to play (I CAN DO IT, COACH!). Of course, I'm paying for my can-do attitude this morning and probably for the next couple of weeks. Anyway, I'm flying solo today.

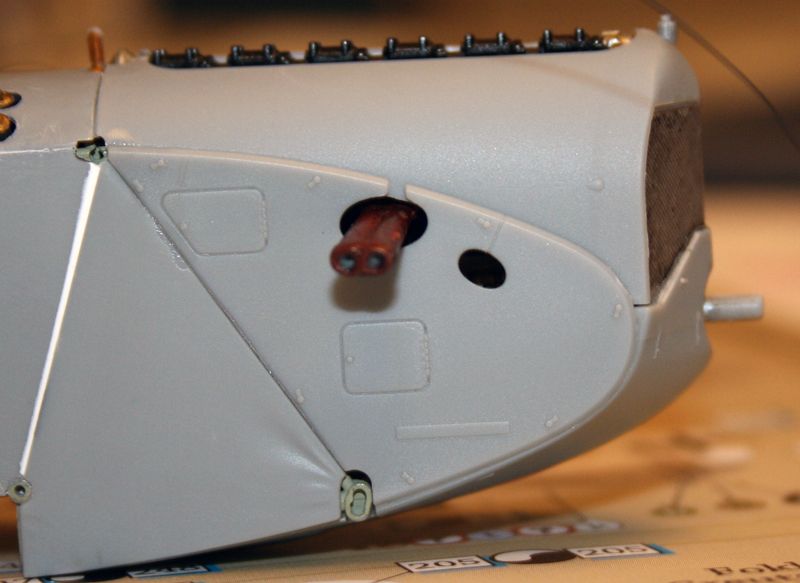
I've closed up the nose:
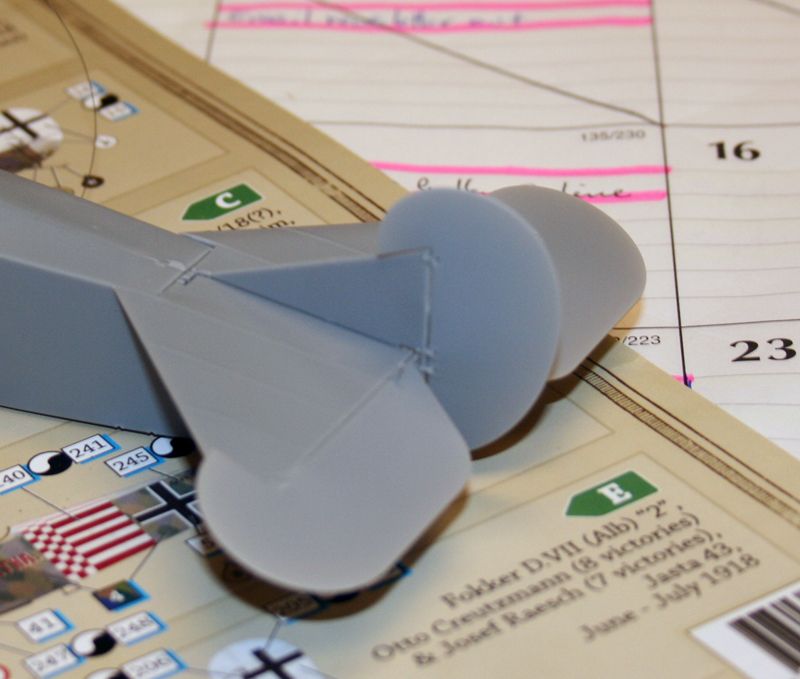
Put on the tail feathers:
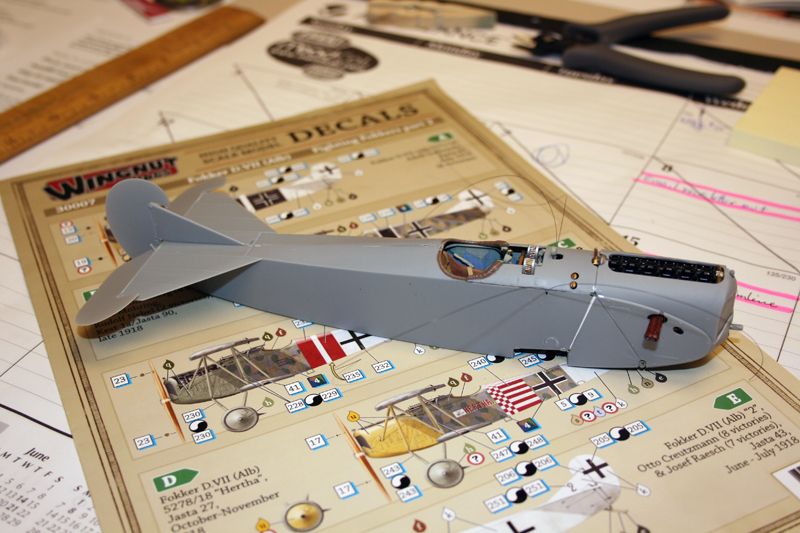
And am getting close to putting on some paint!
I'm debating putting the landing gear struts on or leaving them off for painting. I can't find any reference to the color of the axle wing, so I may just go with red.

That's my update for the week. I think the plan is to unveil our surprise next week. Again, thanks for coming along on this ride with us, and I'll talk to you guys soon!

--

Timothy Kidwell
tkidwell@firecrown.com
Editor
Scale Model Brands
Firecrown Media


  • Member since
    November 2009
  • From: SW Virginia
Posted by Gamera on Friday, May 17, 2013 10:41 AM

Bish: That thing is a beast! Love her!

Mike: I used Reaper paint about 10-15 years ago and it dried up in the bottle very quickly so I stopped using it. I hear they've changed their formula since then though.

Tim: Love the detail there! I have to pick up a Wingnut model some day. LOL, hope you feel better, dunno if I'm old or lazy but the only games I play anymore involve sitting down and using a mouse...

I am making sloooooowwwwwww progress. One of the guys at the local transportation museum our IPMS club meets at wants some models built for a display case so I volunteered for a 1/48th US Army UH-60 medivac Blackhawk from Minicraft and an Academy AH-64 Apache gunship. After all they're both olive drab all over, they should be quick builds right? Right!?!?!

"I dream in fire but work in clay." -Arthur Machen


  • Member since
    April 2005
  • From: Piscataway, NJ!
Posted by wing_nut on Friday, May 17, 2013 2:17 PM

Oh yes... quick builds... absolutely. Whistling

Marc  

  • Member since
    April 2003
Posted by shivinigh on Friday, May 17, 2013 2:46 PM
Tim your build is looking great. Yup thinking the same thing that I might have to pick up one of thos kits.

Quick build? Is there such a thing?


  • Member since
    September 2012
Posted by GMorrison on Friday, May 17, 2013 3:08 PM

Tim- I would leave the struts off till last. A little glue on the join won't be noticable. Bad news about the ankle, but now you can do your Ralph Macchio imitation.

All very far along. I need to get going.

The Hansa Brandenburg kit came yesterday. it's a simple little thing except for the tail control rigging.

I think it is safe to say that 1/72 is NOT a good scale for WW1 aeroplanes! Someone said something about fiddly bits, and boy is that the truth!

I separated and cleaned up the two pedestals that hold the fuel pump propellers. These stupid things are about1.5 mm long, and maybe .25mm in diameter. The only way to handle them is to stick them to a tongue depressor that's been wrapped backwards with tape- sticky side out.

 Modeling is an excuse to buy books.


  • Member since
    December 2002
  • From: Bury St Edmunds, Suffolk, England
Posted by Bish on Saturday, May 18, 2013 12:28 AM

Thanks guys. Mike, I do have the advantage of a simple paint job, and I have been taking the rigging very slowly, thinking each stage through.

Tim, nice looking build.

Kids, got to love em.

I am a Norfolk man and i glory in being so


On the bench: Airfix 1/72nd Harrier GR.3/Fujimi 1/72nd Ju 87D-3

  • Member since
    November 2009
  • From: SW Virginia
Posted by Gamera on Saturday, May 18, 2013 7:59 PM

shivinigh
Tim your build is looking great. Yup thinking the same thing that I might have to pick up one of thos kits.

Quick build? Is there such a thing?

LOL!!! One day I'll learn......  Still working on the UH-60 I'm doing for the museum. I figured the interior which is full of seats was wrong for the medevac version but what Minicraft provides doesn't look right for ANY version of the Blackhawk I looked at on the internet. Doing a quick, cheap, and dirty interior with the medical stretchers etc... or at least that's the idea. (sigh)   Dunce

Hopefully back to the Nieuport soonish... Huh?Time

"I dream in fire but work in clay." -Arthur Machen


  • Member since
    April 2005
  • From: Piscataway, NJ!
Posted by wing_nut on Sunday, May 19, 2013 4:37 PM

Thanks for the comments guys.

Bish, that is looking pretty darn nice there brotha.  Are you hooked on WWI birds yet?

Tim, Oh man that's just too sweet.

With bench time being as scarce as it has been lately the last thing I needed was to have to the regulator for the AB go and die.  Maybe it’s just me but I was really expecting to get more than 42 years out that thing. Whistling Harbor Freight to the rescue… temporarily.


I finished doing all the masking, shading, re-masking then highlighting on the wings and tail plane. A copy of filter coats of deck tan thinned 5/95 to pull it all together and start the toning down process.  That was the 1st look at the over al effect and I and I was real happy with the results.  The part I liked best it the elevator.  That is a dead flat piece of plastic.

Then came the dot filter, a technique used by armor guys on a regular basis but leaves a lot of aircraft scratching their heads when you mention the name.  The 1st 2 pics are of the left lower wing with the dots then side by side with the right to see the effect.  The amount of tonal variation really doesn’t show in the photo.  The bottom pic is an in progress look the process and the final result.

Marc  

  • Member since
    April 2003
Posted by shivinigh on Sunday, May 19, 2013 6:34 PM

Wingmut the colours look great. I was going to try that dot filter but was weary on messing up. Does it matter what colours you use the dots, and also what do you ise for a thinner?


  • Member since
    December 2002
  • From: Northern California
Posted by jeaton01 on Sunday, May 19, 2013 8:46 PM

Nice paintwork, Marc.  I like the dot filter method, I find it the easiest and safest method to use.  

John

To see build logs for my models:  http://goldeneramodel.com/mymodels/mymodels.html


  • Member since
    November 2009
  • From: SW Virginia
Posted by Gamera on Sunday, May 19, 2013 8:50 PM

Cool Marc, never tried the dot filter on an aircraft, yet!

"I dream in fire but work in clay." -Arthur Machen


  • Member since
    April 2006
  • From: ON, Canada
Posted by jgeratic on Monday, May 20, 2013 12:13 AM

Guys, thanks for the comments on my 'chocolate' brown concoction - had no idea it would effect people's sweet tooth.

Bish, it is really looking good, and I do see you have applied a variation of colour on the wing surfaces.  I saw this computer generated graphic from the RiseofFlight game website.  It might give some ideas with the weathering/painting on the sides if you wish to do so.

Tim - excellent work, and the visible lozenge fabric on the interior really looks smart.

Marc - first class stuff with the painting .  The dot method reminds me a lot of a couple techniques or style of painting I was taught in art college.  On one level it helps tie two opposing surfaces together.  Then there was Hawthorne's method of painting.  In his 'way of seeing', colour was actually made up of alternating cool and warm colours.

regards,

Jack

  • Member since
    April 2006
  • From: ON, Canada
Posted by jgeratic on Monday, May 20, 2013 5:17 PM

I was intrigued with what Marc was doing to replicate shadow and light reflection, and have turned my upper wing into a testbed.

Top half of photo shows the wing after having only the ribs masked off and airbrushing some light and dark. This was followed with an overall thin purple filter I made, but it practically obliterated all the airbrush detail.

Bottom pic illustrates another approach, but looks too mechanical.   It clearly shows where masking tape was used to create shadows and lights.  Next up will be an over spray of the original brown to bring it all together.

regards,

Jack

  • Member since
    November 2009
  • From: SW Virginia
Posted by Gamera on Monday, May 20, 2013 6:54 PM

Looks pretty awesome to me Jack, a little overspray should simulate the sun fading of the fabric I'd think.

"I dream in fire but work in clay." -Arthur Machen


  • Member since
    February 2006
  • From: Smithers, BC, Canada
Posted by ruddratt on Monday, May 20, 2013 8:35 PM

Tim - it's really starting to look like a D.VII now. Can't wait to see some paint on it!

Marc - love the dot filtering you're doing. Man what a difference! That is a technique I've yet to attempt - may have to now after seeing your results, but I assure you I won't be using the E.III as a test bed. Wink

Jack - very nice work. A softer demarcation on the shading will make a huge difference. How do you plan to work around the wing crosses?

Work's being ongoing with the E.III and I'm happy with my progress. Took a few pics earlier today but haven't loaded 'em into P-bucket yet. Hopefully later on tonight after dinner and the Wings-Hawks game.

Mike

 "We have our own ammunition. It's filled with paint. When we fire it, it makes pretty pictures....scares the hell outta people."


  • Member since
    February 2006
  • From: Smithers, BC, Canada
Posted by ruddratt on Tuesday, May 21, 2013 12:00 AM

OK fellas, here's where the E.III stands at the moment. The prop is finished (just placed it on for the pic - it won't be glued on until near completion) and the undercarriage is done as well. Got some paint on the rudder, the wings have been primed, ready for the base coat, and the control lines for the rear flaps are in as well, using the Gaspatch type 'C' buckles. The appropriate holes have also been pre-drilled into the wings to accomodate the 'one-end' buckles. Here's some pics.......


Mike

 "We have our own ammunition. It's filled with paint. When we fire it, it makes pretty pictures....scares the hell outta people."


  • Member since
    April 2003
Posted by shivinigh on Tuesday, May 21, 2013 12:29 AM
I don't know what to say Ruddrat but WOW!!!!!! Love the finish on the prop and it fits right in with that beat metal look on the cowling. Great work.


Moderator
  • Member since
    September 2011
Posted by Tim Kidwell on Tuesday, May 21, 2013 8:22 AM

Good stuff, fellas!

This is what I love to see: techniques from across the modeling spectrum used to get the effects you want. Excellent work, Marc. And Ruddratt, I'm just trying to keep up.

Jack, thanks for flying solo and being the first one in the build to use Marc's rib-shading technique. I think you're on the right track.

Yes, with the tail on, the D.VII does now look like an aeroplane. I haven't had any time to work on it this week yet. She sits there, beckoning. I'll get over the hobby store and pick up some Tamiya white primer maybe tonight or tomorrow. Then we're in business.

Have a great day, guys!

--

Timothy Kidwell
tkidwell@firecrown.com
Editor
Scale Model Brands
Firecrown Media


  • Member since
    April 2006
  • From: ON, Canada
Posted by jgeratic on Tuesday, May 21, 2013 2:27 PM

Mike - a really exquisite build you got going, and nice delicate job done with those turnbuckles. Yes

----------------------------------

Alrighty, top half photo has the over spray on.   Masks for the iron crosses were cut from Tamiya yellow tape.  Pheon Decals provided a sheet of top wing views of different coloured wing types along with the insignia.  So simply placed the tape over said area and cut out with a sharp hobby knife.

Bottom half photo shows, what I hope, is the final finish.  Re-introduced some highlights with white weathering powder, with a more solid highlight on the rib areas via paint.  Also used some of the purple wash alongside the shadow area of rib, but is very subtle.  One little blemish to touch up on the trailing edge of the starboard aileron.

regards,

Jack

  • Member since
    April 2005
  • From: Piscataway, NJ!
Posted by wing_nut on Tuesday, May 21, 2013 4:19 PM

By George, I think he's got it!

Marc  

  • Member since
    April 2005
  • From: Piscataway, NJ!
Posted by wing_nut on Thursday, May 23, 2013 8:39 AM

A day and a half without a post?  That's just wrongWink

I started the wood grain process last night.  The steps in order…


-Tape off the panel to be “grained”

-Cut a piece of the paper plywood that’s a bit bigger, coat the back with MIG Natural Wood pigment (no pic) and make a tape hinge.

-The hinge allows the paper to be flipped up to check progress

-Go over each line with a pen.  Any color but black ink so you can see where ya been

-Some brown flecks added for contrast added with an art pencil.  These will be muted a bit with a rubber blending tool.


Seeya in a year when I am done with this whole processWhistling


Marc  

Moderator
  • Member since
    September 2011
Posted by Tim Kidwell on Thursday, May 23, 2013 8:48 AM

Sorry, Marc. Completely my fault. I shoulda been in here raising a ruckus, but I've been super busy editing videos for the FSM website. Newest one shows Aaron post-shading a tank. Good stuff.

But enough of my excuses! I love this technique, and have to get through the D.VII so I can try it on an Albatros of my own. Also, I've been wondering, will you use the dot filter on the fuselage?

--

Timothy Kidwell
tkidwell@firecrown.com
Editor
Scale Model Brands
Firecrown Media


  • Member since
    April 2005
  • From: Piscataway, NJ!
Posted by wing_nut on Thursday, May 23, 2013 9:00 AM

Hey Tim... nah no worries.  Work is work.  The answer to your question is... dunno.  I have not thought that far ahead yet.  No doubt something will have to be done to the fuselage for weathering.  My 1st thought is a more or less traditional sludge was wiping it off front to back for some streaking effects.  i guess with the right colors the dot filter could work, as long as it not too opaque.

Marc  

  • Member since
    November 2009
  • From: SW Virginia
Posted by Gamera on Thursday, May 23, 2013 9:01 AM

Jack: Looks great! I think I'd have just put the wash over the wing crosses to simulate sun bleaching and fading them- did the crews repaint them or maybe they didn't fade as much as the rest of the fabric? Sorry if it's a stupid question but I'm kinda new to aircraft of this era.

Marc: That does look really cool! The 'paper plywood', did you buy this at the hobby shop, art supply store, or make it yourself? If you did so did I miss a post somewhere back there maybe?  

"I dream in fire but work in clay." -Arthur Machen


  • Member since
    April 2005
  • From: Piscataway, NJ!
Posted by wing_nut on Thursday, May 23, 2013 9:40 AM

Thanks gamera.  Nope you didn't miss anything.  Can't give away all my secretsWhistling  Big Smile  I Googled this like "wood grain" and "plywood"  to find some patterns I liked.  Saved to pics and played with them in a photo editor to gt them to gray scale and size it so the pattern seemed the appropriate size.  I changed the contrast etc o get sharper more distinct lines to be able to follow the with the pen.

Marc  

  • Member since
    April 2006
  • From: ON, Canada
Posted by jgeratic on Thursday, May 23, 2013 1:48 PM

Marc - I remember you first introducing your wood grain technique few years back with the Great War GB, and I'm still highly impressed now as I was then.  Some questions about sealing the powder.  What product do you use, and is it applied as each panel is completed or is the powder robust enough to be handled until the whole fuselage is done?

Gamara - you've brought up a good point about fading the wing crosses, though I have no quick answer.  Considering they are black, that would mean they absorb more sunlight, and therefore would be most prone to fading than the surrounding area?  Mind you, I'm sure the original crosses were clear doped along with the fabric, so that might afford some protection.

In the literature I've come across, no in depth description is given if new crosses were applied over the brown repaint.  Either way, masks would have to be used, and I think blanking off the original would of been somewhat quicker, (going the latter route would of required an extra mask for the white outline - so twice the work).   The aircraft itself was perhaps at most five months old when it first appeared in this livery with the pilot's (Franz Graser) personal emblem of the owl.  I'm depicting it as when he had flown it from January to March 1918.  This Oeffag Albatros had the serial 153.106 and through further research, was part of a batch of 50 units (153.62 - 153.111) ordered in July 1917.

hmmm... so most likely will add some fading to those crosses.

regards,

Jack

  • Member since
    March 2003
  • From: Towson MD
Posted by gregbale on Thursday, May 23, 2013 2:20 PM

Catching up:

Tim - Great work getting the cowling closed up and the tail on. I know you're busy, but I hope you got to do some painting.

Mike - The E.III just gets better and better. For a "monotone" finish, the subtle weathering on the fuselage is just breathtaking.

Jack - Inspiring save on the wing shading! That photo of the finished wing is very convincing.

Marc - Superb dot filter work on the wings. And, of course, the plywood pattern is amazing. Can't wait to see it finished out.

I've got the Baby's wings on, main floats finished and pre-rigged (but not attached yet). Wing rigging is all loose strands at this point, waiting to pick up some more super glue to get on with it.

In the meantime, I got the weapons done. Kit supplied flashy but nice Lewis guns, though my bird had unjacketed barrels on both guns, so I redid those with rod and added a combination of the kit's PE for sights and magazine detail, and a modified vane sight for the cowling-mounted gun. Scratchbuilt the mounts for both guns as "best guesses" from period photos, and actually remembered to add the trigger cables so they'd "fire.".
Before:


And after:


Kit supplied molded bomb bodies with PE tailfins. I added fuses, braces and some hand-painted markings decals:


Still have the bomb racks to do, but I'll wait for rigging to be finished to work out positioning on that.

Great work, all. Really enjoying seeing how everybody's birds are shaping up. (Aaron? Aaron???)

Greg

George Lewis:

"Every time you correct me on my grammar I love you a little fewer."
 
  • Member since
    April 2003
Posted by shivinigh on Thursday, May 23, 2013 5:47 PM

Tim-It's good to see you posting. You know we feel lonely when you're not around, but work is work and it must be done.

Gregbale-that's some serious looking weaponry you have going there.

Wing-Nut-good looking woodgrain. Looks like you have a lot of work ahead of you.

JGeratic-love the highlighting in the wings. Can't wait to see the rest of the build.

Still plugging away on the Gotha bomber. Figured I would share a couple pics. Still can't get over how small it is in 1/72 scale.

tThere are a lot of fit issues with this kit as well as brittle plastic is making this build an interesting one.


  • Member since
    April 2005
  • From: Piscataway, NJ!
Posted by wing_nut on Thursday, May 23, 2013 6:25 PM

Greg, those guns and bombs like sweet.

Shiv, looks good. The MM paint bottle gives some idea of how small that it.

Jack, funny you should mention sealing the wood.  Since you remembered the other use of this then may also remember the nose and back half of the fuselage were black so lots to hold on to.  Not sure what I used top mask back then but the tape pulled up most of what I did on the 1st panel so had to redo that.  I have since given it a coat of MM acrylic flat.  So I can do more tan 1 panel at a time before sealing I will just make sure they are not adjacent.

Marc  

  • Member since
    February 2006
  • From: Smithers, BC, Canada
Posted by ruddratt on Thursday, May 23, 2013 7:51 PM

Thanks guys!

Jack - man, the weathering on that wing is really top-shelf! Very convincing, and that overall color - I'm diggin'  that more every time I look at it!

Marc - serious work on the woodgrain. I remember that technique as well, and was blown away by the final product.

Greg - fantastic work on those guns and bombs! Miles ahead of the kit originals. They're gonna look amazing installed! Yes

shiv - I can't believe how tiny that Gotha is! It's size in 1/32 is what's kept me from pulling the trigger on WnW's version - simply no room to display it. May have to grab that 1/72 version - it's a great looking plane!

With a day off tomorrow, the plan is to get a longer than usual session in at the bench tonight and try to get the wings painted and weathered, and if time allows, get some pics up as well.

Mike

 "We have our own ammunition. It's filled with paint. When we fire it, it makes pretty pictures....scares the hell outta people."


JOIN OUR COMMUNITY!

Our community is FREE to join. To participate you must either login or register for an account.

SEARCH FORUMS
FREE NEWSLETTER
By signing up you may also receive reader surveys and occasional special offers. We do not sell, rent or trade our email lists. View our Privacy Policy.