SEARCH FINESCALE.COM

Enter keywords or a search phrase below:

FineScale Modeler WWI Aeroplane Group Build 2013

139489 views
1262 replies
1 rating 2 rating 3 rating 4 rating 5 rating
  • Member since
    March 2003
  • From: Towson MD
Posted by gregbale on Thursday, August 1, 2013 8:54 AM

Beauteous Bumble-Bee there, Bob! [Sorry, the "alliteration" key was stuck.]

Seriously, a really impressive build and scheme. And the shot with the 109 really does sort of boggle the mind, perspective-wise.

Greatly enjoyed the GB and "flying in formation" with all of you. Blue skies and fair tailwinds to all and sundry, and I look forward to the reunion [I'm guessing] when the next FSM GB gets underway. Can't wait!

Greg

George Lewis:

"Every time you correct me on my grammar I love you a little fewer."
 
  • Member since
    November 2009
  • From: SW Virginia
Posted by Gamera on Thursday, August 1, 2013 8:58 AM

Wow, this thread continues to amaze and inspire- just a boatload of awesome from all of you!!!

"I dream in fire but work in clay." -Arthur Machen


Moderator
  • Member since
    September 2011
Posted by Tim Kidwell on Thursday, August 1, 2013 10:29 AM

Just finished shooting the last vlog. I'll edit it together and post it shortly.

--

Timothy Kidwell
Editor
Scale Model Brands
Kalmbach Media


  • Member since
    September 2012
Posted by GMorrison on Thursday, August 1, 2013 12:11 PM

Finished late late last night.

I will get photos together and send in later today.

This was a challenge to say the least, but fun!

 Modeling is an excuse to buy books.


  • Member since
    December 2002
  • From: Bury St Edmunds, Suffolk, England
Posted by Bish on Thursday, August 1, 2013 1:42 PM

GMorrison

Finished late late last night.

I will get photos together and send in later today.

This was a challenge to say the least, but fun!

That's it, keep us in suspense a bit longer.

I am a Norfolk man and i glory in being so


On the bench: Airfix 1/72nd Harrier GR.3/Fujimi 1/72nd Ju 87D-3

Moderator
  • Member since
    September 2011
Posted by Tim Kidwell on Thursday, August 1, 2013 2:52 PM

--

Timothy Kidwell
Editor
Scale Model Brands
Kalmbach Media


  • Member since
    November 2003
  • From: Nashville, TN area
Posted by bobbaily on Thursday, August 1, 2013 3:14 PM

Thank you Greg-it was a fun build....turned out better than I thought it was going to.

Bob


  • Member since
    April 2005
  • From: Piscataway, NJ!
Posted by wing_nut on Thursday, August 1, 2013 4:23 PM

And from the dust of the pack comes freem with a spectacular, and quietWink finish at the buzzer.

John looks good what ya got there and not to far to go.

Aaron well that's just dang purdy.  Really love those colors together.  The faded crosses look sweet.

Bob, may never see a bee again without thinking of that great little bird ya got there.

Great vlog... killer ending.  And yes... oh so many timesStick out tongue

Marc  

  • Member since
    March 2003
  • From: Towson MD
Posted by gregbale on Thursday, August 1, 2013 4:57 PM

Tim Kidwell

VROOOM.....VROOOOMMM...TAT-TAT-TAT-TAT-TAT!

Great vlog, guys!

[But remember, Aaron -  Army isn't likely to confirm your victory if you shoot down your own guy. (Unless, of course, he just had it coming.)]

Thanks for the ride, guys.

Greg

George Lewis:

"Every time you correct me on my grammar I love you a little fewer."
 
  • Member since
    February 2006
  • From: Smithers, BC, Canada
Posted by ruddratt on Thursday, August 1, 2013 9:51 PM

Man am I bummed this had to end, but knowing that there's another coming down the pipe makes it a bit easier to take. Still, one never forgets the first - it's always the best! Yes

Thanks to everyone for making this GB the huge success that it was!

Mike

 "We have our own ammunition. It's filled with paint. When we fire it, it makes pretty pictures....scares the hell outta people."


  • Member since
    April 2005
  • From: Piscataway, NJ!
Posted by wing_nut on Friday, August 2, 2013 6:16 AM

Ya don't see an 80% complete in many GB's that for sure.

Marc  

  • Member since
    November 2009
  • From: SW Virginia
Posted by Gamera on Friday, August 2, 2013 11:17 AM

Well, anyway here is where I am now. I keep knocking a line off everytime I add another so it's kinda been one step forward and one step back. Still I think I'm doing ok for the first time I've ever rigged anything like this. 

I had two spools of E-Z line, fine and heavy- and of course I can't find the spool of fine. This heavy looks really out of scale to me but hey it's a learning experience right!?!

Just curious though - do the Wingnut Wings models give you holes to insert the rigging into or something like that? I drilled a few here but mostly trying to glue them to the surface of the model. 

"I dream in fire but work in clay." -Arthur Machen


  • Member since
    December 2002
  • From: Northern California
Posted by jeaton01 on Friday, August 2, 2013 11:48 AM

Gamera, my DH9a has depressions to glue the ends of the rigging in to, they don't go all the way through.  When I built my Eduard Siemens Schuckert D.IIIa it had no provision for rigging and I drilled holes through which made it easy to glue the rigging from the outside, I put a drop of super glue on the E Z Line and let the line relax back into the wing.  I had to repair the areas on the wings but it wasn't hard.

John

To see build logs for my models:  http://goldeneramodel.com/mymodels/mymodels.html


  • Member since
    April 2006
  • From: ON, Canada
Posted by jgeratic on Friday, August 2, 2013 12:33 PM

Congrats to all that finished, and those about to.  Excellent wrap up on the final vlog.  Tim and Aaron - sweet builds, those wingnut kits from those Kiwis are definitely exceptional.

-----------------------------------

Gamera, you can split the EZ line in half.  Just cut one end with a blade, and then with your finger nails and tweezers in other hand, pull them apart.  This tip compliments of Marc (wingnut).

regards,

Jack

  • Member since
    November 2009
  • From: SW Virginia
Posted by Gamera on Friday, August 2, 2013 1:07 PM

John: Thanks for the advice. I did drill some small holes in the fuselage but thought that since the rigging on the wings goes up to the struts I could shove a small drop of glue in the 45 degree angle there between it and the wing. Sorta worked, holes would have probably been better though.  I'll go with them next time. Btw: beautiful work there!

Jack: Thanks to you and Marc for the tip, I had no idea I could cut it like that! I might as well keep the thickness here constant but on the next biplane I'll do that if I still haven't found the fine spool by then.

"I dream in fire but work in clay." -Arthur Machen


  • Member since
    September 2005
  • From: Central Nebraska
Posted by freem on Sunday, August 4, 2013 10:42 PM

Gamera:  drilling holes for rigging makes the job a lot easier.  A lot of the time you can string a lot with just one thread.  If the starter can be hidden I tie a knot bigger than the hole and anchor it with super glue. I also use accelerator applied with a glass rod, just enough to set the CA. I don't tighten the line with a match or punk but I try to keep it taught without distorting struts or warping surfaces.

Good lookin' Nieuport!

Freem

Chris Christenson


  • Member since
    September 2012
Posted by GMorrison on Sunday, August 4, 2013 10:50 PM

I finally have had some time to set up and take photos of the two builds.

This GB was a lot of fun for me, and new territory as I haven't really built any WW1 aeroplanes before.

Everyone's done fantastic work and I can only humbly submit mine for your viewing.

Tim and Aaron please count your GB a huge success, with incredible participation. You guys all are the best.

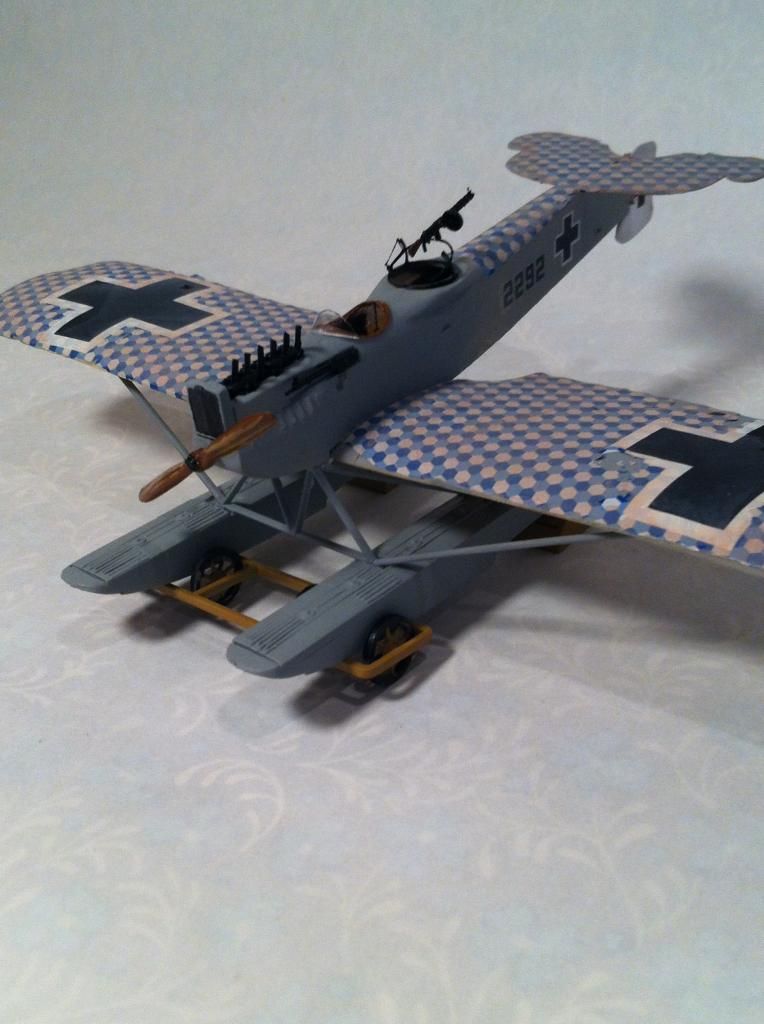
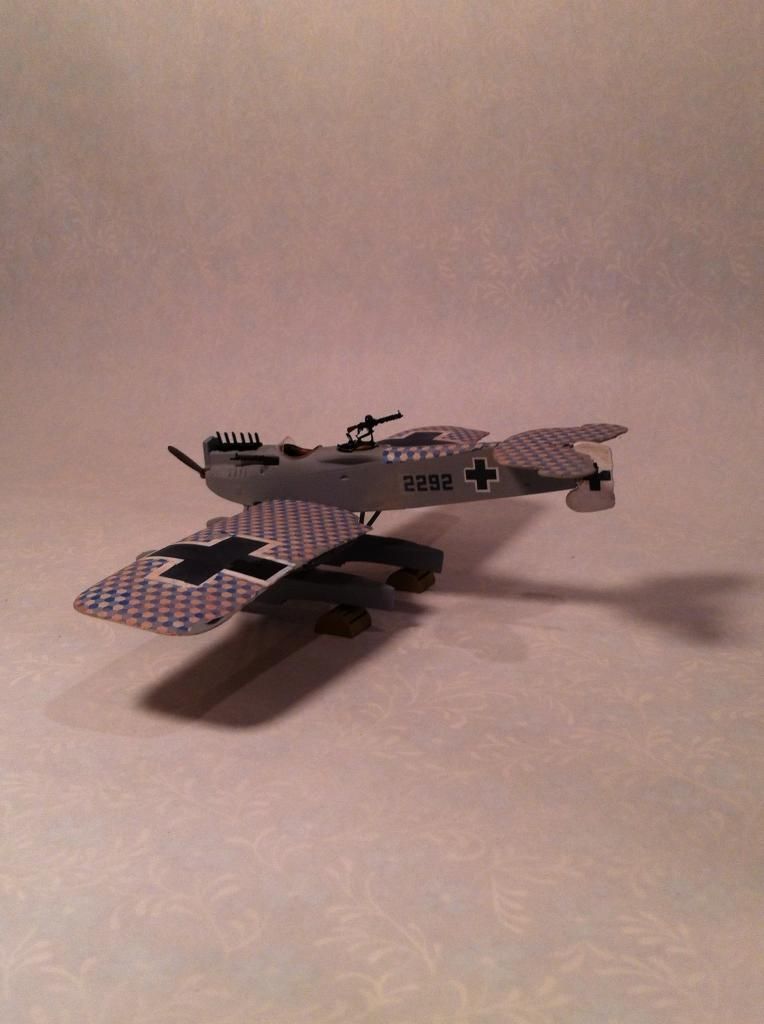
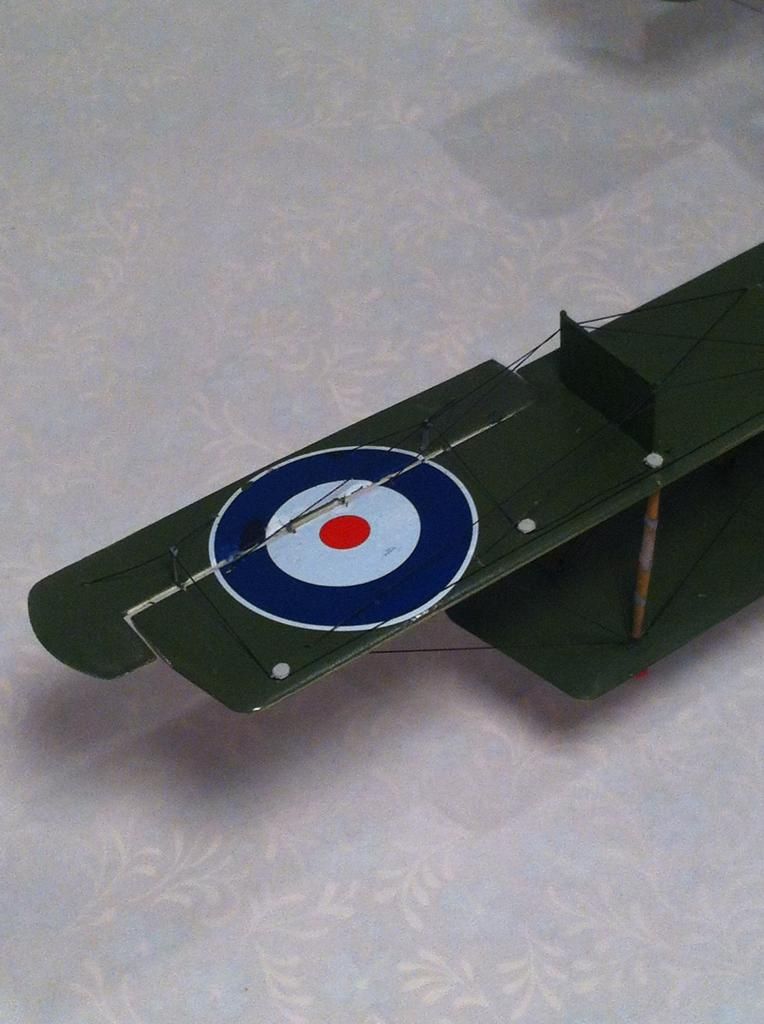
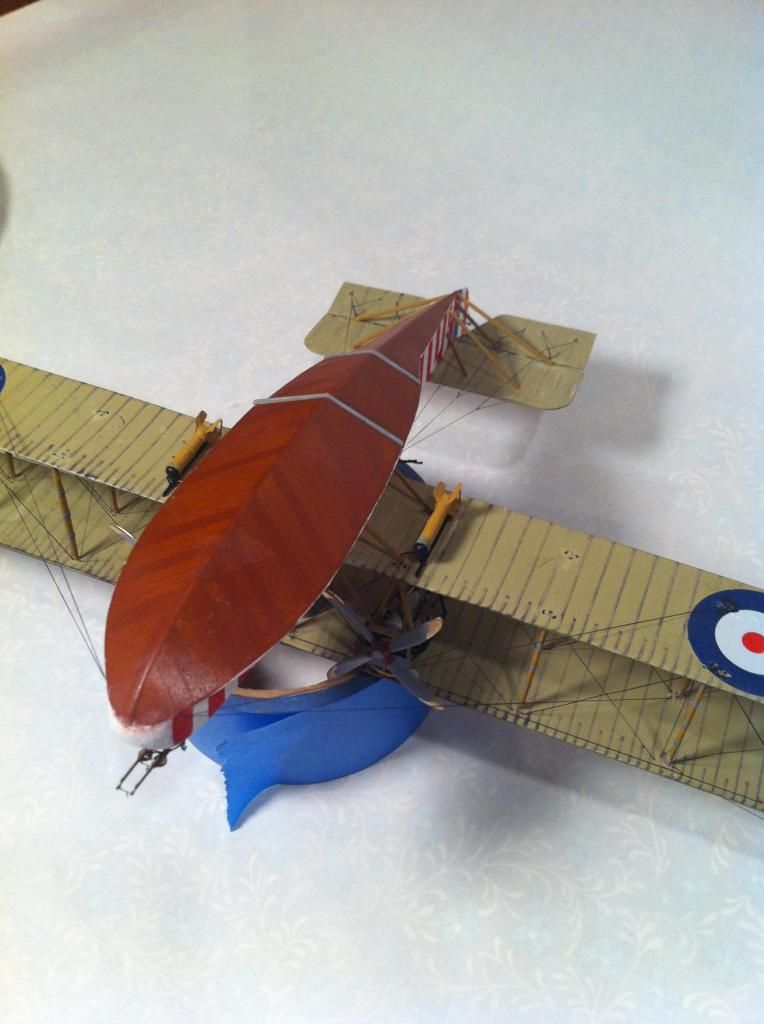
First, the Eastern Express 1/72 Hansa Brandenburg W.29. It's a rebox of the older Toko kit. MPM also makes one in this scale, which looks to be a better model, but I couldn't find one. WnW's also makes one in their scale, which looks just incredible, but it's not my scale and very expensive. Maybe some day, as I love this aircraft. It was the able adversary of the Felixstowes. I started this after the submission deadline so it's ex-officio, but I needed something to get away from the other monster from time to time.

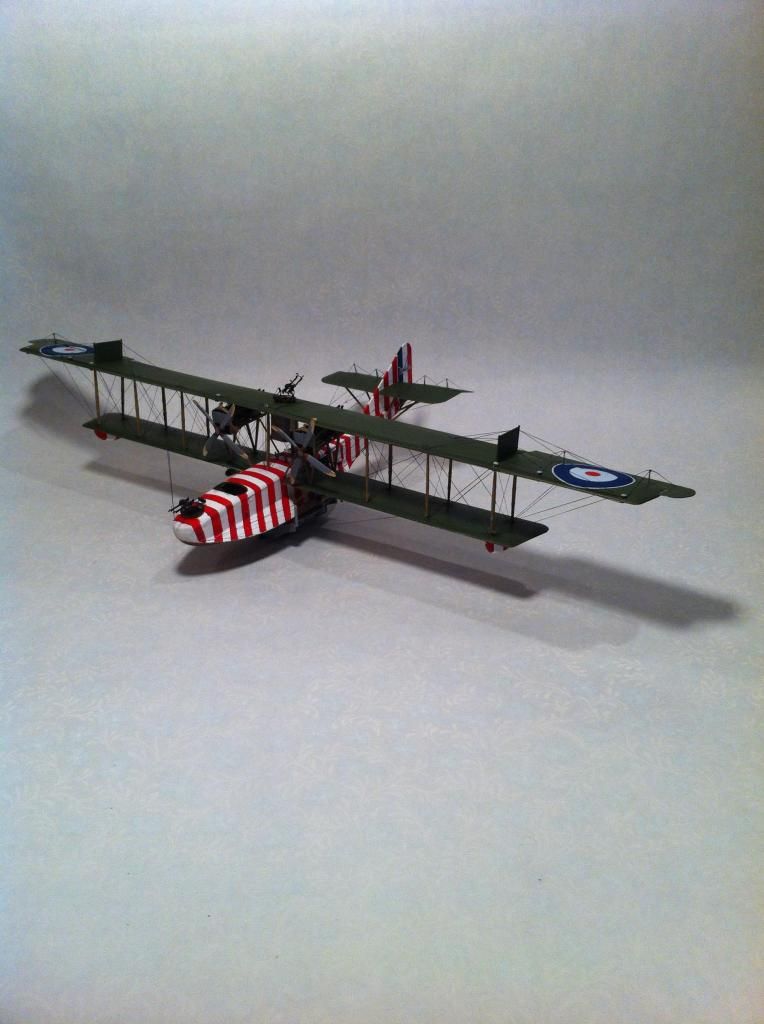
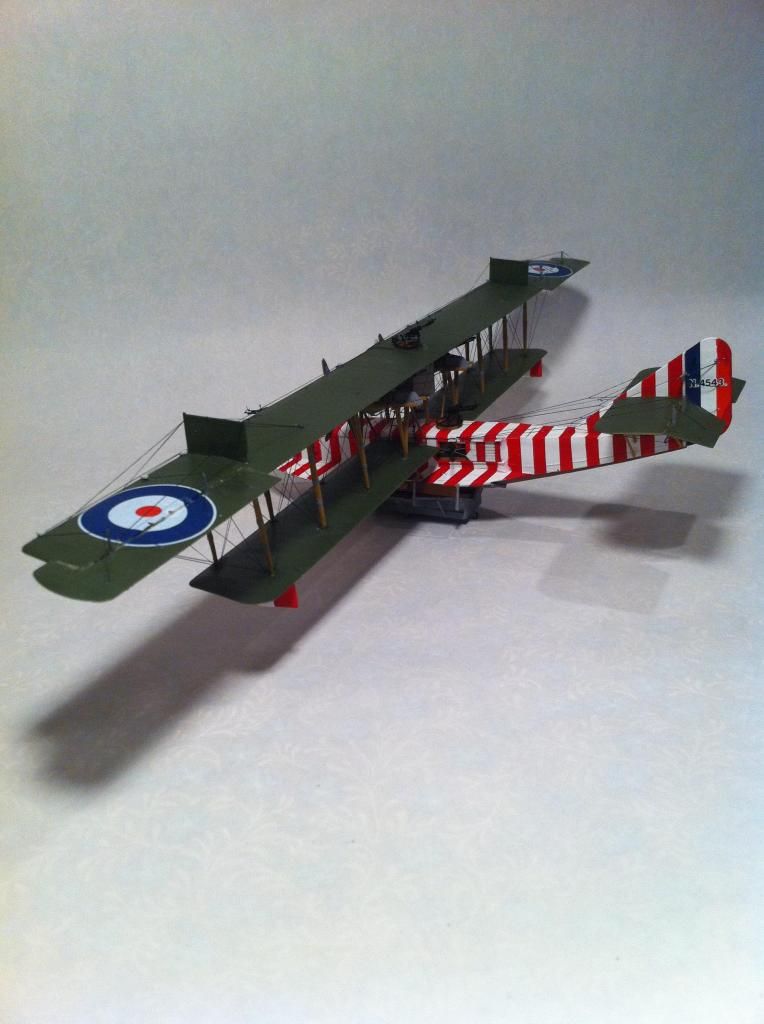
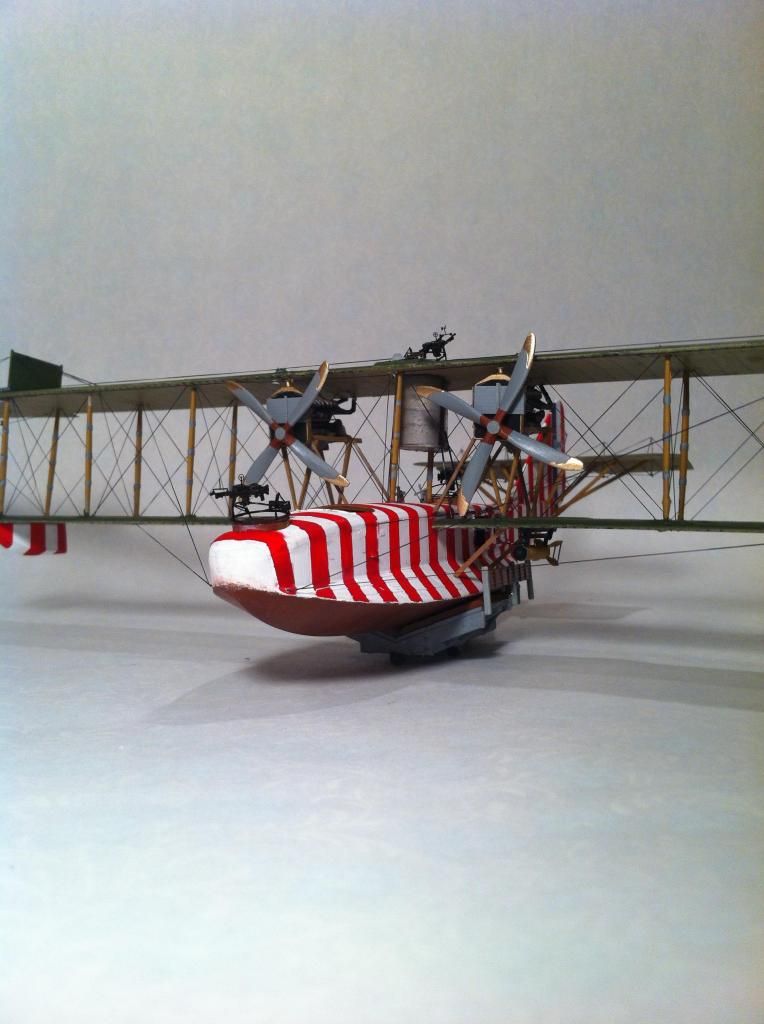
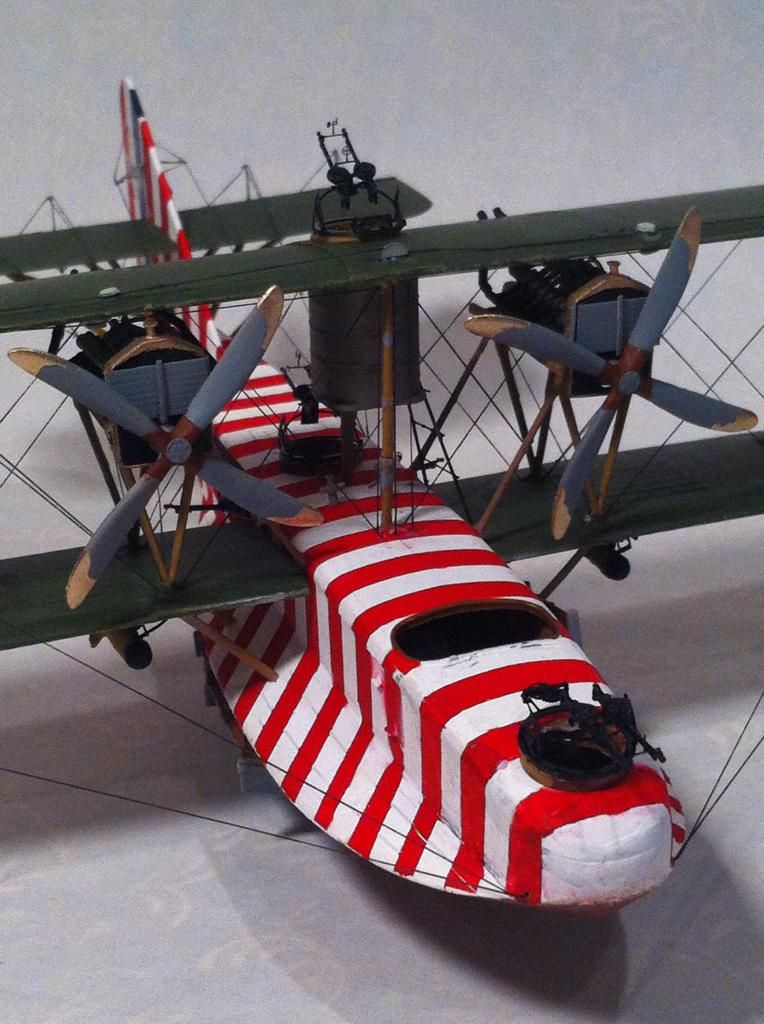
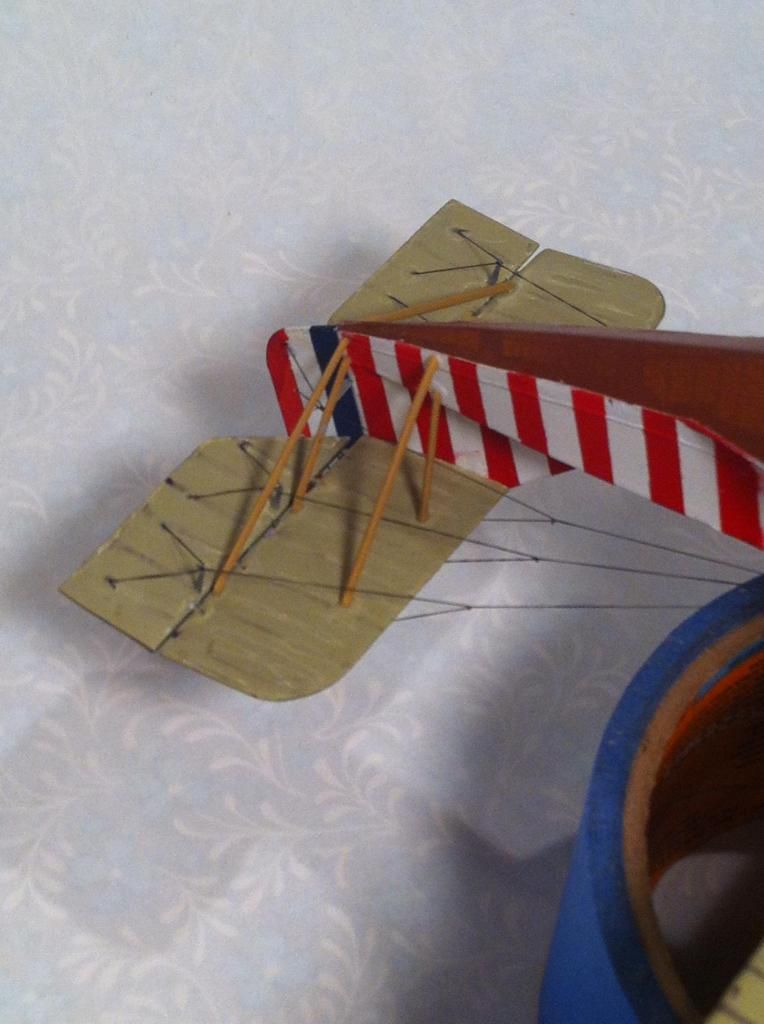
Next, my official entry, the Roden 1/72 Felixstowe F,2A. This particular aircraft had an added gun position in the upper wing for upper hemisphere protection. It's a real gunship.

This was a very difficult model to assemble. A lot of the parts needed replacing, a lot didn't fit very well and a lot needed serious clean up. But it's a great looking airplane and I hope I did it justice.

Thanks again all. I really love everyones work. These builds could not have been accomplished without the use of Windsock Data Files and you all.

Best,

GM

 Modeling is an excuse to buy books.


  • Member since
    April 2005
  • From: Piscataway, NJ!
Posted by wing_nut on Monday, August 5, 2013 6:59 AM

A fine pair of aircraft.  That Felixstowe is really something special though. WOW!

Marc  

  • Member since
    November 2009
  • From: SW Virginia
Posted by Gamera on Monday, August 5, 2013 7:14 AM

Freem: Thanks! I will be drilling holes next time around, that sounds a lot easier than what I've been doing.

GM: Wow, nice work there! The W.29 looks good and the F.2A looks terrific! All that rigging, gee whiz...

"I dream in fire but work in clay." -Arthur Machen


  • Member since
    December 2002
  • From: Bury St Edmunds, Suffolk, England
Posted by Bish on Monday, August 5, 2013 7:19 AM

GM, great builds. I have been looking forward to seeing the Felixstowe. Just stunning.

I am a Norfolk man and i glory in being so


On the bench: Airfix 1/72nd Harrier GR.3/Fujimi 1/72nd Ju 87D-3

Moderator
  • Member since
    September 2011
Posted by Tim Kidwell on Monday, August 5, 2013 8:54 AM

GMorrison - STELLAR! I couldn't imagine tackling either of those right out of the shoot -- and you did them both at the same time. Incredible workmanship, terrific modeling. I'll add the Felixstowe to the Hall of Fame. I'm ecstatic that you finished it. CONGRATULATIONS!

--

Timothy Kidwell
Editor
Scale Model Brands
Kalmbach Media


Moderator
  • Member since
    September 2011
Posted by Tim Kidwell on Monday, August 5, 2013 8:56 AM

Gamera - Keep going! You're almost there.

--

Timothy Kidwell
Editor
Scale Model Brands
Kalmbach Media


  • Member since
    April 2003
Posted by shivinigh on Monday, August 5, 2013 10:11 AM

GM that Felix looks stunning. I can't believe you got all that rigging finished. An absolute first rate job.


  • Member since
    October 2011
  • From: Lake Villa, Illinois
Posted by Chuck Davis on Monday, August 5, 2013 11:47 AM

GMorrison - excellent job!  A perfect "dogfight double"  not sure I would have had the guts to turn her over for photos!

And to reiterate to all the group - excellent job on your builds,everyone!

Chuck Davis

  • Member since
    November 2009
  • From: SW Virginia
Posted by Gamera on Monday, August 5, 2013 11:48 AM

Thanks Tim, the end is in sight! This weekend I tried to finish off the rigging but captain butterfingers here kept knocking stuff off as fast as I was gluing it on again...

"I dream in fire but work in clay." -Arthur Machen


  • Member since
    March 2003
  • From: Towson MD
Posted by gregbale on Monday, August 5, 2013 2:31 PM

Gamera - Excellent progress on the Nieuport. Love those silver-doped birds!

John - I know it wasn't part of the GB, but the Siemens-Schuckert D.IIIa is a beauty. Glad you posted it.

GM - Both the Felixstowe and the W.29 are breathtaking. Bow Down The rigging on the "boat" is particularly striking.

Great job, everybody!

Greg

George Lewis:

"Every time you correct me on my grammar I love you a little fewer."
 
  • Member since
    September 2012
Posted by GMorrison on Tuesday, August 6, 2013 1:22 PM

Thank you all for the kind comments. I hope to get some better pictures soon, as there are a lot of quirky details.

Lessons learned (for next time): Paint the wind top/top and bottom/ bottom after rigging, and filling in the holes. Not sure how, but I will try that.

Invest or devise some sort of wing to wing clamp. On my first try I glued all 14 interplane struts to the bottom wing all nicely and vertical. Then I naively fit the top wing on. Like trying to lie on a bed of nails. Thats when the bottom wing broke off. I fixed that problem, and then just installed the outer pair on each wing and carefully glued on the top wing. Then I slowly added struts in between one at a time.

Put a solid handle on it. Seriously, I spent so much time towards the end trying to figure out where to pick it up.

I am looking forward to the next foray. No idea what it might be....

GM

 Modeling is an excuse to buy books.


  • Member since
    March 2003
  • From: Towson MD
Posted by gregbale on Tuesday, August 6, 2013 2:45 PM

GMorrison

Invest or devise some sort of wing to wing clamp. On my first try I glued all 14 interplane struts to the bottom wing all nicely and vertical. Then I naively fit the top wing on. Like trying to lie on a bed of nails. Thats when the bottom wing broke off. I fixed that problem, and then just installed the outer pair on each wing and carefully glued on the top wing. Then I slowly added struts in between one at a time.

If you get any good ideas on the clamp, please share them. Best I've been able to come up with are cardboard jigs with "wing," i.e.horizontal as well as vertical supports, with rubber bands to hold. It's better than nothing, but even with gentle rubber bands, tape or winding elastic thread, it always seems to want to drag the struts out somewhere. Fixing the outer ones and working in seems as good as anything.

Anyway, looking forward to seeing more pics. If I may ask (since I've got the same kit to do, sometime)--how did you end up fixing the bottom wing? Some kind of pins?

Greg

George Lewis:

"Every time you correct me on my grammar I love you a little fewer."
 
  • Member since
    September 2012
Posted by GMorrison on Tuesday, August 6, 2013 6:08 PM

gregbale

Anyway, looking forward to seeing more pics. If I may ask (since I've got the same kit to do, sometime)--how did you end up fixing the bottom wing? Some kind of pins?

The lower wings are one piece- the two actual wings connected by a pair of scale 4" by 4" plastic bars. Those fit in slots in the tub, which needed widening. I sort of forced the thing together, which may have weakened it. The bars fit far enough down in the slots that there needs to be a little fillet put in the slot to close it up on top. Like a lot of things in this kit, that forced and imperfect fit involving shaving open the slots ultimately sets the slope of the lower wings, and that has intense ramifications down the line that cannot really be foreseen.

After I had mounted both engines on their bearer structures and the interplane struts, I picked it up one night by a wingtip. The wing promptly snapped right off and the model flipped over on the bench, breaking off the other engine.

I tried gluing the wing back on at the break, but it just wasn't enough. So I took it all apart again and drilled a pair of # 70 holes in the wing, and in the side of the tub. That kind of thing is always hard because there's no good way to line the holes up except by eye, and oversizing the holes will not do.

Piano wire pins and more glue. Then I got the underwing braces installed as fast as I could and over glued them to make them solid. Bit of a glue bomb.

I seriously recommend attaching some kind of a handle like a rod out of the back or something. I picked this thing up a thousand times by the upper wing, and towards the end there was hearing way too much popping and creaking for comfort.

 Modeling is an excuse to buy books.


  • Member since
    March 2003
  • From: Towson MD
Posted by gregbale on Tuesday, August 6, 2013 7:17 PM

GM - Wow! Painful to hear you go through it in detail, but I really appreciate the warning. I will take your words to heart. Big thanks.

Greg

George Lewis:

"Every time you correct me on my grammar I love you a little fewer."
 
JOIN OUR COMMUNITY!

Our community is FREE to join. To participate you must either login or register for an account.

SEARCH FORUMS
FREE NEWSLETTER
By signing up you may also receive reader surveys and occasional special offers. We do not sell, rent or trade our email lists. View our Privacy Policy.