SEARCH FINESCALE.COM

Enter keywords or a search phrase below:

Reich Defenders IV Group Build: Strike From Above

54575 views
513 replies
1 rating 2 rating 3 rating 4 rating 5 rating
  • Member since
    April 2013
Posted by SchattenSpartan on Saturday, February 1, 2014 7:17 AM

I'm still messing around with the finish around the turbocharger. I won't get it to be super smooth again, but I think it looks good enough.

  • Member since
    December 2003
  • From: Charleston, SC
Posted by sanderson_91 on Friday, January 31, 2014 7:19 PM

Here's a quick update:

I have all of the decals on and need to add a layer of clear gloss and then a bit of weathering.  I won't be done tonight, but hopefully in the next few days.  

Steve


  • Member since
    April 2013
Posted by SchattenSpartan on Wednesday, January 29, 2014 11:31 AM

Doug: Nah, it's neither of them. It's RLM 04 Wink

I just finished priming the area and I'll give it an hour or 2 to dry and then It's time for the yellow again!

  • Member since
    October 2008
  • From: Georgia
Posted by Rigidrider on Wednesday, January 29, 2014 9:52 AM

Clemens, Thats not yellow... Thats YELLLLLLLOW! Ha! Regardless... Looking good.

Doug

When Life Hands You A Bucket Of Lemons...

Make Lemonade!

Then Sell It Back At $2 Bucks A Glass...

  • Member since
    April 2013
Posted by SchattenSpartan on Wednesday, January 29, 2014 7:40 AM

Doug: Thank you very much, borther! The paint has a bit of texture in certain areas (caused by me spraying the primer with too much pressure) but I think it doesn't really matter with 2 clear coats on top...

I got the area where I goofed up smooth again and I'll reprime/repaint it tonight.

Painting a Thunderbolt completely yellow feels kinda wrong, but it just looks so amazingly different and out-of-place when finished Big Smile

  • Member since
    October 2008
  • From: Georgia
Posted by Rigidrider on Tuesday, January 28, 2014 5:46 PM

Steve... Very cool looking paint! That is a keeper for sure!

Clemens... I do like the concept and I believe I've seen this in other books... Your doing a killer job on your rendition!

When Life Hands You A Bucket Of Lemons...

Make Lemonade!

Then Sell It Back At $2 Bucks A Glass...

  • Member since
    April 2013
Posted by SchattenSpartan on Tuesday, January 28, 2014 7:24 AM

Thanks guys!

Nathan: I thought i was using their acrylic thinner untill now tbh. It doesn't smell nearly as much as other laquer thinners. Heck, most of my acrylic thinners and AB cleaners smell a lot more! The paint dries almost instantly after hitting the model surface. it takes about 2 or 3 minutes untill I can touch it, but I always wait a bit longer to make sure I don't get any fingerprints on my model.

  • Member since
    December 2003
  • From: Charleston, SC
Posted by sanderson_91 on Monday, January 27, 2014 7:22 PM

Thanks Mike and Bish!  For now I'm going to leave the splinter as is and not do the whitewash.  I need to fix the two paint peels from the mask and then gloss coat and decals.

Clemens, your P-47 looks great!  The yellow looks great!  

Steve


  • Member since
    March 2010
  • From: MN
Posted by Nathan T on Monday, January 27, 2014 7:18 PM

Very nice yellow Clemens! The thinner I posted is the stuff formulated for the aqueous paints. It contains a water/alcohol/glycol mix, and has a citrus scent! Smells much better than Mr. Color lacquer thinner you posted. The lacquer thinner is obviously compatible with aqueous as well. It makes the paint go on real thin and translucent. I'm not sure if it makes it dry any quicker though. How soon can you handle the yellow after painting it?


  • Member since
    April 2013
Posted by SchattenSpartan on Monday, January 27, 2014 5:54 PM

Mike: The preshading isn't really covered as much as it looks like in the pics. It shows through just right - not too subtle, but also not too strong. I sprayed 4-5 coats with about 20 seconds between the individual layers. I have to say that I thinned my paint a lot though. I also sprayed an additional layer on top of panel lines to tone down the preshading a bit because the dar kgray was just too dark for the yellow to look right (it appeared kinda greenish before i toned it down.)

I tried fixing my paint problem at the turbocharger and just made it a whole lot worse. I applied a bit too much pressure while sanding an "ripped" part of the paint off. Today really isn't my day... I'll just take a break and continue tomorrow before things get really messed up. I'm just not in the mood to do anything productive. I was really lucky though: The damage is contained in a single panel, so I'll probably mask off the area around that panel and sand everything down to the primer/plastic. Then I'll spray a new coat of primer on top and repaint everything. The area behind the turbocharger is going to be really dirty anyway, so don't have to worry about recreating the color effects on that panel.

  • Member since
    April 2005
Posted by Thunderbolt379 on Monday, January 27, 2014 5:35 PM

SS -- how many coats of yellow to get this density? The 04 from MM Acryl is very transparent, to cover preshading this solidly would take me four or five coats.

M/TB379

http://worldinminiature.blogspot.com/

  • Member since
    April 2013
Posted by SchattenSpartan on Monday, January 27, 2014 5:24 PM

Thanks Nathan! I don't know about the thinner TBH, but i suppose it's not the same. Here's the one I use:

And one final pic of the yellow. Thi sone actually looks kinda like the real thing, but again, no streaking visible.

  • Member since
    April 2013
Posted by SchattenSpartan on Monday, January 27, 2014 5:14 PM

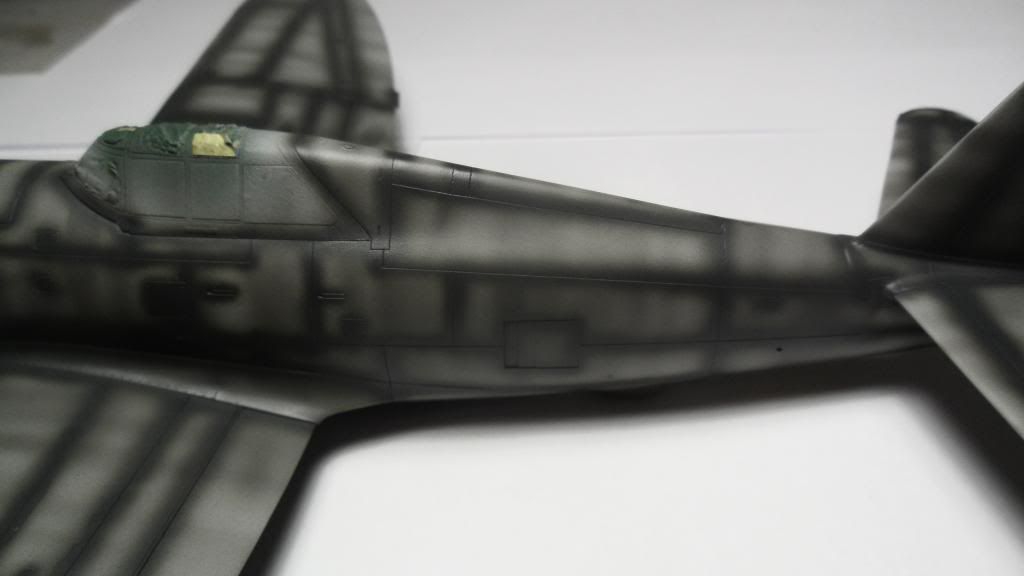
I got the yellow (RLM 04) sprayedonto my Jug. It toned down the streaking quite a bit again, but to a point were it is just visible through the yellow paint - exactly whatI was trying to achieve. Then I mixed the RLM 04 with a wee bit of Gunze clear red and clear yellow (just 1-2 drops each) and thinned that mix quite a lot (3 parts thinner to 1 part paint). I did some very light streaking on the wings, stabilizers and engine cowling to add a bit more interest to the whole plane. All of that results in a barely noticeble streaking effect (especially on the wings). There's only one problem: My damn camera can't pick up those little changes in color so most of the photos just show a yellow surface without any streaking. It looks really nice in person though...

Lets not forget my painting accident of the day:

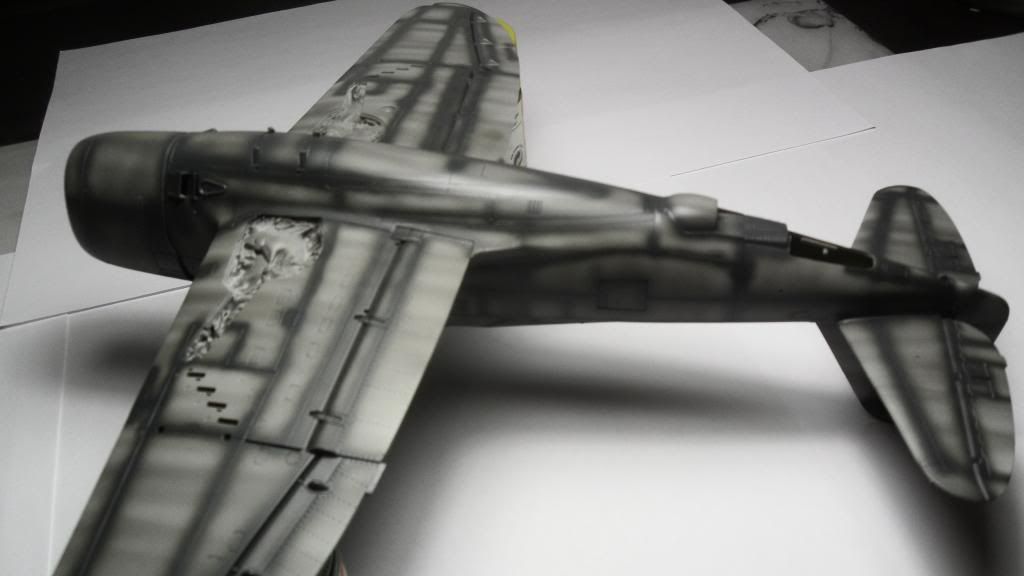
The turbocharger exhaust was literally the last thing I sprayed on my Thunderbolt and I accidently pulled the trigger back too far Bang Head. Looks like I have to sand/repaint the whole area...

There is some dust visible in the pictures, but it's really easy to remove with a stiff brush, so It won't stay on my model forever Wink

The yellow is slightly more orange-tinted, but my camera fails on that as well Tongue Tied


  • Member since
    March 2010
  • From: MN
Posted by Nathan T on Monday, January 27, 2014 5:12 PM

Nice paintwork there Clemens. Have you ever tried this thinner with Gunze Aqueous:?

Just curious cause thats what I use.


  • Member since
    April 2013
Posted by SchattenSpartan on Monday, January 27, 2014 5:03 PM

Thank you very much, Mike!

The leveling thinner is impossible to get in Austria as well...


  • Member since
    April 2005
Posted by Thunderbolt379 on Monday, January 27, 2014 4:48 PM

SS -- I've tried for Levelling Thinner but it doesn't seem to be available in this country. When I can go the $$ I'll have to get some sent from Hong Kong...

Clemens -- looking great! I'm loving your technical approach!

M/TB379

http://worldinminiature.blogspot.com/

  • Member since
    April 2013
Posted by SchattenSpartan on Monday, January 27, 2014 2:47 PM

Next update:

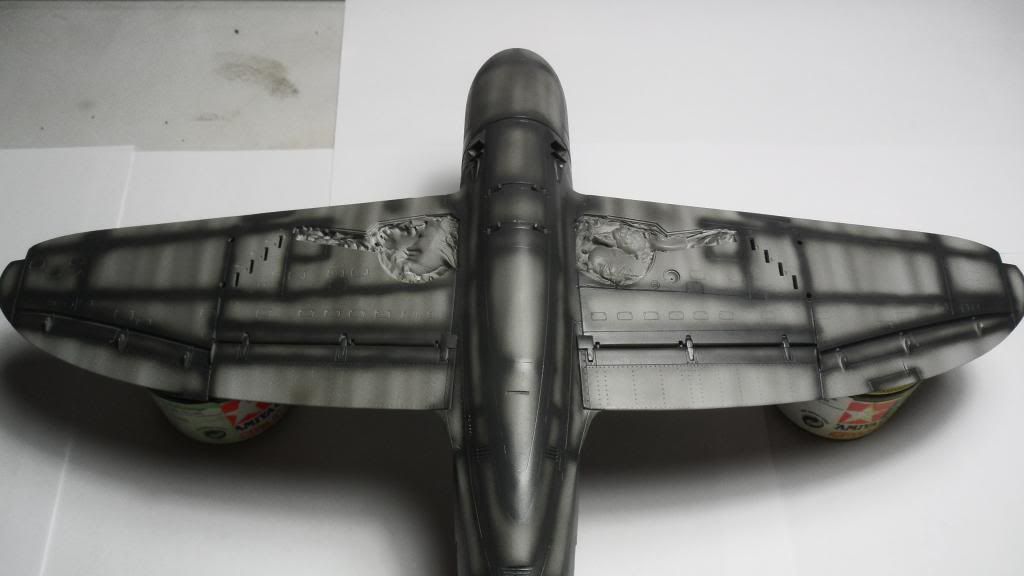
I sprayed the lower surfaces and the tail in white to prepare them for the yellow paint to follow. This partially killed the streaking effect though, so I mixed some RLM 66 (I do love that shade of gray) into the white and applied some more streaking on top of the white paint. I really liked how it worked out because the RLM 66 turns kinda brownish when added to white. I think it just adds some more interest to the streaking.

The streaking on the right stabilizer is a bit too strong, but the yellow should tone it down a bit (I'll just spray an additional layer on top of that area).

After the white has dried completely, I'll spray the yellow and post some pics. That should be in 2 hours or something like that.

Cheers, Clemens

  • Member since
    December 2002
  • From: Bury St Edmunds, Suffolk, England
Posted by Bish on Monday, January 27, 2014 12:45 PM

Steve, that 88 is looking great. Can't beat a good splinter scheme.

I am a Norfolk man and i glory in being so


On the bench: Airfix 1/72nd Harrier GR.3/Fujimi 1/72nd Ju 87D-3

  • Member since
    April 2013
Posted by SchattenSpartan on Monday, January 27, 2014 8:15 AM

I'd suggest using Mr.Leveling thinner instead of the normal thinner. It is basically the same thing with a drying retarder mixed in. That should help a lot with tip-drying and makes it easier to get a smooth finish in hot climate.

  • Member since
    April 2005
Posted by Thunderbolt379 on Monday, January 27, 2014 12:27 AM

SS -- thanks for the Gunze info, especially the thinning variations. I have a great deal of trouble getting paint to lie down smooth these days, so a line which is naturally smooth is always welcome. I might invest in some later this year and give them a go!

Sanderson91 -- looking SWEET! The mixes are close but I usually have to add black to XF-27 to get a decent RLM 70 -- at least, compared to ModelMaster enamel it's definitely light. The '88 looks great, for my money I'd leave it at the camo, just clearcoat, decals and weathering!

Cheers, Mike/TB379

http://worldinminiature.blogspot.com/

  • Member since
    April 2013
Posted by SchattenSpartan on Monday, January 27, 2014 12:09 AM

Thanks guys! You're too kind!

Steve: She's looking great! Very nice paint job on that splinter camo!

  • Member since
    December 2003
  • From: Charleston, SC
Posted by sanderson_91 on Sunday, January 26, 2014 8:22 PM

Thanks Nathan!  I have to say that  my camera does make the paint look lighter than it is.  I have ordered a new camera so I hope that I can get some better photos taken.

Steve


  • Member since
    March 2010
  • From: MN
Posted by Nathan T on Sunday, January 26, 2014 7:59 PM

Very nice looking 88! I love the metallic shine on the big barrel. I think the camo colors look pretty good. 70 could be a bit darker, but it could just be my moniter too. The painting overall is just really pleasing. Don't be afraid to try a whitewash, it could really add some nice visual interest. I'd like to see it.


  • Member since
    December 2003
  • From: Charleston, SC
Posted by sanderson_91 on Sunday, January 26, 2014 7:23 PM

Clemens - your pre-shade looks good.  I'm curious to see how the streaking comes out - I've seen it done before by DoogsATX and need to keep that in mind for my next build.

Doug - thank you!  I've been following the 190 Group Build and you have done soem really nice 190's!

Here's a shot of today's work - I got the RLM 70 on to finish up the splinter scheme.  I had paint pull in two places when I removed the masking, but they should be pretty easy to touch up.  After laying down the RLM71 I went and re-applied the pre-shade over the areas to get the RLM 70.  My mix for of Tamiya paints for this is Black Green cut by a bit of Buff  - Black Green XF27:3 + Buff XF57:1. 

Next up is to repair the two areas of paint pull and add the guns to the cockpit.  I really like how the splinter scheme came out so I don't think that I am going to attempt the winter white-wash scheme.  Let me know what you guys think.

Steve


  • Member since
    October 2008
  • From: Georgia
Posted by Rigidrider on Sunday, January 26, 2014 5:15 PM

Wow, Clemens... You and Sanderson are really kicking butt! Your Razorback and Sanderson, Your Ju88 are just about there! Keep up the great work!

Doug

When Life Hands You A Bucket Of Lemons...

Make Lemonade!

Then Sell It Back At $2 Bucks A Glass...

  • Member since
    April 2013
Posted by SchattenSpartan on Sunday, January 26, 2014 5:07 PM

Thank you very much!

Gunze paints are not pre-thinned, they just have really fine pigments (that's why i love them) which makes them a pain to brush-paint (I have Vallejo for that). I thin my gunze paints with Mr.Color Thinner. 1:1 for normal covering coats, 2:1 for streaking and post-shading, 3:2 for light coats of paint to build up effects. They spray super smooth once you got the right paint to thinner ratio figured out. Their color selection is also really good. The only paints I can't get in that color line are the interior colors for the Thunderbolt (I used Tamiya XF-26 with a wee bit of black for the cockpit and XF-4 for everything else)

  • Member since
    April 2005
Posted by Thunderbolt379 on Sunday, January 26, 2014 4:57 PM

Clemens -- great work! Your pre-shade is a heck of a lot more accurate than mine, and I LOVE the idea of the streaking at this point, I look forward to seeing how that turns out! I've never used Gunze but I've heard lots of good things about it! Is it pre-thinned in the bottle? I seem to recall hearing that many years ago... Can't wait to see the colour go on!

M/TB379

http://worldinminiature.blogspot.com/

  • Member since
    April 2013
Posted by SchattenSpartan on Sunday, January 26, 2014 4:27 PM

Time for another update!

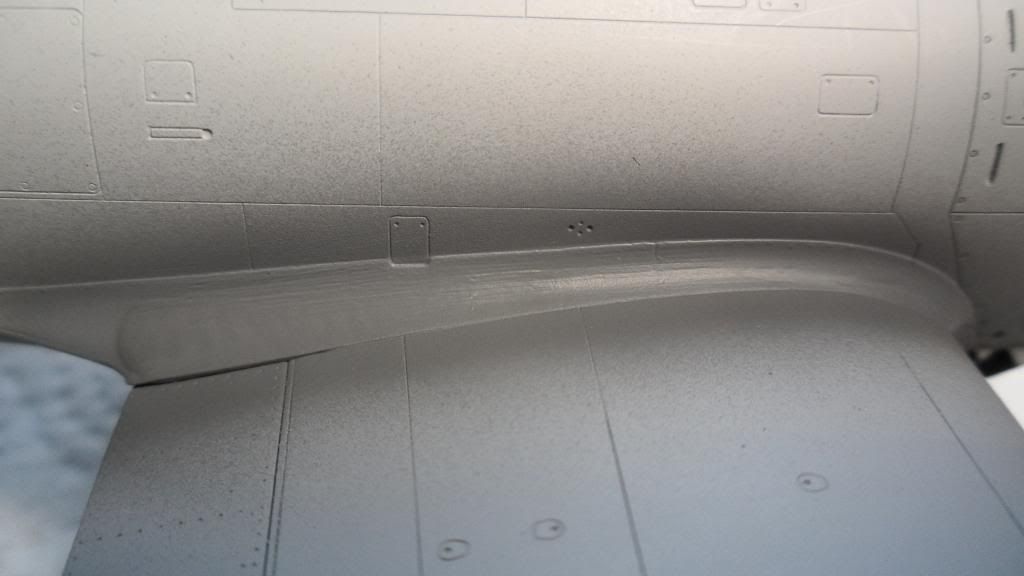
First thing I did was to fix my little boo-boo:

Everything sanded:
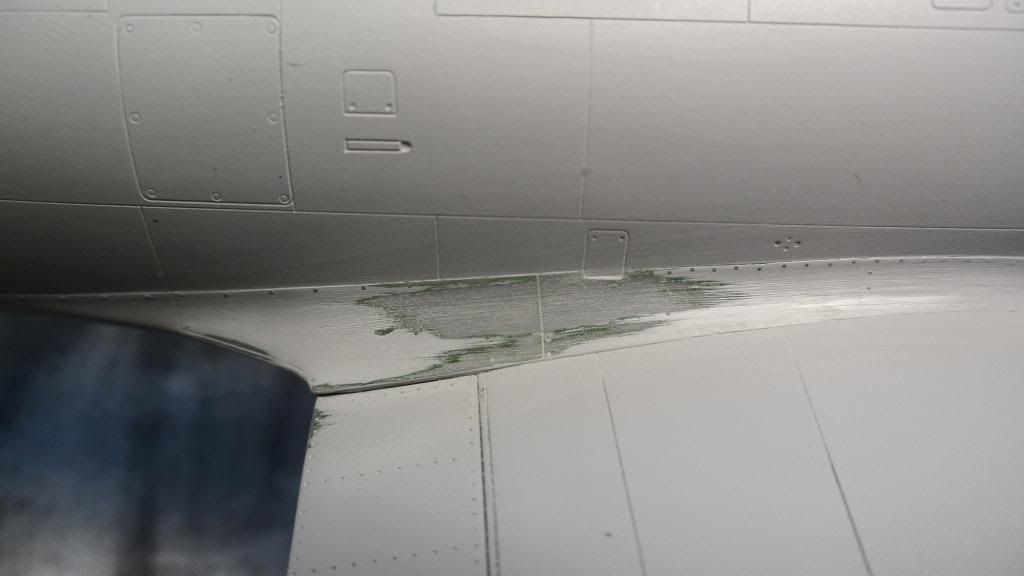
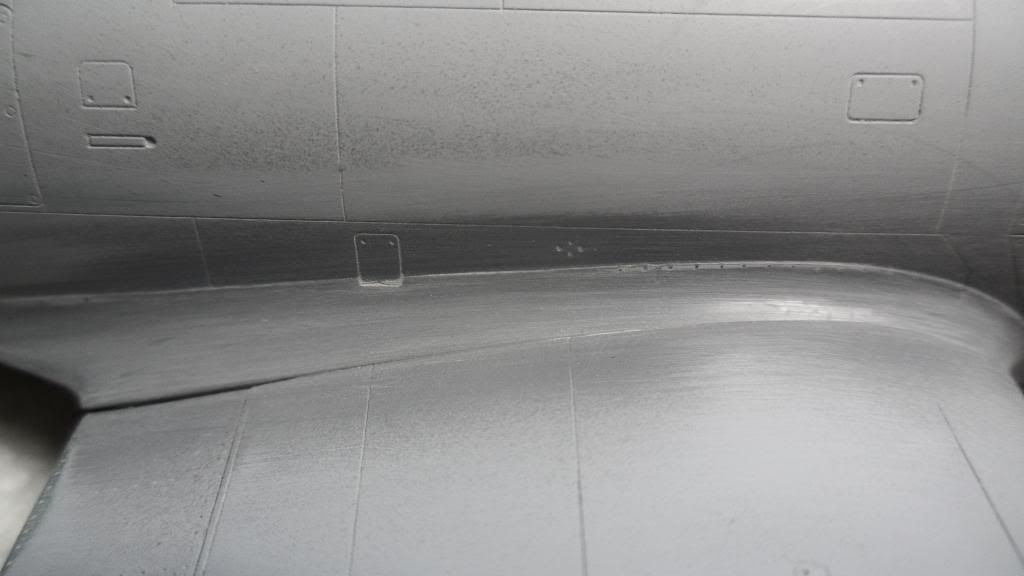
Followed by several coats of Alclad microfiller to even out the area:
Some more sanding and polishing:
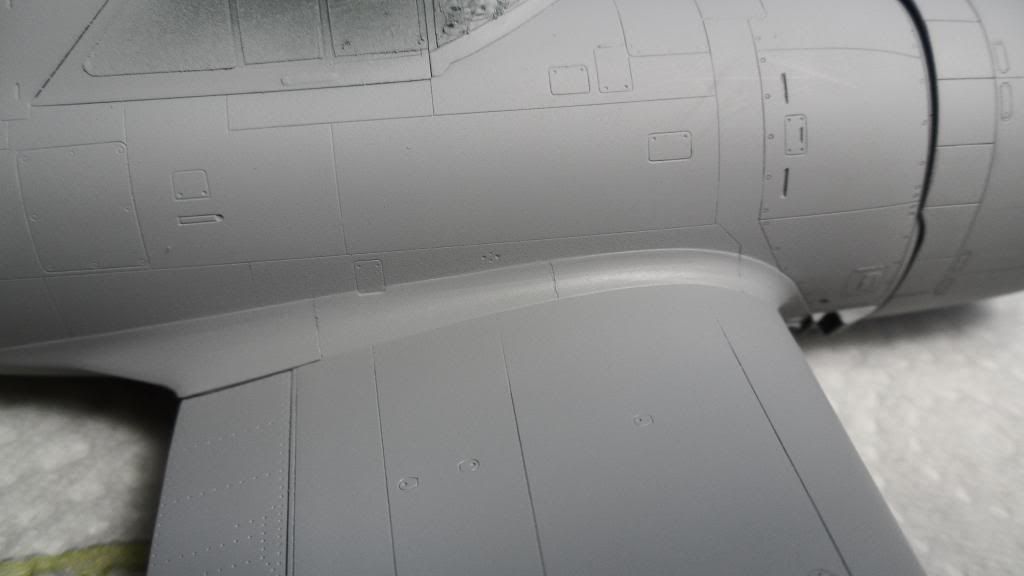
And a final coat of Gunze primer:
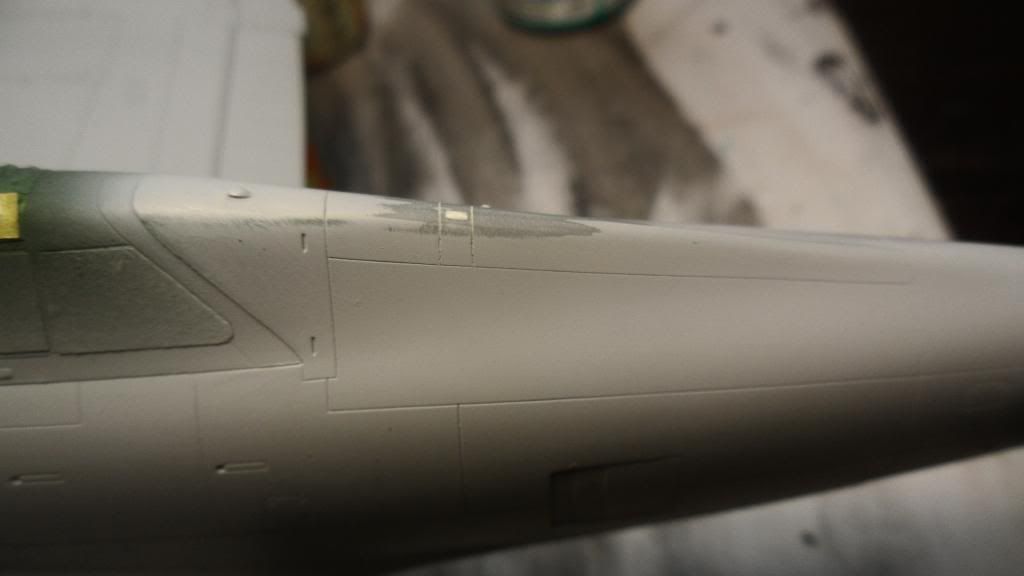
Then I filled in the antenna slot on the fuselage spine (the photos of T9+FK show her without the antenna):
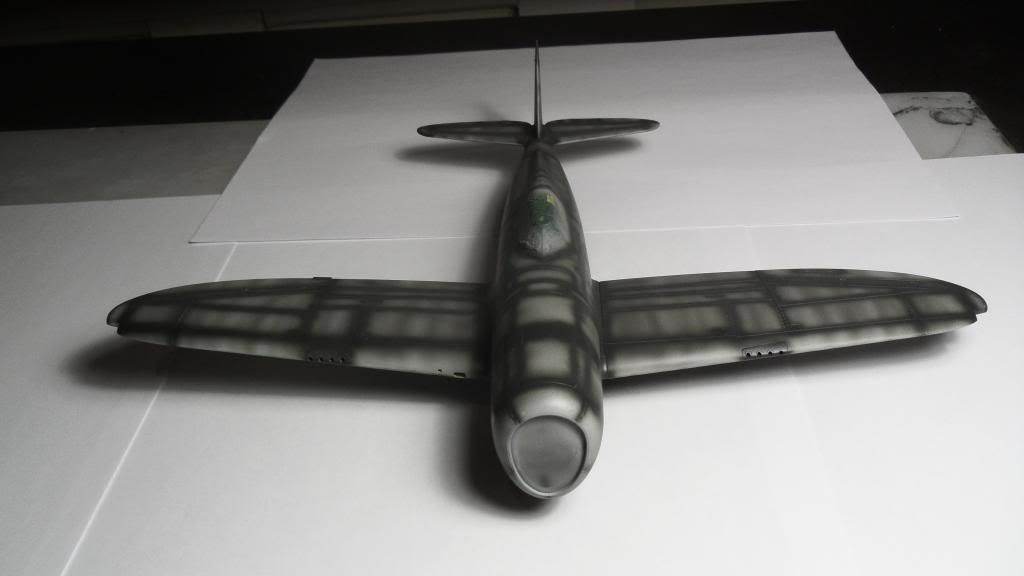
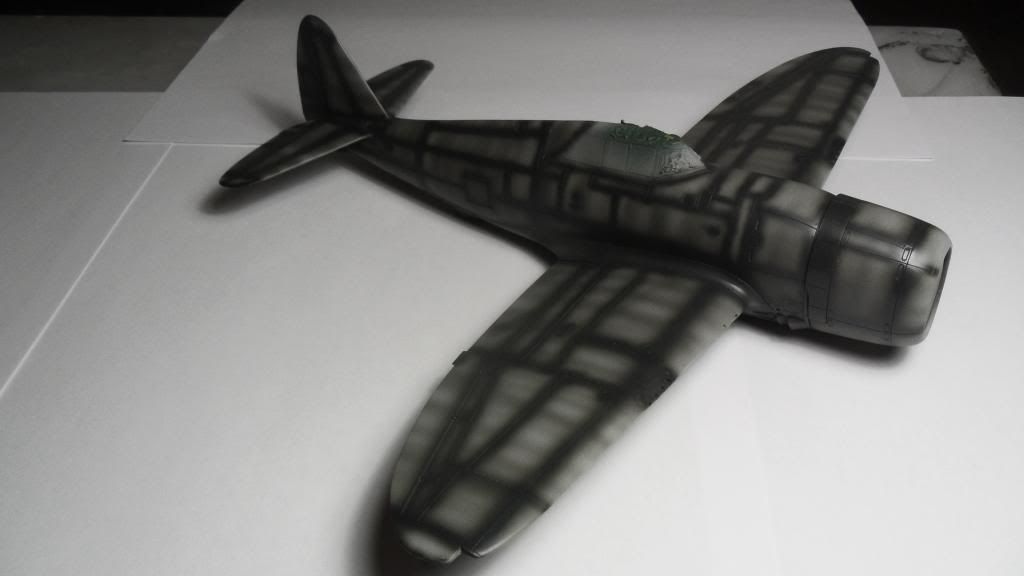
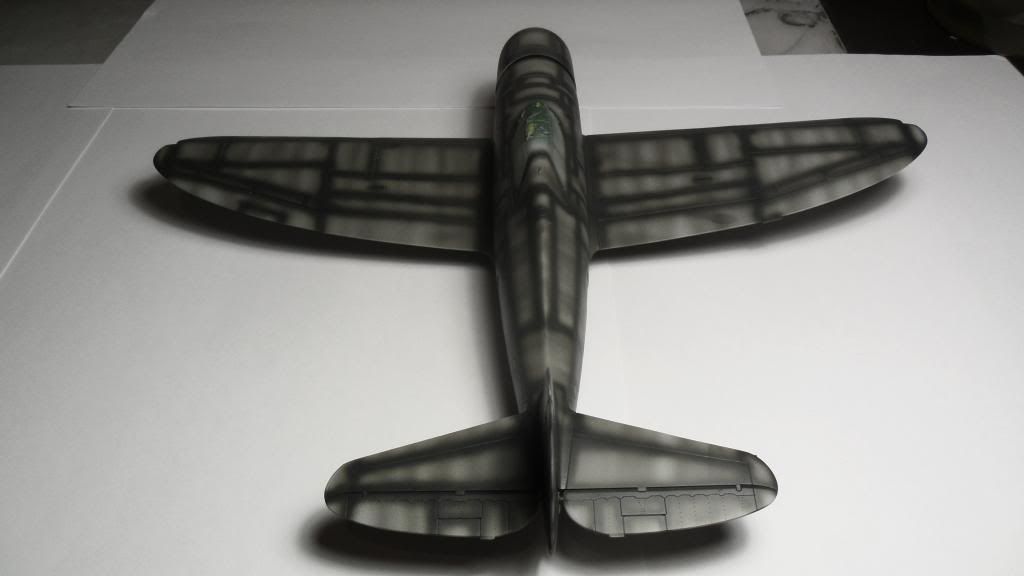
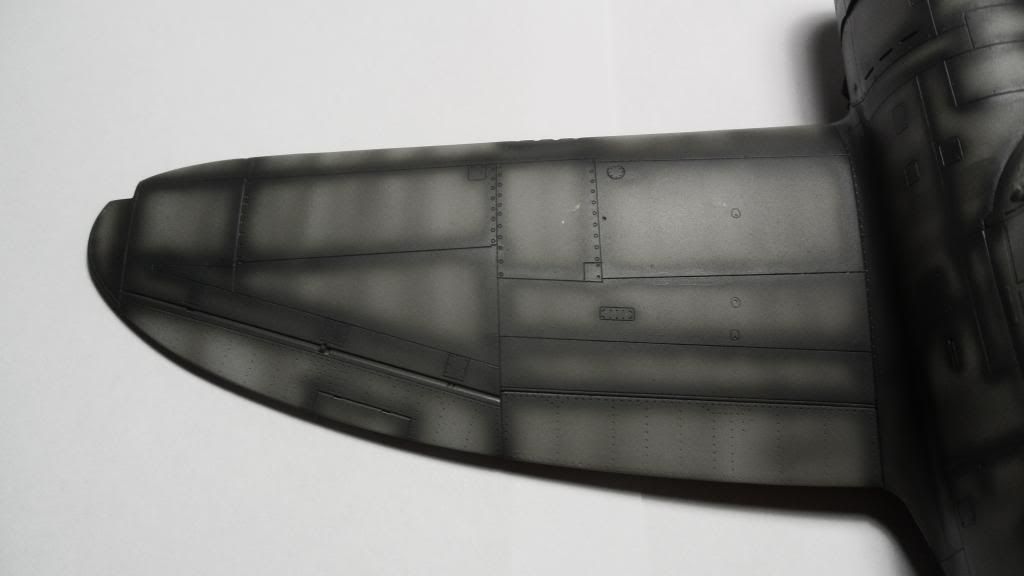
After some touch-ups with Mr.Surfacer 1200 I started the preshading. I wanted to try out something new this time, so I applied some streaking using highly thinned RLM 66 as additional preshading:
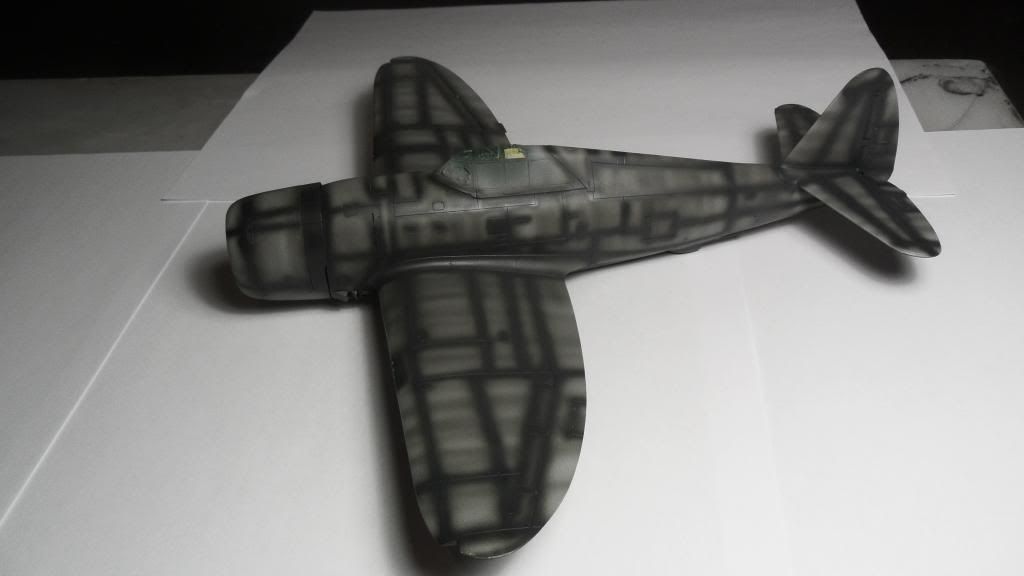
This streaking should be visible after painting her and make the finish look like in the photos i posted earlier.

The preshading is a bit rough in certain areas, but I don't think it matters a lot:
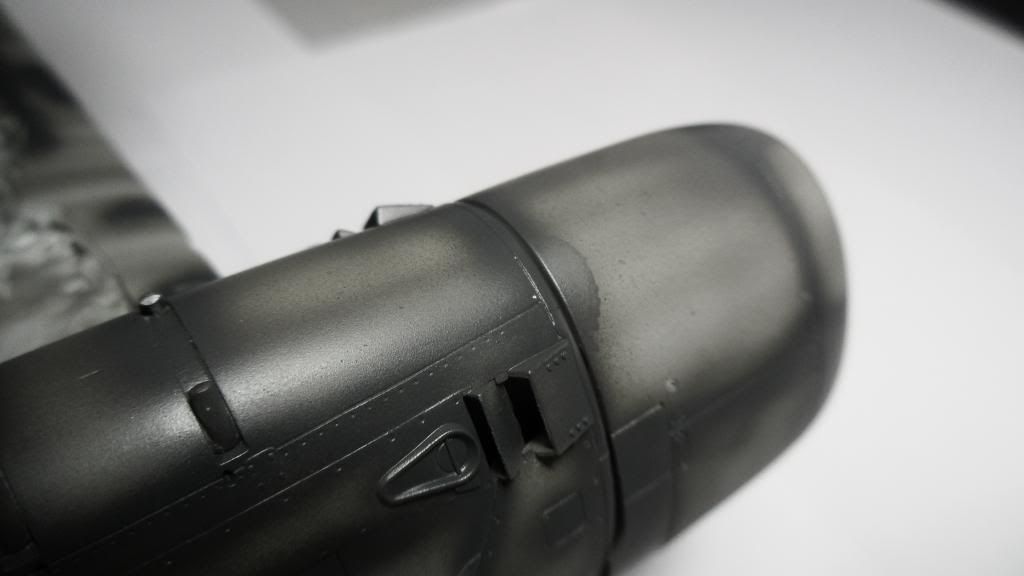
Here are the paints I used:

Gunze H401 "Dark Gray" for the preshading and H416 "RLM 66" (thinned 1:2 parts paint to thinner) for the streaking effect:
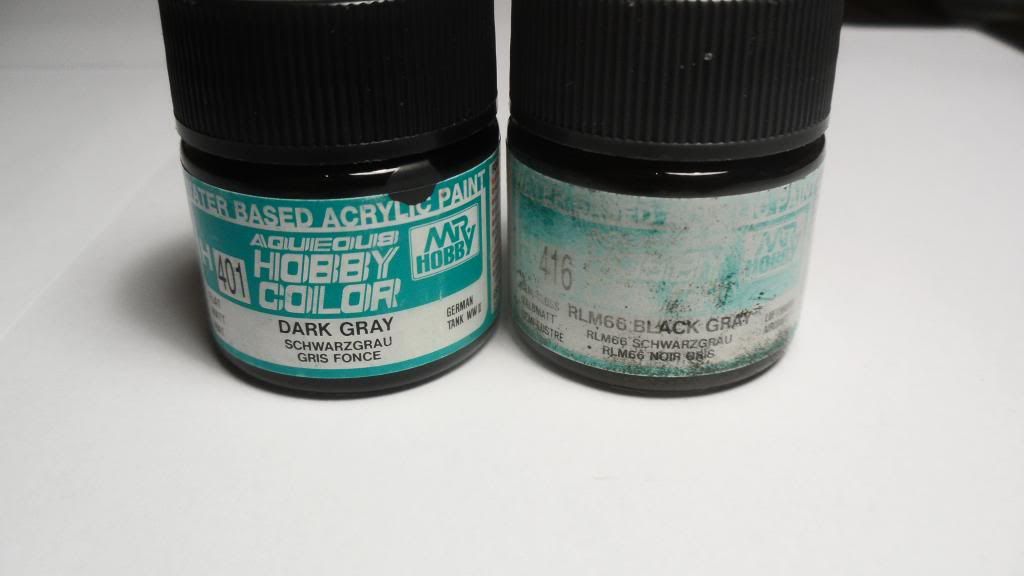
I just love the way those paints spray and I'd never trade them for any other brand. 

Cheers, Clemens 

  • Member since
    December 2003
  • From: Charleston, SC
Posted by sanderson_91 on Saturday, January 25, 2014 7:50 AM

No problem Mike!  This is the first real attempt at mixing my own colors and I like it!  I'm going to do more google searches to see if I can find more paint mixes to use as a base.  

Steve


  • Member since
    April 2005
Posted by Thunderbolt379 on Friday, January 24, 2014 11:00 PM

Steve, thankyou so much! I like the sound of some of those mixes, yours and on the link page, I've used something similar a few times, but it's great to have a fuller listing. I was hoping RAF PRU Blue would have been on it, I'm still looking for a recommendation on that one. It's great to be able to  mix a necessary shade in a familiar paint brand!

Cheers, Mike/TB379

http://worldinminiature.blogspot.com/

JOIN OUR COMMUNITY!

Our community is FREE to join. To participate you must either login or register for an account.

SEARCH FORUMS
FREE NEWSLETTER
By signing up you may also receive reader surveys and occasional special offers. We do not sell, rent or trade our email lists. View our Privacy Policy.