SEARCH FINESCALE.COM

Enter keywords or a search phrase below:

OFFICAL NATURAL METAL FINISH GB V (2013-2014)

71514 views
662 replies
1 rating 2 rating 3 rating 4 rating 5 rating
  • Member since
    November 2008
  • From: Central Florida
Posted by plasticjunkie on Thursday, October 9, 2014 7:59 AM

I finished the office and before sealing the forward halves, I added a small lead sinker to the nose to keep it from being a tail sitter. There is still another pe part that is to be attached to top of the dash where that square looking molded part is at..

 GIFMaker.org_jy_Ayj_O


Too many models to build, not enough time in a lifetime!!

  • Member since
    November 2008
  • From: Central Florida
Posted by plasticjunkie on Tuesday, October 7, 2014 12:28 PM

The pe set really dresses up things, adding some really nice details . The IP instruments have a drop of Clear Parts cement for the glass face. I still have to shoot some clear flat on the pit  (less the IP) to kill a bit the shine of the pe consoles and need to paint the head cushion grey. The camera flash makes colors look a bit lighter.

 l

 GIFMaker.org_jy_Ayj_O


Too many models to build, not enough time in a lifetime!!

TUG
  • Member since
    December 2013
Posted by TUG on Thursday, September 18, 2014 7:43 AM

Hi Clemens - glad you like it. It was a bit of a haul but now it's finished I well pleased with the result. I have several, non plastic, modelling things to attend to now so it will be a while before I can pick something else up but I have enjoyed taking part and would certainly like to do so again in the future.

I used the full size flying F-86 picture as a lead in to my build photos file so I guess I would prefer that one if possible.

Does it automatically appear or do I have to do anything to make it part of my profile? If so, can you tell me what I have to do please.

Thanks for hosting this GB - long may it go on and as they say - 'I will be back' Wink

Regards - Tug

  • Member since
    April 2013
Posted by SchattenSpartan on Wednesday, September 17, 2014 2:19 PM

You absolutely nailed that finish, Tug! Your Super Sabre is perfect in every way! Which one of the pics would you like to see on the front page?

  • Member since
    January 2012
  • From: Hatfield
Posted by Misty on Monday, September 15, 2014 12:15 PM

Glad to see the beautiful reults, its superb!

TUG
  • Member since
    December 2013
Posted by TUG on Monday, September 15, 2014 11:57 AM

Hi Clemens and everyone  else in the NMF GB

Well it's finished at last - it's been a long haul particularly as it had to be shared with my other interests but that last little detail - the chocks - was finally added today Smile

Here are a 'couple' of pics so you can see how it turned out - I shall post some more on the open forum later. Despite going over the deadline I've been very pleased to have been able to take part and even more pleased to actually have completed it.

I began with this image in a book but later found it on the net - it's not meant to be an exact copy just a good reference to try to replicate so I hope you like it

I won't be starting anything else for a while though the result has fired me for another NMF - probably a P-51B  (half painted ETO) but when remains the question.

Hope you are all finding time to do some modelling - it's been very quiet on here of late.

Regards to all - Tug

  • Member since
    April 2013
Posted by SchattenSpartan on Wednesday, August 20, 2014 1:29 PM

She's looking fantastic, Tug! That Marmite trick sure is something different!

TUG
  • Member since
    December 2013
Posted by TUG on Wednesday, August 20, 2014 1:08 PM

Damm I missed that last pic Tongue Tied

That's better - I do wish there was a way to see the whole post as a preview instead of having that black banner covering it - most annoying.

TUG
  • Member since
    December 2013
Posted by TUG on Wednesday, August 20, 2014 1:04 PM

Hi Guys - how y'all doin' - all taking a summer break?

Britt - your 'Down Beat' looks pretty damm 'Up Beat' to me - love the weathering - really nice work Yes.

I've been away from mine for quite a while but have just started back onto it again hopefully to see it through to the finish. I began putting the main U/C on today so thought you might like a couple of pics

This first one shows that bland, blue tinged lacquer on the lower surfaces much better

And this one using flash a bit less dark in the bay areas

Incidentally I took these few pics some time back. You may recall I mentioned using 'Marmite' (a yeast spread ) in the UK for masking?

Well ....

Transfer some to a small jar - don't dip yer brush in the one for yer toast! and spread some on a smooth surface. Depending on the amount of 'peel' effect required pick up very small amounts on the end of a stiff bristled brush

Stipple it gently over the required area - this is the arrestor hook - it looks rather black in the image but in fact is Alclad 'Steel'

Paint as usual - this is Tamiya paint Nato Black of varying shades to get some faded look

Once dry wash off with water - under a tap or in a bowl and dry off and you get this lovely 'flaky' paint effect.

Hope that's not teaching Granny etc Smile

Regards to all - what are you up to at the moment - Tug

  • Member since
    April 2013
Posted by SchattenSpartan on Wednesday, July 30, 2014 5:53 AM

I got one for ya: How about an NMF BF 109? Eduard's new G-6 looks very promising and Eagle Cal makes some decals for JG300 birds, one of which is bare metal...

  • Member since
    June 2013
Posted by bvallot on Tuesday, July 29, 2014 11:20 PM

Thanks Misty! =]  I'd like to do another one...maybe a prototype of something.  I've been toying with maybe a Me 262 or a XP-40.  I'm not decided.  Anybody out there think of a plane that ought to get more love?

On the bench:  

Tamiya F4U-1  Kenneth Walsh


  • Member since
    January 2012
  • From: Hatfield
Posted by Misty on Tuesday, July 1, 2014 5:24 AM

damn awesome  job, Brit!

  • Member since
    June 2013
Posted by bvallot on Monday, June 30, 2014 4:23 PM

Thanks Spartan.  I just might actually.  It'll be some time before I get to one though.  I have a P-40 to finish for another GB, the WW1 GB, and the Vietnam GB.  I'll make time for another one though. =]

The props spinning wasn't so hard.  I have them set up so that they can spin freely.  For the picture I just held a clean airbrush on one prop and blew on the other.  Pretty low-tech.  If it were bigger I might try my hand at wiring something one day.  Maybe a B-17....  Hope that doesn't ruin the magic. lol

On the bench:  

Tamiya F4U-1  Kenneth Walsh


  • Member since
    April 2013
Posted by SchattenSpartan on Monday, June 30, 2014 4:09 PM

Amazing work! I hope mine turns out as well as yours (hell, half as good would make me more than happy) Any chance of you building another birdie in here? How did you make the props spin BTW, blowing air across the prop blades?

  • Member since
    June 2013
Posted by bvallot on Monday, June 30, 2014 1:15 PM

Spartan, you can put the last one as the pic for the front page.  Thanks again.  =]

On the bench:  

Tamiya F4U-1  Kenneth Walsh


  • Member since
    June 2013
Posted by bvallot on Monday, June 30, 2014 1:09 PM

Okay!  Here's a quick repost from my WIP:

Okay.  I've finally managed to wrap this up and clean off my bench.  Since this kit from Academy has a tricky way of doing the props, I thought I'd drop a couple of quick photos of what I came up with and share what I might do next time.  So buckle up and strap in cause I'm going to load this post with pictures! =D

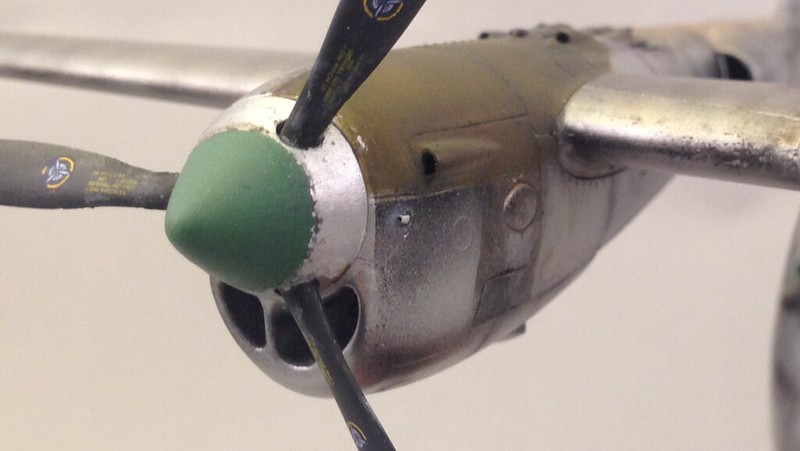
To start...this is what the Academy kit sets up for the props.  If they would have just formed the cone a little higher up it would have negated the need to remove the seam it leaves behind and the panel line they have could take it's place.
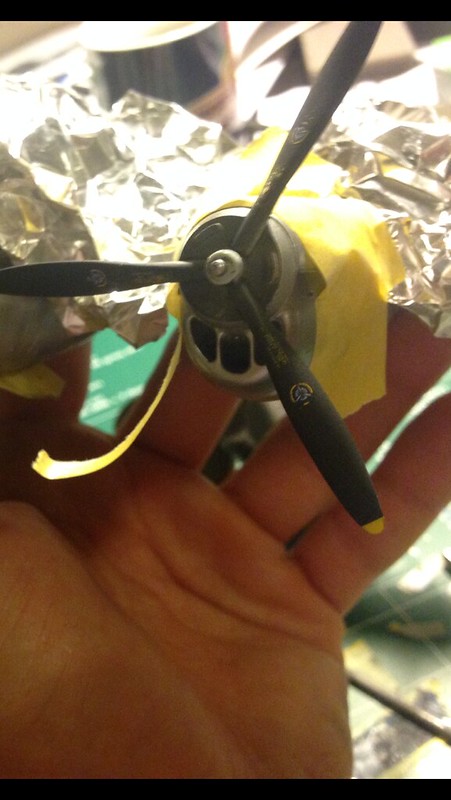
 image by brittvallot, on Flickr

This time around I wanted to ensure that these props would spin, so before I placed the stopper onto the prop assembly I put a drop of mineral oil onto the rod that receives the prop.  Just occurred to me as I was doing it and it works like a charm. =]  As far as taking care of the seam here, I wasn't having the same luck with the CA I was using for some reason so I tried my hand at some Milliput for the first time and man that stuff is sweet.  I think it made all the difference.  To paint the cone of the spinner, I cut a 1/2 in circle and placed over the cone to mask it for paint/clearcoat/flat finishes.
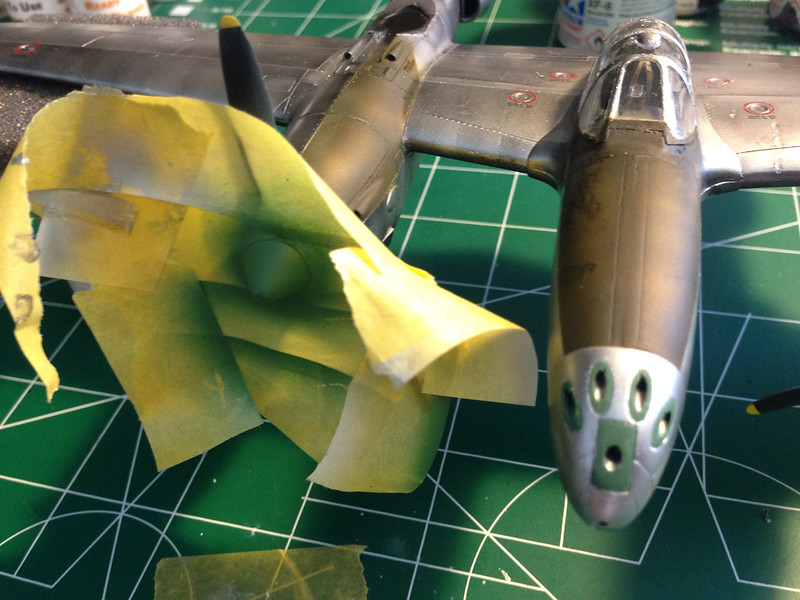
 image by brittvallot, on Flickr

I went back and scratched away a little paint here and there to show the work that would've been done by removing it to get to the props themselves.

Okay. So that's that.  Next time I think what I might do is to use a tube cutter to cut the bottom half of this cone to match up the first part of the prop assembly and take care of the seam before I even place it on the plane.  That way the painted part of the cone can be painted and then glued on after if you're careful about such things.  Either way it will make it loads easier to take care of the seam if it's something that's important to you.  That's my thoughts on that.  Did I mention I have perfect hindsight. lol 

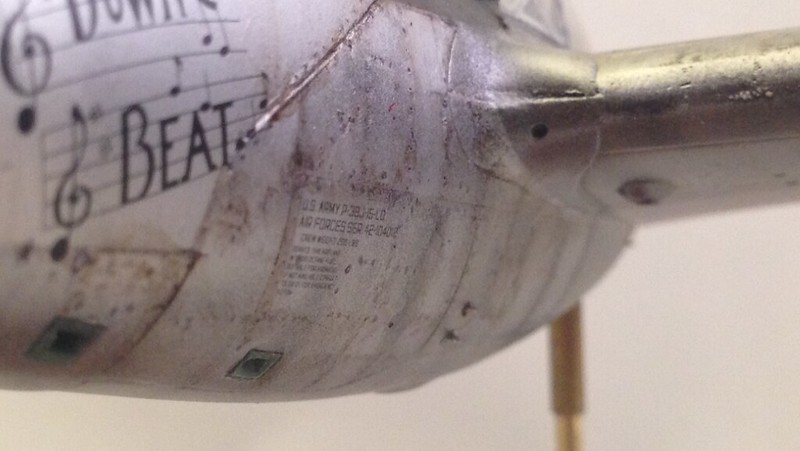
And here's the finished set of pictures.  I have found that my new lightbox doesn't exactly accommodate planes larger than a that of a single engine fighter at 1:48.  So I apologize for some of these.  I did the best I could with what I've got.  Next time I do one this big I'll try something a little different.
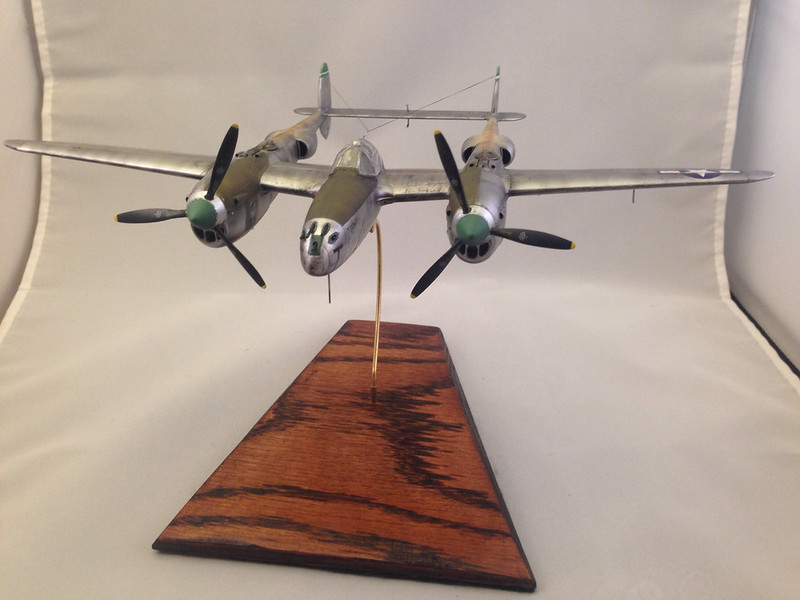
 image by brittvallot, on Flickr

 image by brittvallot, on Flickr
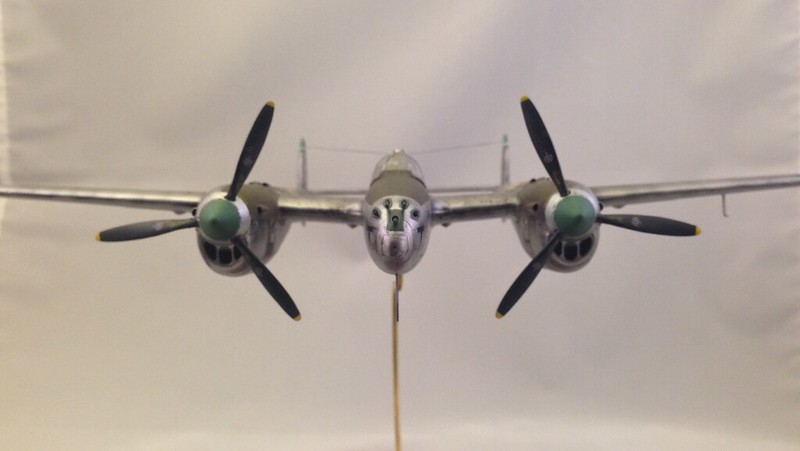
 image by brittvallot, on Flickr

 image by brittvallot, on Flickr
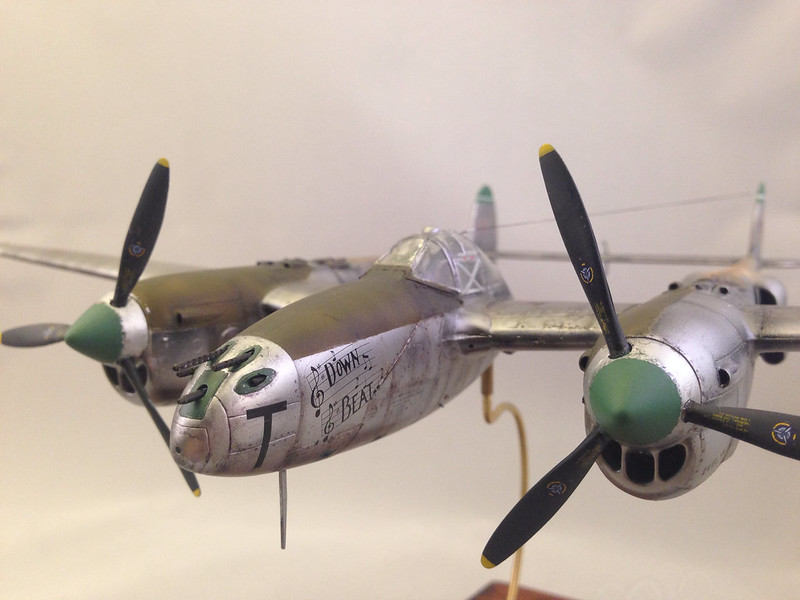
 image by brittvallot, on Flickr
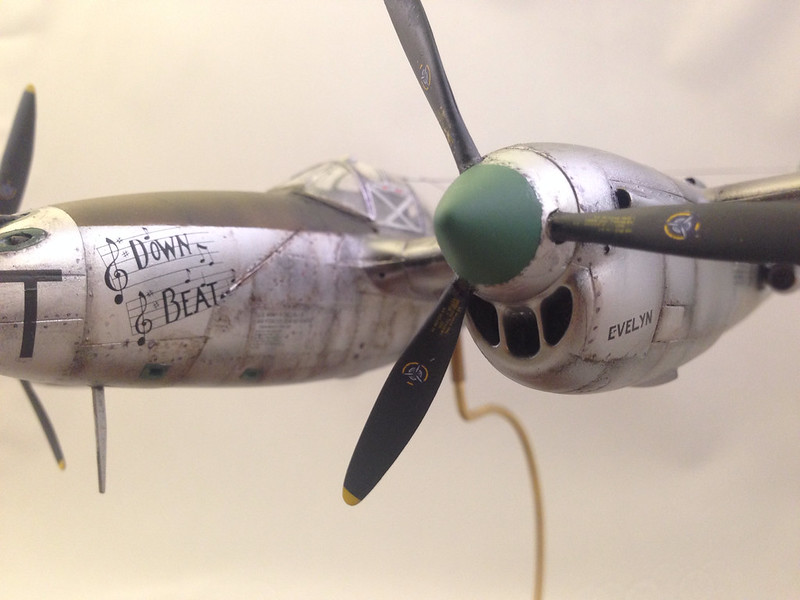
 image by brittvallot, on Flickr
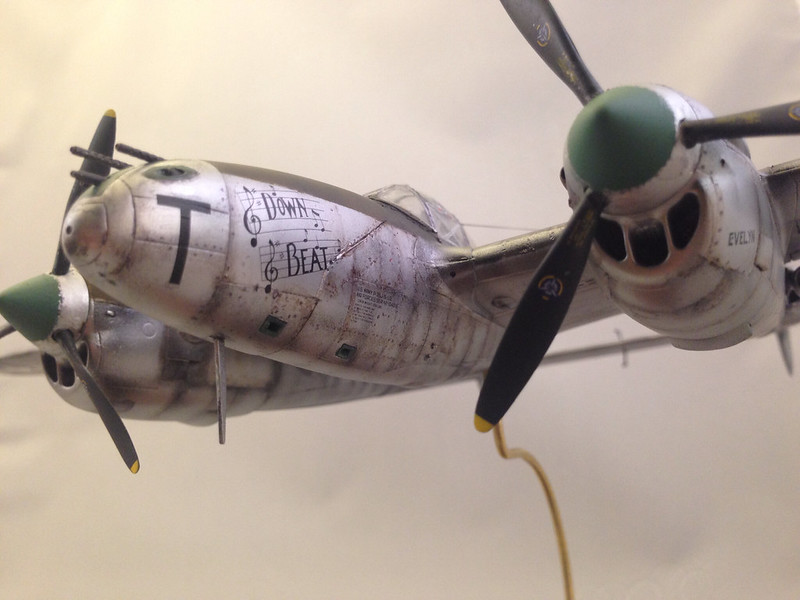
 image by brittvallot, on Flickr
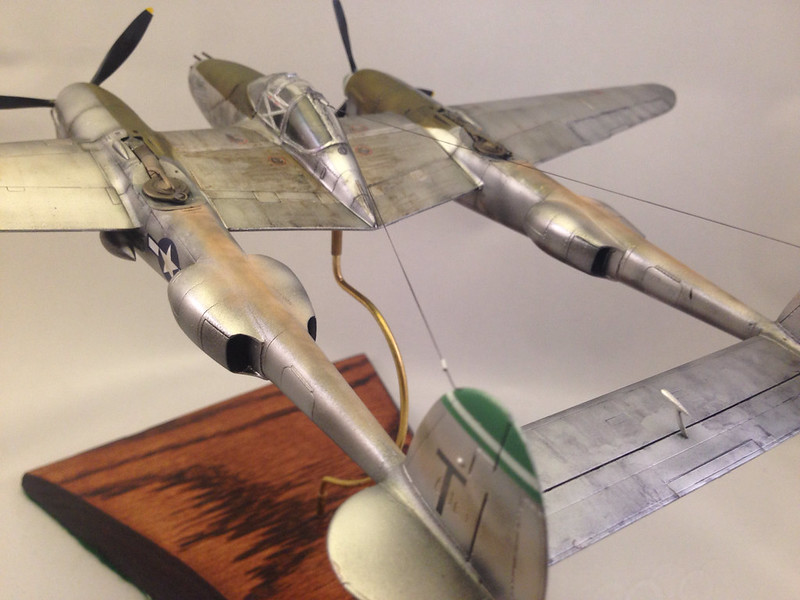
 image by brittvallot, on Flickr
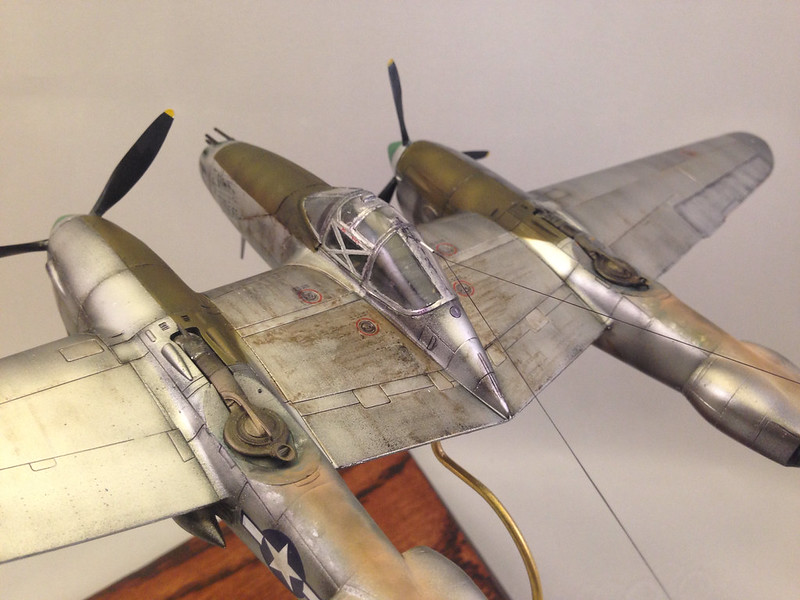
 image by brittvallot, on Flickr
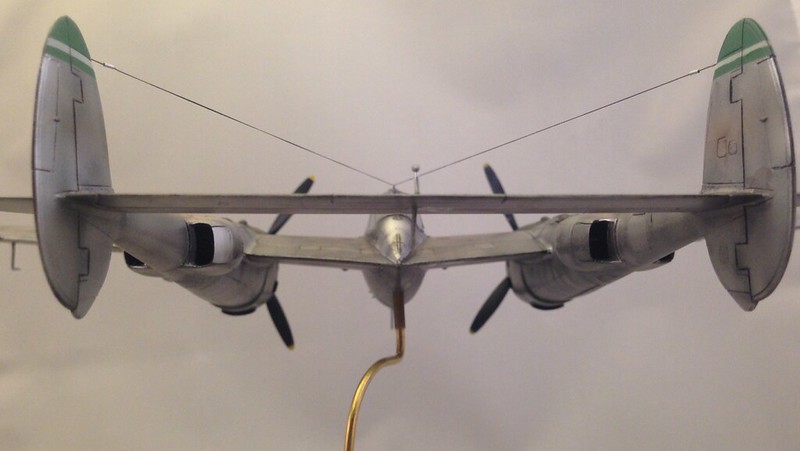
 image by brittvallot, on Flickr
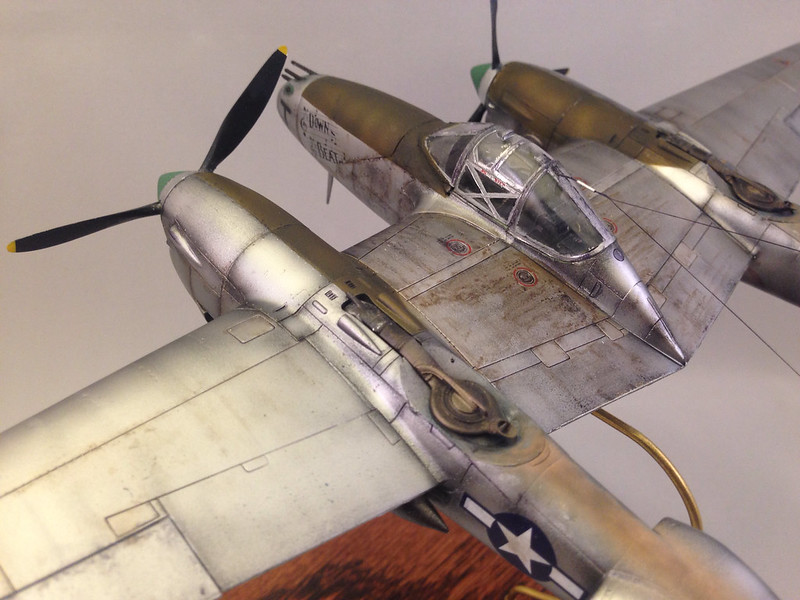
 image by brittvallot, on Flickr
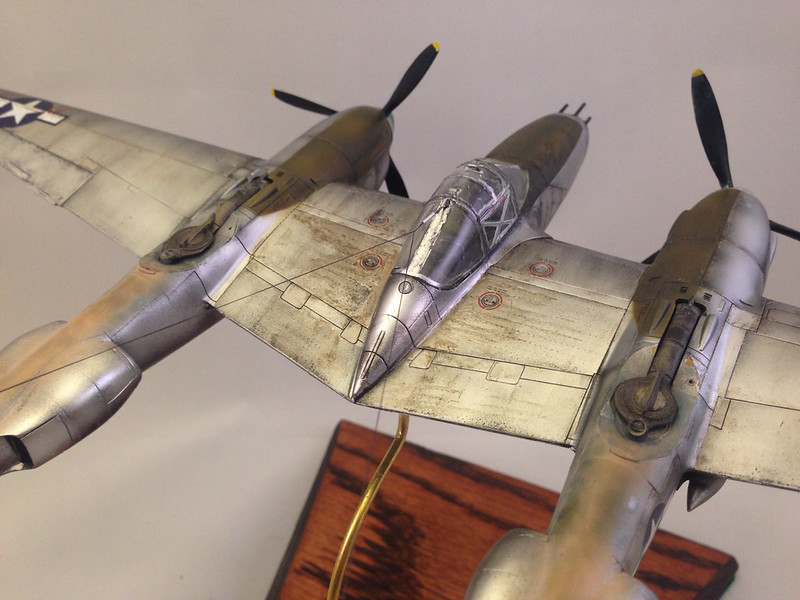
Here's a detail of the seam cleaned up. I also replace this intake with an Albion nickel tube.  Some were just the piping and not a sleeker intake.

 image by brittvallot, on Flickr

Detail of static pitot tube.

 image by brittvallot, on Flickr

 image by brittvallot, on Flickr

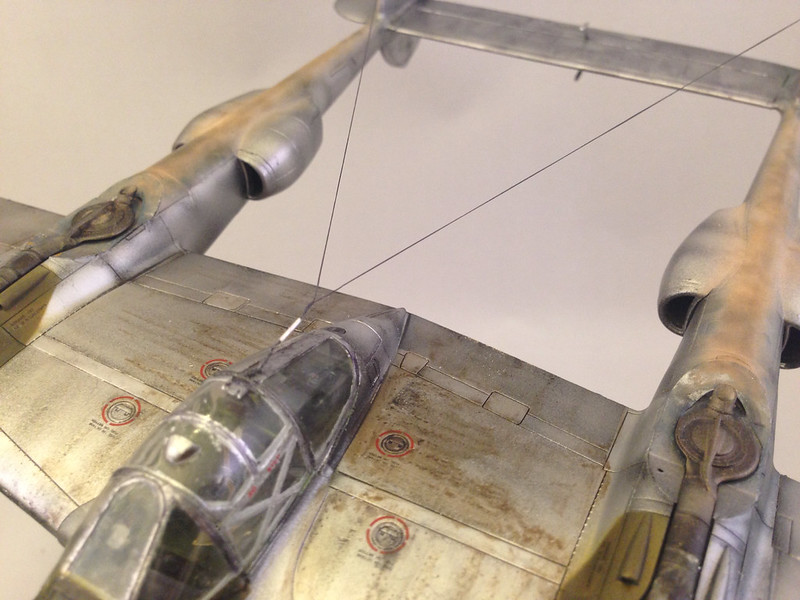
For the radio aerials, I have finally found the way I always want to make these!!  I forget who it was on here that turned me on to EZ Line, but I did pick up the smaller gauge it comes in and it has made all the difference.  This combined with the Albion tube set has allowed me to keep from pulling my hair out and has made this part of the build much more rewarding. I start by cutting two short lengths to act as the turnbuckles(term?? the word escapes me...any help here is appreciated. =]) and a longer one for the main attachment to the back of the cockpit.  I slide the EZ Line through the smaller tube and place a drop of glue on each end of it to secure it's place along the line.  Next, I secure the line to the vertical stabilizer with a small dab of CA.  I pulled an appropriate length of line and passed it through the longer piece of tube and the left about a half inch here and doubled it back through being careful not to pull it all the way out.  I place a drop of CA on the rear side to lock it down and then twist up the forward part of the line and tack it down with a dab of CA carefully onto the back hinge just behind the canopy door.  Then, I pull the line taut so that it's equidistant on each side, repeat with the other smaller tube, and secure the line.  Simple.  I've never had a radio line come out so well before and be so tough to breaking.  I have to laugh at how happy that makes me.  =]

 image by brittvallot, on Flickr

 image by brittvallot, on Flickr

 image by brittvallot, on Flickr

Figured I'd show those spinning props too.  =P

Any and all thoughts are welcome.  Aside from the cockpit debacle, this was a very rewarding kit to build and with a little extra TLC here and there you'll get more bang for buck.  I'd recommend this kit to anyone to try and do.  Thanks for stopping to look. 

On the bench:  

Tamiya F4U-1  Kenneth Walsh


  • Member since
    April 2013
Posted by SchattenSpartan on Monday, June 30, 2014 4:32 AM

She's looking fantastic! I'm looking forward to some pics of her when she's done!

  • Member since
    June 2013
Posted by bvallot on Friday, June 27, 2014 11:36 AM

Misty, Jay:  Y'all are too nice.  =]  I still had a couple of spots that I fooled around with more than I should have.  I walk into mistakes I should be avoiding by being impatient.  I'm just glad they don't poke out too much at the end when it's finished.  =P

Spartan:  No worries.  I know you're busy.  I still haven't really had the chance to get these photos up for the Lightning.  I want to go back and redo some of the pictures.  They are just too dark in places and it doesn't allow NMF to do like it should.  It's a little bigger than the Mustang so I'm just finding what I need to do to accommodate the extra wingspan.  I'll put a picture up of the weathering I focused more on just for now though.  I'm pretty pleased with it, and I found I had to stop myself from getting carried away! lol I didn't want this plane to look totally neglected.  =]  So here that is:

 image by brittvallot, on Flickr

Hopefully this weekend I'll be able to get to it.  Planning a wedding is definitely interfering with all my spare time. lol

On the bench:  

Tamiya F4U-1  Kenneth Walsh


  • Member since
    March 2014
  • From: Cockeysville, MD
Posted by JaySantos on Thursday, June 26, 2014 8:43 AM

Bvallot, spectacular display of craftsmanship!!  

  • Member since
    April 2013
Posted by SchattenSpartan on Thursday, June 26, 2014 3:42 AM

I already commented on the awesomeness of your P-51, bvallot, but that part of my post disappeared somehow. She's a truly inspiring pice of art and if your Lightning looks only half as good it's gonna be a maasterpiece as well!

  • Member since
    January 2012
  • From: Hatfield
Posted by Misty on Thursday, June 26, 2014 2:25 AM

id give that 5/5 to Brit, it looks awesome!!

  • Member since
    June 2013
Posted by bvallot on Wednesday, June 25, 2014 4:49 PM

Thanks Tug!  I'm actually very happy with the way that Light Sheen came out.  Really makes for a good and used warplane.  =]  I have all my photos for the P-38J Lightning done as well.  I'll have those up tonight if I get the chance.

Fiddly bits huh?  You must be almost done. ;)  I always wait to put those on last.  

On the bench:  

Tamiya F4U-1  Kenneth Walsh


TUG
  • Member since
    December 2013
Posted by TUG on Wednesday, June 25, 2014 3:39 PM

Nice work Britt - looks great. Very nice weathering too. Mines coming along slowly - began adding the 'small bits' today

Looking forward to your next one

Regards  - Tug

  • Member since
    April 2013
Posted by SchattenSpartan on Tuesday, June 24, 2014 4:16 PM

Front page is updated with all the finished builds and the new end date!

  • Member since
    June 2013
Posted by bvallot on Monday, June 23, 2014 5:25 PM

Reposting from my WIP:  =D

Alright, here it is.  Finally finished.  I's dotted and t's crossed.  I finally got my light box in to film with better than I'd been doing.  This post will be a bit pic heavy, but I wanted to all the NMF to show what it can do.  I had a lot of fun on this build and learned a lot from it.  I'd give this kit 5 out of 5 stars.  =]  It's a real winner.

 image by brittvallot, on Flickr

 image by brittvallot, on Flickr

 image by brittvallot, on Flickr

 image by brittvallot, on Flickr

 image by brittvallot, on Flickr
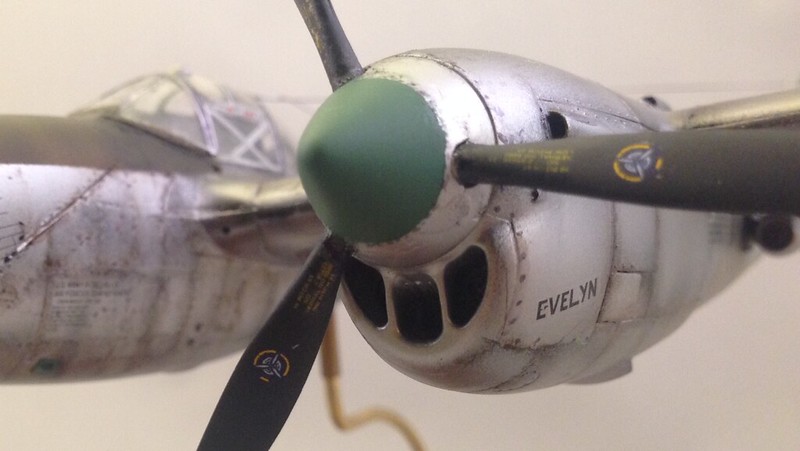
 image by brittvallot, on Flickr
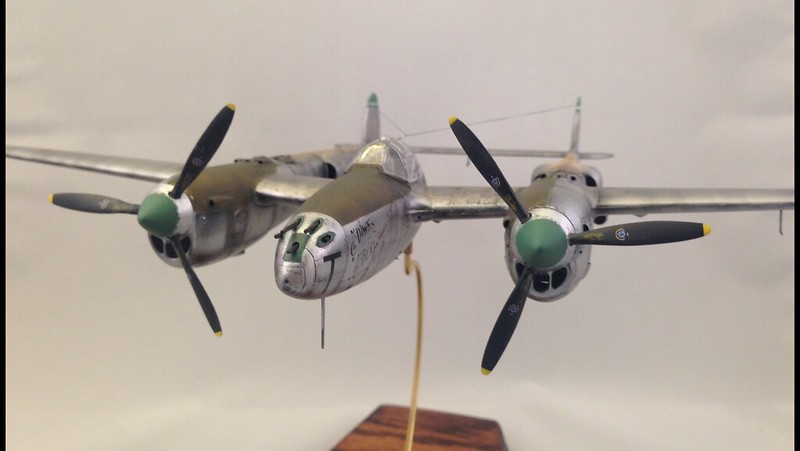
 image by brittvallot, on Flickr
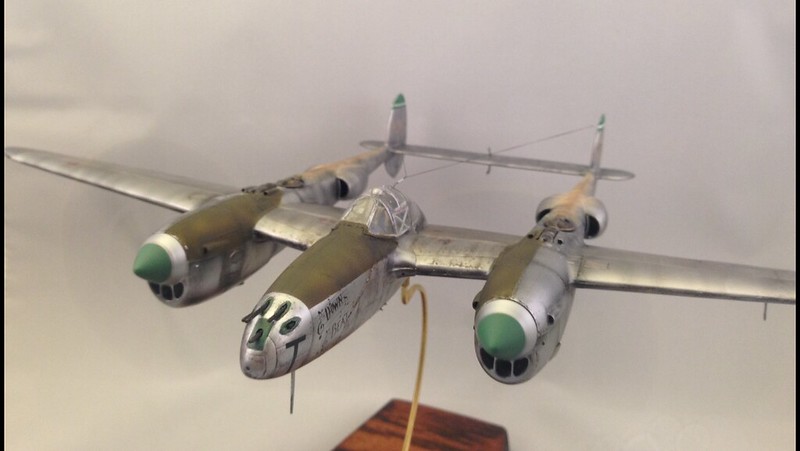
 image by brittvallot, on Flickr

 image by brittvallot, on Flickr

 image by brittvallot, on Flickr

 image by brittvallot, on Flickr

 image by brittvallot, on Flickr

 image by brittvallot, on Flickr

 image by brittvallot, on Flickr

 image by brittvallot, on Flickr

 image by brittvallot, on Flickr

Spartan, if you could...use the very last photo for the front page for this one.  Thanks again for hosting.

On the bench:  

Tamiya F4U-1  Kenneth Walsh


TUG
  • Member since
    December 2013
Posted by TUG on Thursday, June 19, 2014 4:38 AM

Clemens - good to hear you may soon be back to some quality modelling time. The extension is fine - a good compromise to suit most of us I guess - I should be able to make that with ease (he says hopefully)

Glad you guys like the Hun - it's 'tedium time' now, painting all the very small bits before hanging them all on then the last haul on the final bits for the cockpit and the canopy - I'm beginning to really enjoy the time I'm now getting on it and even looking forward to the next project.

Looking forward to seeing your new builds too.

Regards for now - Tug

  • Member since
    January 2012
  • From: Hatfield
Posted by Misty on Wednesday, June 18, 2014 2:45 PM

thats cool, i may even finish in time  B-)

  • Member since
    April 2013
Posted by SchattenSpartan on Tuesday, June 17, 2014 3:38 PM

Sorry guys for not replying to this GB. I was really busy lately and had no free time at all. I'm back now and oh my, that's some great stuff here! So many shiny planes!

Theuns: Nice to see that little F-100 finished! I really like the colorful scheme!

Tug: You keep impressing me every time you post a update on your big Sabre! She looks simply gorgeous!

bvallot: Great save on that nose section. The gap sure looked nasty!

Jorge: I love Thunderbolts and yours looks perfect! Nice color scheme and great execution all around! Keep the bagde in your sig, you really earned it!

REgarding the next round: There wont be a next round... yet. Most of you still got quite some work to do and I wasn't even able to start on my project, so I think I'll just extend this round untill Dec. 31st. The next round will start 2015. I hope everyone is ok with that Wink

  • Member since
    March 2014
  • From: Cockeysville, MD
Posted by JaySantos on Tuesday, June 17, 2014 10:07 AM

I would like to know the etiquette for that too, I finished my model after the cutoff date, but would like it if it counted for this GB, I also grabbed a badge but I will get it out of my sig until I know I am following the rules.

TUG - great job on your model! I may steal some of your ideas for my next NMF.

Jorge

JOIN OUR COMMUNITY!

Our community is FREE to join. To participate you must either login or register for an account.

SEARCH FORUMS
FREE NEWSLETTER
By signing up you may also receive reader surveys and occasional special offers. We do not sell, rent or trade our email lists. View our Privacy Policy.