SEARCH FINESCALE.COM

Enter keywords or a search phrase below:

OFFICAL NATURAL METAL FINISH GB V (2013-2014)

71514 views
662 replies
1 rating 2 rating 3 rating 4 rating 5 rating
  • Member since
    March 2014
  • From: Cockeysville, MD
Posted by JaySantos on Sunday, May 11, 2014 11:44 AM

Thanks bvallot, I think i will take your advice on both the glossy black and the windscreen.

I really appreciate the input.

I really love jugs too... every kind! :D

Jorge

  • Member since
    June 2013
Posted by bvallot on Sunday, May 11, 2014 9:38 AM

Jorge, that's looking great so far.  You may want to consider fitting the windscreen now before you continue. Some times it works out that you get a nice clean, even fit without any fuss.  But if not it may detract from your NMF finish.  Also, it's hard to tell from this angle with the light only hitting the leading edge of the wings, but your gloss black coat ought to really shine.  So if you're happy with it by all means leave it be...there's no sense in ruining a good thing.  If you do go over it again...keep the coats light.  I found out the hard way it doesn't take much to start losing fine surface detail.  =]

Looking forward to your next post.  I'm fast learning to appreciate jugs more.  =D  The aircraft kind of course. ;)

On the bench:  

Tamiya F4U-1  Kenneth Walsh


  • Member since
    March 2014
  • From: Cockeysville, MD
Posted by JaySantos on Sunday, May 11, 2014 9:12 AM

oops, looks like I deleted the photos from my album!

Anyway here is my progress.

Got the anti glare panel done, just to realize that I had left an enormous step between the windshield and fuselage. I removed the windshield carefully, dry fitted and sanded where needed, now it goes on perfect, but I will leave it out for now.

First coat of black is on and after this pic I already polished it with 12000 micromesh.

I might give it the first go with duraluminium this afternoon... but it is a beautiful day, I have 3 kids and it is mother day, so I'll probably will be away from my bench for most of the day.

Thanks for looking

Jorge 

Tags: NMF

  • Member since
    March 2014
  • From: Cockeysville, MD
Posted by JaySantos on Wednesday, May 7, 2014 8:45 PM

1st coat of primer, now sand and fix imperfections.

Almost ready for Alclad!!

Constructive criticism always welcome!

Jorge 

TUG
  • Member since
    December 2013
Posted by TUG on Wednesday, May 7, 2014 2:08 AM

Nice work Britt - it's coming on well

Tug

  • Member since
    June 2013
Posted by bvallot on Tuesday, May 6, 2014 8:50 PM

Alright!!  Got some work done.  =]

I got the boom halves mated together and attached to the wing.  I first set them up on the horizontal stabilizer/elevator.  That way I was able to keep them perpendicular and prevent them from warping and twisting on the wing.  Once they set, I used Tenax to attach them to the wing and followed up with a 2 part epoxy to ensure they stay put.  =]

Here it is:
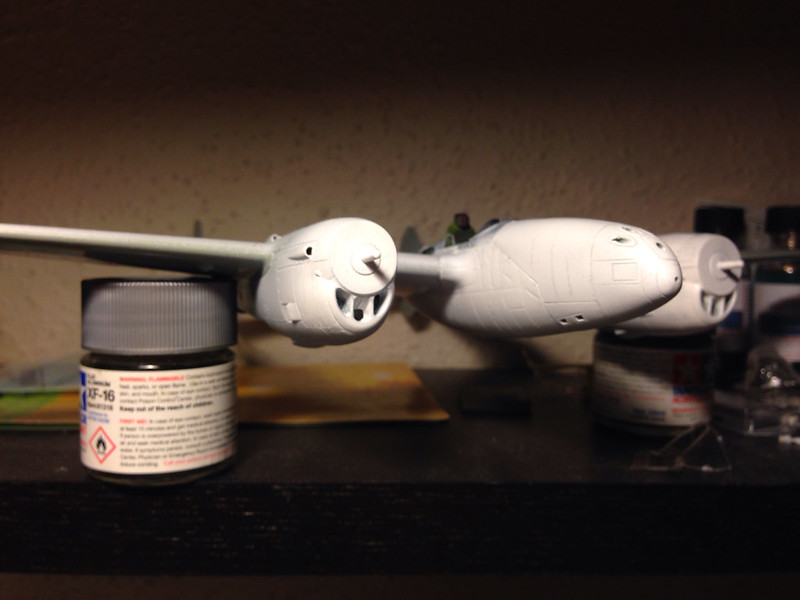
 image by brittvallot, on Flickr

 image by brittvallot, on Flickr
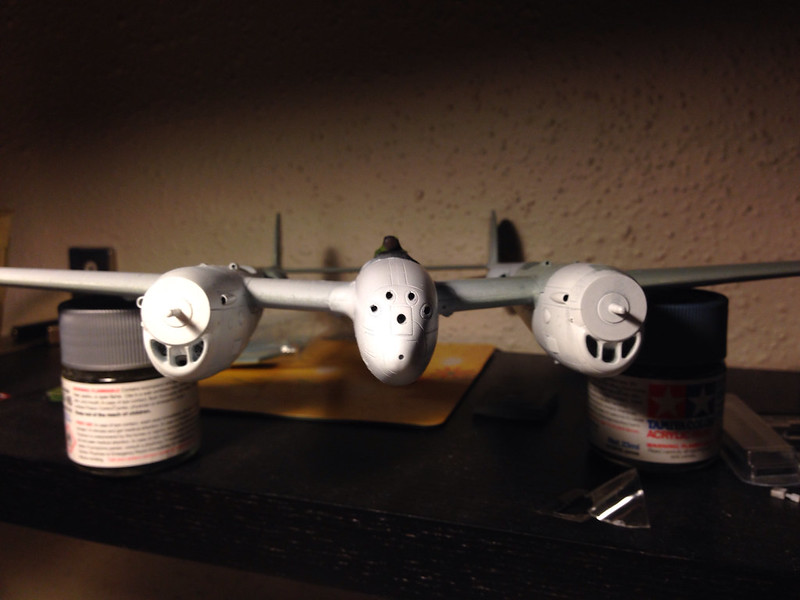
 image by brittvallot, on Flickr
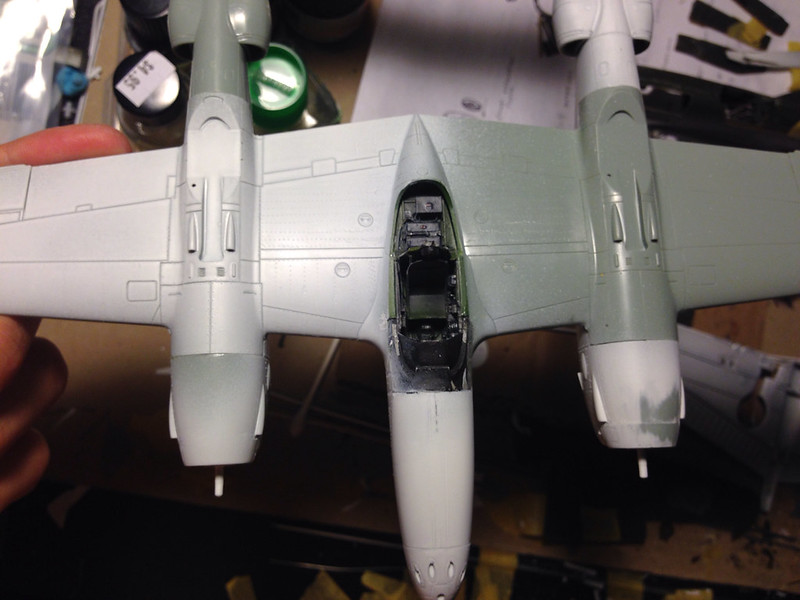
For the intercooler intakes, I scratched out a bulkhead to hold the housing for the intakes.  I realize that there isn't a real bulkhead here and the housing doesn't extend this far up, but seeing as none of it is visible I cut it to fit the area of the nacelle to allow for more contact to make it a stronger fit. 
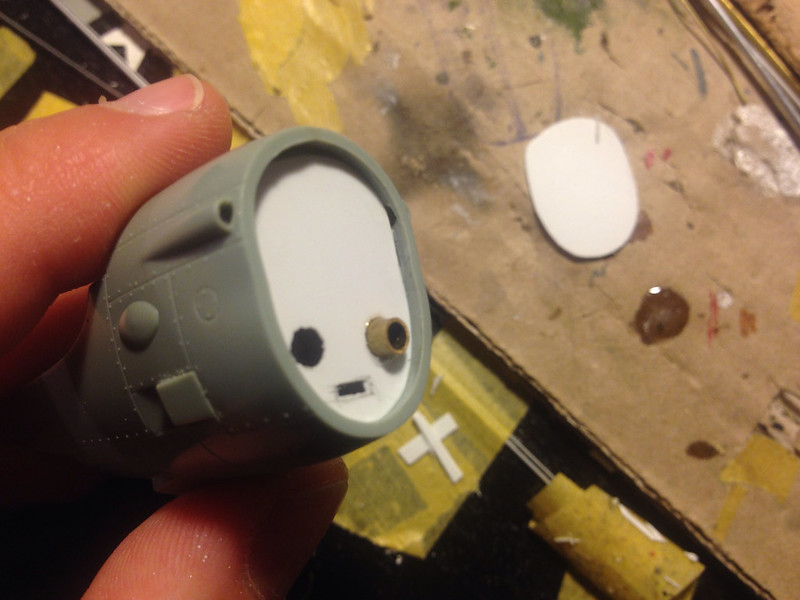
 image by brittvallot, on Flickr

 image by brittvallot, on Flickr
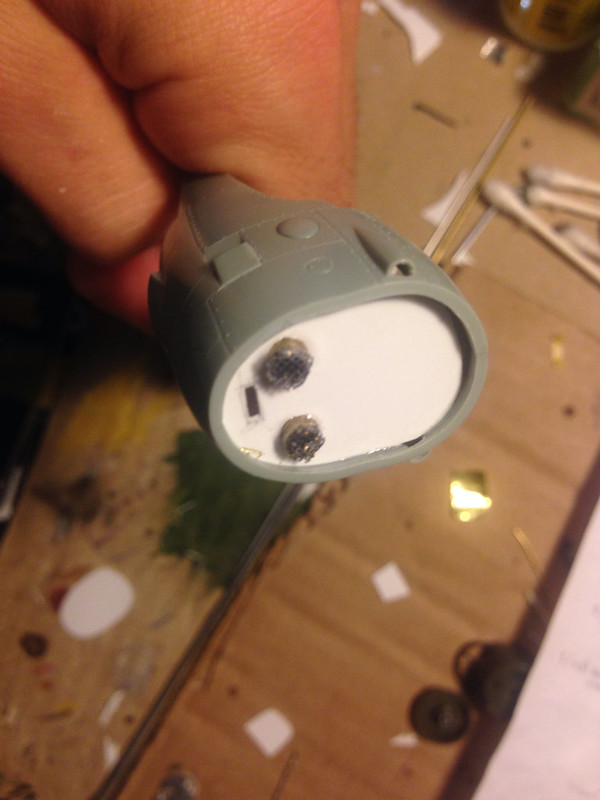
 image by brittvallot, on Flickr
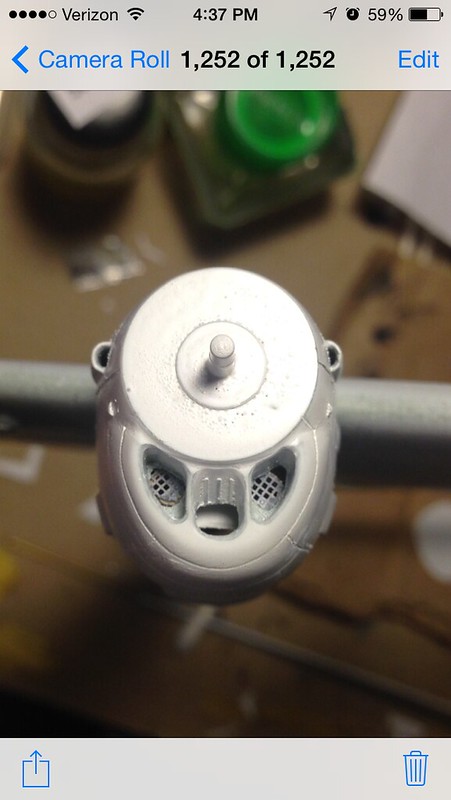
Here's a seam that needs fixin up:
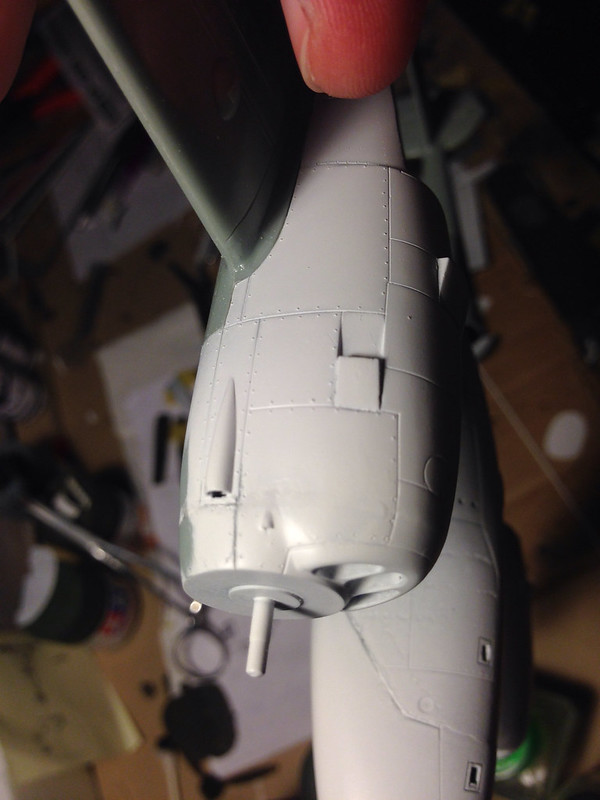
 image by brittvallot, on Flickr

 image by brittvallot, on Flickr
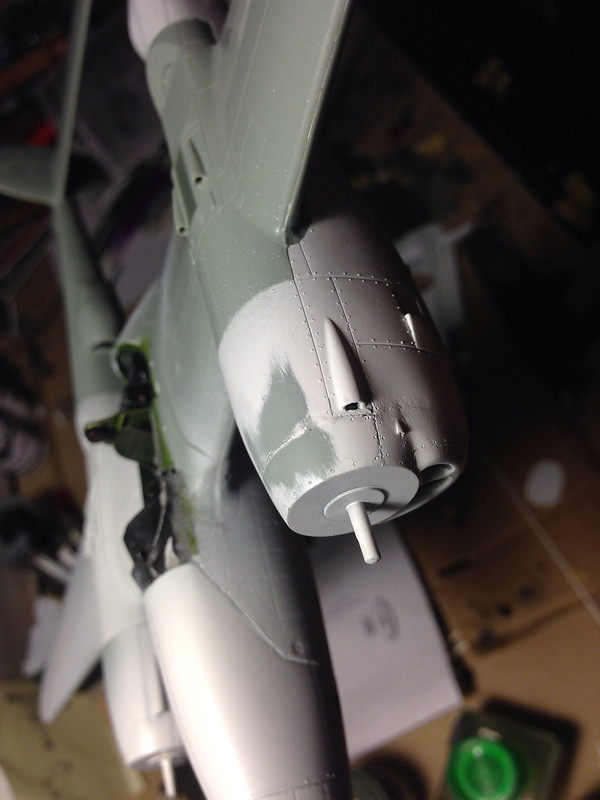
The panel here has been sanded and rescribed a little lower. There is also two panel lines that need to be extended to meet the front face of this engine nacelle:
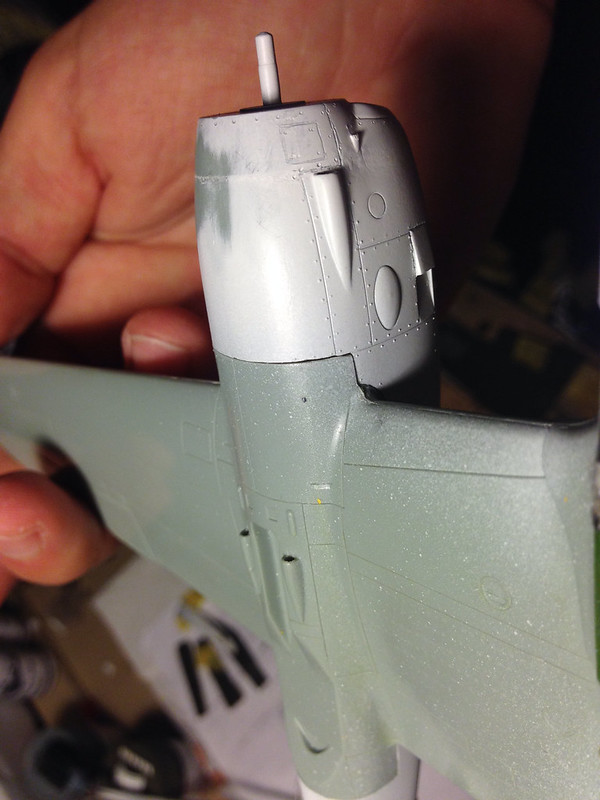
 image by brittvallot, on Flickr

AM parts:
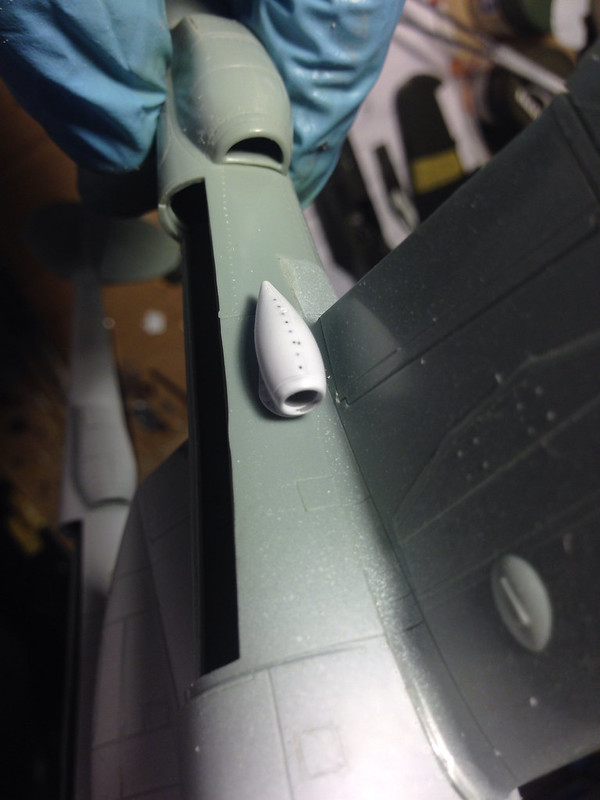
 image by brittvallot, on Flickr

 image by brittvallot, on Flickr
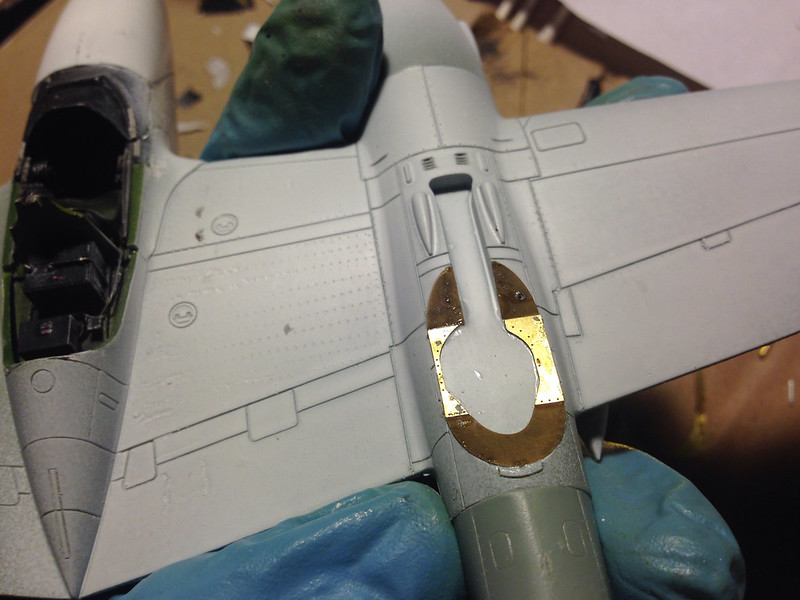
 image by brittvallot, on Flickr
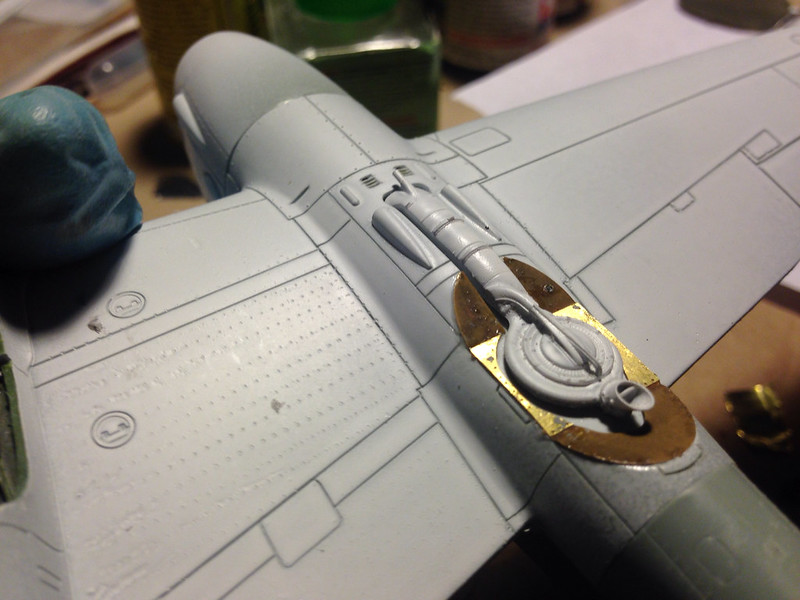
Happy to see these superchargers working out! 

Comments, suggestions... =]

On the bench:  

Tamiya F4U-1  Kenneth Walsh


  • Member since
    June 2013
Posted by bvallot on Tuesday, May 6, 2014 1:13 PM

That's unfortunate.  =[  I know based on the order that things usually work in regards to painting...the acrylic Klear Kote they make should be fine.  As for the other, it may be a laquer based product and you may find it ruining something underneath it like an acrylic or enamel.   The enamel may be sturdier and may not suffer if done in light coats even still.  So definitely test it.  You never know what you can get away with until you try! =D

I'd been "breaking the rules" for a while with my lacquer dullcote I had been using previously, and it worked just fine as it was on top of future.  Soooo... =P

On the bench:  

Tamiya F4U-1  Kenneth Walsh


  • Member since
    April 2010
Posted by Theuns on Tuesday, May 6, 2014 10:32 AM

Hey guys, I got hold of some alclad semi matt ,as usual I could not get the semi light sheen I wanted.

After 2 light coats, I got the super shine toned down, maybe a little more than I wanted but it is a learnng experience for me.

I hate to admitt it, but this does (for me atleast) make the model a little more "life like" without loosing any of the "feel" that alclad gives.

I tried some matted down future over alclad and it TOTALLY messed up the look, so I am happy I did not try it on the Hun!

I will keep looking for light sheen, or maybe get some gloss and mix the 2 to get it right.

Can alclad clear coats be used over enamles successfully??

Theuns

  • Member since
    June 2013
Posted by bvallot on Wednesday, April 30, 2014 7:04 PM

Tug...this is exactly the visual aid that reveals what you first spoke about months ago when you came on board!!  So happy to see this. =] This really lays it out.  And it's quite polished too.  The thinned, white coat that you put on first is evidence of a clever mind at work.  I'll definitely put this one in my playbook.

*two thumbs up

On the bench:  

Tamiya F4U-1  Kenneth Walsh


  • Member since
    January 2012
  • From: Hatfield
Posted by Misty on Wednesday, April 30, 2014 5:11 PM

Nice tip with the powder, seems to have given a much more realistic result than salt

TUG
  • Member since
    December 2013
Posted by TUG on Wednesday, April 30, 2014 4:04 PM

Hi again Guys - after reclaiming the roundels last up on masking was the two turbine warning stripes.

On the image I have of the full size it can be seen that these are quite distressed with white showing through so an attempt to replicate that was made. I used the 'salt technique' but replaced the salt with 'embossing powder'.

First up was to mask the stripes and spray an off white undercoat in the areas to be chipped

Lay some clean water on in the area required with a brush

This is how the powder comes - it's a 'card craft' accessory and is granular like salt but does not solved into a paste - in fact it can be recycled should you wish to do so.

Liberally sprinkle the powder on to cover the area completely and allow to dry thoroughly - that does take a while but once it's dry it can be gently brushed away using the tip of a dry brush leaving the areas to be masked. This has to be very gently done as it's very easy to brush it all off.

I got a bit carried away and forgot to take a pic of that but here is after spraying red and removing the outer masking - I'm sure you can get the idea

After removing the defining masking

The final effect - this will be further distressed when the washes are applied at a later time

And this is how it looks so far. At last  that masking in the cockpit and U/C bays can be removed and hopefully before too long get back to it and begin working on the wings

That's it for a while I'm afraid as I have several other matters to attend to that are going to have to take priority but in the meantime you guys keep at it and make up for my lack of not meeting the deadline - go for it Wink

Regards - Tug

  • Member since
    June 2013
Posted by bvallot on Wednesday, April 30, 2014 10:35 AM

Beautiful!!  =D

On the bench:  

Tamiya F4U-1  Kenneth Walsh


  • Member since
    January 2012
  • From: Hatfield
Posted by Misty on Wednesday, April 30, 2014 4:31 AM

good save on the yellow, shes looking real nice. lookinf forward to the rest of the pics.

TUG
  • Member since
    December 2013
Posted by TUG on Wednesday, April 30, 2014 2:37 AM

Hi Guys

At last I have some progress to report on but first -

That Hun is looking good Theuns with really nice decal work. I have promised myself (ha ha) when -if - 'Trumpy' ever do bring out the F version in 1/32 I shall do it in similar style.

Same thoughts on the P38 Britt - nice work on the stressed skin appearance. I've never plucked up the courage to have an attempt at that save for a small area around the nose on the Ju52. That new Airfix 1/24 Typhoon has it on all panels but that's a big model to find a home for.

For myself I have good news and some not so good. I have managed to get several lengthy sessions at the bench and now have the fuse more or less finished but I don't think I'm going to be able to make the cut off date due to other matters that require some input - looks like a carry over it is. Hope you intend to do another NMF GB Clemens.

After this stage (repeat pic) it was masked up for the unit code lettering, the anti-glare panel and the serial number sprayed with Tamiya Nato Black over Flat black then a dusting of Nato B with deck Tan to give a hint of fading. 

Next up was the French roundel which did not go as well! Apart from areas where finger grease has contaminated the surface I've never experienced paint lift off with Tamiya or Alclad even when masking within an hour or so. The one problem with Tamitya range is their lack of basic colours so a different yellow was chosen - some old Eagle colour. It went on superbly - excellent coverage (for yellow) but unfortunately despite a lengthy drying period came off again nearly as easily!!

Too much to accept as the  'weathering distress' intended new masks were cut and hopefully re-aligned without gaps. The paint adhesion was so poor the rest was picked off with a cocktail stick then cleaned with a glass fibre pencil

Repainted using Tamiya Yellow, darked with Desert Yellow it re-claimed better than anticipated - those chips in the red and white areas are intentional - done with a scalpel to distress it.

I got to this stage last night but before I could go on the server went down so lost it all - I'll post this now and come back a bit later with the rest of it.

Regards - Tug

  • Member since
    June 2013
Posted by bvallot on Tuesday, April 29, 2014 2:24 PM

Update. =] 

Trying to take care of some of the little things to make this Lightning shine a little brighter.  Right now I'm scratching out the radiators on the booms. I first cut some plasticard and sanded it down into shape to make up a backing for the mesh I have from Eduard.  All of this will also receive a primer before Alclad's Gloss Black.  So far I'm thinking these surfaces will get painted in the Alclad Semi matte Aluminum.

 image by brittvallot, on Flickr

 image by brittvallot, on Flickr

Here's a view that will be more commonly seen.  The actuating arm for the radiator door is visible too.

 image by brittvallot, on Flickr

I've also including some thin strips of brass rod to approximate the ribbing that I've seen in photos of this radiator wall.  If you look close, in the walkarounds of Lightnings there are two on both the top and bottom of the radiator housing. This will be more evident after it's primed.  The shadow from it will show better... =]

On the bench:  

Tamiya F4U-1  Kenneth Walsh


  • Member since
    April 2013
Posted by SchattenSpartan on Tuesday, April 29, 2014 7:46 AM

Theuns: Very nice progress on that F-100!

Misty: She looks absolutely gorgeous! The washing looks just right IMO!

  • Member since
    January 2012
  • From: Hatfield
Posted by Misty on Monday, April 28, 2014 1:12 PM

yup have a practice, the problem i have with clearcoats that are not full gloss is knowing when to stop, as judging what is a wet coat or not is more difficult. my eyes are so bad i have to wear an optivisor when spraying  :-(

btw i use about 15 psi for the lightsheen and a 0.3mm tip.

  • Member since
    April 2010
Posted by Theuns on Monday, April 28, 2014 12:58 PM

I will give it a go on my little MiG 15 first and learn from that :-)

Theuns

  • Member since
    June 2013
Posted by bvallot on Monday, April 28, 2014 12:53 PM

That might all just depend on your compressor psi you're working at as well as your AB.  With a double action brush you can have a bit more control over how hard it's coming out.  It will aslo depend on your coordination and control of the AB.  But it should still go down somewhat wet....just not too wet.  Tape off a spot and test it first to see.  Allow it to dry and before long, you'll know just how much to apply.  I promise for me it didn't take much for that Light Sheen to go to work.  =]

Misty: Excellent work there!!

On the bench:  

Tamiya F4U-1  Kenneth Walsh


  • Member since
    April 2010
Posted by Theuns on Monday, April 28, 2014 12:47 PM

I have never used a clear coat over the decals on alclad, but on my F-86 (also airframe allu over gloss black like the F-100) I found some finger marks that over time seem to have "rusted" so I need to stop this.

The decals went on very well without needing any prior gloss coat and on all mt alclad stuff.

I want to retain the glossy look of a pollished plane, but not as brilliantly as on some F-104's, just a little toned down. I will gove the light sheen a go.

Do you guys mist on the clear coats or give it a good "wet" coat? If it is shot on lightly, does it still flow without giving on a rough texture?

Theuns

  • Member since
    January 2012
  • From: Hatfield
Posted by Misty on Monday, April 28, 2014 12:16 PM

Just a couple of coats of alclad flat to seal down the decals and panel wash. If i decide to do the metal finish it will probably be light sheen as its not a chrome shine finish. If it was id use aqua gloss or again leave it as is. Depends on how the decals go down.

Are you going to clear coat yours ?

  • Member since
    April 2010
Posted by Theuns on Monday, April 28, 2014 10:08 AM

Misty, that is nice! What clearcoat did you use? Howmany coats thereof?

Theuns

  • Member since
    January 2012
  • From: Hatfield
Posted by Misty on Monday, April 28, 2014 8:38 AM

Hey Theuns that is looking ace!

i am still loitering and trying to find time to finish my Mig MF up.

its sitting on the shelf of doom but does get minor updates. Some of the decals are on,the colours parts have been washed (a bit too dark i think ) and flat coated, and the rest has been alcladed. i WILL finish it one day i swear!

 mf1 by omgpainful, on Flickr

  • Member since
    April 2010
Posted by Theuns on Monday, April 28, 2014 8:23 AM

Yes that does help, thanx.

After 3 hurs of decaling I got this to show for it. The decals came off the paper within 10 seconds and formed very well, I would just have liked the red stripes on the exhaust area, I had to cut these from the spares box.

I am not entirely happy with the heat staining, but to late to fit it now :-(

The pannel tone difference however looks good to me.

I will try the clearcoat this week.

Theuns

  • Member since
    June 2013
Posted by bvallot on Sunday, April 27, 2014 5:49 PM

Well, I've only done it once before.  So that doesn't really work in your favor by the numbers. =D  Buuuuuut... I did find that on my mustang I just completed that it did not take much at all to take down the shine from the "brighter" polished aluminum areas on the plane.  I got it to a point I liked, then taped off those higher shine areas and came back over certain spots that ought to receive more wear and hit those again with the Light Sheen.  Again, it did NOT take much at all.  I don't remember exactly how long I waited until I applied the Light Sheen, but I doubt it was more than an hour.  ...That is unless I came back to it the day after (24hrs maybe?)  I've found the Alclad Line-up to be very user-friendly in fact.  I usually gave coats a day or so between doing something else to it only cause I've heard people talk of an 8-10 hr dry time, but honestly there were a couple of times that within 20 minutes I was putting another coat of a different Alclad down without any trouble.

Hope that helps. =]

On the bench:  

Tamiya F4U-1  Kenneth Walsh


  • Member since
    April 2010
Posted by Theuns on Sunday, April 27, 2014 10:07 AM

Ok, so then basically you "build up" the "dullness" in fine light coats? I have not done this before.

What is the cure time between coats? How long does the alclad "metal" need to cure before I shoot the clearcoat?

Theuns

  • Member since
    June 2013
Posted by bvallot on Sunday, April 27, 2014 9:59 AM

That shine is sick!! ...and yeah.  The light sheen in "light" coats will take it down a notch.  Just do it very lightly at first, and add what you want and where.  I'd even recommend masking off certain panels and hitting some heavier so that the effect doesn't run into everything.  Try it out.  You may like it the other way too. =]

On the bench:  

Tamiya F4U-1  Kenneth Walsh


  • Member since
    May 2006
  • From: Chapin, South Carolina
Posted by Shipwreck on Saturday, April 26, 2014 6:11 AM

SchattenSpartan

Another Diagram showing the application of putty/paint:

Blue areas: 2 layers of putty - no panel lines or rives visible, silver paint

Green areas: 1 layer of putty - no panel lines (maybe a wee bit of them) or rivets visible, silver paint

Yellow areas: just silver paint, no putty

SchattenSpartan this is excellent. Do you have the source for this? Thank you!

On the Bench:

Revell 1/96 USS Constitution - rigging

Revell 1/48 B-1B Lancer Prep and research

Trumpeter 1/350 USS Hornet CV-8 Prep and research


JOIN OUR COMMUNITY!

Our community is FREE to join. To participate you must either login or register for an account.

SEARCH FORUMS
FREE NEWSLETTER
By signing up you may also receive reader surveys and occasional special offers. We do not sell, rent or trade our email lists. View our Privacy Policy.