SEARCH FINESCALE.COM

Enter keywords or a search phrase below:

Third Annual Berny Memorial Group Build

96101 views
1373 replies
1 rating 2 rating 3 rating 4 rating 5 rating
  • Member since
    June 2009
Posted by jimbot58 on Sunday, October 12, 2014 11:19 PM

Tal Afar Dave


Well finally getting to my ancient 1965 Revell F-4B Phantom II.  Kits don't get much simpler than this one.  I remember building this kit as the Blue Angels 'diamond formation' kit of the 70s and 80s. Also issued, with some slight modification, as the Thunderbirds kit.  This won't be too detailed as it will be mostly out of the box.  I did cut out some of the excessive plastic around the cockpit ejection seats and instrument panels.  I may throw a little effort into detailing it up a bit.  But the cockpit is pretty spartan.


Due to it's age, the fuselage parts had some significant warping to them.  I began gluing the halves together beginning at the tail and working forward to the nose.  I had to add some sprue rods just in front of the exhaust nozzles to force the fuselage haves open so that they would fit the lower wing area without creating a large gap.  I'll work on the cockpit a bit before closing it up and dealing with the fuselage warpage at the nose, as seen here:

http://i1228.photobucket.com/albums/ee446/wallymcgee/Revell%201-72nd%20Scale%20F-4B%20Phantom%20II/IMG_20141012_174642_829.jpg

More progress soon.....

TAD

Dave, I've had to do that same trick with sprue rods a time or two to force a fuselage out to meet a wing root.

Jim

*******

On my workbench now:

It's all about classic cars now!

Why can't I find the "Any" key on my keyboard?


  • Member since
    June 2009
Posted by jimbot58 on Monday, October 13, 2014 3:22 AM

Hello again!

Well, after being taken down for much of the evening by an upset stomach (something I ate?) I finally felt up to work in the hobby room.

 2 things I worked on was finishing up on closing the F-8 fuselage. Took me 2 sessions as I take a lot of time to babysit the process. I spend most of it to be sure the two halves line up to avoid that step you can get. This kit does go together  very well, and the areas I glued last night barely took a few swipes with a sanding stick to make them disappear. The nose and the section behind the cockpit are done. I did have to add a drop of CA for filler where the parts had been attached to the sprue and left a bit of a flaw.

I also added a few more PE parts to the Flanker seat. Hard to see them as they are mostly black on black. I think I mentioned that there were something like 13 or 15 pcs. to add to the seat. I only can do a few at a time as it is so unnerving! Dead

A few things I did on previous sessions was to drill out the gun barrels (easy) and also open up the scoops on the rear of the aircraft (not so easy!) Micro-drill and pin vise time!

You can sort of tell the scale I'm working with as you can see the color cup for my airbrush behind the aircraft in the background.

Jim

*******

On my workbench now:

It's all about classic cars now!

Why can't I find the "Any" key on my keyboard?


  • Member since
    June 2009
Posted by jimbot58 on Monday, October 13, 2014 3:31 AM

I did read something very helpful in the latest issue of FSM I always have trouble with painting the areas around the wing root. I always end up with grainy paint and clear is even worse. I guess there is a vortex that occurs there, the paint swirls around and partially dries before contacting the surface. I read the cure is to paint and mask the two areas separate. Seems like a pain, but sounds worth a try.

Jim

*******

On my workbench now:

It's all about classic cars now!

Why can't I find the "Any" key on my keyboard?


  • Member since
    November 2009
  • From: SW Virginia
Posted by Gamera on Monday, October 13, 2014 8:32 AM

Dave & Jim: Those look great guys, please keep the photos coming!

"I dream in fire but work in clay." -Arthur Machen


  • Member since
    June 2003
  • From: Rowland Heights, California
Posted by Duke Maddog on Monday, October 13, 2014 10:00 AM

Thanks Jim! I had thought that I;d purchased an F-35 before that had 33rd TFW markings but I couldn't find it. Once I finish this one it'll probably pop up so we may yet have the chance to build two together. I don't remember what maker the other one was though. I do like the open bays and will be doing them all open on this model.

jimbot58

I did read something very helpful in the latest issue of FSM I always have trouble with painting the areas around the wing root. I always end up with grainy paint and clear is even worse. I guess there is a vortex that occurs there, the paint swirls around and partially dries before contacting the surface. I read the cure is to paint and mask the two areas separate. Seems like a pain, but sounds worth a try.

Jim

I usually spray in at an angle from the front or back parallel to the fuselage to avoid that vortex. That way the paint goes in and has an outlet on the other side, thus no vortex. I've never had an issue with grainy paint on my wing roots. Just a thought...

  • Member since
    November 2009
  • From: SW Virginia
Posted by Gamera on Monday, October 13, 2014 11:22 AM

Whoops Duke, very cool looking F-35 there- how did I miss you? Looks like gobs of beautiful detail there!

"I dream in fire but work in clay." -Arthur Machen


  • Member since
    December 2002
  • From: Bury St Edmunds, Suffolk, England
Posted by Bish on Monday, October 13, 2014 12:07 PM

Interesting looking build Duke. I still haven't decided which F-35 kit I want to get yet, just so many to choose from. I hadn't realised those areas around the panels were raised so much.

I am a Norfolk man and i glory in being so


On the bench: Airfix 1/72nd Harrier GR.3/Fujimi 1/72nd Ju 87D-3

  • Member since
    December 2002
  • From: Bury St Edmunds, Suffolk, England
Posted by Bish on Monday, October 13, 2014 12:13 PM

Jim, that's looking very nice. Good work on drilling out those bits.

I am a Norfolk man and i glory in being so


On the bench: Airfix 1/72nd Harrier GR.3/Fujimi 1/72nd Ju 87D-3

  • Member since
    September 2010
  • From: California
Posted by mikeymize on Monday, October 13, 2014 4:14 PM

Great looking work guys. I want to build the F-35 as well but couldn't stand the thought of masking off all those zig zags. I understand one of the kits out now has decals for them and that's the one I'll buy when the times comes.

"Time you enjoy wasting is not wasted time".


  • Member since
    June 2009
Posted by jimbot58 on Tuesday, October 14, 2014 3:27 AM

mikeymize

Great looking work guys. I want to build the F-35 as well but couldn't stand the thought of masking off all those zig zags. I understand one of the kits out now has decals for them and that's the one I'll buy when the times comes.

Yes, that masking is going to be a bear when it comes down to that. The Hasegawa kit recently released is the one that has the decals. 9From hobby search Japan:

The one minus to the Hasegawa kit is that it does not have open weapons bays. But that may be what somebody wants as you really don't see these aircraft on the tarmac with the bays open.

As I said all the kits offered so far are different, and each has it's own plus and minuses. I understand the Tamiya kit has a very nice detailed engine you install inside the fuselage and never see again.

Well, most of the work tonight was clean up of seams on both the Crusader and the Warthog. I also made a bulkhead for the back of the A-10. The only problem is, when I went to paint it, I don't have the color I need! Seems I remember tossing out a few bottles that had gone bad, and I think this was one of them! Unfortunately, all the hobby stores I could get to close by the time I get off work! Oh well, it's not like I don't have 2 other projects to work on until then, though I tend to be a bit impatient when I want something!

Jim.

*******

On my workbench now:

It's all about classic cars now!

Why can't I find the "Any" key on my keyboard?


  • Member since
    June 2003
  • From: Rowland Heights, California
Posted by Duke Maddog on Tuesday, October 14, 2014 9:53 AM

No problem Gamera, I slipped in quietly. Thanks for the compliment.

I agree Bish, this model has some really high raised detail. Still, I don't think it's anything that a little sanding won't fix.

I wouldn't mind having decals for all the raised areas, but I will deal with the masking when the time comes. Maybe I'll ask a friend of mine to do the masks for them.

Thanks again for the great replies guys!

  • Member since
    January 2011
  • From: Commonwealth of Virginia
Posted by Tal Afar Dave on Tuesday, October 14, 2014 11:54 AM

Duke- cool looking F-35; lots of progress and very quickly!

Thanks Gamera and Jim; I actually read about the sprue spanner in one of the group builds I've been working in,  so many thanks to whoever put that idea on the board.  Really gave that Phantom something solid to grip other than the air.  Just braced the fuselage behind the cockpit tub and it helped close up the top seam and the pesky seam across the rear seater's IP.  The cockpit is pretty laughable; there are no ejection seats to speak of, it looks like the crewmen are sitting on park benches!!  

Still, having lots of fun and learning from all you guys!

TAD

2022 New Year's Resolution:  Enter 1 group build and COMPLETE a build this year!!  Why Photobucket did you rob me of my one Group Build Badge???  Must be part of the strong anti-Monogram cartel!!!

 ]

  • Member since
    September 2010
  • From: California
Posted by mikeymize on Tuesday, October 14, 2014 10:33 PM

Looks like the Hasegawa kit will be then Jim, i'm aware of the potential for problems when it comes to decals for stuff like that but I just can't face the prospect of taping all the angles without losing my mind (I've lost too much of it already!)  For those that can pull it off with masking and paint my hats off to them.I remember painting a JU-88 canopy years ago and I though I was going to get a aneurysm!

"Time you enjoy wasting is not wasted time".


  • Member since
    June 2009
Posted by jimbot58 on Wednesday, October 15, 2014 3:15 AM

mikeymize

Looks like the Hasegawa kit will be then Jim, i'm aware of the potential for problems when it comes to decals for stuff like that but I just can't face the prospect of taping all the angles without losing my mind (I've lost too much of it already!)  For those that can pull it off with masking and paint my hats off to them.I remember painting a JU-88 canopy years ago and I though I was going to get a aneurysm!

You want to talk of insanity? Propeller

The PE kit arrived for the A-10 today.

The challenges?

The kit is partially built already, and....

The PE set is not made for this manufacture of kit!

First off, they provide a new cowling for the forward cockpit:

Yes, there are other parts that go in those grooves, such as the HUD.

This means major surgery! Cut, cut, cut......

That hole in the center is suppose to take the big ol' clunky solid clear plastic bit that is to represent the HUD. Bye-bye!

Offending bit removed successfully!

I see an opportunity to add just a bit more weight to the nose, while I'm at it!

I tried to pop the seat loose to better work on it, but I did a very good job cementing it in! It won't budge! Oh well!

The kit supplied instrument panel was very difficult to put in place, and actually fell out while I was cutting. So long to it! It fell to the floor and I'll let the carpet monster keep this one.....

New instrument panel consists of 3 layers for assembly. These are not self adhesive on this one, so I puddled on some Future and stacked the parts. letting it be the "glue".

Just to give you an idea of scale, I backed up a bit and put a #11 blade next to it....

Is any further evidence of my insanity needed?

And to think - I do this to relax? Sheesh!Dunce

Jim

P.S. Another battle damaged A-10 that came back!

Still an amazing aircraft!

J.

*******

On my workbench now:

It's all about classic cars now!

Why can't I find the "Any" key on my keyboard?


  • Member since
    November 2009
  • From: SW Virginia
Posted by Gamera on Wednesday, October 15, 2014 7:54 AM

Yow Jim! I hate working with PE in 1/48th and 1/35th- you sir are a better man than I to deal with that teeny-tiny stuff!

"I dream in fire but work in clay." -Arthur Machen


  • Member since
    September 2010
  • From: California
Posted by mikeymize on Wednesday, October 15, 2014 10:37 AM

Jim, you should have been a neurosurgeon! Looks great and thanks for the tip on using the future as an adhesive, wish I would've thought of that!

"Time you enjoy wasting is not wasted time".


  • Member since
    June 2009
Posted by jimbot58 on Thursday, October 16, 2014 12:19 AM

I want to see this movie!

*******

On my workbench now:

It's all about classic cars now!

Why can't I find the "Any" key on my keyboard?


  • Member since
    July 2014
Posted by modelcrazy on Thursday, October 16, 2014 12:44 AM

Read the comments afterward. Wow, I supposed there were those kind of feelings about America and our roll in the war but never really realized they were that volatile of hateful.
I feel sad for the future.

Steve

Building a kit from your stash is like cutting a head off a Hydra, two more take it's place.


http://www.spamodeler.com/forum/

  • Member since
    June 2009
Posted by jimbot58 on Thursday, October 16, 2014 2:33 AM

modelcrazy

Read the comments afterward. Wow, I supposed there were those kind of feelings about America and our roll in the war but never really realized they were that volatile of hateful.
I feel sad for the future.

I couldn't get the lower half of the page to load so I could read the comments.Just kept saying "loading" with little circle that rotates. From your reaction, it probably would *** me off anyway. My Dad served proudly in that war for 3 1/2 years!

Jim

*******

On my workbench now:

It's all about classic cars now!

Why can't I find the "Any" key on my keyboard?


  • Member since
    June 2009
Posted by jimbot58 on Thursday, October 16, 2014 3:02 AM

Well, that aside...

Cutting and carving on the A-10 to make that instrument panel fit! you would think that if these kits were accurate, things like this would be interchangeable. The cockpit of the  Revell/Italeri kit must be larger.

A test to be sure the cowling would fit right. I had to trim a bit off the bottom of the panel as it was a bit high.

Then a quick check to be sure every thing will clear the windscreen:

All looks good so far. Next, I'm having to sand a bit on the edges of the side consoles to make them fit. PE can be a pain even when your working with a set that's matched to the kit your working on!

Last before I called it a night: Just one more good size fishing weight to assure no tail dragging planes here!

Nice ejector pin mark on the back of that seat, huh? And look how out -of-scale that control stick looks...

Enough! Off to bed!

Jim

*******

On my workbench now:

It's all about classic cars now!

Why can't I find the "Any" key on my keyboard?


  • Member since
    June 2009
Posted by jimbot58 on Thursday, October 16, 2014 3:10 AM

One last thing! Hopefully I can get that seat just a bit closer to this with the PE parts.....

See! I'm hopeless! Seems I just can't do anything straight out of the box anymore!

*******

On my workbench now:

It's all about classic cars now!

Why can't I find the "Any" key on my keyboard?


  • Member since
    November 2010
  • From: Lafayette, Indiana
Posted by Son Of Medicine Man on Thursday, October 16, 2014 6:01 AM

jimbot58

Hello friends!

Finally have a whole weekend off!

Some work around the house, but not as much as I would have liked. Hard to motivate myself right now, feeling a little down and a trip to Wal-mart didn't help: they already have their Christmas stuff out! I took a step to seek out an eviction lawyer to get a consultation. I want to hire someone as I want to detach myself emotionally from the act. My last contact with the "family" left me battered and bleeding as I was given a verbal assault that I still haven't fully recovered from. I think it best if I have as little contact as possible.

Did sit down at the hobby desk a bit here and there.

Some PE work done on the Flanker. Looks kind of messy, but this camera picks out everything- plus don't forget this is 1/72 scale. Those parts are barely a quarter inch long or so. And yes, the instructions show the 2 parts aligned as they are. 

8
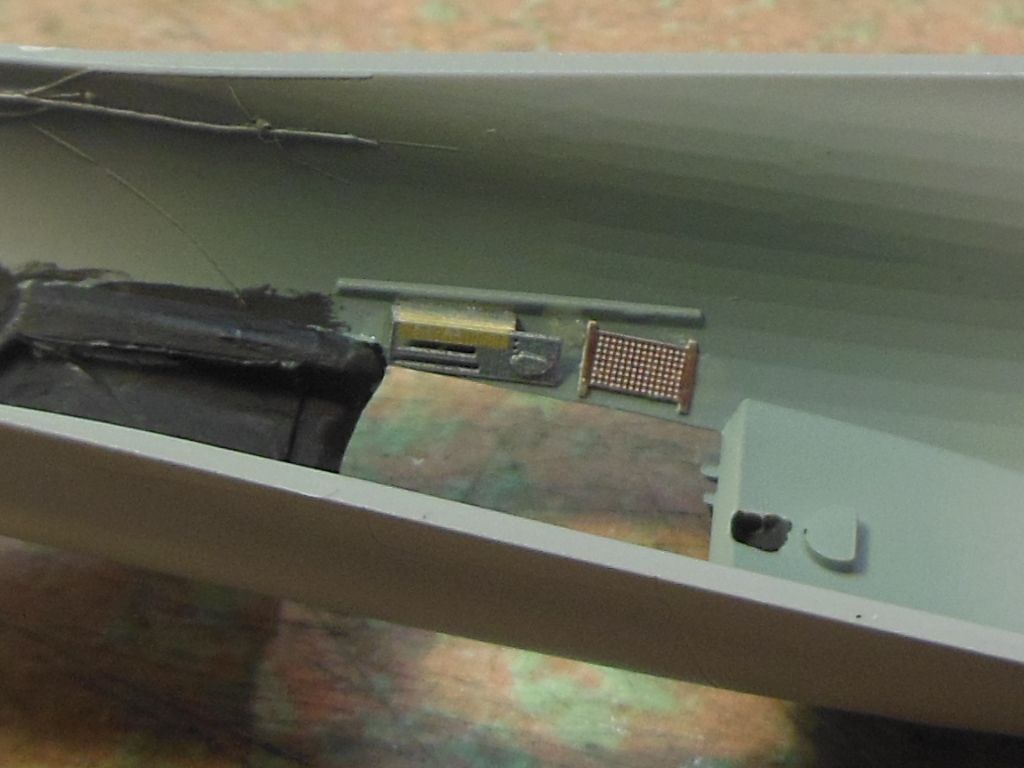
The exhaust for the F-8 The back end of the nozzle gets chopped off and PE parts added.
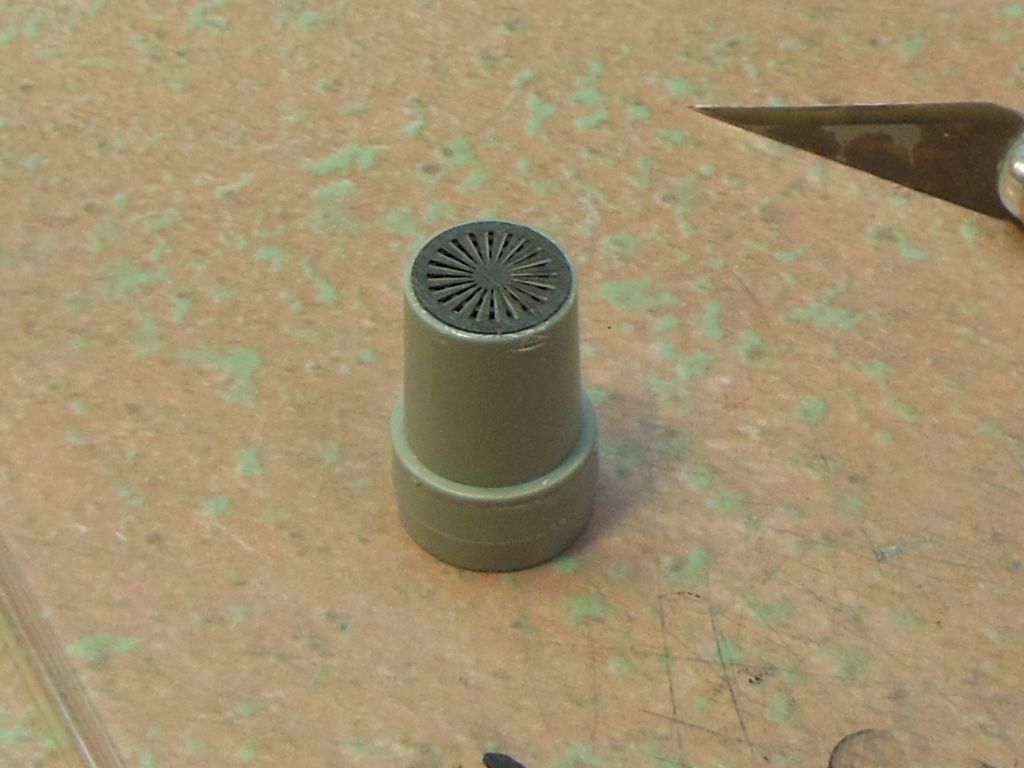
Have to stop on the PE until I get over to Hobby Clown... er, I mean Town...

Anyway, my thin CA is beginning to age and has reached the consistency of gap-filling glue and no longer flows. Needs to be replaced.

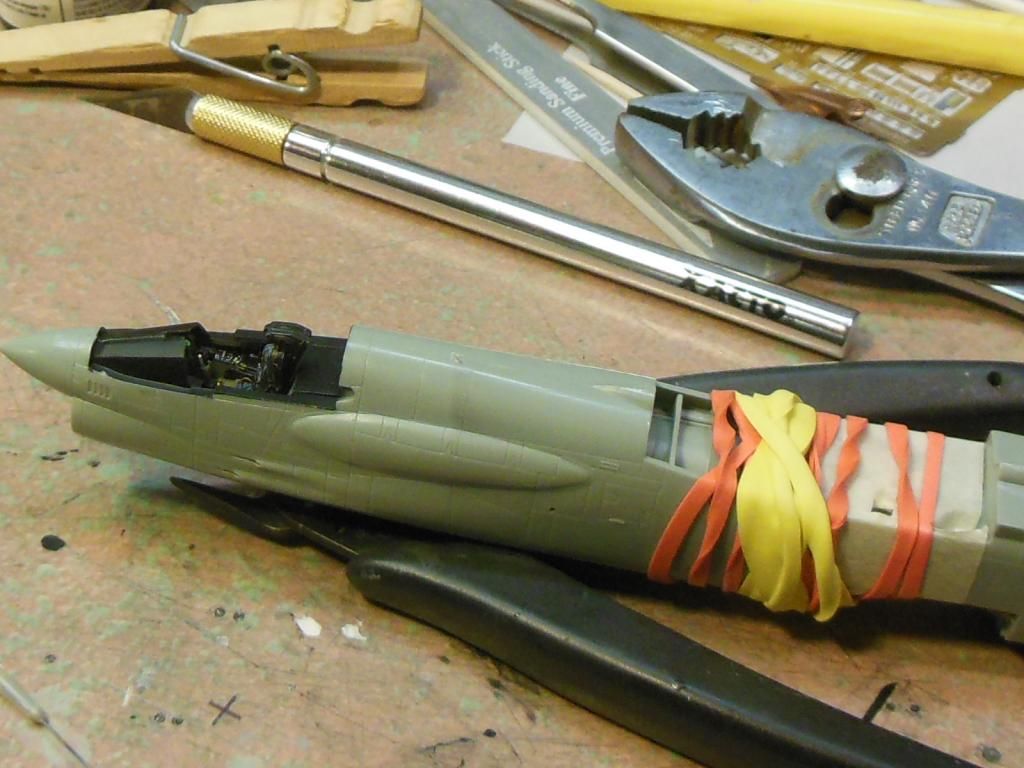
The other thing was that I began closing up the F-8. I had to 'persuade' a part into alignment using Mr rubber band as it didn't want to behave. It wasn't the kits fault-I didn't quite line up the parts inside as i should have. I had decided to glue all the assemblies into one side of the fuselage, but probably should have waited to do that until now.
Close up of the cockpit. There are still a few PE parts to do, but that will wait until after painting day. I don't want to take a chance of knocking things loose such as the HUD and the loops for the ejection seat that hang over the pilots head. There is also a U-shaped part that covers the deck behind the pilot, and covers the side rails. I don't want that to get damaged either.
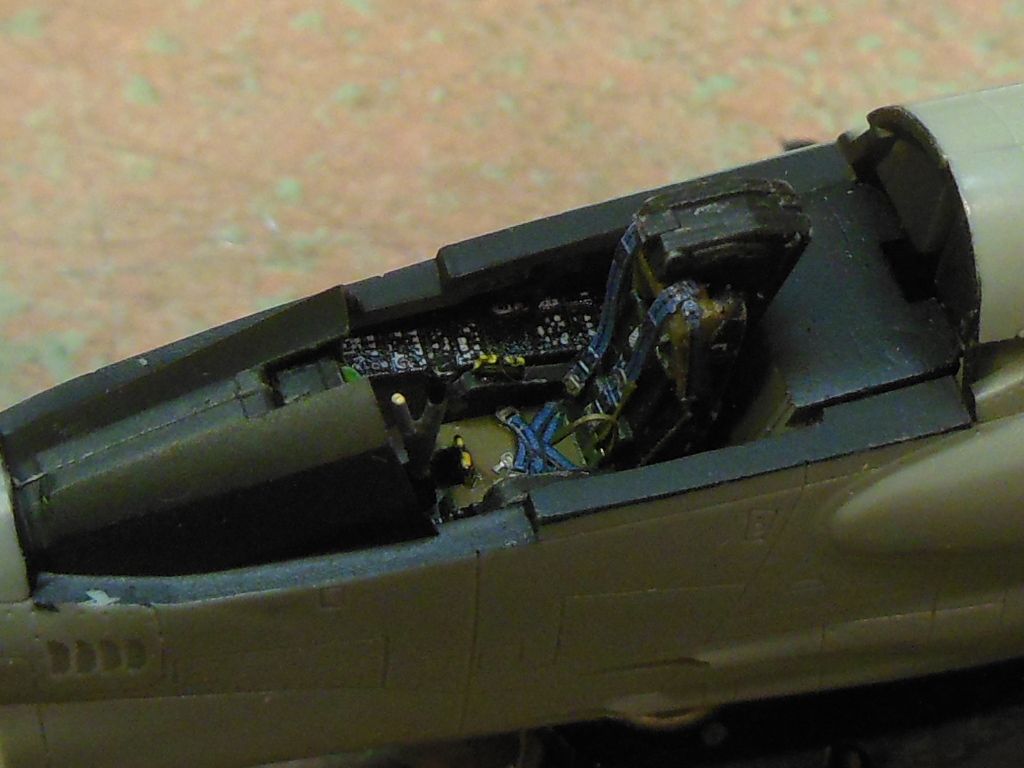
I also have to fill that gap you see here. The original HUD was a clunky solid clear plastic thing that I had to cut away. You see a stub of it still there. I left it there thinking it would fill the gap. Obviously I was wrong.

Jim

Hi Jim,

Very glad to hear you got a weekend off finally!  You needed it.

And I agree with you about hiring a lawyer to handle the eviction.  Good move on your part.

And what can I say about your build?  Amazing work there Jim!  Yes  Yes  It looks great!

Ken

  • Member since
    November 2009
  • From: SW Virginia
Posted by Gamera on Thursday, October 16, 2014 7:53 AM

Jim: Again looks good! And yeah, it's amazing how different two kits of the same subject can be, sometimes the PE set will fit and sometimes you have to beat it with a hammer...

BTW: Still haven't had a chance to check out the video since I've been posting in slow times at work. But I don't read any comments of YouTube- honest to god I sometimes wonder how that much distilled stupidity in one place doesn't create a giant black hole of stupid.

"I dream in fire but work in clay." -Arthur Machen


  • Member since
    June 2009
Posted by jimbot58 on Thursday, October 16, 2014 9:28 AM

Gamera

Jim: Again looks good! And yeah, it's amazing how different two kits of the same subject can be, sometimes the PE set will fit and sometimes you have to beat it with a hammer...

I had to be very careful cutting on the plastic: too much and the cowling wouldn't cover, leaving a gap that would have been very hard to fill.

*******

On my workbench now:

It's all about classic cars now!

Why can't I find the "Any" key on my keyboard?


  • Member since
    December 2002
  • From: Bury St Edmunds, Suffolk, England
Posted by Bish on Thursday, October 16, 2014 1:08 PM

Jim, that missing weapons bay is certainly a minus for me. I would normally jump on any Hase kit, but that is a disappointment. They seem to be slacking off lately, I got the 72nd osprey last year and was disappointed to find it had no interior for the cargo compartment. But those decals are certainly a plus and I think in the end I may go for the Hase kit.

I just got the PE exhaust for my F-16 today so I have everything I need. All being well, I can start at the end of Nov and get it done in time.

I am a Norfolk man and i glory in being so


On the bench: Airfix 1/72nd Harrier GR.3/Fujimi 1/72nd Ju 87D-3

  • Member since
    September 2010
  • From: California
Posted by mikeymize on Thursday, October 16, 2014 6:37 PM

Gamera
BTW: Still haven't had a chance to check out the video since I've been posting in slow times at work. But I don't read any comments of YouTube- honest to god I sometimes wonder how that much distilled stupidity in one place doesn't create a giant black hole of stupid.

Hey Cliff, I feel the same way. The most imbecilic comments usually begin by calling others stupid while using poor grammar and misspellings. I think the anonymity emboldens the worst in people making them write things they'd never say to one's face. I have a tendency to dismiss most of the negative stuff as the ramblings of morons.Wink

"Time you enjoy wasting is not wasted time".


  • Member since
    January 2011
  • From: Commonwealth of Virginia
Posted by Tal Afar Dave on Thursday, October 16, 2014 9:24 PM

Mikey,

You are spot on in your critique of the Youtube comment gang!!

2022 New Year's Resolution:  Enter 1 group build and COMPLETE a build this year!!  Why Photobucket did you rob me of my one Group Build Badge???  Must be part of the strong anti-Monogram cartel!!!

 ]

  • Member since
    June 2009
Posted by jimbot58 on Thursday, October 16, 2014 10:28 PM

Tal Afar Dave

Mikey,

You are spot on in your critique of the Youtube comment gang!!

I finally got to read some of those comments by opening it up on my android. And that's just it: I read a few then quit. A bunch of people trying to have a battle of wits and most of them seem to have come unarmed!

I guess something on the Youtube site doesn't work with Firefox, and I never use IE, so I didn't try that.

Just the same, I don't care about the comments. Dribble, dribble, dribble.....

Jim

*******

On my workbench now:

It's all about classic cars now!

Why can't I find the "Any" key on my keyboard?


  • Member since
    June 2009
Posted by jimbot58 on Friday, October 17, 2014 2:36 AM

What a waste of a night! My power was out for almost 4 hours! Going to bed wasn't an option as I have said before, I have issues with insomnia. Drove down to Walmart to wander around for a while, but how interesting is that? read for a while on the Kindle, but then the battery was dead, so I went out in the truck so I could plug it in and finish my book. I did doze off for a while out there, so now I'll be up for hours!

Isn't amazing how much we rely on our utilities and such?

I whine about this, but what about people who are caught in storms and end up going days without power in the middle of winter? I should keep my mouth shut!

*******

On my workbench now:

It's all about classic cars now!

Why can't I find the "Any" key on my keyboard?


  • Member since
    November 2010
  • From: Lafayette, Indiana
Posted by Son Of Medicine Man on Friday, October 17, 2014 5:41 AM

Duke Maddog

Okay, I'm finally able to start this Group Build! here is the box for the model I started for this:

This is the 1/72 scale F-35; I started with the usual suspects: cockpit, then engine, then I closed everything up inside the fuselage. Later I realized that, again; I'd forgotten to take some additional pics. Here is where it was after all that:


You'll note that it is sitting on it's nose. That is because they require you to assemble the main landing gear in the main landing gear bays first; then install the bays inside the fuselage. Otherwise; adding the landing gear later would be considerably more difficult. You'll also note that the cockpit isn't painted yet. That is because it is so open that I can easily do that later.

I did go ahead and add the nose gear to the front to let it sit straight:


This actually went together quite well, except for the internal parts for the air intakes. One side didn't want to cooperate no matter how much I tried to get it right, so I had to resort to Mr. Surfacer 500:

Okay, that's all for now. Thanks for looking in; I hope to have more done later.

Looks good Duke.  How long did it take you to do all of that?

Ken

JOIN OUR COMMUNITY!

Our community is FREE to join. To participate you must either login or register for an account.

SEARCH FORUMS
FREE NEWSLETTER
By signing up you may also receive reader surveys and occasional special offers. We do not sell, rent or trade our email lists. View our Privacy Policy.