Thanks for the kind words fellas!
Theuns - funny you should ask about the detail on this kit! Read on....
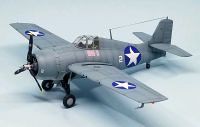
Assembly of the major parts is done. Just need to work on the little details (there's not much) and she'll be ready for paint.

The two major components are the fuselage which comes already molded as one piece with the antennas already molded on, and the wing assembly which is also molded as one piece with the MG tubes. All you have to do is glue the wing assembly to the fuselage. Not sure if you can see the seam on the sides of the fuselage where the wing assembly meets it. There's a noticable gap on the other side which I'll have to fill. I'll take more pics of this tomorrow.
The cockpit comes already molded in the one piece fuselage and is very basic. There is some ribbing on the floor and the joystick is also already molded in place. You do get a nice decal for the insturment panel!

The pilot's seat is molded separate and just glues in place. That's it!! The whole cockpit looked too plain so I dressed it up a bit by making a headrest from scrap plastic, painted it Tamiya Red Brown and glued it in place. Then I added harness straps made from Tamiya tape.

The radial engine is molded as one piece which I painted up and dry-fitted into the cowling. Then I dry-fitted the cowling in place on the fuselage.

The molded on machine gun tubes need to be drilled out.

Hoping to have this done tomorrow!
Ernest
Last Armor Build - 1/35 Dragon M-26A1, 1/35 Emhar Mk.IV Female


Last Aircraft Builds - Hobby Boss 1/72 F4F Wildcat & FW-190A8

