SEARCH FINESCALE.COM

Enter keywords or a search phrase below:

Airliner Group Build 2014-2015

24108 views
219 replies
1 rating 2 rating 3 rating 4 rating 5 rating
  • Member since
    December 2006
  • From: Phoenix, AZ
Posted by Fly-n-hi on Thursday, June 4, 2015 6:14 PM

Thanks modelcrazy!

I have no idea what to use for that  Braniff  color.  I wonder if using some kind of metallic black color and then spraying clear blue on top of that would work?

I know I've seen some metallic Model Master enamel paints that are marketed as car paints.  They might have a good match.

Good luck with that one.  I wish I could give you something better.  I hope you make it work though cause that would look really cool I think!

  • Member since
    January 2014
  • From: Nampa, Idaho
Posted by jelliott523 on Thursday, June 4, 2015 6:58 PM

What about a gloss black base to start, then a light mist of polished aircraft aluminum Alclad II and then the transparent blue over the top?  Or I've seen some bright blue metal flake Testors paint; add a couple drops of black and silver to it?  Just some ideas, no idea how it would work.

On the Bench:  Lots of unfinished projects!  Smile

  • Member since
    April 2014
  • From: Australia
Posted by lostagain on Thursday, June 11, 2015 6:48 AM

Fly-n-hi,

The DC-10 is looking great, the Alclad is coming up very well.

MC, can't wait to see how the Braniff comes up.

There has been minimal progress on the Sikorsky, a few bits of EZ line glued in, nacelles painted and some spars cut to length.

  • Member since
    July 2014
Posted by modelcrazy on Thursday, June 11, 2015 7:59 AM

Lost,

Your Sikorsky is going to look so cool when you finish. I am anxiously waiting to see it.

Steve

Building a kit from your stash is like cutting a head off a Hydra, two more take it's place.


http://www.spamodeler.com/forum/

  • Member since
    April 2014
  • From: Australia
Posted by lostagain on Tuesday, June 30, 2015 7:44 AM

Had a few hours on the Sikorsky the other day. Got the wing lined up on top of the alignment jig and held in place with a rubber band. Then found the brass struts I have cut to size did not fit. Went back and checked the jig was the right size - it is - and the struts were the right length - they are, but it does not fit. I was just about to start cutting back the struts when I had another look from in front - a real D'Oh moment...

I could not find a band long enough to get rid of the anhedral in the struts - the solution was moving the bands to the outside.

And these are the shortest bands I have and  they are pretty loose - so I need to get /make them shorter.

And by now I had run out of time - so a deep breath and planning for the next time I have a good few hours free.

So it goes...

  • Member since
    April 2014
  • From: Australia
Posted by lostagain on Tuesday, July 21, 2015 7:02 AM

So I have managed to take the first steps in the wing struts and rigging. The set up took a bit of getting right - each time I had to open up the structure a bit to fit in the next strut, the previous one fell out. Temporary gluing with PVA was enough to hold them in place long enough.

SO the centre struts went in first. The front struts were easy but the rear ones kept popping out
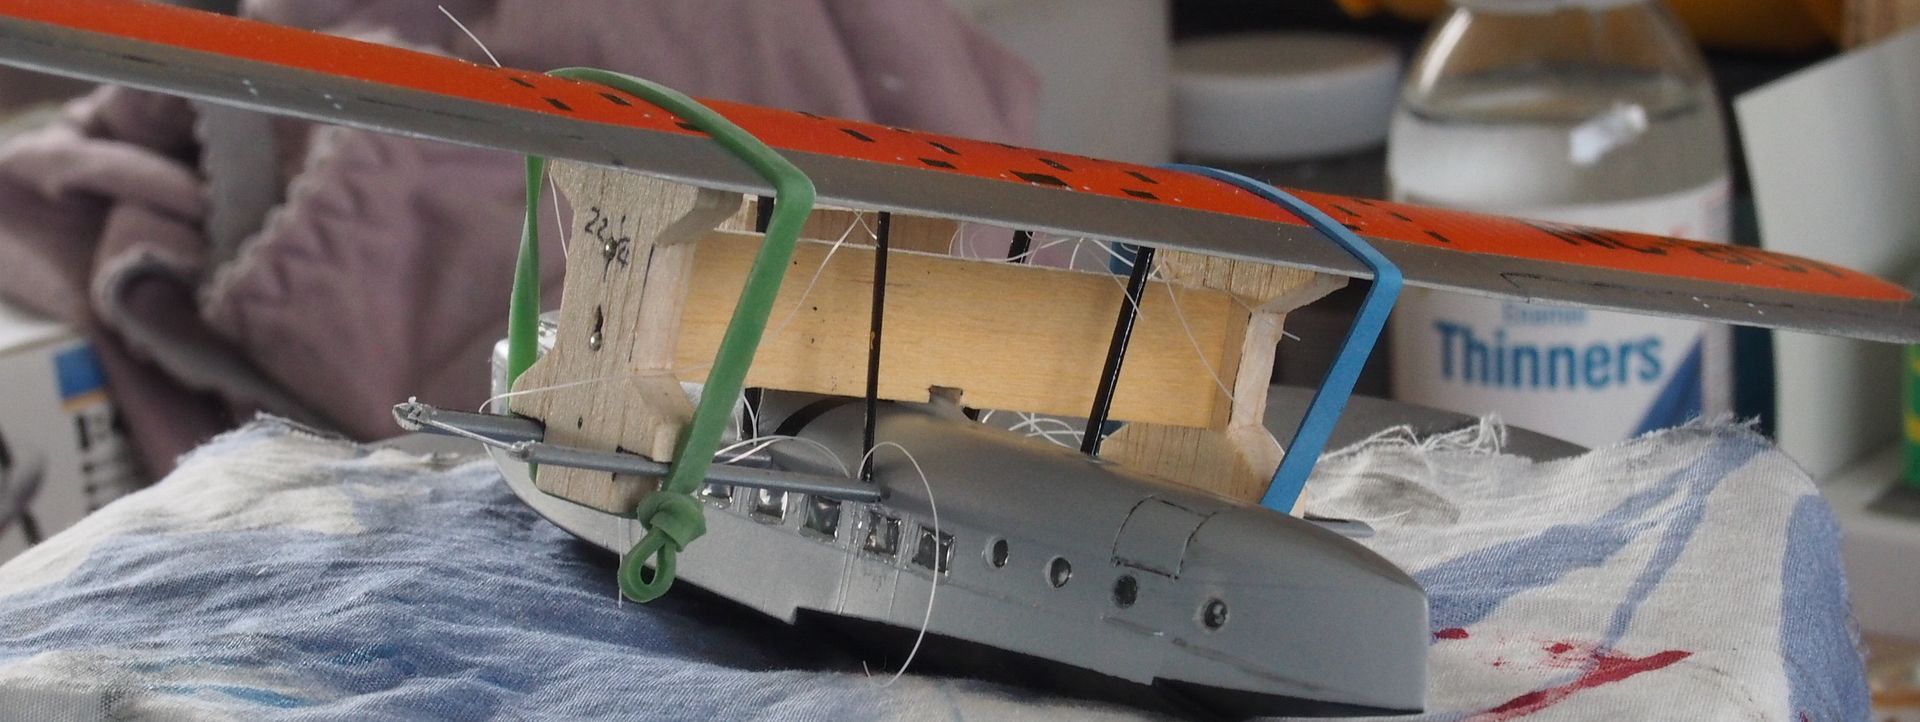
After that the front outer struts went in place. The engine nacelles were placed on the front struts before they were put in place.
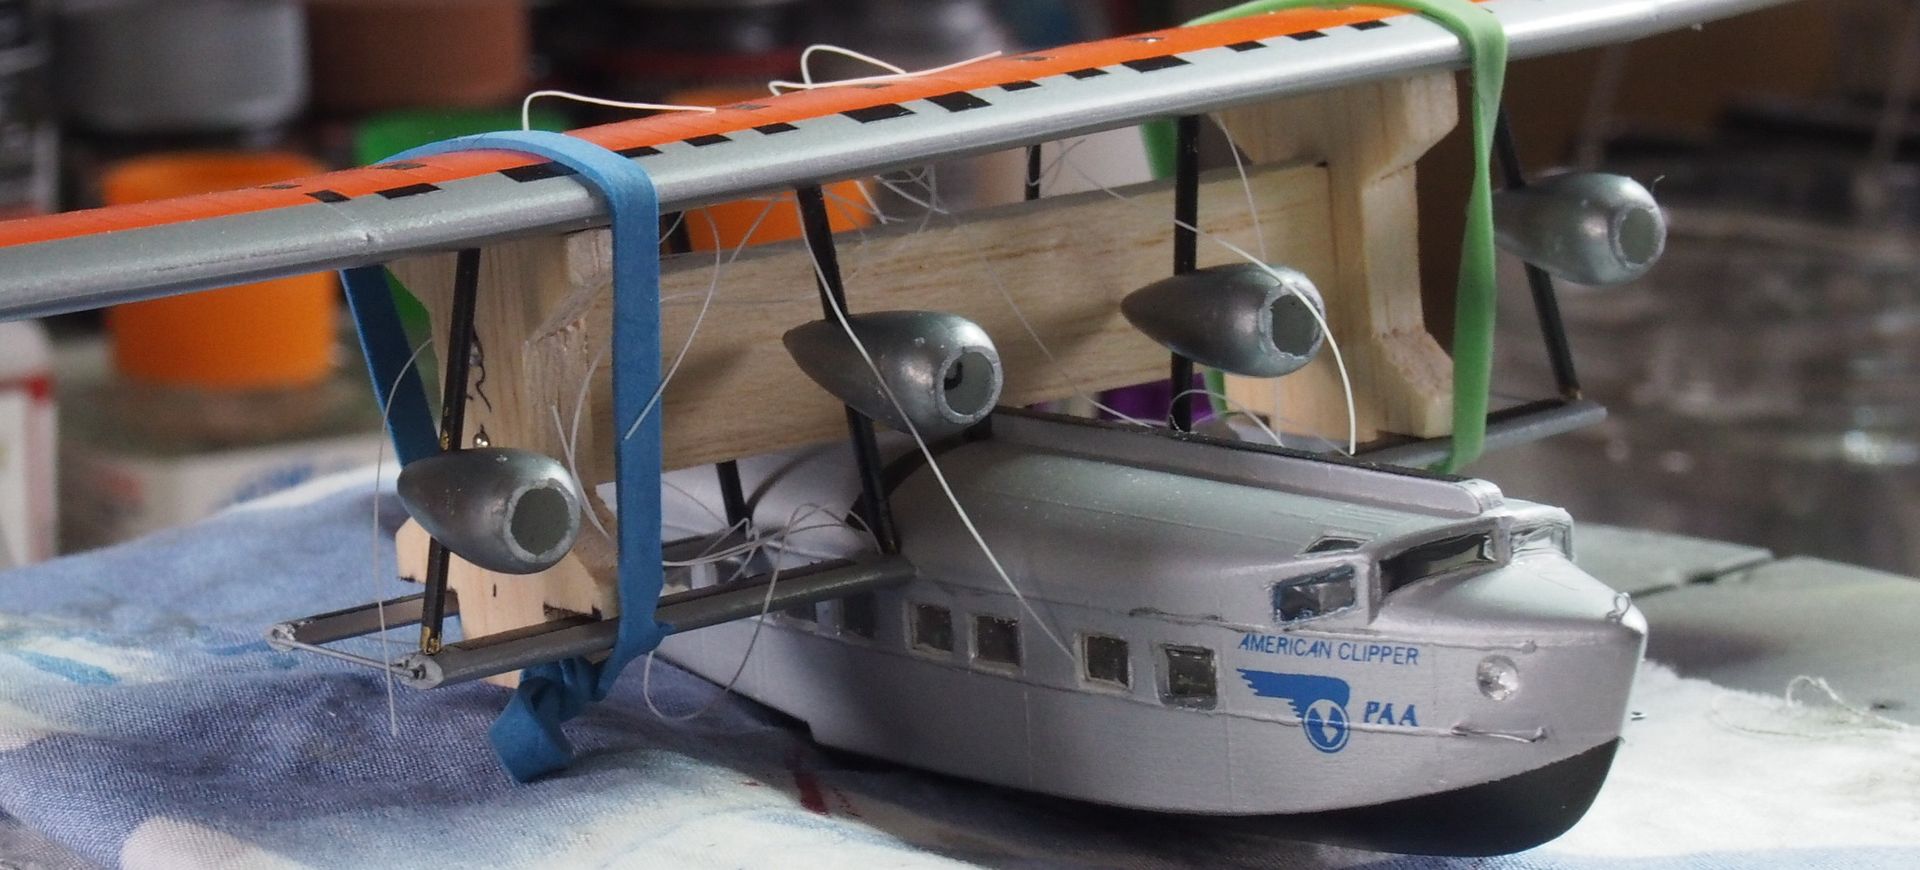
  The force required to get the struts in place has stripped the black paint off in places, so there will need to be some retouching.
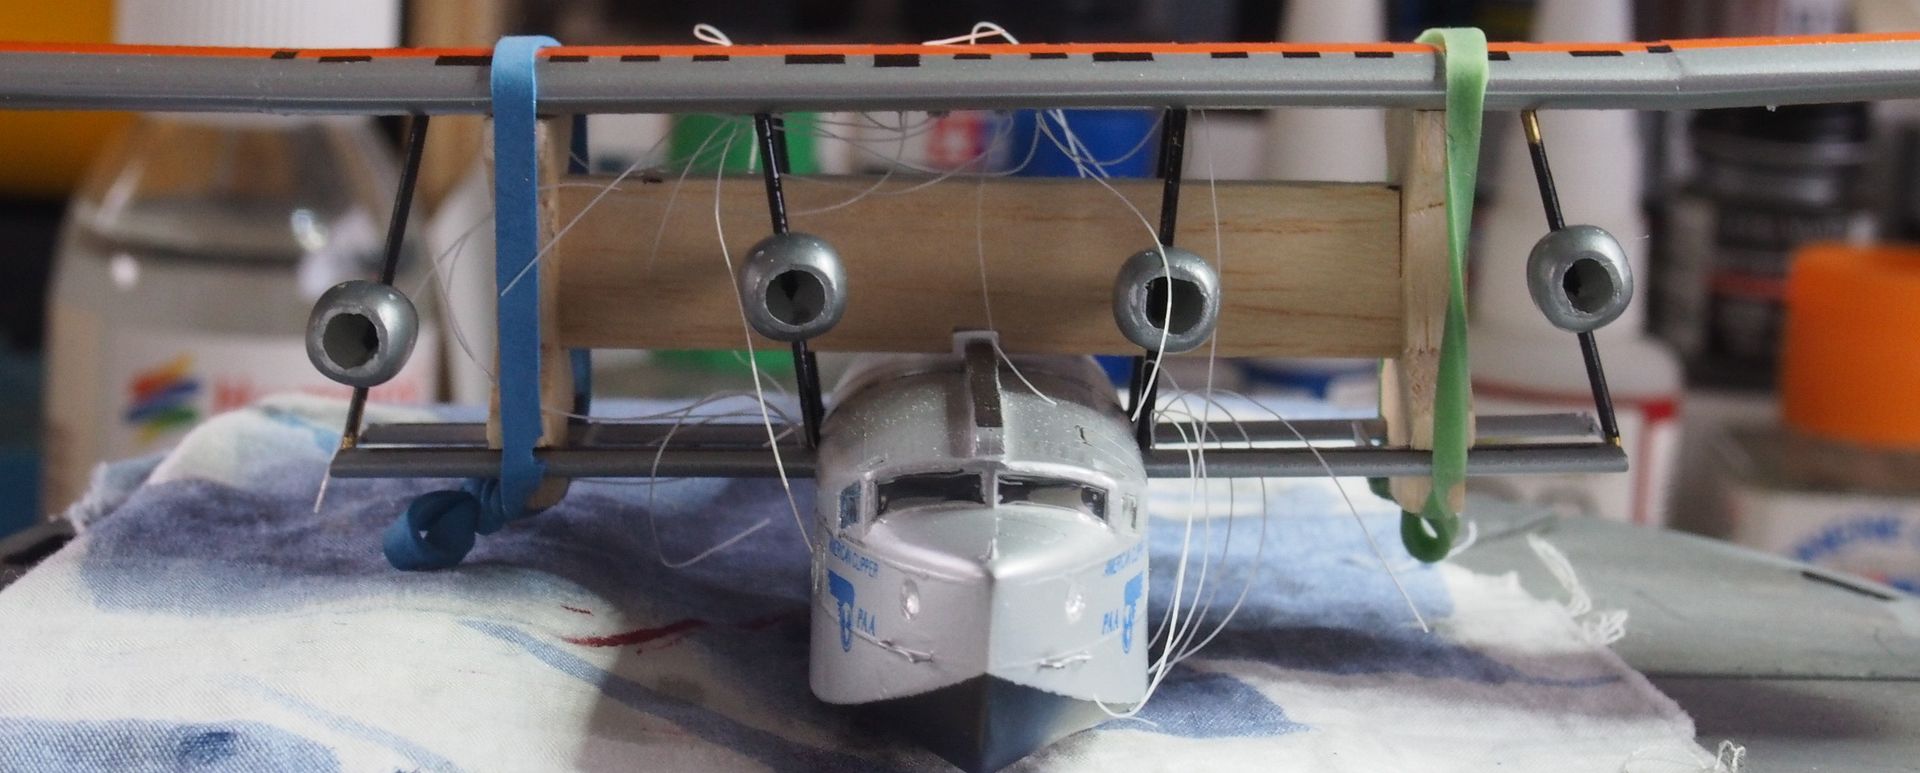
The nacelles are loose, and need to be aligned before the central front struts are in place and the central rigging starts. 

I'm starting to think this may all come together one of these days...

  • Member since
    April 2014
Posted by B_one fixer on Tuesday, July 21, 2015 2:00 PM

Looks pretty sharp there, Rigging has always intimidated me.

  • Member since
    July 2014
Posted by modelcrazy on Tuesday, July 21, 2015 10:48 PM

Lost,

That is really taking shape. Hand in there, it'll come together just fine. You knew this was going to be a challenge.

Steve

Building a kit from your stash is like cutting a head off a Hydra, two more take it's place.


http://www.spamodeler.com/forum/

  • Member since
    December 2006
  • From: Phoenix, AZ
Posted by Fly-n-hi on Wednesday, July 22, 2015 9:59 AM

Looking good so far Lost!  That looks like a real pain in the you-know-what!

  • Member since
    April 2014
  • From: Australia
Posted by lostagain on Thursday, July 30, 2015 6:14 AM

Fly-n-hi, you have no idea...

The next step was to align the nacelles in all directions - it wasn't perfect but it went okay.

And then the front of the nacelles were sanded back to be even.

After this the jig could be removed and the wings are on their own. I am surprised about sturdy the structure feels, and hopefully the extra struts and rigging will strengthen it further....

I have started doing the rigging, but I am not sure the elastic EZ line was the best option. The EZ line needs to be held in place with tape so there is no tension on it until the superglue sets each time. It took 2 hours to do the 4 control lines.

Next I am moving on to the inner nacelles rigging and secondary struts. This could take some time...

  • Member since
    April 2014
  • From: Australia
Posted by lostagain on Wednesday, August 12, 2015 6:29 AM

So the slow work continues...

I have started the rigging from the inside. The inner port strut is rigged up and the secondary struts are added. The rigging is part done on the inner starboard struts, there needs to be a replacement with stretched sprue to complete it. Then paint over all the scars before moving to the outer nacelle struts.

from the front:

I am finding this very intense work with not much visible reward after a long session. It is however teaching me new skills and patience. It should be done by the end of the year....please!

See you next time

  • Member since
    December 2006
  • From: Phoenix, AZ
Posted by Fly-n-hi on Wednesday, August 12, 2015 9:43 AM

Well I finally have an update for my DC-10!  Its been a while and I've been a terrible host!  Sorry guys.Embarrassed

Anyway, I've painted the fuselage Mr Color gloss white and masked off the areas that will be gold/red/orange.  I'm going to roll the dice and paint the stripes on.  I'm feeling lucky:

  • Member since
    December 2006
  • From: Phoenix, AZ
Posted by Fly-n-hi on Wednesday, August 12, 2015 9:44 AM

Lost, that's looking really good!

  • Member since
    April 2014
  • From: Australia
Posted by lostagain on Sunday, August 16, 2015 6:16 AM

Thanks fly-n-hi

Painting stripes on the DC 10? Well done, I've never managed to carry it off yet.

What are you thinning the Mr Colour with - the finish looks very smooth.

Got a bit more rigging done - will post pics later.

  • Member since
    April 2014
  • From: Australia
Posted by lostagain on Sunday, August 23, 2015 12:12 AM

Well I have got the rigging complete for (I think) a big step of the way. All of the inner struts and rigging is complete for the main plane. So I stopped and had a breather before carrying on:

Next are the nacelle bracing struts and outer struts, but first I am enjoying having this done. The rigging is happening quicker as I go along, until I stuff something up by being too cocky.

  • Member since
    July 2014
Posted by modelcrazy on Sunday, August 23, 2015 12:20 AM

That looks like a TON of work Lost.

Steve

Building a kit from your stash is like cutting a head off a Hydra, two more take it's place.


http://www.spamodeler.com/forum/

  • Member since
    March 2006
Posted by simpilot34 on Tuesday, September 8, 2015 4:01 AM

Builds are looking great guys! Would like to have joined, maybe the next oneSmile

Want to post a referance pic for anyone that can use it. I work at Melbourne Airport in Australia and was driving past JetStar terminal and saw this one parked. Had to grab a pic and share it with you guys. Lol kinda makes you wonder what kind of life this bird has had. This is one way to add interest to an otherwise mono scheme Toast

Cheers, Lt. Cmdr. Richie "To be prepared for war, is one of the most effectual means of preserving the peace."-George Washington
  • Member since
    April 2014
  • From: Australia
Posted by lostagain on Tuesday, September 8, 2015 8:52 AM

I have to say MC, it has been a ton of work. Doing a model with no molded parts or locating tabs and lots of rigging has been quite an experience.

But now the outer struts and rigging is done, it is looking closer to the real thing.

Also the nacelle struts are complete - the kit supplied struts were way too big, so I carved some up out of 30 thou rod. 3 struts for each nacelle made life interesting.

Next up, the side floats at the end of the lower struts.

Hey simpilot34, hopefully that wasn't the plane I took up to Phuket... maybe I need to take a closer look next time...

  • Member since
    December 2006
  • From: Phoenix, AZ
Posted by Fly-n-hi on Tuesday, September 8, 2015 9:37 AM

Thanks Lost!  I used Mr Color Gloss White.  The stuff goes on really well and is rock solid after it dries.

I've got the red, orange and gold colors on.  Just need to upload the pics.  The wife has the SD card reader, though, and she's out of town.

  • Member since
    December 2002
  • From: Northern California
Posted by jeaton01 on Tuesday, September 8, 2015 12:24 PM

What a nice project!  Well done .

John

To see build logs for my models:  http://goldeneramodel.com/mymodels/mymodels.html


  • Member since
    December 2006
  • From: Phoenix, AZ
Posted by Fly-n-hi on Wednesday, September 9, 2015 1:35 PM

Ok, here's some progress!  I've managed to paint the colors on this bird.  Its not perfect but I'm really happy with the results.  I probably should have used more of a bronze color instead of gold but it looks close enough I think..

I also painted the windshield framing instead of using the decals.  This is my first time trying this I think it should look good.

There are a few places that need to be touched up and I still need to paint the black glare shield and the bare metal underside...

  • Member since
    April 2014
Posted by B_one fixer on Wednesday, September 9, 2015 2:21 PM

That looks really good fly, As much as I love good quality decals, nothing beats a paint job.

  • Member since
    July 2014
Posted by modelcrazy on Wednesday, September 9, 2015 2:23 PM

Agreed, I just can't seem to get my masking a good as you Fly.

Steve

Building a kit from your stash is like cutting a head off a Hydra, two more take it's place.


http://www.spamodeler.com/forum/

  • Member since
    April 2014
  • From: Australia
Posted by lostagain on Tuesday, September 29, 2015 8:47 AM

really top notch paint job there fly. Are the metallics also Mr Colour? And what thinner are you using to get it so smooth?

I have got the side floats on, now I am moving on to the tail structure. To get it all stuck together right, I cobbled together this jig to hold it all in place.

Despite this I have still given it a few good accidental knocks.

I have got a bit further with the tail structure, more photos to come

  • Member since
    December 2006
  • From: Phoenix, AZ
Posted by Fly-n-hi on Tuesday, September 29, 2015 9:02 AM

Model and B-one, thanks alot!

Lost, excellent work!  I like the little jig you came up with.  I didn't realize how tiny that model was until I saw it right next to the thumb pins!

I've got more work done on the DC-10 and I'll post some pics soon!

  • Member since
    July 2014
Posted by modelcrazy on Tuesday, September 29, 2015 10:58 AM

Most excellent Lost, that will make a nice addition. 

Steve

Building a kit from your stash is like cutting a head off a Hydra, two more take it's place.


http://www.spamodeler.com/forum/

  • Member since
    April 2014
  • From: Australia
Posted by lostagain on Saturday, October 3, 2015 9:27 PM

Thanks MC, fly and John.

Yes Fly it is a small model - wingspan is just under 250 mm - just a touch bigger than the 1/48 Me 109 I have going. Body is 23mm wide.

The build continues with tail support structure and its rigging added:

Have added more of the tail rigging since - closer to complete. I will post the photos once it is done.

The motors and props are cast metal, I have started the clean up - going from rough cast to polished - in fact too polished looking at the references. These are only 10mm across:

Have calculated there are still around 50 detail parts for me to make, paint and attach before the model is done.

  • Member since
    April 2014
  • From: Australia
Posted by lostagain on Saturday, October 24, 2015 5:18 AM

I had a couple of weeks off for a cycling holiday, hence the pause.

So there has been more work done to finish the rigging around the tailplane, all the control and supports are done.

So getting closer, but I am currently hung up on how to do the control vanes on top of the ailerons - the first attempts have not been inspiring, so the test work continues.

  • Member since
    December 2002
Posted by 7474 on Thursday, October 29, 2015 1:40 PM

Can I join in on this build? I have a 1/72 C-47 that I'm building into a "What if" cargo/passenger airline? 


  • Member since
    December 2006
  • From: Phoenix, AZ
Posted by Fly-n-hi on Friday, October 30, 2015 9:40 AM

7474, no problem!  Welcome aboard.  There are only a few people participating and we aren't the most active GB but then again airliners tend to be a less popular subject.

JOIN OUR COMMUNITY!

Our community is FREE to join. To participate you must either login or register for an account.

SEARCH FORUMS
FREE NEWSLETTER
By signing up you may also receive reader surveys and occasional special offers. We do not sell, rent or trade our email lists. View our Privacy Policy.