SEARCH FINESCALE.COM

Enter keywords or a search phrase below:

Floats and Boats: Amphibious Aircraft Group Build

28979 views
865 replies
1 rating 2 rating 3 rating 4 rating 5 rating
  • Member since
    June 2014
Posted by BrandonK on Saturday, December 31, 2016 10:34 AM

TJ, nice finish. That is one very cool looking A/C. I'll update the front page.

BK

On the bench:

A lot !! And I mean A LOT!!

2024 Kits on deck / in process / completed   

                         14 / 5 / 2  

                              Tongue Tied

  • Member since
    April 2006
  • From: ON, Canada
Posted by jgeratic on Saturday, December 31, 2016 10:31 AM

Hi TJ, have to say that looks to be a fine example of the Junkers float version. Yes

Yeah, I can imagine the corrugated surface posing decal problems, but she looks great from here.

regards,

Jack

  • Member since
    November 2003
  • From: Naples, FL
Posted by tempestjohnny on Saturday, December 31, 2016 5:37 AM

I'm calling this beastie done. A lot more silvering on decals then I hoped but the corrugated skin is really difficult to decal.  I'll build another better next time.


  • Member since
    November 2003
  • From: Naples, FL
Posted by tempestjohnny on Friday, December 30, 2016 10:01 AM
I think I might just squeeze in this before midnight. Decals and dull coat done. Weathering tonight I hope. Pics too come


  • Member since
    June 2014
Posted by BrandonK on Thursday, December 22, 2016 7:46 PM

Oaky dokely.

BK

On the bench:

A lot !! And I mean A LOT!!

2024 Kits on deck / in process / completed   

                         14 / 5 / 2  

                              Tongue Tied

  • Member since
    May 2011
  • From: Honolulu, Hawaii
Posted by Real G on Thursday, December 22, 2016 5:04 PM

BrandonK
 
lewbud

If you would be so kind, please roll me over to the 2017 build.  Thanks.


Me too, please.  I hoped to get some bench time, but tis the season.  Embarrassed

“Ya ya ya, unicorn papoi!”

  • Member since
    June 2014
Posted by BrandonK on Wednesday, December 21, 2016 9:59 AM

lewbud

If you would be so kind, please roll me over to the 2017 build.  Thanks.


Done.

BK

On the bench:

A lot !! And I mean A LOT!!

2024 Kits on deck / in process / completed   

                         14 / 5 / 2  

                              Tongue Tied

  • Member since
    June 2008
Posted by lewbud on Tuesday, December 20, 2016 12:33 PM

If you would be so kind, please roll me over to the 2017 build.  Thanks.

Buddy- Those who say there are no stupid questions have never worked in customer service.

  • Member since
    June 2014
Posted by BrandonK on Wednesday, December 14, 2016 9:41 AM

tempestjohnny

Now we're moving along. She has feet


Now that certainly looks like it belongs in the Floats and Boats GB. I getting excited!!!

BK

On the bench:

A lot !! And I mean A LOT!!

2024 Kits on deck / in process / completed   

                         14 / 5 / 2  

                              Tongue Tied

  • Member since
    November 2003
  • From: Naples, FL
Posted by tempestjohnny on Wednesday, December 14, 2016 5:28 AM

Now we're moving along. She has feet


  • Member since
    June 2014
Posted by BrandonK on Tuesday, December 13, 2016 6:34 PM

tempestjohnny

Painted and looking worn out

I love it when I forget to add text. This looks wonderful. The weathering and fading is very nice.

BK

Oh, very nice. That looks very realistic. Awesome!

BK


On the bench:

A lot !! And I mean A LOT!!

2024 Kits on deck / in process / completed   

                         14 / 5 / 2  

                              Tongue Tied

  • Member since
    November 2003
  • From: Naples, FL
Posted by tempestjohnny on Tuesday, December 13, 2016 9:12 AM

Painted and looking worn out


  • Member since
    June 2014
Posted by BrandonK on Tuesday, December 13, 2016 9:07 AM

WOW, RG, just WOW!! That's crazy and amazing. Nice work.

BK

On the bench:

A lot !! And I mean A LOT!!

2024 Kits on deck / in process / completed   

                         14 / 5 / 2  

                              Tongue Tied

  • Member since
    May 2011
  • From: Honolulu, Hawaii
Posted by Real G on Monday, December 12, 2016 9:46 PM

Like OJ's glove.  It fits, but not in the condition you see before you!  But I'd better stop crying - at least the Be-10 isn't covered in corrugated skin!  Now THAT'S a tough build!  Stick out tongue

“Ya ya ya, unicorn papoi!”

  • Member since
    November 2003
  • From: Naples, FL
Posted by tempestjohnny on Monday, December 12, 2016 6:44 PM

RG seems to be fitting like a gloveBang Head


  • Member since
    May 2011
  • From: Honolulu, Hawaii
Posted by Real G on Monday, December 12, 2016 3:18 PM

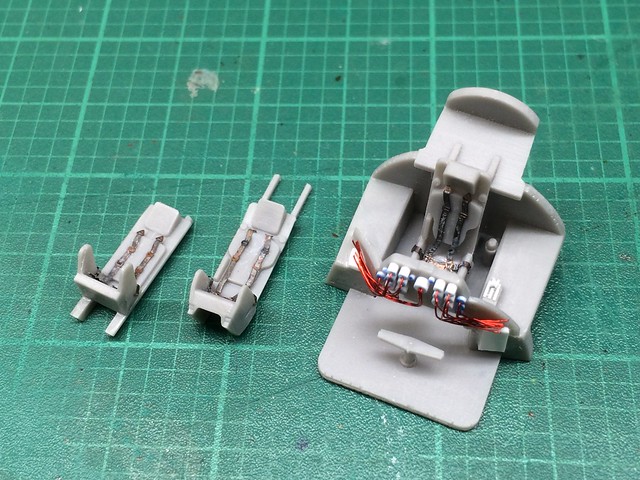
The Be-10's bare-bones cokpit tub contrasts sharply with the tiny box-encrusted fuselage sidewalls, so plastic rod instrument bodies with motor winding wire dressed up the IP while some Fine Molds' WW II Luftwaffe PE belts went on the seats.  And some phony throttles were made up from punched discs and plastic strip.  Still need to make a gunsight and make sure the control yoke will fit.

https://flic.kr/p/Q69BGM] [/url]Be-10-36 by N.T. Izumi, on Flickr
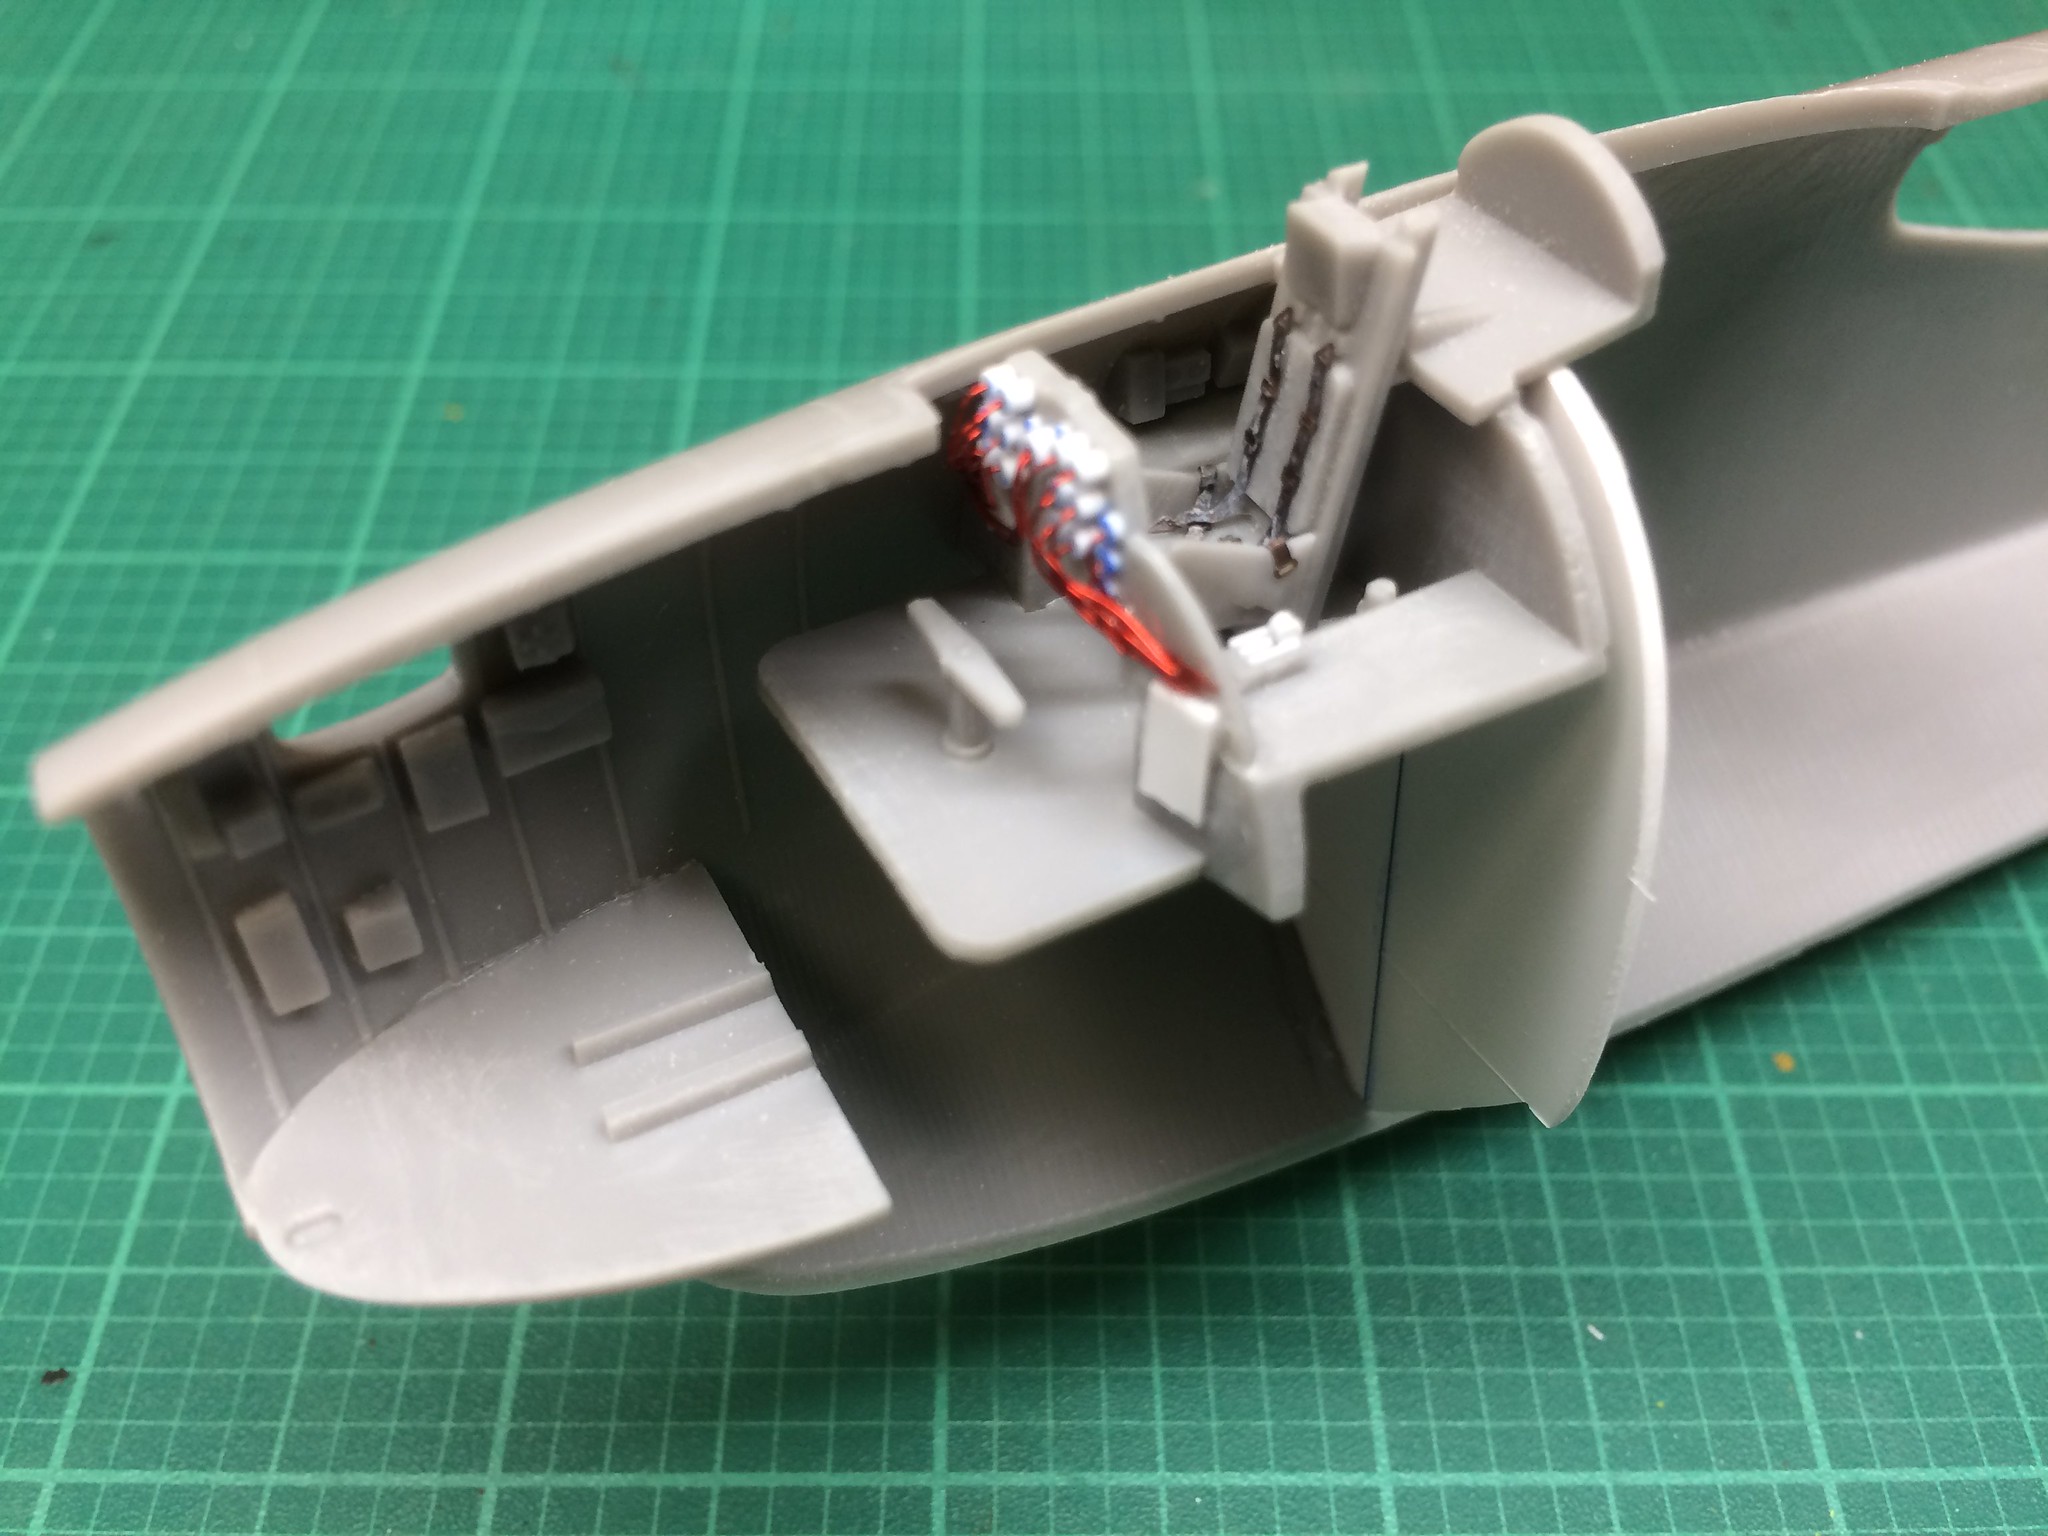
I also added a sheet plastic bulkhead behind the pilot's station, to block "see-thru" from the nose.  I used a contour gauge to get the profile, but there are no in-progress photos because it was total chaos (measure once, cut twice, throw away part because I made an error, try again with card stock to make sure no more screw-ups happen, verify fit, finally cut a new plastic bulkhead, sand-sand-sand, trim-trim-trim, OK it fits, apply glue, done).

https://flic.kr/p/PVrhvx] [/url]Be-10-43 by N.T. Izumi, on Flickr
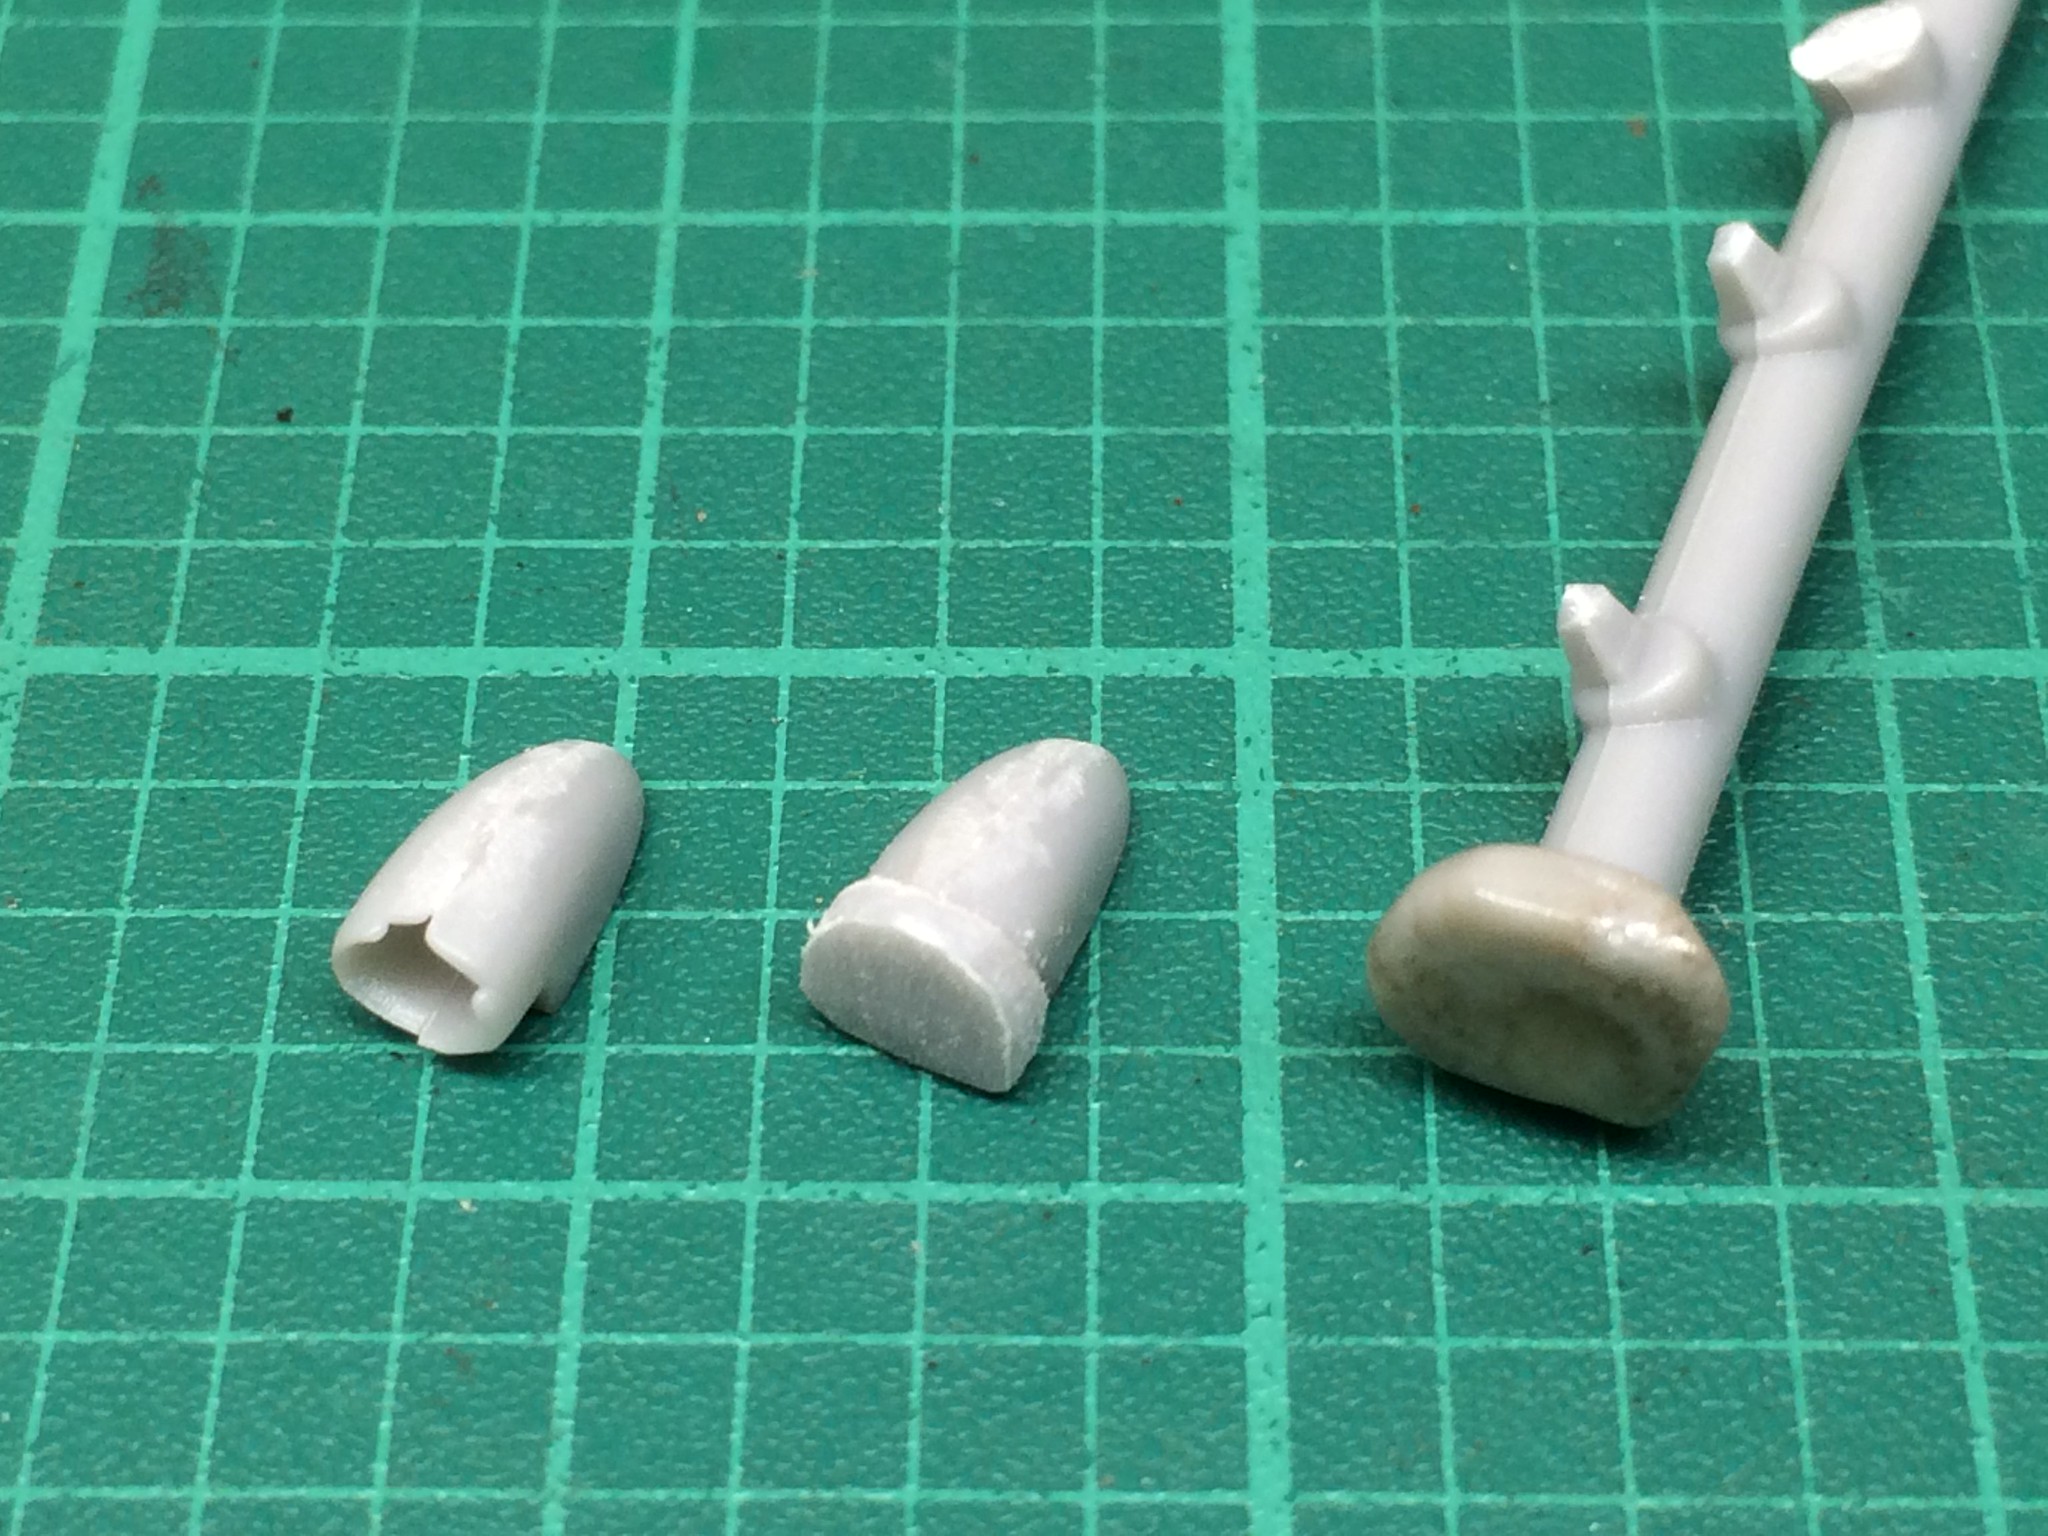
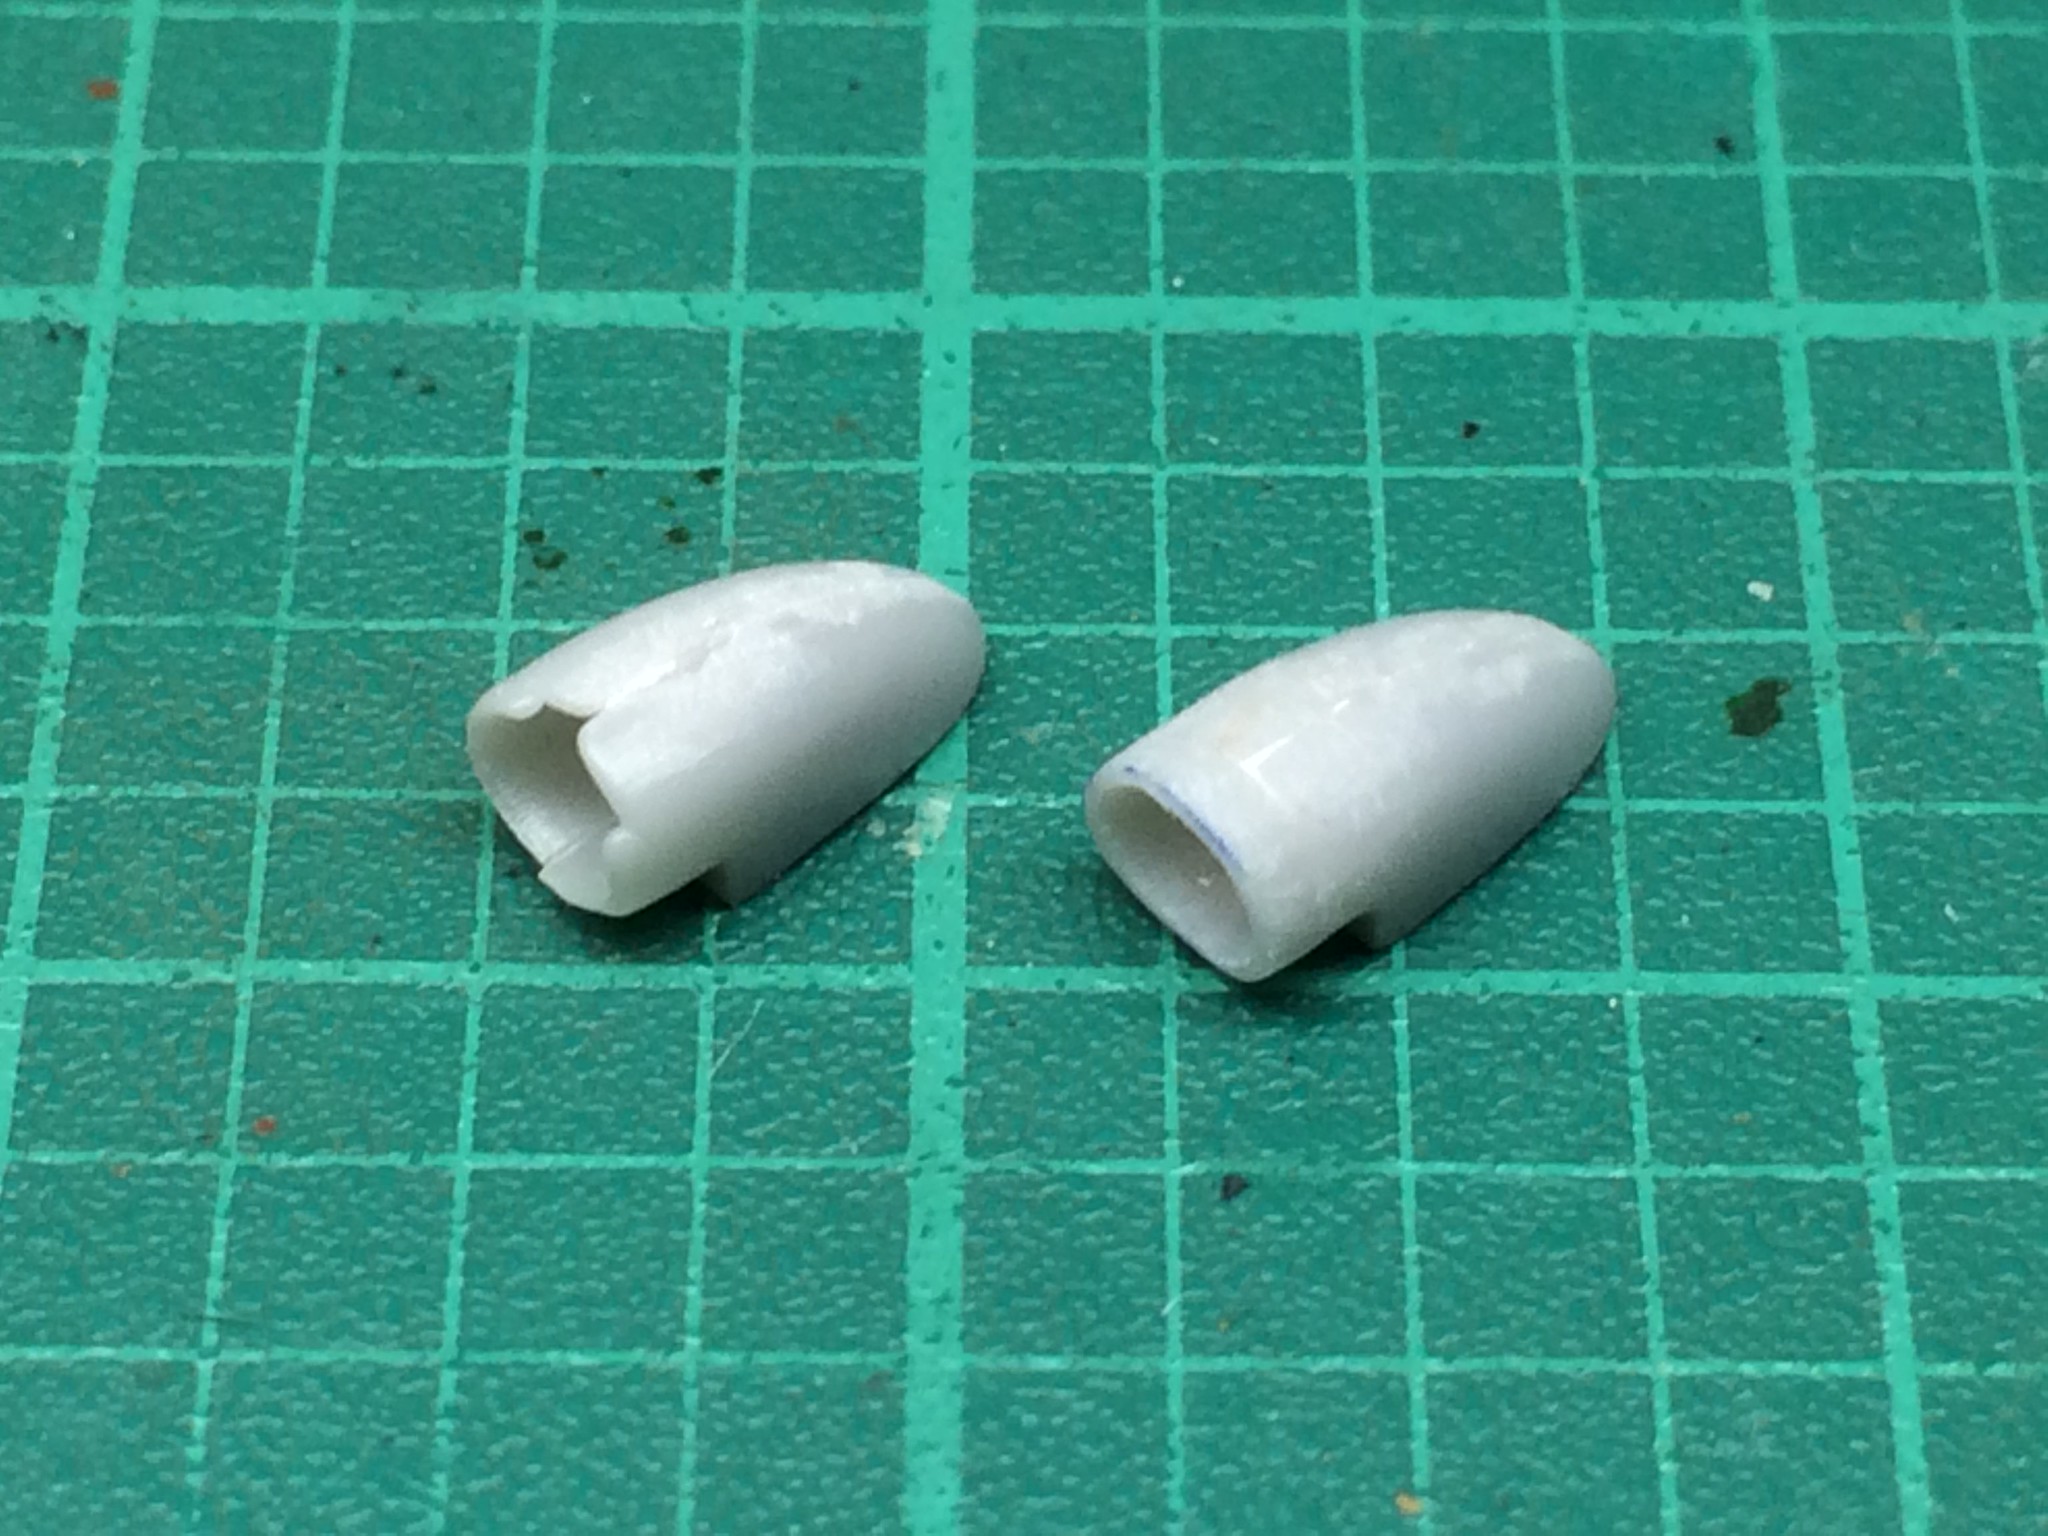
The short-shot engine side scoops were repaired by cutting away the malformed inlets, adding some kit sprue heat squashed to the approximate size, then drilled, carved and sanded to shape.  I am pretty pleased with this fix.

https://flic.kr/p/PwgBhN] [/url]Be-10-37 by N.T. Izumi, on Flickr
https://flic.kr/p/PSdzJW] [/url]Be-10-38 by N.T. Izumi, on Flickr
https://flic.kr/p/NRE4eF] [/url]Be-10-39 by N.T. Izumi, on Flickr
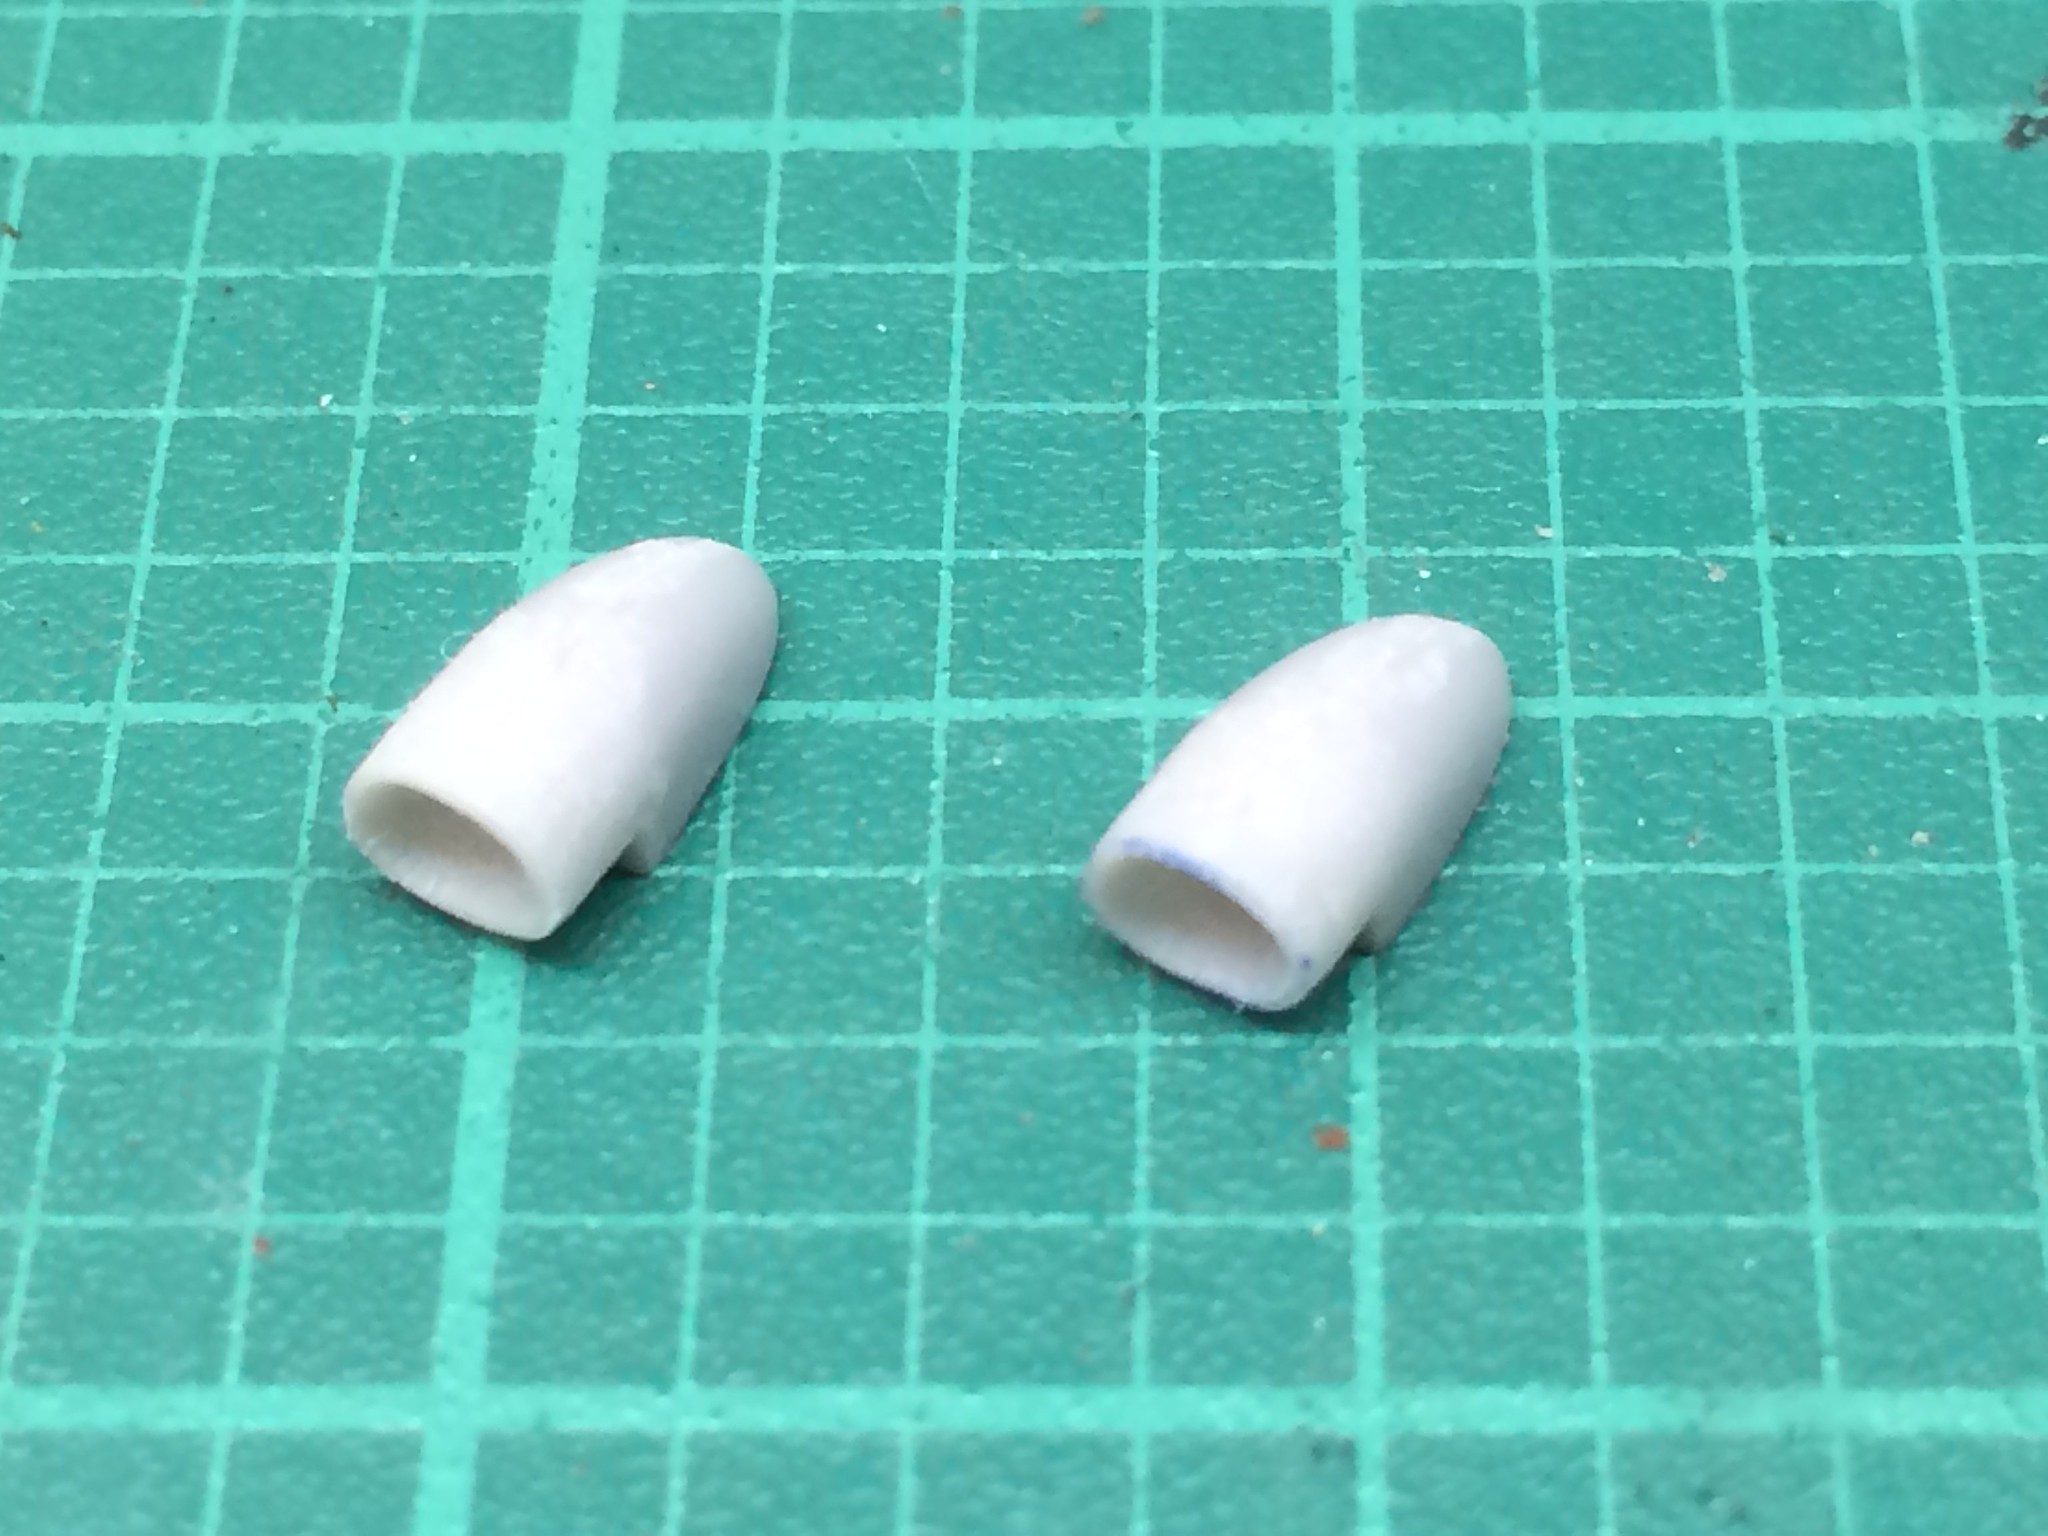
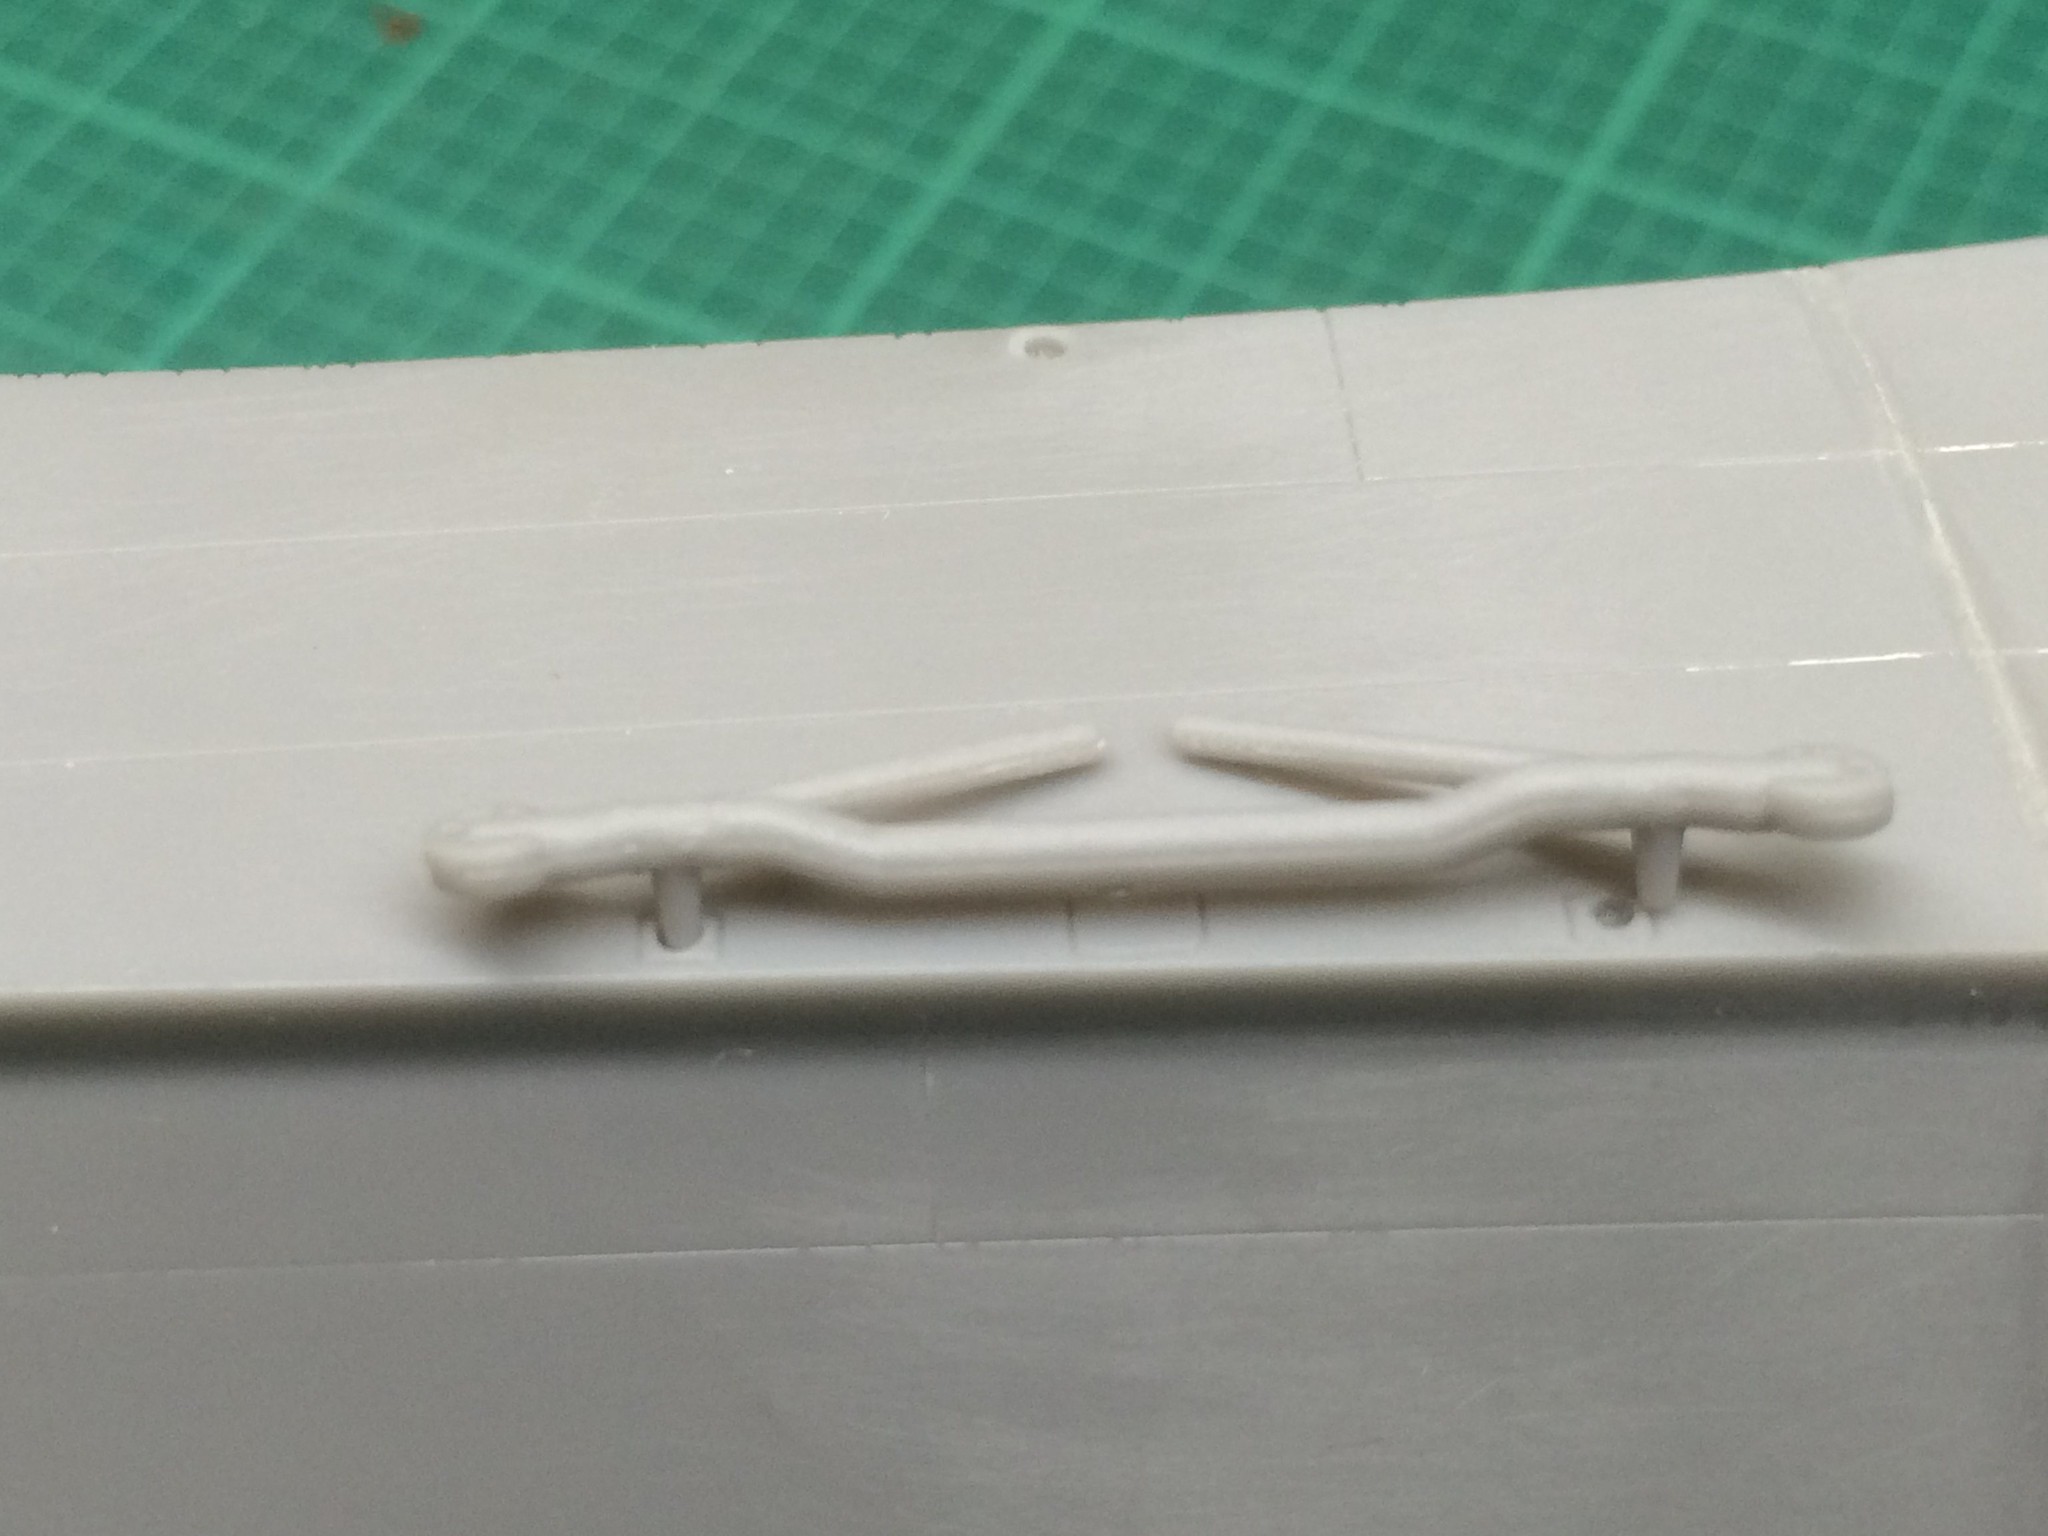
The beaching gear was another adventure getting the parts to fit, but fit they eventually did.  But all parts have mold slip lines, so some putty work will be needed.

https://flic.kr/p/Q6bAr6] [/url]Be-10-40 by N.T. Izumi, on Flickr
https://flic.kr/p/Pwix93] [/url]Be-10-41 by N.T. Izumi, on Flickr
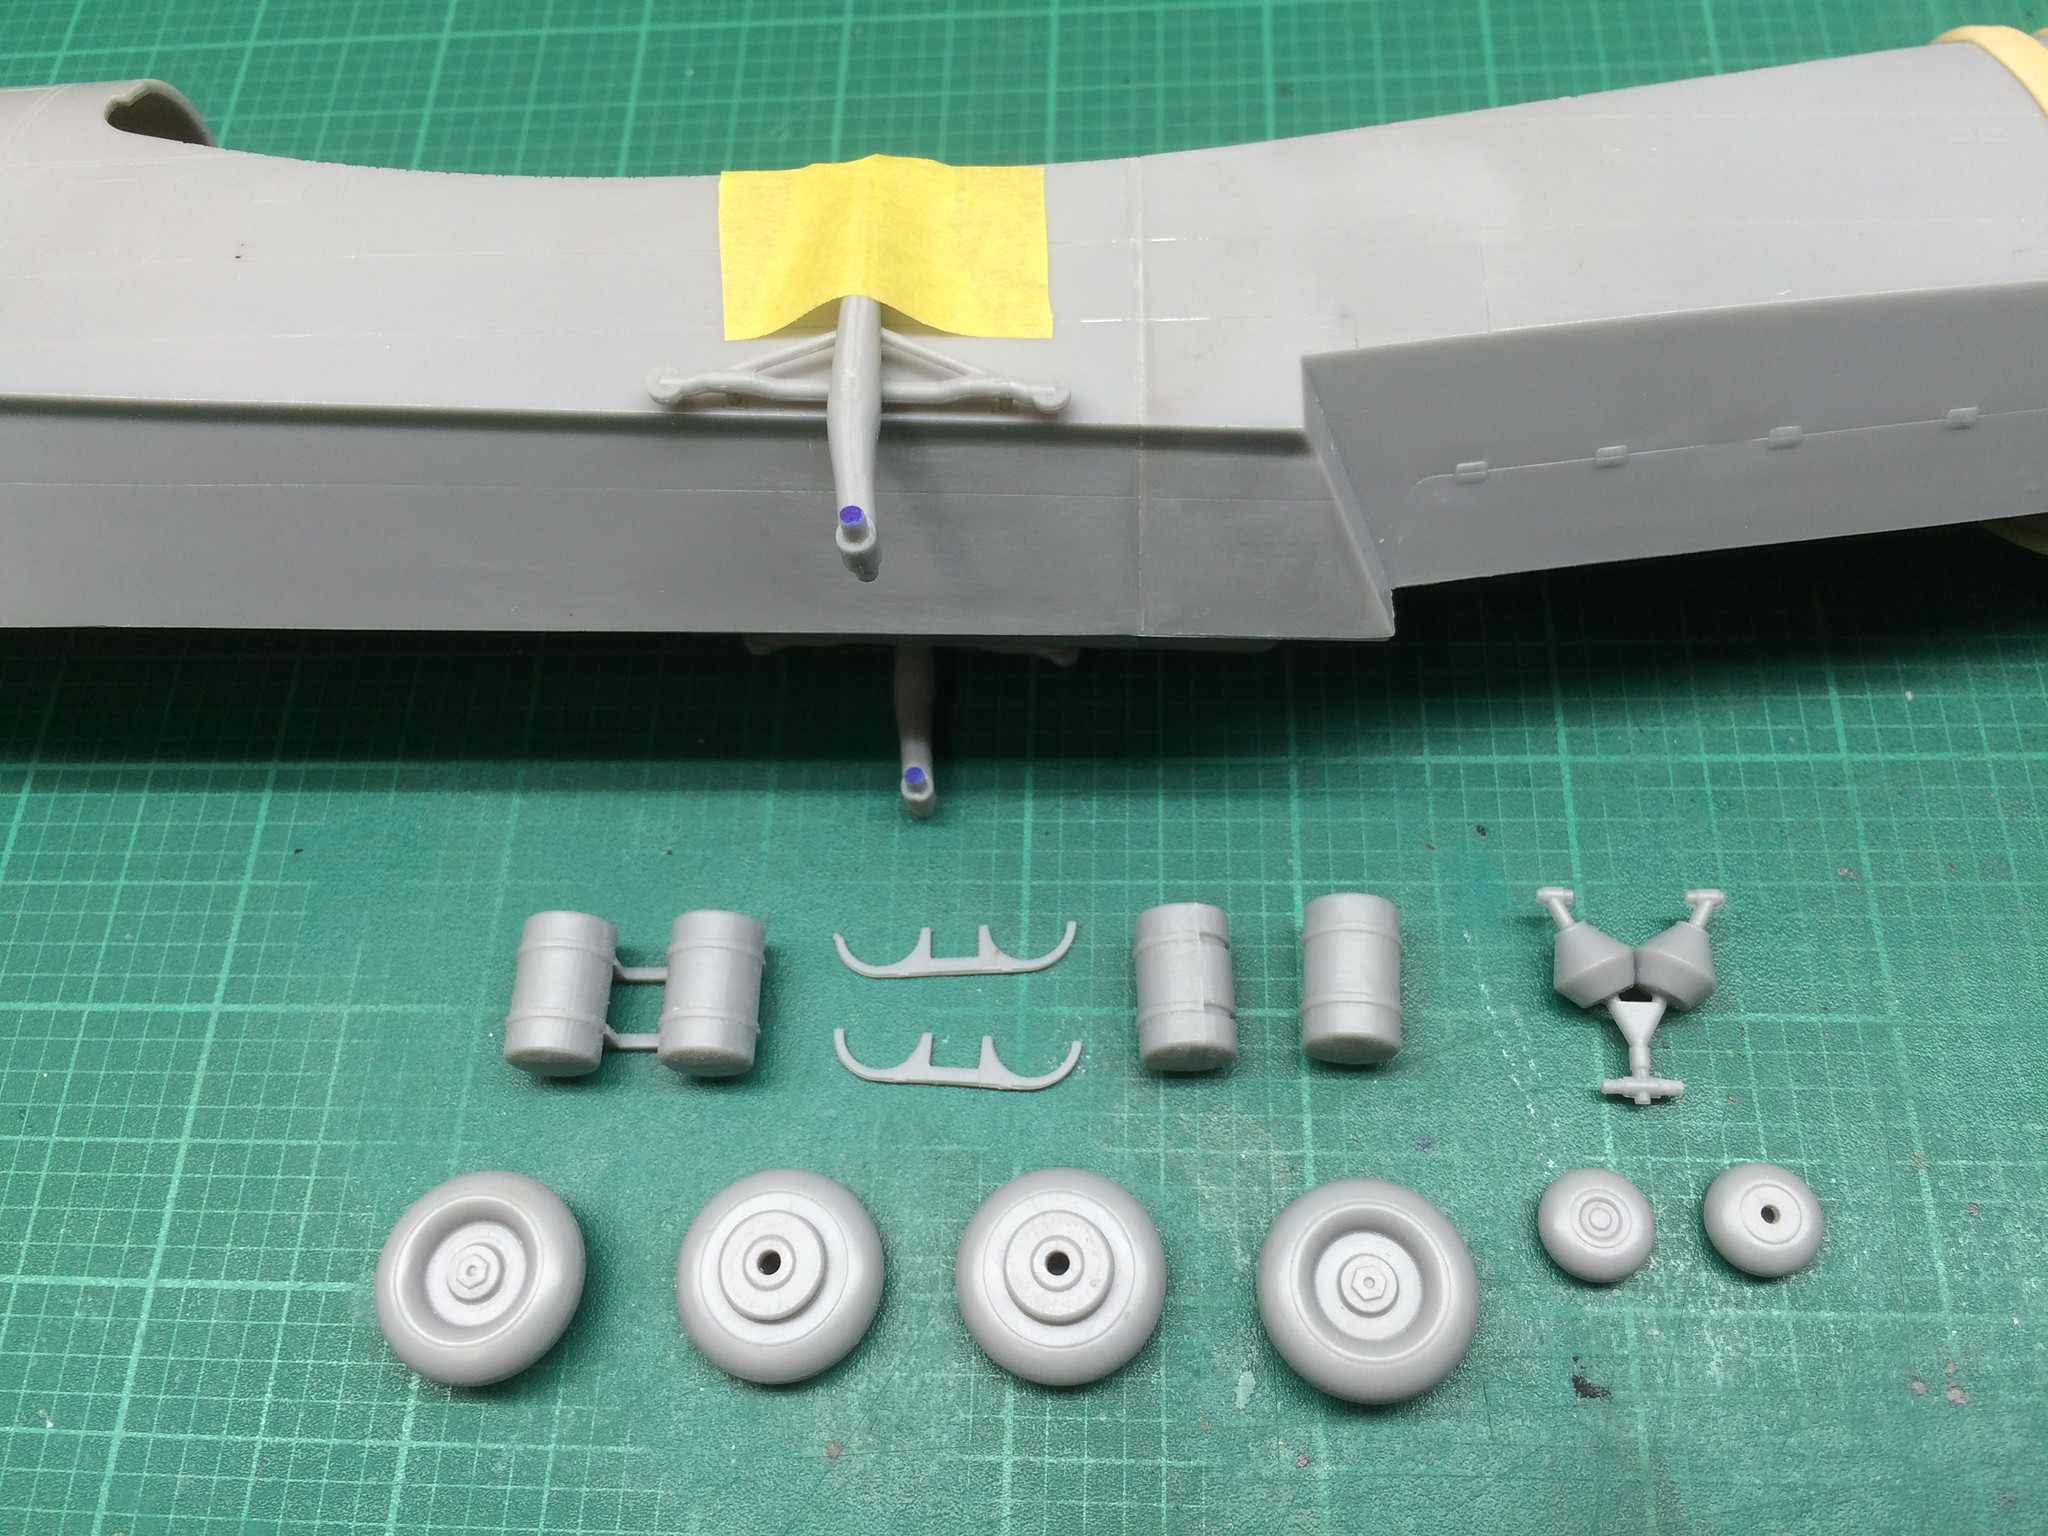
Painting of the interior will now commence - yay!

“Ya ya ya, unicorn papoi!”

  • Member since
    May 2011
  • From: Honolulu, Hawaii
Posted by Real G on Sunday, December 11, 2016 1:11 PM

Thanks guys!  I will probably need extra runway to get this thing off the ground, so your 2017 extension is appreciated.  I'll be working on it as much as possible in the mean time.

“Ya ya ya, unicorn papoi!”

  • Member since
    November 2003
  • From: Naples, FL
Posted by tempestjohnny on Sunday, December 11, 2016 11:59 AM

BrandonK

Glad youre feeling better and looking forward to seeing those pics.

BK


Yea what he said


  • Member since
    June 2014
Posted by BrandonK on Sunday, December 11, 2016 11:06 AM

Glad youre feeling better and looking forward to seeing those pics.

BK

On the bench:

A lot !! And I mean A LOT!!

2024 Kits on deck / in process / completed   

                         14 / 5 / 2  

                              Tongue Tied

  • Member since
    May 2011
  • From: Honolulu, Hawaii
Posted by Real G on Sunday, December 11, 2016 4:37 AM

Got hit with a flu bug, so I stayed home from work and slept all Friday.  Feeling better today, and what do you know, I felt like working on a model!  Do antibiotics make you feel more focused?

Anyway, the Be-10's interior parts are just about ready for paint (finally!), some short shot boo-boos got fixed, and the beaching gear is coming together.  Mind you nothing fit perfectly!  I have seen another recent build of this kit, but that guy is made of stouter stuff than I, as he finished it AND he didn't cry about all the stupid fit problems.

Speaking of stupid, I'm still too dumb to post pics from my phone, so no pics till Monday.  Assuming I go to work - the doc told me to stay away from people until Wednesday!  Not sure I can do that.

“Ya ya ya, unicorn papoi!”

  • Member since
    June 2014
Posted by BrandonK on Sunday, December 4, 2016 10:22 AM

tempestjohnny

Tante Ju is starting to get some color.  RLM 65 is on.


BK

On the bench:

A lot !! And I mean A LOT!!

2024 Kits on deck / in process / completed   

                         14 / 5 / 2  

                              Tongue Tied

  • Member since
    November 2003
  • From: Naples, FL
Posted by tempestjohnny on Sunday, December 4, 2016 6:46 AM

Tante Ju is starting to get some color.  RLM 65 is on.


  • Member since
    November 2003
  • From: Naples, FL
Posted by tempestjohnny on Saturday, December 3, 2016 9:31 AM
RG excellent work on the interior. I haven't built many short runs but I learned pretty quick to double check every measurement


  • Member since
    May 2011
  • From: Honolulu, Hawaii
Posted by Real G on Thursday, December 1, 2016 12:42 PM

Thanks BK!  I figured that I can tart up the blank side consoles with placard decals, so the only things I'll add are throttle knobs and a gyro gunsight for the pilot.  I will try to get paint on the interior parts this weekend.

I just discovered that the nose cap glazing is narrower than the fuselage, so some trimming of the nose and floor boards will be needed.  The cockpit canopy fits fine though.  Gotta love limited run kits.  Stick out tongue

“Ya ya ya, unicorn papoi!”

  • Member since
    June 2014
Posted by BrandonK on Thursday, December 1, 2016 9:11 AM

RG, you are certainly adding a lot of loving touchs to a fairly sparse interior. It is really taking shape. I just can't bring myself to not doll up those cockpits. Loving the progress.

BK

On the bench:

A lot !! And I mean A LOT!!

2024 Kits on deck / in process / completed   

                         14 / 5 / 2  

                              Tongue Tied

  • Member since
    May 2011
  • From: Honolulu, Hawaii
Posted by Real G on Wednesday, November 30, 2016 9:33 PM

Trying to get in some time to work on my Beriev.  A couple of cockpit bits remain before I can zip up the fuselage.

https://flic.kr/p/PxfA5f] [/url]Be-10-28 by N.T. Izumi, on Flickr

Some sheet plastic was added to help align the crew seats and set the location of the instrument panel.  The IP will get some punched dics to represent the instrument bodies protruding from the front of the panel.  Mike Grant instrument decals will fill the empty dial faces and blank consoles.

https://flic.kr/p/NwC9ig] [/url]Be-10-29 by N.T. Izumi, on Flickr

The kit does not include seat belts, so I will probably make some from wire and lead foil or something.

https://flic.kr/p/NvjAXm] [/url]Be-10-30 by N.T. Izumi, on Flickr

https://flic.kr/p/Pco6P9] [/url]Be-10-31 by N.T. Izumi, on Flickr

I noticed that the gunner's window and ball turret were slightly wider than the fuselage halves.  Shims will fix this.  I have gotten bitten several times blindly trusting that the fuselage and clear parts matched in width, so I always check now.

https://flic.kr/p/NwC5sk] [/url]Be-10-33 by N.T. Izumi, on Flickr

One of the rudder pedals (on the right) is short shot, but no one will notice when it gets buried under the IP.  The items on the left that look like oversize pitot tubes are actually 23mm cannon muzzles that mount to either side of the cockpit.


“Ya ya ya, unicorn papoi!”

  • Member since
    May 2011
  • From: Honolulu, Hawaii
Posted by Real G on Monday, November 21, 2016 5:57 PM

Here are a few photos from Friday night's Beriev Build:

https://flic.kr/p/PdK6jz] [/url]Be-10-21 by N.T. Izumi, on Flickr

Strip styrene was added to the molded-in guides to help the fuselage sides algn with the engine module.  The fuselage cutout contour does not match the engines, so the extra material will also ensure contact surface for gluing.

https://flic.kr/p/PoM9CP] [/url]Be-10-22 by N.T. Izumi, on Flickr

Lots of little plastic strips were needed to help parts stay aligned.  The raised rims that locate the tailpipes have been partially ground away to allow the pipes to be inserted after all the filling/sanding is done.  Note stretched sprue filling in the horizontal seam line.  My new favorite over putty.  I'm trying to see how little filler I can use on this not-so-good-fitting kit.  I think a better modeler would use even less.

https://flic.kr/p/NQmzcq] [/url]Be-10-23 by N.T. Izumi, on Flickr

Just have to paint the interior and then the major airframe parts can be joined.


“Ya ya ya, unicorn papoi!”

  • Member since
    November 2003
  • From: Naples, FL
Posted by tempestjohnny on Sunday, November 20, 2016 5:05 AM

BrandonK

RealG, I am looking forward to seeing your pics and progress.

BK


Ditto


  • Member since
    June 2014
Posted by BrandonK on Saturday, November 19, 2016 10:20 AM

RealG, I am looking forward to seeing your pics and progress.

BK

On the bench:

A lot !! And I mean A LOT!!

2024 Kits on deck / in process / completed   

                         14 / 5 / 2  

                              Tongue Tied

JOIN OUR COMMUNITY!

Our community is FREE to join. To participate you must either login or register for an account.

SEARCH FORUMS
FREE NEWSLETTER
By signing up you may also receive reader surveys and occasional special offers. We do not sell, rent or trade our email lists. View our Privacy Policy.