SEARCH FINESCALE.COM

Enter keywords or a search phrase below:

Thunderbolt GB 2016

20086 views
473 replies
1 rating 2 rating 3 rating 4 rating 5 rating
  • Member since
    September 2014
Posted by rooster513 on Tuesday, September 26, 2017 9:35 AM

Looking forward to seeing the finished product BK!

-Andy

  • Member since
    January 2015
Posted by BrandonD on Tuesday, September 26, 2017 3:35 PM

Well I have been away from this for way too long (moving, then other stuff), but I've been able to follow via email, and managed to get some work in here and there, so I now have something to show for this build (finally).

My kit is the 1/48 Tamiya Razorback, and I believe I posted pics of the cockpit before (if not - too late. Dropped my phone in the river and it did not survive).

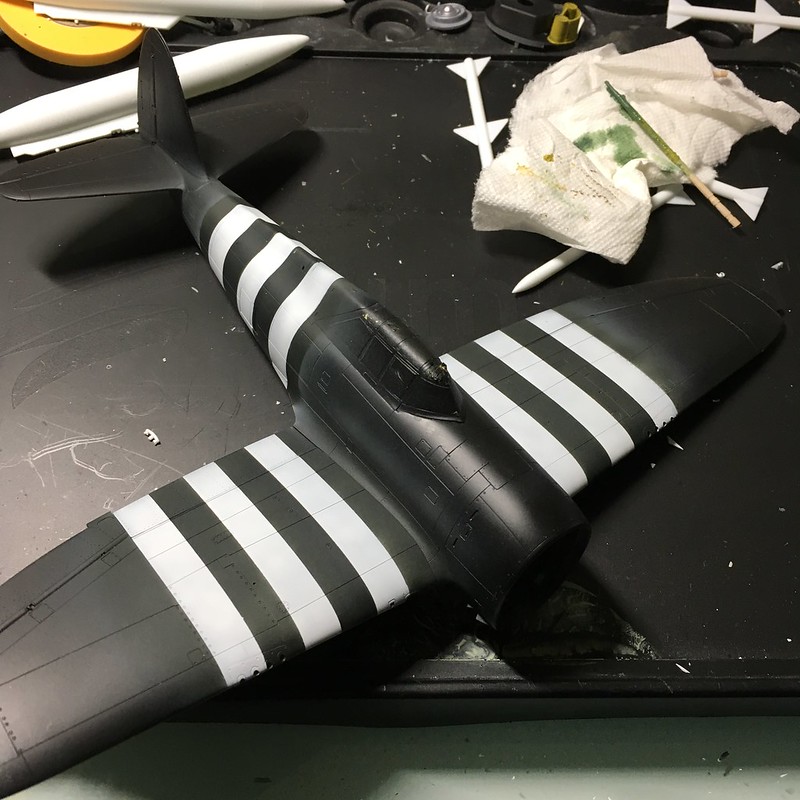
I have the Kitsworld decal set because I wanted to do something a little more fun than OD over Neutral Gray, and I went with a 56th FG bird. The scheme is supposed to have the top invasion stripes overpainted in OD, but I opted to leave it in the D-Day scheme before the overpaint.

This is the first time I've done invasion stripes, and it took a fair amount of tweaking to get them where I wanted them. 
 

Untitled

But once done, I was pretty happy with them. They are Tamiya White and NATO Black sprayed over gray.

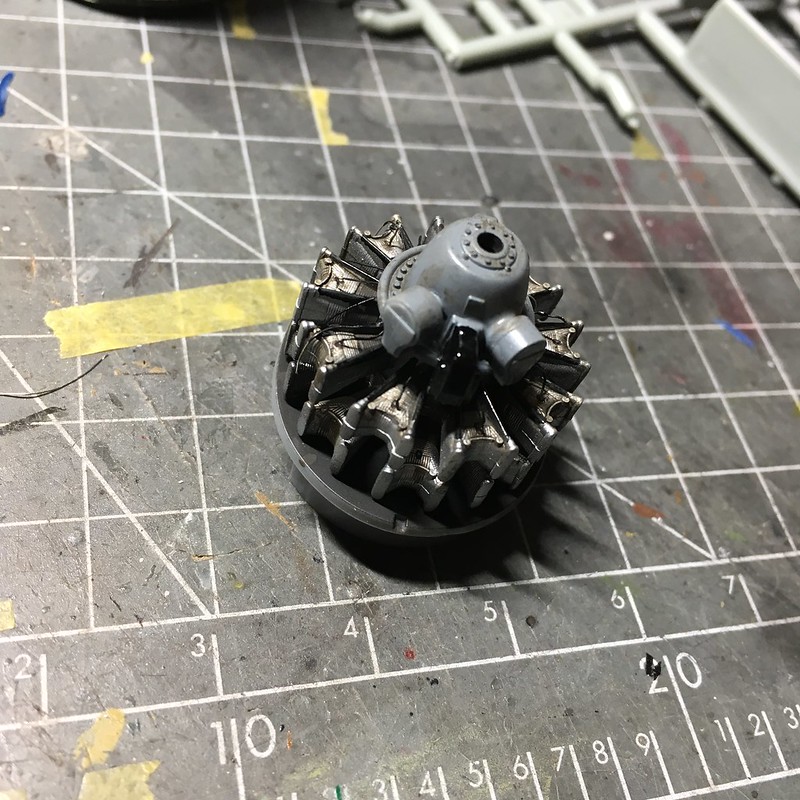
Next up was the engine. I added some spark plug wires, as I've never done this before and wanted to give it a shot. Next time, I'll use copper wire, as the steel wire I had was not great to work with (too stiff). 
Untitled

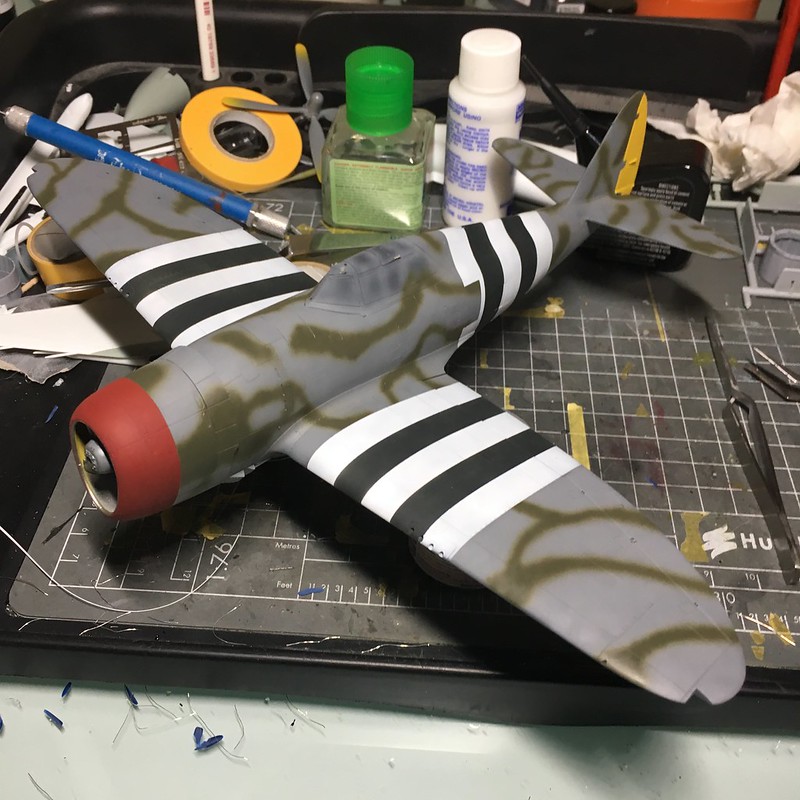
 Next up was the scheme. I freehanded the camo after masking the nose, rudder and invasion stripes. My reference pics of this bird show the edges pretty soft, and I tried to replicate the effect without getting the green too discolored over the gray. The colors are Tamiya Medium Sea Gray (bottom), Dark Sea Gray and RAF Dark Green 2, all without mixing. The red is Model Master Insignia Red, and the rudder is Model Master Insignia Yellow. 
Untitled

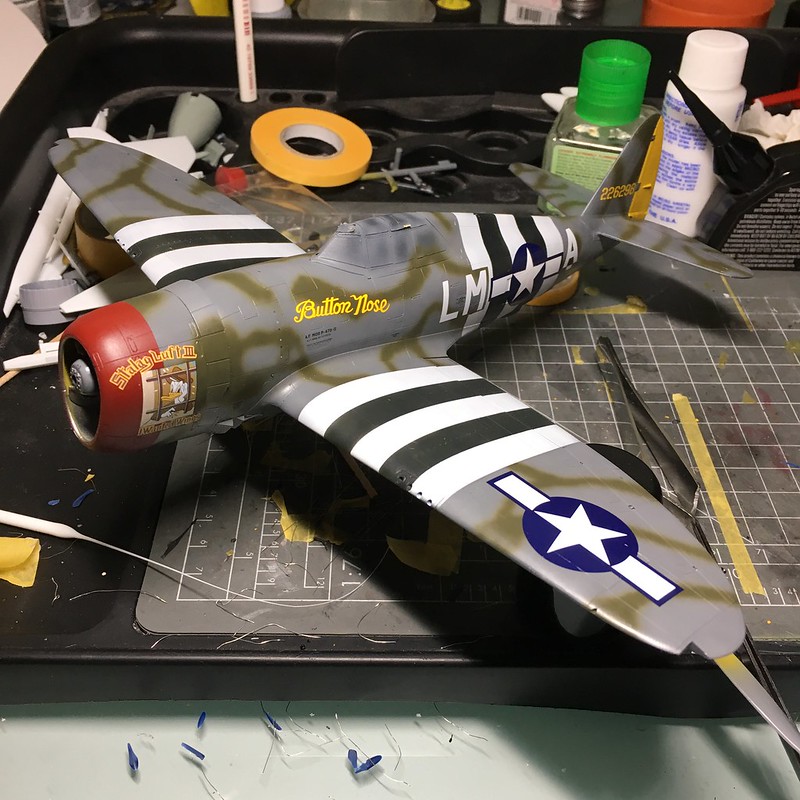
Next up were the decals. As I mentioned, they're from Kits World. These went down excellently, and really sank into the detail nicely with the Micro Set/Sol combo on top of a layer of Tamiya X-22 gloss. I can't say enough good things about the quality of the decals.

The instructions, however - were not good. At all. The main scheme decals are easy enough to see, but the stencil data had literally nothing to indicate placement. I referenced the Kits World stencils to the Tamiya ones and placed them with the callouts in the Tamiya instructions. It took way longer than it should have and should not be necessary. None of them are numbered, either.

Oh well, it's ready for its next clear coat before going to washes. 
Untitled

 Thanks for looking, and hopefully I'm back in the saddle now after too much time away!

-BD-

  • Member since
    June 2010
  • From: Rochester, New York USA
Posted by rocker286 on Tuesday, September 26, 2017 11:02 PM

Well I know there's only a few days left before the deadline, so I've been busy! There are an enormous amount of stencils and decals in this kit, it's taken me a whole weekend to apply them all but they are all on! I've attached the bombs and fuel tank as well. Tomorrow night I'll start weathering!

2017-09-13_07-18-32

2017-09-13_10-21-57

2017-09-23_12-25-16

2017-09-26_11-58-13

2017-09-26_10-19-00

4badges

  • Member since
    January 2015
Posted by BrandonD on Thursday, September 28, 2017 1:19 AM

Oh, crap - just realized the deadline is Sunday! I'd better get crackin'.

-BD-

  • Member since
    December 2002
  • From: Bury St Edmunds, Suffolk, England
Posted by Bish on Thursday, September 28, 2017 2:14 AM

BD, that is looking amazing, love that camo job, it is niceto see somthing different on one of these.

Look forwardto seeing the end result.

I am a Norfolk man and i glory in being so


On the bench: Airfix 1/72nd Harrier GR.3/Fujimi 1/72nd Ju 87D-3

  • Member since
    December 2002
  • From: Bury St Edmunds, Suffolk, England
Posted by Bish on Thursday, September 28, 2017 2:15 AM

Looking good rocker, anotehr one nearly across the finish line.

I am a Norfolk man and i glory in being so


On the bench: Airfix 1/72nd Harrier GR.3/Fujimi 1/72nd Ju 87D-3

  • Member since
    September 2014
Posted by rooster513 on Thursday, September 28, 2017 8:52 AM

rocker that is coming along really nicely!

BD, that paint work is great! If it takes past Sunday to finish up it's no problem. Certainly don't sacrifice quality to get it done quickly:)

-Andy

  • Member since
    June 2010
  • From: Rochester, New York USA
Posted by rocker286 on Thursday, September 28, 2017 6:04 PM

BK - Looking forward to seeing your finished jug!

BD- Love that camo scheme!

Rooster & Bish - thanks for the comments! And Rooster, do you think you might be able to re-post or send me the Group Build badge?

I finally crossed that proverbial finish line last night- my Thunderbolt is complete! Like most of my planes (especially those configured for ground attack missions), I chose to weather this one heavily. I used testors aluminum and a small brush to create lots of paint chips on the red cowling and OD anti-glare stripe. I used a sludge wash to fill in lines and recesses and created gunsmoke and exhaust streaks by dry brushing testors flat black. After all was said and done, I sprayed the model with dull clear and pealed off the masks. She looks pretty good if I do say so myself!

2017-09-27_11-55-10

2017-09-27_11-55-46

2017-09-27_11-55-59

2017-09-27_11-56-29

Now I have two Thunderbolts in my collection. Do I dare seach the internet for a third??? Thanks to all of you guys who kept giving me words of encouragement during this whole build. You guys rock and so do all of your builds! These group builds are a heap of fun!

2017-09-28_06-53-03

4badges

  • Member since
    September 2014
Posted by rooster513 on Thursday, September 28, 2017 8:40 PM

Great finish rocker! It turned out awesome! I'll get it added to the front page and I'll also work on getting the badge back up. Thanks for joining! This one is coming to an end but if you like German planes I'm thinking about starting up a 109 or 190 GB after I'm done with this one. They are a lot of fun.

-Andy

  • Member since
    June 2014
Posted by BrandonK on Saturday, September 30, 2017 11:39 AM

BD, very nice !! I love it. I gotta get a bird done with invasion stripes.

Rocker, that is really cool. Love the weathering.


Well, I'm down to the last day but this one is finally done. I have been sick all week and I really had to force myself to finish this off. I am rather happy with it. I tried to get it close the real deal. I looked a couple shots of this one and it appeared well cared for and lacking any real weathering, so that made it easier for me. This plane shot down 5 Japanese planes in one sortie late in the war and was stationed in New Guinea I believe. 

I hope you enjoy the photos.

BK

On the bench:

A lot !! And I mean A LOT!!

2024 Kits on deck / in process / completed   

                         14 / 5 / 2  

                              Tongue Tied

  • Member since
    January 2015
Posted by BrandonD on Saturday, September 30, 2017 8:08 PM

Very nice job, Rocker and BK!

Mine is done. Hope to have a minute to shoot pics tonight. No media card for the camera, but I may be able to make it work with the phone.

It's great to see so many T-bolts in this build.

-BD-

  • Member since
    September 2014
Posted by rooster513 on Saturday, September 30, 2017 9:22 PM

Man BK that is a beauty! Awesome paint job! Thanks for joining and turning in a great build.

-Andy

  • Member since
    September 2014
Posted by rooster513 on Saturday, September 30, 2017 9:23 PM

Looking forward to seeing the final pic BD!

-Andy

  • Member since
    May 2017
  • From: Denver, Colorado
Posted by MrStecks on Sunday, October 1, 2017 6:33 PM

Hey Rocker and BK, nice pair of Thunderbolts!  Looking forward to seeing BD's as well.  Smile

Cheers, Mark


On the bench:  Revel 1/48 B-25J Mitchell

In the queue: Tamiya 1/48 F4U-1A Corsair

  • Member since
    June 2007
  • From: Seabrook, TX
Posted by Axemanwb on Sunday, October 1, 2017 7:43 PM

Hi All, I've been busy working on filling and sanding seams. I really need to improve at rescribing panel lines! (any suggestions?). I've got the kit taped up for the white of the invasion stripes.

readyforstripes


William 'Axeman' Hawes

In Progress: Tamiya 1/35 Panzer II

'Just' Completed: Testors P-51 1:48


  • Member since
    January 2015
Posted by BrandonD on Tuesday, October 3, 2017 12:38 AM

As promised, here are the pics.

Once again, this is the 1/48 Tamiya P-47 Razorback kit with Kitsworld decals. Paints are mostly Tamiya with  Model Master for the nose, rudder and rocket tubes. Mr. Paint Dark Dull Green was the interior color. Alclad is most of the metal bits, with some Tamiya and Testors.

Anyway, we're mostly just here for the pics, yeah?


P-47 05 copy

P-47 04

P-47 03

P-47 02 copy

P-47 01 copy

P-47 08

P-47 06_1

P-47 06 copyThanks for having me. This was a fun group build, and I finally have a Jug for the shelf!

-BD-


  • Member since
    December 2002
  • From: Bury St Edmunds, Suffolk, England
Posted by Bish on Tuesday, October 3, 2017 2:33 AM

Axemanwb

Hi All, I've been busy working on filling and sanding seams. I really need to improve at rescribing panel lines! (any suggestions?). I've got the kit taped up for the white of the invasion stripes.

readyforstripes


Looks good Axeman. Afraid ican't help with thge panel lines, thats something i need to work on.

I am a Norfolk man and i glory in being so


On the bench: Airfix 1/72nd Harrier GR.3/Fujimi 1/72nd Ju 87D-3

  • Member since
    December 2002
  • From: Bury St Edmunds, Suffolk, England
Posted by Bish on Tuesday, October 3, 2017 2:34 AM

BD, wow, that looking just brilliant.

I am a Norfolk man and i glory in being so


On the bench: Airfix 1/72nd Harrier GR.3/Fujimi 1/72nd Ju 87D-3

  • Member since
    September 2014
Posted by rooster513 on Tuesday, October 3, 2017 7:01 AM

Axemanwb

Hi All, I've been busy working on filling and sanding seams. I really need to improve at rescribing panel lines! (any suggestions?). I've got the kit taped up for the white of the invasion stripes.

readyforstripes


I can certainly improve myself but lately I've been using a thin saw that I purchased to rescribe panel lines. I seem to slip less with the saw then when I use a scribing tool. I use electrical tape to lay down the line I need and lightly run the saw along the edge. I have much better luck when I take many light cuts to get the depth I need. Let me know if you need anymore info.

-Andy

  • Member since
    September 2014
Posted by rooster513 on Tuesday, October 3, 2017 7:13 AM

Man BD that turned out beautiful! Gotta love the Tamiya Jugs. Thanks for taking part in the GB!

-Andy

  • Member since
    June 2014
Posted by BrandonK on Tuesday, October 3, 2017 9:33 AM

BD, that is a stunner. WOW ! What a beauty. Well done, Sir.

BK

On the bench:

A lot !! And I mean A LOT!!

2024 Kits on deck / in process / completed   

                         14 / 5 / 2  

                              Tongue Tied

  • Member since
    January 2015
Posted by BrandonD on Wednesday, October 4, 2017 12:15 PM

Thanks, everyone!

Rooster - thanks for hosting. This was a fun group build.

-BD-

  • Member since
    November 2003
  • From: Naples, FL
Posted by tempestjohnny on Thursday, October 5, 2017 7:07 AM
BD, BK, and Rocker. All three are great looking. Axeman great start can't wait to see it continue


  • Member since
    September 2014
Posted by rooster513 on Friday, October 6, 2017 3:34 PM

I've got the badge back up on the front page for anyone who is interested. 

-Andy

JOIN OUR COMMUNITY!

Our community is FREE to join. To participate you must either login or register for an account.

SEARCH FORUMS
FREE NEWSLETTER
By signing up you may also receive reader surveys and occasional special offers. We do not sell, rent or trade our email lists. View our Privacy Policy.