SEARCH FINESCALE.COM

Enter keywords or a search phrase below:

Star Trek 50th Anniversary Group Build

15005 views
286 replies
1 rating 2 rating 3 rating 4 rating 5 rating
  • Member since
    September 2003
  • From: AandF in the Badger State
Posted by checkmateking02 on Tuesday, September 13, 2016 4:24 PM

Good information, Gamera. Thanks! I like the idea of the constant 1/1000 scale for these. Hope Polar Lights puts out even more.

I still have an AMT TOS Enterprise hanging from my office ceiling at work. Picked it up back in '79 in Stone Mountain, GA, just before the premier of ST: TMP. After all those years, it's never had a "droop" issue.

Can't say the same for some of FASA's old metal gaming miniatures, from the '80's. Eventually, the Enterprise's engines and nacelles looked a lot like the ears on a beagle.

But the figures were good. A couple of companies put out gaming figures for Star Trek role-playing games: Heritage and then FASA, in the '70's and '80's. Still have them painted up. Maybe I'll dig them out of storage and post some photos.

My Enterprise and Reliant arrived in the mail today, but I have about three other GB's to finish before I can start in on them. Enterprise comes with aztec decals, but they have to be purchased separately for Reliant.


  • Member since
    November 2009
  • From: SW Virginia
Posted by Gamera on Wednesday, September 14, 2016 10:38 AM

Oh that's cool. I have the FASA Trek RPG and the wargame. I never could find anyone to play the RPG with but I played about a zillion battles with the wargame playing both sides. 

I'd love to see the figures and ships. The figures had been taken off the market when I bought my games but the ships were still out. I ended up just using the cardboard counters though and never bought any. 

"I dream in fire but work in clay." -Arthur Machen


  • Member since
    November 2009
  • From: SW Virginia
Posted by Gamera on Thursday, September 15, 2016 7:52 AM

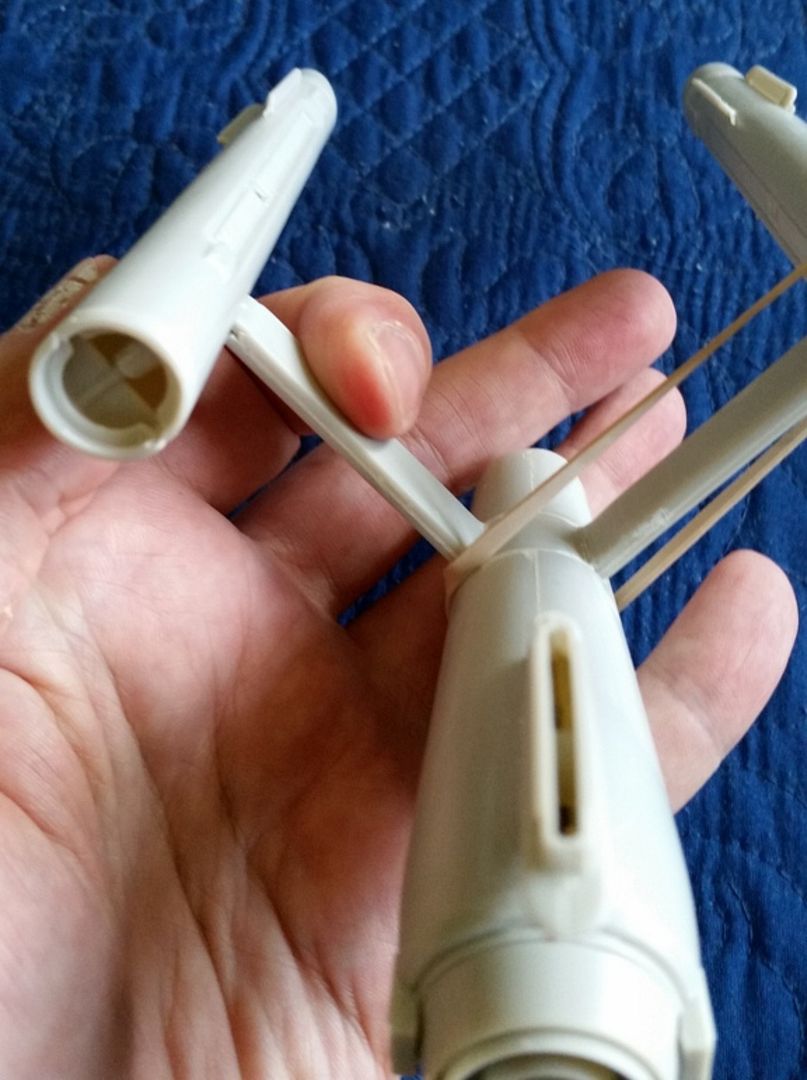
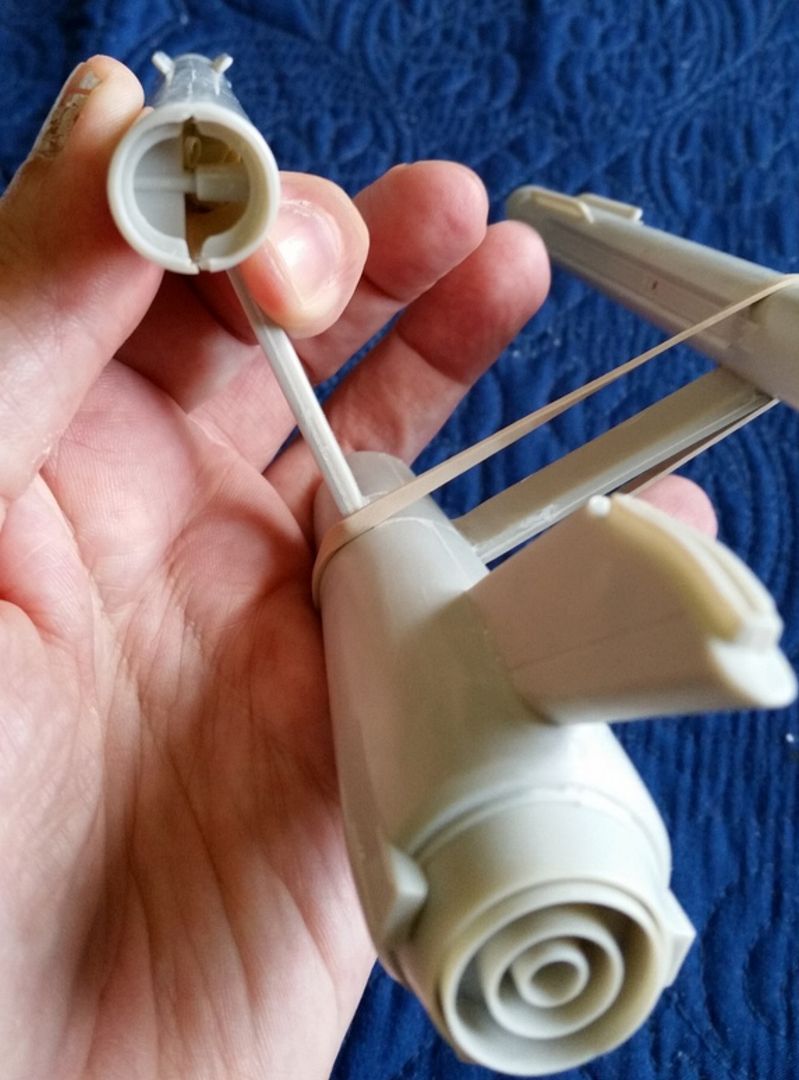
Alright, maybe I spoke too soon here... I went to attach the warp nacelles to their struts on my 1/1000th Polar Lights original Enterprise last night and WTH!?!? The tabs did not fit as inserted, they would if forced. But even then they rotated the nacelles out of alignment- the two radiator fins that should be evenly spaced on the sides near the top ended up rotated out with one on top and the other almost horizontal out on the outside of the engine. The inner cooling grills were canted up at a 45% angle toward the top. 

No amount of sanding or carving would get the nacelles straight. So I ended up cutting the tabs off, drilling some holes in the struts and sticking some wire in them. Then I just epoxied the whole thing in place and set it aside to dry. I hope when I look at the kit this evening everything is still straight. If so I guess I'll be doing the same to the starboard nacelle and strut. 

I wonder if I somehow messed up the kit, though it's pretty simple I don't see how. Matt Usher in his review stated that he cut the pins off and super-glued his together. Several other online reviews list problems with them. 

I mean it's not something an experienced modeler can't deal with but this is marketed as a snap-fit kit for kids with stickers along with decals. I just wonder how this got though and into a production kit. And now I'm almost scared to think what kind of issues the big 1/350th kits might have... 

"I dream in fire but work in clay." -Arthur Machen


  • Member since
    June 2010
  • From: Berwyn!
Posted by Beans on Thursday, September 15, 2016 9:42 AM

WIP pictures...

  • Member since
    November 2009
  • From: SW Virginia
Posted by Gamera on Thursday, September 15, 2016 9:58 AM

Right Beans, photos.

I hate posting photos of stuff I've messed up but maybe someone can learn from my mistakes.

"I dream in fire but work in clay." -Arthur Machen


  • Member since
    September 2003
  • From: AandF in the Badger State
Posted by checkmateking02 on Thursday, September 15, 2016 5:28 PM

Yeah, this is really NOT good news to hear! If you can bring yourself to do it, Gamera, I'd like to see photos of the issues and your fix. It's frustrating that the producers don't address these issues and make these problems go away for subsequent releases of the kit. I don't think they have much excuse for perpetuating major fit problems after the problems are found to be so widespread. I suppose it's $$$$$. Or would that be gold-pressed latinum?

I used to have the FASA rules and stuff, too. I think I sold them on eBay years ago, but I kept the figures. Too much invested in painting them to get rid of them. I found them in storage and took a look at them. They still look pretty good, although some of the casting was a little crude.

I'll see if I can find time to take photos and post them this weekend. I forgot over the years that I had Klingons and Romulans and Talosians and Andorians and Tellerites, etc., along with the Federation crew.


  • Member since
    September 2003
  • From: AandF in the Badger State
Posted by checkmateking02 on Thursday, September 15, 2016 5:45 PM

And just for conversation, here's my 1979-vintage AMT USS Enterprise hanging from my office ceiling at work.

It came in useful years ago.  We had a copy machine in the office at the time that required a pass code to operate. We chose "1701," so when anyone forgot it, they could check out the Enterprise for a reminder.


  • Member since
    June 2010
  • From: Berwyn!
Posted by Beans on Thursday, September 15, 2016 6:06 PM

checkmateking02
And just for conversation, here's my 1979-vintage AMT USS Enterprise hanging from my office ceiling at work.

It came in useful years ago.  We had a copy machine in the office at the time that required a pass code to operate. We chose "1701," so when anyone forgot it, they could check out the Enterprise for a reminder.

Nice and clean. I like that.

I really like the paint job on the Bussard Collector Assembly. How'd you do that?

It's cool that they let you hang your model at work.

  • Member since
    September 2003
  • From: AandF in the Badger State
Posted by checkmateking02 on Thursday, September 15, 2016 6:53 PM

Thanks, Beans!

I used gradually lightened shades of orange and yellow, sprayed on with an airbrush. Started with the darkest orange, then moved up to pure yellow, sort of feathering the colors.  Finished with a clear gloss.

I had a book titled something like the Star Fleet Technical Manual that had a page with colour chips.  I used that for determining colors, but references were pretty hard to come by back then.  If I remember, I think it called for the ship to be "Platinum" or something.  I used some sort of silver metallic on it.


  • Member since
    November 2009
  • From: SW Virginia
Posted by Gamera on Thursday, September 15, 2016 7:05 PM

She's beautiful CMK02! And code 1701- useful too!

I had two of those kits back as a youngster. I cut one up trying to open all the portholes and then melted a second one with interior lights. Those were the good old days, no cool-burning LEDs, I used big fat bulbs I bought at Radio Shack!

"I dream in fire but work in clay." -Arthur Machen


  • Member since
    November 2009
  • From: SW Virginia
Posted by Gamera on Thursday, September 15, 2016 7:10 PM

No sure how clear these photos are on the rotated nacelles but here they are. I don't know why they're like that, it wouldn't have cost anymore to have designed the kit so they fit properly.

As said I just cut off the tab, replaced it with paper clip wire, and then epoxied the whole thing in place. This fixed one has the rubber band on it holding it place. The rotated one is the other.


"I dream in fire but work in clay." -Arthur Machen


  • Member since
    September 2003
  • From: AandF in the Badger State
Posted by checkmateking02 on Thursday, September 15, 2016 7:43 PM

Thanks, Gamera.  I had one of the first issues, too, back in the '60's.  Don't think mine turned out too well.  One of the later releases--maybe '69?--came with lights, but I don't remember if I got it to work.  I built the '79 release just after I finished up college.

I can see what you mean with your project.  "They" should have known better, and never let this thing off the production line the way it is.  The fit flaw is so obvious.  

Looks like you did a good job of repairing the port nacelle and engine--and it didn't take a chimpanzee and two trainees to accomplish it.

Qapla'!


  • Member since
    November 2009
  • From: SW Virginia
Posted by Gamera on Thursday, September 15, 2016 8:43 PM

'Aye lad, sometimes ya just need to whack the bloody thing with a hammer...'

"I dream in fire but work in clay." -Arthur Machen


  • Member since
    January 2016
  • From: Winnipeg, Manitoba Canada
Posted by iSteve on Thursday, September 15, 2016 9:50 PM

Ok I'm in. AMT Klingon Cruiser from Star Trek: The Motion Picture modified with JT Graphics resin parts for accurization.

  • Member since
    January 2016
  • From: Winnipeg, Manitoba Canada
Posted by iSteve on Thursday, September 15, 2016 10:05 PM

Beans

Gotta share...

My wife gave me a sheet of Star Trek forever stamps she picked up from the post office yesterday.

Cool huh?

Very cool. Canada Post has a couple of sets available too that I'd like to get. Check out canadapost.ca


  • Member since
    January 2016
  • From: Winnipeg, Manitoba Canada
Posted by iSteve on Thursday, September 15, 2016 10:18 PM

Gamera

No sure how clear these photos are on the rotated nacelles but here they are. I don't know why they're like that, it wouldn't have cost anymore to have designed the kit so they fit properly.

As said I just cut off the tab, replaced it with paper clip wire, and then epoxied the whole thing in place. This fixed one has the rubber band on it holding it place. The rotated one is the other.
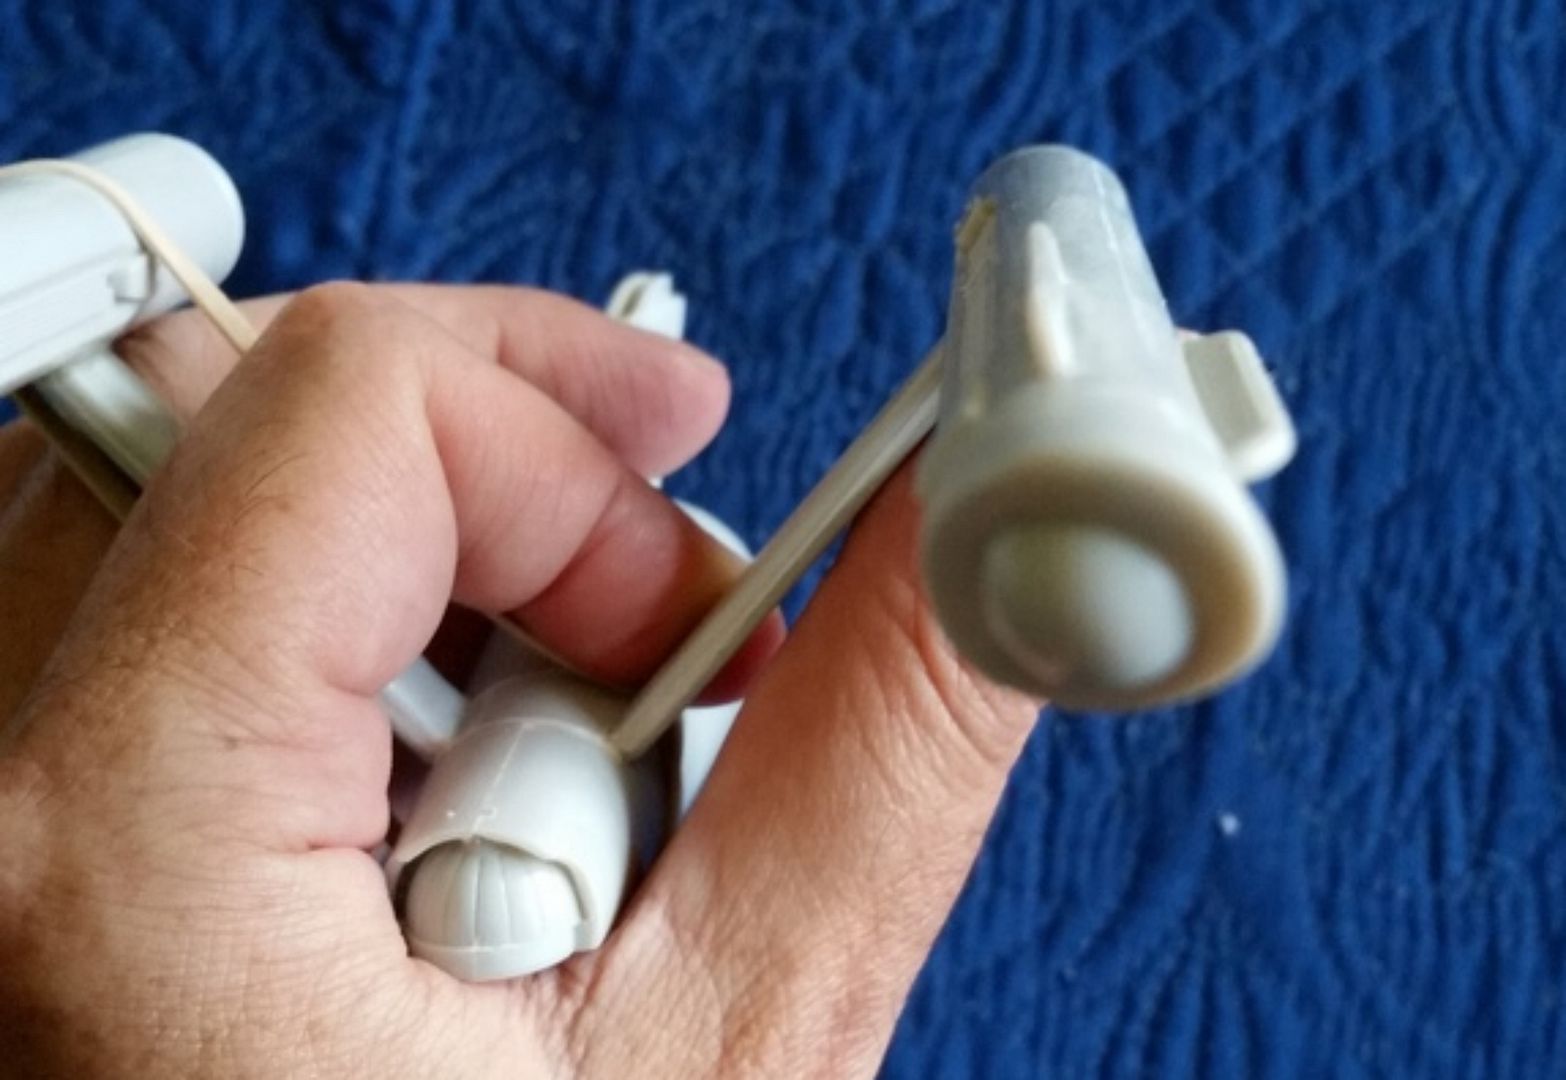
  

Gamera, I've never owned that kit but I think the problem might be you have the pylons reversed, judging by your photos. Are there not four rectangular grills on them? If so, they should be facing inward, not outward. My apologies if I'm completely off base here.

  • Member since
    November 2009
  • From: SW Virginia
Posted by Gamera on Thursday, September 15, 2016 10:31 PM

Steve thanks for the help!

I'm not sure how clear this photo of the instructions is but I don't think you can put the pylons on backwards since it's all one big U or V shaped piece. Unlike the AMT the grills aren't molded on the pylons but come as decals.

"I dream in fire but work in clay." -Arthur Machen


  • Member since
    January 2016
  • From: Winnipeg, Manitoba Canada
Posted by iSteve on Thursday, September 15, 2016 10:47 PM

Ah. Thanks for clearing that up for me Gamera. I thought the pylons might have been separate. Sorry I couldn't have been of more help. It just seems so weird how they could twist so much like they did.

  • Member since
    May 2016
Posted by RockyD on Friday, September 16, 2016 2:27 AM

Your not alone here..I have built this kit and had the exact problem you are describing...and I did the pretty much the same thing you did but with brass rod and 5 min epoxy, I did build a jig out of legos to keep them both straight


  • Member since
    November 2009
  • From: SW Virginia
Posted by Gamera on Friday, September 16, 2016 7:42 AM

Hey Steve, thanks for trying to help. I can use every little bit! 

And Rocky, thanks too. I was really starting to wonder how I'd screwed the kit up. 

"I dream in fire but work in clay." -Arthur Machen


  • Member since
    March 2010
  • From: Boston
Posted by mach71 on Sunday, September 18, 2016 9:03 PM

Can I get in on this? I don't know I missed this.


Not sure what I'll build, I have a very wide collection of trek stuff.

  • Member since
    June 2010
  • From: Berwyn!
Posted by Beans on Monday, September 19, 2016 11:16 AM

mach71

Can I get in on this? I don't know I missed this.


Not sure what I'll build, I have a very wide collection of trek stuff.

You're in like Flyn, mach71. We were waiting for you. We're just getting started.

  • Member since
    June 2010
  • From: Berwyn!
Posted by Beans on Monday, September 19, 2016 11:57 AM

Dry-fitting...

Ugh, seams!

I see lotsa puttying and sanding in my future...

At least the starship gave no heartache...

Sadly, I probably won't see the workbench until Wednesday night. That's all for now.

  • Member since
    September 2003
  • From: AandF in the Badger State
Posted by checkmateking02 on Monday, September 19, 2016 5:40 PM

Nice start, Beans. I remember the AMT Star Trek ships always have lots of heavy seams to deal with.


  • Member since
    March 2010
  • From: Boston
Posted by mach71 on Monday, September 19, 2016 7:46 PM

Thanks!


Now I have to figure out what to build. I'm leaning towards the Classic AMT Enterprise

Tholian Web edition, or maybe the Polar Lights small Enterprise/ Botney Bay. But I do have a Marco enterprise TOS Tricorder to build...


So many choices. I'll pick by the end of the week.

  • Member since
    November 2009
  • From: SW Virginia
Posted by Gamera on Tuesday, September 20, 2016 7:23 AM

If I could find my boatswain's whistle I'd pipe Mach 71 aboard.... Wink

Beans: Yow, that is a bunch of seams. It least there's not much detail to sand off. 


I've gotten most of my kit together. I think the nacelles are mostly straight. Not sure how to mask off the bridge and lower domes and the navigation lights. I'm thinking about using white glue as a liquid mask. 


"I dream in fire but work in clay." -Arthur Machen


  • Member since
    June 2010
  • From: Berwyn!
Posted by Beans on Tuesday, September 20, 2016 2:27 PM

Gamera: That’s coming along nicely.

That’s such a cool looking ship. Every time I see it.

About seams...

Working off seams is the one thing I hate most in modeling. I spend 60% of my time working off seams.

 The deflector shield grid ribs don't line up well either. I'm considering how much time I want to spend sweating over a mediocre kit.

  • Member since
    September 2003
  • From: AandF in the Badger State
Posted by checkmateking02 on Tuesday, September 20, 2016 10:42 PM

Despite the flaws, you've got it looking good, Gamera.  


  • Member since
    November 2009
  • From: SW Virginia
Posted by Gamera on Wednesday, September 21, 2016 7:33 AM

Hey thanks guys. Hope I'll get a little more work done this weekend. 

Beans, I'm with you man- seams are the most hated thing about modeling here as well. Only thing that comes close is making canopies. 

"I dream in fire but work in clay." -Arthur Machen


  • Member since
    June 2010
  • From: Berwyn!
Posted by Beans on Wednesday, September 21, 2016 2:20 PM

iSteve


Beans

Gotta share...

My wife gave me a sheet of Star Trek forever stamps she picked up from the post office yesterday.

Cool huh?


Very cool. Canada Post has a couple of sets available too that I'd like to get. Check out canadapost.ca

I'm tempted to cross the border for a set.

Then, of course, stop by a Tim Horton's for a sack of Canadian Maple's. Oh, and I can't forget to pick up some Red Cap Stubbies too. It's been awhile since I've visited the Great White North.

JOIN OUR COMMUNITY!

Our community is FREE to join. To participate you must either login or register for an account.

SEARCH FORUMS
FREE NEWSLETTER
By signing up you may also receive reader surveys and occasional special offers. We do not sell, rent or trade our email lists. View our Privacy Policy.