SEARCH FINESCALE.COM

Enter keywords or a search phrase below:

75th Anniversary of 1942 (World at War)

39074 views
860 replies
1 rating 2 rating 3 rating 4 rating 5 rating
  • Member since
    September 2003
  • From: AandF in the Badger State
Posted by checkmateking02 on Thursday, July 5, 2018 7:52 AM

Great-looking plane, Steve.  Nice work!


  • Member since
    July 2014
Posted by modelcrazy on Sunday, July 8, 2018 4:28 PM

Thank you Check.

I applied the sand color. I'm waiting for the belts to come in before I attach the canopy and complete the fuse, then I'll add the green and red camo.

I am leaving for Boise on the 15th for 2 weeks. If I get the belts in before then I'll put them together and install them. I'll be back on Aug 1st and get back to this.

Steve

Building a kit from your stash is like cutting a head off a Hydra, two more take it's place.


http://www.spamodeler.com/forum/

  • Member since
    September 2003
  • From: AandF in the Badger State
Posted by checkmateking02 on Sunday, July 8, 2018 8:32 PM

That will be a spectacular paint scheme, Steve.

Have a safe trip; see you in August!


  • Member since
    July 2014
Posted by modelcrazy on Wednesday, August 8, 2018 4:06 PM

Check,

I started back on thhe Storch and added the belts. I also installed the canopy and I'm ready to install the gear and paint the yellow on the fuse.

Steve

Building a kit from your stash is like cutting a head off a Hydra, two more take it's place.


http://www.spamodeler.com/forum/

  • Member since
    September 2003
  • From: AandF in the Badger State
Posted by checkmateking02 on Wednesday, August 8, 2018 8:24 PM

Great looking cockpit, Steve.  Nice job!


  • Member since
    July 2014
Posted by modelcrazy on Friday, August 10, 2018 11:22 PM

Check,

I added some brake lines and a few touch-up's are done. The fuse stripe and yellow under wingtips painted. Now comes the camo. I test fit the wings and it looks like I'm going to need to glue them down instead of leaving them removable for transport. Not a horrable thing but it will make it more difficult to move.

Steve

Building a kit from your stash is like cutting a head off a Hydra, two more take it's place.


http://www.spamodeler.com/forum/

  • Member since
    September 2003
  • From: AandF in the Badger State
Posted by checkmateking02 on Sunday, August 12, 2018 9:29 AM

That's a lot of very delicate looking work, Steve.  Nicly detailed engine, too.  Good work!


  • Member since
    July 2014
Posted by modelcrazy on Sunday, August 12, 2018 7:34 PM

Thanks Check,

I started the camo, and still need to do some more adjusting to the green but I forgot to paint the cross on the rudder, so I took care of that. I don't care for decals for something so simple.

Steve

Building a kit from your stash is like cutting a head off a Hydra, two more take it's place.


http://www.spamodeler.com/forum/

  • Member since
    September 2003
  • From: AandF in the Badger State
Posted by checkmateking02 on Sunday, August 12, 2018 8:54 PM

That is looking very sharp, Steve; great camouflage and cross.


  • Member since
    July 2014
Posted by modelcrazy on Monday, August 13, 2018 8:08 PM

Thanks again Check,

I completed the camo and now am ready for the decals.

Steve

Building a kit from your stash is like cutting a head off a Hydra, two more take it's place.


http://www.spamodeler.com/forum/

  • Member since
    September 2016
  • From: Albany, New York
Posted by ManCityFan on Monday, August 13, 2018 8:57 PM

Been watching this build, and realized I had not commented.  You are doing a great job on this kit, Steve.  The pit, the engine, camo...all top notch.  Been fun to watch!

Dwayne or Dman or just D.  All comments are welcome on my builds. 

  • Member since
    September 2003
  • From: AandF in the Badger State
Posted by checkmateking02 on Monday, August 13, 2018 11:18 PM

Absolutely stunning work, Steve!  That is an extraordinary job with the camouflage!

Did you use an airbrush to accomplish it?


  • Member since
    July 2014
Posted by modelcrazy on Tuesday, August 14, 2018 10:42 AM

Thanks D and Check.

checkmateking02
Did you use an airbrush to accomplish it?

Yes, very thin paint, high pressure (the lower pressure, the more spitting with my AB) and very low paint flow. I'm adding decals today, there are just a few. I'm going to try to transport it back to Boise when I return in Sep for the Salt Lack City show. It'll also be safer there, there's not a lot of room at my brothers house for me to store my builds.

I thought about adding it to a dio with a Pz IV. While making a great looking dio, it would be too large for me to display.

Steve

Building a kit from your stash is like cutting a head off a Hydra, two more take it's place.


http://www.spamodeler.com/forum/

  • Member since
    September 2003
  • From: AandF in the Badger State
Posted by checkmateking02 on Tuesday, August 14, 2018 12:53 PM

Thanks, Steve.  It looks really good.  It's been a long time since I tried that kind of camouflage.


  • Member since
    July 2014
Posted by modelcrazy on Tuesday, August 14, 2018 10:59 PM

I applied the decals and decided to do some dot filtering. I needed to tone down the white and add a dusty look overall. I still need to do the undersides then add a sealer before continuing with the weathering.

Before

Steve

Building a kit from your stash is like cutting a head off a Hydra, two more take it's place.


http://www.spamodeler.com/forum/

  • Member since
    September 2003
  • From: AandF in the Badger State
Posted by checkmateking02 on Thursday, August 16, 2018 9:04 AM

That came out very nicely, Steve.  The effect is subtle, but it ties everything in together.  Looks great!


  • Member since
    July 2014
Posted by modelcrazy on Thursday, August 16, 2018 5:22 PM

It does kinda blend everything together and cut the starkness doesn't it? I applied another simi gloss topcoat to protect the filtering and will add chipping on the cowlings, fuel tank covers and landing gear. After that will come streaking and such.
Almost done Check.

Steve

Building a kit from your stash is like cutting a head off a Hydra, two more take it's place.


http://www.spamodeler.com/forum/

  • Member since
    July 2014
Posted by modelcrazy on Thursday, August 16, 2018 9:42 PM

Just a few more things to do now. I want to add some dusting and need to attach the prop and cockpit door. The wings are not glued and will allow me to transport it when needed. The cowling will stay unattached.

Steve

Building a kit from your stash is like cutting a head off a Hydra, two more take it's place.


http://www.spamodeler.com/forum/

  • Member since
    September 2003
  • From: AandF in the Badger State
Posted by checkmateking02 on Thursday, August 16, 2018 11:36 PM

Exquisite work, Steve!


  • Member since
    July 2014
Posted by modelcrazy on Sunday, August 19, 2018 2:54 PM

Thank you Check.

I finished the Storch. This was a nice kit with a great fit. The detail was good but really lends itself to additional AM parts and scratchbuilding. I added RB 1/32 belts and scratched the added engine detail. I used Tamiya acrylic, Testers MM and My Hobby paints followed by oils and finally a dusting of weathering powder.

Steve

Building a kit from your stash is like cutting a head off a Hydra, two more take it's place.


http://www.spamodeler.com/forum/

  • Member since
    September 2016
  • From: Albany, New York
Posted by ManCityFan on Sunday, August 19, 2018 6:23 PM

Steve, that is a masterpiece!  What else can I say but Bow DownBow Down

Dwayne or Dman or just D.  All comments are welcome on my builds. 

  • Member since
    September 2003
  • From: AandF in the Badger State
Posted by checkmateking02 on Sunday, August 19, 2018 10:44 PM

Absolutely fantastic, Steve!  What a great piece of work that is--so very delicate and almost insect-looking!  Nice job!

Which photo do you prefer for the finish-picture?

Thanks again for being part of the GB.  You're artistry is always exceptional.


  • Member since
    July 2014
Posted by modelcrazy on Sunday, August 19, 2018 10:55 PM

Thanks D and Check Embarrassed. If I can get it up to Boise in one piece (or more accurately, 3) I can hopefully find someone who is going to the Salt Lake show on the 22nd and take it with them. My wife and I are going the opposite direction that weekend to the coast near Seattle so I won't be personally attending.

Check, I  think the first or second one will do fine, thank you.

Steve

Building a kit from your stash is like cutting a head off a Hydra, two more take it's place.


http://www.spamodeler.com/forum/

  • Member since
    February 2010
  • From: Berkeley CA/St. Paul MN
Posted by EBergerud on Sunday, August 19, 2018 11:02 PM

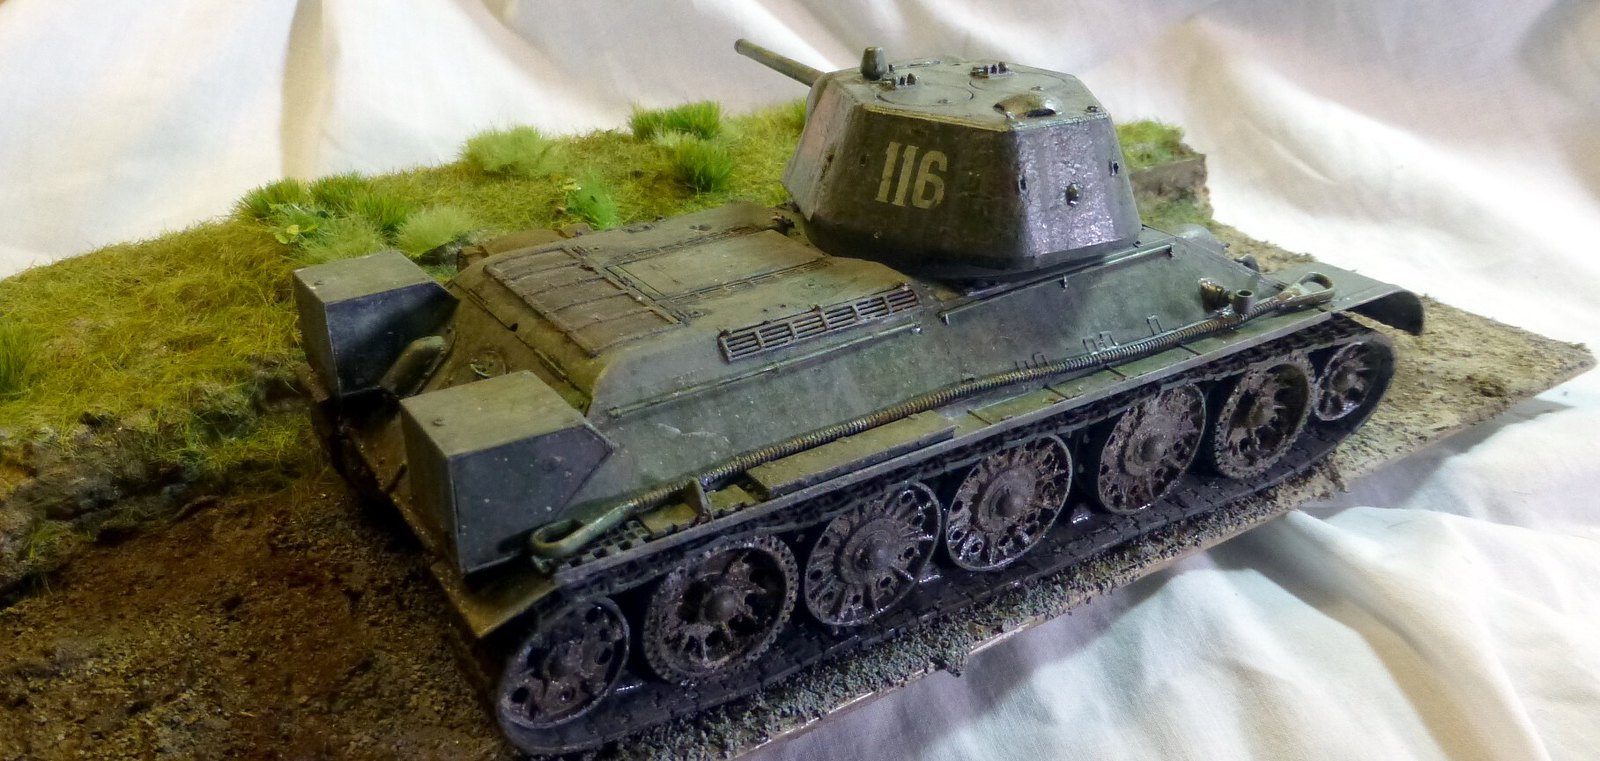
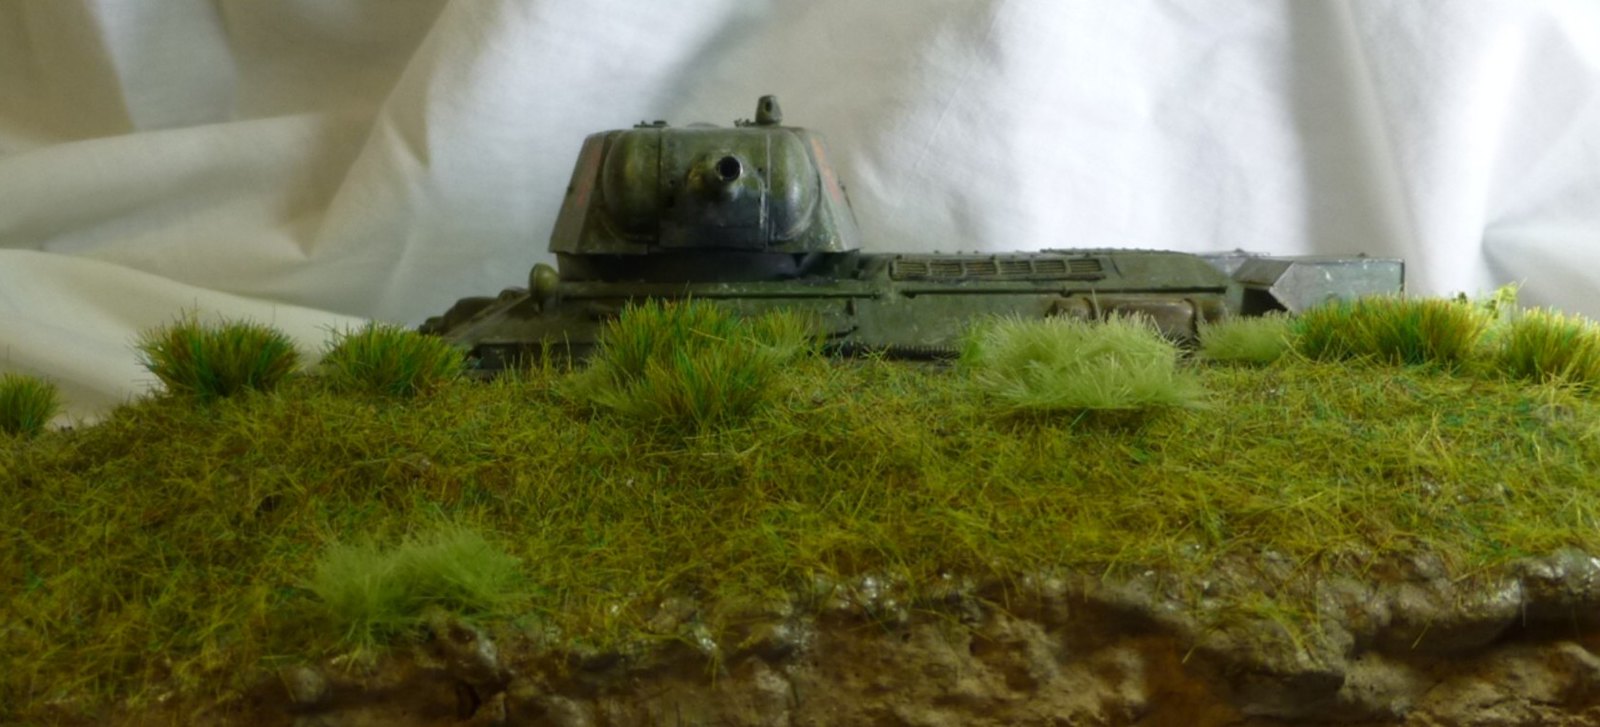
Glad to see the GB is back - for the moment anyway. We've lost at least six weeks of posts - the Commonwealth GB lost more. Knock on wood I guess. On the front, I note that my T-34 is absent. So for archival purposes, I repost my final reveal on that kit.


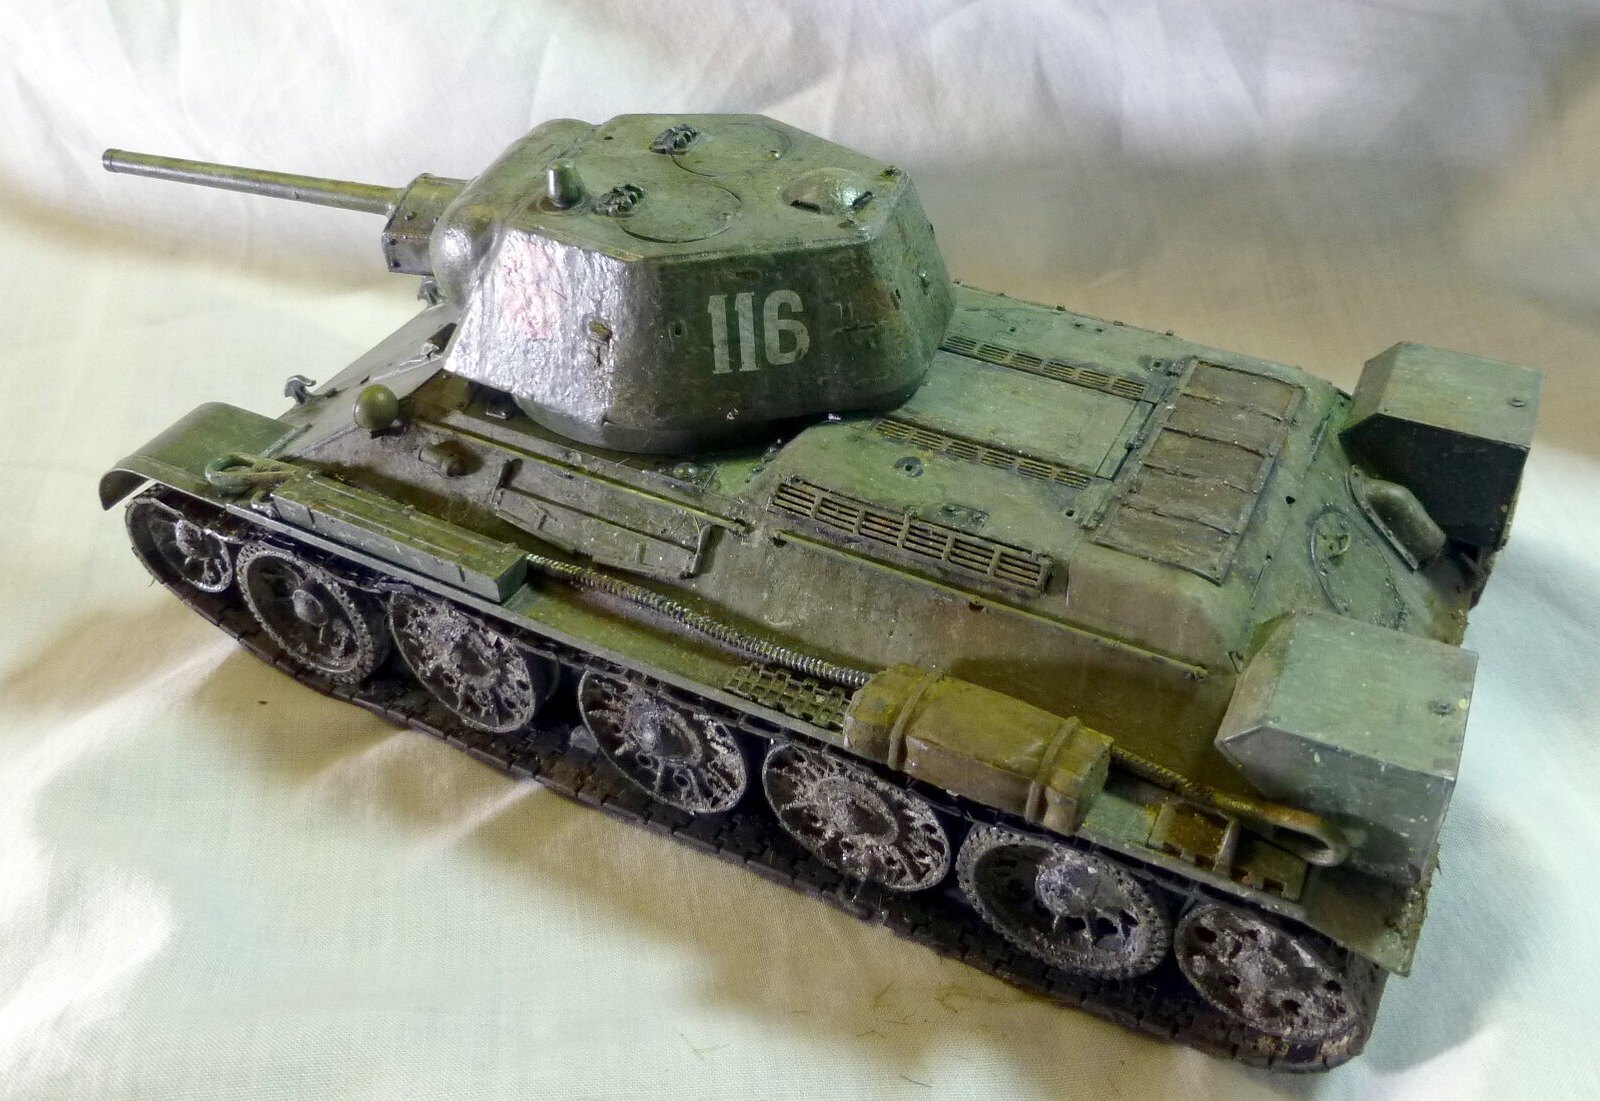
OK: I think we have a wrap on the Kusk T-34/76.


Kit: 1/35 ICM T-34/76


Paints: Golden High Flow Acrylics


Weathering: Vallejo Washes, Vallejo Acrylic Weathering Effects, Wilder AquaLine Weathering Products, Medea Com.Art Paints, Sennelier pigments. MIG oils


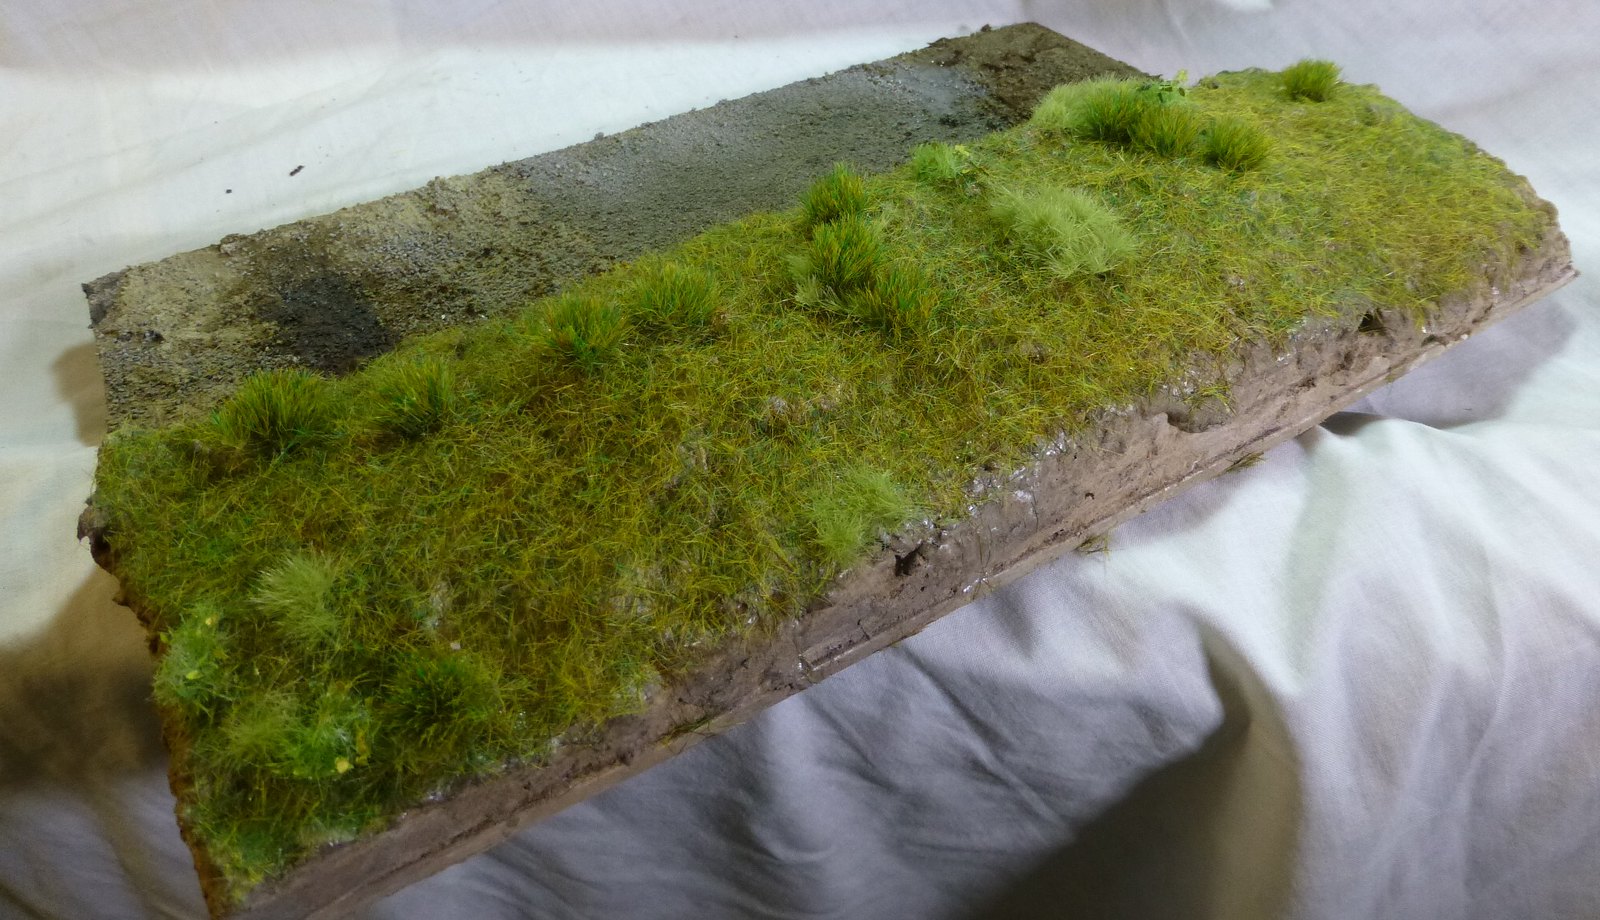
Base: PVC Foamboard, Sculptamold, Static Grass – GrassTech USA Applicator I & WWS Weathering Products (2mm, 4mm, 6mm grasses) & Silfor prepared 10mm clumps.
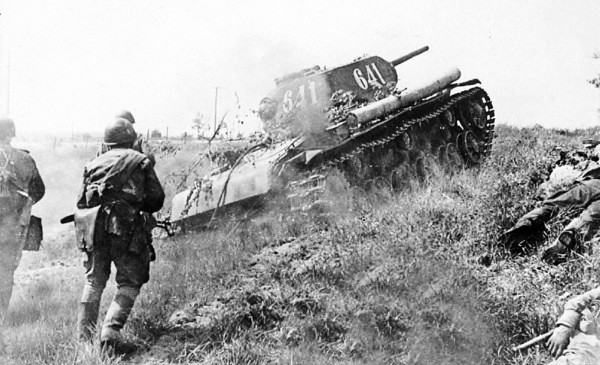


 00kursk by Eric Bergerud, on Flickr


 0base-tnk-n2! by Eric Bergerud, on Flickr


This build turned was longer and more complex than I planned. Normally I find the greatest challenge in trying to evoke a historic artifact as realistically as possible – splendid modelers like Mig Jimenez argue this approach is both impossible and no fun. I'll live with the impossible – that's inherent in modeling – and enjoy trying to catch a bit of reality. Aside from that, I don't have the graphic skills to create some of the really fancy effects often seen by elite armor modelers and now even in airplanes. (AMMO/MIG published a jaw-dropping book on aircraft weathering by Jamie Haggo which I found well worth the money. Check Phil Flory's channel for an hour chat with the gent. Remarkable stuff done with panache and skill. But real? No, but if you can master those techniques you could tone things down easily. This is not a right/wrong matter.) Ship modelers, perhaps because of the time required on their builds, are much too restrained in my view, at least when picturing warships in heavy action.


But on this build I wanted to follow the bouncing ball on a 23 episode KV-1 build sequence on YouTube done by Adam Wilder, my favorite AFV guru. So this meant trying to create acrylic equivalents of the multitude of steps produced by Adam often using enamels. Overall, as Wilder himself points out, one doesn't need 22 weathering steps to make a good kit. I just thought I'd try it. I've done bases before and I thought I'd give static grass applied with an electric/ion applicator a try – another new. In other words, I spent a lot of time trying things out. I learned a lot and hope it will pay off down the road. So this was a kind of self-tutorial. I don't think I did much damage throwing everything but the kitchen sink at my humble T-34.


But there was history always in the background. This is a 1943 build, and that means Kursk, especially if you've never built a T-34. (That was me.) The model presented here by ICM was very late 42/early 43 and would have been at Kursk in large numbers. Russians went through tanks fast. Ironically, one of these models could have been a veteran in Russian terms because of the long lull in the East after the early 43 thaw and Manstein's recapture of Kharkov. Once Hitler decided on a 1943 offensive (there was opposition in OKH) the Germans needed to get everything they could to the East to launch an offensive. (It's true Manstein wanted to hit the Kursk salient created by his Kharkov victory in May, but with the strength then available it could only have been a “spoiling attack.” A substantial victory needed more tanks, troops and planes of all types – not just the Panthers and Tigers.) Stalin decided to stand on the defensive which meant an unusually long delay: fun started on July 4. During May/June the Soviets built a multitude of defenses in the Kurk area. The salient was about half the size of England. Was that big? It did dwarf Normandy. But it was much smaller than the Stalingrad/Baku front of 1942, which in turn was much smaller than Barbarossa in 1941. You can see what direction the war was following. Nevertheless a million Soviet troops plus were inside the salient – and more just to the west, northwest (Orel) and southwest (Belgorod). The Orel counter-blow of mid-July was a devastating German defeat almost lost to history because of the more famous failue at Kursk proper. When another counter-blow started south of the salient around August 1, the entire German front was sent fleeing to the Dnieper and Leningrad liberated.


What this meant was that a Russian tank preparing for Citadel would have spent weeks in intensive training. Russian dispositions were changed on an almost weekly basis depending upon fresh intelligence. Everyone would have been moving around a lot. And people were digging. Hundreds of miles of trenches and new roads were built inside the salient including defensive positions of every type. There was a lot of rain, a lot of sun and a megaton of dust. This was the steppe. Under normal circumstances there would have been huge areas cultivated with grain, but with the local population digging this would have been largely fallow ground. But if you look at pics of the battlefield you can see thick grasses all over – probably a lot of it wheat that had planted itself. It was July, so I'm thinking the foliage would have had summer colors. But it would have been spare on trees and no major urban areas outside of Kursk itself. So I was thinking dust, dry mud, serious wear but not damage like missing fenders. There were hundreds of tanks inside the salient and many were literally “dug in.” That would have made a neat base but hid the tank, so I put a well worn T-34 “hull down” on a road behind a mound of earth and pretty dense grass. I think in the real world, the tank would have looked for a little more earth to guard everything but the turret, but that too would have hid the model. In any case, if you check the Kursk photo above, I think you can get the idea.


Back to the tank. Gurus like Wilder and Mike Rinaldi talk about “layering” a tank's weathering. Actually as the steps built up, you could see what they were getting at. Here's the base coat (I didn't keep the exact recipe – think it was platho blue, cadmium yellow, raw umber and SAP green):
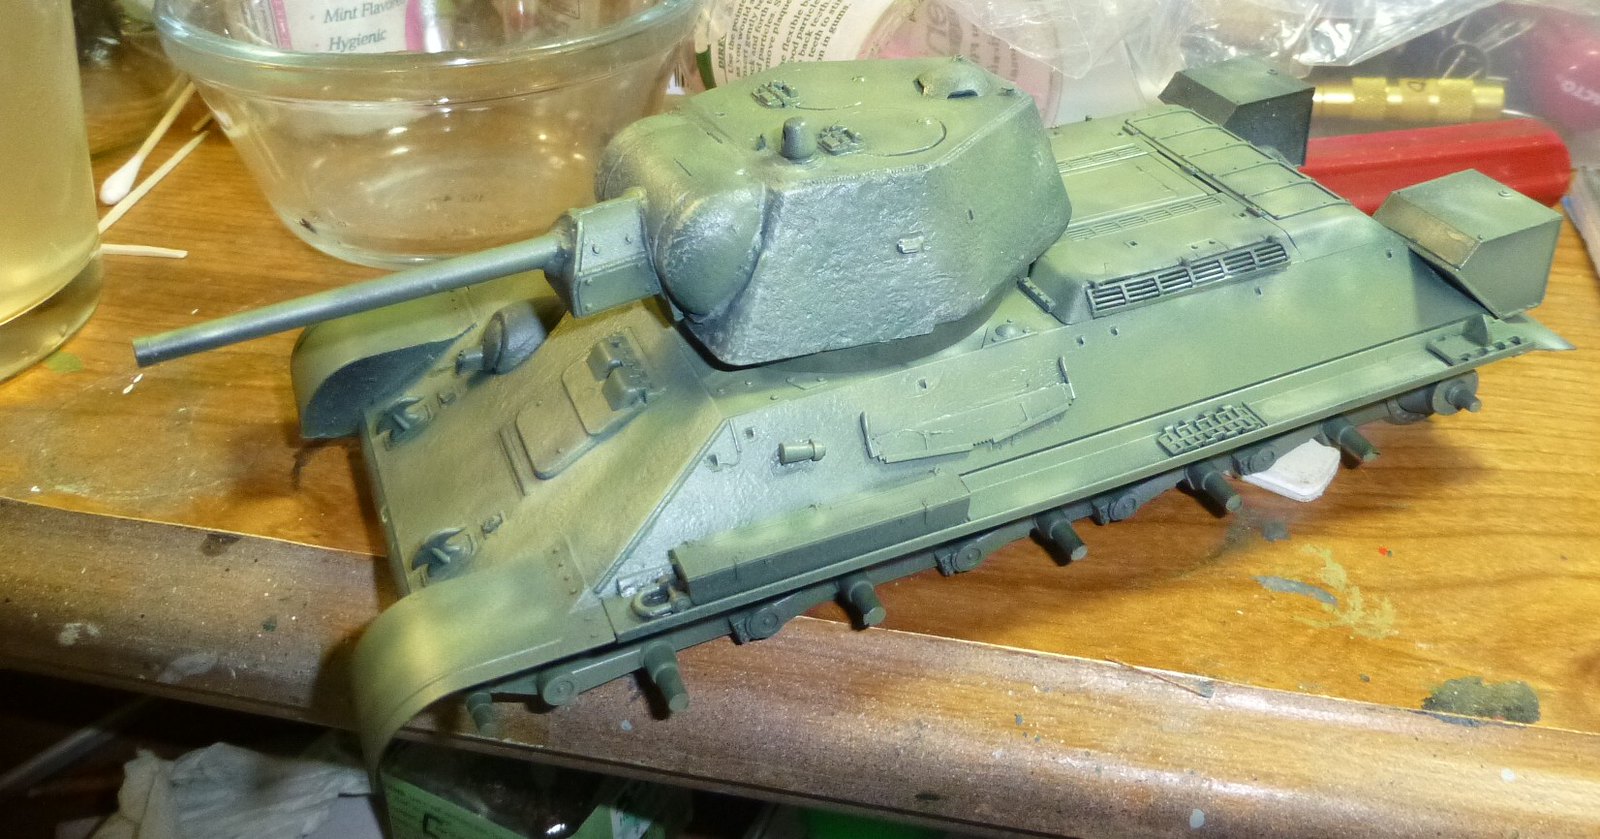
 

 meld! by Eric Bergerud, on Flickr


Here's how it looked after filters, oil dots and chipping. I was actually a little worried about the chipping getting out of hand:
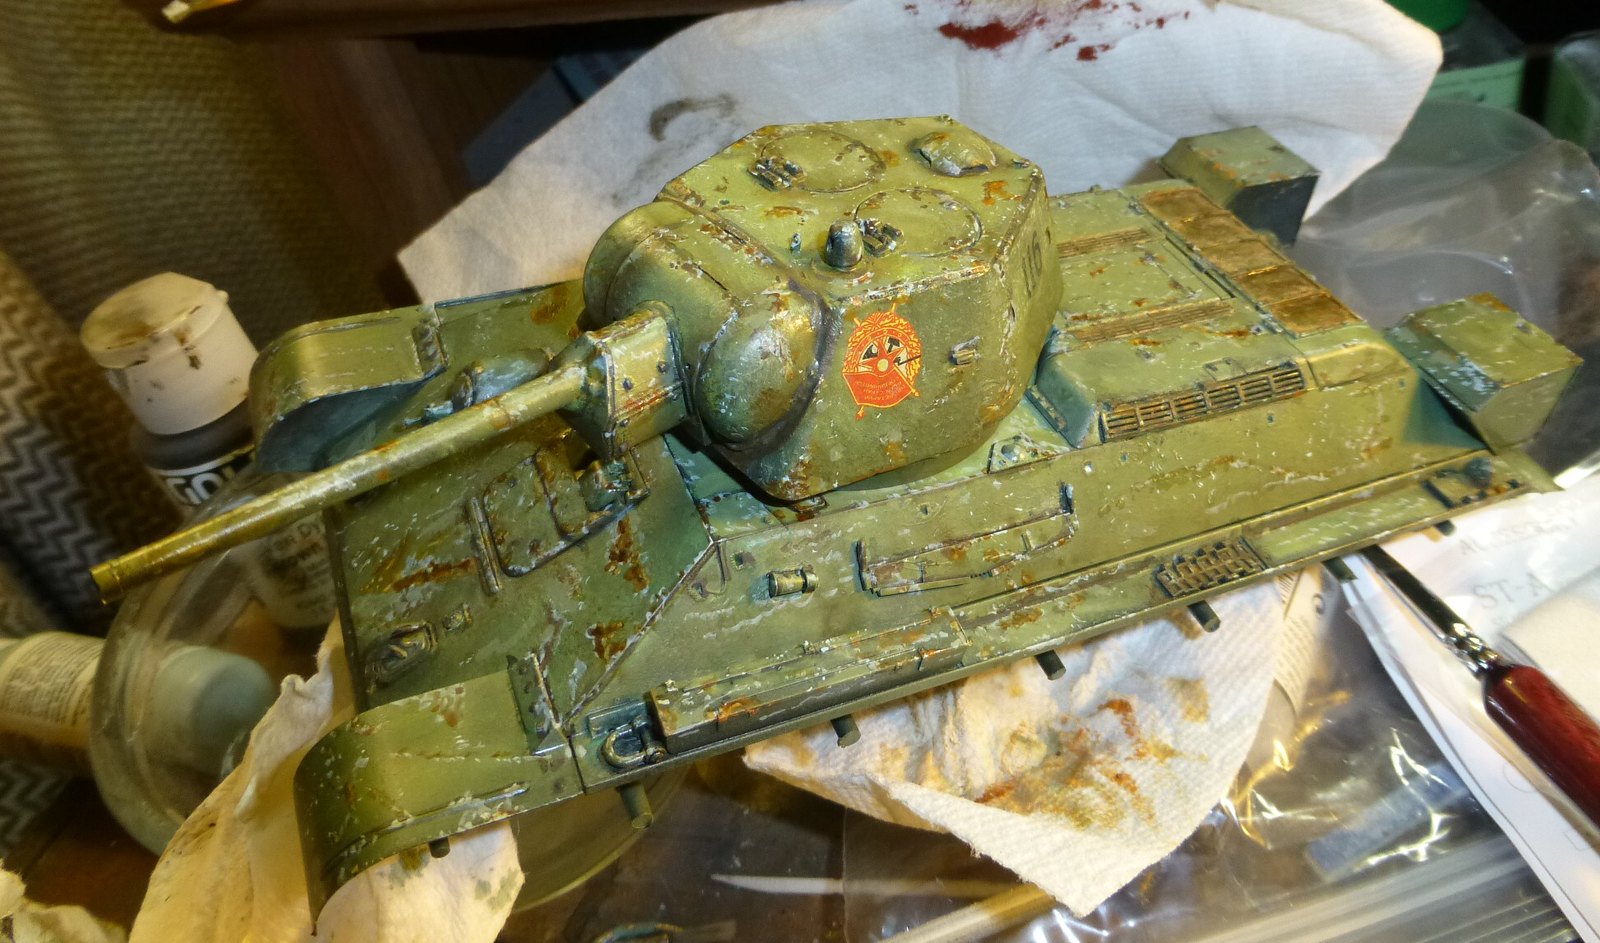
 

 chip1 by Eric Bergerud, on Flickr


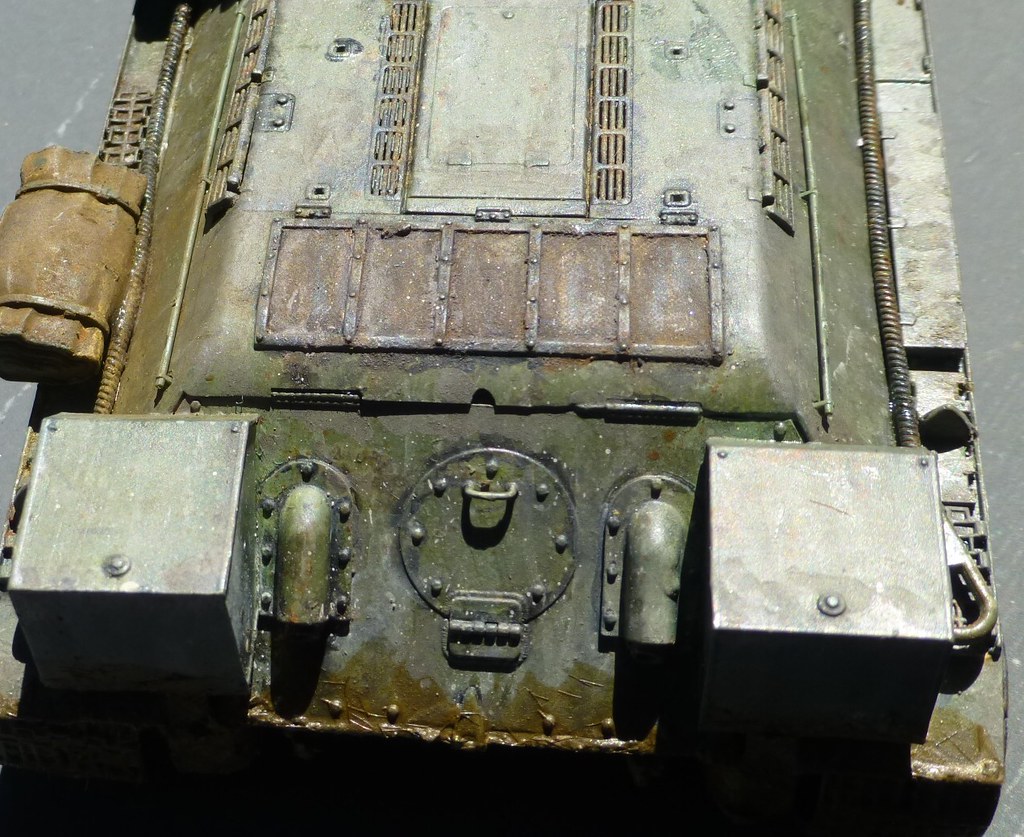
I admit that I elminated some chips with base coat, but not many. What followed was extra fading, streaking (with Com.Art, Vallejo Washes and Wilder's acrylic stuff) and very complex layered pigments. The result is quite different:


 1aRT-tank by Eric Bergerud, on Flickr


 1blft-tank by Eric Bergerud, on Flickr


Here are some close ups – the surface is much richer than anything else I've done in armor.
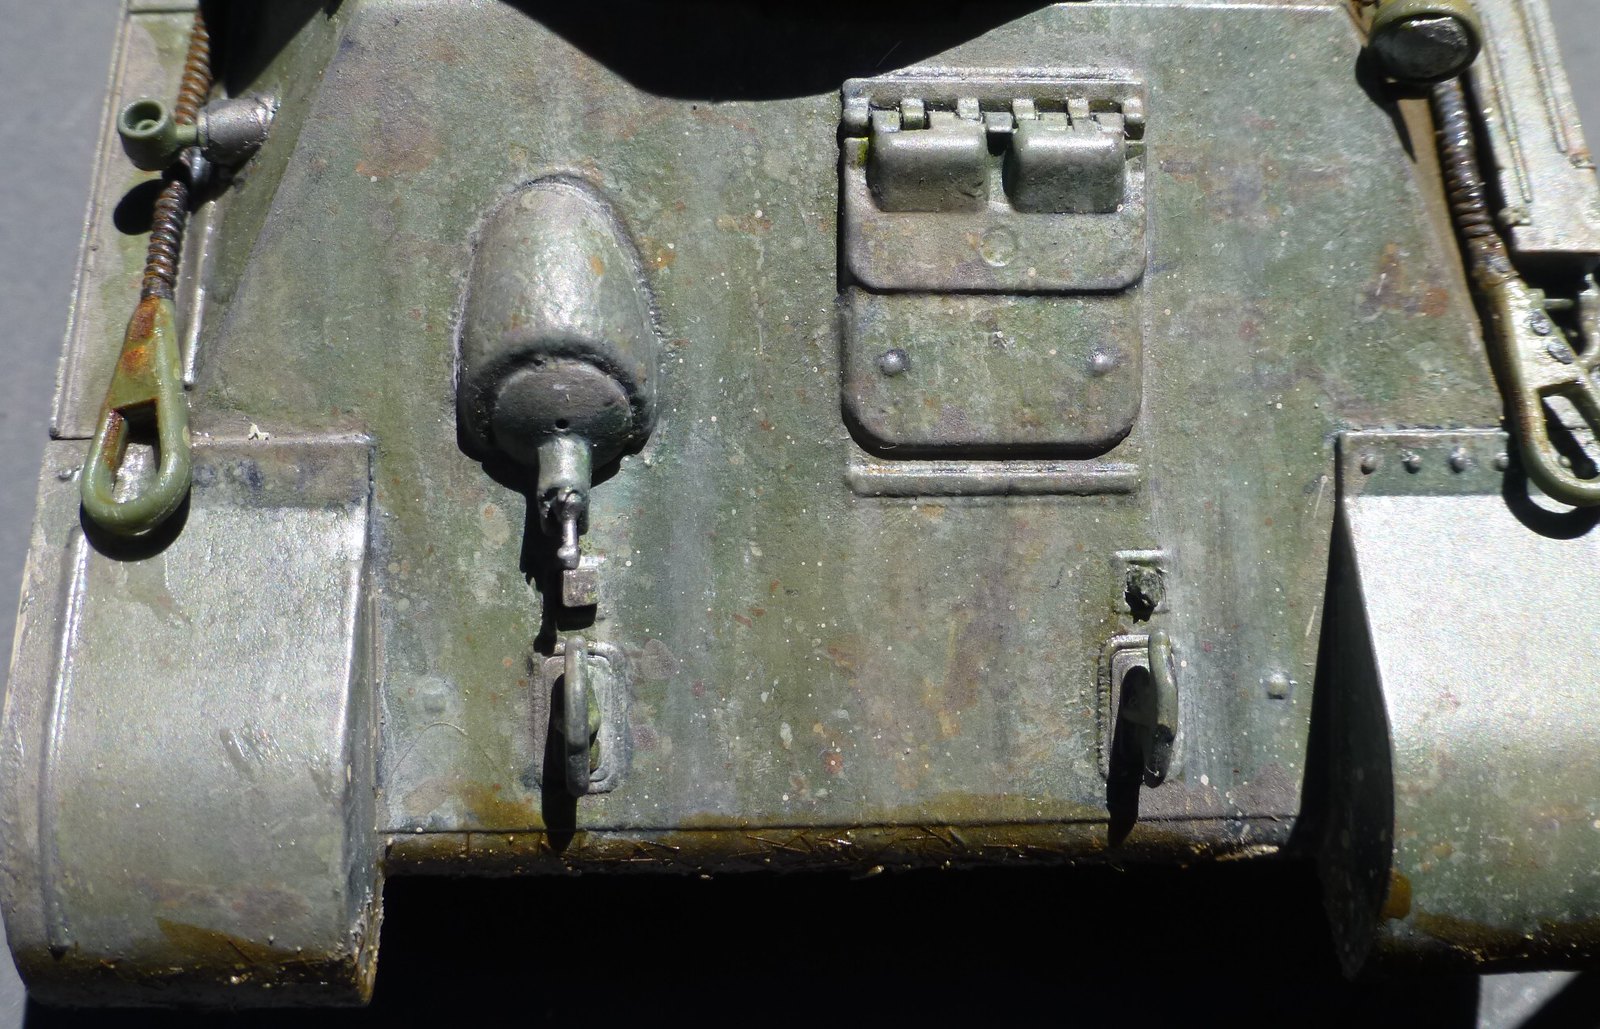
 

 1D-FT-O! by Eric Bergerud, on Flickr


 1D-Rear-O by Eric Bergerud, on Flickr
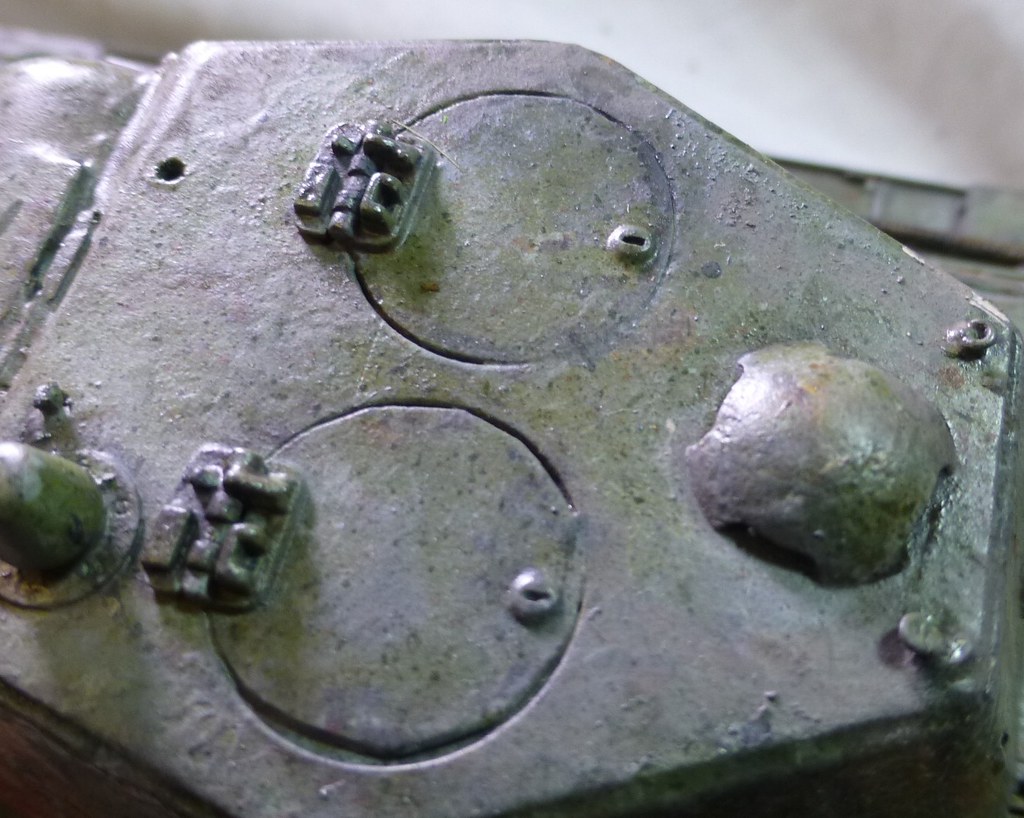
 

 1Det-Tur-Top! by Eric Bergerud, on Flickr


As noted I wanted a base. This vignette really needed static grass and so I got some. This is different stuff from usual flock which is normally some kind of colored sawdust. Instead it's nylon fiber. You attach an electronic gizmo to a nail in the base which creates static electricity, and you dust static grass out of a round sieve on the gizmo (carefully – a shock would wake you up). And sure enough, the stuff stands up. I used static grass from a Brit company WWS in sizes of 2mm, 4mm and 6mm in four different colors. I added some prepared 10mm clumps from the pricey company Silfor – you'd need a larger applicator to apply 10mm grass. The base is PVC Board. This stuff is a real find. It's very light, doesn't warp and is very strong. You cut it with several passes with a good utility knife, so it's much tougher than foam board, but much easier to use wood products. I bought a 12X12X3” piece on Amazon for $6 and have enough left over for another tank dio. The stuff is often used to back photos or make signs – it's much cheaper by bulk. Definite thumbs up, although I'll stay with styrofoam for sea bases. Here's the base and a detail pic:
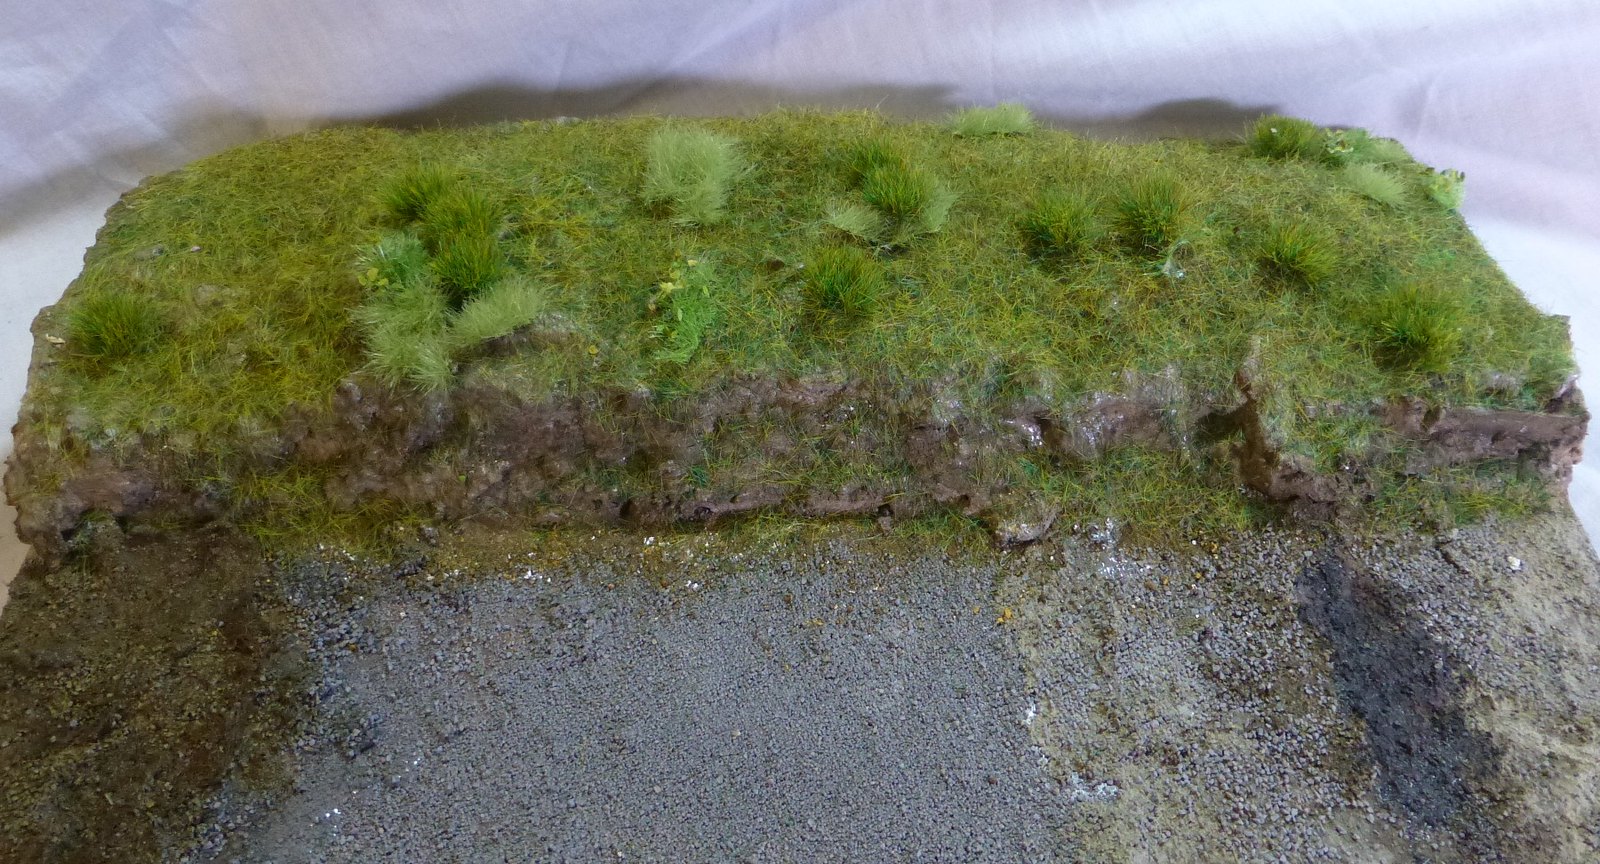
 

 2base2 by Eric Bergerud, on Flickr


 2base1 by Eric Bergerud, on Flickr


 2grass-D by Eric Bergerud, on Flickr


Well, below are some pics of the tank on the base and that's it. I hope to get another tank in on this GB before year's end (Panther or Sherman – not sure). But next up, is an Airfix Tomahawk done in Desert Air Force colors that I owe Bish for the Commonwealth build.


Eric
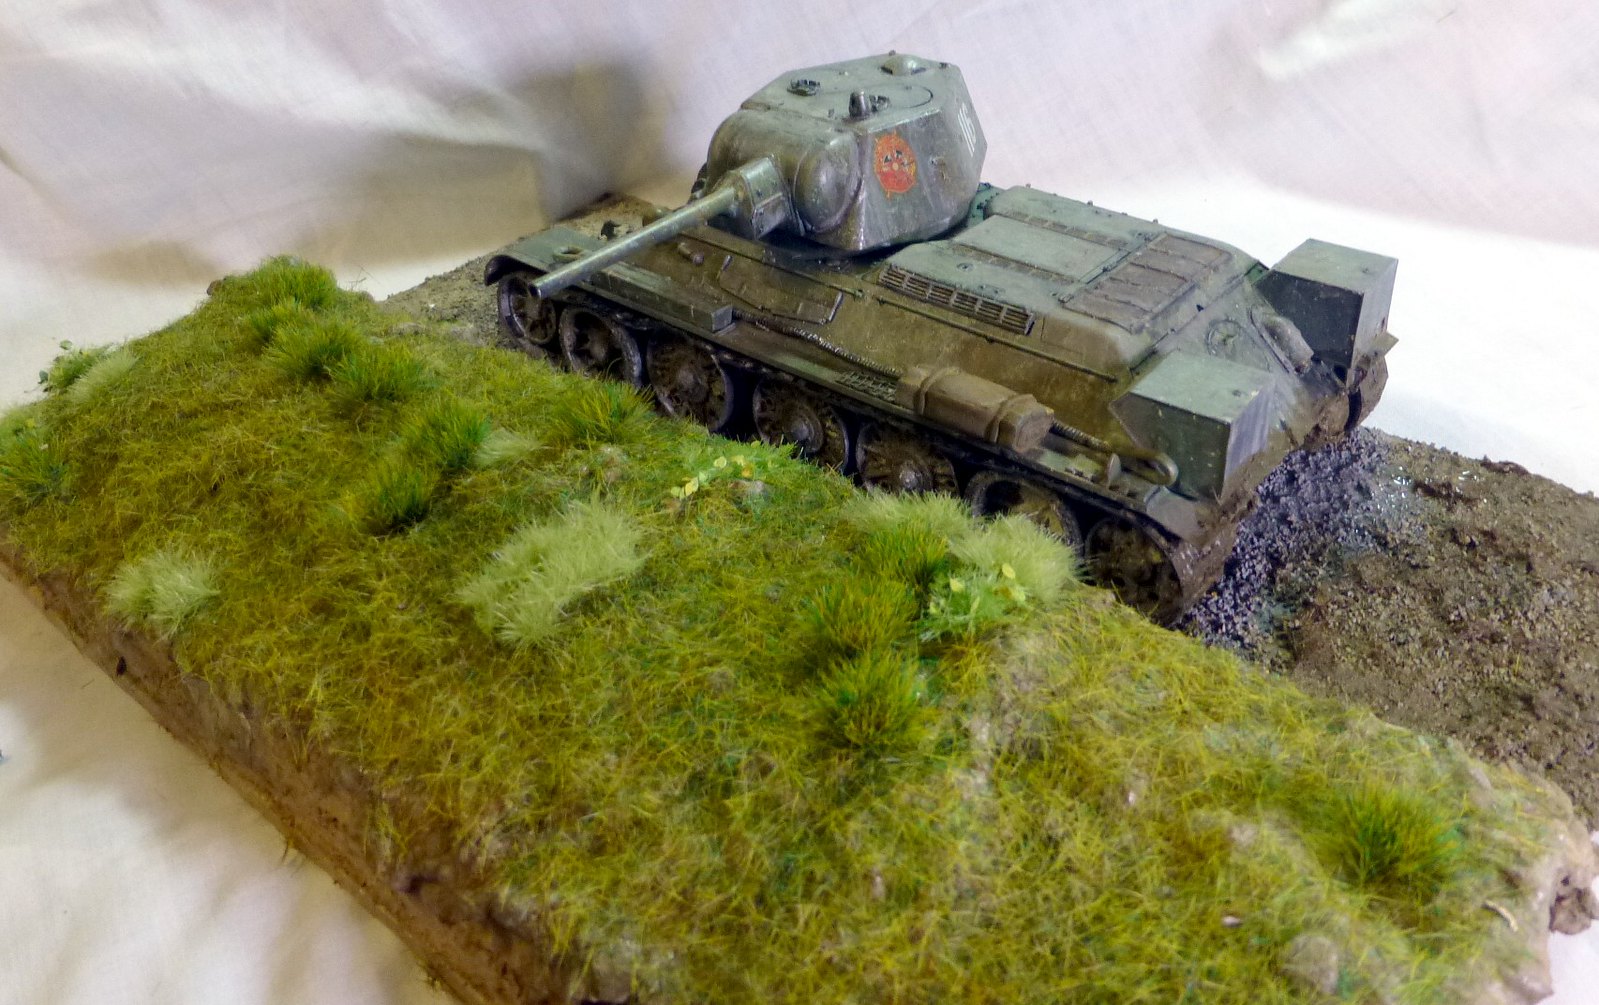
 

 3lft-rearV by Eric Bergerud, on Flickr
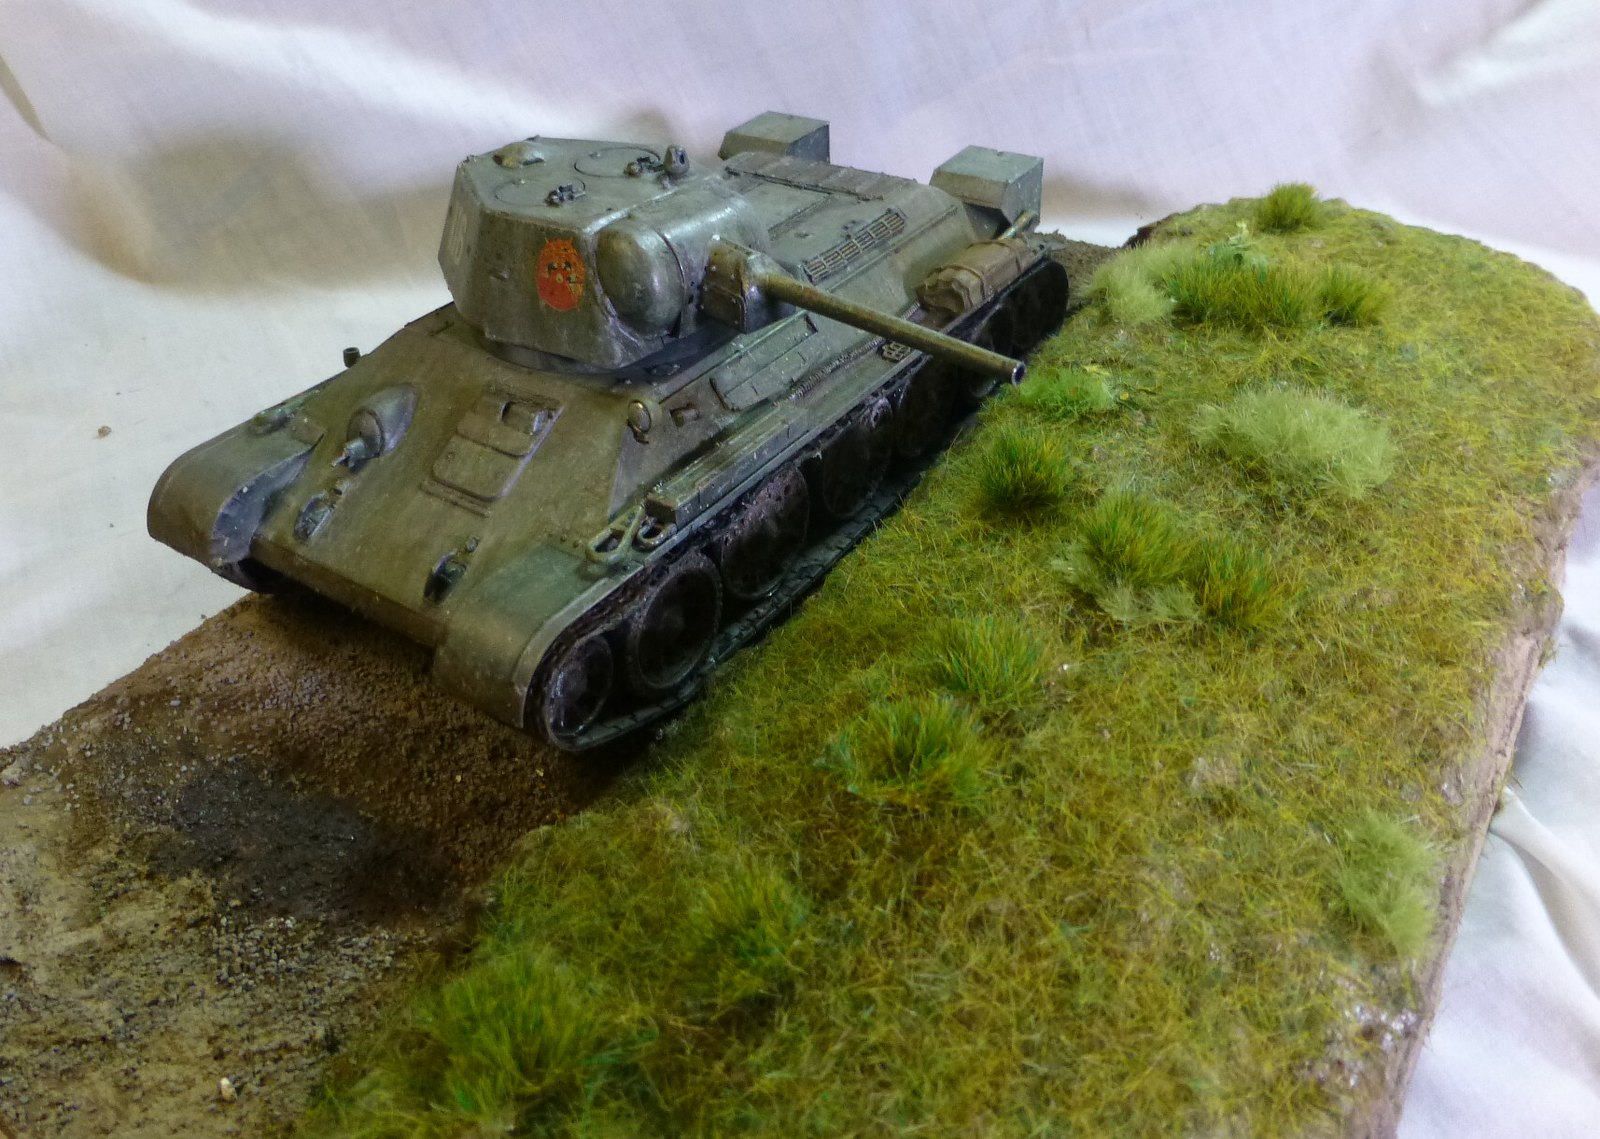
 

 3lft-ft-V by Eric Bergerud, on Flickr
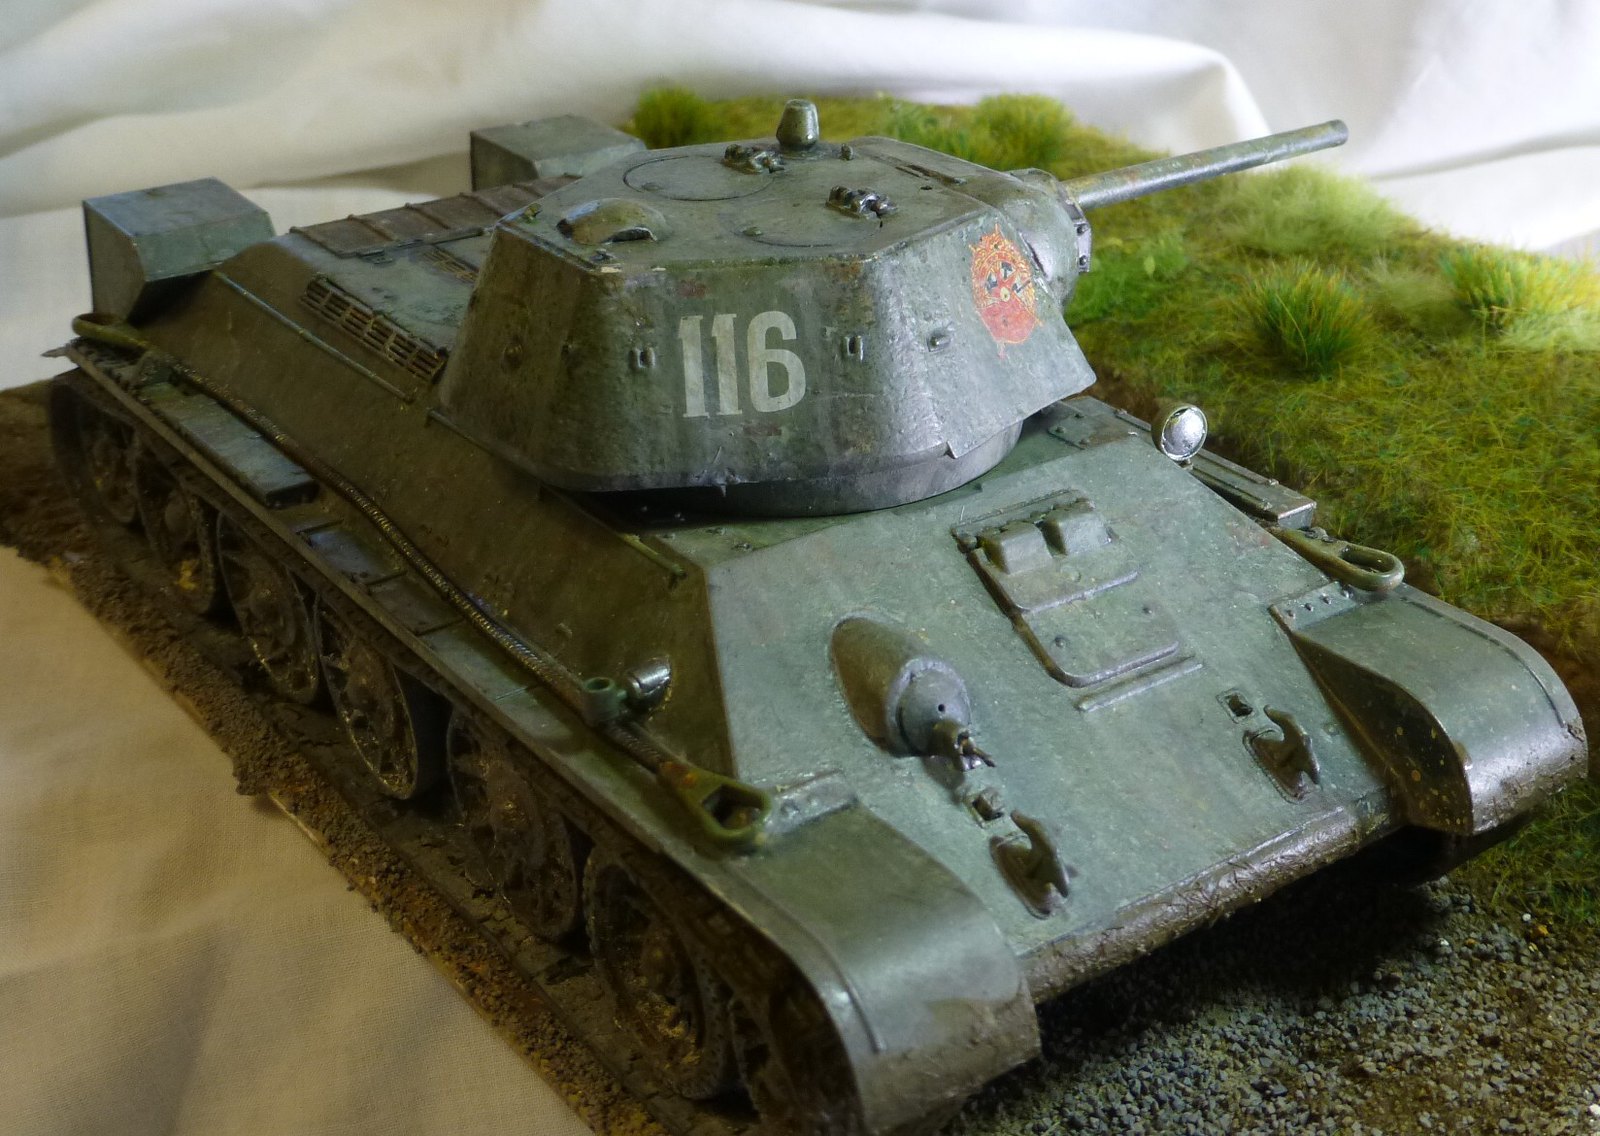
 

 3-RTFT-V! by Eric Bergerud, on Flickr
 

 3R-R-V by Eric Bergerud, on Flickr
 

 L-Vig! by Eric Bergerud, on Flickr


A model boat is much cheaper than a real one and won't sink with you in it.

  • Member since
    September 2003
  • From: AandF in the Badger State
Posted by checkmateking02 on Monday, August 20, 2018 3:26 PM

Thanks, Steve.  Finished photo is posted.  Thanks for being part of the GB.  Hope the plane arrives at it's destination safely.


  • Member since
    September 2003
  • From: AandF in the Badger State
Posted by checkmateking02 on Monday, August 20, 2018 3:34 PM

Hi, Eric.

I have your T-34 included in the 1943 GB, not the 1942 GB.  It still appears in the finished-photo roster in 1943, safe and sound.

For the 1942 GB, I have you listed for a Panzer IVD and a Wildcat, both of which you finished, and the photos are posted.

Sorry for any confusion!  Embarrassed  I wasn't aware that any threads were having problems, except for the late, lamented photobucket scandal.  


  • Member since
    April 2019
  • From: South west, PA
Posted by Tomcat on Wednesday, September 11, 2019 7:08 PM

My World at War 1942 group build entry will be this American workhorse...

Mark aka Tomcat

On the workbench: Monogram 1/24 '69 Pontiac GTO and a Monogram 1/67 (box scale) B-26 Invader

  • Member since
    September 2003
  • From: AandF in the Badger State
Posted by checkmateking02 on Thursday, September 12, 2019 4:17 PM

Mark:  I've added the Liberator to the build roster.  

You are bringing back memories with your build.  Revell's 1/72 line was pretty innovative when they came out.  They had quite a number of WWI and WWII planes.  And the great thing was the consistent scale.


  • Member since
    April 2005
  • From: Australia
Posted by taxtp on Monday, November 18, 2019 6:11 PM

As I continue to catch up on the GBs that I've missed, I find that I've completed the Coree Productions Hans Joachim Marseille figure. I'm not going to build the Buffalo any time soon, please delete it from the roster. Here are my photos.

Cheers

Tony

I'm just taking it one GB at a time.

  • Member since
    September 2003
  • From: AandF in the Badger State
Posted by checkmateking02 on Saturday, November 23, 2019 12:07 PM

Nice job, Tony.  Good paintwork, effective shading and highlights!

Do you have a preference for the front page?

I'll take off the Buffalo.

Thanks for being part of the GB.  It's always a pleasure to see the work you do.


JOIN OUR COMMUNITY!

Our community is FREE to join. To participate you must either login or register for an account.

SEARCH FORUMS
FREE NEWSLETTER
By signing up you may also receive reader surveys and occasional special offers. We do not sell, rent or trade our email lists. View our Privacy Policy.