SEARCH FINESCALE.COM

Enter keywords or a search phrase below:

The Airfix Farewell GB from now until 1st Jan 2007

25346 views
408 replies
1 rating 2 rating 3 rating 4 rating 5 rating
  • Member since
    April 2003
  • From: Edgware, London
Posted by osher on Wednesday, October 18, 2006 4:42 AM
Hey Sirdrake, that Avro's really coming along.  Funny, I just realised, I never thought of rigging when setting the OOB rules, but as they're the same sort of thing as seatbelts (essential bits left for the modeller to add), they're cool.  I really can't wait to see it finished, if nothing else, because I'd love to see how you've rigged it up!

jwb, that Spit look great, and yes, the F.22/24 is a great kit.  The Eduard kit is actually the Airfix kit, which I think shows the quality of the kt.
  • Member since
    January 2006
  • From: K-Town, Germany
Posted by sirdrake on Wednesday, October 18, 2006 7:51 PM
 osher wrote:
Hey Sirdrake, that Avro's really coming along.  Funny, I just realised, I never thought of rigging when setting the OOB rules, but as they're the same sort of thing as seatbelts (essential bits left for the modeller to add), they're cool.  I really can't wait to see it finished, if nothing else, because I'd love to see how you've rigged it up!


Hm, I never thought of it that way, but in a sense rigging of a biplane is not entirely oob because there's no rigging provided in the box Confused [%-)]. But there's diagrams for rigging in the instructions. And a biplane without rigging is just not the real thing. There's something missing. It's an essential part of making it look 'real'... And whatever they told you, it's fun! It builds character Laugh [(-D].

Karl, I usually use 2lb fishing line painted black or 0.05" or 0.08" straight wire, or a mix of both. Depends on how much rigging, where it attaches, the phases of the moon, and what mood I am in...

SD


  • Member since
    May 2006
  • From: Nanaimo, BC, Canada
Posted by Brews on Thursday, October 19, 2006 4:19 PM
I've heard that Aeroclub rigging thread is the cat's whiskers, but I haven't tried it personally.
  • Member since
    July 2003
  • From: waynesboro va, via Ireland
Posted by sidure on Friday, October 20, 2006 11:54 PM

Smile [:)]Hey JWB, talking about the Griffon Spits. I built the 46/47 Seafire quite a few years ago so here are some photos or it. The kit is great in all aspects, fit,detail and great panel lines. Up there with the best of them (Tamigawa etc). Shame they did not make more like this one. This one is done as an Irish Air Corps and was built before I learned some tricks of the trade like panel washing etc. I think I will put some finishing touches to it soon. Hope you like it.

Steve

  • Member since
    July 2003
  • From: waynesboro va, via Ireland
Posted by sidure on Saturday, October 21, 2006 12:07 AM

SD, nice work on the Avro,504 right. I have started the same kit but had to put it on hold for a while. I am almost at the same stage. I have never rigged a bi-plane and would be interested in knowing how you do it and how it turns out.

Steve

  • Member since
    July 2013
Posted by DURR on Saturday, October 21, 2006 11:18 PM

well just some touch up and the decaling is all that is left

then i will do some other model or two and come back here with 1-2 more


  • Member since
    September 2004
  • From: Vernon, BC, Canada
Posted by razordws on Sunday, October 22, 2006 11:15 AM
Steve, nice looking Spitfire.  I did not know such a thing as the Irish Air Corp existed.  Interesting choice, I like it. Smile [:)]

Durr, nice collection of Chipmunks.  Thumbs Up [tup]  Which one is Alvin? Clown [:o)]

Dave

  • Member since
    July 2003
  • From: Bicester, England
Posted by KJ200 on Sunday, October 22, 2006 11:46 AM
Durr, nice job on the Chipmunks.

Finally some pice from me of the Dora....


The panel shading hasn't come out as well as I would have liked, I should have knocked the base colours back more, but overall a fun little kit.

I still need to add the Morane antenna, and the aerial, then it's done.

Once it is I'll post a full set of prpoer photos.

Karl


Currently on the bench: AZ Models 1/72 Mig 17PF

jwb
  • Member since
    February 2006
  • From: Parkton, NC
Posted by jwb on Sunday, October 22, 2006 1:10 PM
 sidure wrote:

Smile [:)]Hey JWB, talking about the Griffon Spits. I built the 46/47 Seafire quite a few years ago so here are some photos or it. The kit is great in all aspects, fit,detail and great panel lines. Up there with the best of them (Tamigawa etc). Shame they did not make more like this one. This one is done as an Irish Air Corps and was built before I learned some tricks of the trade like panel washing etc. I think I will put some finishing touches to it soon. Hope you like it.

Steve

It looks great- thanks for showing that!

Glad to hear it's a good kit- I ordered one this week! LOL

Jon Bius

AgapeModels.com- Modeling with a Higher purpose

"For I know the plans I have for you," declares the Lord, "plans to prosper you and not to harm you, plans to give you hope and a future." ~ Jeremiah 29:11

  • Member since
    July 2003
  • From: waynesboro va, via Ireland
Posted by sidure on Sunday, October 22, 2006 11:48 PM

Durr, really like that chipmunk collection you have going on there.. Got your own squadron?. Good job.

Karl, very nice progress on the dora.

Steve.

  • Member since
    July 2006
  • From: near London, UK
Posted by Pruz on Monday, October 23, 2006 4:28 AM
Wow everyone, some fantastic work going on. Very glad to hear that there are some decent Airfix kits around too. That 48th Seafire sounds like one to get.

Well I've finished the Tonka. Here it is!


Like I said - it was more fun making than it looked at the start, and the decals went on really well.

Looking forward to seeing the others - I'll be watching out!

Thanks osher for a great GB idea.

All the best,
Al
If it ain't Boeing, I ain't going! Finishing off: Revell 1/48 B-1B Lancer for USAF 60th Anniversary GB In production: Revell 1/32 F-16A - C conversion
  • Member since
    April 2003
  • From: Edgware, London
Posted by osher on Monday, October 23, 2006 6:35 AM

WOW!  WOW! WOW!  Pruz you really have tamed the beast!  You taken a monster, and made it into a pet.  The 1/48 Tornado is quite nasty in places, but you've made it look great!  I'm now tempted to pull out my part built one, fix it, and finish it!

You're also the first person to finish completely a model for the GB, well done sir!

  • Member since
    April 2003
  • From: Edgware, London
Posted by osher on Monday, October 23, 2006 6:41 AM
Update: Still struggling (getting fed-up too) with the masking on the caonopy of the MiG-15.  The problem is that when I cleaned it up, I lost most of the canopy lines, and I am not very good when it comes to curves.  Just can't seem to get them right...
  • Member since
    December 2005
  • From: Germany
Posted by jeff on Monday, October 23, 2006 10:54 AM

Great job Al on the Tornado!  Congratulations on a beautiful model.  Osher, hang in there.  I'm certainly no expert on canopies, but it helps me to mask curves using strips of tape cut into smaller pieces.  Just make sure to burnish them together well to help prevent bleed under.

The E-3D is still coming along.  I meant to post some pics by now, but haven't pried the camera away from the wife yet.  I hope to finish painting the rotodome tonight, the CFM-56 engine pods are done, the outer wings are done including the tip-mounted Yellowgate ESM pods (which were a bear, more later), and I even have the warped fuselage glued together (by gluing and clamping them about 3-4 inches at a time, thanks Brews for the tip!)  Now I just need to dig up 6-8 ounces of nose weight, which is harder than it sounds in western Europe due to strict controls on lead, and I can join the wings to the fuselage.  Dry fitting reveals a train wreck in the making at the wing-fuselage joint, but I'll worry about that later!

"Congratulations, gentlemen! You're everything we've come to expect from years of government training." Zed (Men in Black) [IMG]
  • Member since
    April 2003
  • From: Edgware, London
Posted by osher on Monday, October 23, 2006 12:41 PM
 jeff wrote:
Now I just need to dig up 6-8 ounces of nose weight, which is harder than it sounds in western Europe due to strict controls on lead
Hobbystores here in the UK sell it, for use in flying models.  The stuff I use comes in small rectangles, is self-adhesive.  It's from Great Planes or something like that.  I'm guessing it's sold in Germany too.  If you are really struggling, maybe we can organise something?
  • Member since
    July 2003
  • From: Bicester, England
Posted by KJ200 on Monday, October 23, 2006 2:45 PM
Al, stunning job on the 'Tonka'.

You'd never believe it was an Airfix kit.

Karl

Currently on the bench: AZ Models 1/72 Mig 17PF

  • Member since
    July 2003
  • From: waynesboro va, via Ireland
Posted by sidure on Monday, October 23, 2006 11:27 PM

Al, great job on that Tonka. Very impressive finish and you made the Airfix kit a stunner. It goes to show what a little patients and hard work can turn out. Great job and a fast build. Congrats.

Steve

  • Member since
    September 2004
  • From: Vernon, BC, Canada
Posted by razordws on Monday, October 23, 2006 11:50 PM
Al... Sign - Ditto [#ditto] to all of the above.  Great Job!!!

Dave

  • Member since
    July 2013
Posted by DURR on Wednesday, October 25, 2006 10:20 AM

GREAT work guys


seeing that my chipmunks will be done in about 48 hrs i am going to enter

2 or 3 fiat g91r in as well s/b able to start them by 10/30 or 10/31

prior to this group build i only entered 1 other about a yr ago

and now i have this one and an other going at the same time

and i must say

as much fun as i have doing models (although i am a touch below avg in the talent area) this has brought my fun level way up

thanks guys

  • Member since
    December 2005
  • From: Germany
E-3D progress report
Posted by jeff on Thursday, October 26, 2006 2:10 PM

Finally, photographic evidence that I am indeed building a model for this group build.

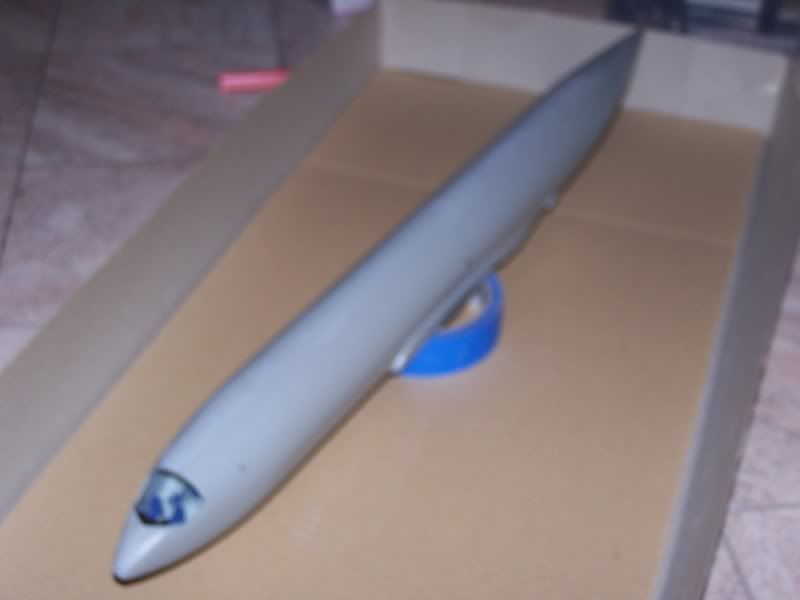
Sorry for the blurry pic, but here's the fuselage.  Almost ready to glue on the flight deck clear piece and lower wing section.  After forcing the warped halves together, it didn't really require much filler.
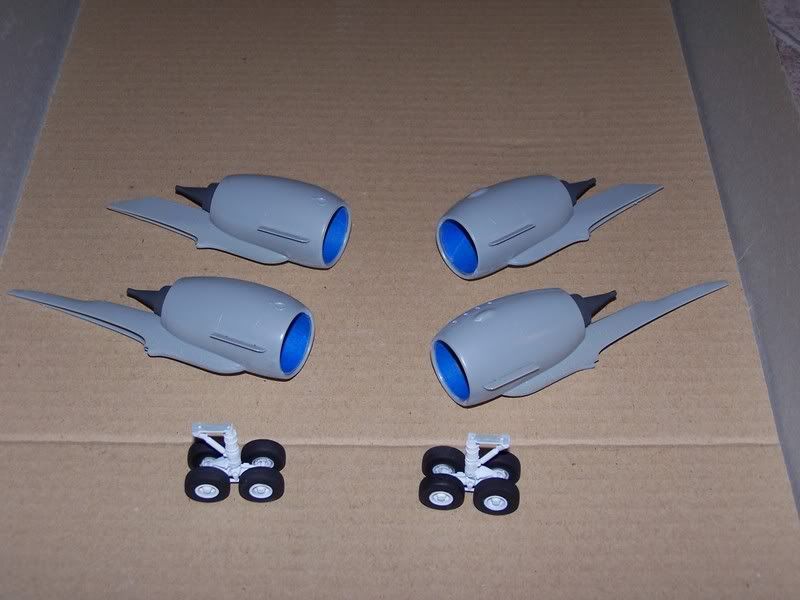
Here are the CFM-56 engine pods and main gear trucks.
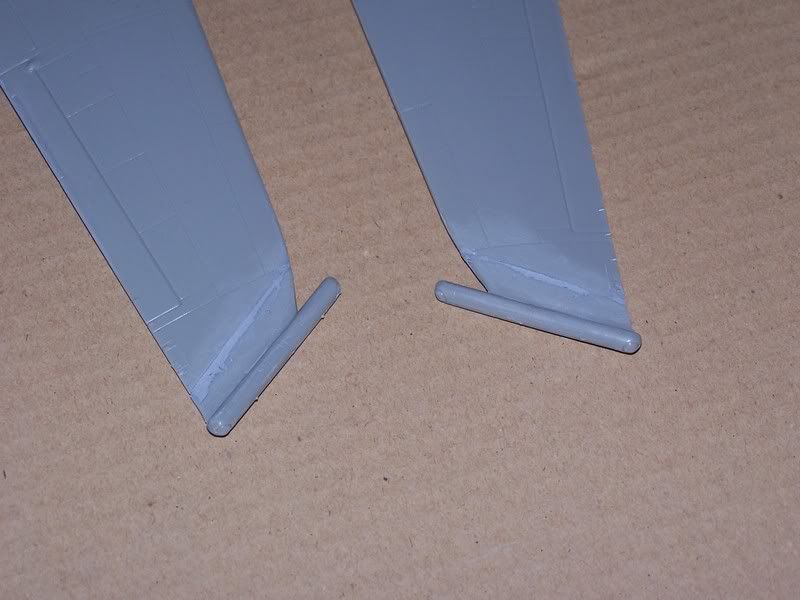
Here are the Yellowgate ESM wingtip pods.  These were a pain in the rear.  Even though the kit is an E-3D with the option to build an E-3F (French), the E-3F would be an easier build because Airfix requires you to cut 1/2 inch off the wingtips to mount the pods.  Even worse, they really aren't accurate, as one reviewer noted, the wings should proceed straight to the pods, not sweep back as on the model.  At least Airfix scored the inside of the wing to make cutting easier.
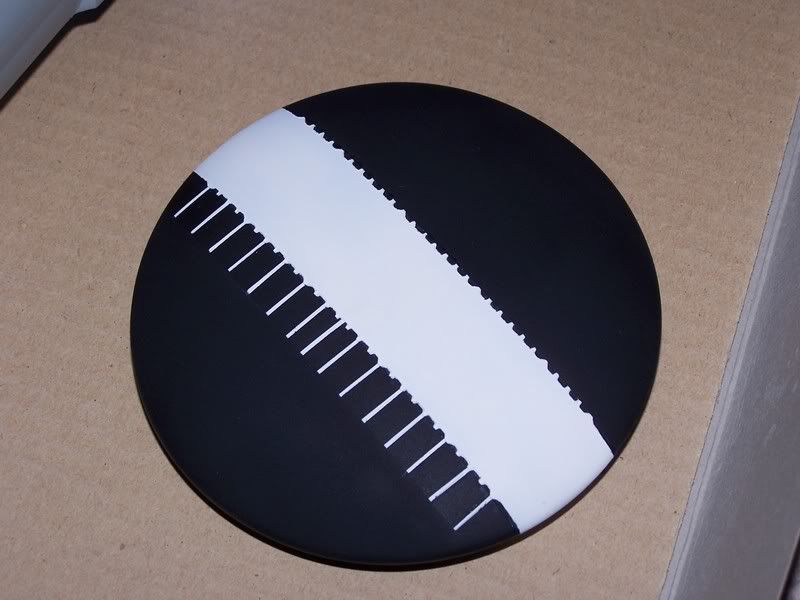
Here's the rotodome.  Took twice as long to paint than I anticipated, mainly due to my having to touch up after getting white paint smudges on the black areas from handling too soon after painting.
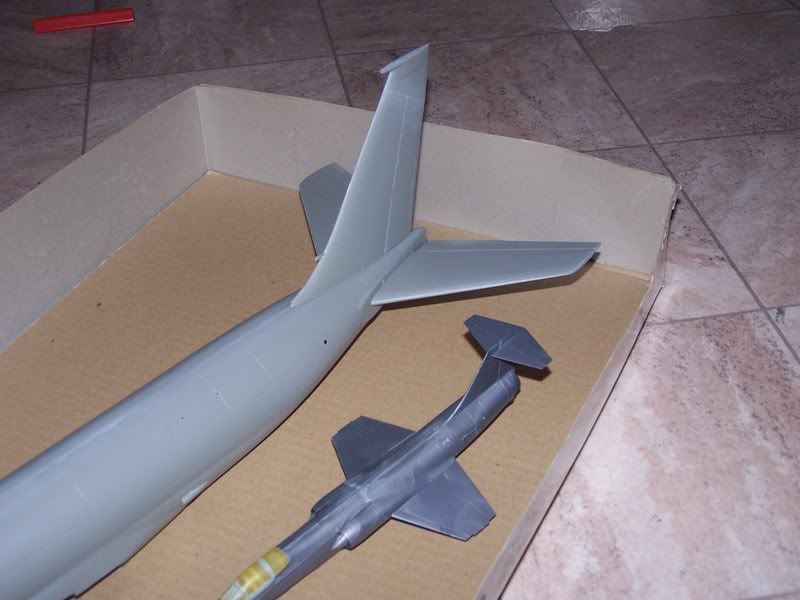
One more of the tail section, similar scale F-104 added for relative size.  Note the crack near the top of the vertical stabilizer.  The panel broke here while trying to straighten out warpage.  As a matter of fact, one outer wing panel is warped slightly up, the other slightly down.  I'm afraid to try and fix it, though, given the brittleness of the plastic.  I'm just going to live with it and hope that it won't be noticeable once the engine pods are glued on and the kit is complete.  With the model's size, the wingtips will be pretty far apart.
Pressing onward with the wings next.  Probably still several weeks away from being complete given my limited work time.

Cheers!

"Congratulations, gentlemen! You're everything we've come to expect from years of government training." Zed (Men in Black) [IMG]
  • Member since
    July 2006
  • From: near London, UK
Posted by Pruz on Thursday, October 26, 2006 4:40 PM
Very nice work so far jeff - the dome looks like a masking nightmare but you brought it out spot on!

Thanks everybody for your kind words too - its what makes groupbuilds so inspiring!

Al
If it ain't Boeing, I ain't going! Finishing off: Revell 1/48 B-1B Lancer for USAF 60th Anniversary GB In production: Revell 1/32 F-16A - C conversion
  • Member since
    July 2003
  • From: Bicester, England
Posted by KJ200 on Friday, October 27, 2006 3:04 PM

Jeff, Al is spot on about the radome. You must have the patience of a saint!

Karl 


Currently on the bench: AZ Models 1/72 Mig 17PF

  • Member since
    December 2005
  • From: Germany
Posted by jeff on Friday, October 27, 2006 3:31 PM
Thanks for the kind words, guys.  I'd like to take credit for tediously masking the rotodome, but in fact I cheated thanks to a technique from a British modeler's review I found on the internet.  I oversprayed the white part, then masked straight across the outer points of the mounting tabs (little white protrusions).  After it was dry, I went back and touched up the black between the tabs with a detail brush.  It was really easy thanks to the . . . . brace yourself . . . raised panel lines!  All the other main external pieces except the engine pods have recessed lines, but the rotodome thankfully still has the raised ones.  I think Airfix based this kit on the older Heller E-3, probably carrying over the engine pods and dome.  The white lines are also raised lines, which I masked off with thin Tamiya tape and sprayed white.  So the old school parts here made my life much easier.
"Congratulations, gentlemen! You're everything we've come to expect from years of government training." Zed (Men in Black) [IMG]
  • Member since
    April 2003
  • From: Edgware, London
Update
Posted by osher on Saturday, October 28, 2006 7:40 PM
That darn canopy is giving me grief!  Actually, it delaying all my other models (well, that and snaping the needle head thingy inside the 'tunnel' between paint bowl and crown, which can't be removed...), as it's just sitting there, challenging me to do something!  It's getting the curves right, with just partial lines, that's bugging me
  • Member since
    July 2003
  • From: waynesboro va, via Ireland
Posted by sidure on Sunday, October 29, 2006 1:31 AM

Hey Osher, hang in there man. I know you will get it sorted out soon enough. When it comes to canopys with no frames just commit to where you think they should be and go from there. Keep at it and you will get it eventually.

On the Vampire side it got its undercoat yesterday and then the silver went on today. So far so good and will let it sit for a day or so before masking for the dayglow colours. Took some photos tonight and hopefully will post some tomorrow.

Steve.

  • Member since
    July 2003
  • From: Bicester, England
Posted by KJ200 on Sunday, October 29, 2006 10:49 AM

Osher, I had exactly the same thing happen with my Badger 100 earlier in the year.

I wedged a small round file into the portion of the head that was jammed into the body, and then just turned it, and out it popped ready for a new head assembly.

Best of luck with the canopy, I always seem to have more than my fair share of hassles with them, the Dora excepted!

Karl 


Currently on the bench: AZ Models 1/72 Mig 17PF

  • Member since
    April 2003
  • From: Edgware, London
Posted by osher on Sunday, October 29, 2006 7:07 PM

Thanks Karl.  Actually, I'm sending my Iwata back to The Airbush Company, and have them do an 'MOT' on the airbush, replace the snapped head, and generally get the thing working again.

 As for the canopy, well, I painted it freehand.  Now to get a toothpick (so useful to modellers), and clean up were I painted the wrong area.  OK, it's not going to be perfect, but the worst finished model is better than the best unfinished model, no?  I'm also fed-up with this kit, and itching for something easier.  A 1/48 B-52 Vacform from Sanger might be easier than my MiG-15!  I still can't believe that Airfix have been using these old moulds until the end, and marking them as starters kits.  What a way to put kids off modelling!  At least Hobby Boss produce ideal starter kits for kids.

 Still, call me a glutton for punishment, but next up is a 1/72 Lancaster that is a fair way towards completion, but has shattered undercarriage (from when I moved).  Once that little challenge is overcome, need to join the fuselage sides, add in the instrument panels, and freak out over masking off all those windows...At least they're mostly straight sided

  • Member since
    April 2003
  • From: Edgware, London
Posted by osher on Sunday, October 29, 2006 7:08 PM
Speaking of the Dora, how's she coming on?  I guess I'll be adding her to the completed list soon?
  • Member since
    July 2003
  • From: waynesboro va, via Ireland
Posted by sidure on Sunday, October 29, 2006 10:58 PM

So here are the latest updates on the Vampire. Undercoated and the top coat all Silver is done and now drying from a clear coat before decals go on. I was going to put the dayglow colours on today but found in my research that I have the wrong colour and should be Red not Orange so off to the hobby shop tomorrow. Here is where it is right now.

Getting close to finishing this one.

Steve.

  • Member since
    November 2003
  • From: Virginia
Posted by JoeRugby on Monday, October 30, 2006 8:39 AM

Steve,

Great looking Vampire there, certainly better than mine.  I will be posting pics tonight.  Sadly, I had to take the pics with my phone camera, misplaced the good one.  The photos are awful of course but the build is just okay.

Nice build Osher, thanks for moderating it.

Wonderful work done here to one and all.

Check out the WW I Special Interest Group @ http://swannysmodels.com/yabb/YaBB.pl?board=WW1SIG
JOIN OUR COMMUNITY!

Our community is FREE to join. To participate you must either login or register for an account.

SEARCH FORUMS
FREE NEWSLETTER
By signing up you may also receive reader surveys and occasional special offers. We do not sell, rent or trade our email lists. View our Privacy Policy.