SEARCH FINESCALE.COM

Enter keywords or a search phrase below:

Knights of the Sky WWI GB The End

111745 views
1882 replies
1 rating 2 rating 3 rating 4 rating 5 rating
  • Member since
    September 2003
  • From: South Central Wisconsin
Posted by Daywalker on Friday, February 13, 2009 1:45 PM
Well done Tom!  I am going to check with my LHS on those paint colors you mentioned, as they do carry figure colors.  Thanks for the tip, and glad to see you cross the finish line!  I updated page 1 for you. Approve [^]

Frank 


  • Member since
    April 2005
  • From: Baton Rouge, LA
Posted by T_Terrific on Friday, February 13, 2009 11:26 AM

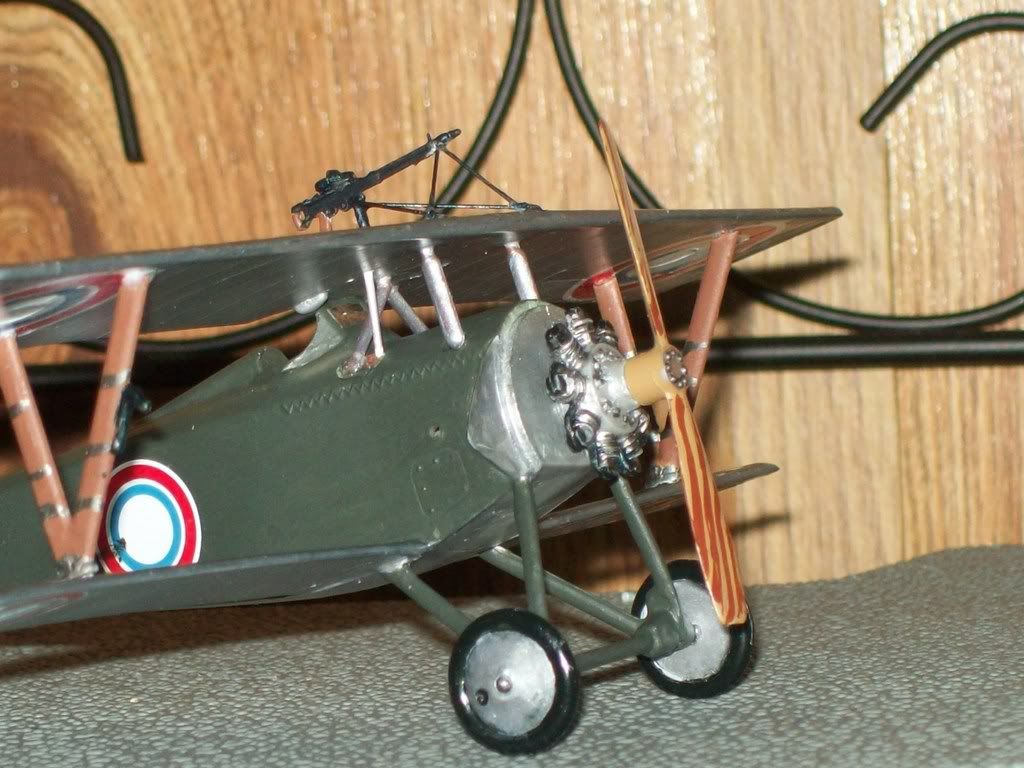
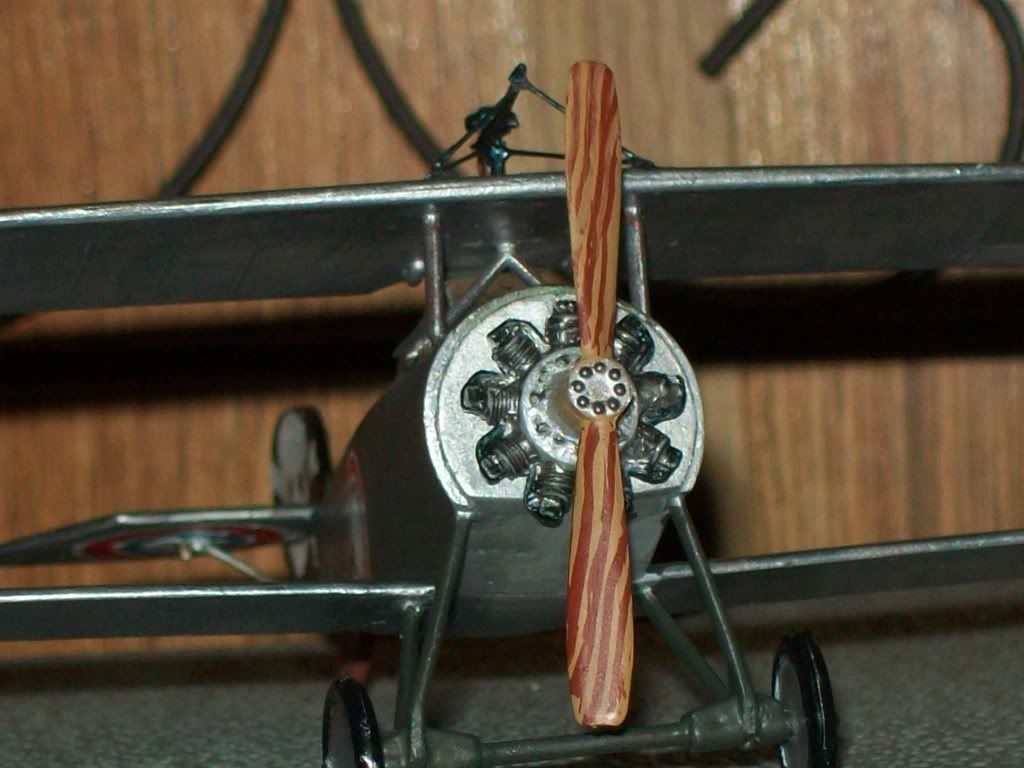
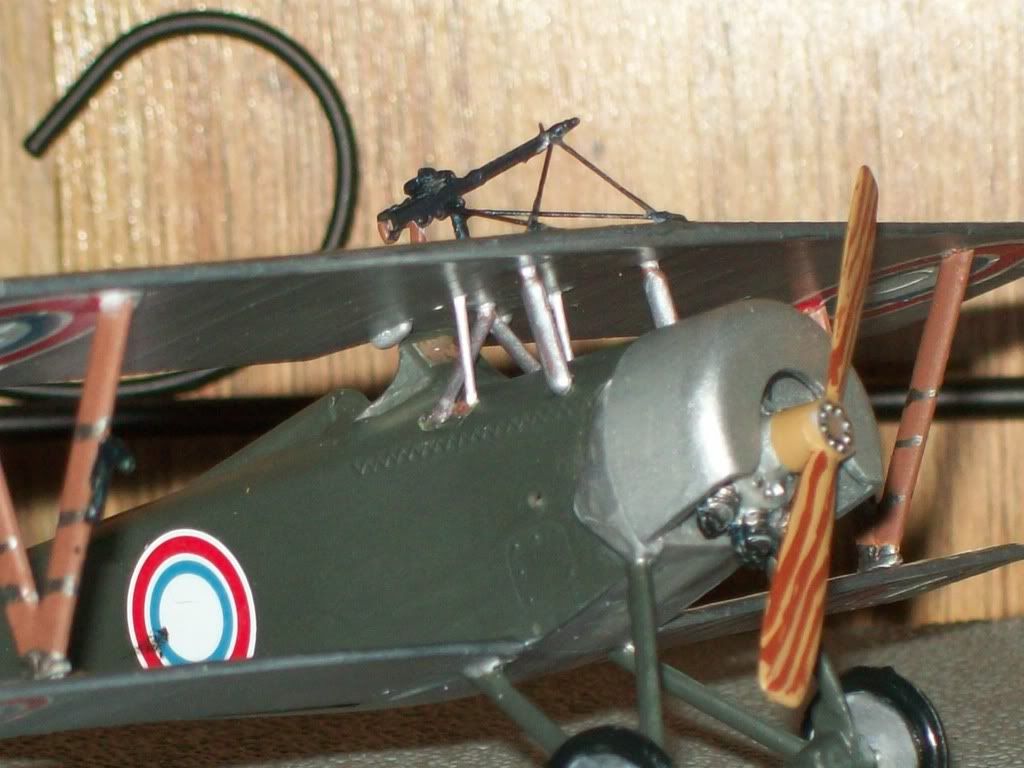
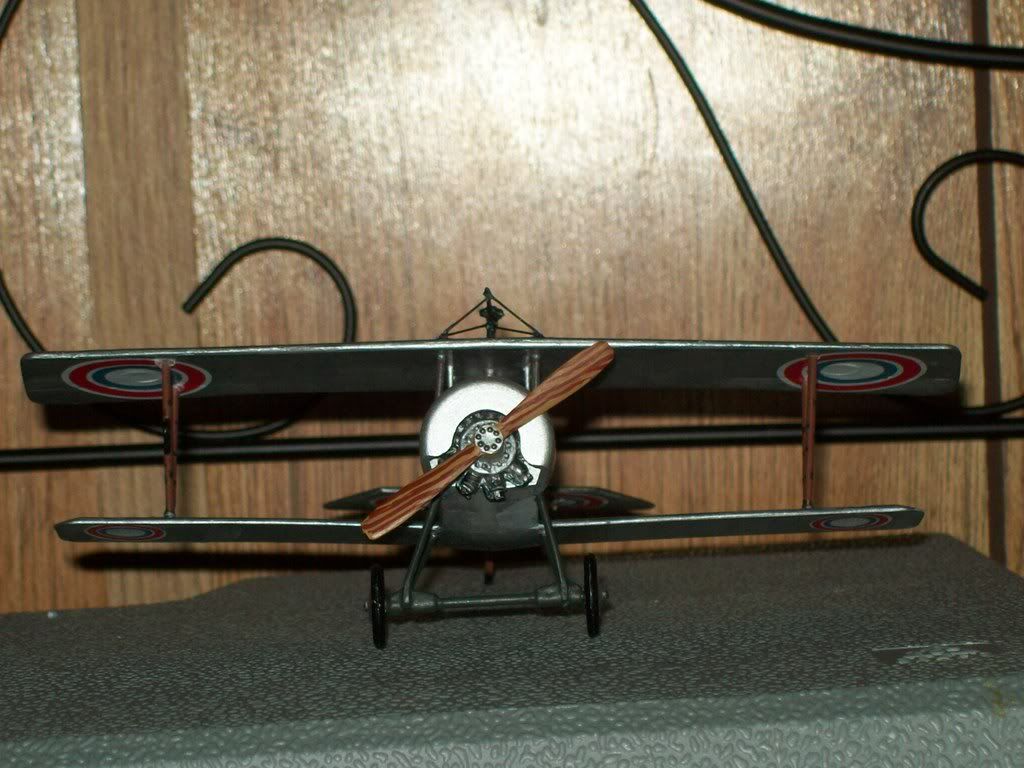
With Frank's permission,I am doing this "Post-Hurricane" entry:
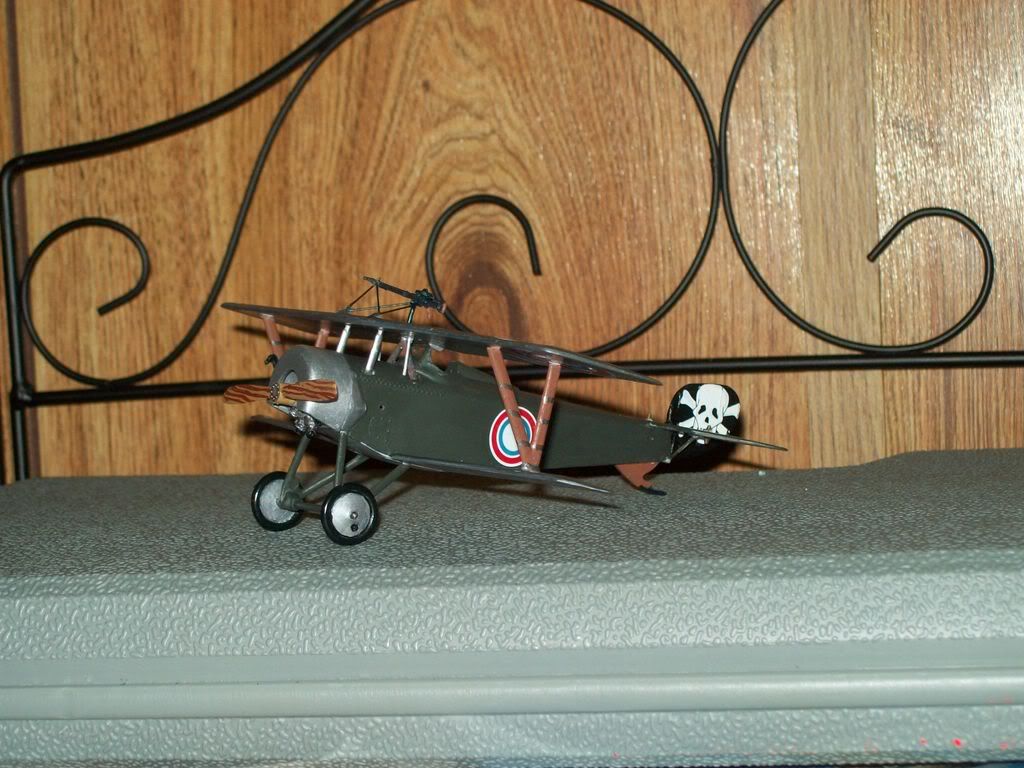
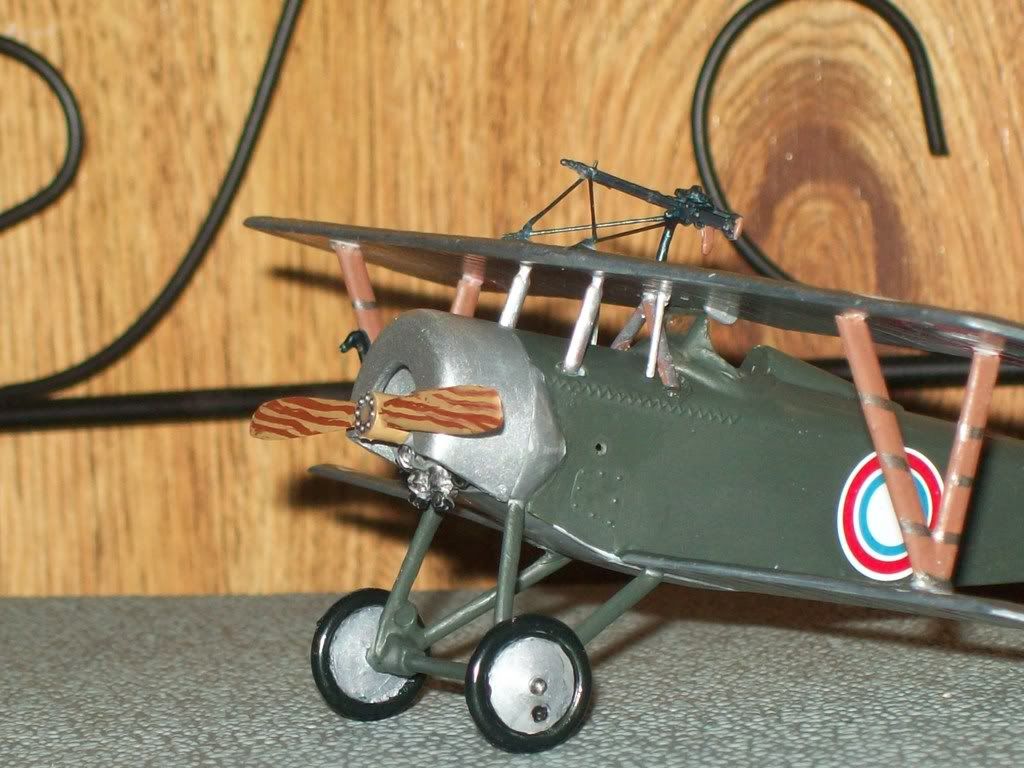
This kit has a nice cowling that literally snaps in place, so you can remove it to show off the engine.

Another nice aspect about the old Aurora kit is that the engine rotates with the prop as it should.

I experimented with a special brush I got from Hobby Lobby to make the laminated wood effect for the prop.
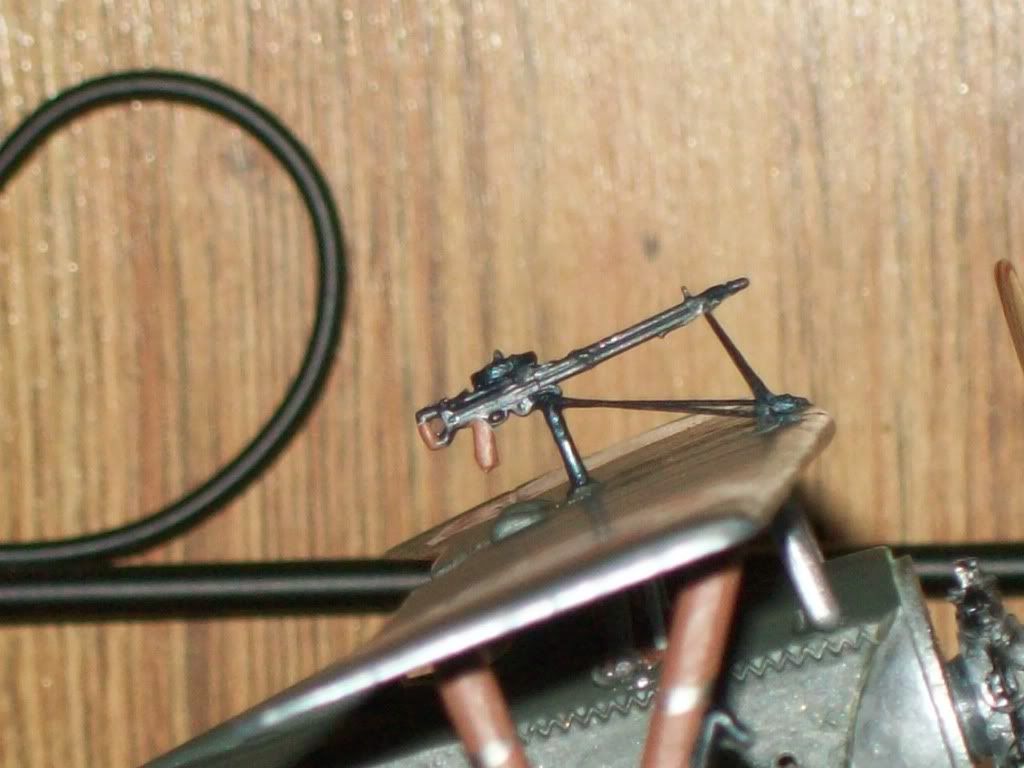
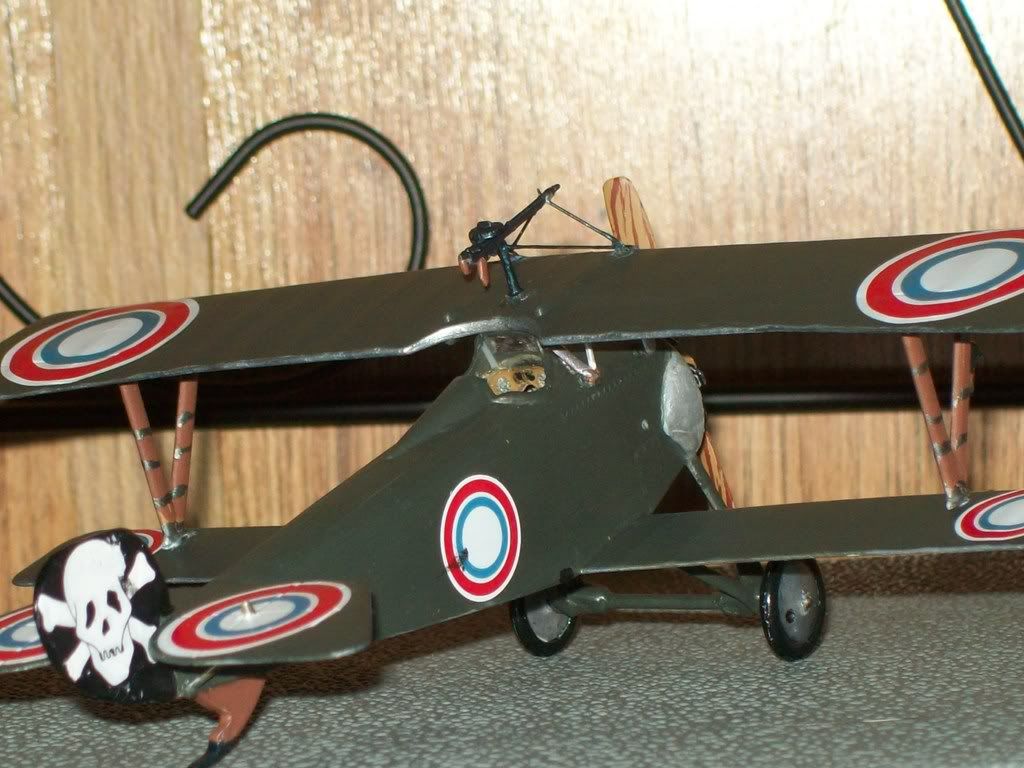
Steel wire and Loctite's new Super Glue gel makes for a nice gun barrel bipod support.
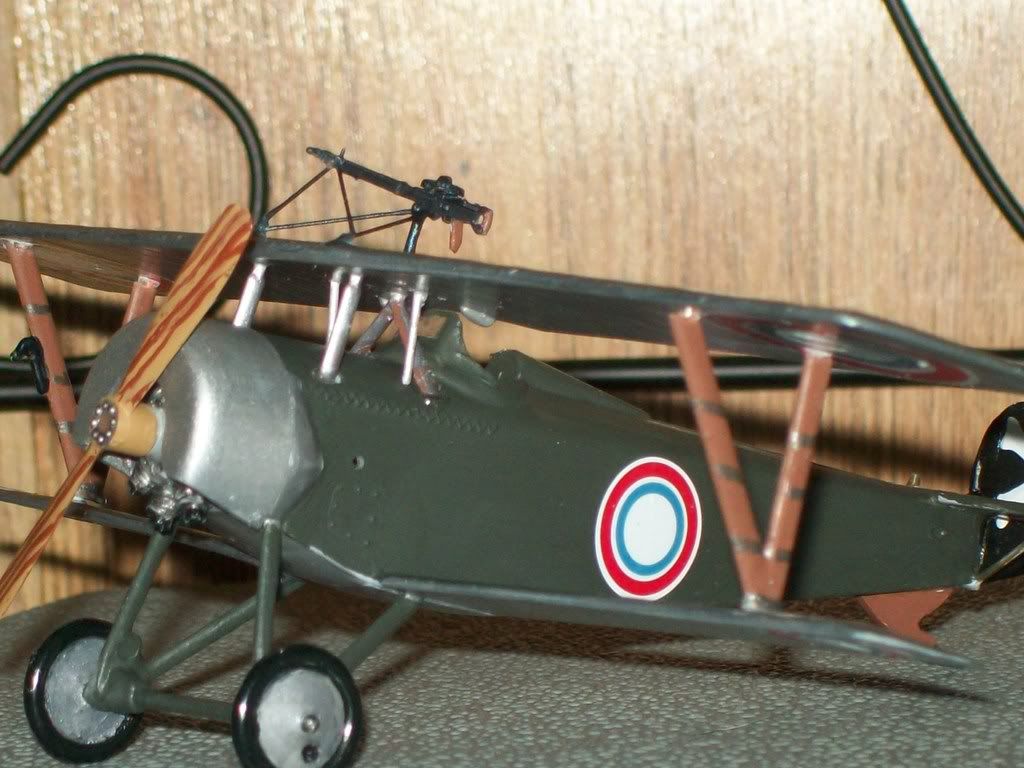
I added the aeleron control rods by drilling the upper wing and poking some plastirod through the holes, sealing them with plastic welder.

Since the kit's Lewis gun appears to be an infantry version, with the mount being too short where it would shoot holes in the prop, I scavanged a spare Lewis from a Roden BE2C kit I am working on, and built the mount using stretched sprew for the main base and spare rigging wire from a Lindberg P-6E kit I recently got.
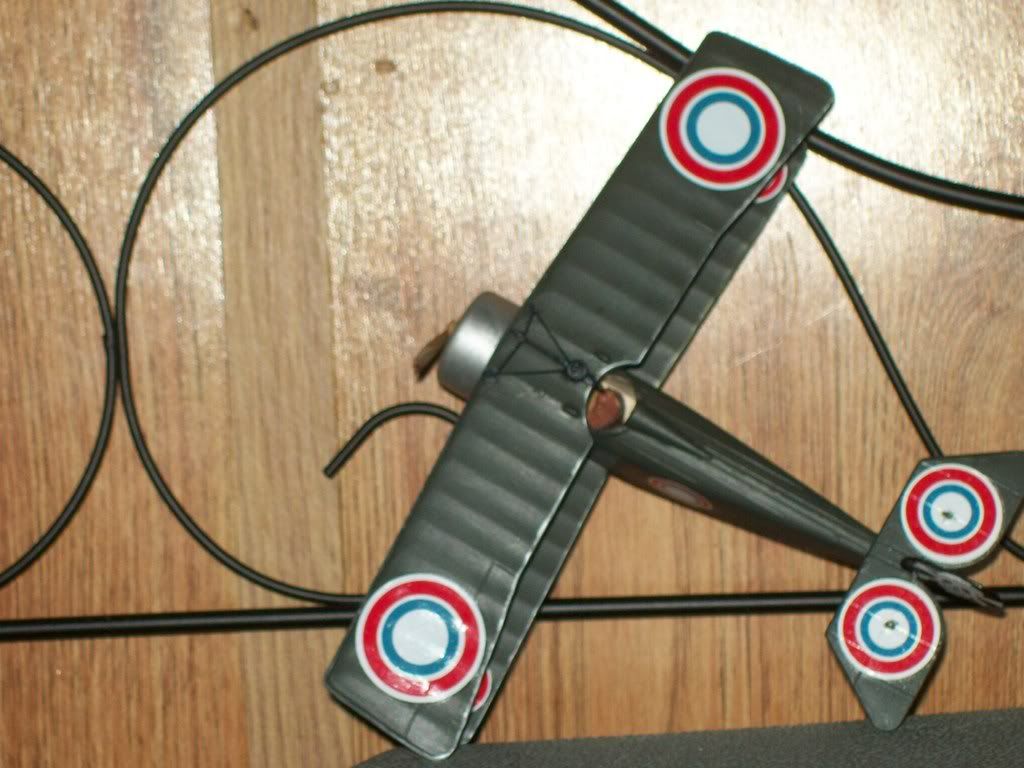
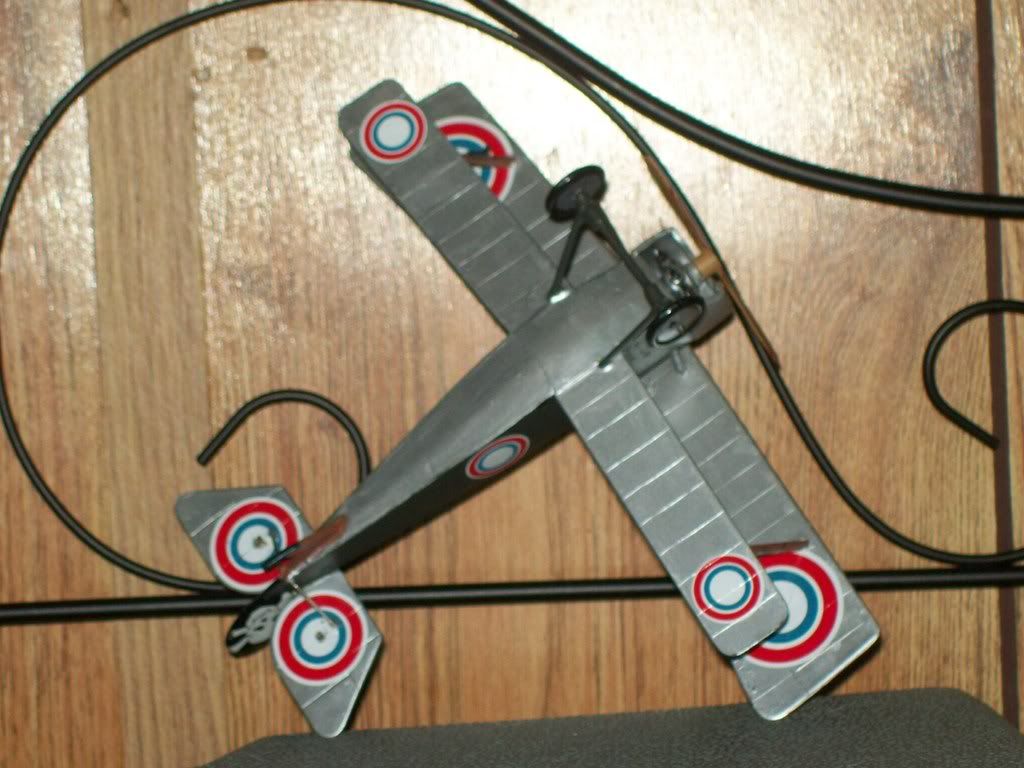
Since the Smer kit includes both a headrest and Russian markings for the -16 varient that the old Aurora kit did not, I enjoyed building this varient for a change.

I could rig it or add rockets later, but at this point in time, I prefer to make this 1/ 48th scale kit my entry for this group build, as-is.Wink [;)]

I will probably add the rockets to the Nieuport 11 Smer kit I have (I bought two, since they are so nice to build).

To be frank, if you look at WWI photos, in most cases the rigging is nearly, if not, invisible. So when we scale modellers get all excited about using heavy thread or thin gauge wire on subjects 1/48th scale or smaller, we frequently border on obsession, if not go over the line. Whistling [:-^]

The trick to sharp looking details is to use metallic miniture figure colors that acn be bought at a miniture war games shop to highlight the engine, gun mounts, etc., instead of the typical aircraft paints.

Among my favorites are colors called "Boltgun Metal", "Pig Iron", "Gunmetal Blue", as well as using "Armor Wash" to emphasize metallic crevices such as for the rotary engine fins.

Tom T Cowboy [C):-)]

Tom TCowboy

“Failure is the opportunity to begin again more intelligently.”-Henry Ford

"Except in the fundamentals, think and let think"- J. Wesley

"I am impatient with stupidity, my people have learned to live without it"-Klaatu: "The Day the Earth Stood Still"

"All my men believe in God, they are ordered to"-Adolph Hitler

  • Member since
    September 2003
  • From: South Central Wisconsin
Posted by Daywalker on Thursday, January 1, 2009 11:53 PM
Sign - Welcome [#welcome] across the finish line Joe!  Nicely done lil' Camel, I updated page 1 for you! Thumbs Up [tup] Sorry to hear about your fractured rib, I know how much those hurt! Yuck [yuck]

Frank 


  • Member since
    October 2006
  • From: Rochester, NY
Posted by silentmodeler on Thursday, January 1, 2009 11:01 PM

sorry for long delay since i got fractured rib from car accdient. Black Eye [B)]  now im all better but painful cough laugh and so on.  here is my finished sopwith camel.  i didnt add the rigged thread yet  since im not sure how to do it but ill add to it later.  maybe on the next group build who knows Smile [:)]  feel free to comment or feedback.  if one of you guys know the easiest way to glue the thread on the wings  let me know  thanks again   Happy hoildays 

Enjoy the pix

"Do, do not, theres no try" ~Yoda
  • Member since
    September 2003
  • From: South Central Wisconsin
Posted by Daywalker on Thursday, January 1, 2009 12:31 PM
Well, this GB is officially closed.  I posted photos of all of the finished works over in Aircraft.  Thank you again everyone who participated here and made this GB so much fun!  I am really looking forward to working with all of you again in KOTS II.  If you're still finishing up a build here, feel free to continue to post pics and I shall update anything if needed.  Or, I can transfer your WIP over to KOTS II if you like.  Thanks again! Approve [^]

Frank 


  • Member since
    September 2003
  • From: South Central Wisconsin
Posted by Daywalker on Wednesday, December 31, 2008 7:35 AM

Well, today is the final day of this GB!  If you are still working on your kit, feel free to continue posting here if you would like.  Or, I can transfer any ongoing work over to KOTS II.  Thank you again everyone for being a part of this, and making it what it is.  Three dozen finished builds, now THAT is impressive.  Believe it or not, I often look at page one and marvel at the sheer number of participants, and the ever growing red typeface that signals a finished build.  My hat is off to all of you.

THANK YOU ONE AND ALL FOR MAKING THIS GROUP BUILD SUCH A SUCCESS.

Frank 


  • Member since
    September 2003
  • From: South Central Wisconsin
Posted by Daywalker on Tuesday, December 30, 2008 7:38 AM

Stephen- Absolutley amazing!  I must be honest, when you started adding builds to the GB I thought "no way this guy can build all of those".  You have no idea how delighted I am to see your work, and especially all of the help you have handed out here over the last 15 months.  The quality AND quantity is nothing short of amazing, I have enjoyed watching a master at work.  It has truly been a pleasure building here with you, and I cannot wait to start KOTS II!

Take a good long nap Stephen, you're gonna need it!

I uodated page one for you. Approve [^]

Frank 


  • Member since
    October 2004
  • From: Colorado
Posted by StephenLawson on Tuesday, December 30, 2008 1:25 AM

Stick a fork in it folks it is done!  Frank this is my last completed build for this round please tack it on to page 1.  13 builds for me - now for a nap!

Higher res images seen here.

Also for anyone building this kit. or the Hisso motor version. The SE 5a had a steerable tail skid and the lowest access holes in the rear fuselage are for those cables.


Stachel...unconfirmed by Armee means unconfirmed!!!!

  • Member since
    October 2004
  • From: Colorado
Posted by StephenLawson on Monday, December 29, 2008 4:55 PM

 ruddratt wrote:
'. . .Stephen, now you're just showing off! Tongue [:P] Seriously, top-notch work my friend! Every build you show sets the bar that much higher. . . " Bow [bow]

Greetings Ruddratt!  Good news is the decals are all in place.  The kit I got had the older sets in them and needed a good deal of coaxing.  I have gone with F.8005  Lt. Rorison's mount from 25th Aero. These need very warm water and lots of sol & set.  Next more tail & aileron rigging and the Lewis gun & Foster mount.


Stachel...unconfirmed by Armee means unconfirmed!!!!

  • Member since
    February 2006
  • From: Smithers, BC, Canada
Posted by ruddratt on Sunday, December 28, 2008 2:23 PM

Jeeves, very nice work for your first bipe! Miles ahead of my first attempt. As long as you enjoyed it, that's the main thing. Now, are ya ready to tackle another? Wink [;)]

Scotty, nice job on a subject we don't see often around here. Be proud of that one...it's a difficult bird to build! Thumbs Up [tup]


Stephen, now you're just showing off! Tongue [:P] Seriously, top-notch work my friend! Every build you show sets the bar that much higher. Bow [bow]

Mike

 "We have our own ammunition. It's filled with paint. When we fire it, it makes pretty pictures....scares the hell outta people."


  • Member since
    September 2003
  • From: South Central Wisconsin
Posted by Daywalker on Sunday, December 28, 2008 8:33 AM
I don't know how you do it... that would take me weeks or even months to do.  Man, I love the lines of the SE 5a.  Looks so purposeful.  If the build runs over a bit, no worries mate! Wink [;)]

Frank 


  • Member since
    October 2004
  • From: Colorado
Posted by StephenLawson on Sunday, December 28, 2008 5:18 AM

 Daywalker wrote:
Very cool Stephen!  Looks like you're gonna finish this one right on time! Big Smile [:D]

I would like to but we will see what happens in the next 4 days. For now the rigging between the wings is done except for the ailerons. And they have to wait for the cockades to be applied.  Looks like I have one RAFwire to move over a bit . . .


Stachel...unconfirmed by Armee means unconfirmed!!!!

  • Member since
    September 2003
  • From: South Central Wisconsin
Posted by Daywalker on Saturday, December 27, 2008 9:49 PM
Very cool Stephen!  Looks like you're gonna finish this one right on time! Big Smile [:D]

Frank 


  • Member since
    February 2007
  • From: Casa Grande, Az.
Posted by DesertRat on Saturday, December 27, 2008 9:31 PM

 StephenLawson wrote:
Its official!!! The top wing is mounted and the cabanes & landing gear have been rigged. Now for the interwing rigging.


Party [party]Propeller [8-]Make a Toast [#toast]Cool [8D]Big Smile [:D]

Warmest regards,

Roger

  • Member since
    October 2004
  • From: Colorado
Posted by StephenLawson on Saturday, December 27, 2008 6:48 PM
Its official!!! The top wing is mounted and the cabanes & landing gear have been rigged. Now for the interwing rigging.


Stachel...unconfirmed by Armee means unconfirmed!!!!

  • Member since
    September 2003
  • From: South Central Wisconsin
Posted by Daywalker on Friday, December 26, 2008 6:51 PM

Thanks Mike!  I suspect part II will be a blast as well, especially with the line-up of talent we have.  Glad the usual suspects are all there, and some new blood too!

Stephen- I like your take on the CDL, very convincing.  Quite a stunning effect especially with the relatively quick time to do.  Very nice work, and thanks to you- I must get an SE 5a!

Frank 


  • Member since
    October 2004
  • From: Colorado
Posted by StephenLawson on Thursday, December 25, 2008 11:31 PM

As promised some images if the undersurfaces and my attempt at CDL.  As noted earlier cotton battens were attached to the wooden skeletal portions of the wing.  To these were attached  the wing cover / fabric and the rib tapes were attached on top of these and sewn into the cotten battens mentioned earlier.

I started with painting a bright CDL  to the flying surfaces first. then laying black graphic arts tape over the ribs.  Below,

Next below; Then I removed the tape and shot another light coating of CDL  In this image you will see one of the lower wings and the horizontal tail unit has yet to have the CDL shot over it and you can appreciate the need to tone down dark areas a bit.

Then finally you wil see the finished surfaces flattened (no gloss) and the variations of the simulated CDL with internal shadows.

All in all about 3.5 hour job.


Stachel...unconfirmed by Armee means unconfirmed!!!!

  • Member since
    February 2006
  • From: Smithers, BC, Canada
Posted by ruddratt on Thursday, December 25, 2008 10:29 PM

Thanks buddy, and the same to you and yours! This build was a blast, and I'm only expecting more fun times and great builds in version II! Thumbs Up [tup]

By the way, I'm eyeballing an Eduard 1/48 Fe2.b as a possible second entry to it. Wink [;)]

Mike

 "We have our own ammunition. It's filled with paint. When we fire it, it makes pretty pictures....scares the hell outta people."


  • Member since
    September 2003
  • From: South Central Wisconsin
Posted by Daywalker on Wednesday, December 24, 2008 11:09 PM
I just wanted to wish all of you here a very Merry Christmas, and thank you again for everything you have done here.  Only seven days left!

Frank 


  • Member since
    September 2003
  • From: South Central Wisconsin
Posted by Daywalker on Tuesday, December 23, 2008 6:59 AM

Scott- I would love to see your Camel build!  I understand about deciding on a kit, I have a couple too I am considering and the Camel is one of them. Thumbs Up [tup]  Just let me know when you decide and I'll add them to your list.


Frank 


  • Member since
    November 2005
  • From: that state up North
Posted by More Power Scotty on Monday, December 22, 2008 9:25 AM

Roy,

Thanks for the kind words. Big Smile [:D] 

Frank,

Thanks for your praise as well. Thumbs Up [tup]  I am going to finish the year cleaning up a few odds and ends projects, but I did just pick up the Eduard Sopwith Camel Weekend edition kit.  I may build that one next year for part 2 of this build, but there are a couple of others that I am looking at as well.  Although I am Not quite building on the frequency of Stephen, I will still probably add a couple of builds anyway.  When I do commit to my first kit, I will update in that posting.

Stephen,

I thought that the decals looked a little gimicky, but I did not foresee the top coat breaking down as it did.  I have not seen the D. VII decals you are mentioning, but I can imagine what you are talking about.  I wish they had just put the regular decals in my kit based on the end results.  Anyway, we live and we learn.

Scott
  • Member since
    October 2004
  • From: Colorado
Posted by StephenLawson on Saturday, December 20, 2008 1:17 PM

 More Power Scotty wrote:
Just out of curiosity, have you heard any comments about Eduard decals for the DH2 Weekend kit that I just finished?  The white used to make the decals appear to be faded came off in spots when I set them in place with Micro Sol.  The decals were not damaged, the top color just came off in random spots.

Thanks for your kind words Scott.  Now for those  Eduard decals.  When I first saw them That is what I was afraid of.  The top coating was intended to make the decal look weathered and faded.  While obviously a gimmick like the fabric imperfections on their first Fok. D.VII lozenge attempts Eduard was trying to tone down these cockades.  I have the first kit issue that has these decals as well  but the colours were true with no attempt at fading.


Stachel...unconfirmed by Armee means unconfirmed!!!!

  • Member since
    September 2003
  • From: South Central Wisconsin
Posted by Daywalker on Friday, December 19, 2008 10:16 PM

Well done Scott!  Great to see another one from you.  And that does make 35 completed builds!  WOOHOO!  I updated page one for you as well. Wink [;)]

As far as your querry about the decal issue, I have no idea.  Perhaps someone might have the answer for you.

Frank 


  • Member since
    August 2006
  • From: The Great State of Wyoming
Posted by wyoroy on Friday, December 19, 2008 7:39 PM
Scott, that looks way cool.  Great job.

Roy (Capt. Wyoroy FAAGB/USNFAWGB)

John 3:16

  • Member since
    November 2005
  • From: that state up North
Posted by More Power Scotty on Friday, December 19, 2008 7:35 PM

Stephen,

Wonderful work once again! Bow [bow]

Just out of curiosity, have you heard any comments about Eduard decals for the DH2 Weekend kit that I just finished?  The white used to make the decals appear to be faded came off in spots when I set them in place with Micro Sol.  The decals were not damaged, the top color just came off in random spots.

Scott
  • Member since
    November 2005
  • From: that state up North
Posted by More Power Scotty on Friday, December 19, 2008 7:32 PM

Frank,

Let us make that thirty-five.  I wrapped up the Airco DH2 this morning and photographed it this afternoon.

Scott
  • Member since
    September 2003
  • From: South Central Wisconsin
Posted by Daywalker on Wednesday, December 17, 2008 11:32 PM

With pleasure Stephen!  Another stunning example of a not-often-modeled subject.  Love the weathering on this one, very authentic looking.  Thanks for another awe-inspiring piece of work. Approve [^]

Gents, that makes 34 completed builds here.  Is this amazing, or what?

Frank 


  • Member since
    October 2004
  • From: Colorado
Posted by StephenLawson on Wednesday, December 17, 2008 10:29 PM

Now the tails up rear quarter views.  Frank Please mark this one down - completed.  Looks like that completes my list on page 1. 


Stachel...unconfirmed by Armee means unconfirmed!!!!

  • Member since
    October 2004
  • From: Colorado
Posted by StephenLawson on Wednesday, December 17, 2008 10:26 PM

Yes my dear wingnuts!  Stick a fork in it.  Its done!

Now from the quarter rear views.


Stachel...unconfirmed by Armee means unconfirmed!!!!

JOIN OUR COMMUNITY!

Our community is FREE to join. To participate you must either login or register for an account.

SEARCH FORUMS
FREE NEWSLETTER
By signing up you may also receive reader surveys and occasional special offers. We do not sell, rent or trade our email lists. View our Privacy Policy.