SEARCH FINESCALE.COM

Enter keywords or a search phrase below:

The Gulf Wars GroupBuild--Operations Desert Storm & Iraqi Freedom (2/8/08- 28/2/09)

35616 views
215 replies
1 rating 2 rating 3 rating 4 rating 5 rating
  • Member since
    October 2007
Posted by White_R34 on Wednesday, August 26, 2009 9:00 AM

Building the Impossible Is my main goal!!
  • Member since
    October 2007
Posted by White_R34 on Wednesday, August 26, 2009 8:58 AM

An yes I'll be building the full engine and tranny.

Building the Impossible Is my main goal!!
  • Member since
    October 2007
Posted by White_R34 on Wednesday, August 26, 2009 8:53 AM

Hay Dupes good budy I'm sorry for not being here for so long., but with all the scratchbuiling detail I'm doing it's just takeing longer that my first rushed build of a bradley. so here's what I have so far. Now I must let you in on something I get a lot of news and updates so from time to time I stop my work to add the new updates to my build. Like shot trap armor and for a time I didn't even know what that was. I also will be using a new color background. I'm also going to post photos from my desk as well, you know the ones with that green cutting bord.

Building the Impossible Is my main goal!!
  • Member since
    November 2006
  • From: Coastal Maine
Posted by dupes on Tuesday, March 3, 2009 4:38 PM

Russ - looks like a sweet build to me!

Glad to hear your Mom is recovering so well. Hoping that mine follows a similar path getting back to normal. Smile [:)]

  • Member since
    February 2005
  • From: Green Bay, Wisconsin
Posted by russamys on Monday, March 2, 2009 5:19 PM

Well, I know the GB is over, but I thought I would post photos of my kit.  GBs are a curse for me - something always happens to keep me from finishing in time.  I would have been done by the deadline - all I had to do was attach the rotors and finish a couple other odds and ends - but my mom had a stroke February 16.  I have spent the last couple weeks at the hospital; model building has understandably taken a back seat for now.  Anyhow, today I realized I missed the deadline, so I took a few minutes to attach the rotors and take a few pictures:

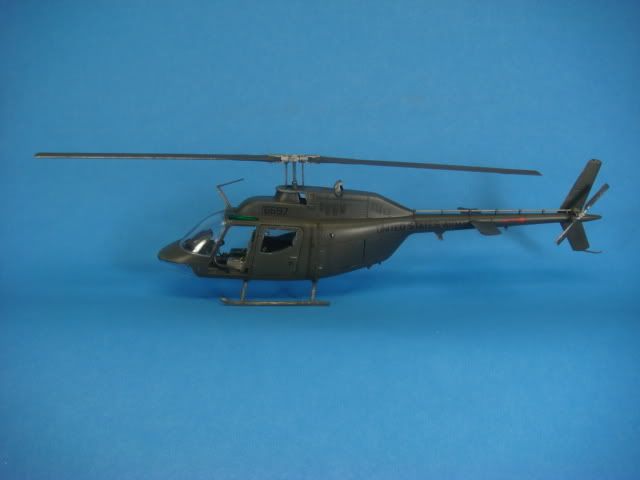
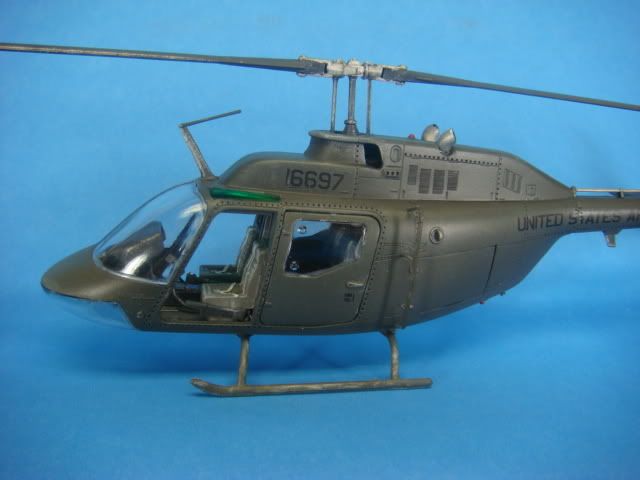
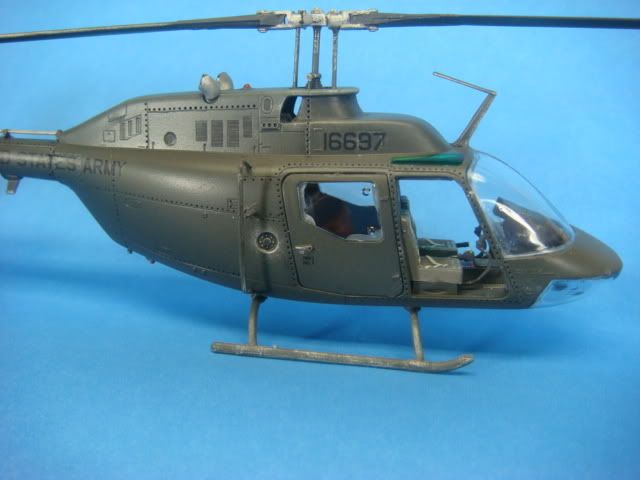
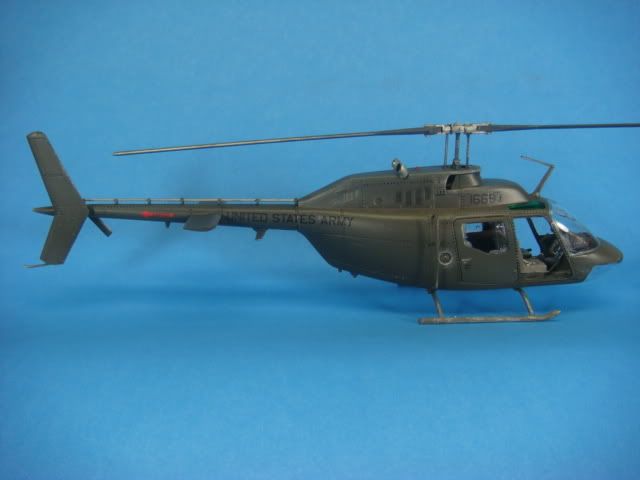
This was the Italeri 1/48 scale OH58A kit.  It is a reasonably good representation of the early Alpha model.  I flew an OH58C mod during Desert Storm.  The windscreen is correct for the style aircraft I flew, but the exhaust stacks are wrong, there is no seat armor, the seats are wrong and there is no wire strike protection system.  I have a 1/48 Heller kit of the aircraft.  I planned on attaching the wire strike blades from that kit to this kit, but given the family medical emergency, I did not have time to finish that part.  My Desert Storm aircrat also had a two rail Stinger launcher on the left side (where the minigun was originally attached).  I may buy this kit again, do a little scratchbuilding of the missing/incorrect parts and see if I can create a more accurate version of what I flew.  I left the front doors off - we flew without them most of the time since it was so darn hot.

I was a bit rushed on this kit from the start, and it shows.  I had some issues fitting the fuselage halves together and fillling the resulting gaps.  The doors did not fit well and the tail rotor gearbox was missing (a tail boom molding defect).  There is also a gap along the top of the front windscreen.  The paint job is not the best either - I am not the best at making monotone colors look realistic.  But...learning from my mistakes, I will hopefully do a better job next time.

I realize I am not eligible for the badge for this group build since I missed the deadline.  But since I was so close to finishing, I thought I would at least post some photos.

Russ

  • Member since
    November 2006
  • From: Coastal Maine
Posted by dupes on Thursday, February 5, 2009 9:37 AM
Constructor - looks like a sweet Warrior to me! Nice build. Thumbs Up [tup]Thumbs Up [tup]
  • Member since
    June 2008
  • From: Iowa
Posted by Hans von Hammer on Wednesday, February 4, 2009 1:00 PM
UPDATE: I'm behind the curve here, I'll make the cut-off for the model, but the diorama won't make it on time... I've got the 577's interior done and base colors laid on, might be able to start the TOC extension next week... 

  • Member since
    July 2006
  • From: Philippines
Posted by constructor on Tuesday, February 3, 2009 5:42 AM

I'm finally done with my Warrior "Operation Telic" build. I used Eduard PEs but I was only able to use the generic pieces as this set was not designed for a Warrior during Operation Telic. I also inserted a brass wire to the bottom of the hull periscopes and the one on the top of the turret so that it rotates. I have not finalized yet how the gears will be arranged so nothing has been tied down yet. Here are some photos:

  • Member since
    June 2005
  • From: San Tan Valley,AZ
Posted by smokinguns3 on Thursday, January 15, 2009 1:11 PM
id be interrested in joining iive got the tamiya m2a2 kit unstarted.
Rob I think i can I think i can
  • Member since
    December 2008
  • From: Upstate New York
Posted by PhantomPhreak on Sunday, December 14, 2008 3:59 PM

Is there still time for me to join in this one as well? I have a couple Hummers from Italeri that I ahve been wanting to build.  I could do one of them for this build...

Please let me know.  If I can still be included I can get busy on it tomorrow morning first thing!


Later, Bri
  • Member since
    February 2005
  • From: Camp Lejeune, NC
Posted by rufioizgrreat on Wednesday, December 10, 2008 5:47 PM

mick,

 thanks anyways! i know that squadron made the decals, i just didnt know if it was the same sheet that might have been in the kit. thanks tho!

"All right, they're on our left, they're on our right, they're in front of us, they're behind us...they can't get away this time." -Lewis B. "Chesty" Puller
  • Member since
    January 2005
  • From: Kopparberg, Sweden
Posted by Swedish Mick on Wednesday, December 10, 2008 12:31 AM

And if someone of you all (who's building something from the period 17-07-1990 -- 09-04-1991) would like to join our GB at Modellbygge iFokus, you are very welcome to do so. Altough the site is in Swedish, most of us understand English quite well so I don't think there will be any problems. For us Swedes, that is! We don't have any English version of Modellbygge iFokus yet, but we have a English-speaking information page under construction. Meanwhile, just join and we will try to help you in the right direction. Sign - Welcome [#welcome]

Gruppbygge #8: Gulfkriget  


Modellbygge iFokus http://www.modellbygge.ifokus.se
  • Member since
    January 2005
  • From: Kopparberg, Sweden
Posted by Swedish Mick on Wednesday, December 10, 2008 12:24 AM

@ rufioizgrreat: 

I have asked him and I have a scanned decal sheet. We DO NOT find any name on the sheet. Sorry!

If you want me to send you the picture, please let me know.

Modellbygge iFokus http://www.modellbygge.ifokus.se
  • Member since
    January 2005
  • From: Kopparberg, Sweden
Posted by Swedish Mick on Monday, December 8, 2008 3:58 PM

@ rufioizgrreat: 

Sure! Will do!


Modellbygge iFokus http://www.modellbygge.ifokus.se
  • Member since
    February 2005
  • From: Camp Lejeune, NC
Posted by rufioizgrreat on Friday, December 5, 2008 6:21 PM

mick,

 i looked at your site there and even tho i cant read swedish i noticed that one of the guys there is building the RF-4C from the 106th, that was the squadron my father flew in Desert Storm, they made a decal set with my fathers name on it, but i didnt know if that was included in the kit or not. can you ask because he only has one set and im trying to find another, if thats the case then i will look around online for that kit. its lt.col. susnik.

"All right, they're on our left, they're on our right, they're in front of us, they're behind us...they can't get away this time." -Lewis B. "Chesty" Puller
  • Member since
    January 2005
  • From: Kopparberg, Sweden
Posted by Swedish Mick on Thursday, December 4, 2008 4:15 AM

If it's still possible, I would like to join this GB.

We have just started a Gulf War GB at Modellbygge iFokus, a Swedish modelling site. One of my entries there would be right here too, so i'm in with a Sukhoi Su-22M4R Fitter-K from IqAF. The kit is MasterCraft #020170 in 1/72.


Modellbygge iFokus http://www.modellbygge.ifokus.se
  • Member since
    October 2007
Posted by White_R34 on Monday, December 1, 2008 6:12 AM
Hay your projects are coming on strong you two. Keep up the outstanding work.
Building the Impossible Is my main goal!!
  • Member since
    February 2005
  • From: Camp Lejeune, NC
Posted by rufioizgrreat on Monday, December 1, 2008 1:08 AM


i took the PE saw that came with the kit and cut off the saw part and kept just the sheath, all the pics ive seen of iraqi sa-6s have the saw off. im just trying to figure out how to make the clamps that go in the empty holes. im thinking a bent piece of PE.

i colored the glass just a mix of purple and blue, really couldnt think of anything better. all i got left now is the tracks which i attempted and its really not getting me anywhere so i might just get the aftermarket set, and the 2 missiles and travel lock.

"All right, they're on our left, they're on our right, they're in front of us, they're behind us...they can't get away this time." -Lewis B. "Chesty" Puller
  • Member since
    February 2005
  • From: Green Bay, Wisconsin
Posted by russamys on Sunday, November 30, 2008 4:43 PM

Well, I finally got started on my Italeri 1/48 OH-58A.  This weekend I had a fair amount of extra time on my hands, so I got most of the cockpit done:

This is the same aircraft I flew in Desert Storm.  Unfortunately I have not been inside one since 1992 and when I started digging through pictures to refresh my memory on what the interior looked like, I realized that I have very few photos of the interior Boohoo [BH] The instructions said to paint the interior light ghost gray.  That may have been correct during the Vietnam War, but I do remember that my aircraft was flat black inside, so that is the color I used.  The seats are not correct; the front seats were an OD nylon mesh over a tubular frame, while the back seat was a very thin (and uncomfortable) foam cushion covered with an OD color nylon.  But since I want this to be an OOB build and do not have the skill or time to scratchbuild seats, I went with the ones supplied in the kit. 

The interior wear and tear drybrushing may be a tad bit overdone - I may tone it down a bit (it is amazing what flaws appear when you take a digital photo Blush [:I] ).  Anyhow, I hope to continue to make reasonably quick progress on this kit, as it is fairly simple and straightforward.  I am dreading the exterior.  I am not very good at making monochrome paint jobs look realistic.  I will post more as I make additional headway.

Russ

  • Member since
    February 2005
  • From: Camp Lejeune, NC
Posted by rufioizgrreat on Sunday, November 30, 2008 12:45 PM
its the trumpeter 1/35. ya i just sat down and started pluggin away, it goes together fast because the parts are such a good fit, and since i use superglue as my main glue i didnt have to wait long for parts to dry.
"All right, they're on our left, they're on our right, they're in front of us, they're behind us...they can't get away this time." -Lewis B. "Chesty" Puller
  • Member since
    October 2007
Posted by White_R34 on Sunday, November 30, 2008 2:10 AM
Only 2 days in and it looks that good, man you on a roll. May I ask what's the scale? Keep us posted will ya.?Thumbs Up [tup]
Building the Impossible Is my main goal!!
  • Member since
    February 2005
  • From: Camp Lejeune, NC
Posted by rufioizgrreat on Saturday, November 29, 2008 1:52 PM

heres the sa-6 im working on, it will be finished as an iraqi sam. this kit is awesome, its my second armor build and while some parts were a little iffy for me to assemble (mainly the fins on the missiles and the elevating part of the turret),it fits awesome and the details are nice and crisp. its going together fast too, this is my second day of working on it. any advice/critiques/BS is appreciated!


"All right, they're on our left, they're on our right, they're in front of us, they're behind us...they can't get away this time." -Lewis B. "Chesty" Puller
  • Member since
    October 2007
Posted by White_R34 on Thursday, November 27, 2008 11:48 PM

Ok here's some more work:

M3A2's and A3's should not have those small view ports.

As for the chassis I marked off the places were the larg shocks should go, an I had to move the upper roller wheels.

(Mock up only)not the parts that will be used.

This photo is just before I moved the upper roller wheels.

Ok that's it for now, next you will see photos of all the shocks and the rear tension wheel arm.


Building the Impossible Is my main goal!!
  • Member since
    October 2007
Posted by White_R34 on Thursday, November 27, 2008 2:35 PM

Hay dupes I'm sorry I have bean gone for a wile. I wanted this build to be just right so I went to a site where I could get the best help ever. I know some of my photo will not show a lot but I'm working on a alot of othere models at the same time. "But" here's some of my work.

Now I started this project on the roof of the rear of the Bradley and started to work my way over the turret and down to the interior. So that is what you will see in my photo. As I have a lot I will ony post part now and let some hr's go by and post more later to day.

Now I'm going to stop here as I said I have a lot more for you all to see so I will post more later to day. The chassis will help out a lot of you guys that have never known what's past the tracks and wheel. I now know and will show you what you cant see or have looked over in mini real photo.

Building the Impossible Is my main goal!!
  • Member since
    November 2006
  • From: Coastal Maine
Posted by dupes on Monday, November 17, 2008 8:51 AM

Sweet. Where can you find acrylic rod? I definitely want to give this a shot! Thumbs Up [tup]

  • Member since
    January 2015
  • From: Katy, TX
Posted by Aggieman on Sunday, November 16, 2008 1:28 PM

The base is a clock face piece of wood I picked up at Hobby Lobby.  I didn't want to buy a bigger piece of wood from Home Depot or Lowe's and have to rout the edges and cut it to shape myself (guess I'm getting lazy).  I cut the picture to fit the base and glued it on with ModPodge (something like that, borrowed it from my wife who uses this stuff in scrapbooking).

I got some acrylic rod, cut it to length and held it over my range just long enough to make it pliable, and bent it around a big jar.  Drilled the hole for the rod with my drill press.  Now I just need to glue the rod in place so that there is no future accidents.

  • Member since
    November 2006
  • From: Coastal Maine
Posted by dupes on Sunday, November 16, 2008 11:02 AM

Looks like a sharp build to me, Aggieman! The A+M flag is pretty neat touch.

How'd you make the base? I'd love to be able to do some builds gear-up with having to hang them from the ceiling. Wink [;)]

  • Member since
    July 2006
  • From: Philippines
Posted by constructor on Saturday, November 15, 2008 8:53 PM
Townsy, I could'nt upload our badge. I followed the usual procedure but it is the URL that is appearing instead of the badge. Help!
  • Member since
    January 2015
  • From: Katy, TX
Posted by Aggieman on Saturday, November 15, 2008 5:18 PM

I'm calling it a build (although I still have to put a couple of coats of poly on the base and permanently affix the acrylic rod to both the base and the model).

I built the Revell F-15E Strike Eagle 1/48 with the following inspiring photograph from my alumni magazine

A special thanks to Buddy (Lewbud) for providing me with the AMRAAM missiles and GBU bombs.

JOIN OUR COMMUNITY!

Our community is FREE to join. To participate you must either login or register for an account.

SEARCH FORUMS
FREE NEWSLETTER
By signing up you may also receive reader surveys and occasional special offers. We do not sell, rent or trade our email lists. View our Privacy Policy.