Here it is so far. I have the hull pretty much complete. I built it pretty much straight by the Takom instructions. I blanked off the driver's hatch with the plate supplied in the Dragon kit (J57) and filled in the driver's periscopes.
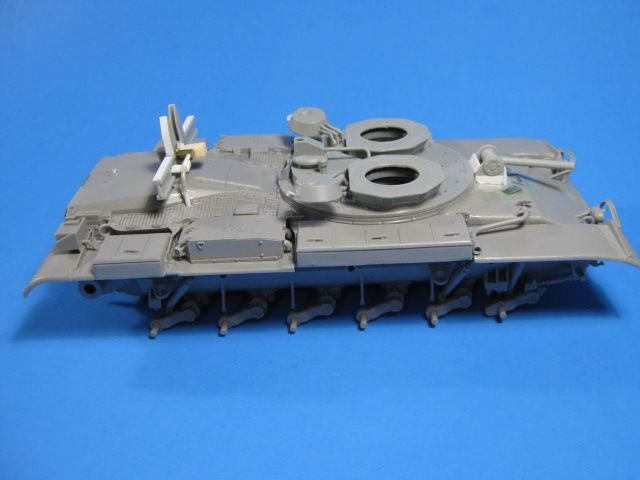
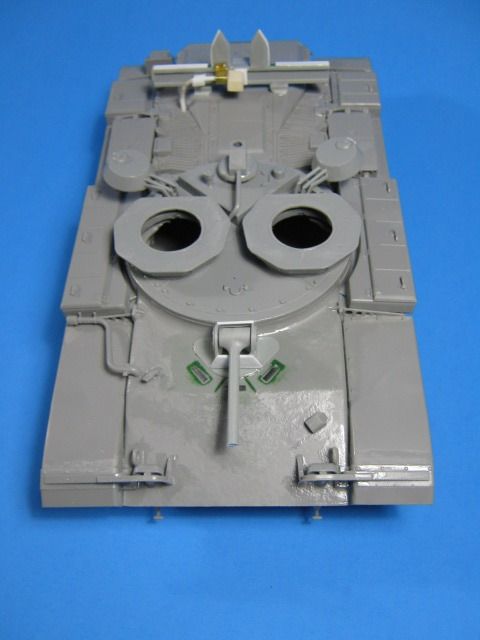
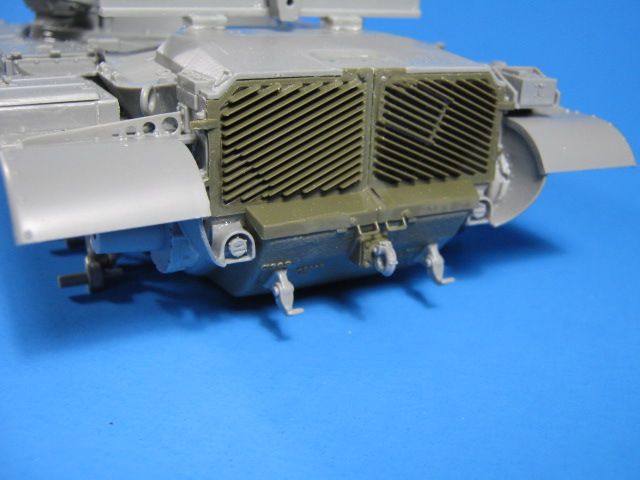
I added the M60A2 rear parts from the AFV Club M60A2 kit. These include the CBSS (Closed Breech Scavenger System) bulge and the rear doors with added shelf-like lower edges. The AFV Club parts fit the Takom kit like a glove and required no modification at all.
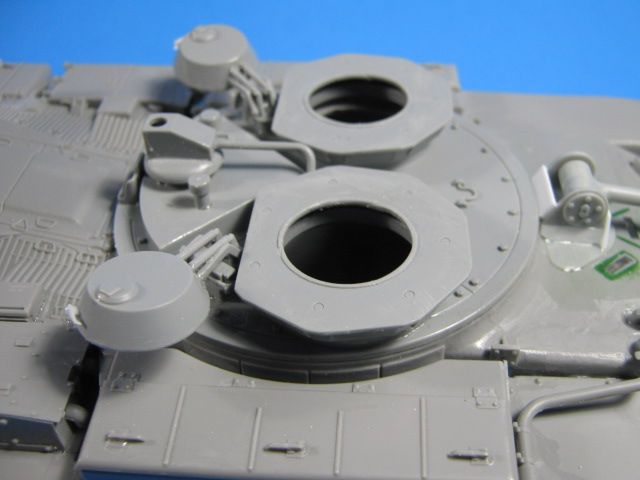
On the plate that covers the turret opening, I cut open the driver's and TC's hatches. I am not sure why Dragon molded them closed, but they were easy to open up. I gently cut around each dome-shaped hatch with an xacto knife. Once cut open, I cleaned them up and then built the hinge mechanisms per the Dragon instructions. The hatch pops up and then rotates to the outside and rear to open. To accomplish this, on the rotating base (F9), cut the key off the bottom and it can be glued in any position. I then added handles and lock mechanisms to each hatch.
For the rear bridge supports, I added details Dragon missed. These include closing in one side of the guides with strips of styrene. I also added strips along the horizontal supports. Lastly, references show that this later version also has a box ans conduit on the front side of the support. I built this using a block of resin, sheet brass, sheet styrene, and a styrene rod. It was glued onto the rear deck with a rearward tilt, as per references.
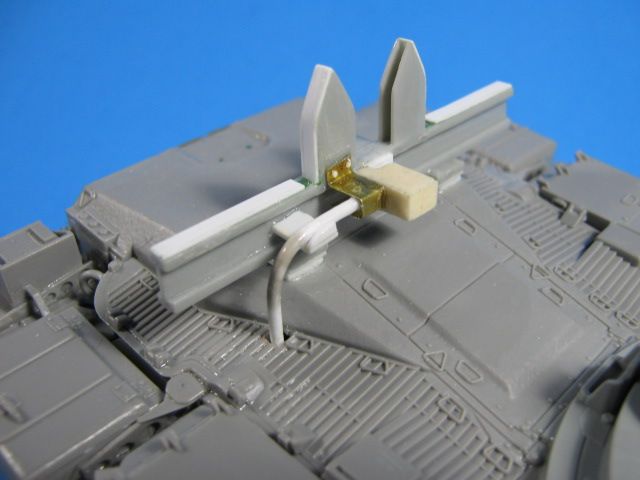
Ready for the surprise?? OK, it isn't that big, but...
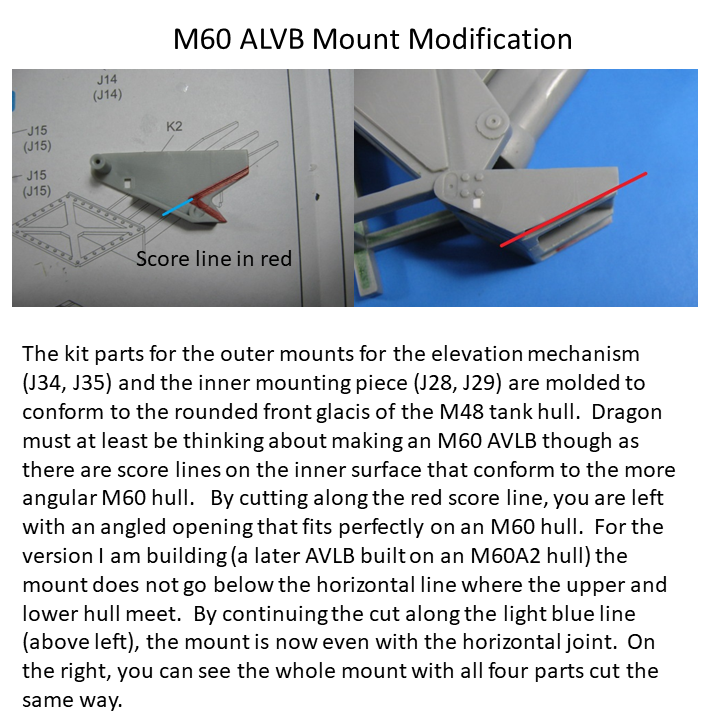
For the elevating mechanism mount at the front of the hull, it looks like Dragon is at least thinking about an M60 AVLB kit. On the inside of the front mount parts that meet the hull, there are score lines that match the profile of an M60 front hull perfectly.
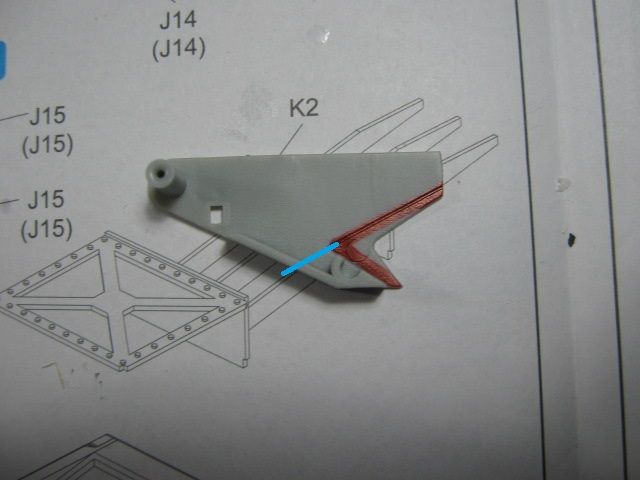
I had to do a little more to it though. On these later version M60A2-based vehicles, the mount does not overhang the horizontal line where the upper and lower hull come together. By continuing the cut, you have the correct angle to mount it on the upper part of the hull. This does shift the whole mount back a coupe of millimeters though, as it is on the actual vehicle. I also had to raise up the pivot point for the lower hydraulic cylinder (per references) and shorten up the piston by about 2mm to get it all to fit.
Here is the full elevation mechanism awaiting to be added to the hull. On it, I filled in the back sides of the square bars as they were hollow and should be solid.
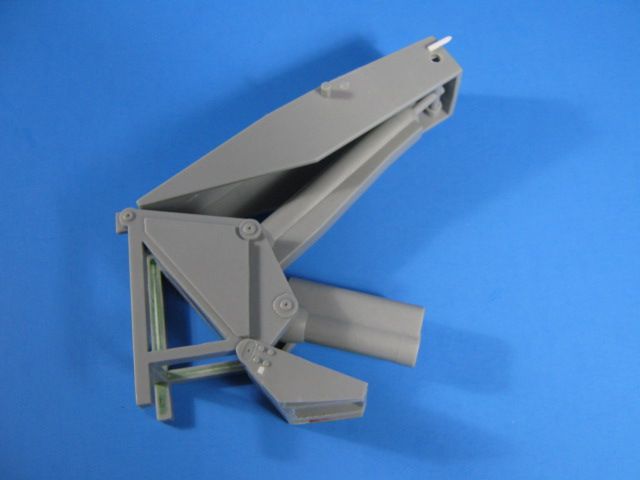
It has been fun so far and not that hard to do. Next up is mounting the elevation mechanism and starting on the bridge sections.
By the way, there is a great walk-around of this vehicle at Toadman's Tank Pictures website: http://www.toadmanstankpictures.com/m60a1avlb.htm
Gino P. Quintiliani - Field Artillery - The KING of BATTLE!!!
Check out my Gallery: https://app.photobucket.com/u/HeavyArty
"People sleep peaceably in their beds at night only because rough men stand ready to do violence on their behalf." -- George Orwell